IMPORTANT: The Calendar module is accessible to users with the following roles:
- Admin
- Facilitator
- Scheduler
Scheduling an event is essentially determining a specific time interval for a group of learners to complete a simulation as described in detail within a specific SCE.
IMPORTANT: An event is the actual realization of the Simulation Event phase of the SCE Scheduling, therefore the time interval determined in the Calendar has to accommodate the sum of the duration of the stages (Preparation, Briefing, Simulation, Debriefing, Teardown) in the Simulation Event.
When scheduling within an Activity, the events will be linked/grouped.
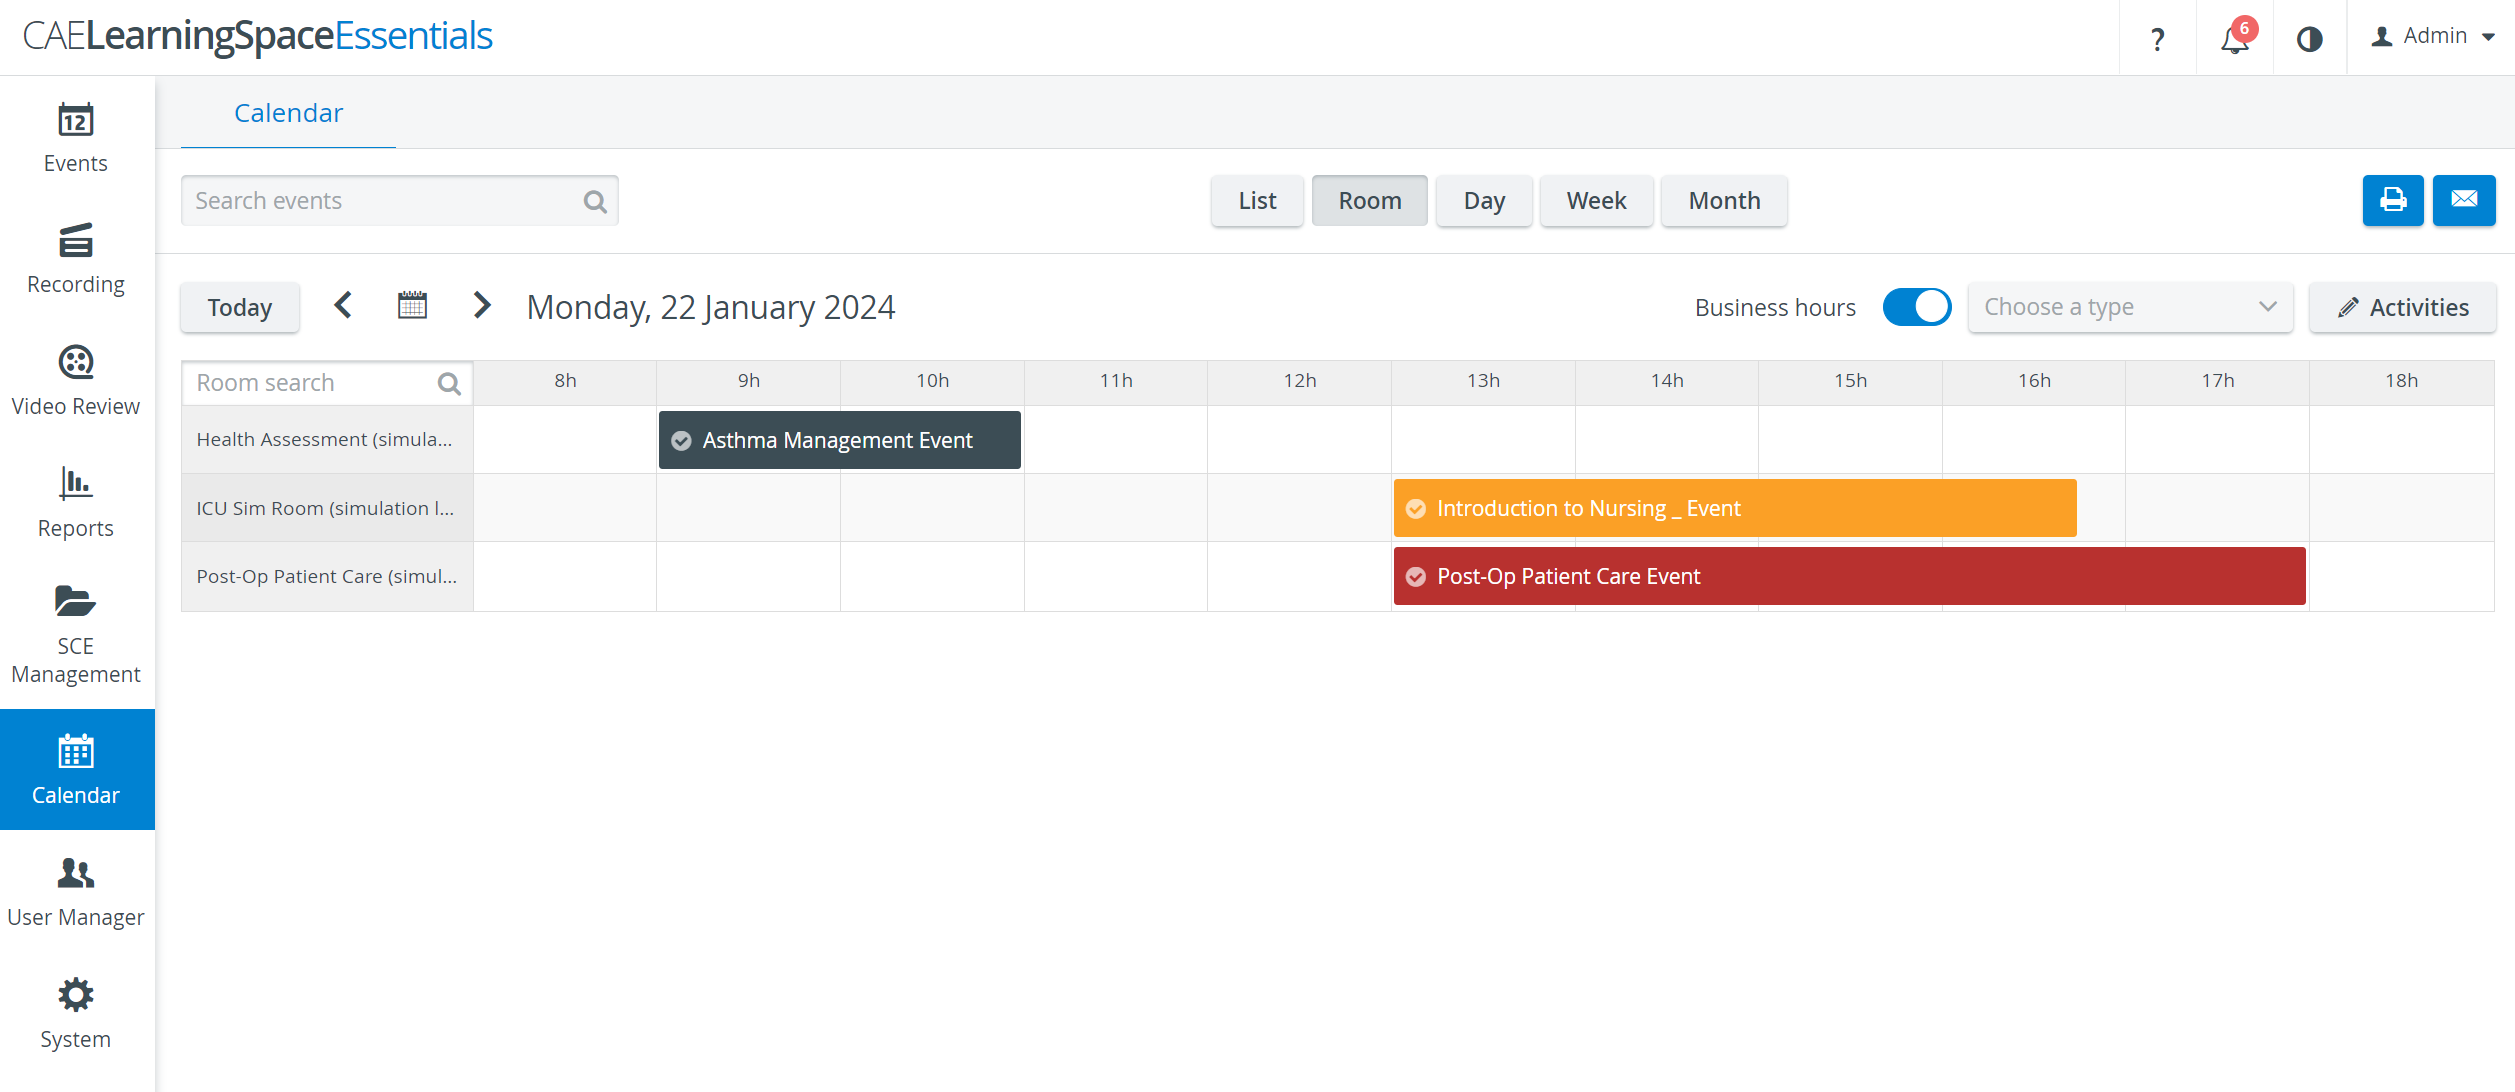
Scheduling an event is possible in the Room, Day or Week views of the Calendar module. Scheduling an event is also possible in the Month view, by double-clicking in the field of the respective day.
Preliminary Setup
User Manager: The participant groups desired to be scheduled (including the intended users) need to be set up in the User Manager.
SCE Management: The simulation content (the SCE intended for the scenario) is built up in the SCE Management, with special attention to the SCE Scheduling part of the SCE.
IMPORTANT: Automatic recording can be set up for the Briefing, Simulation and Debriefing parts of a scheduled event. For the recording to start, the camera icon has to be activated within the SCE Scheduling part of the SCE Management.
Process Flow
Adding an Activity
- If your Activity has not yet been created, click the Activities button in the top right corner of the calendar.
The Activities pop-up will open.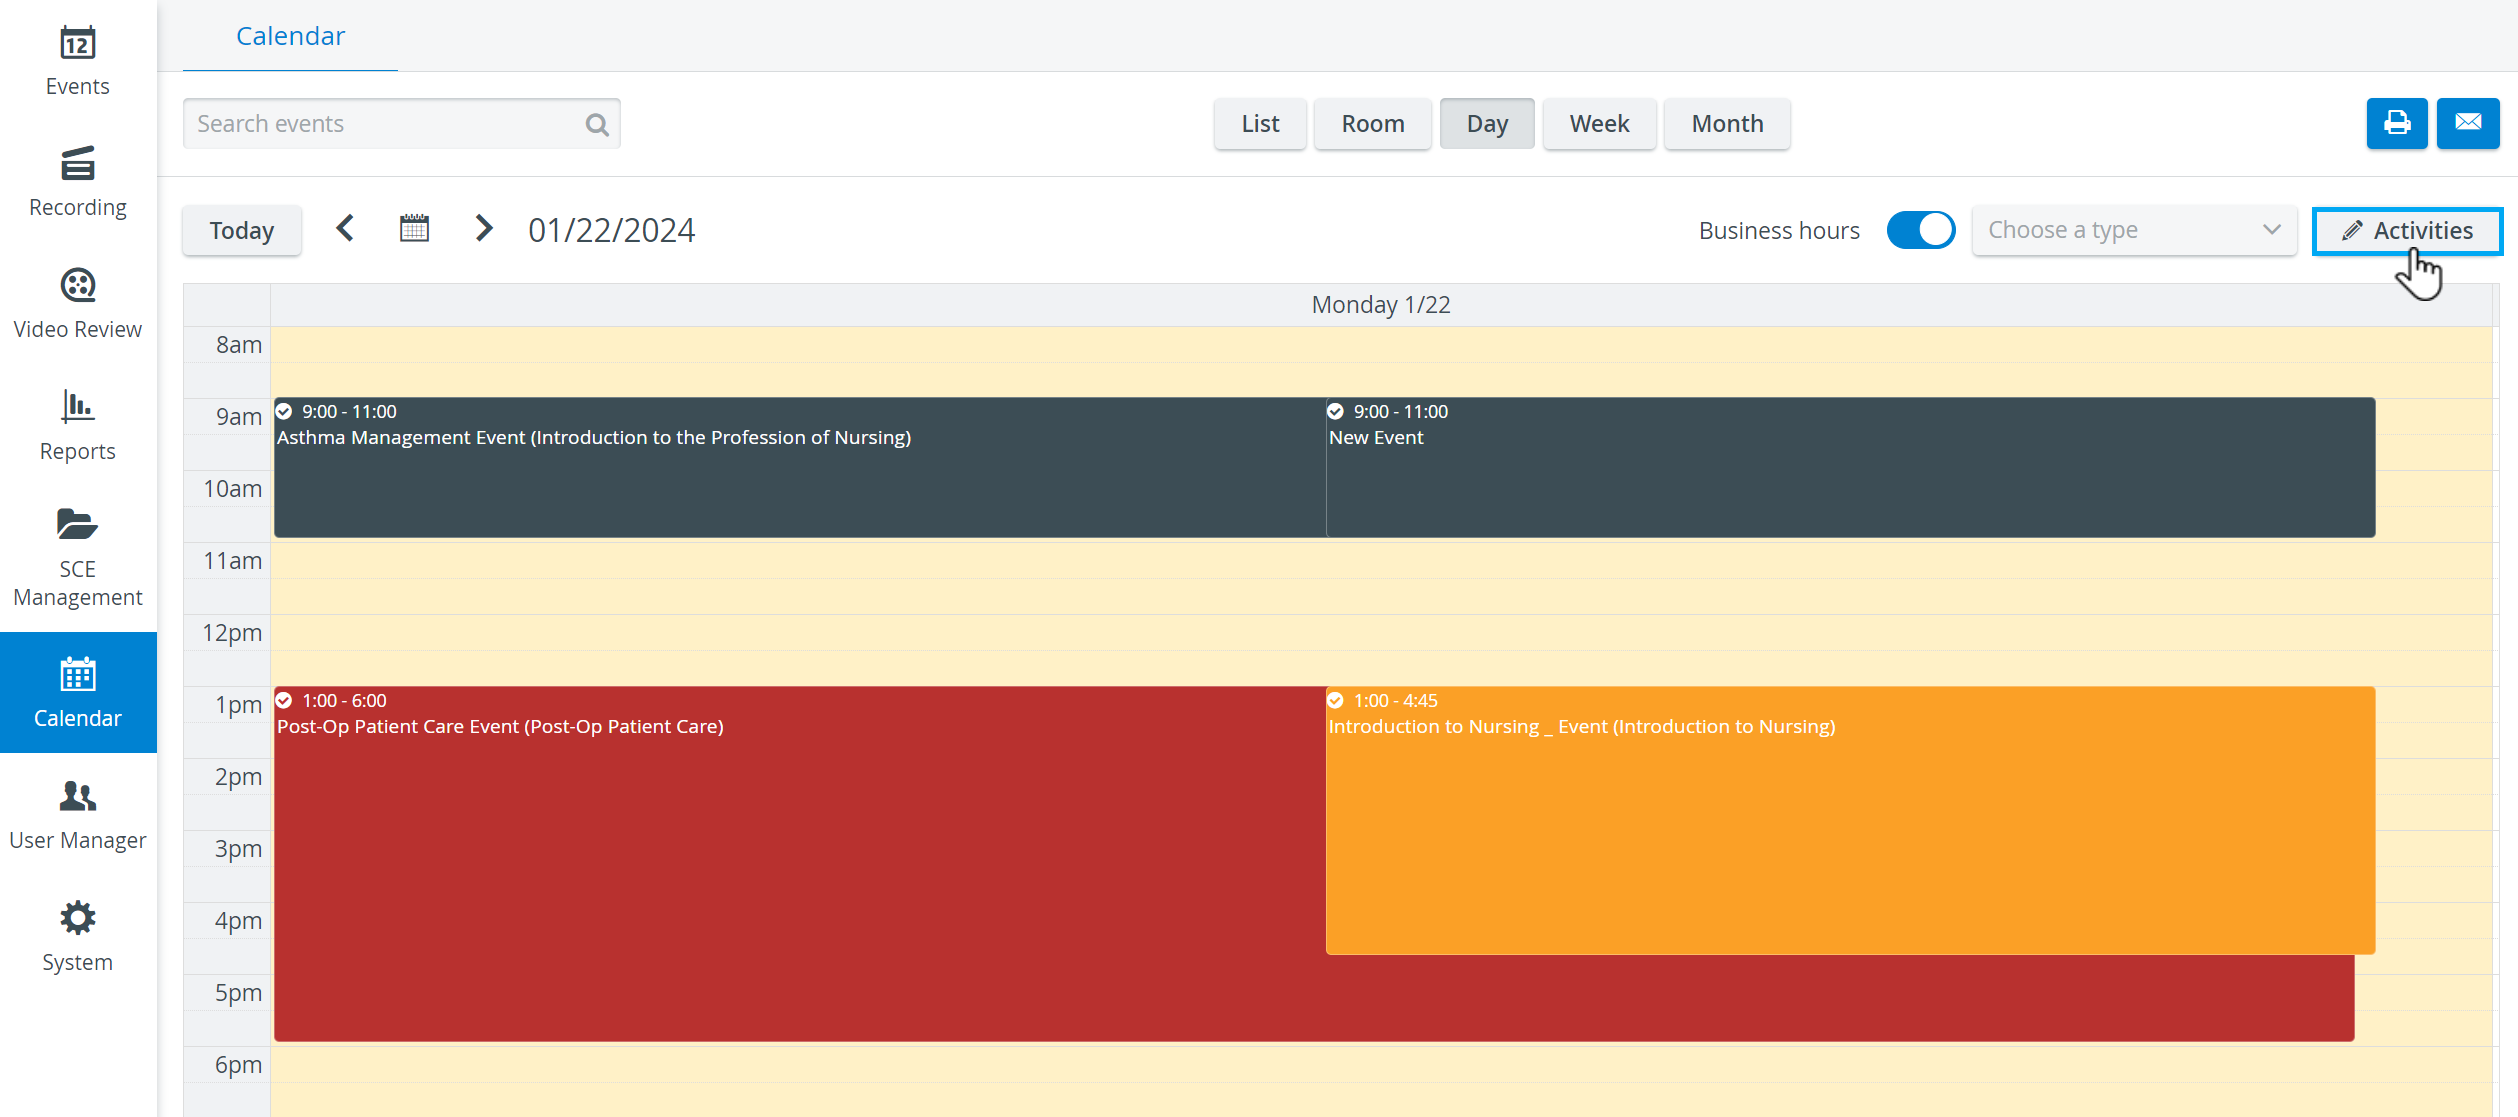
- Type the title of the Activity in the corresponding field.
Select the type of the Activity from the drop-down.
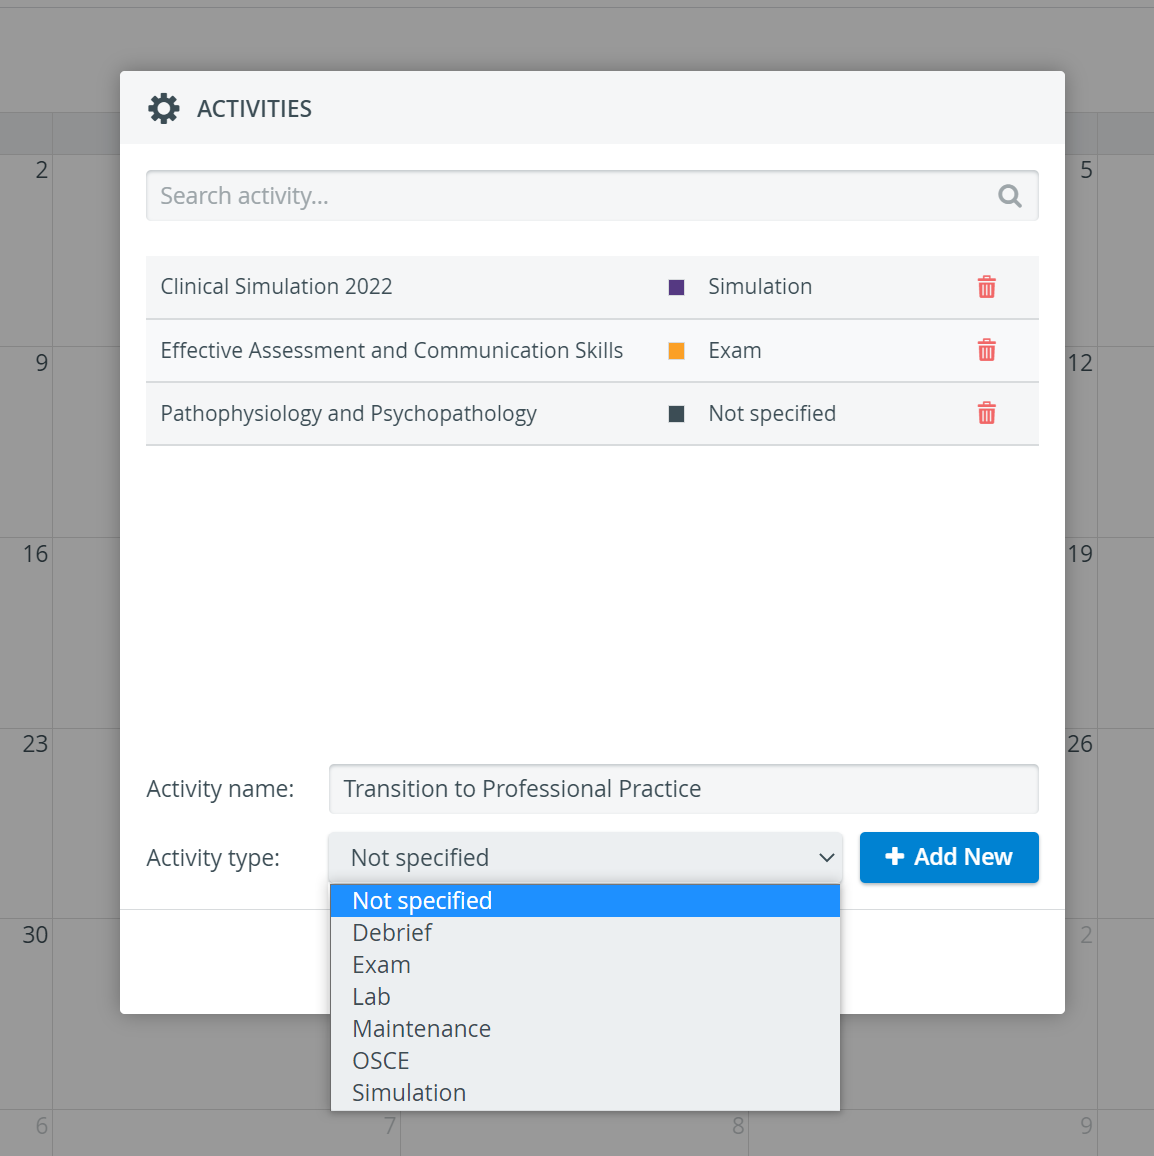 The types of Activity are color-coded and can be filtered for in each calendar view.
- Once the Activity is saved, you can proceed with the event scheduling.
A new Activity can be added via the Edit Event pop-up as well, by clicking and thus expanding the Add New Activity function.
Adding an Event
- In the selected calendar view, display the day - the date of the event.
Click and drag the cursor through the time interval you intend to schedule for the event.
NOTE: When scheduling in Room view, make sure that the time interval is determined in the line of the desired room.
When scheduling in Day or Week view, the room can be selected via the Room drop-down at the top of the pop-up window.
When scheduling in Month view, double-click in the field of the respective day to open the Edit Event pop-up window.The Edit Event pop-up window opens where all specifications can be given for the event.
By default, a newly added event is entitled "New Event".
To avoid confusion and ensure proper distinction, make sure to enter a specific title for your event.Select the SCE intended to be performed.
Switch to the Participants tab of the pop-up and add the desired participant groups using the corresponding tabs and drop-downs.
On the SCE Scheduling tab, modify the stages of the Pre- and Post-Simulation if necessary, or adjust the duration of the Simulation.
Modifications on an SCE affect previously created Events.
IMPORTANT: The most exact scheduling of the event can be determined via the editable time fields of the SCE Scheduling tab of the Edit Event pop-up.Click Save to conclude the event scheduling.
For further information, visit our Calendar Module and Calendar - FAQ pages.
Overview
Content Tools