A Setup Sheet is an event-related list containing the final selection of Equipment and supplies and their fixed quantity needed for conducting a scenario. You can look up the precise supply- and equipment-need of events in the Setup Sheets tab.
With the help of an event-specific Setup Sheet, check out exactly what you need for a scenario and print the Check-out list to reference when you pick up the supplies at the physical storage location.
The Setup sheet's header contains the exact date and place of the event to help the person in charge of moving the equipment keep track of the physical items:
Creating a Setup Sheet
A Setup Sheet can be created by finalizing an existing Equipment and Supply List while editing an event in the Calendar module.
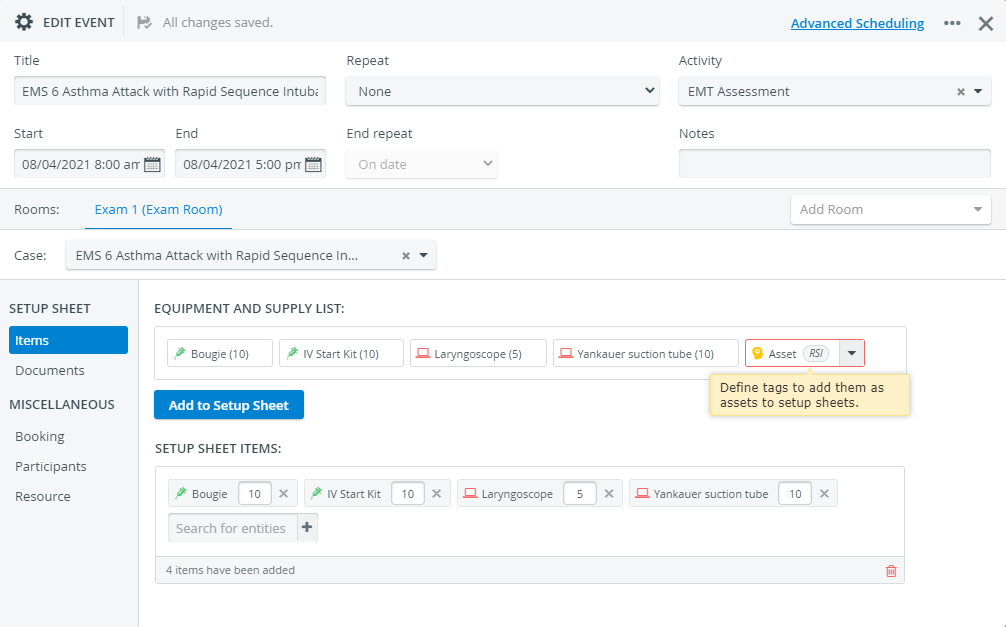
If you have added Asset tags to your Equipment and Supply list, you can decide on the specific asset when setting up the Setup Sheet for an event.
Asset Tags
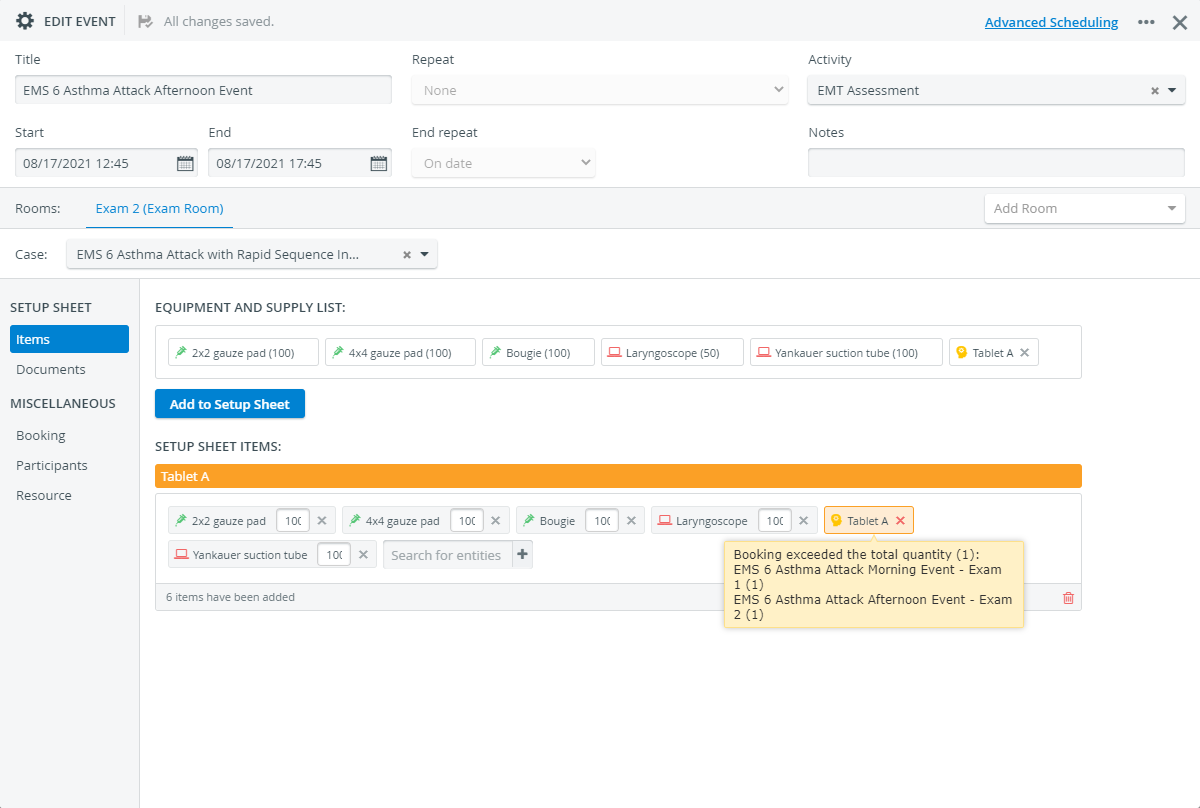
Make sure to select a specific asset on the Equipment and Supply List before clicking Add to Setup Sheet. Otherwise, the system will warn you that your Setup sheet is not finished, and the asset tag will be highlighted in red.
How to Recognize Asset Tags?
To tell an Asset tag and a specified asset apart, check if the Asset label on the Equipment and Supply List has a drop-down and a short note inside a grey bubble written in italics. If yes, you have an asset tag on your Equipment and Supply List: 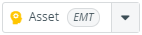
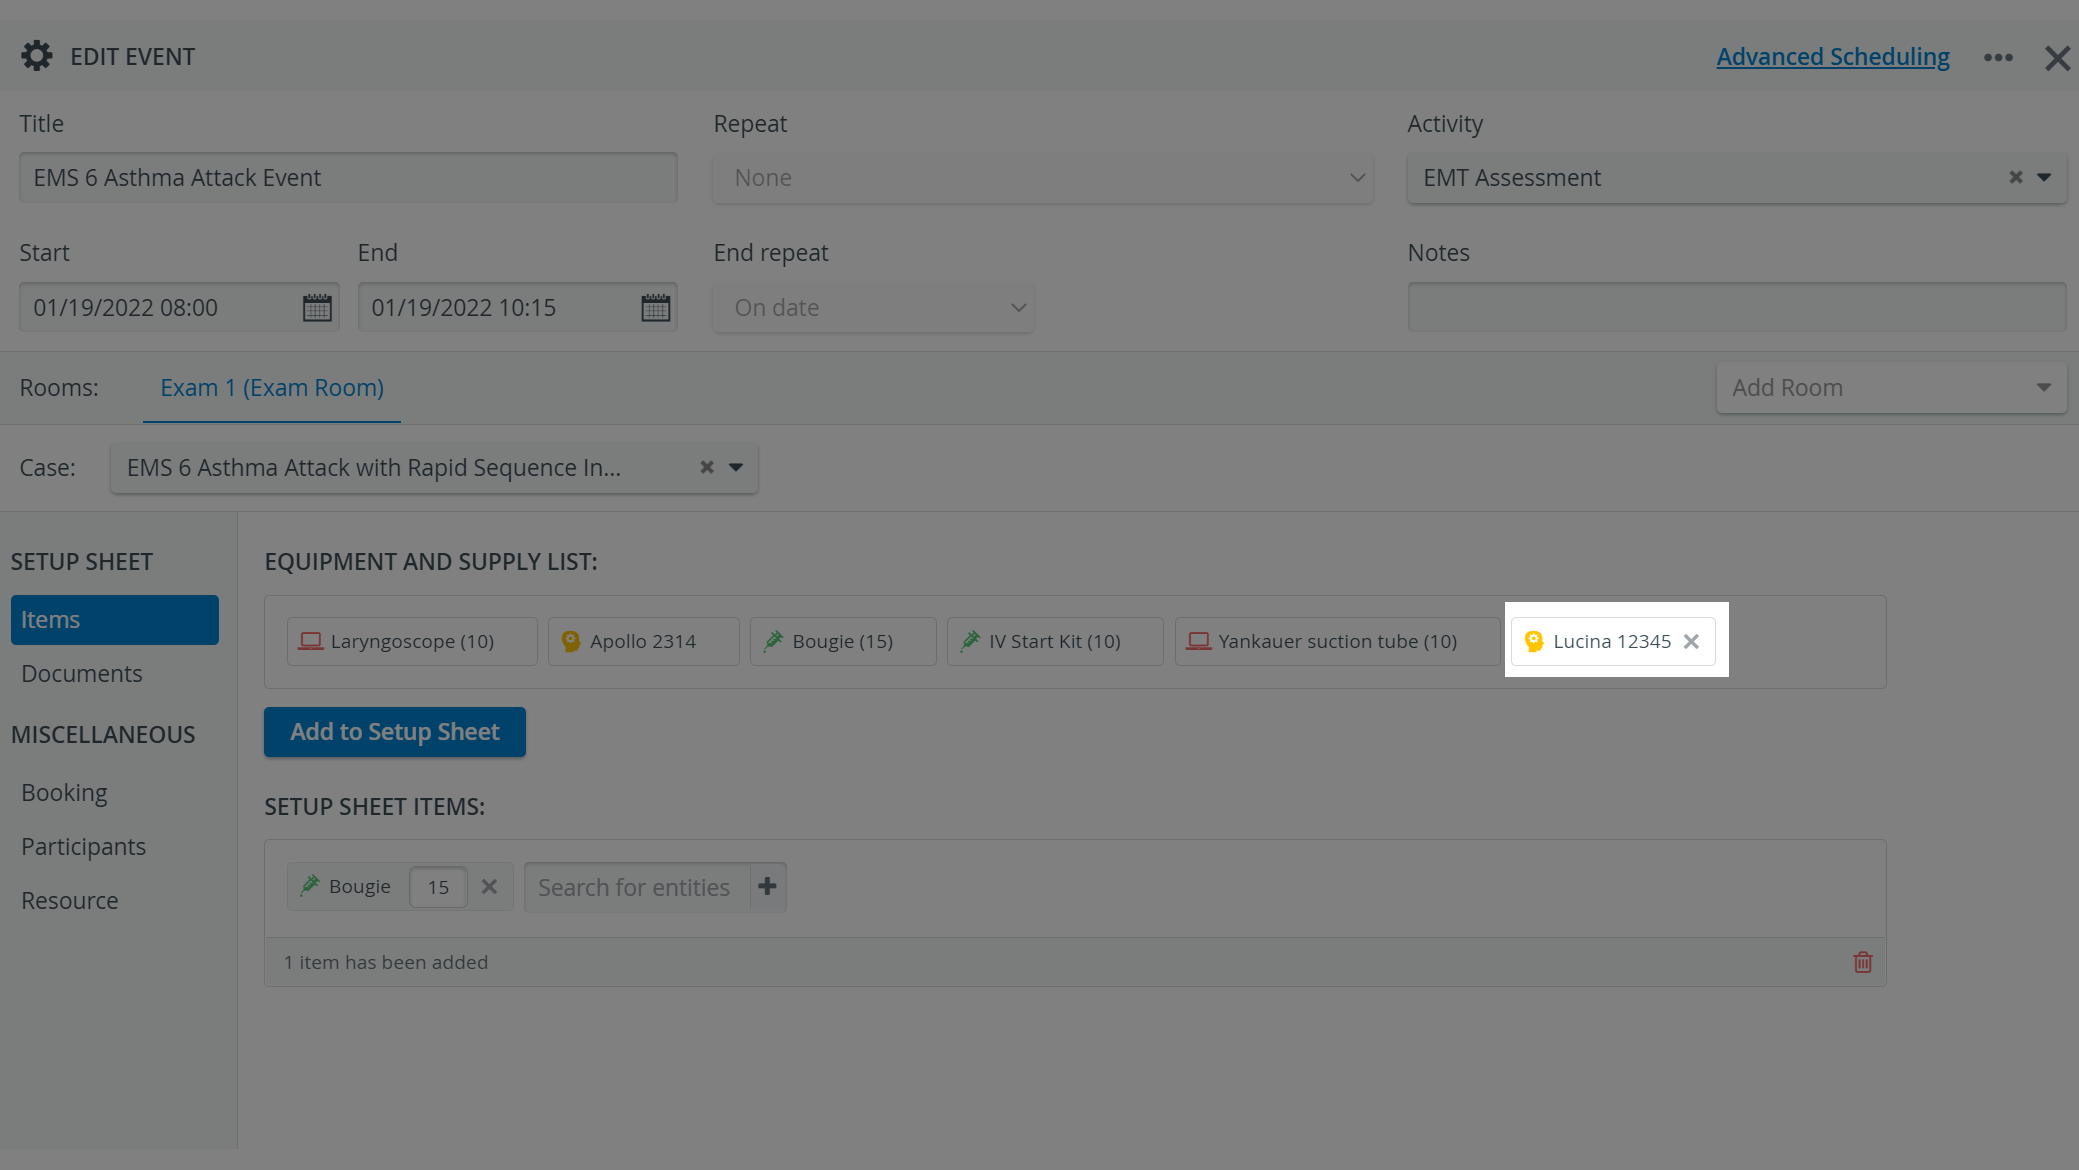
Open the drop-down to list every asset labeled with the given Asset tag and select one.

Important - About Asset Availability
By selecting an asset for an event or adjusting and finalizing the number of items included on your Setup Sheet, you do not reserve them for the event. Ensure that the asset you are about to check out on your Setup Sheet is returned.
The system warns you about this conflict if the necessary amount of any item is unavailable in your Inventory.
Hover over the highlighted item to get more information on its status and quantity.
Use the Forecasting report to check how often your asset has been booked for upcoming events.
Learn more about How to Create a Setup Sheet and view our related Training video.
Checking Out Setup Sheet Items
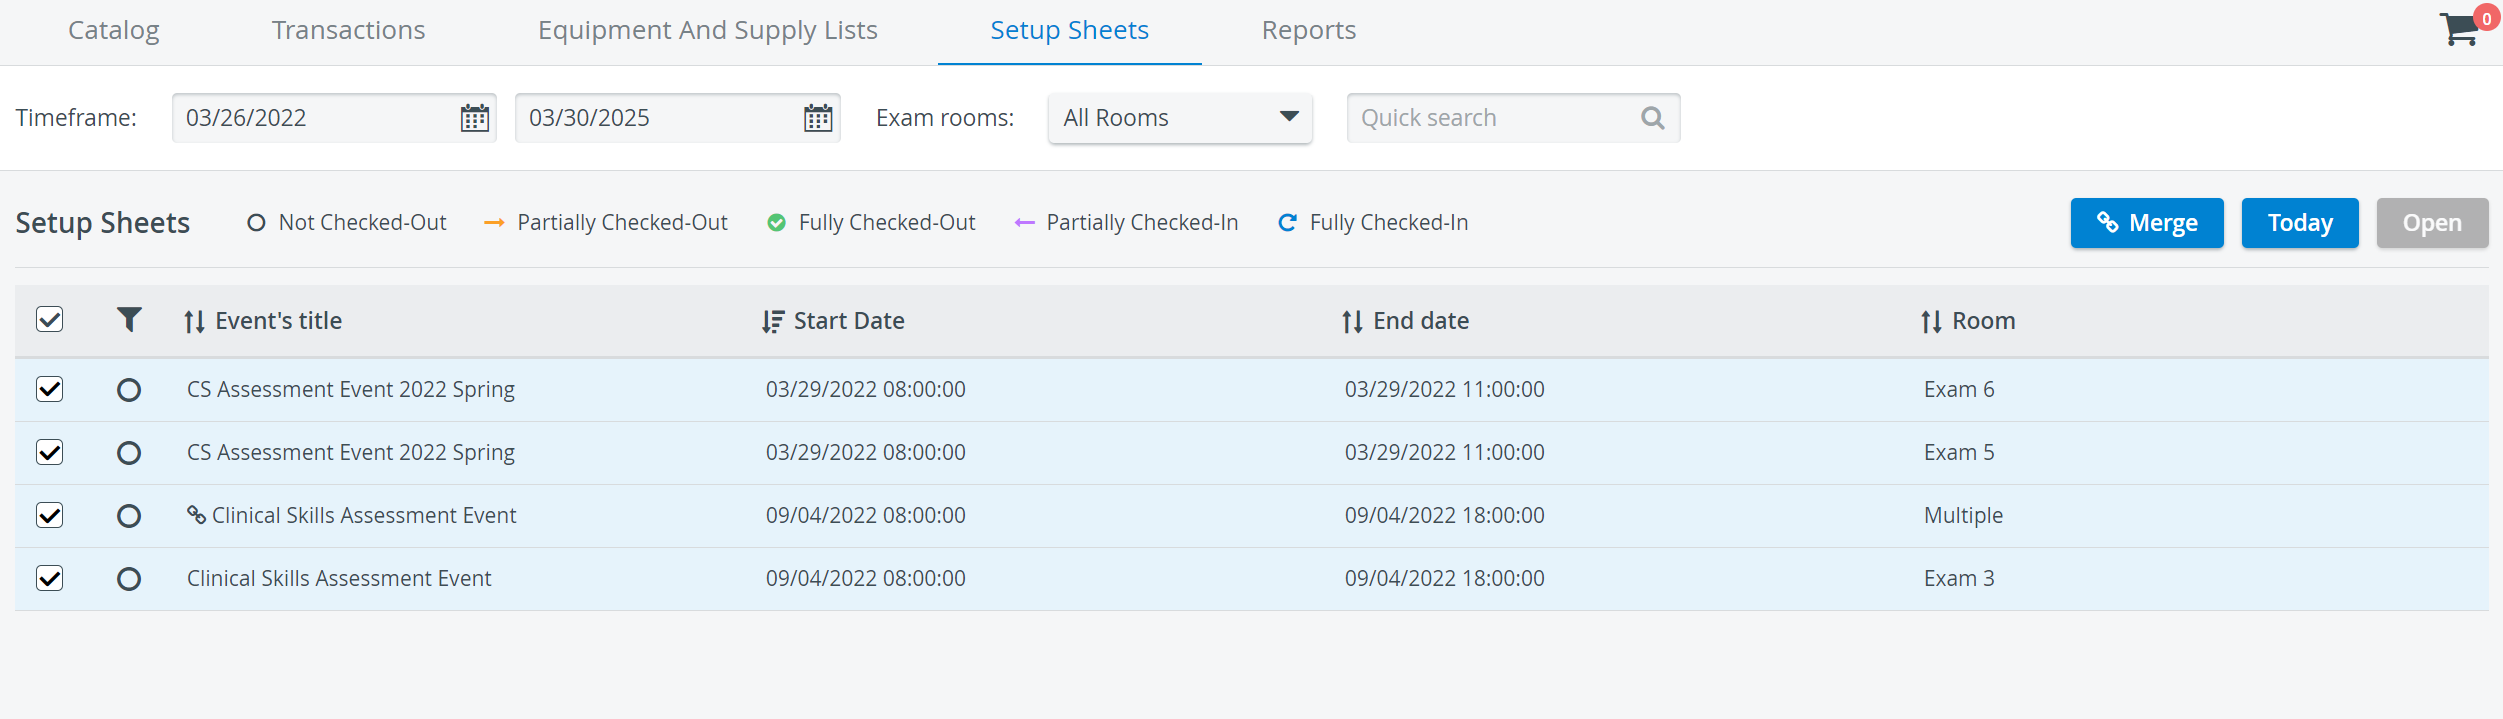
Setup Sheets can be found by the title and the date of the event they were added to. By default, only the current day's Setup sheets are listed upon opening the Setup Sheets tab.
To view more Setup Sheets at a time, change the Timeframe with the date picker: pick the start date in the first field, then the end date in the second.
The date selection only becomes active if a day is selected.
You can change back to the current day's Setup sheets with the Today option.

The date in the second field is not inclusive, it displays event setup sheets up to the selected date.
You can also filter by the rooms where the events will take place, or you can use the Quick search bar.
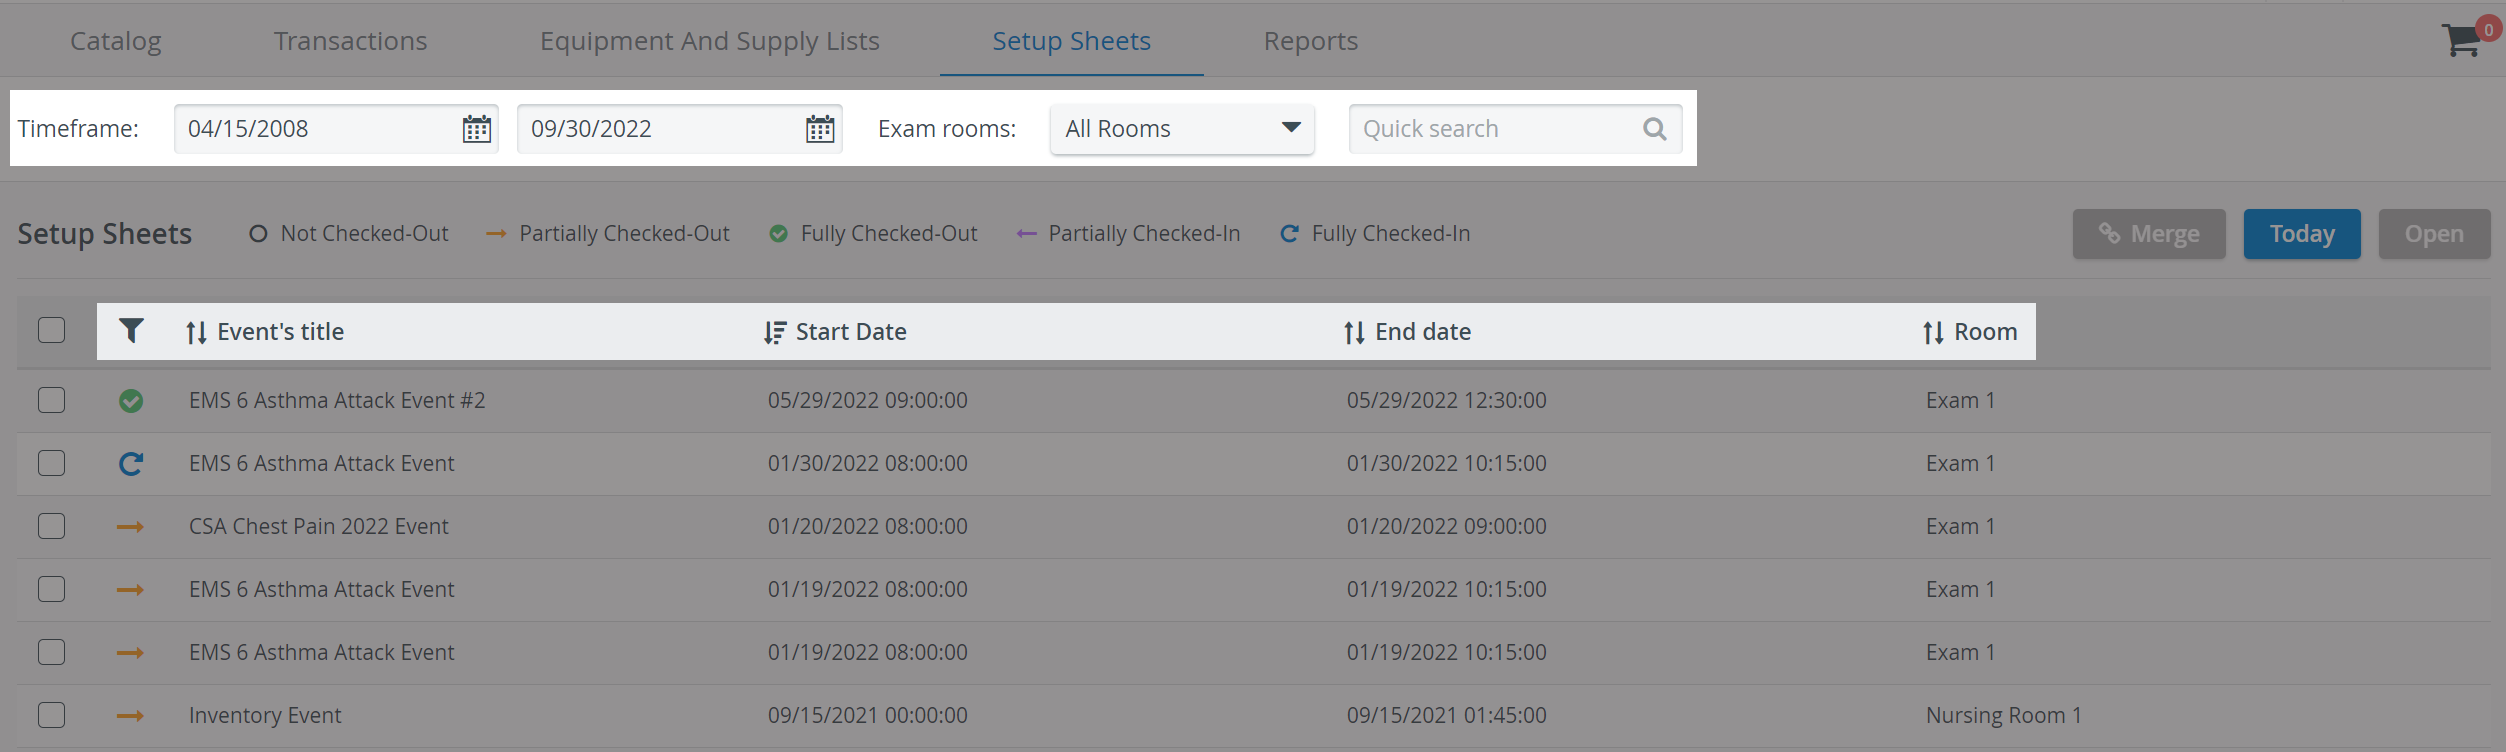
Select the Setup Sheet you want to check out to activate the Open button.
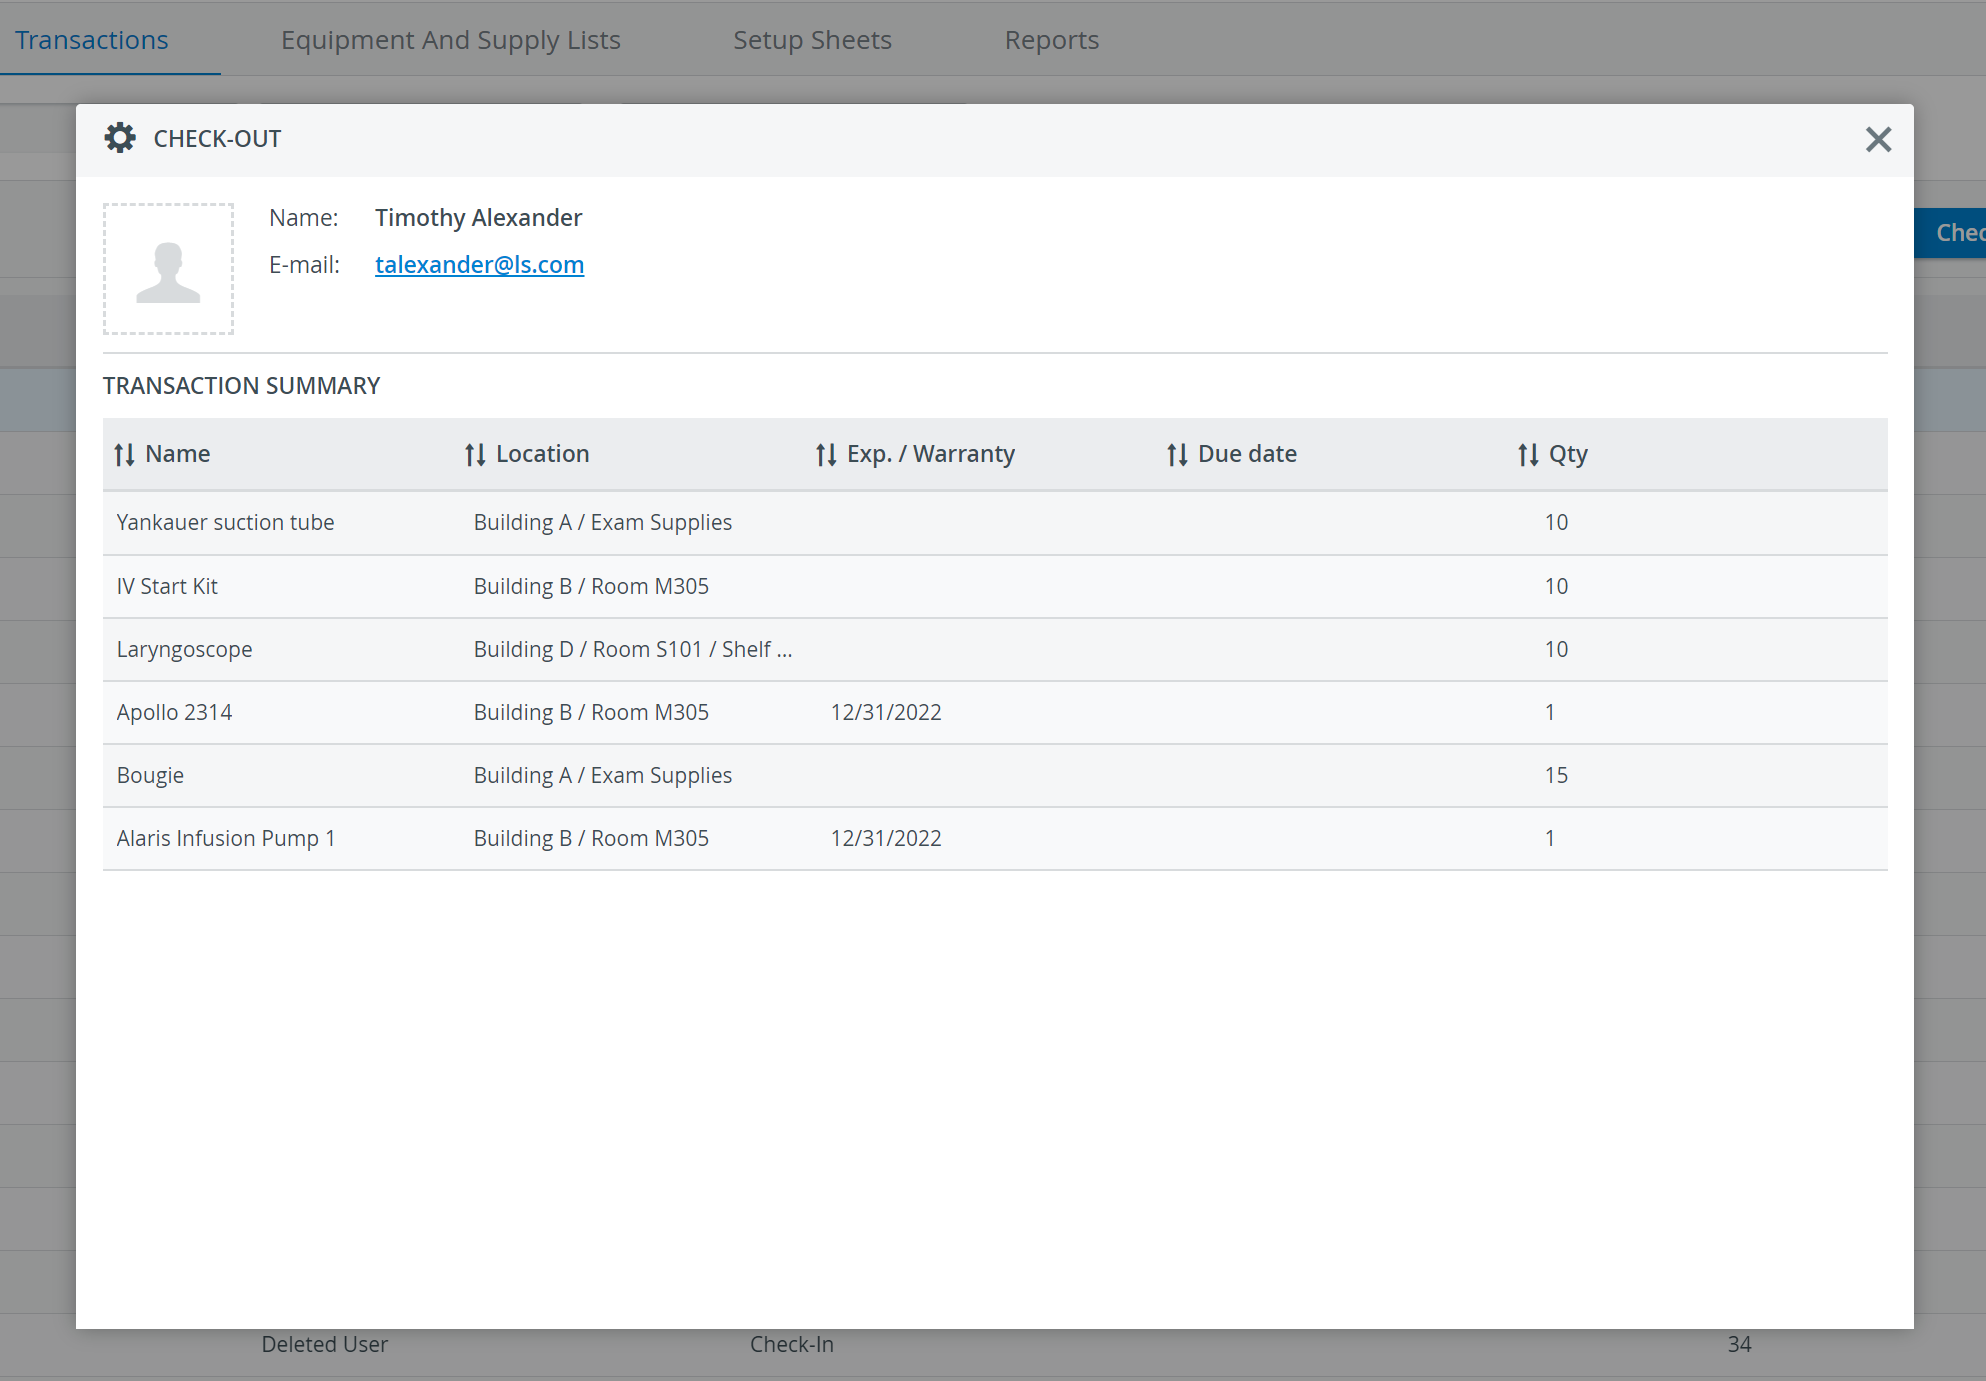
Once you open a Setup Sheet, you have to select a Transaction assignee by using the Assignee drop-down, just as you would do during a basic Check-out transaction.
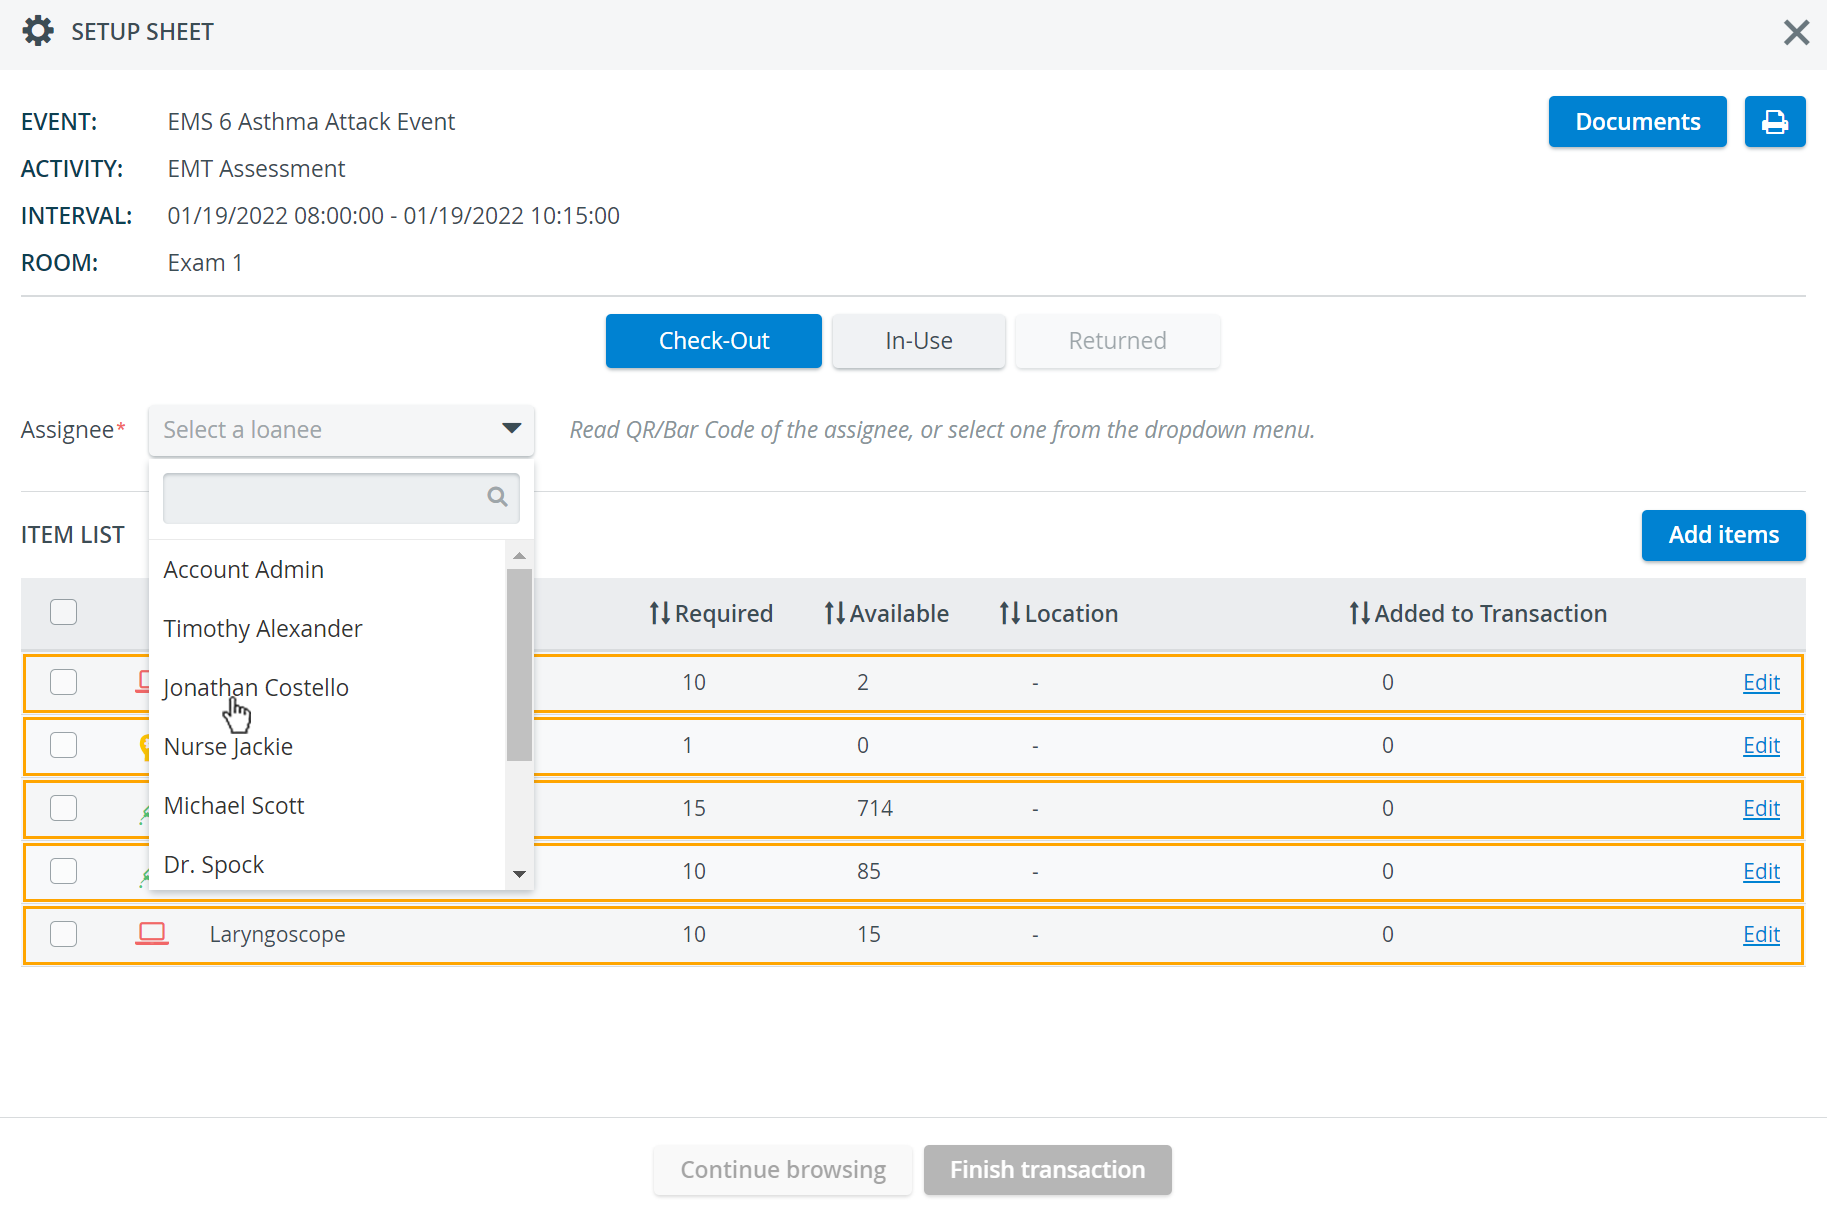
If you cannot find an assignee in the list, start typing their name in the quick search bar (a maximum of 50 names can load in the drop-down list).
The Inventory module is designed to handle barcode and QR-code reading to facilitate Transaction assignee registration and item detection during Transactions.
The Transaction assignee can be selected by scanning their ID card.
Learn more about the Recommended Barcode and QR Code Scanners for LearningSpace Inventory.
Verify the quantity of each item.
Check the Available quantity column if you have every item ready for Check-out at the selected storage location: this column shows how many of that particular item is available in your Inventory.
Add the Required amount of each item to the Transaction, with the help of the Edit option.
- For any item (except an Asset), the location will not be displayed until the item quantity has been selected from the checkout location using the Edit link. The location displayed is the location where the items will be checked out.
- For Assets the storage location is displayed (because there is only one asset and therefore only one storage location). You do not need to use the Edit link to select the quantity: an Asset can be checked out simply by making sure to select it (by checking the box on the left).
Once the Added to Transaction amount equals the Required amount, the orange warning frame disappears, and you can proceed with checking out each item.
- Select the items to be checked out and click on Finish transaction.
The system checks out the exact number of items you have set up. The items will be moved from the Check-Out column to the In-Use column.
The Checked-out Setup sheet will be available in the Transaction History. The title of the event will be tied to the Transaction.
 In the case of overlapping events, an asset's potential booking conflict lasts from the start date of the first overlapping event until the end date of the last overlapping event. To resolve the issue, remove the asset from one of the events and select a different item.
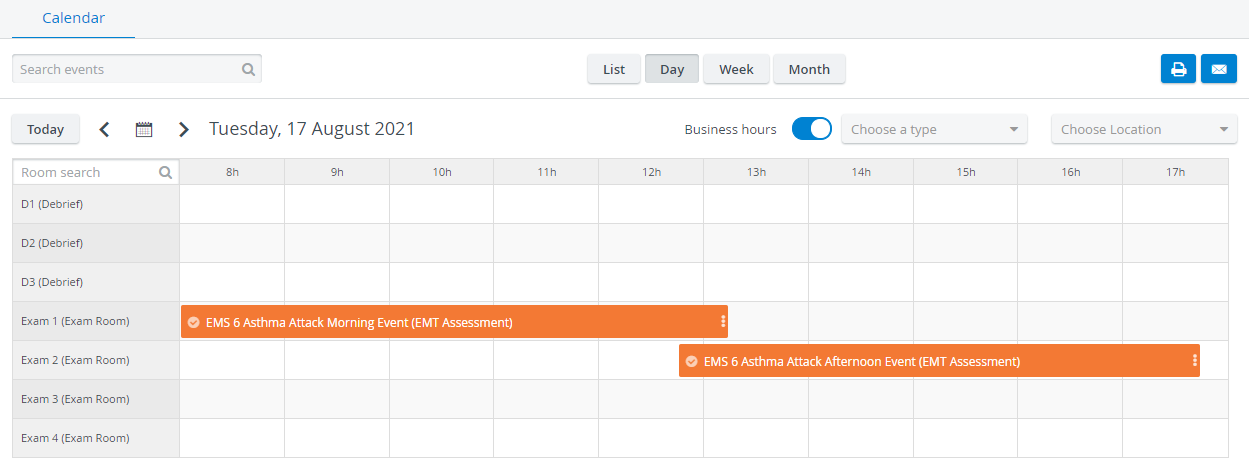
Checking In Setup Sheet Items
Checked out Setup sheet items can be checked back into the Inventory after an event, directly from the Setup sheet window. In this case, the items will move from the In-Use column to the Returned one.
If checking back in the items of the Setup sheet through Transactions, the result of this action will NOT be visible in the Setup sheet itself.
Printing Setup Sheets
Setup Sheets can be printed by clicking on the Printer icon in the upper right corner: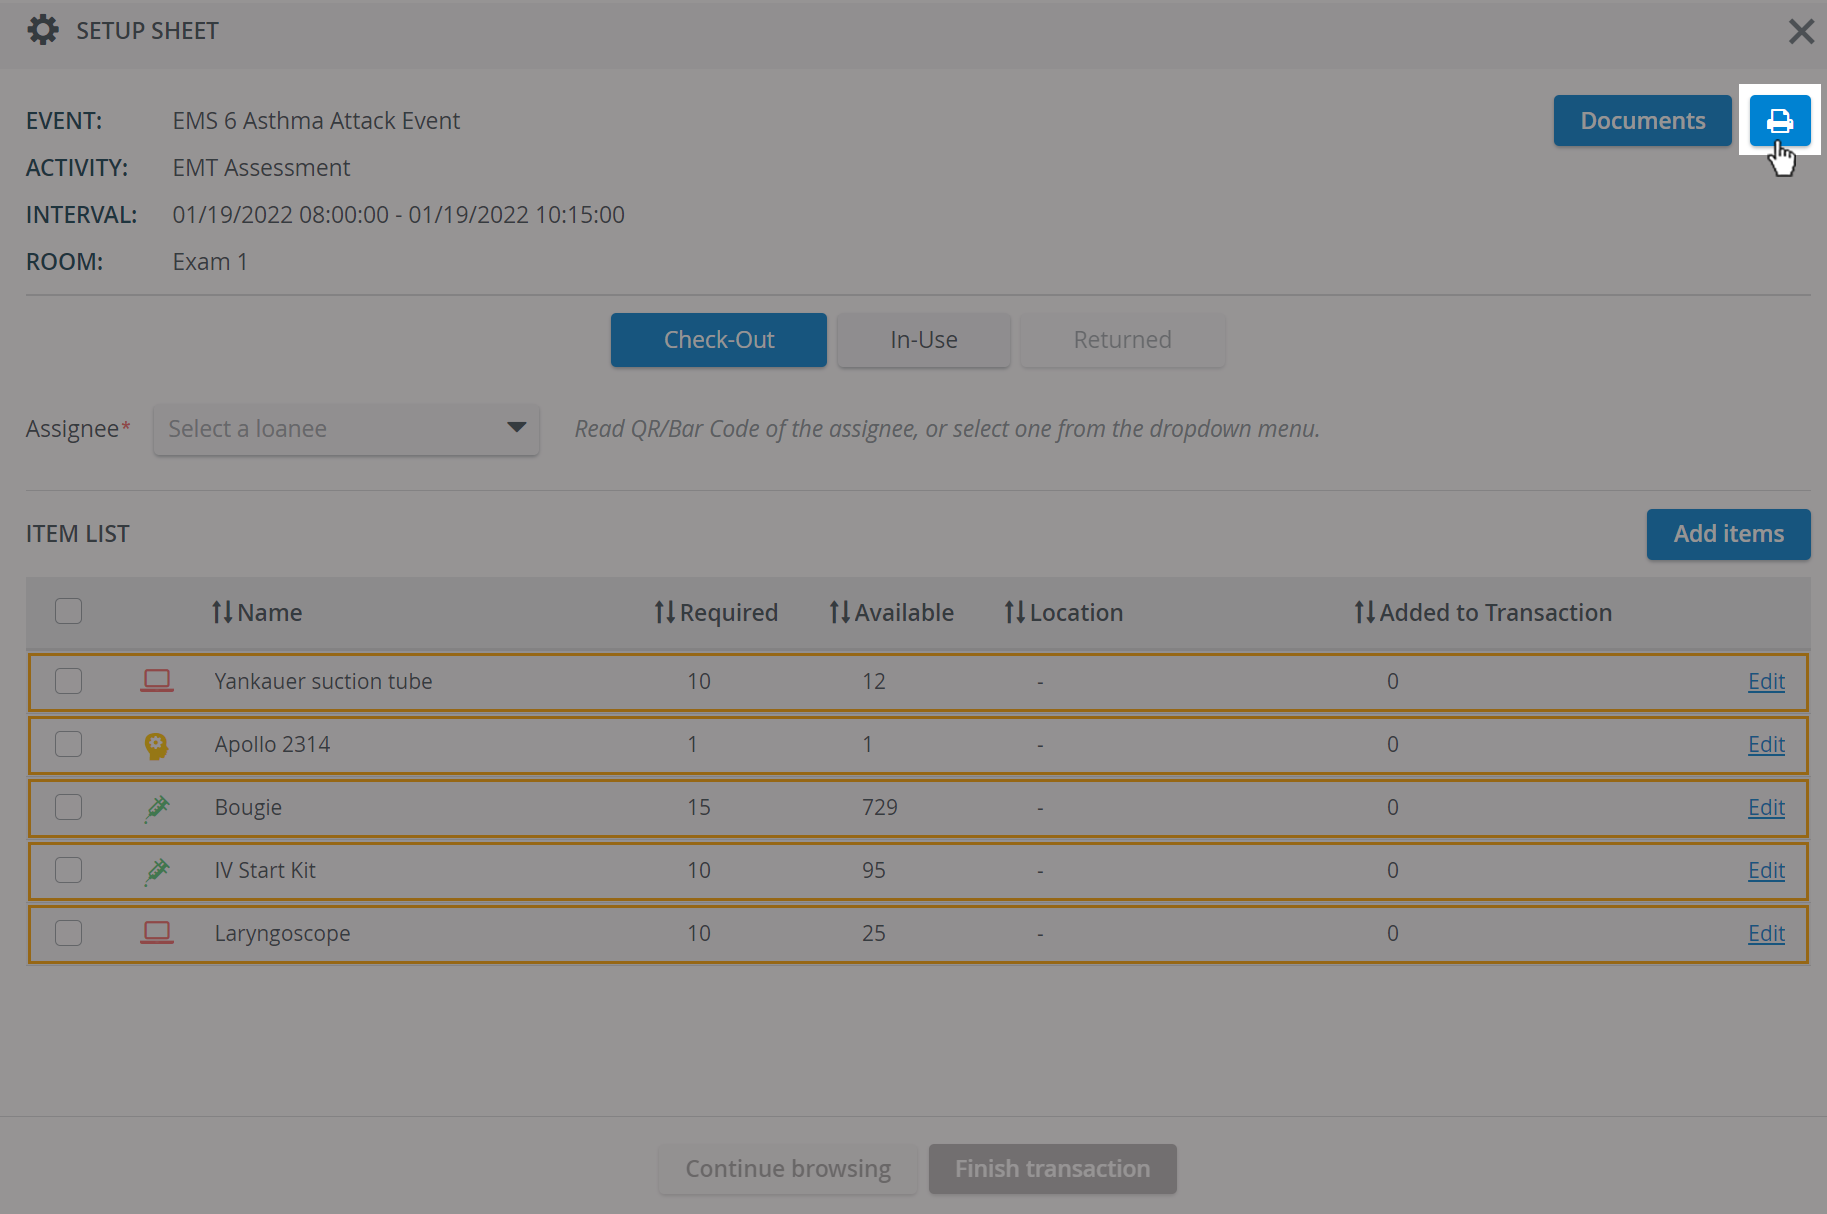
Printing of the checked-out Setup Sheet is possible at any point of the Transaction process.
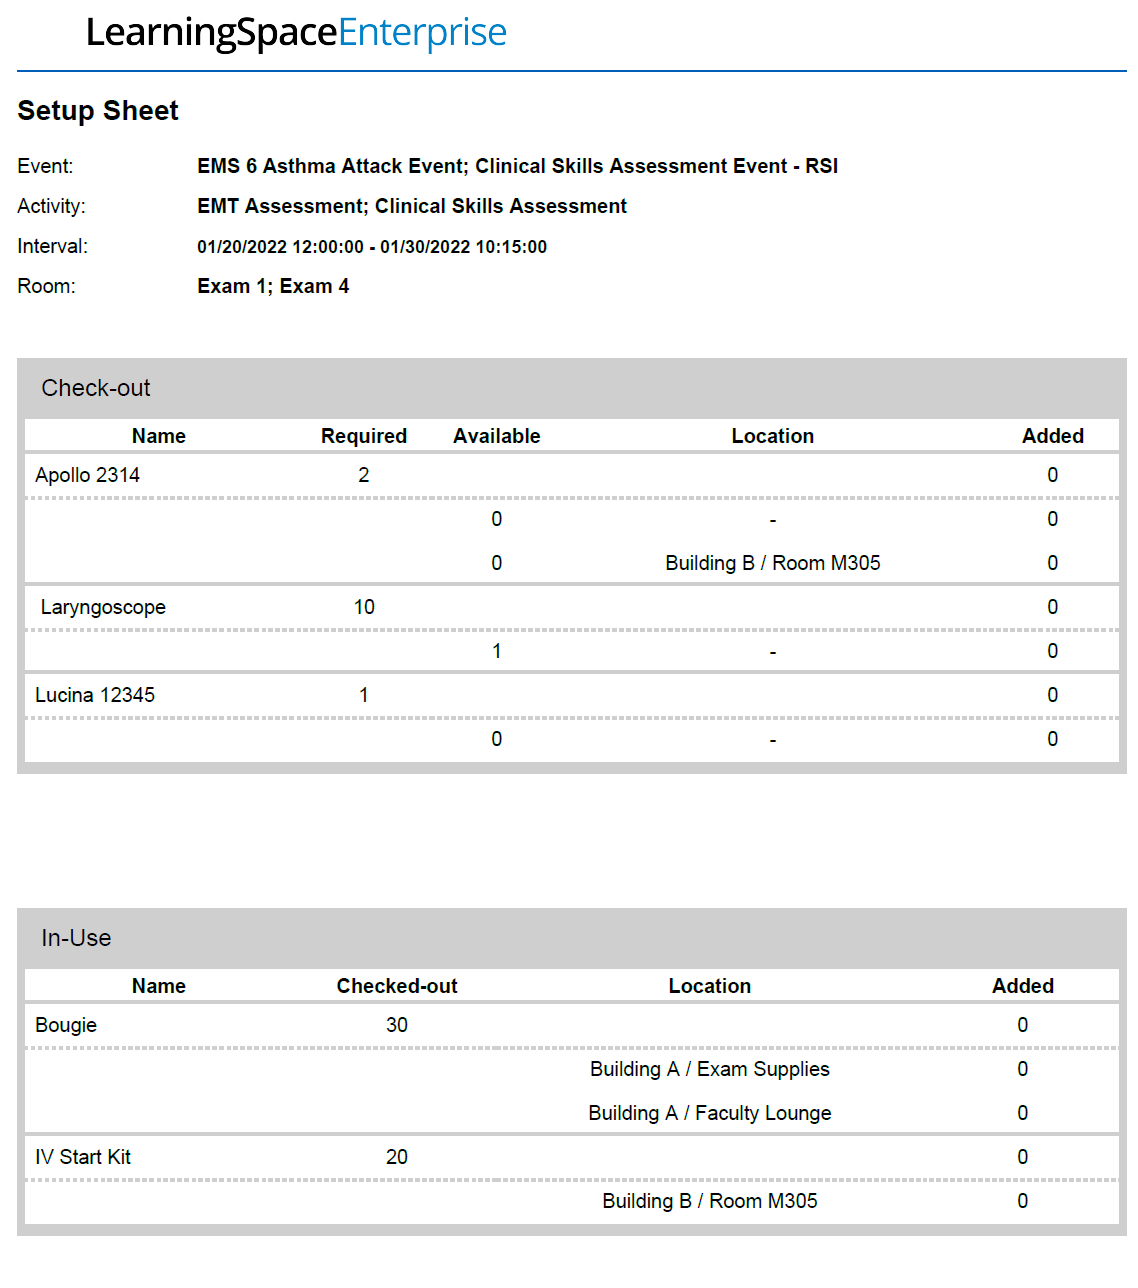
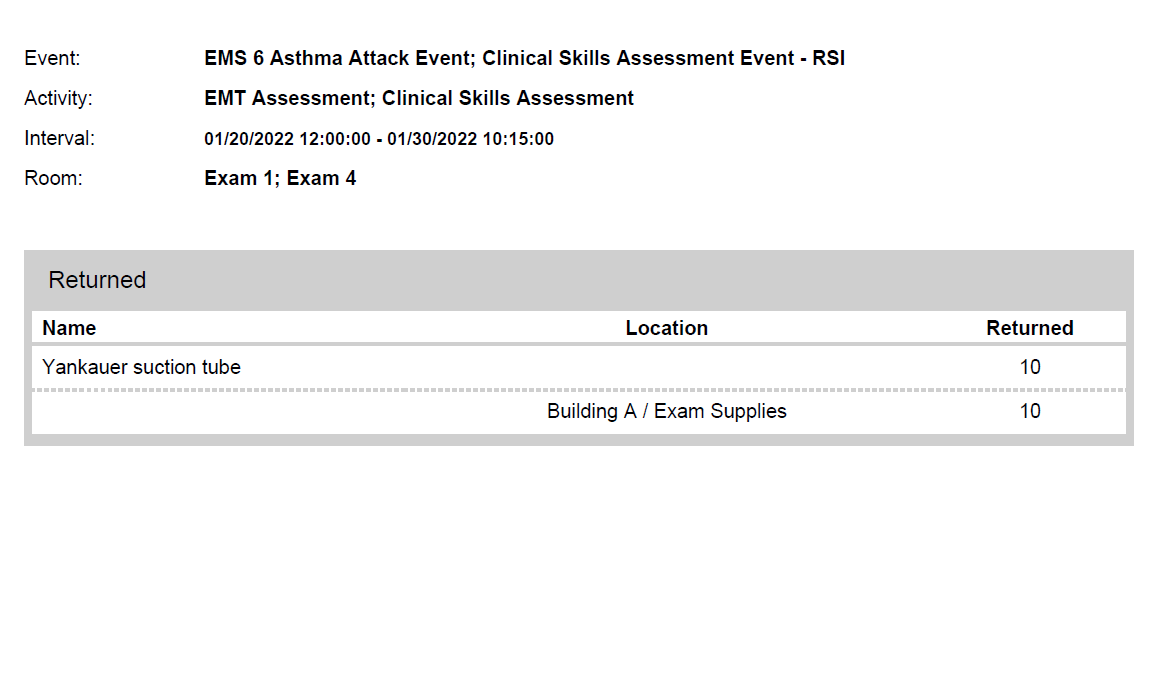
In the printed version of a Setup sheet, the items are grouped and listed by their status: Check-out, In-Use, Returned.
- In the first row of each item, the Required, Checked-out and Returned amount is displayed.
- In the second row, the Available amount is displayed and also the quantities are listed by Locations the items belong to.
Setup Sheet merge 
To facilitate the work of Inventory managers, Setup sheets of multiple Cases can be merged within Calendar events, with the Merge Setup sheets option.
This enables them to Check out multiple Setup sheets at once.
By hovering over the Setup Sheet merge icon ![]() , the information "Merged" is displayed. When opening the merged Setup sheets - by double-clicking on the line or using the Open option - you can view which Setup sheets were merged.
, the information "Merged" is displayed. When opening the merged Setup sheets - by double-clicking on the line or using the Open option - you can view which Setup sheets were merged.
You can merge:
- Setup sheets of multiple rooms/cases within the same event (both in the Calendar and in the Inventory module)
- Setup sheets of different events (only within the Inventory module)
- already merged Setup sheets (only within the Inventory module)
In the Calendar, only the Setup sheets of multiple rooms/cases within one Event can be merged. The merged Setup sheet only applies to the specific event it was created in.
A warning message is displayed before finalizing the merge:
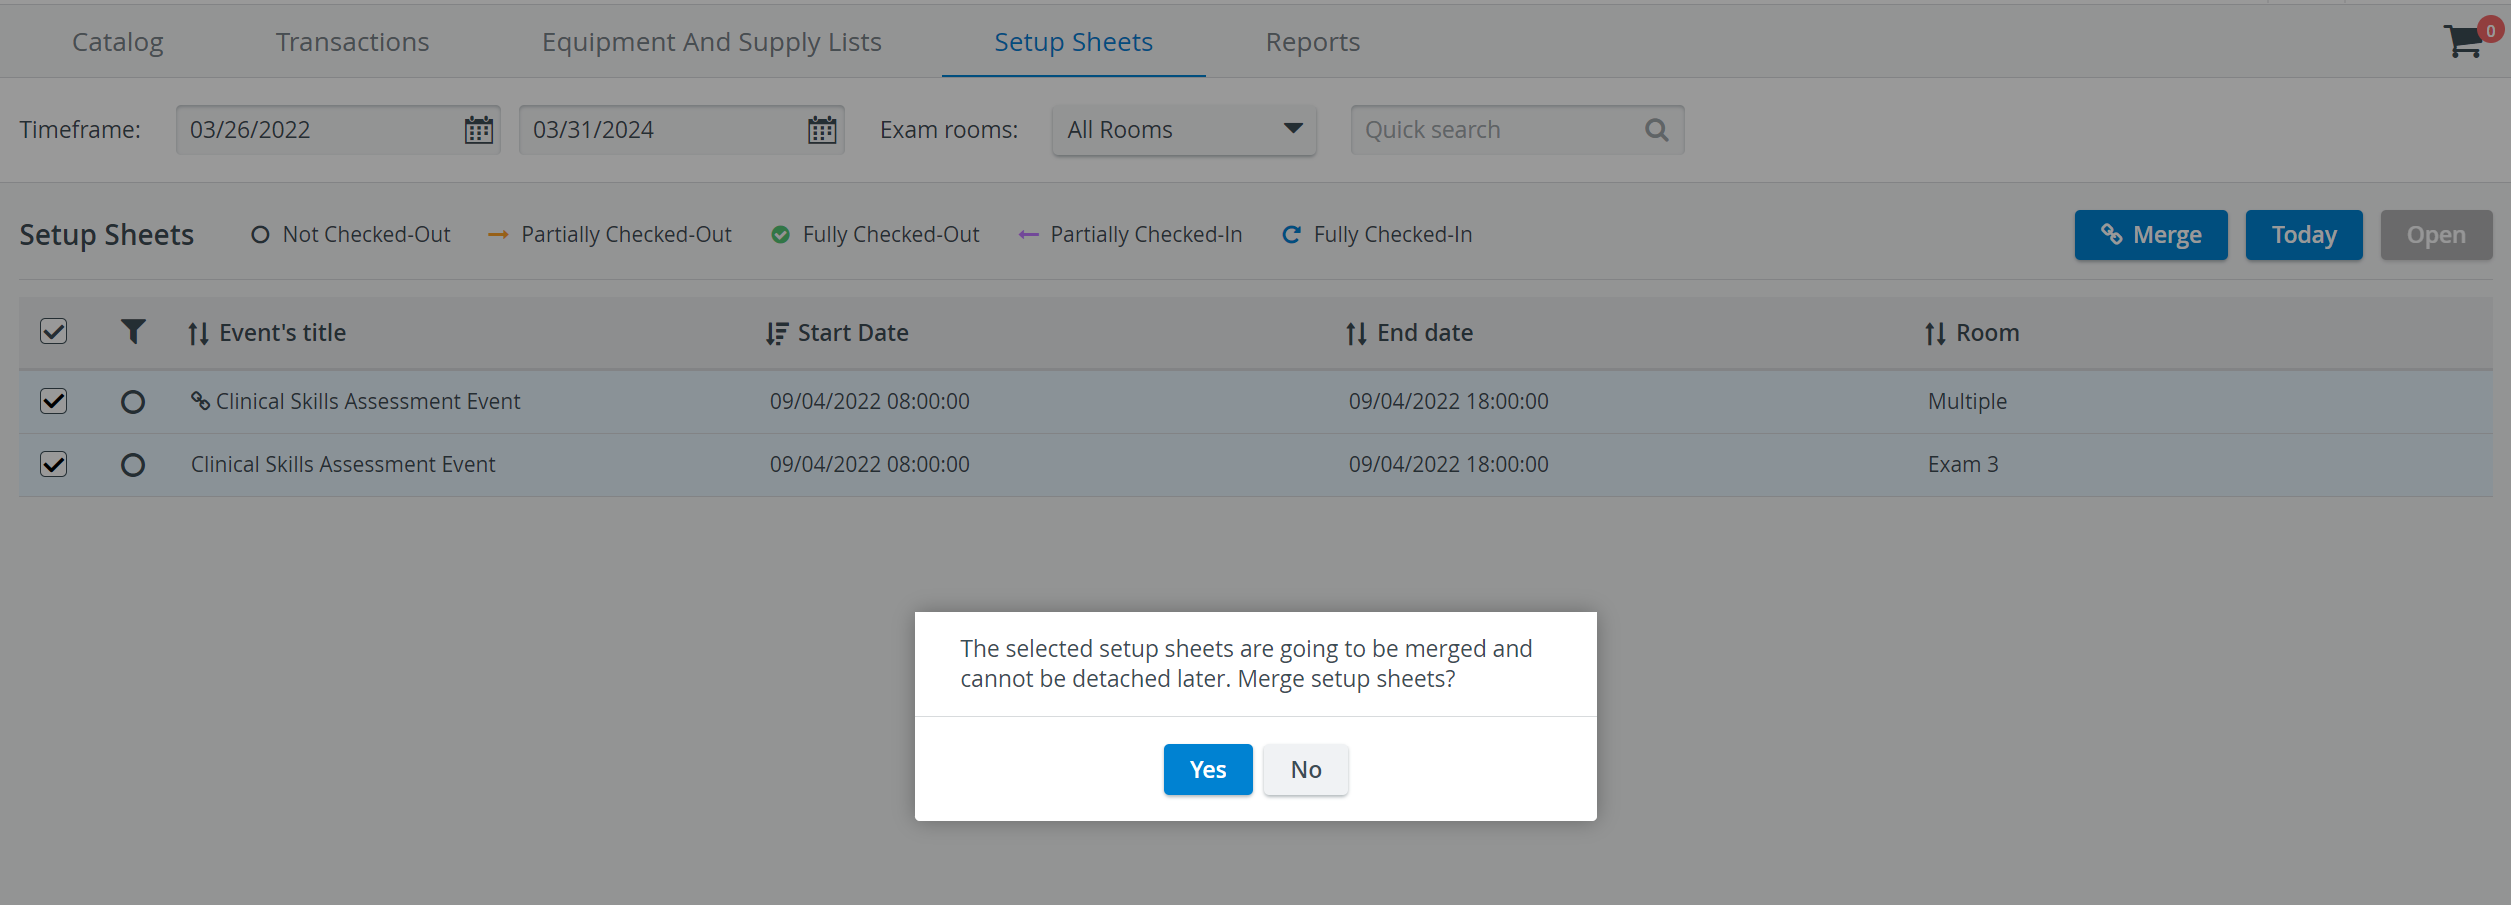
Merged Setup sheets can not be detached later on. If it is necessary to “undo” a merge, the merged Setup Sheets must be deleted, and then re-created individually. You can delete or modify the merged Setup sheets within the Calendar event or delete the event itself.
If Check-out has already been performed on the merged Setup sheet when you remove it from the Calendar event, the Setup sheet will still remain in the Inventory, to make sure that the checked-out items will be returned to stock.
You can also delete all rooms within the Calendar event (this is only possible in the weekly view of the Calendar), and this way the merged Setup sheets will be removed from the Inventory as well.
Setup sheets of rooms added to the Calendar Event after the merge will also be included in the merged Setup sheet.
A Setup sheet merge can be performed via the Calendar module as well. In this case, only the Setup sheets of the selected event can be merged.
During a Setup sheet merge, Assets are not multiplied since these are all specific equipment, with an amount of 1.
Until the Check-out, all additionally added items will be included in the merged Setup sheet. After the Check-out, further items can be added to the Setup sheet within the Inventory but not via the Calendar.
Since Setup sheets with Transactions cannot be modified, it is not possible to merge Setup sheets after Check-out either: the Merge button will be inactive.
See also: Document upload to merged Setup sheets.
Setup Sheet Statuses
Status symbols implemented for Setup sheets:
 Not Checked-Out
  Partially Checked-Out
  Fully Checked-Out
  Partially Checked-in
  Fully Checked-in
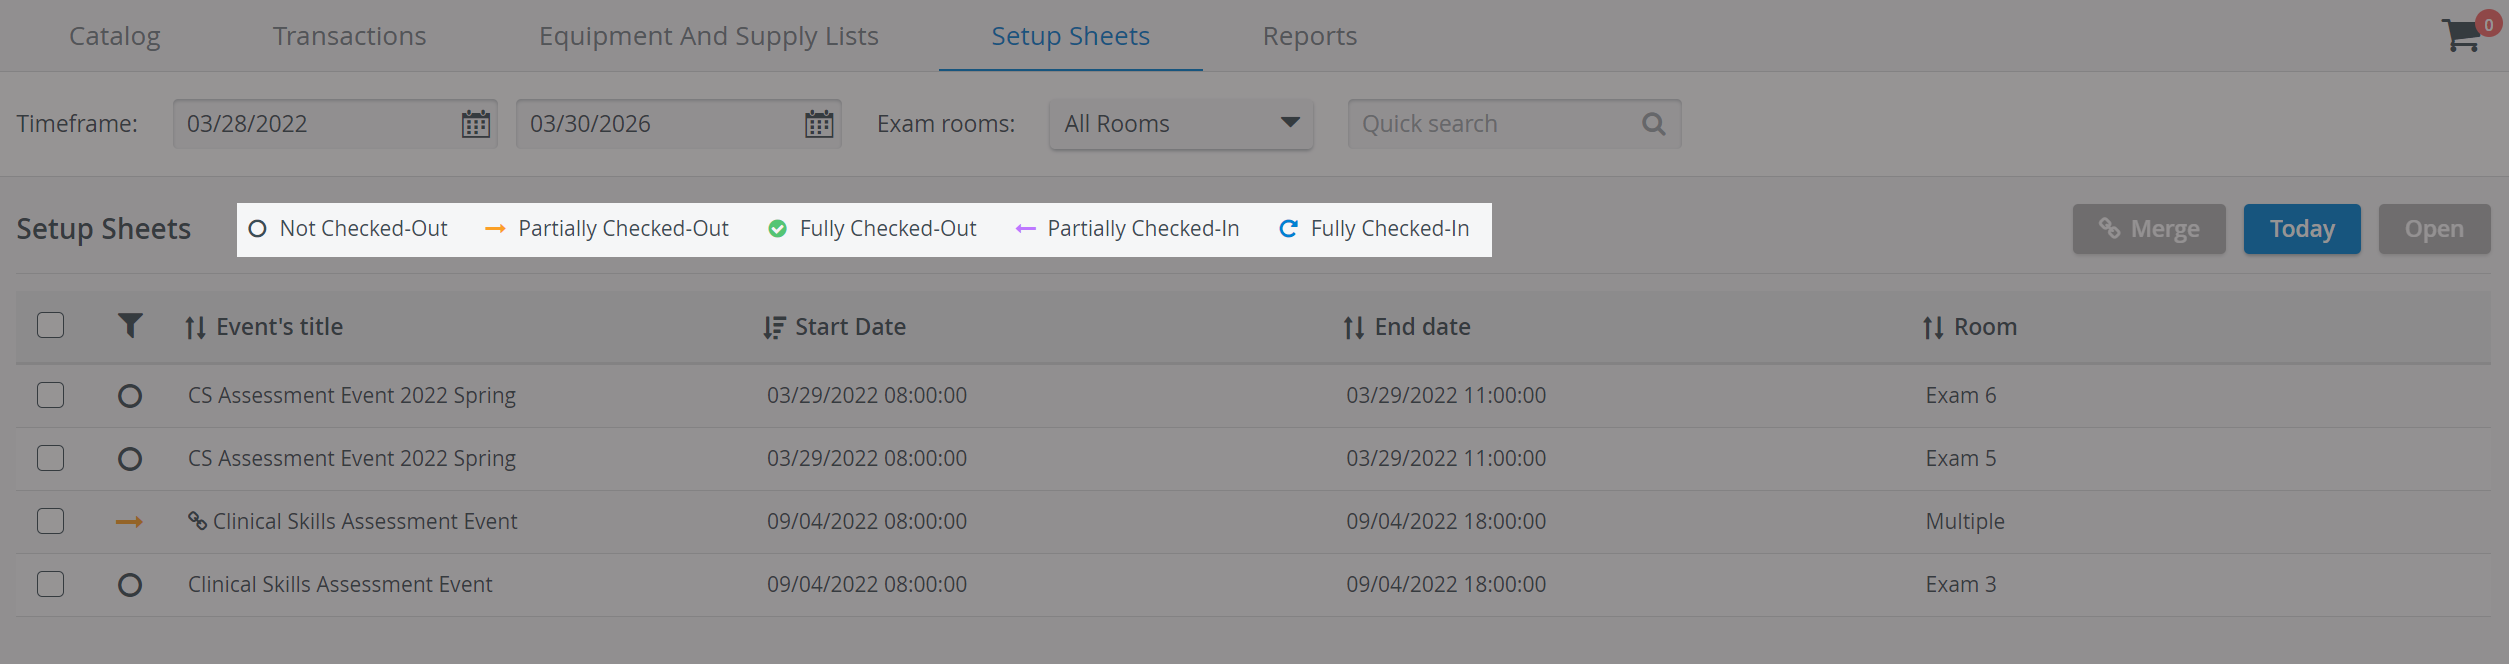
The status symbols are displayed on the Setup sheets tab, according to the Check-in or Check-out status of a Setup sheet.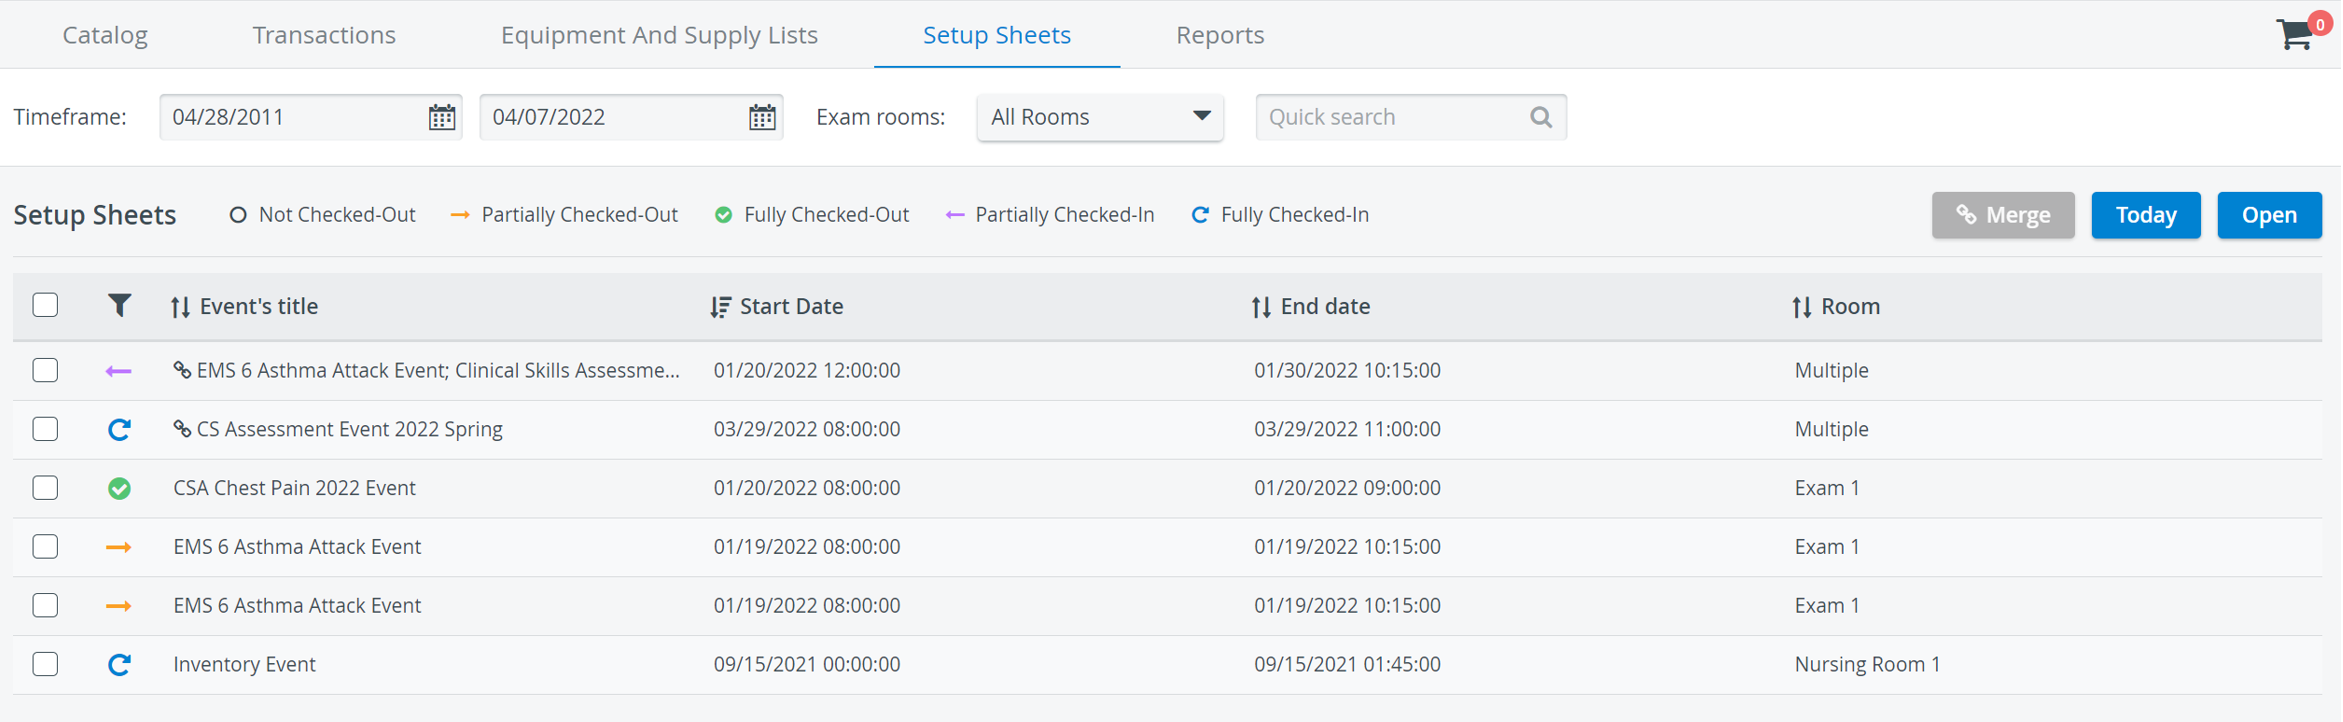
Item Status
Items of a Setup sheet can be checked out and checked in (returned) one by one or all at once - depending on their availability in the Inventory.
Based on its Item status, an item can be displayed under the
- Check-out tab → this tab indicates which items were requested when the Setup sheet(s) for the event(s) were generated ("to be checked out").
- In-Use tab → items already checked out can be checked back in from this tab.
- Returned tab → this tab indicates which items have been checked back in to the Setup Sheet.
Consumables not used during the event ("leftovers") can be checked back in after editing/selecting location and amount.
Also, in the printed version of a Setup sheet, the items are grouped and listed by their status: Check-out, In-Use, Returned.
If the Added to Transaction quantity of an item is lower than the required quantity, the item is displayed in an orange frame and cannot be checked out until the necessary amount
- has been checked in, (in case of Assets and Non-Consumables)
- has been selected based on the expiration date (in case of Consumables with expiration), after clicking Edit,
- has been selected based on location (in case the required full amount is not available at only one location), after clicking Edit.
The orange frame is displayed according to item type as follows:
- Assets: it is only displayed if the item is not in stock.
- Non-Consumables: it is only displayed if the item is not in stock and if quantity hasn’t been selected from the storage location by clicking the Edit link.
- Consumables with expiration: it is always displayed upon opening a Setup sheet until the item has been added to the transaction based on the expiration date, and/or until the item has been selected based on location.
- Consumables without expiration: it is displayed if the quantity hasn’t been selected from the storage location by clicking the Edit link.
It is possible to complete the transaction without the full required quantity being checked out - and this will result in a partially checked-out status of the Setup sheet. In such cases, the orange frame remains.
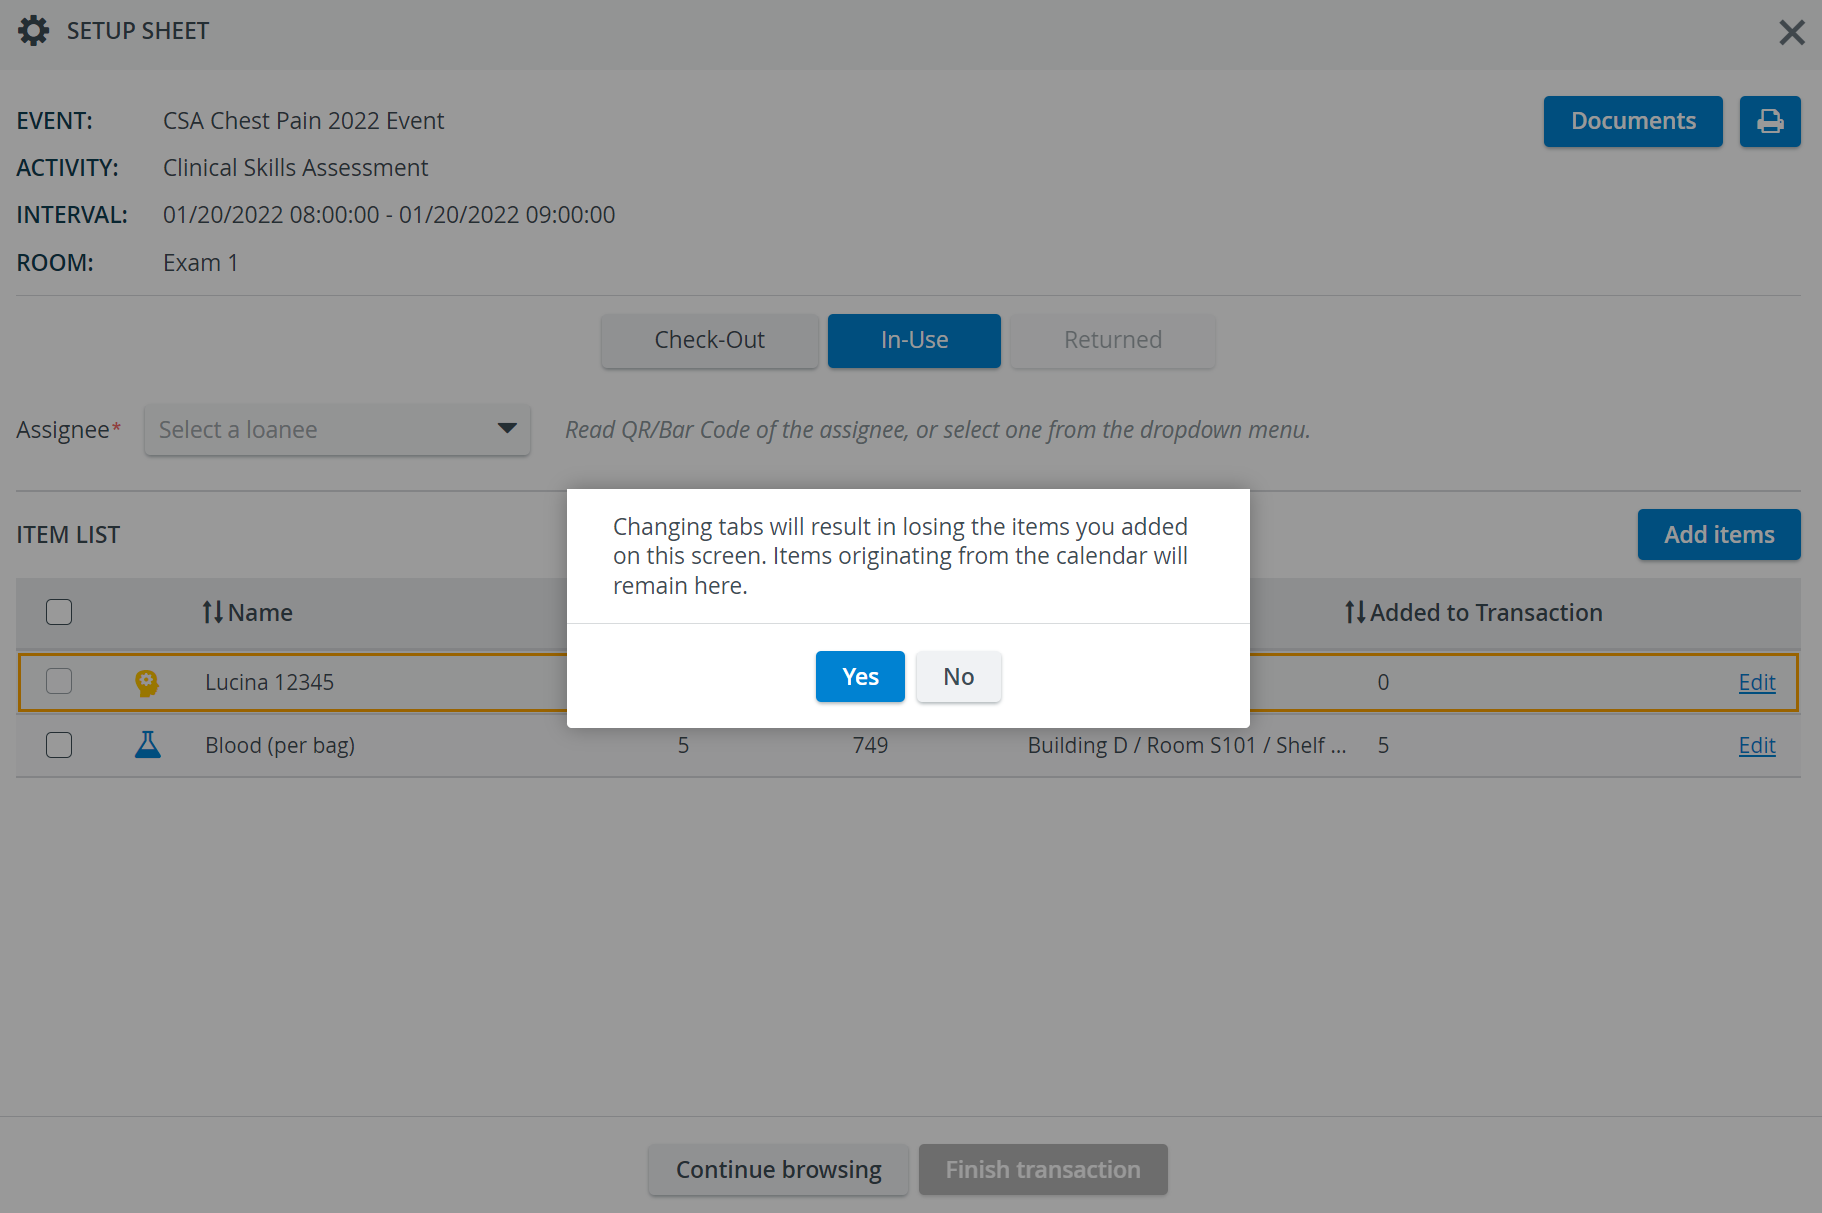
Additional items can be added to the Check-out tab with the help of the Add items button. However, when changing tabs before finishing the Check-out transaction, the items will disappear:
Document upload
The Documents feature available at Events in the Calendar module, and at Setup Sheets in the Inventory module allows you to upload complementary documents,
e.g. guides about preparing for the training or exam environment.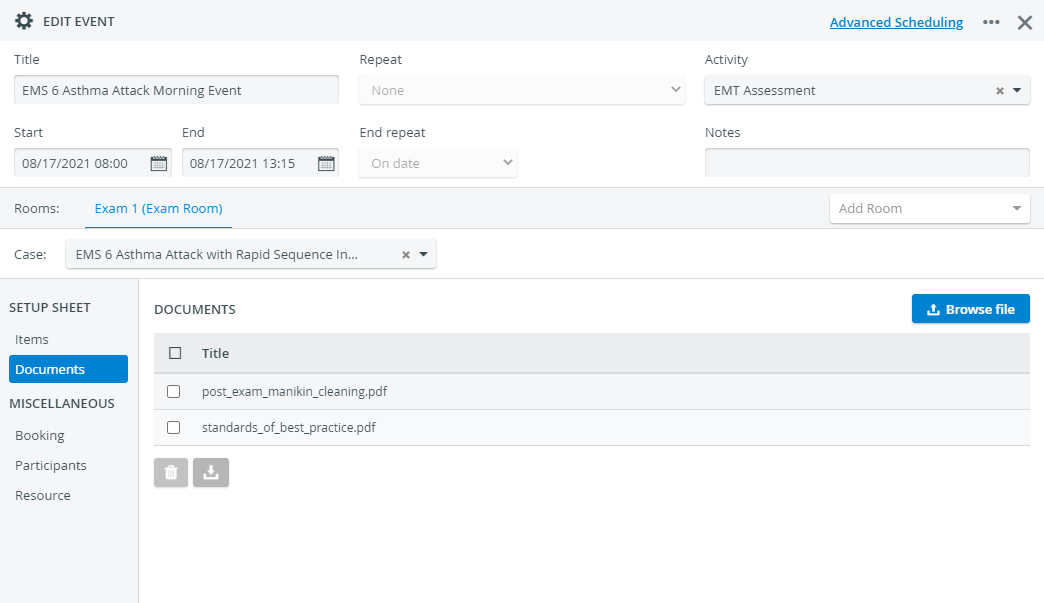
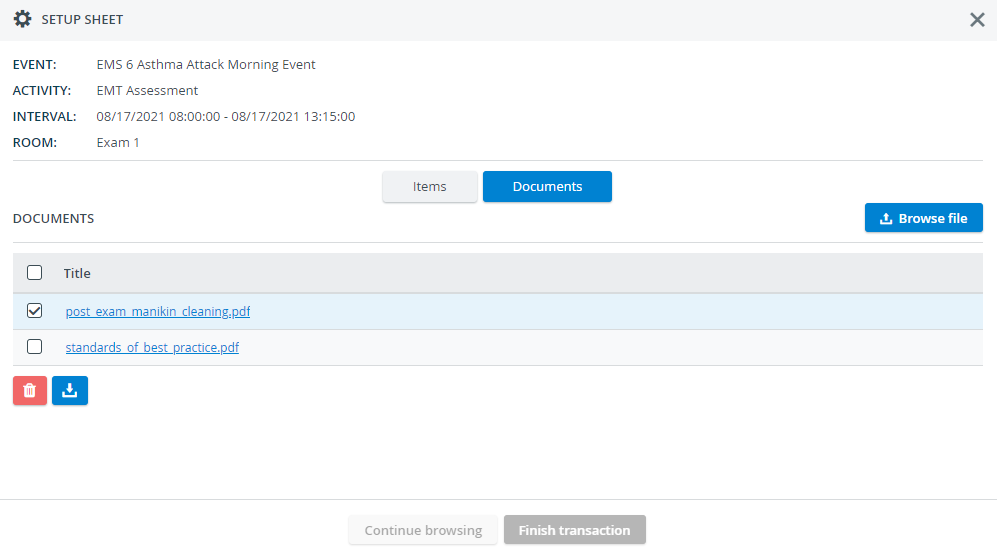
Each document you upload at the event will be passed down to the Setup Sheet located in the Inventory module.
Then, the Transaction Assignee in charge of the equipment can print the instructions when checking out the items for the event.
Document upload is also possible to events via the Calendar module, without a Setup sheet being added to the event (if the Inventory manager module is enabled).
Documents uploaded to events this way are only displayed in the Calendar, not in the Inventory module. Once, however, a Setup sheet is being added to the event, the document will appear in the Inventory module as well.
You can also upload additional files to a Setup Sheet in the Inventory module.
In case Setup sheets are merged, documents previously uploaded into them get added up as well. After a merge, documents can only be uploaded to an event via the Calendar.
Learn more about the Inventory Manager on our Inventory - How to pages, and watch the Inventory Manager Training Videos.
Overview
Content Tools