Full screen mode
Clicking the full screen icon in the header displays all the camera feeds in full screen mode. Clicking the full screen icon in a single camera panel displays the single camera feed in full screen mode.
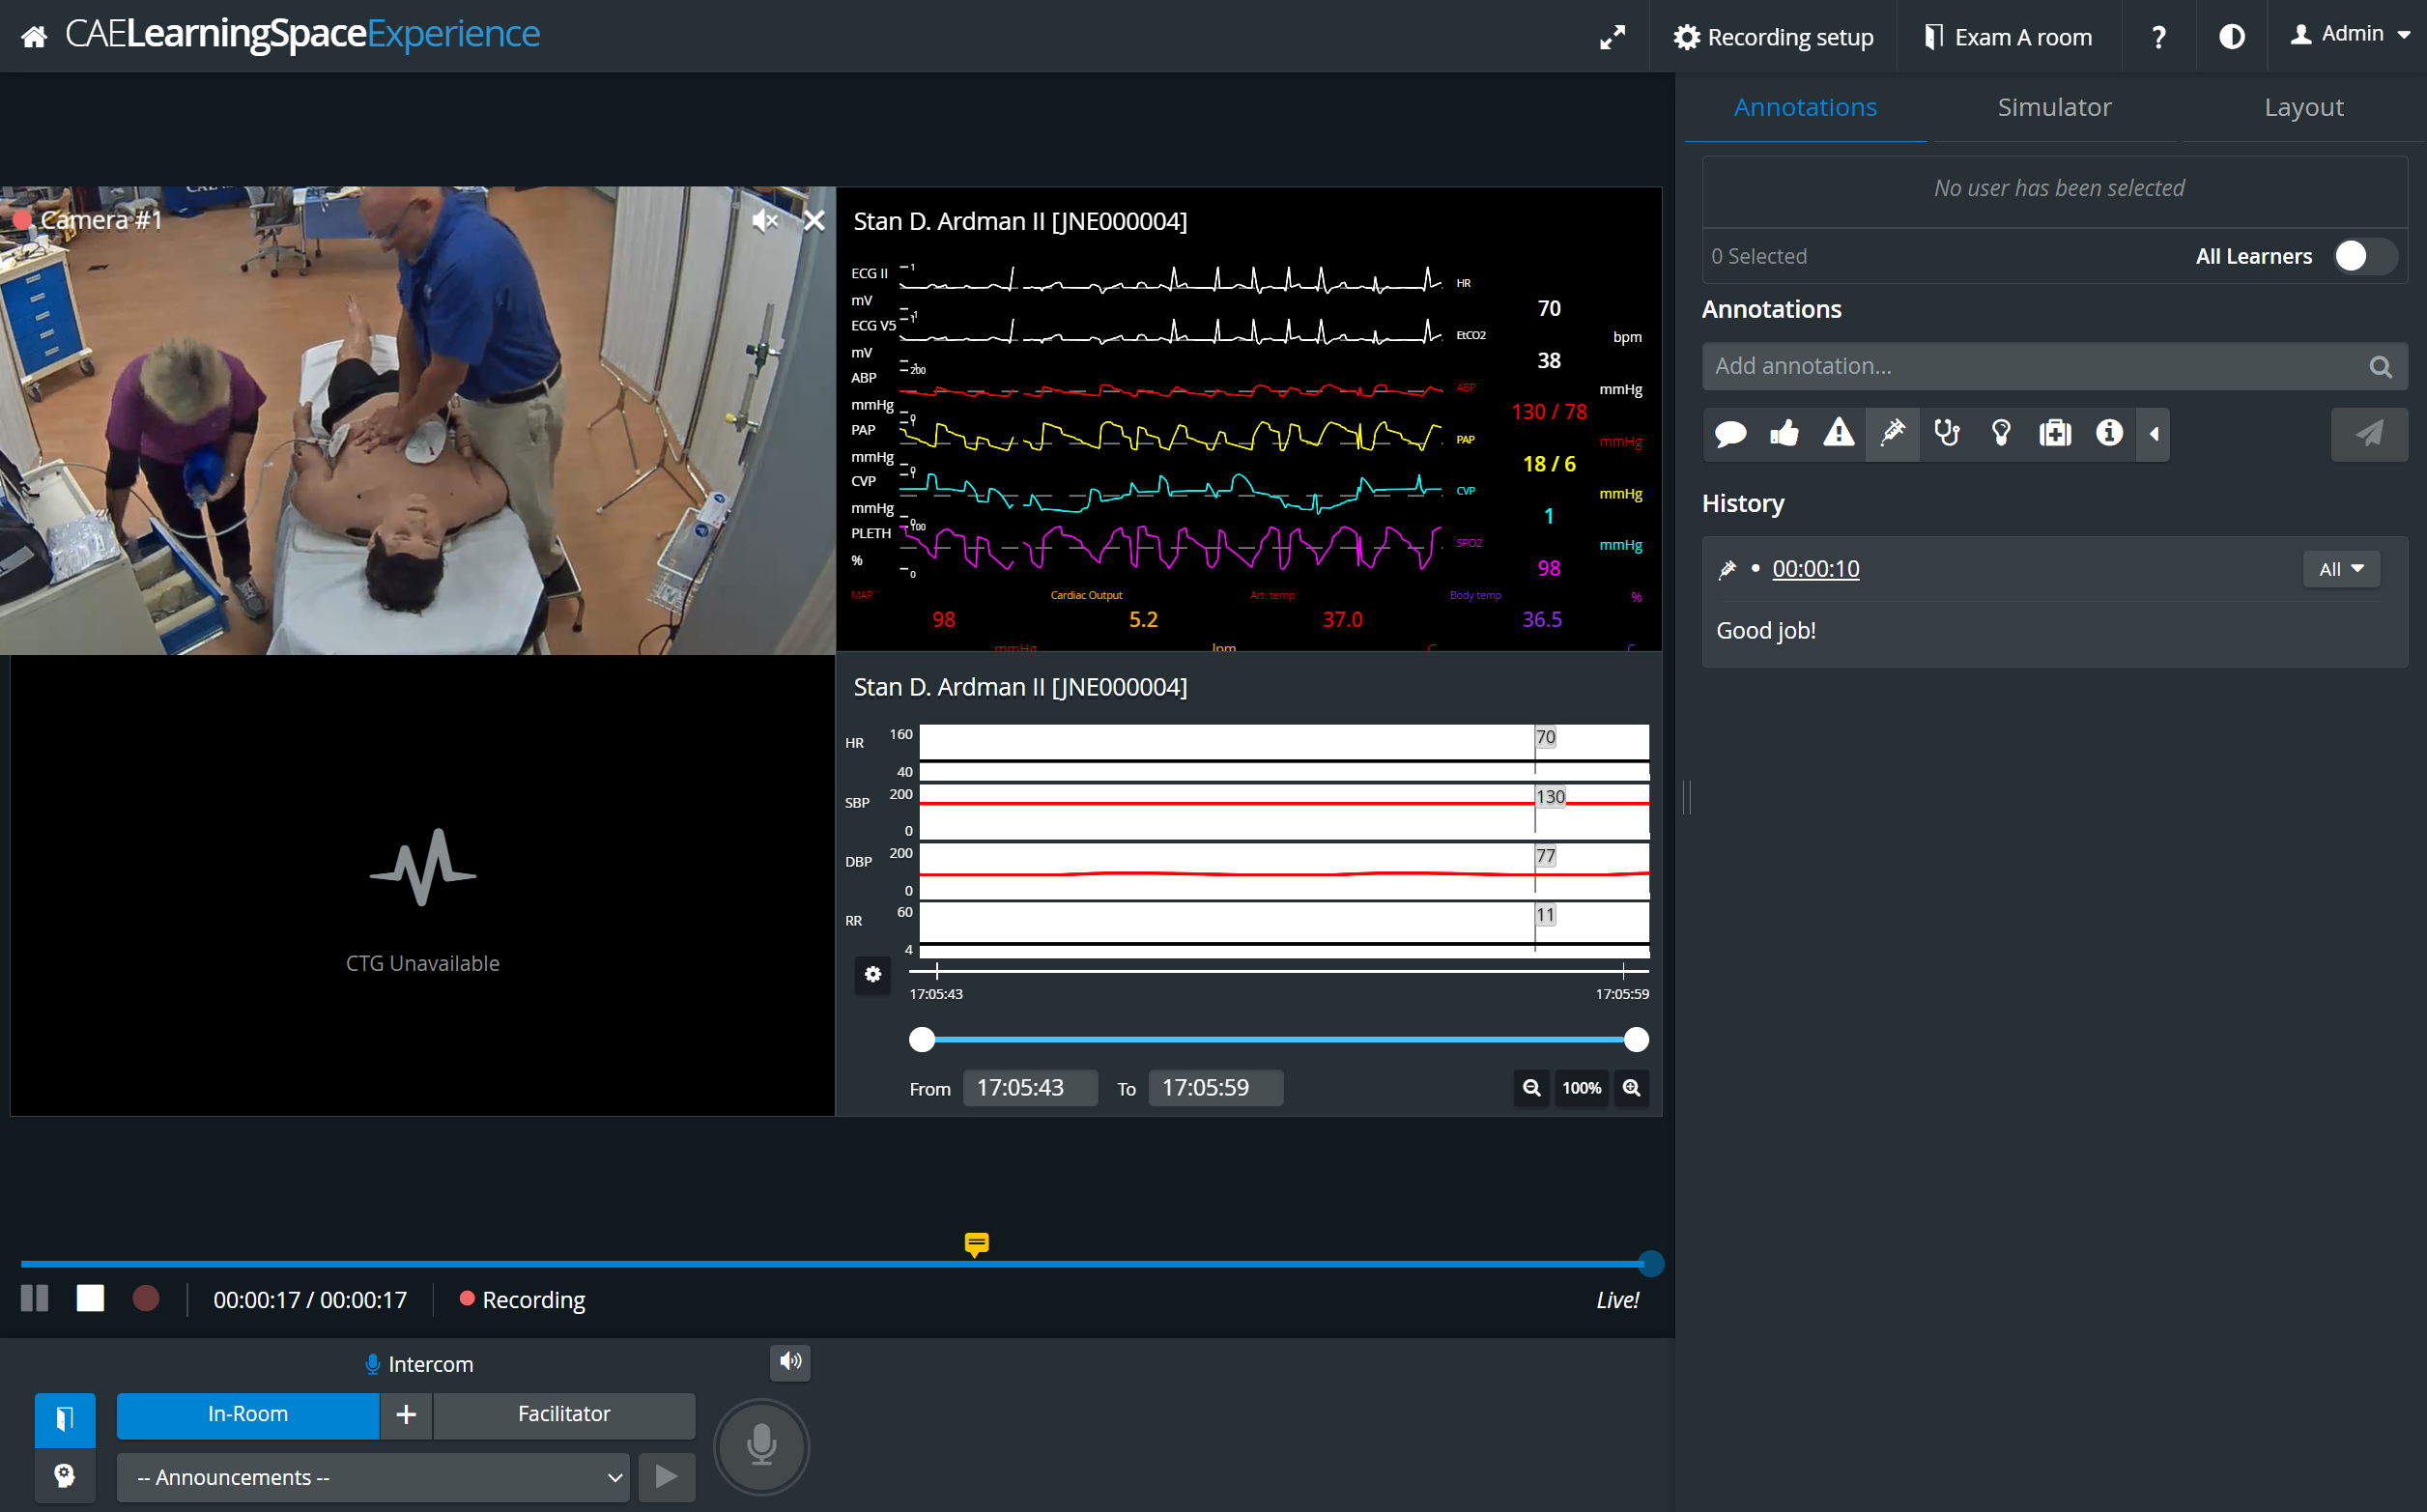
- The Slider component at the bottom is available in full-screen mode.
The whole camera layout can be set to full-screen mode, not just a single media stream.
To exit full screen mode
- click the
 icon in the lower left corner,
 - double-click anywhere in the camera image,
- hover to the middle upper part of the camera image and click on the X that reveals by this action,
- use the Esc button.
Camera panel
Camera settings can be adjusted by clicking on the icons in the right upper corner of the camera panel:
![]() Audio setting: The audio of a particular camera can be turned on or off by clicking the Toggle Audio on/off in the top right corner of the camera panel.
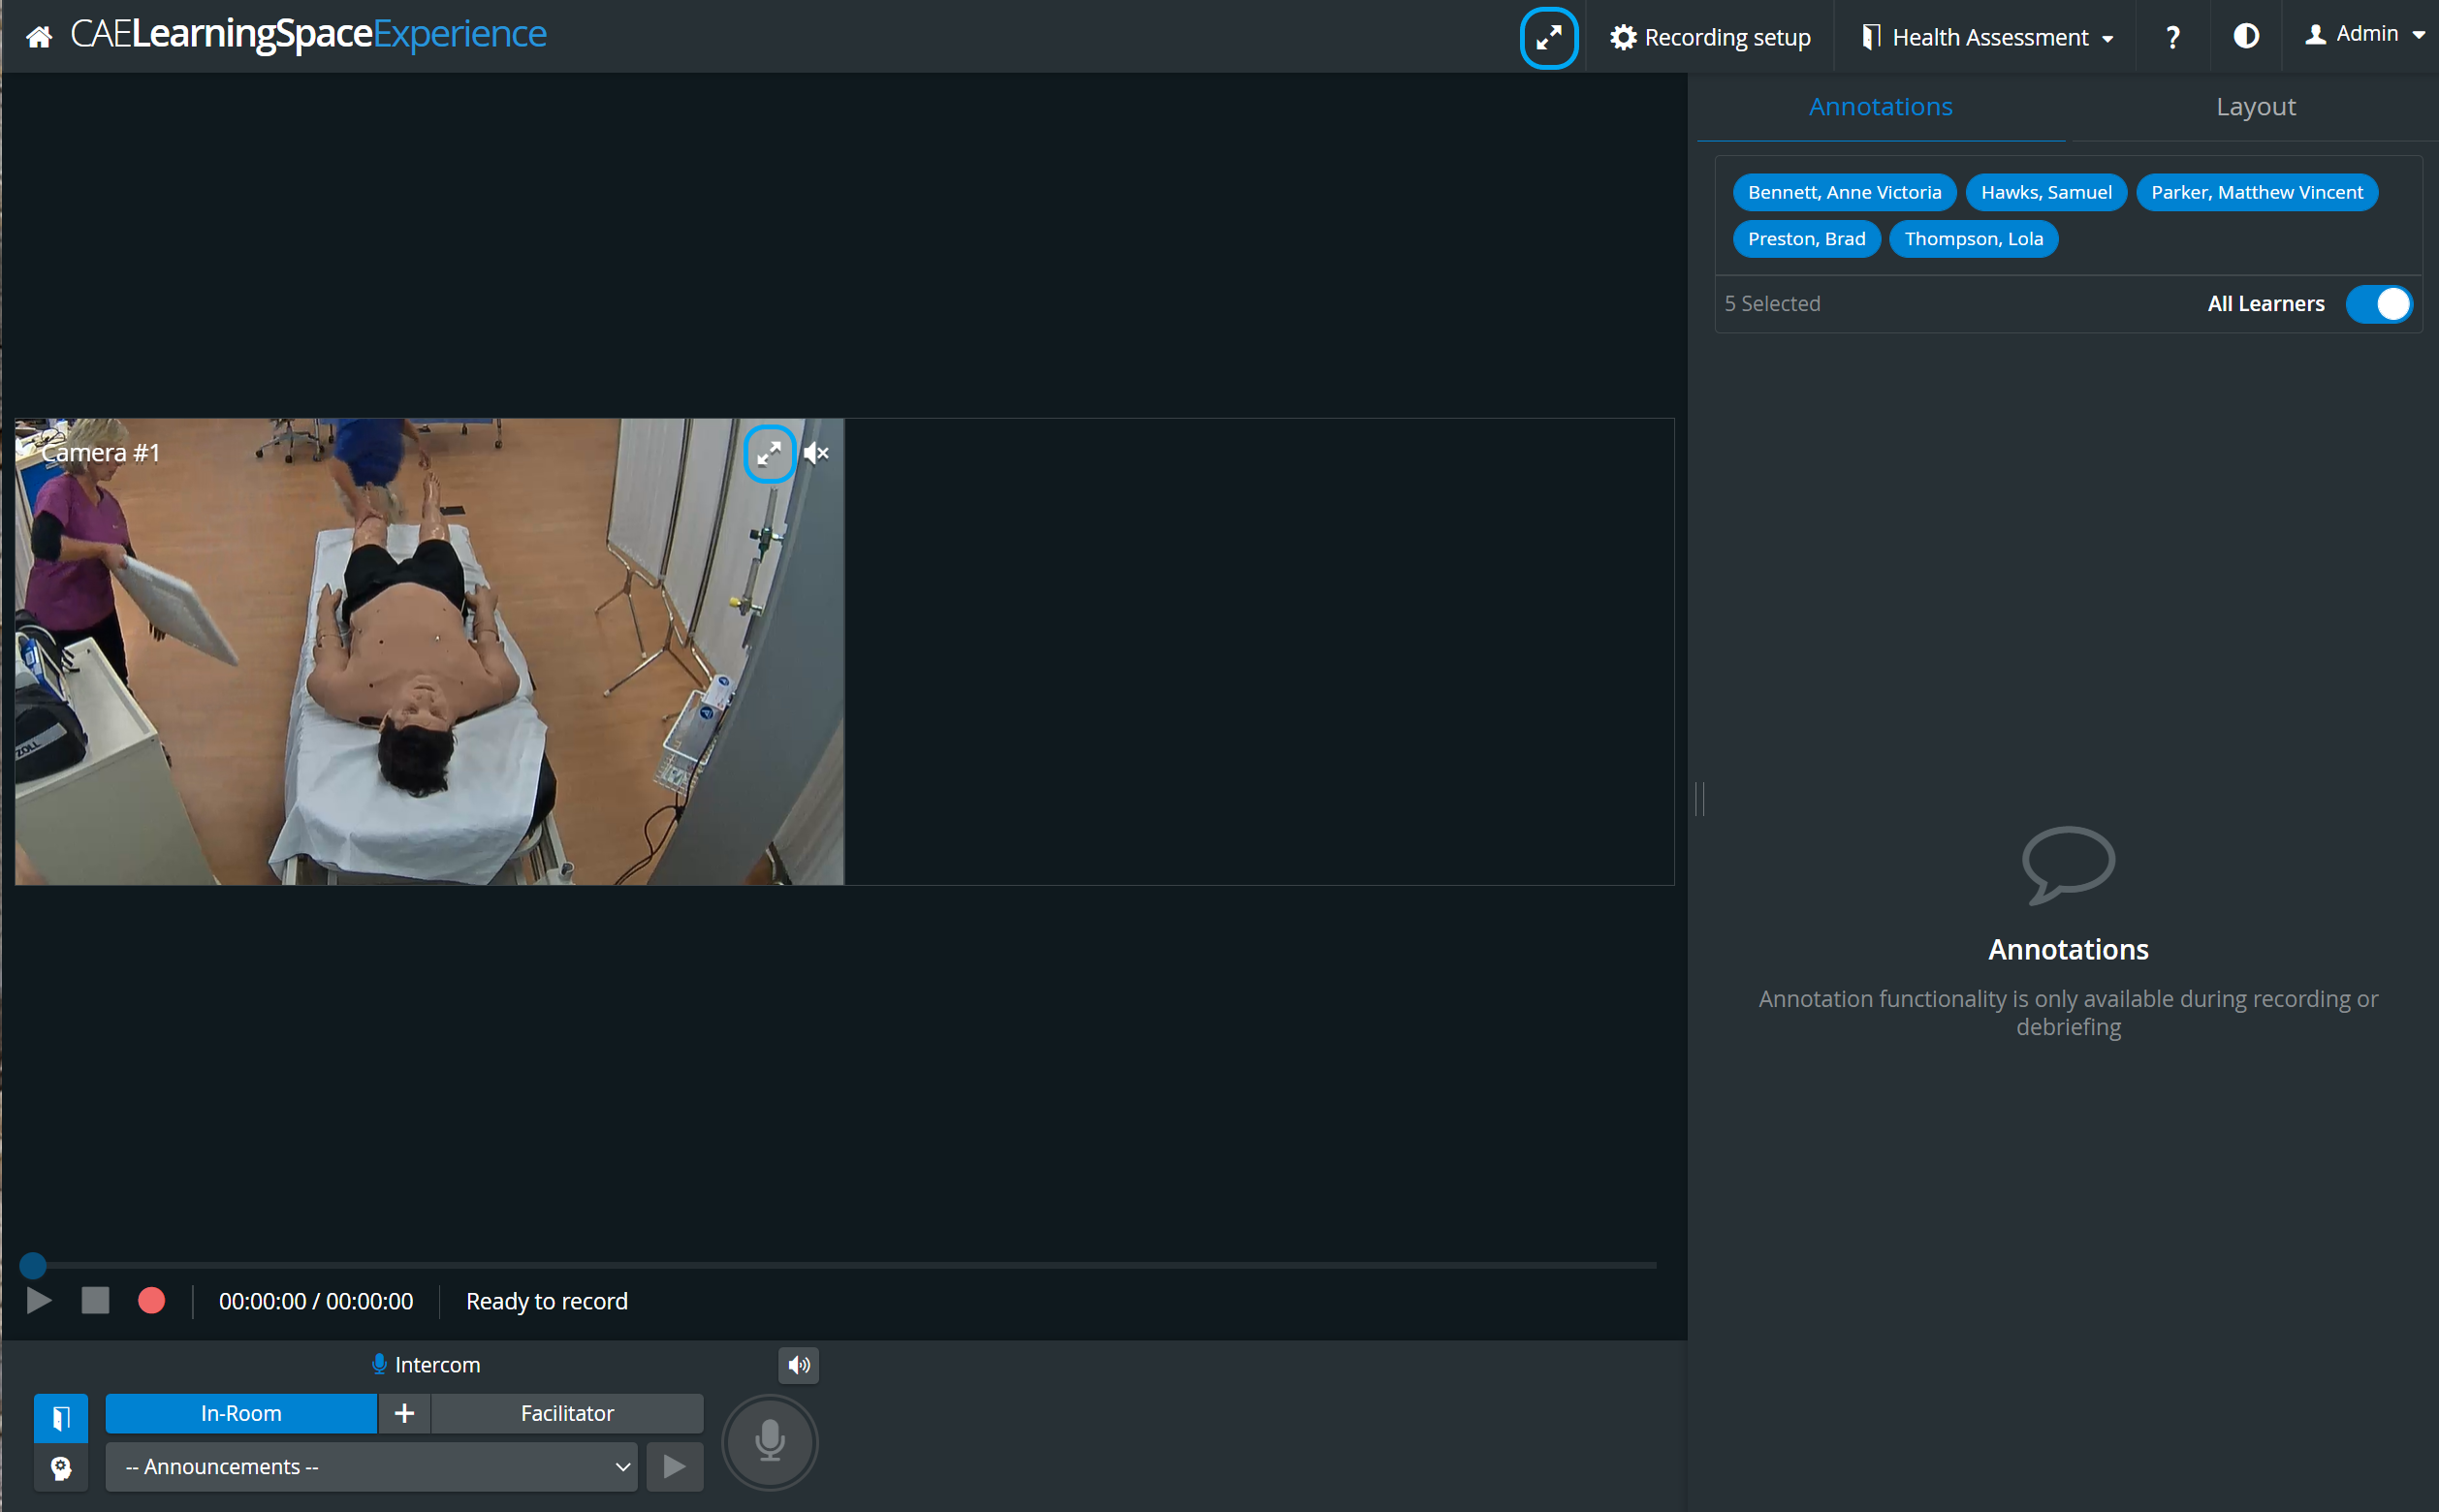
Audio setting: The audio of a particular camera can be turned on or off by clicking the Toggle Audio on/off in the top right corner of the camera panel.![]() Full screen icon: Clicking the full screen icon in a camera panel displays the camera feed in full screen mode.
Full screen icon: Clicking the full screen icon in a camera panel displays the camera feed in full screen mode.
Only one camera of a room can have its audio turned on at a time.
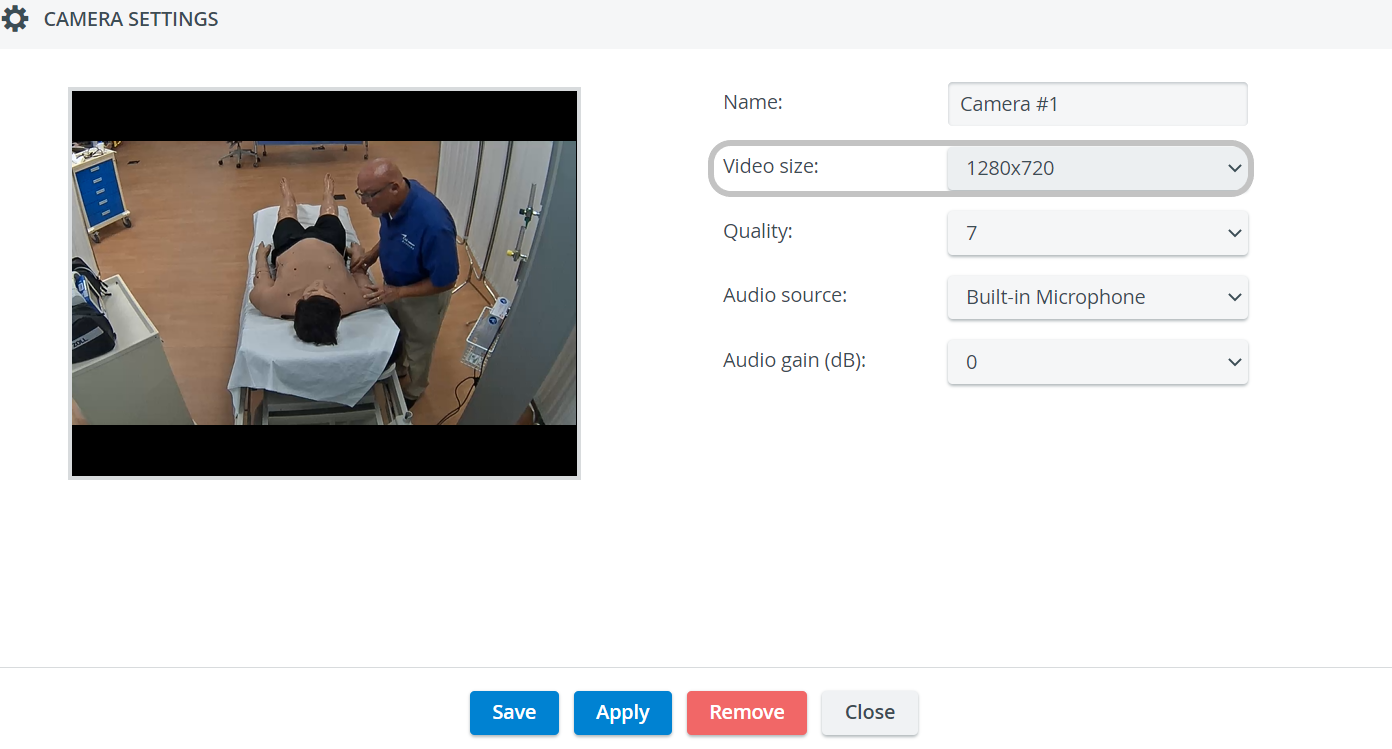
The sizing of camera streams might not be optimal (an additional black bar/stripe might be visible at the upper and lower edges of the screen) with a 4:3 video size (aspect ratio). The recommended ratio is 16:9 (e.g. 1280x720), which can be set within the Camera settings window of the Cameras page, in the System Module.
PTZ functionalities
The following pan-tilt-zoom (PTZ) functionalities are available during recording, to improve camera movements:
On-Screen PTZ: Click in the center of the video
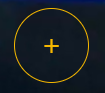 , drag the crosshair and pull the camera into the desired direction. The movement of the camera will stop by releasing the mouse.
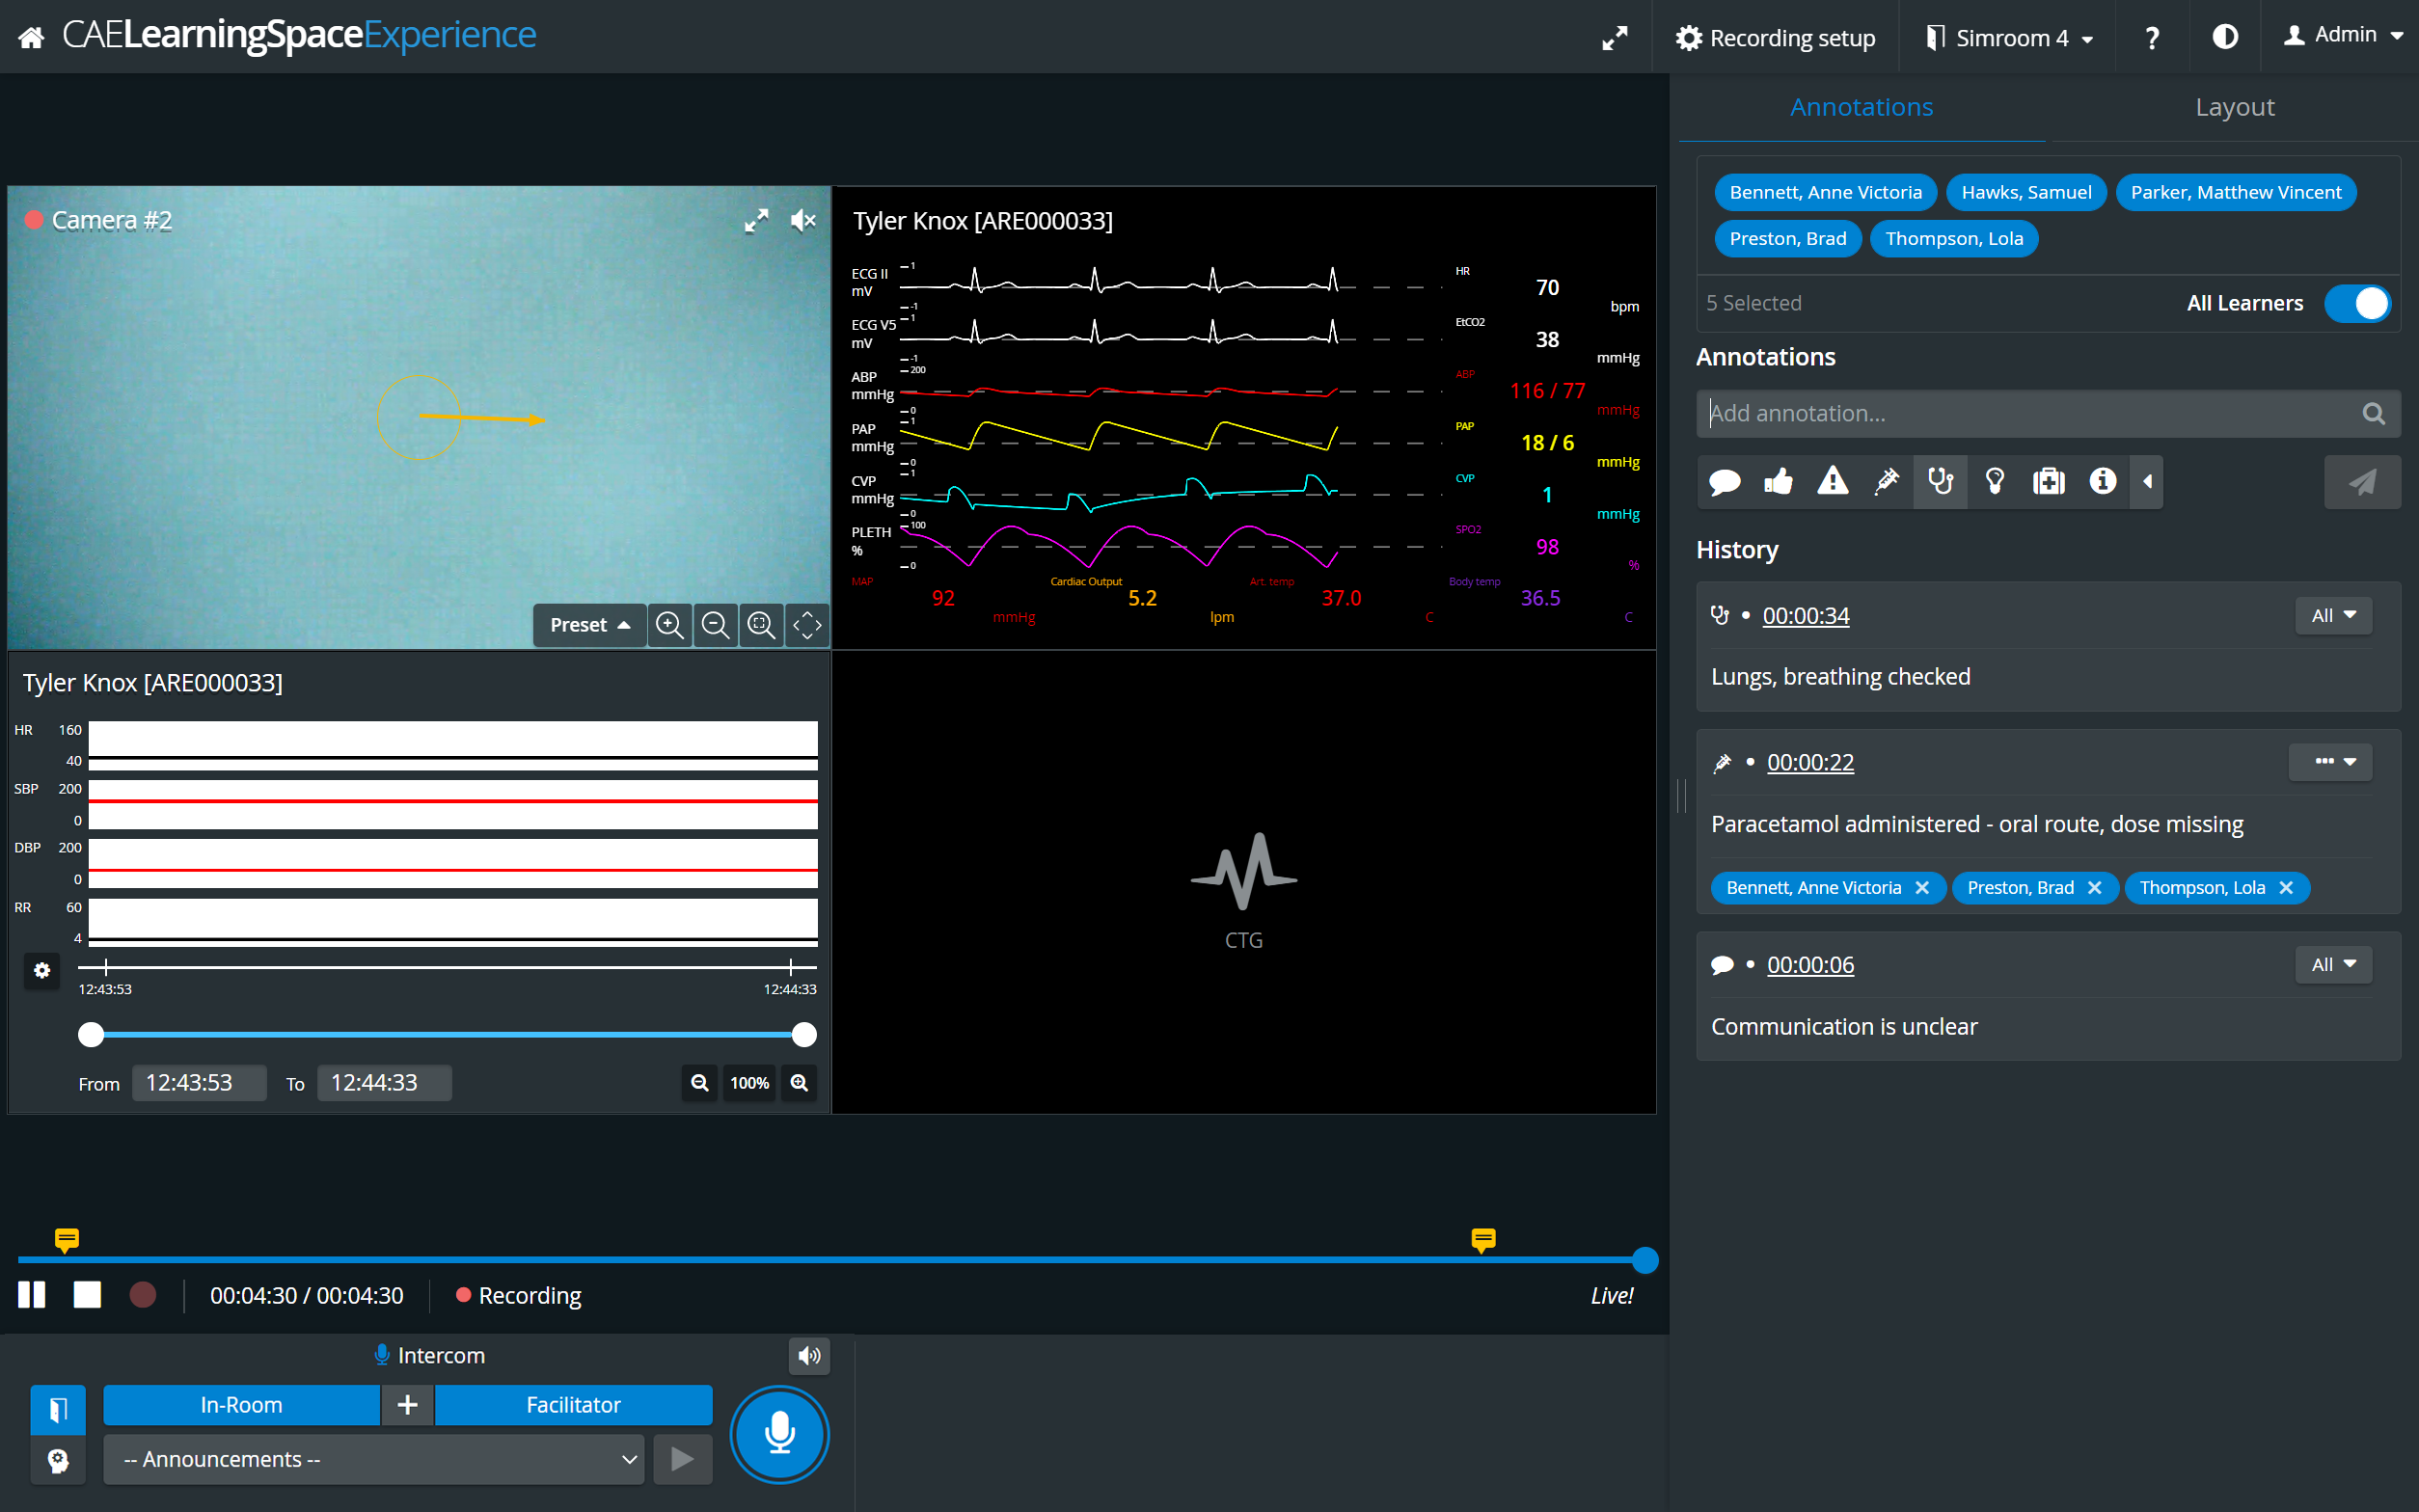
IMPORTANT
On-Screen PTZ is focused on the middle of the screen, thus it cannot be used in the footer and header of the SRV camera feeds.
- Scroll-To-Zoom: zoom-in and zoom-out by scrolling on the mouse.
- Pan-Tilt-Move: camera moves into a direction after clicking into the desired area of the camera feed.
- Area Zoom: camera zooms into the area drawn by the user.
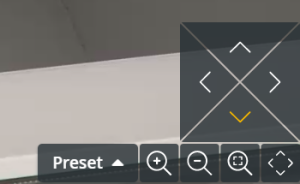
- Move and reset buttons: camera movement can be controlled by the arrows and the magnifying glass icons in the right lower corner of the camera feed.
Zoom level can be reset to the default value with the Reset zoom icon.

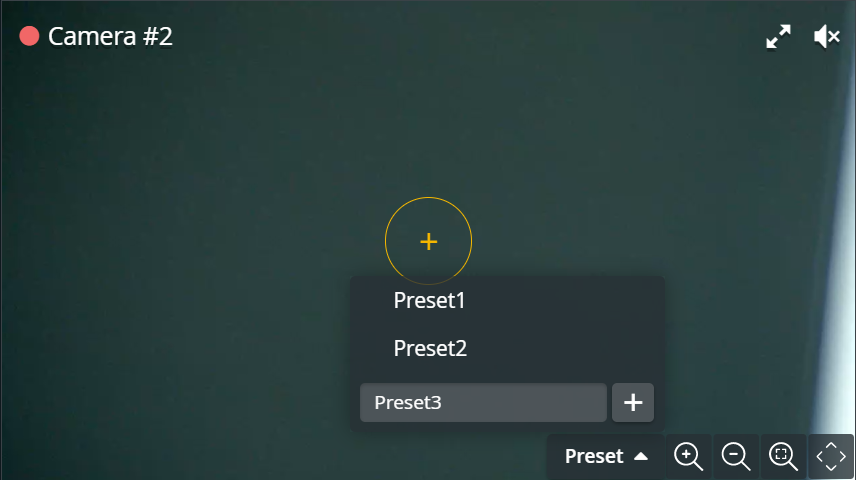
- PTZ preset: Saving a particular view of a PTZ camera can be done by clicking the Presets drop-down, typing the desired title in the Add new preset field then clicking the plus button. To select an already added view, click its title in the drop-down.
Audio setting
The audio of a particular camera can be turned on or off by clicking the audio icon ![]() in the top right corner of the camera panel.
in the top right corner of the camera panel.
Only one camera of a room can have its audio turned on at a time.
Mute/Unmute functionality
The mute/unmute functionality during Live recording in the Single Room View operates as follows:
- General rule: the system only unmutes a camera when the user clicks on the unmute button OR if the user enters the Single Room View (live or review).
- 3-state click functionality for mute/unmute:
First click: (on the icon when it is in muted state) unmutes the given camera stream and other unmuted streams stay unmuted too.
The icon on all unmuted streams changes to an icon showing that multiple streams are unmuted.Second click: mutes all other cameras (even the unmuted ones) and only the selected camera stream stays unmuted.
Third click: mutes the selected camera stream as well.

Recording setup
Clicking the Recording setup in the header prompts the Recording Setup pop-up window to appear where the Learners and Faculty (FON) can be added to a recording.
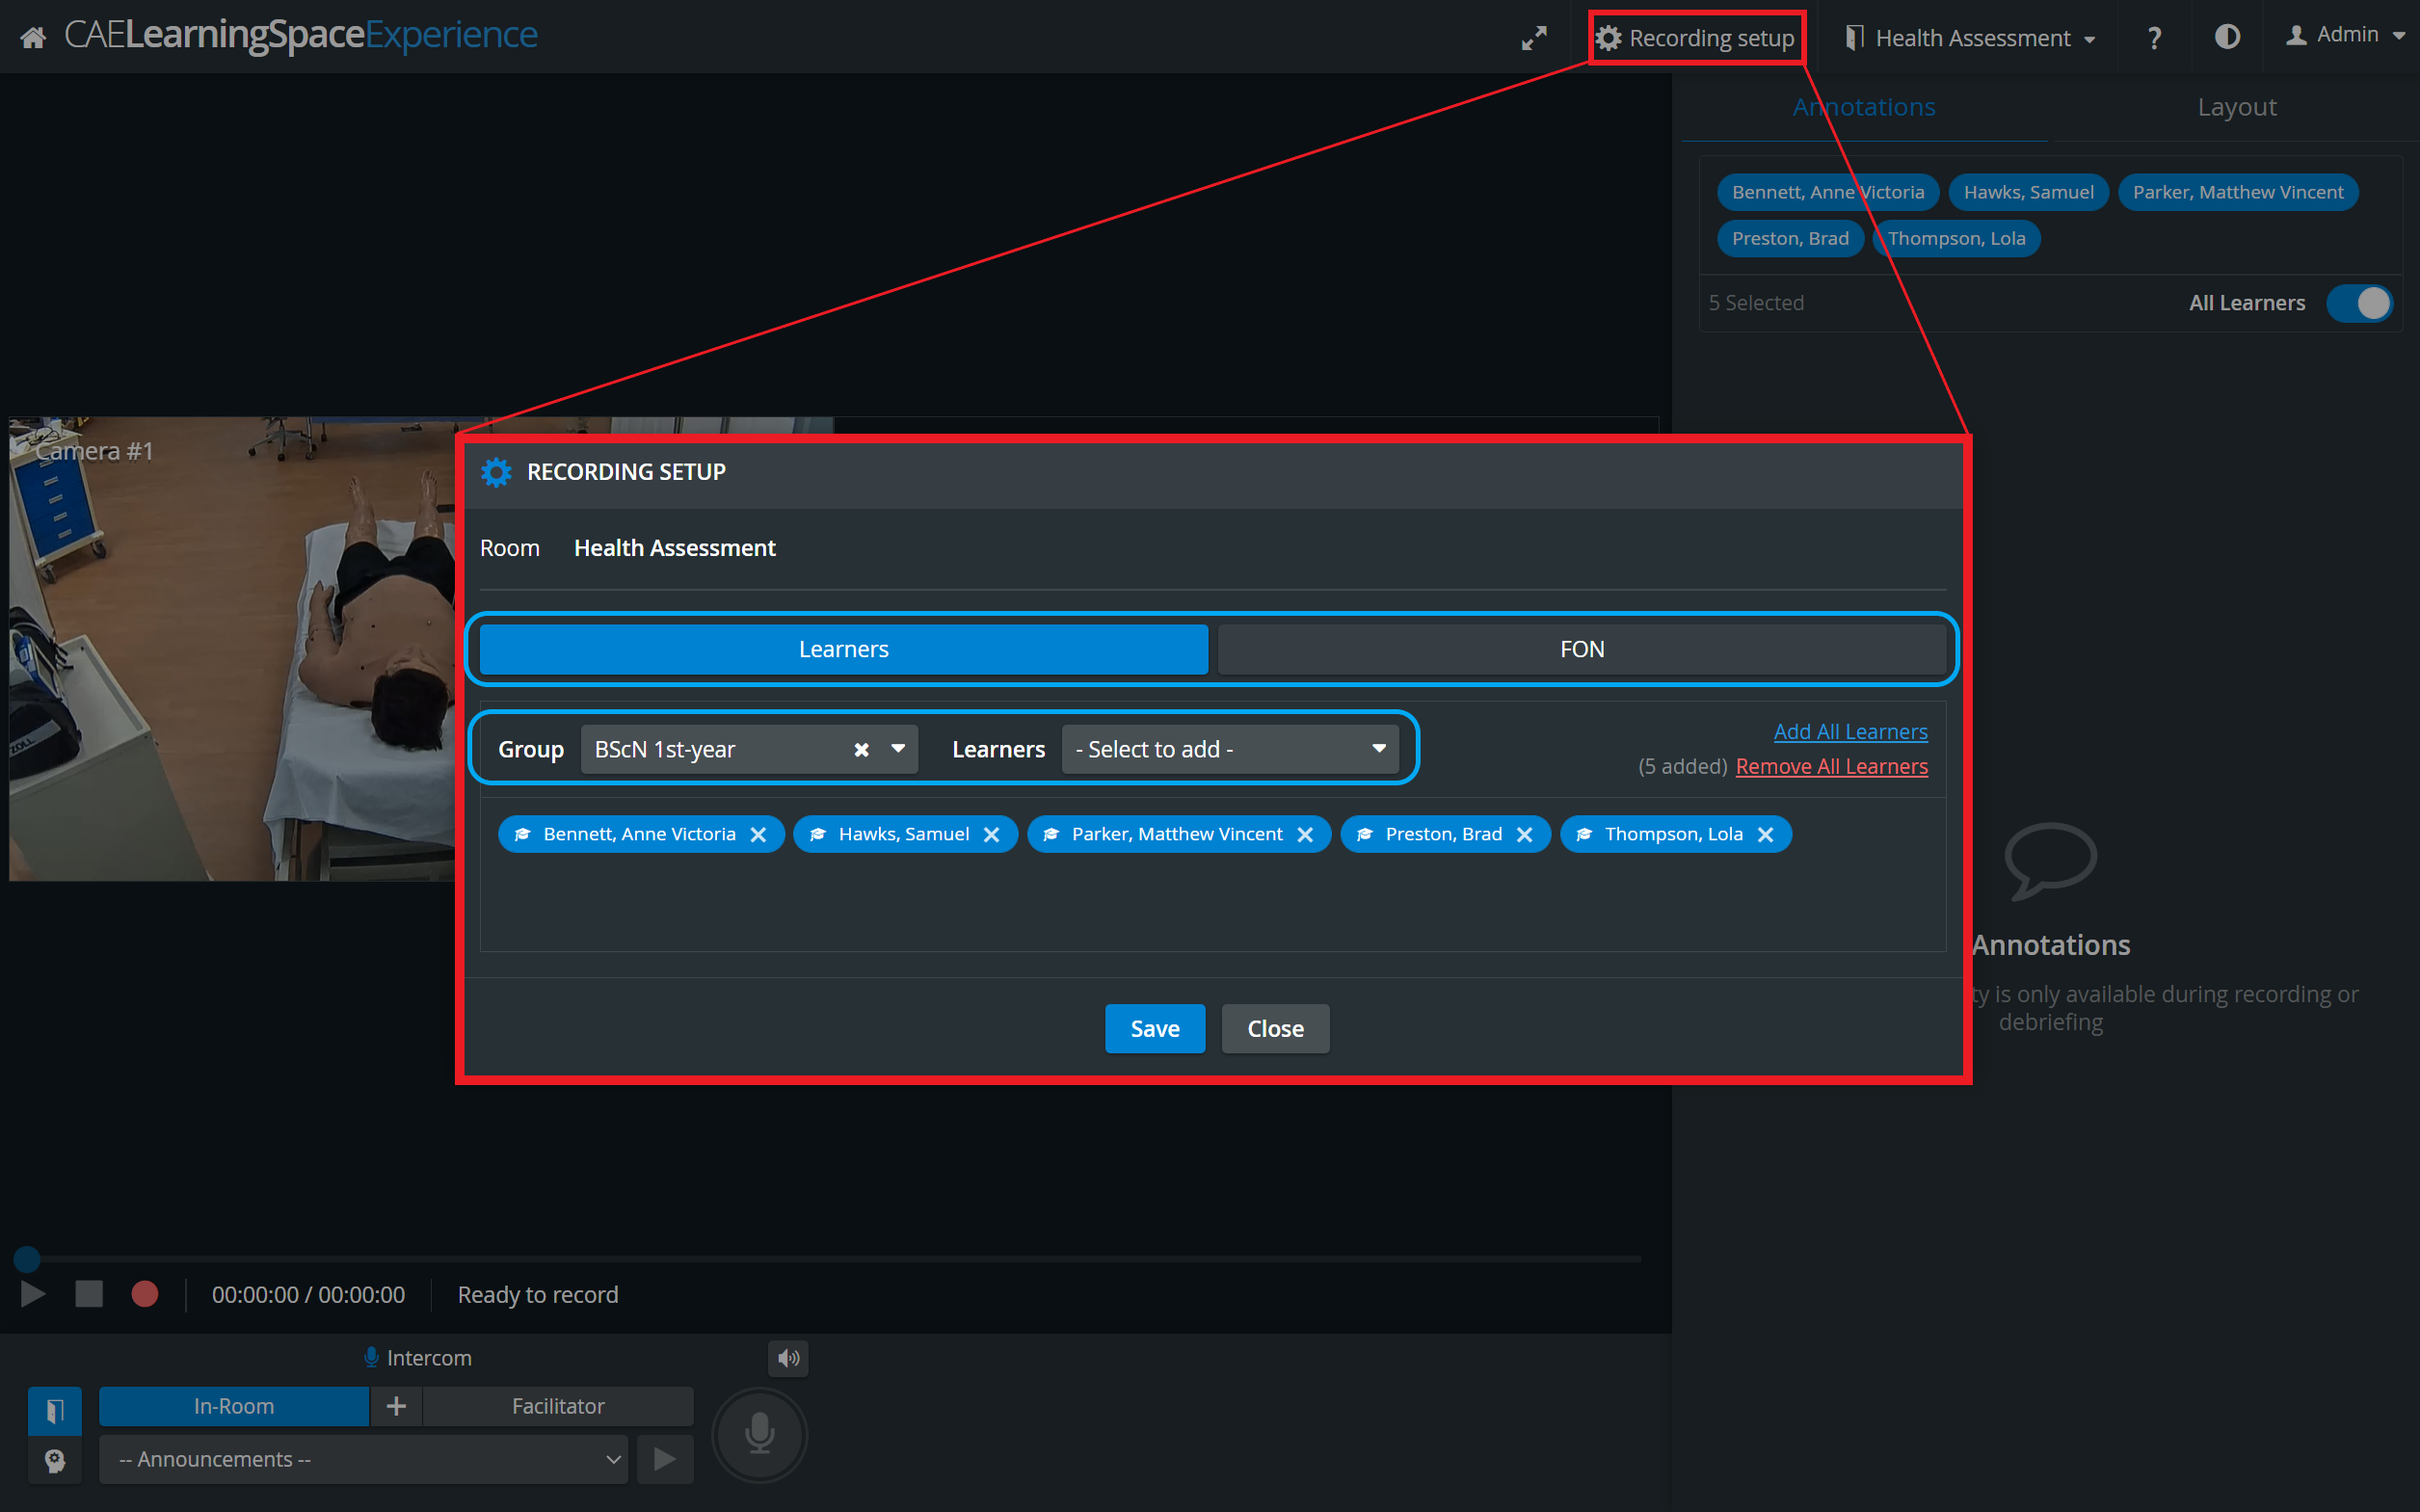
The Learners/Staff dropdown only gets active, once Learner/FON Group has already been selected.
Selected participants show up as 'disabled' (greyed out) in the Learners dropdown.
IMPORTANT
In CAE LearningSpace Experience, an Instructor manages the scenario on the patient simulator via the instructor workstation (tablet, control workstation) and LearningSpace captures the data of the simulator. (Therefore, no Sim Control Panel is available in any of the Recording views.)
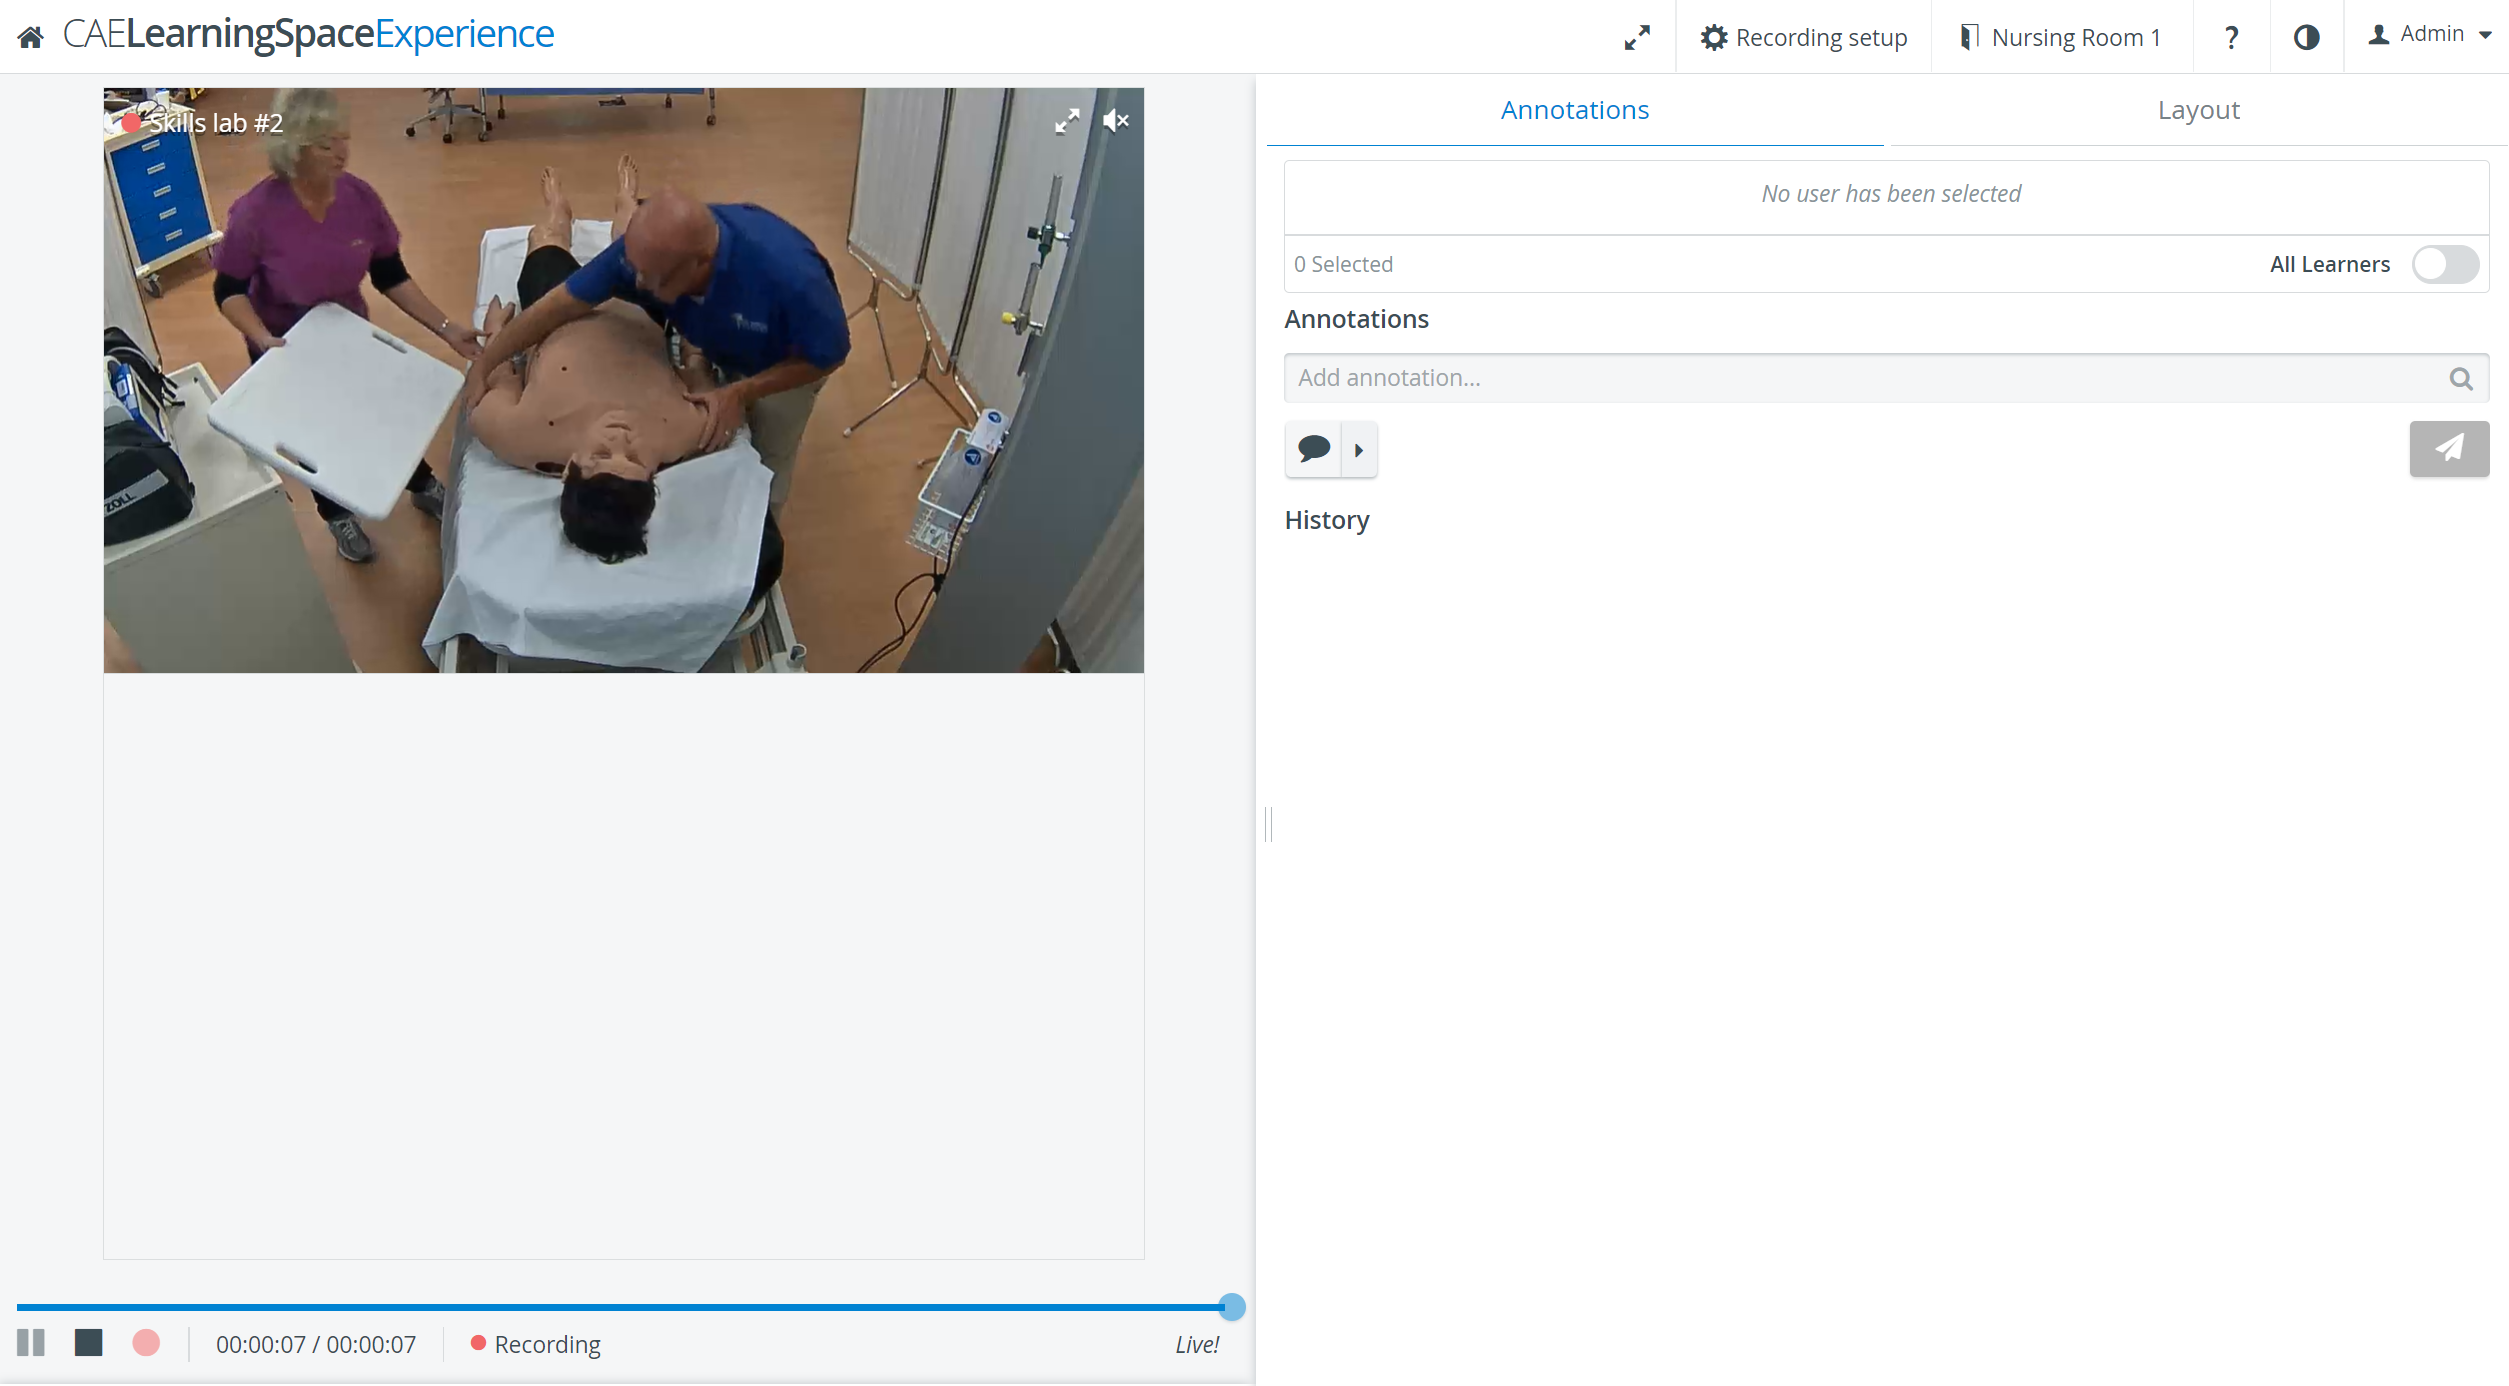
Toggle Panel Width/Height
With this functionality, the bottom- and side panels can be minimized in order to maximize the displayed camera- or media view.
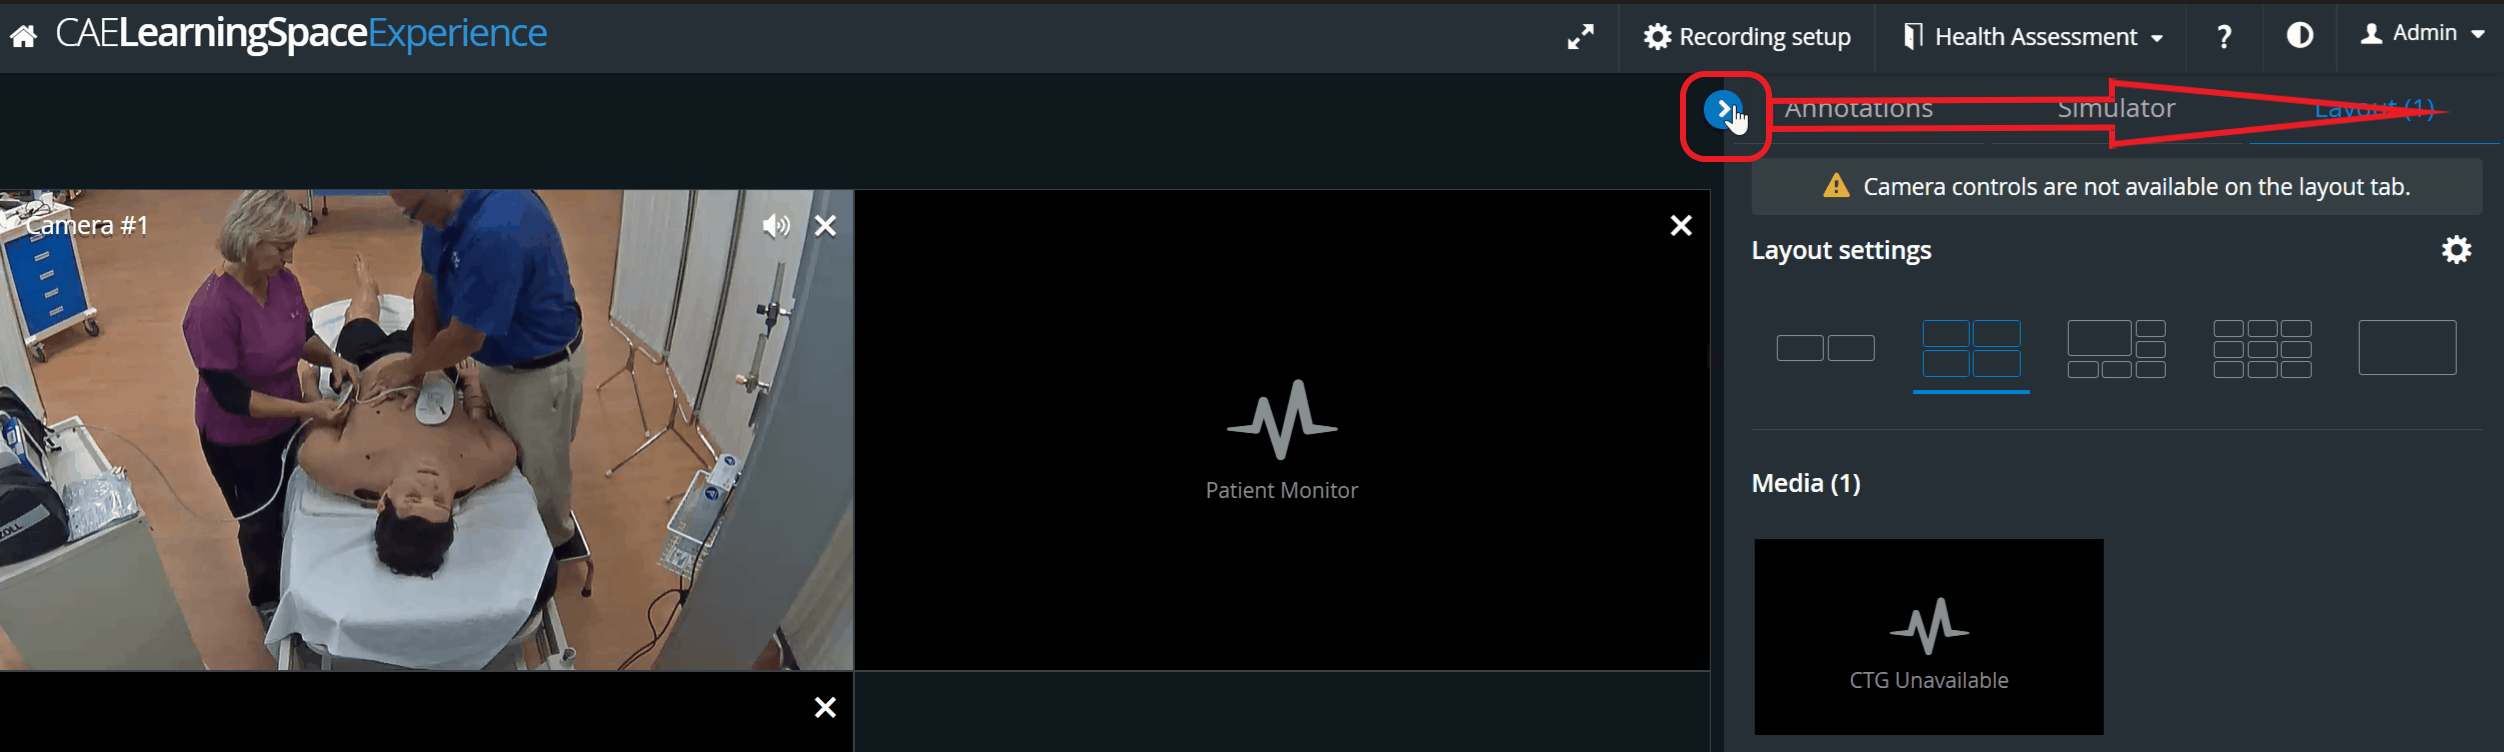
The toggle reveals itself by hovering over the bottom- or side panel, or on the panel border lines. When activated (i.e. camera view is maximized), the toggle arrows are displayed constantly.
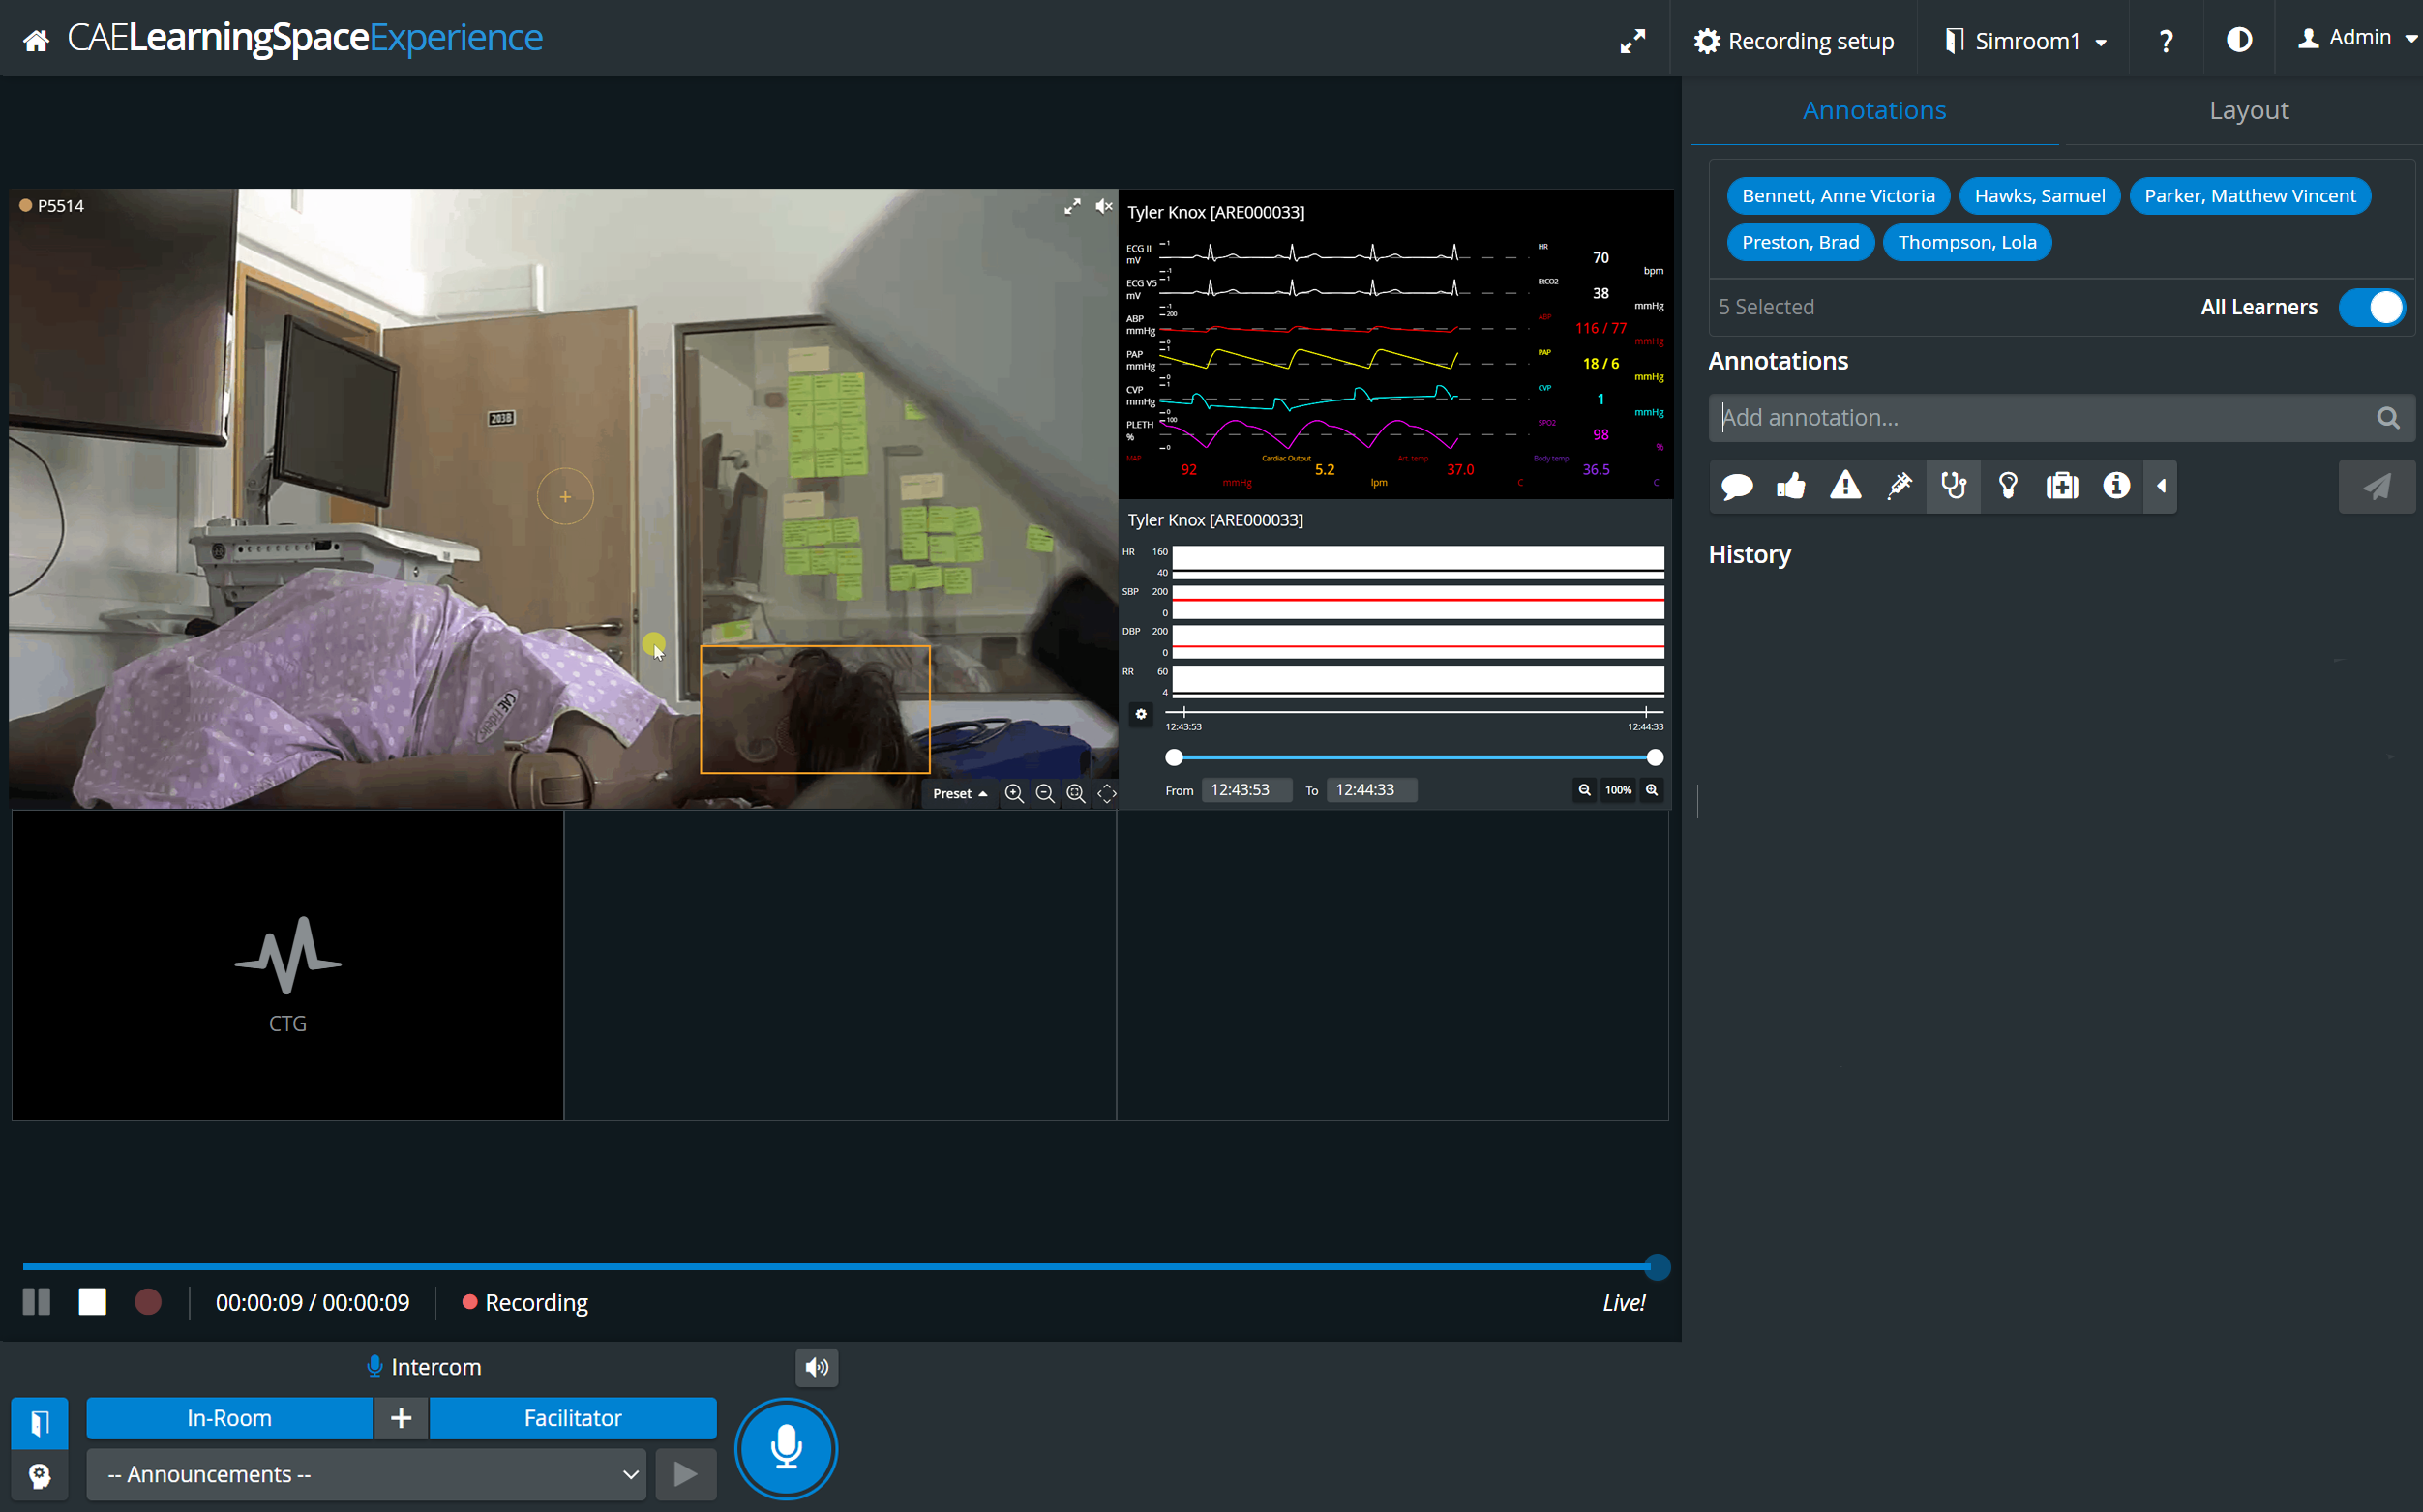
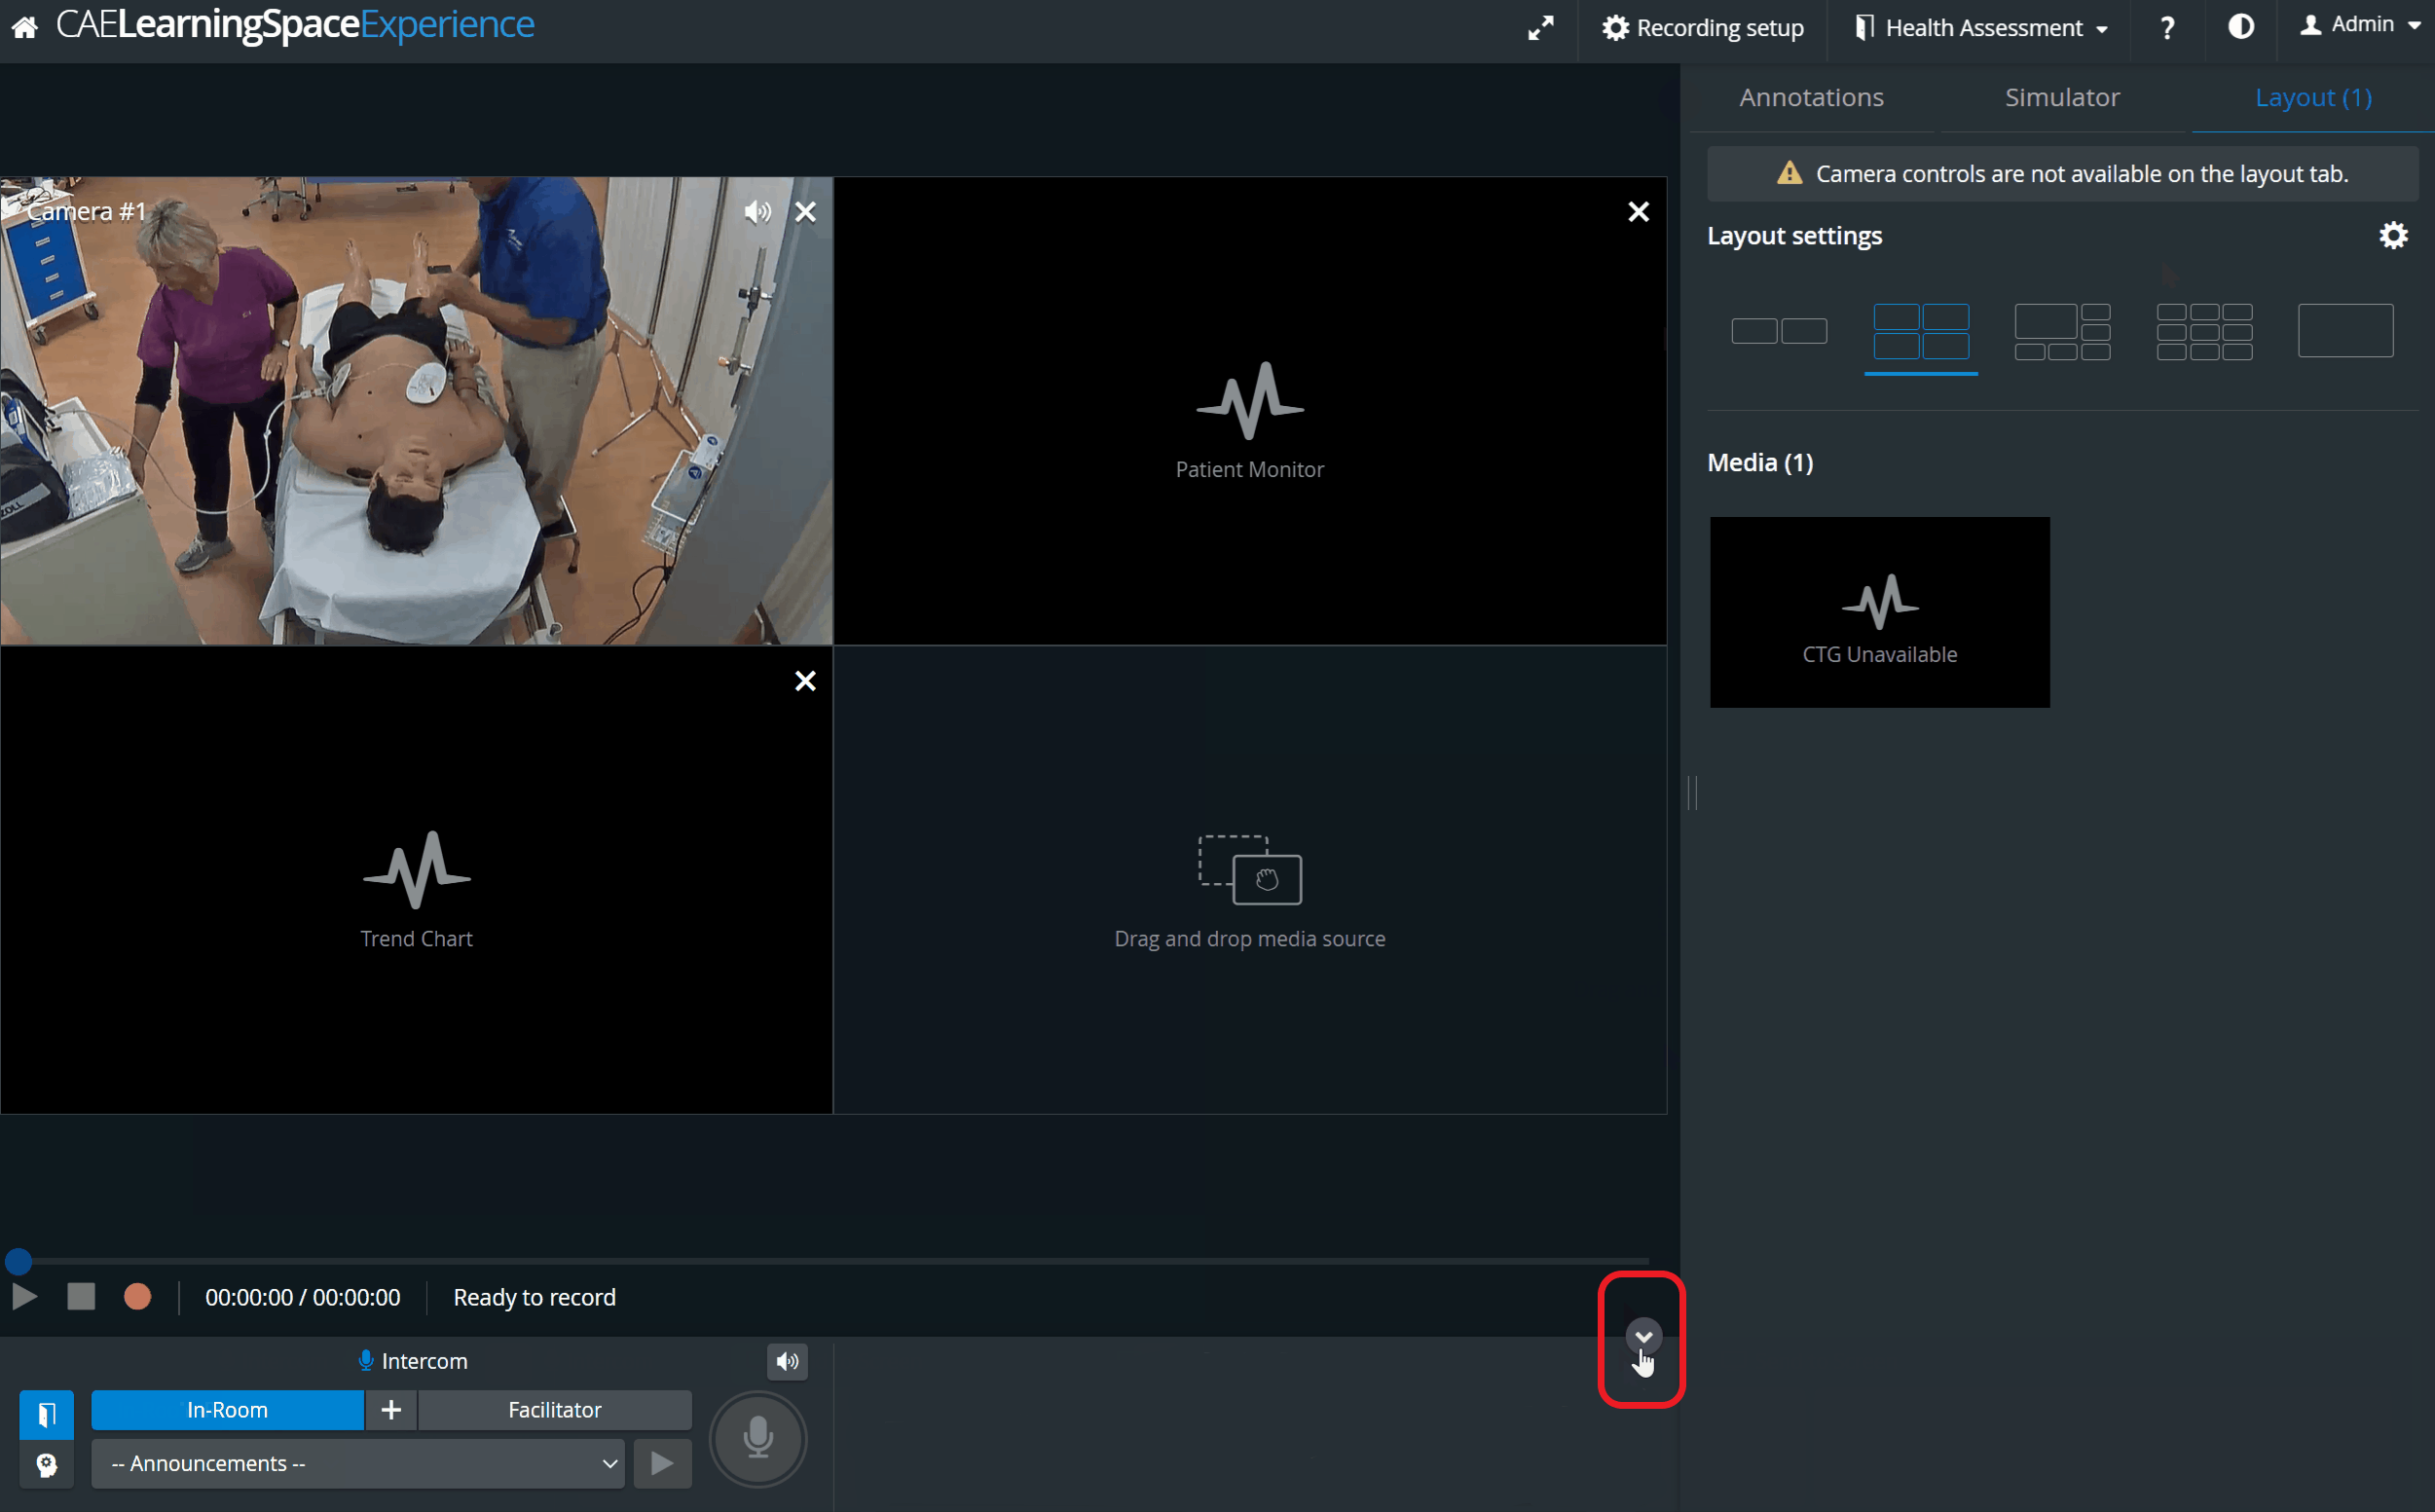
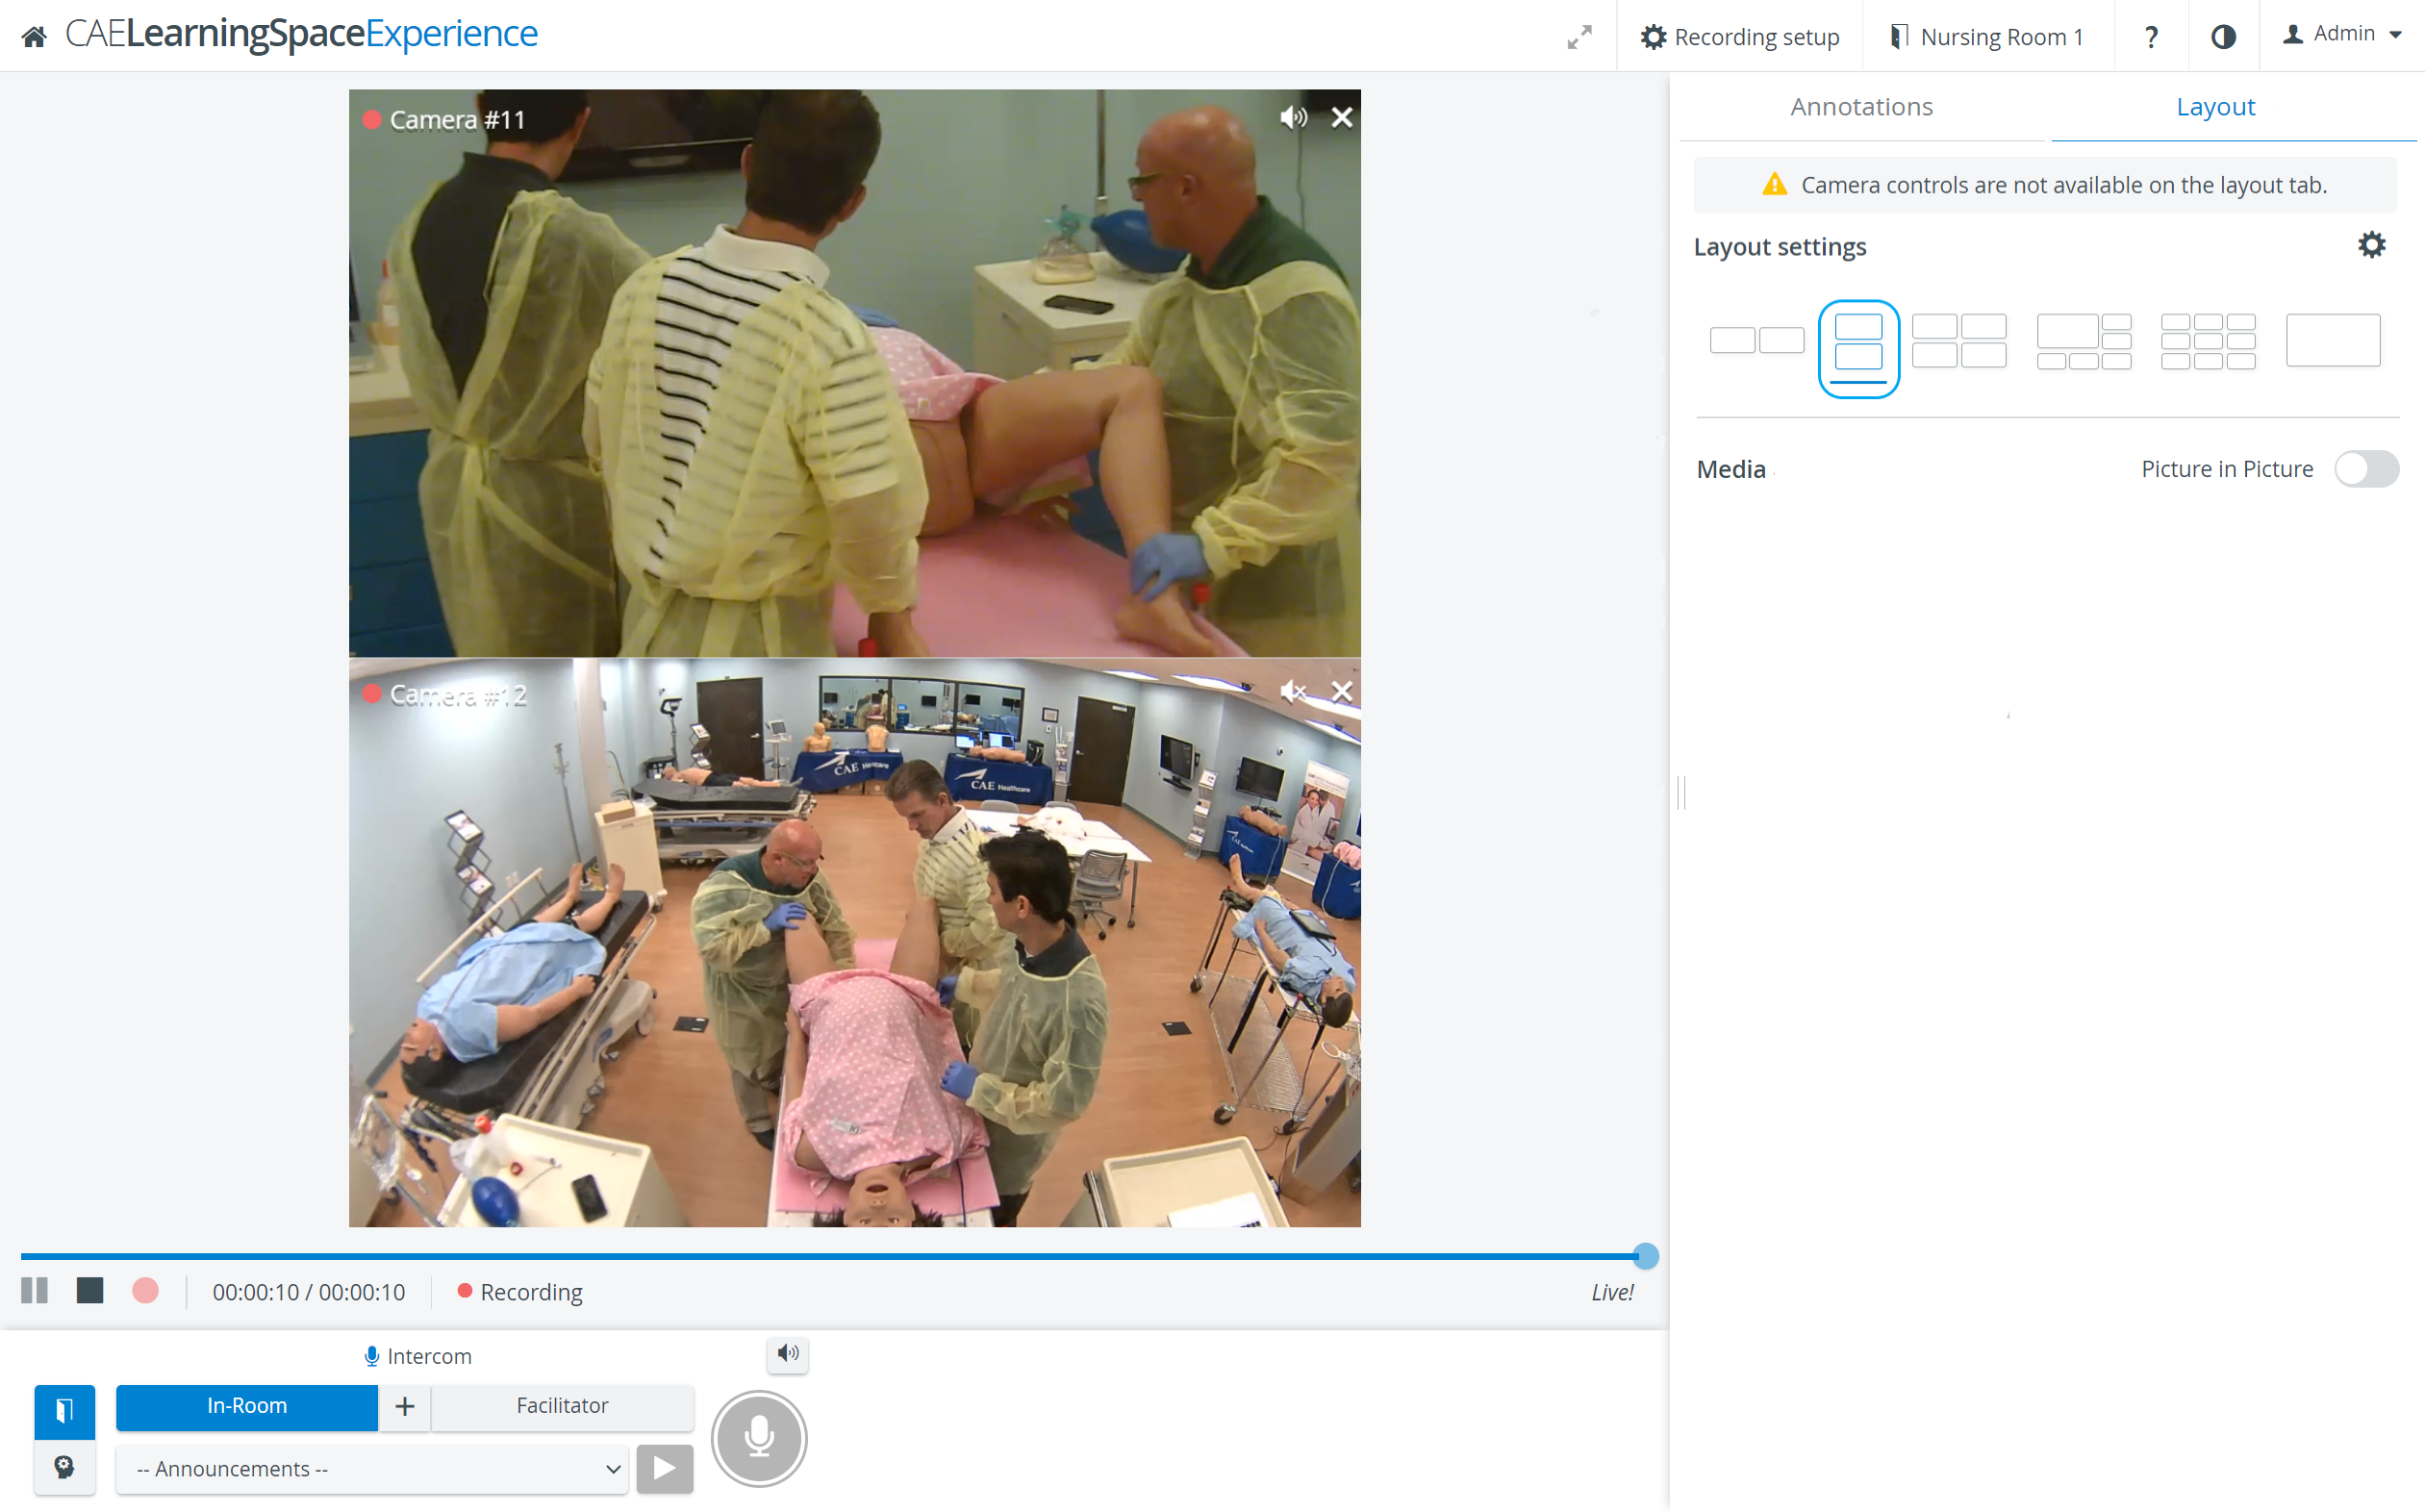
Vertical Double Layout
In some cases, two camera views need to be displayed on top of each other (i.e. in a single column) during recording.
In the latest versions of CAE LearningSpace, the utilization of the space available in the Single Room View panels can be maximized and the panels on the right side (Annotations tab, Layout tab) or additional windows can be displayed in a larger size, by using the Vertical double layout feature.
See also our Practical Recording and Recording - FAQ pages.
Overview
Content Tools