Page History
Send live or recorded audio announcements with the Intercom to speakers or other Intercom endpoints set up in the rooms displayed in the Single Room View (SRV).
| Info |
|---|
IMPORTANT: The Intercom functionality of CAE LearningSpace requires the web browser to have access to the microphone of the client PC, which in turn requires a secure HTTPS connection to the CAE LearningSpace server. |
Table of Contents
Intercom Announcements
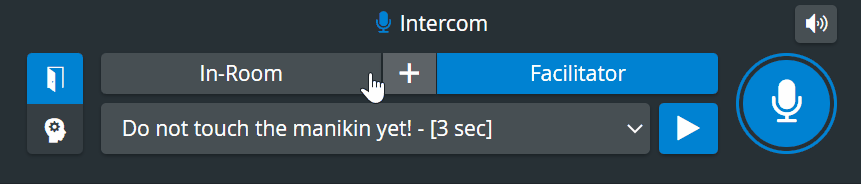
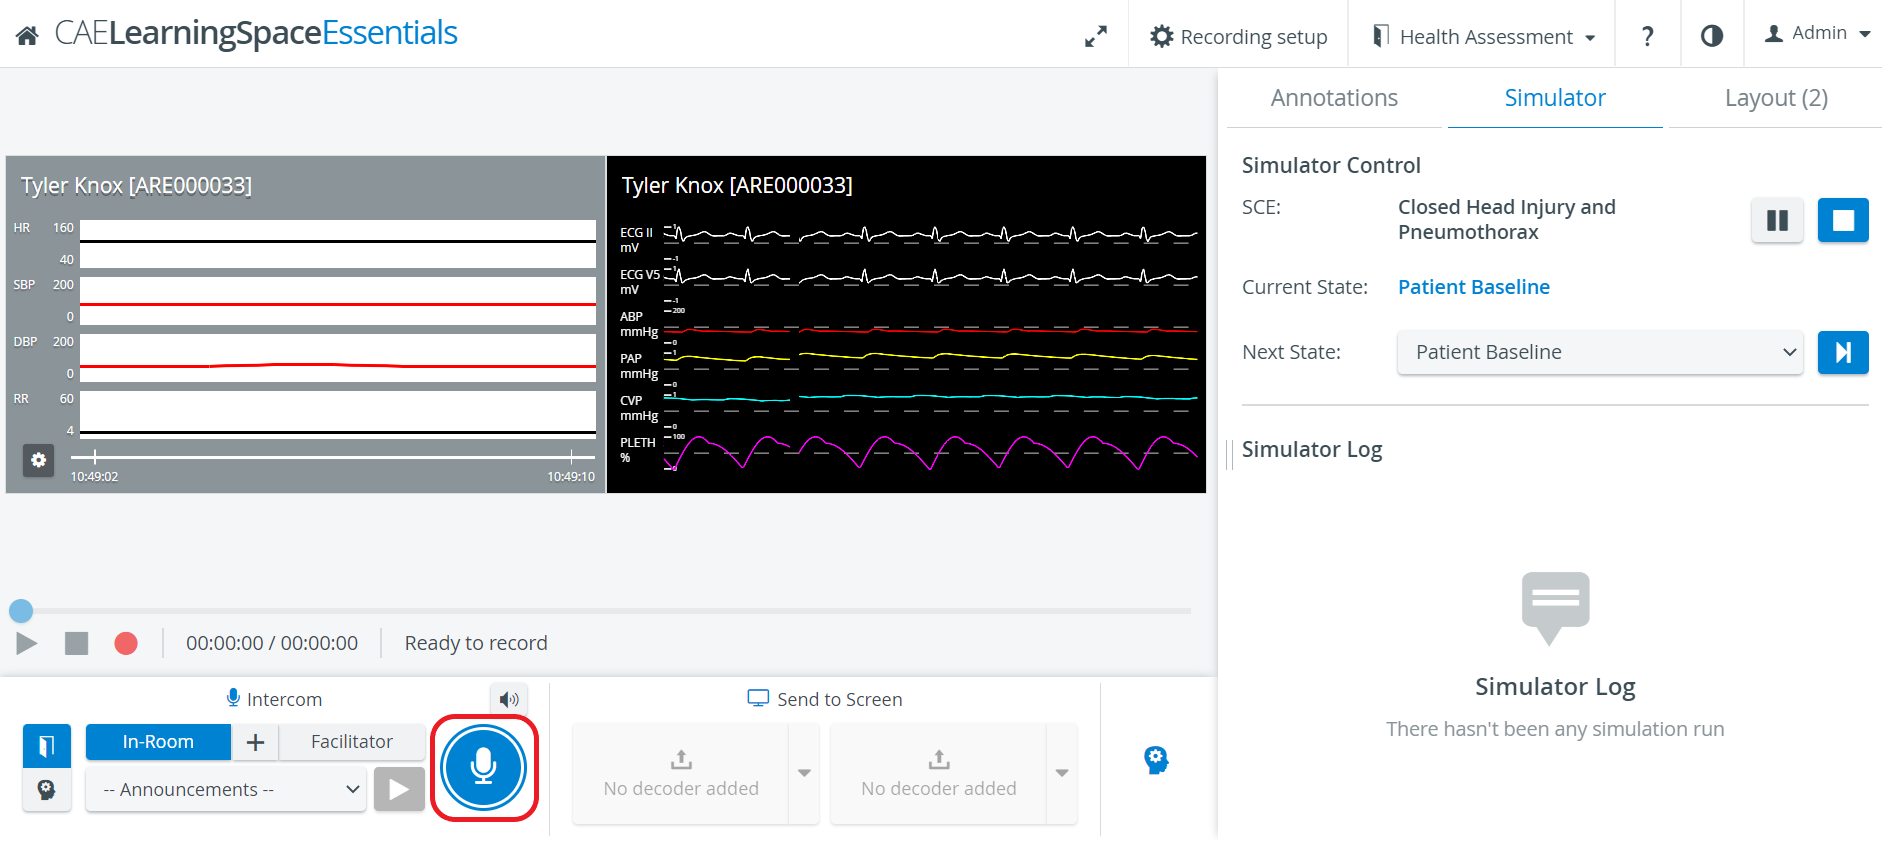
Intercom Announcements can be sent to the following endpoints:
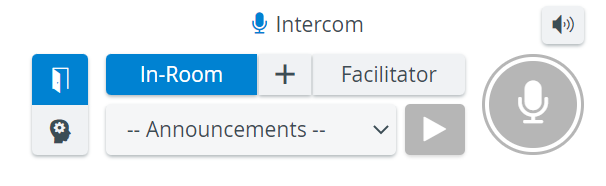
In-Room - the Room button sends announcements to the simulation area
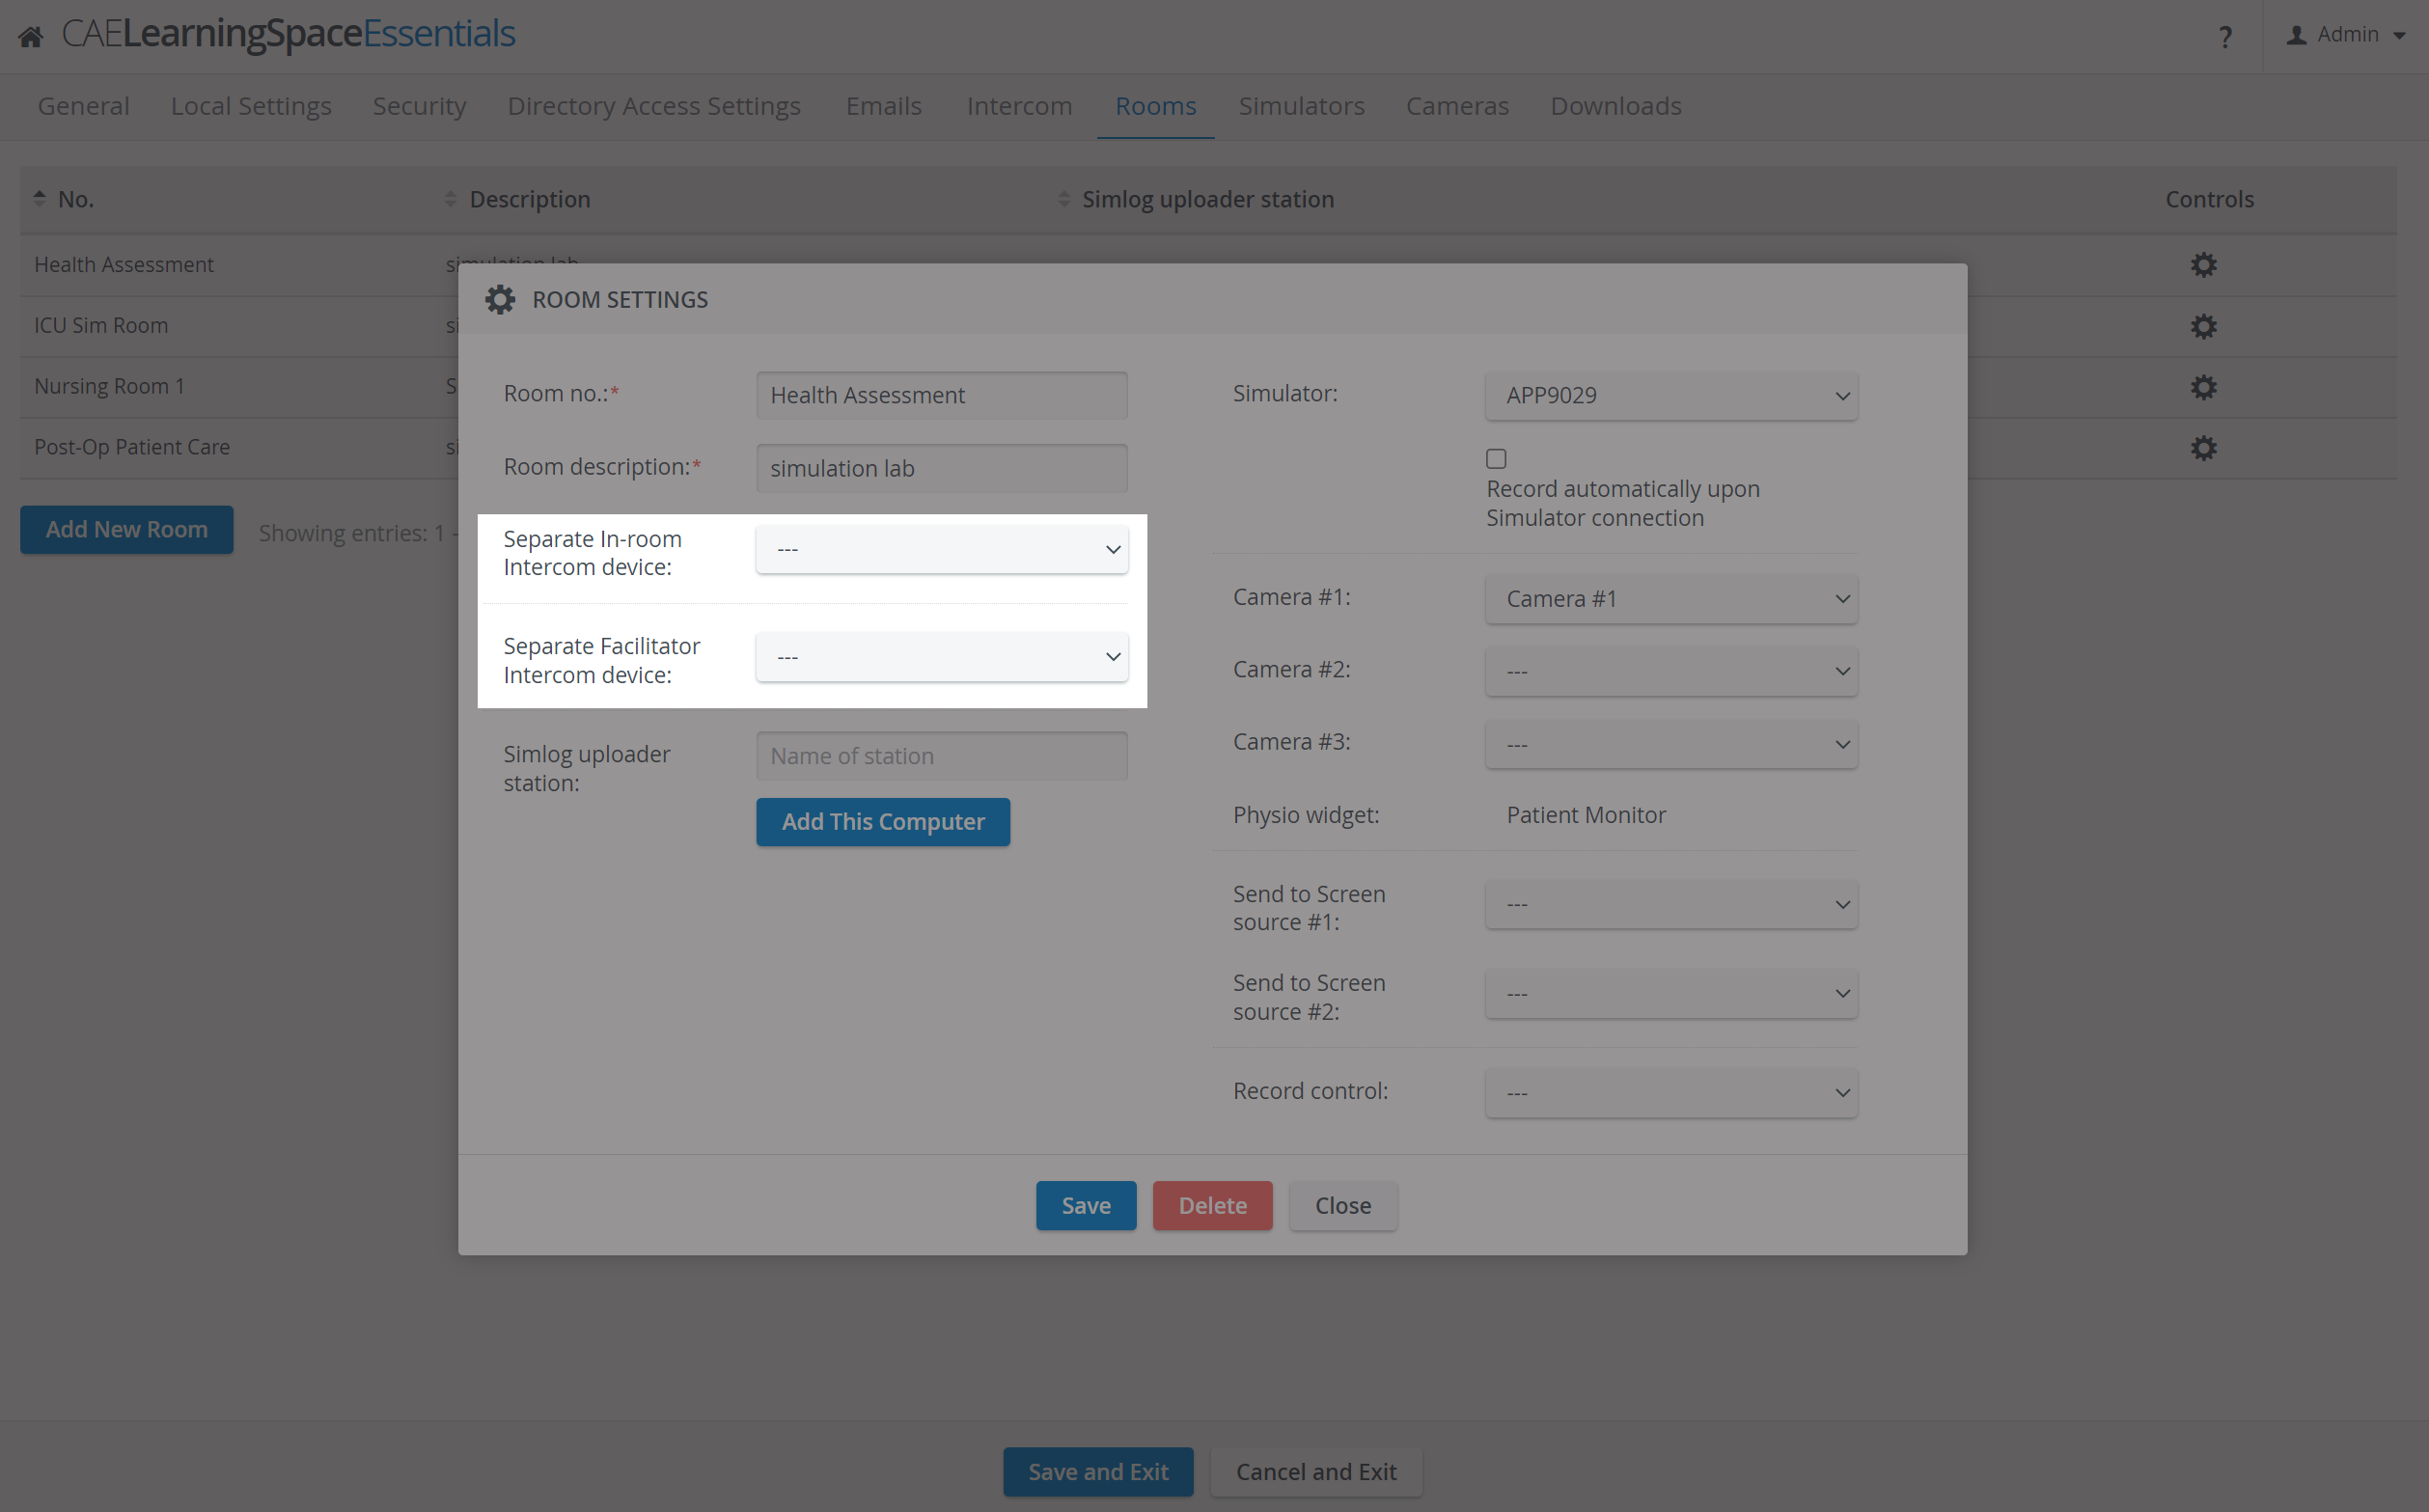
Note In case no network speakers are used as intercom devices, a DAK (Digital Audio Kit) has to be connected and assigned to the Room (corresponding to the simulation area) via the Rooms tab of the System module, as a Separate In-room Intercom device
- Facilitator - a device (e.g. headset) can be connected for direct communication with the facilitator, which can be assigned to the room as Separate Facilitator Intercom devices via the Rooms tab of the System module.
Simulator - a Maestro-ready simulator can be connected and used for sending announcements through the manikin.
Info NOTE: Once the simulator is connected, the Intercom is also connected for the manikin.
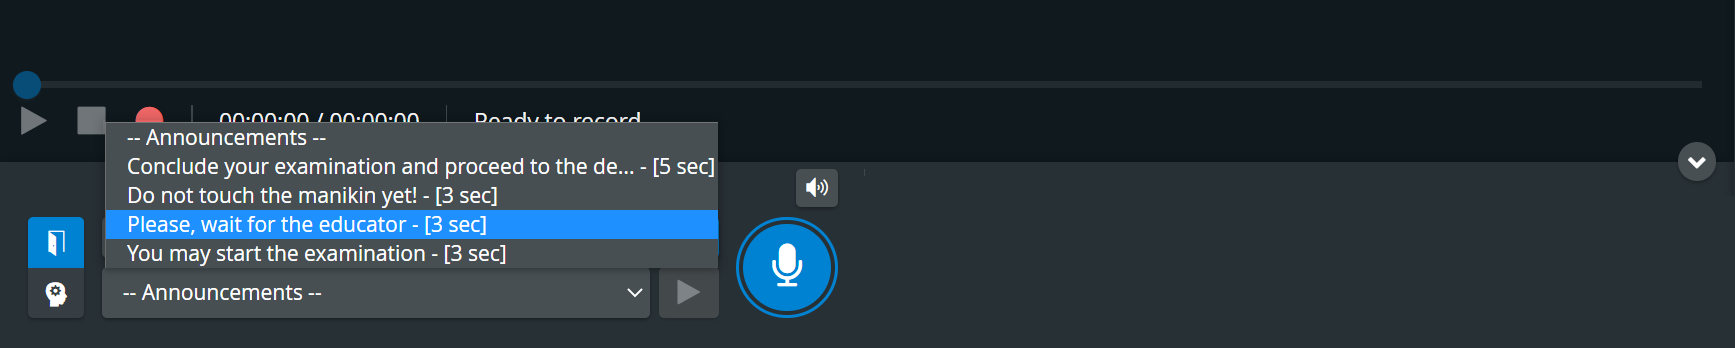
Pre-Recorded Intercom Announcements
During events, you can send Pre-Recorded Intercom Announcements to the Room and to the Facilitator - to give instructions to the Learners or Facilitators - by selecting them via the arrow in the announcement drop-down, after having highlighted the desired target (In-Room, Facilitator or both, and Simulator).
The Intercom endpoints can be Separate In-room Intercom devices and/or Separate Facilitator Intercom devices placed within the physical rooms of your institution and assigned to the rooms within your LearningSpace system (in the System module, Rooms tab).
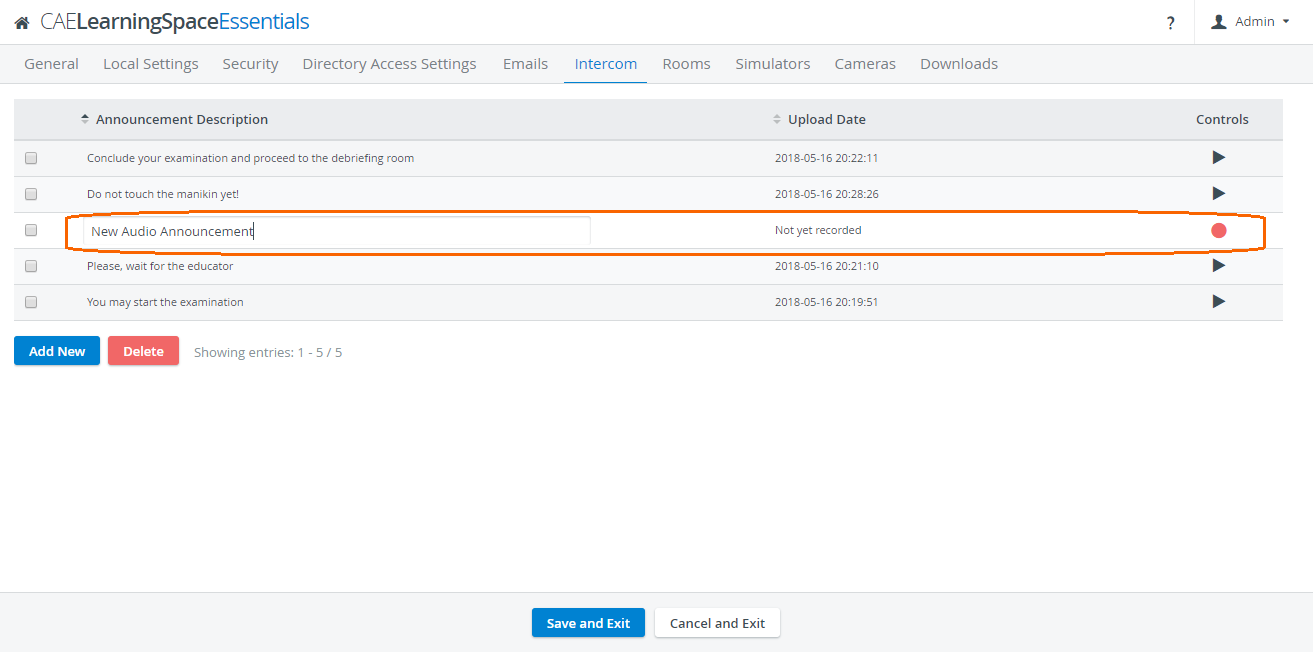
These announcements can be recorded and managed on the Intercom page of the System module:
On the Intercom tab, announcements can be added, then recorded and thereby used in the system during recording.
- To create a new audio recording, click Add New and click on the red circle
 on the right. When finished, click the stop
  button.
 - To select a recording, click the checkbox next to it.
To change the name of the recording, click on the name and type in the new name.
- To play a recording, click on the black triangle
 on the right.
 - To delete an announcement, click the checkbox in its row and click Delete.
Push-to-Talk Intercom
Live announcements can also be sounded via the respective device by selecting a target device (In-Room, Facilitator or Simulator), and then clicking and holding the Push-to-Talk button. The broadcast ends once you let go of the button.
| Info |
|---|
A Maestro-ready simulator (with built-in speakers) can be connected and used for sending announcements through the manikin. |
See more details atHow can I add new/customized Intercom announcements?
| Tip |
|---|
Learn more about theThree-Way Intercom and the Intercom panel. |
Overview
Content Tools