Page History
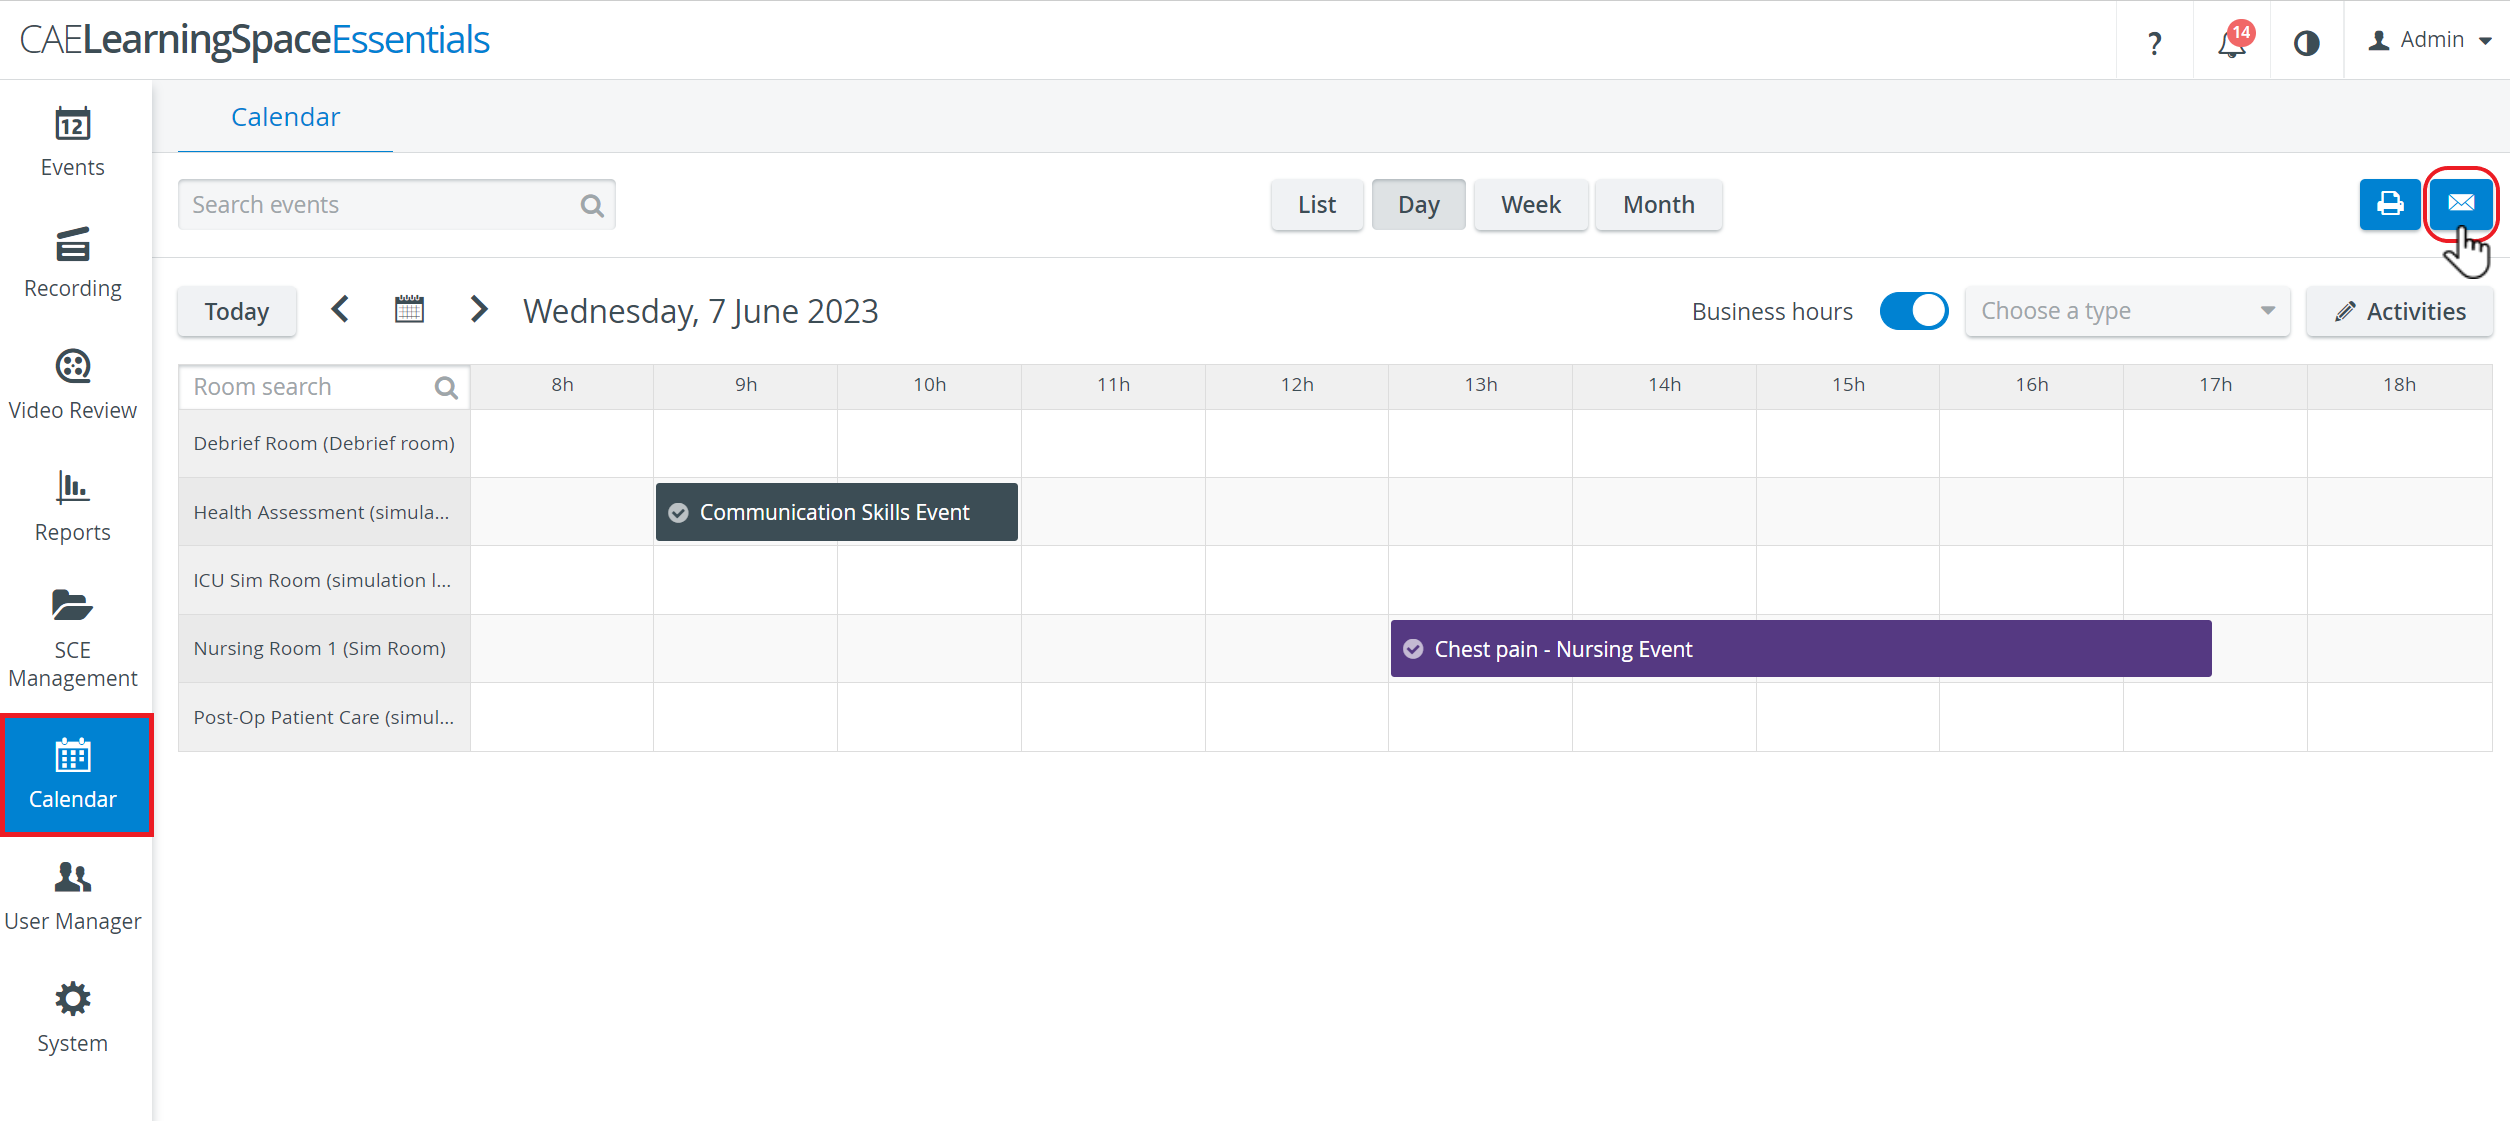
The content of the Calendar, that is, the scheduled events, can be emailed in either view of the calendar.
- Select the desired view by clicking the corresponding button at the top of the calendar.
Search for the desired time interval you wish to include.
Tip TIP: Click the Calendar icon to set a specific date or use the left and right arrows next to the calendar icon to move back- or forward by the unit of the selected view. - When the desired interval is displayed, click the Envelope icon in the top right corner of the screen.

The Send Email pop-up window appears. Add the desired users or groups of users by starting to type their names in the Add addressee field then clicking the name once it is listed in the search results.

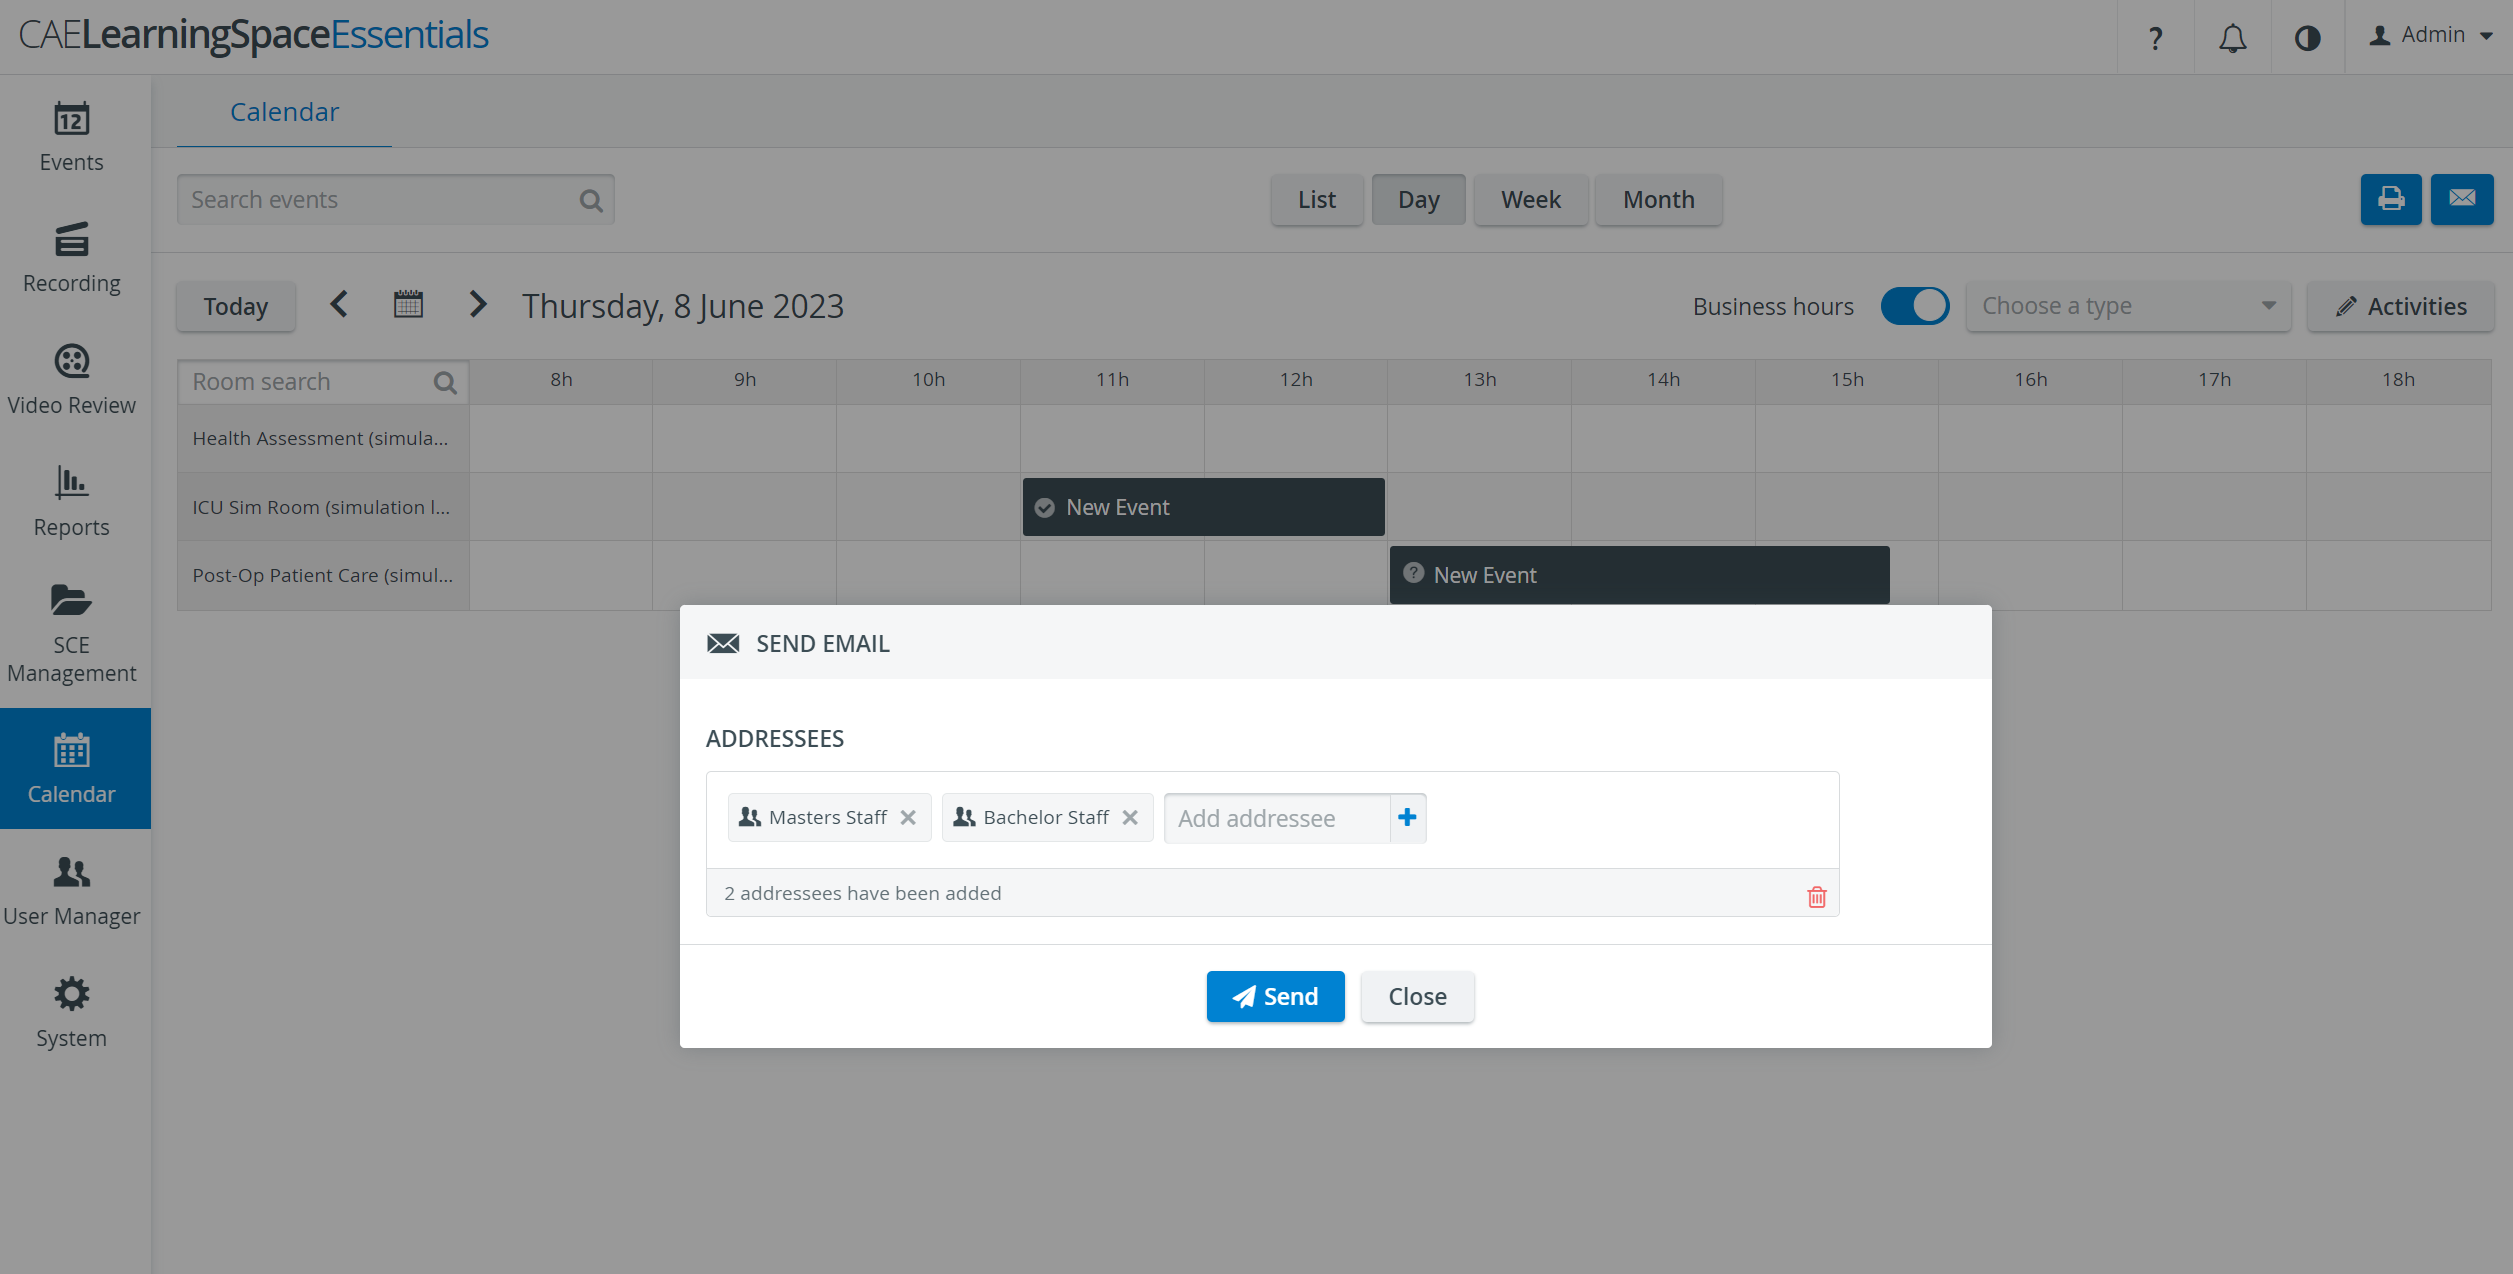
Info The search filters for any datum that contains the typed character string, including names of individual users as well as groups, and email addresses. Tip TIP: To remove an addressee, click the  in the field of its name. When hovering over the added name, the X becomes red.
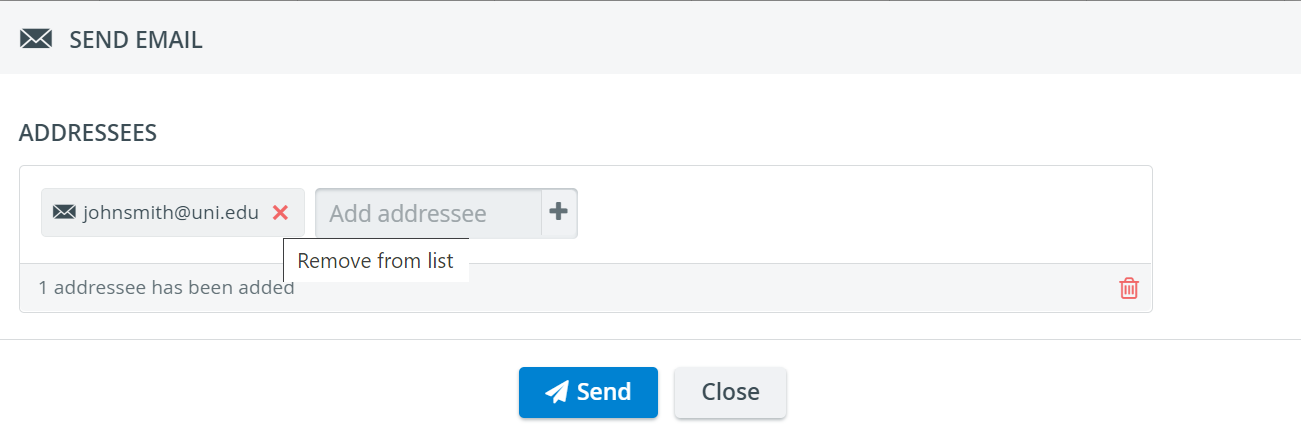
When all desired addressees are added, click the Send button.
Info For further information, visit our Calendar Module and Calendar Practical pages.
Overview
Content Tools