Page History
...
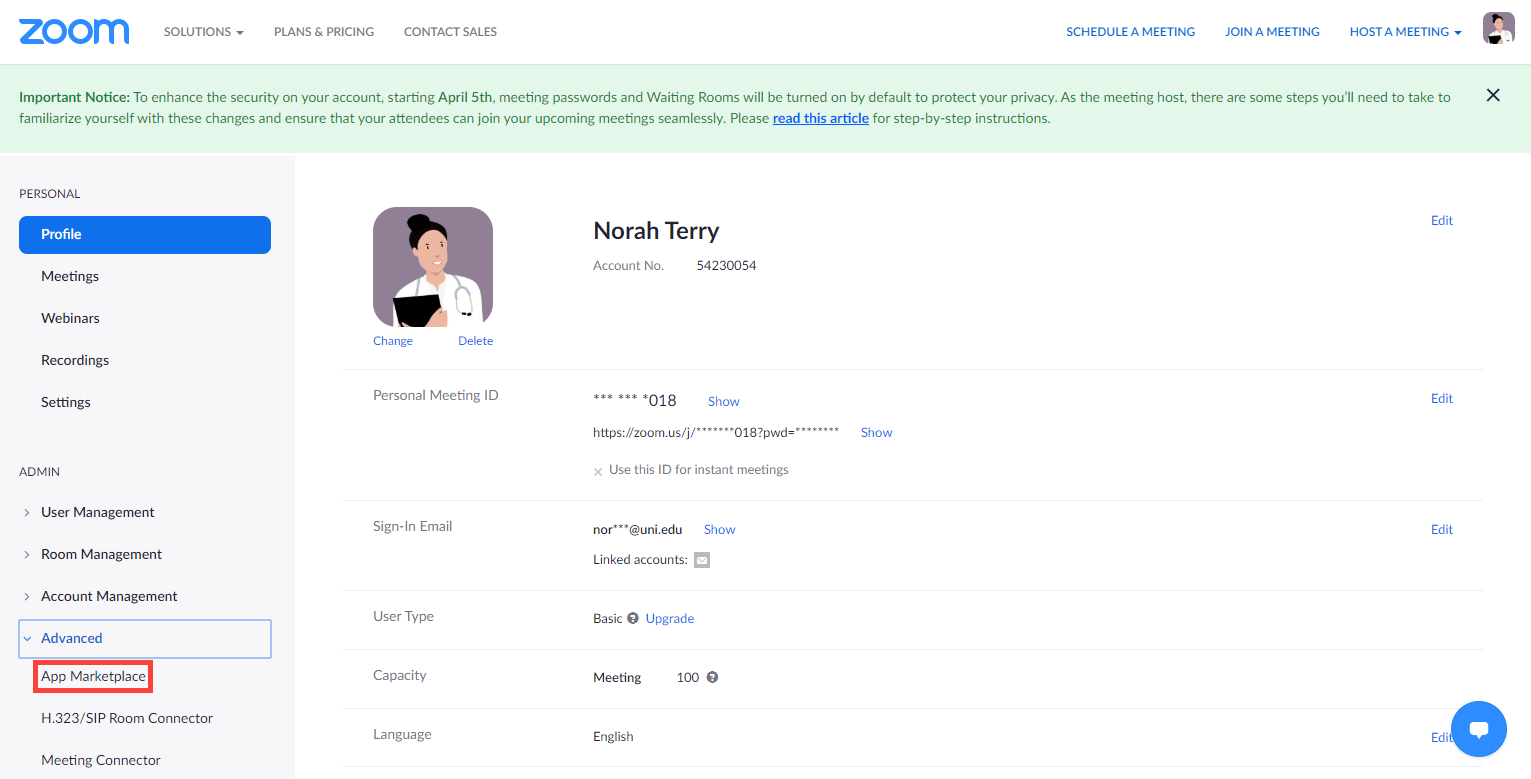
- Log into your Zoom owner account.
- Stay on your Profile, and in the side menu on the left, click on Advanced to display further options.
- Click on App Marketplace.
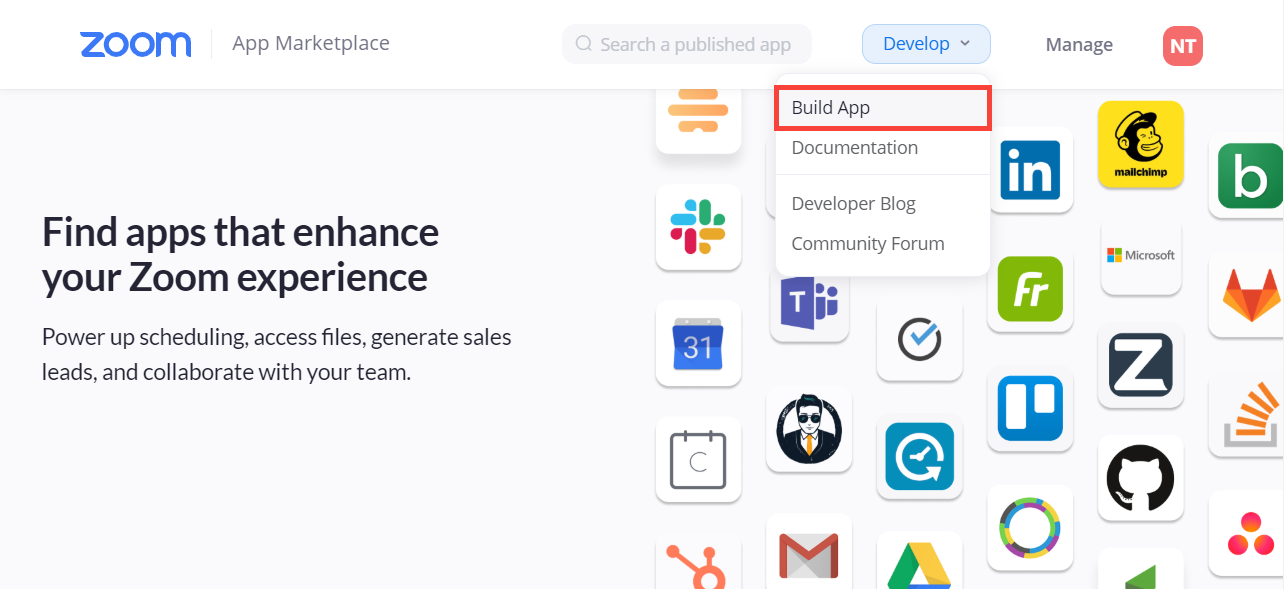
- On the Zoom App Marketplace page, on the right select the Develop drop-down and open it.
- Click Build App.
On the Choose your app type page, find OAuth.
Info The OAuth application is a tool that allows you to determine the level of access that CAE LearningSpace will have once a user has authorized CAE LearningSpace to access their Zoom account.
- Click Create.

A window pops up where you need to
Name the new OAuth application you are creating.
Info In the example, we are simply naming the new application after CAE LearningSpace, but you can give any name to the app you prefer.
The name of the app does not affect the API configuration in any way.Select the User-managed app option.
Users will be able to allow access for CAE LearningSpace to their Zoom user account individually.Deselect the third switch to avoid publishing your application on the Zoom App Marketplace.
Note Do not share your OAuth application with external users.
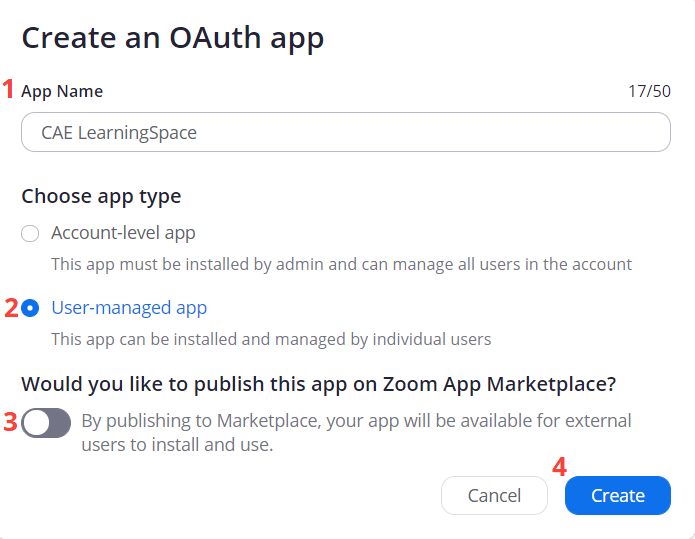
- Click Create to continue.
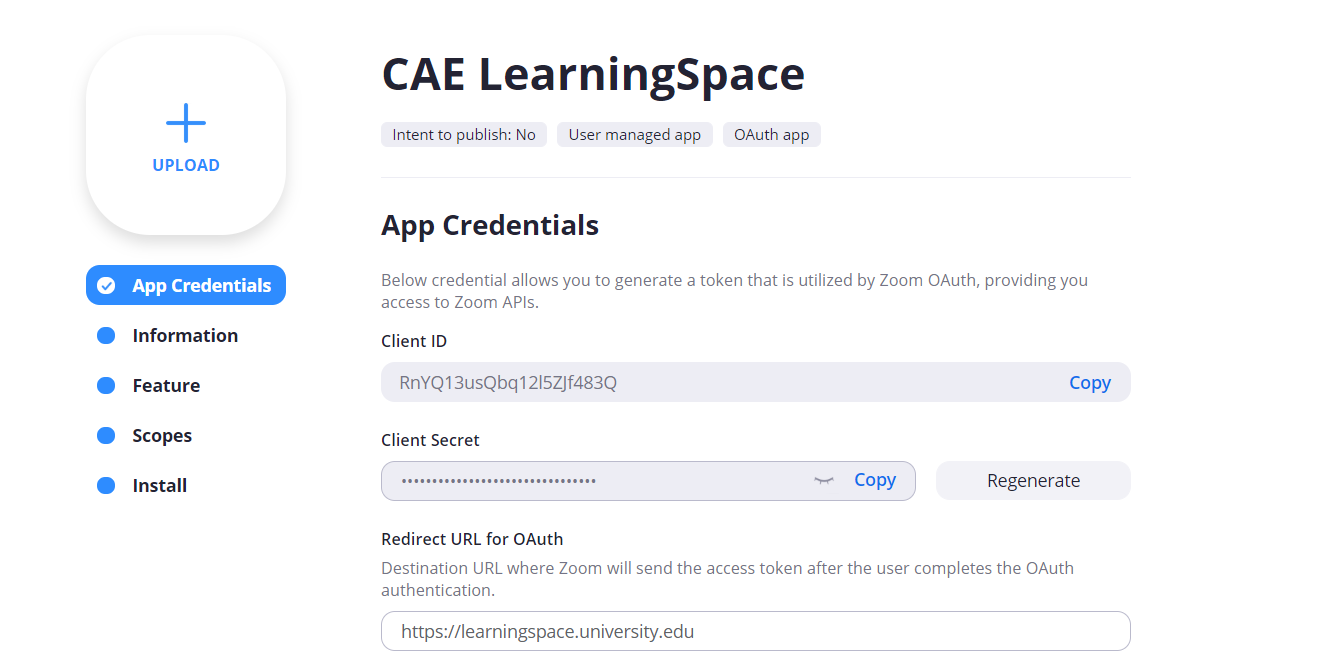
- You will be directed to the App Credentials page of your new OAuth application.
- Copy your Client ID and Client Secret to a safe place of your choice.
You will be needing these credentials later on when setting up the OAuth meeting provider in CAE LearningSpace. In the Redirect URL for OAuth field, provide the URL where your users access CAE LearningSpace.
Info After authorizing CAE LearningSpace access to a Zoom account, users will be redirected to this page.
- Scroll down to the Whitelist URL field.
Here, provide the URL where your users access CAE LearningSpace once more.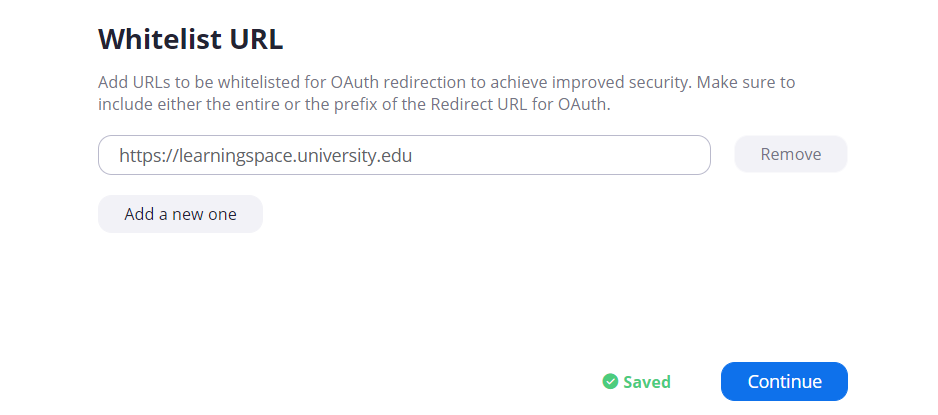
- Copy your Client ID and Client Secret to a safe place of your choice.
- Click Continue and you will arrive at the Information page.
Here, provide some further required details:- Provide the Short and Long Description of your OAuth application.
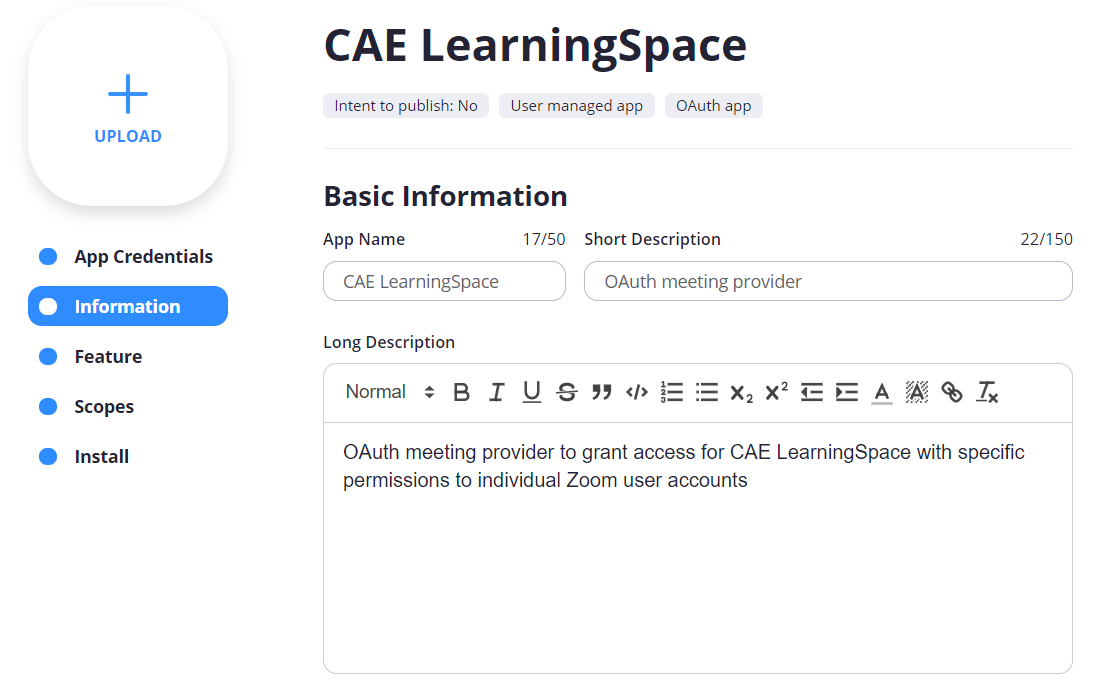
- Scroll down to the Company Name field.
Name your organization. Add the Contact Information of the Developer in charge of the OAuth application.

Tip Developer Contact Information can be the same as the account owner’s information.
- Provide the Short and Long Description of your OAuth application.
- Once finished, switch to the Scopes tab.
Here, you have to determine the list of user-specific resources CAE LearningSpace can have access to in a Zoom user account following authorization.
Once CAE LearningSpace is authorized by a user to access their Zoom account, CAE LearningSpace will be limited to the list of permissions specified in Scopes.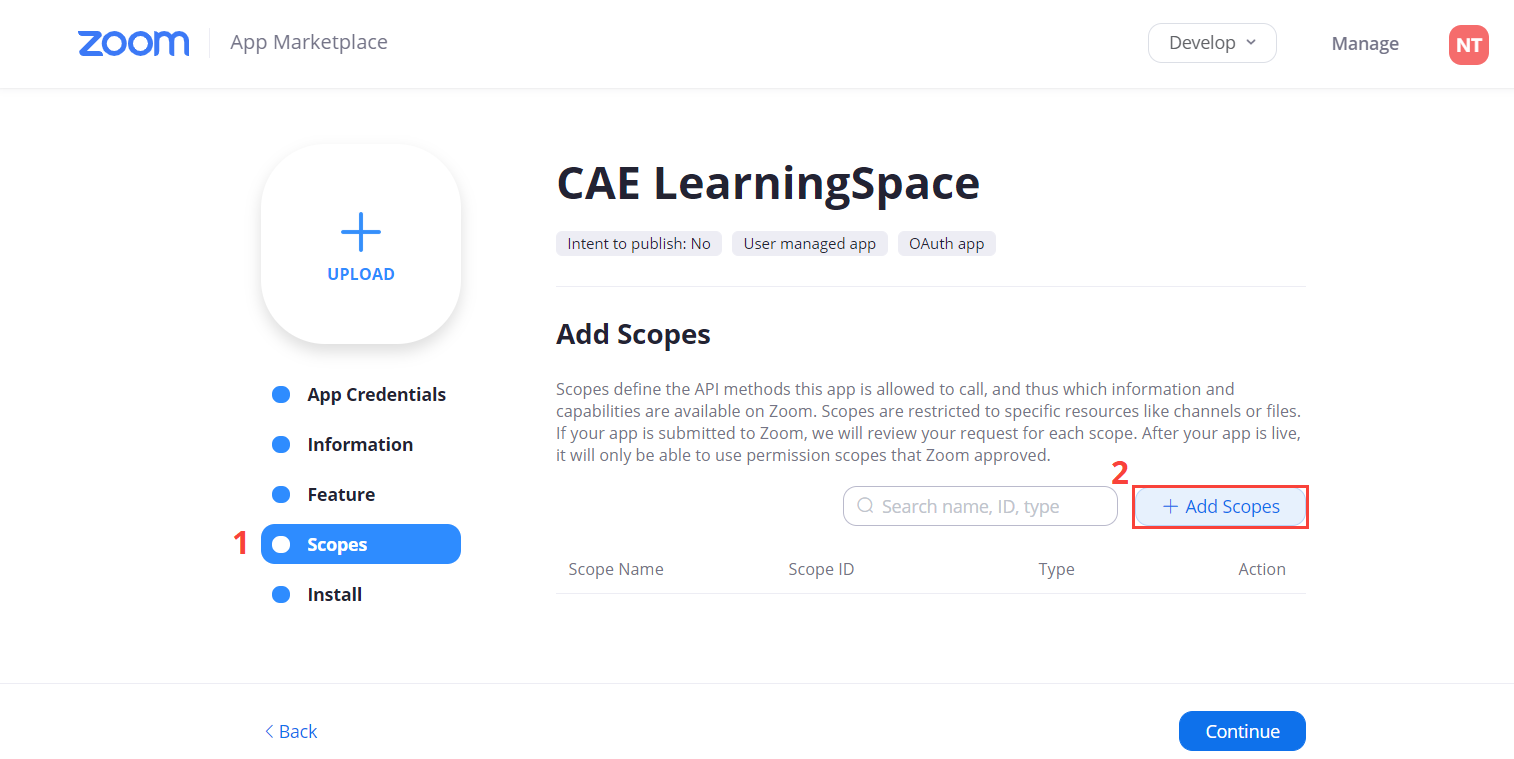
- Click the Add Scopes button.
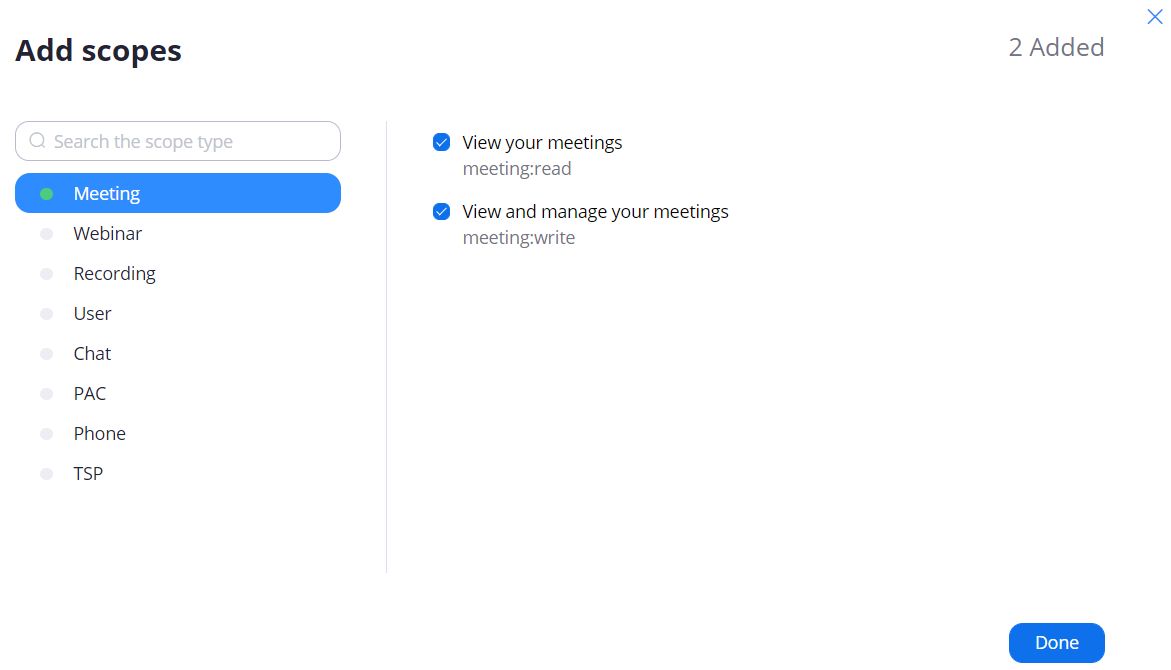
A pop-up will open where you can search and specify the scope of permissions.Select Meeting, then select both checkboxes as shown below:
Info Once authorized, CAE LearningSpace will be able to view and manage meetings in a Zoom user account.
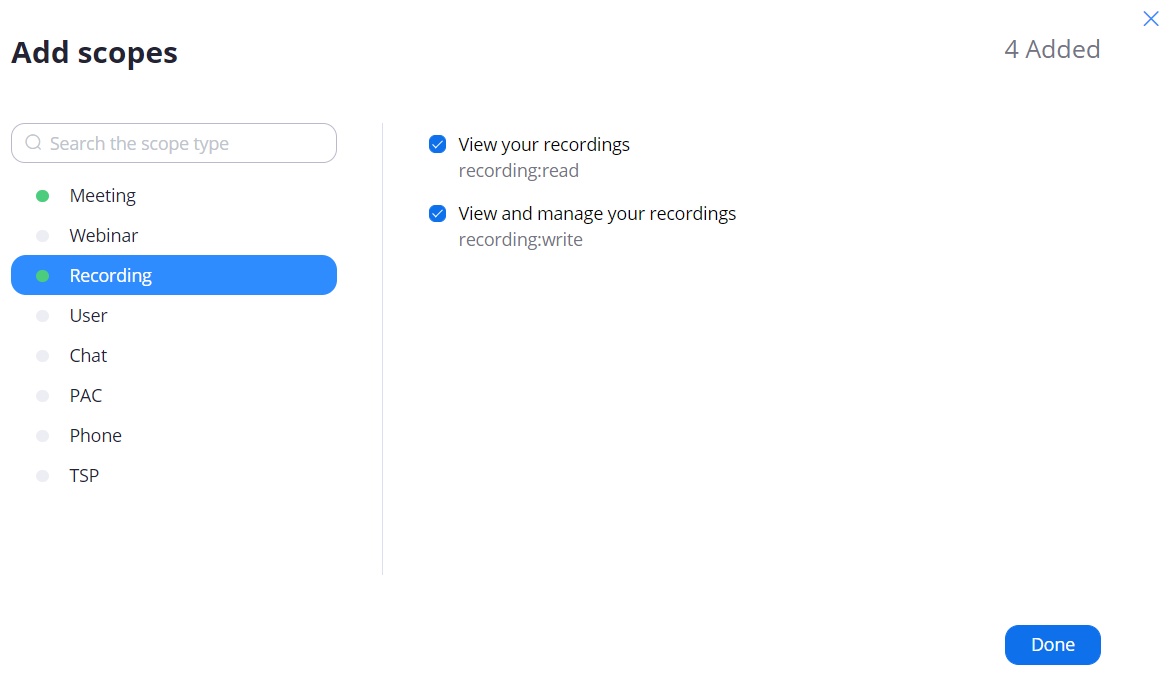
Select Recording, then select both checkboxes as shown below:
Info Once authorized, CAE LearningSpace will also be able to view and manage recordings in a Zoom user account.
Select User, then select all of the three checkboxes as shown below:
Info Once authorized, CAE LearningSpace will also be able to view and manage user information, and view profile information in a Zoom user account.
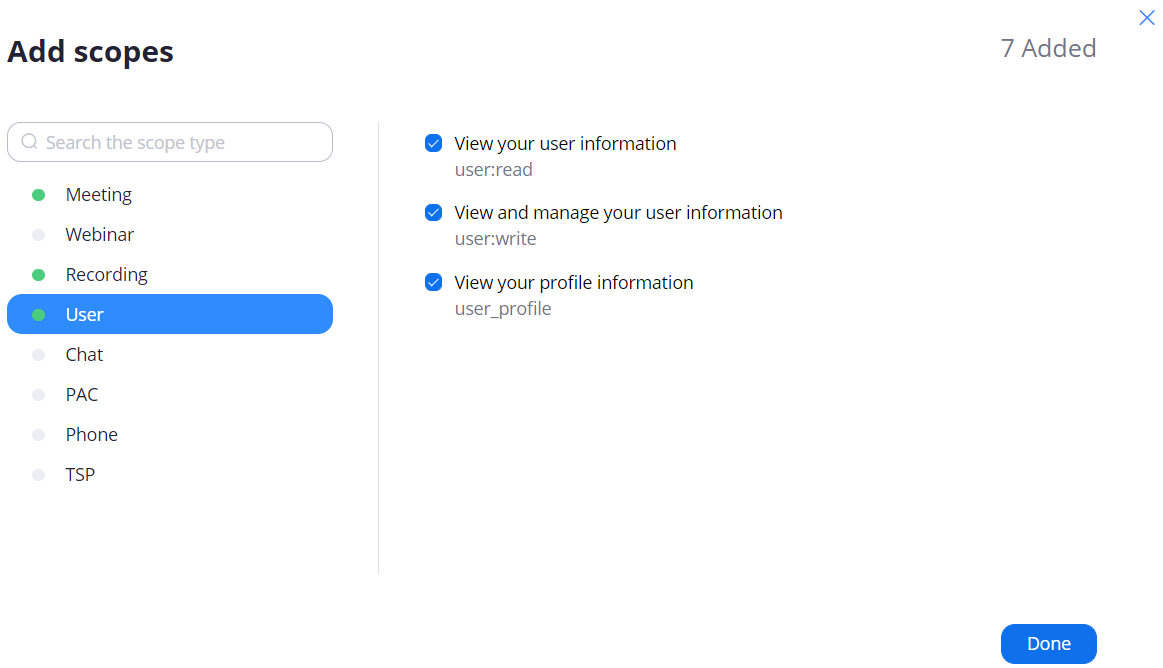
- You should have a total of 7 permissions selected.
To make sure, check the upper right corner of the Add scopes pop-up. - Click Done to save your settings.
You can also check your current scope settings on the page: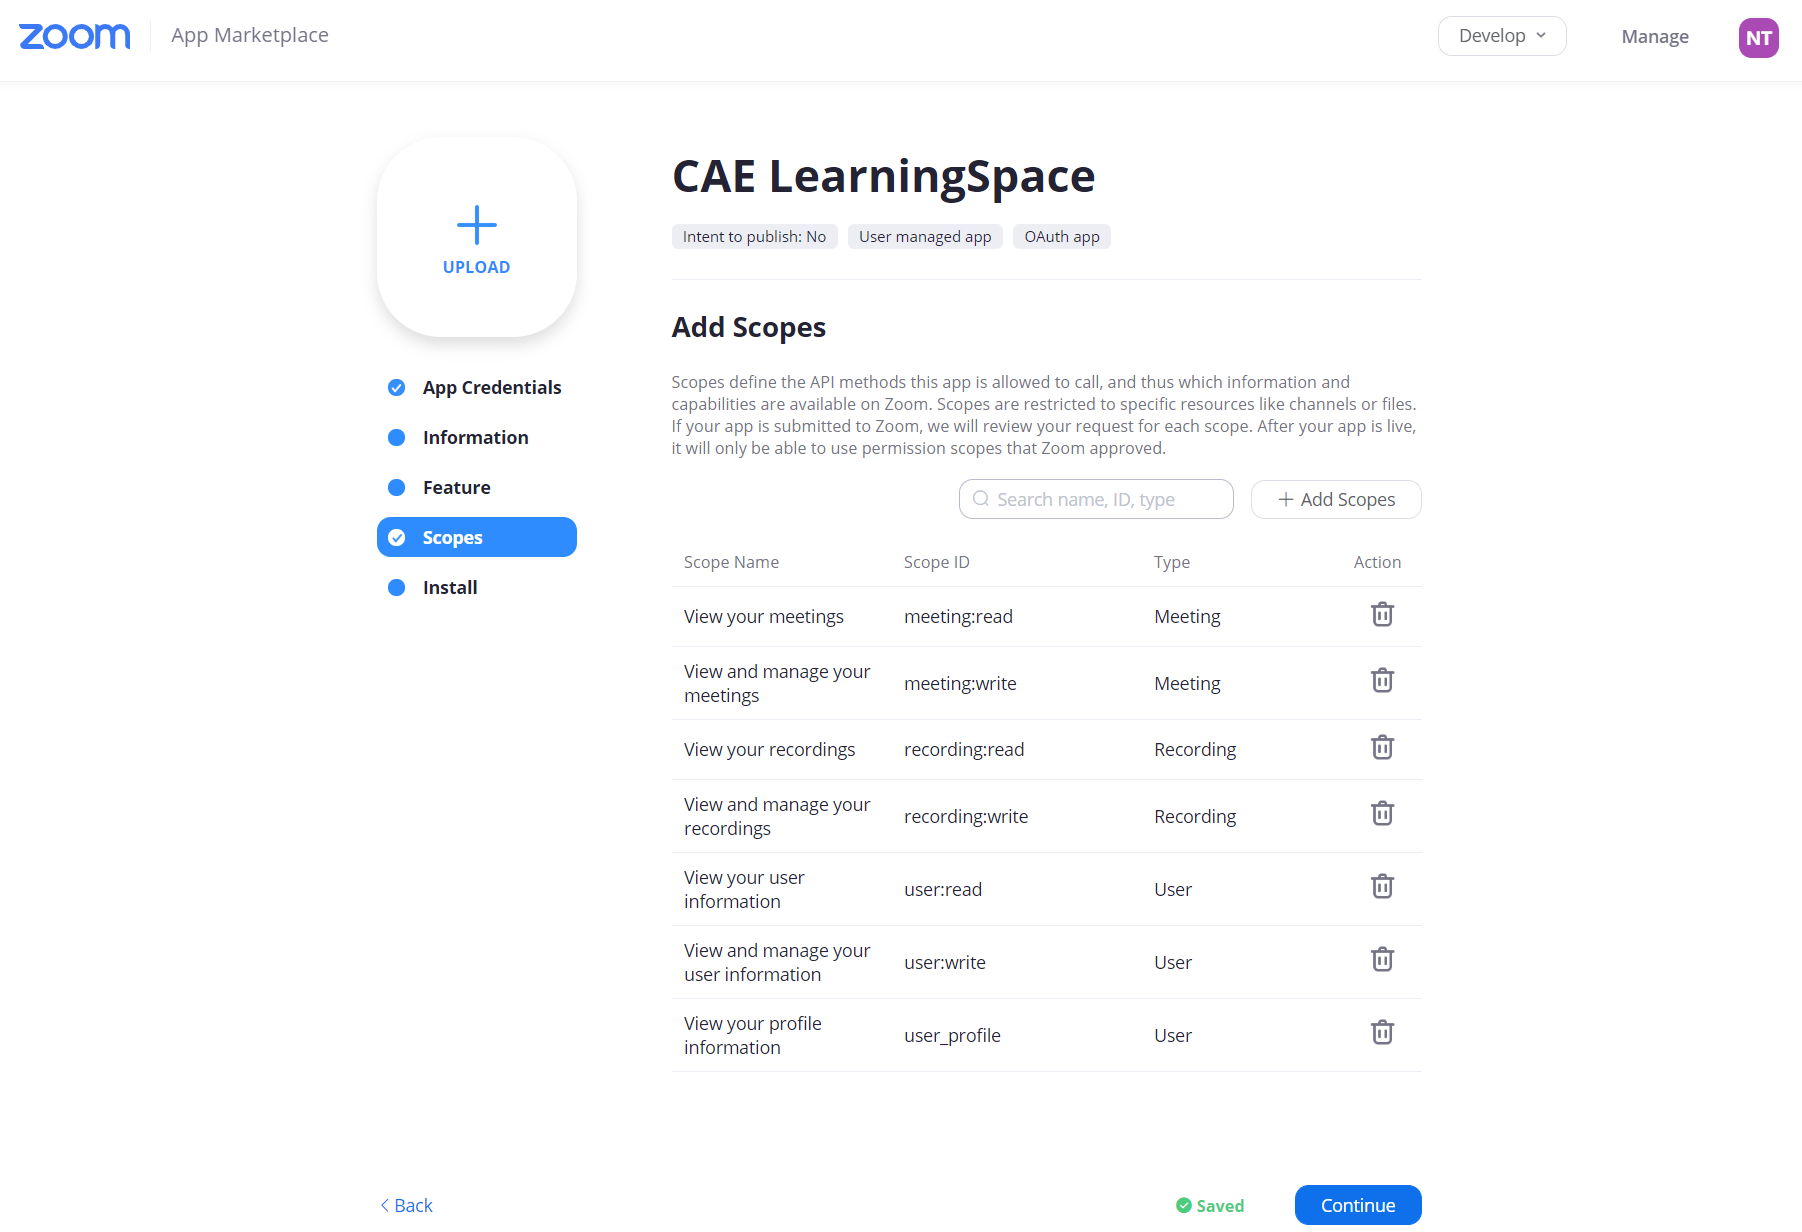
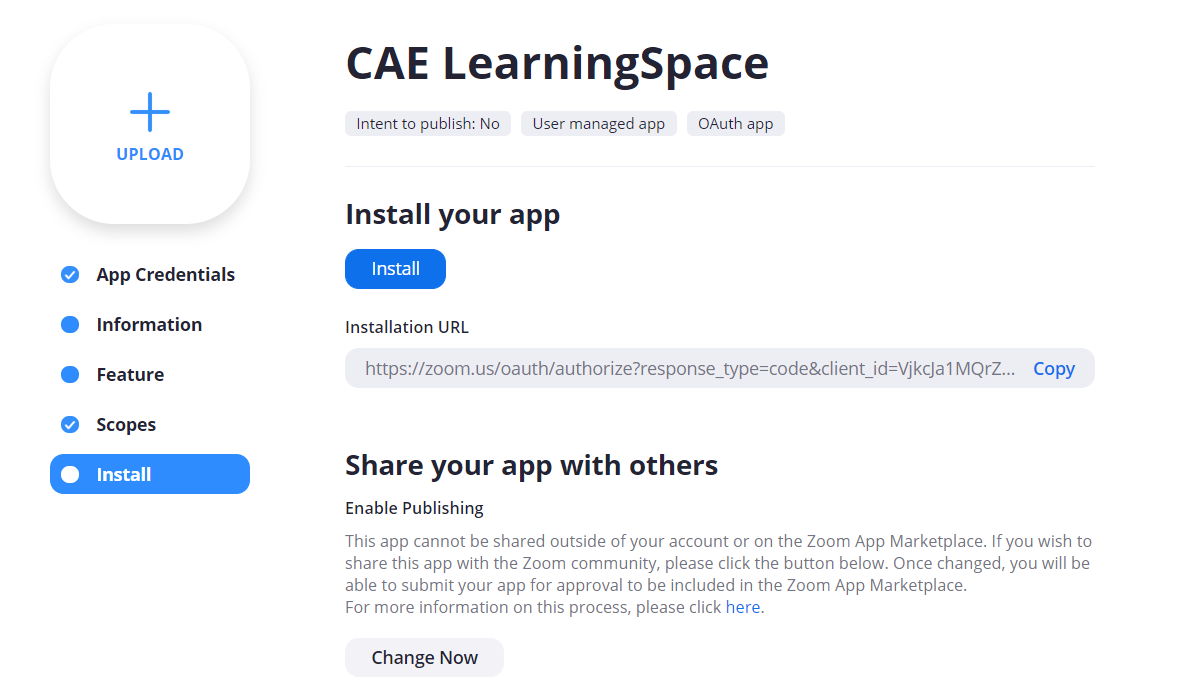
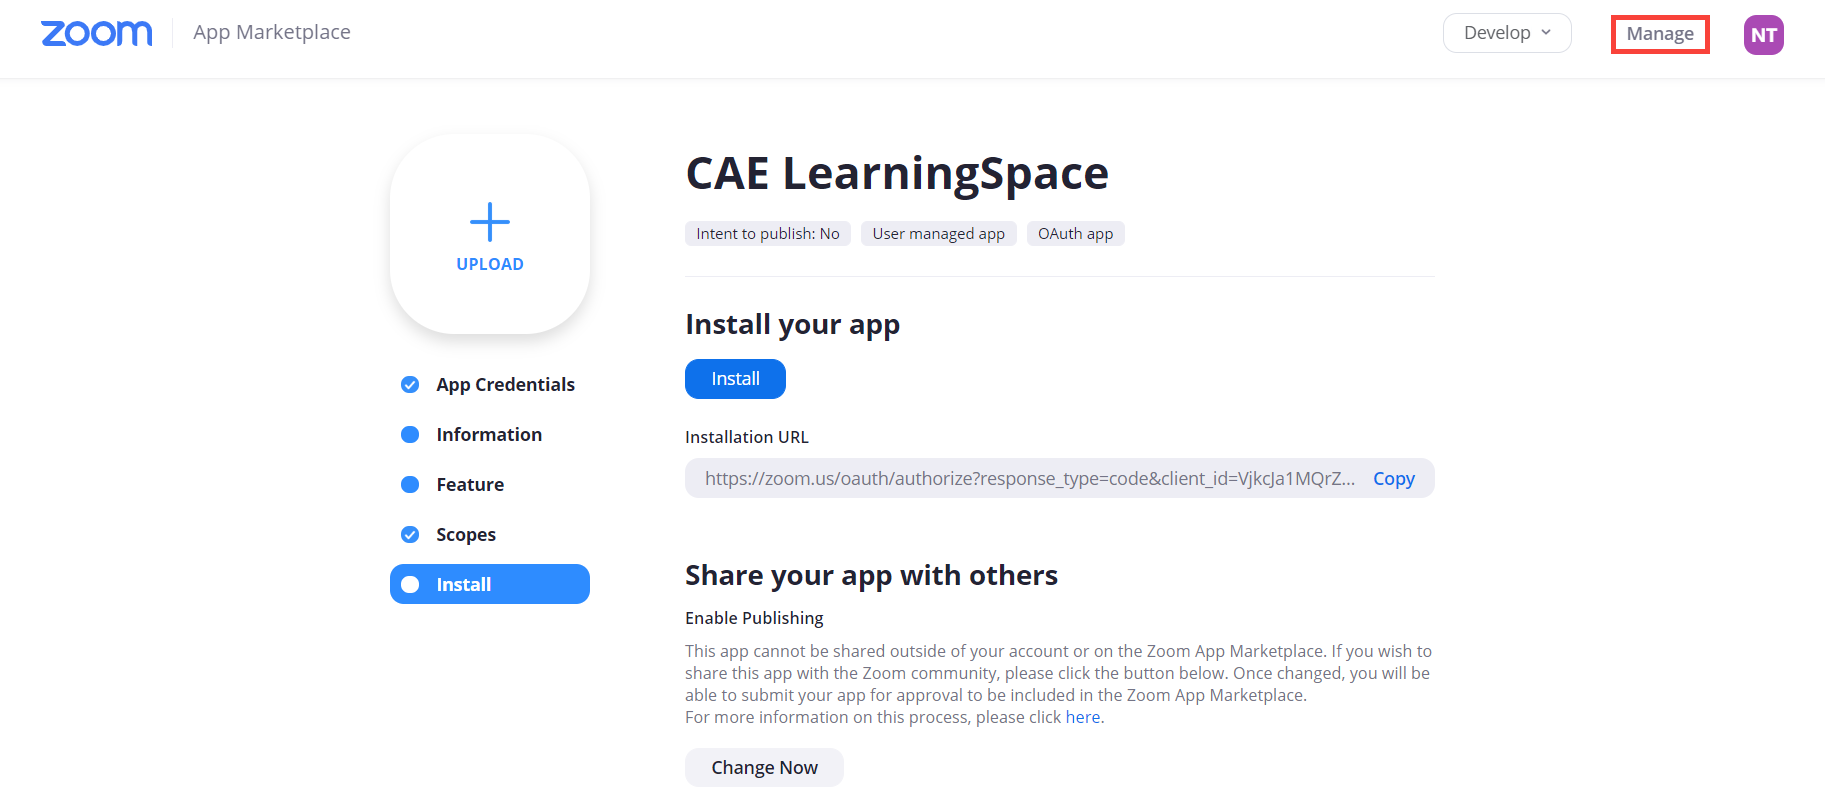
- Click Continue to arrive at the Install tab of your OAuth application.
Check if the Install button is active.
Note Do not install the application. Only check if the application is "ready" for installation. The OAuth installation is "ready" if the Install button is active.
- Click Manage in the upper right corner of your page to access your created applications.
You should have your new application added to your Dashboard on the Created Apps tab:
...
Overview
Content Tools