Page History
In case you are not registered in your institution's LearningSpace system yet, start with creating a new account in the the SPA Mobile Application.
| Widget Connector | ||||||
|---|---|---|---|---|---|---|
|
| Info |
|---|
You are required to fill in an Enrollment application form before your new account could be created. Your enrollment application will be reviewed by your institution. |
| Note | ||
|---|---|---|
| ||
You should be provided with a sign-in QR code by your institution to connect your smartphone to the institution's LearningSpace server. Get in touch with the SP coordinators of your institution if you were not provided with a QR code yet. |
| Table of Contents | ||
|---|---|---|
|
Getting Started with the Application
| Info |
|---|
Download the SP Administration application to your smartphone from the Play Store or App Store. |
- Go to the Create Account page of the application after installing the SP Administration application on your mobile phone to have a new account created.
Also, on the Sign In page, you can use the Create an Account option at the bottom of the page, for creating a new account.
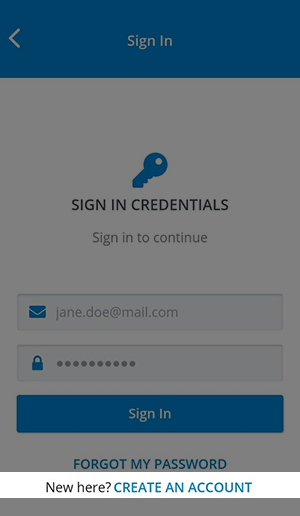
Info SPs with an existing LearningSpace user account can log in to the SPA Mobile app through the Sign In tab, using their LS user account credentials.
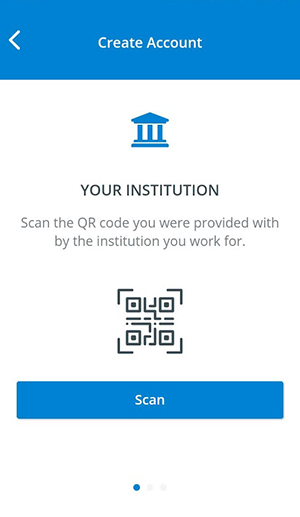
Prepare the QR code that you have been provided by your institution.
Tap Scan to scan the institution's QR code.
Info Allow the application to access the camera on your smartphone.
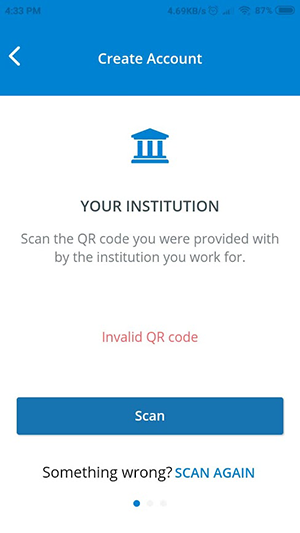
Tip title Invalid QR Code Error Message Try scanning the QR code again if you are receiving the following error message:
If the scan was successful, the application will present you with the URL of your institution's LearningSpace system:
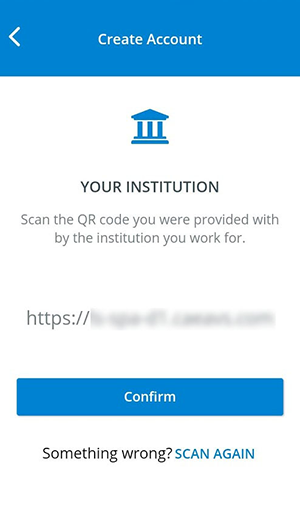
Tap Confirm to connect to your institution's server.
Setting Up Your Account
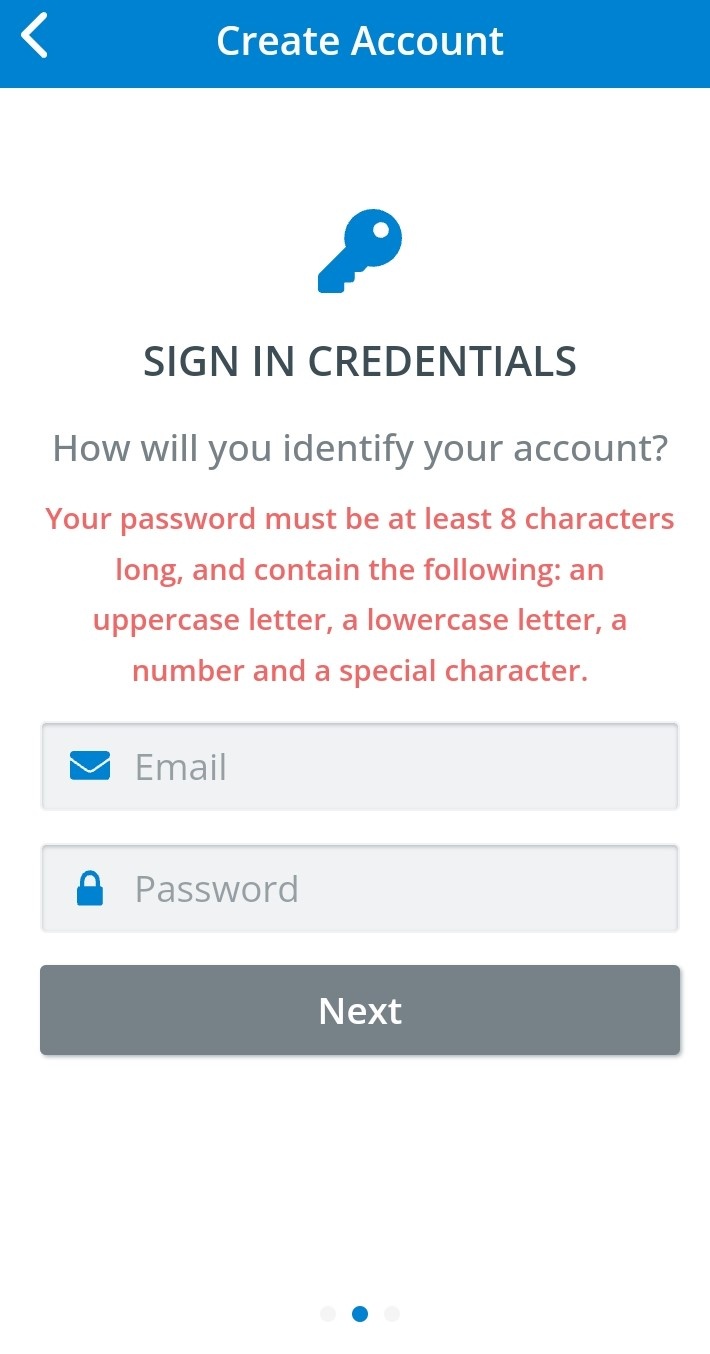
After connecting to the institution's LearningSpace server, you are requested to provide your sign-in details.
Provide a sign-in email and password then tap Next.
Info You will be notified of your enrollment status via the email address you have entered here. If your enrollment application is approved, you will be registered with this email address in the institution's LearningSpace system.
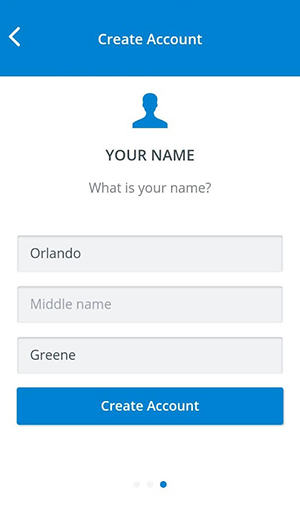
- Enter your name and tap Create Account.
On the next page, you will be asked to continue and complete your profile.
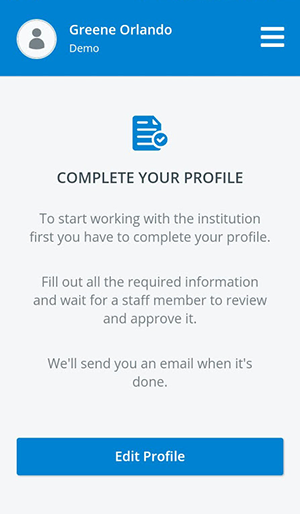
Editing Your Profile
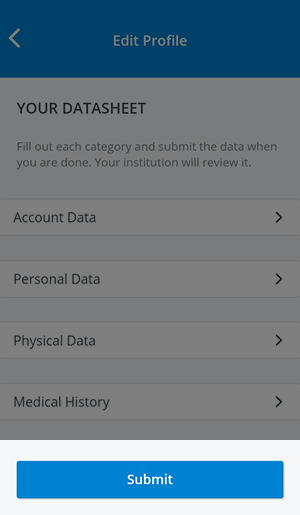
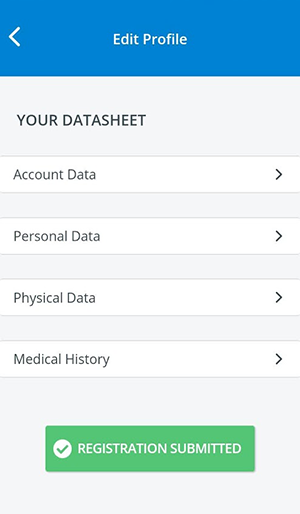
Tap Edit Profile to land on the main page of your enrollment datasheet and to start filling in your details:
Info Enter each category and fill in the required details. Required details will be marked by an asterisk. At all times, use the back arrow to return to the main page of your enrollment datasheet.

Excerpt Account Data
Tap on Account Data to review your sign-in credentials.
Info The email address that you provided earlier will already be filled in.
Note Review your email address and make sure you have entered it correctly: you will receive feedback about your enrollment status at this email address.
Excerpt 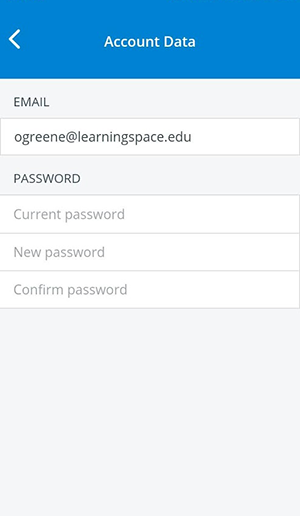
Personal Data
Tap Personal Data to start filling in your personal details.
Note You are required to enter your full name, address, and cell phone number in order to submit your enrollment; every other detail is optional.
Excerpt 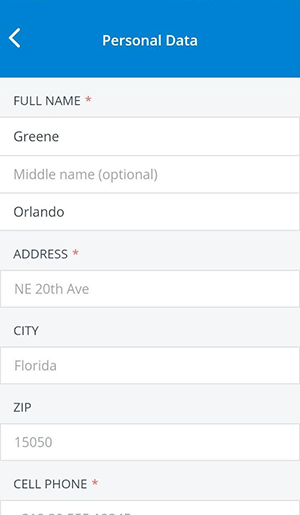
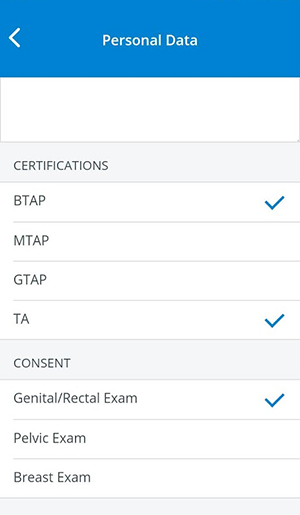
Tip title Certifications & Consent Scroll down to select your certifications and/or consent to participate in sensitive examinations. By entering information about your certificates and/or consent, you can increase your chance of being selected for patient scenarios.
Tap on a field to select and save it:
Physical Data
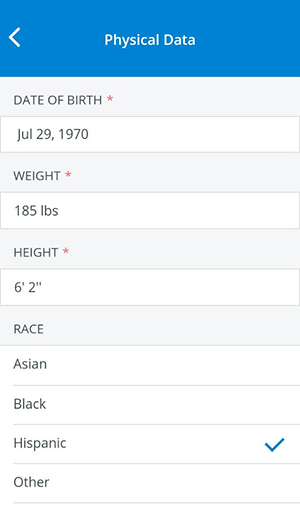
Return to the Edit Profile page and tap Physical Data to provide your physiological details.
Note Mandatory fields are marked by an asterisk (*).
Tip Providing as many details as possible will help you appear more often in search results when SP coordinators are recruiting for scenarios.
Medical History
Return to the Edit Profile page and tap Medical History to enter any of your current medical conditions that can affect your work as an SP.
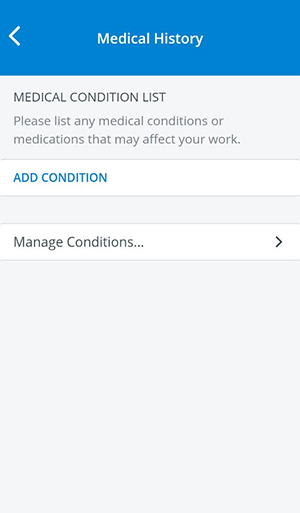
Add Your Medical Conditions
Tap Add Conditions to continue to the global medical condition list.
Info Every medical condition is listed here that has been added to any SP's profile in the Physical & Medical History tab in Users or in the SPA Moblie application. (See also Create New Medical Conditions further below).
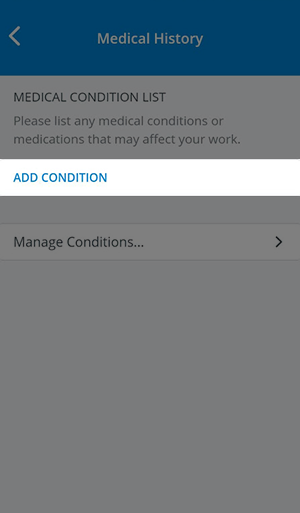
Tap on a medical condition to select it.
Info You can select more at a time.

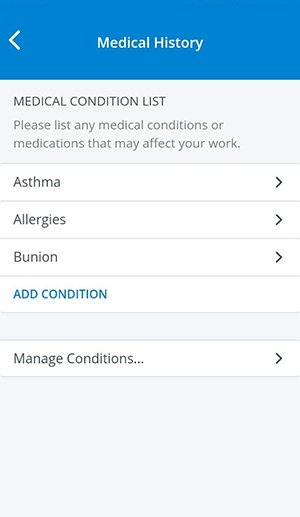
Tap on +Add to finalize your medical condition list.

- Return to the Medical History page where you can view your list of medical conditions saved to your profile:
Create New Medical ConditionsInfo Add new conditions to the global medical conditions list. Return to the Medical History page using the back arrow.
- Tap Manage Conditions to add a new condition.
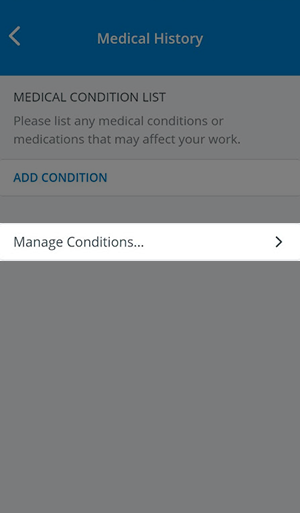
- Tap +New next to the search field.
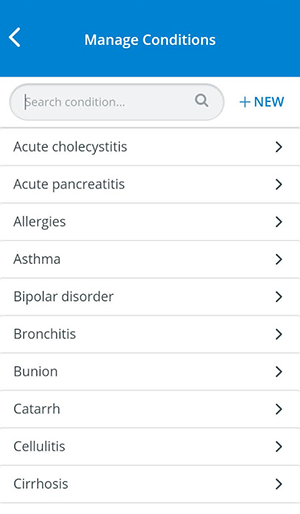
- On the next page, enter the name of your new condition under Condition Name.
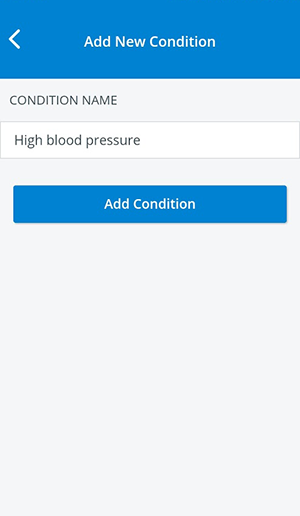
- Tap Add Condition to save your new entry.
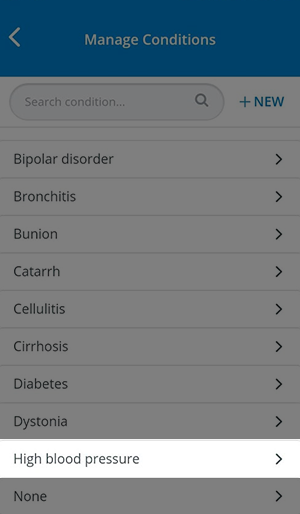
You will be redirected to the Manage Conditions page.
Tip Scroll to view your new entry.
- Return to the main page of your enrollment datasheet once you have completed your profile.
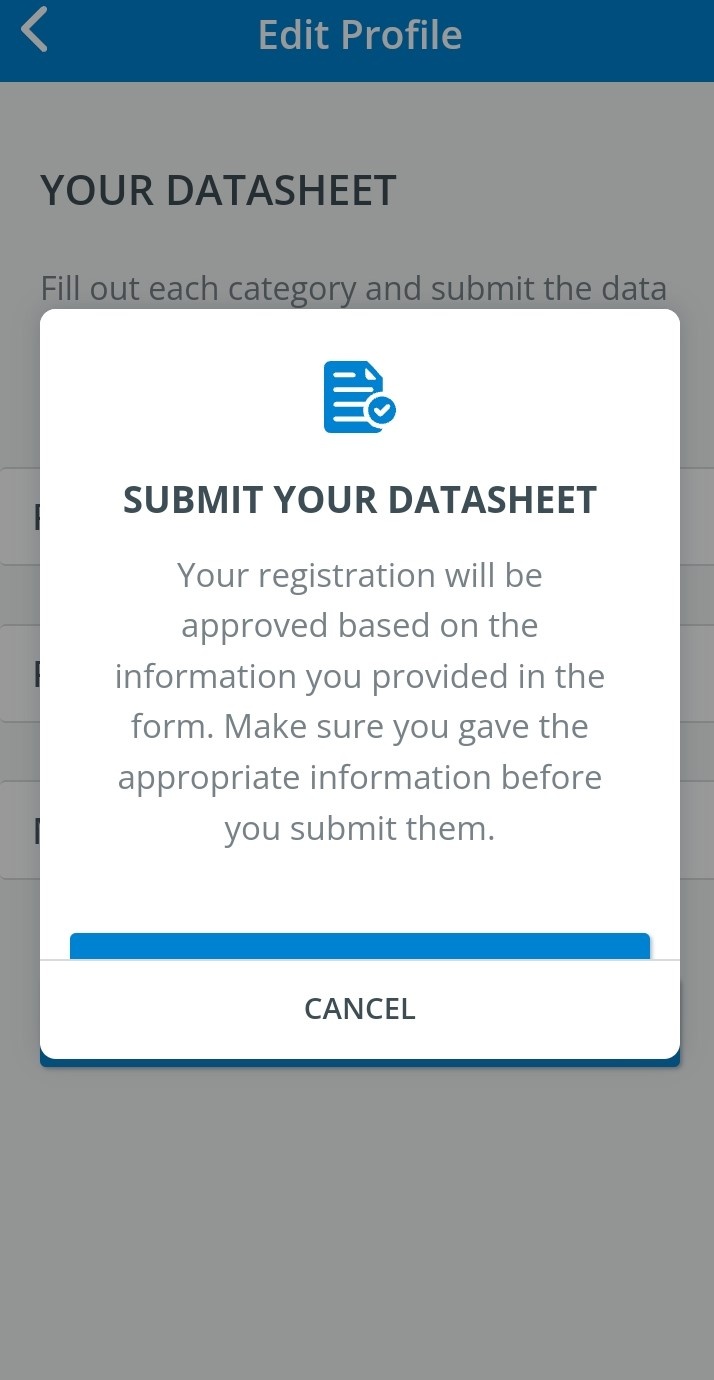
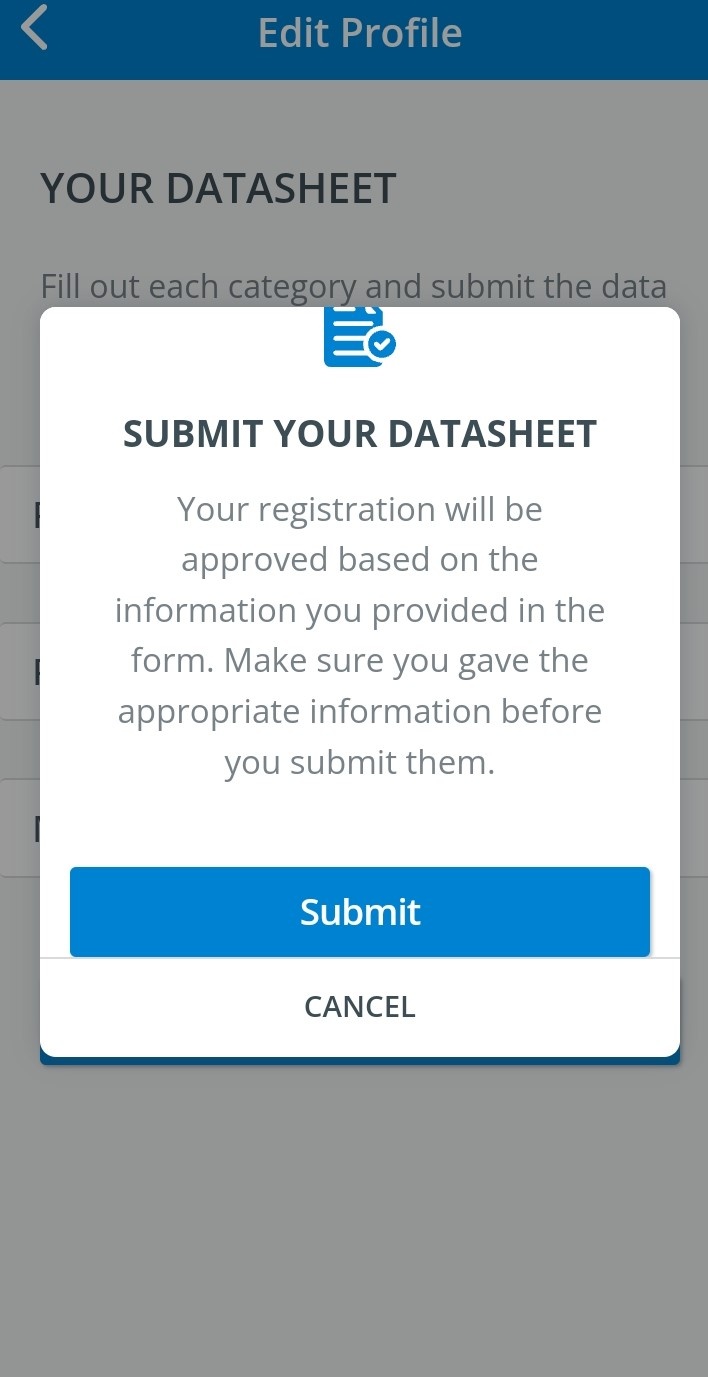
- Tap Submit to send your datasheet for review.
You will be asked to confirm your submission:
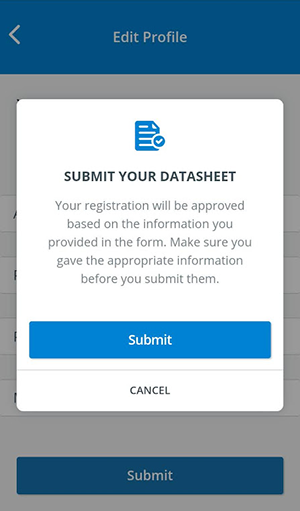
Note Should the Submit button not be visible on your mobile device, scroll down to make it visible.
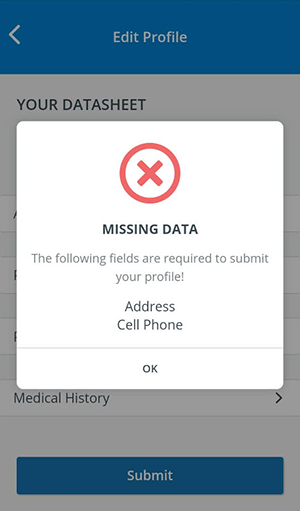
The SPA application will warn you in case you missed one or more mandatory fields:Info Return to the corresponding categories to fill in your missing details.
Note SPs registered through LearningSpace can complete their profiles - in case there is any data missing - through the Fill required fields page, after logging into the SPA Mobile app.
You will receive the following message after successfully submitting your enrollment datasheet:
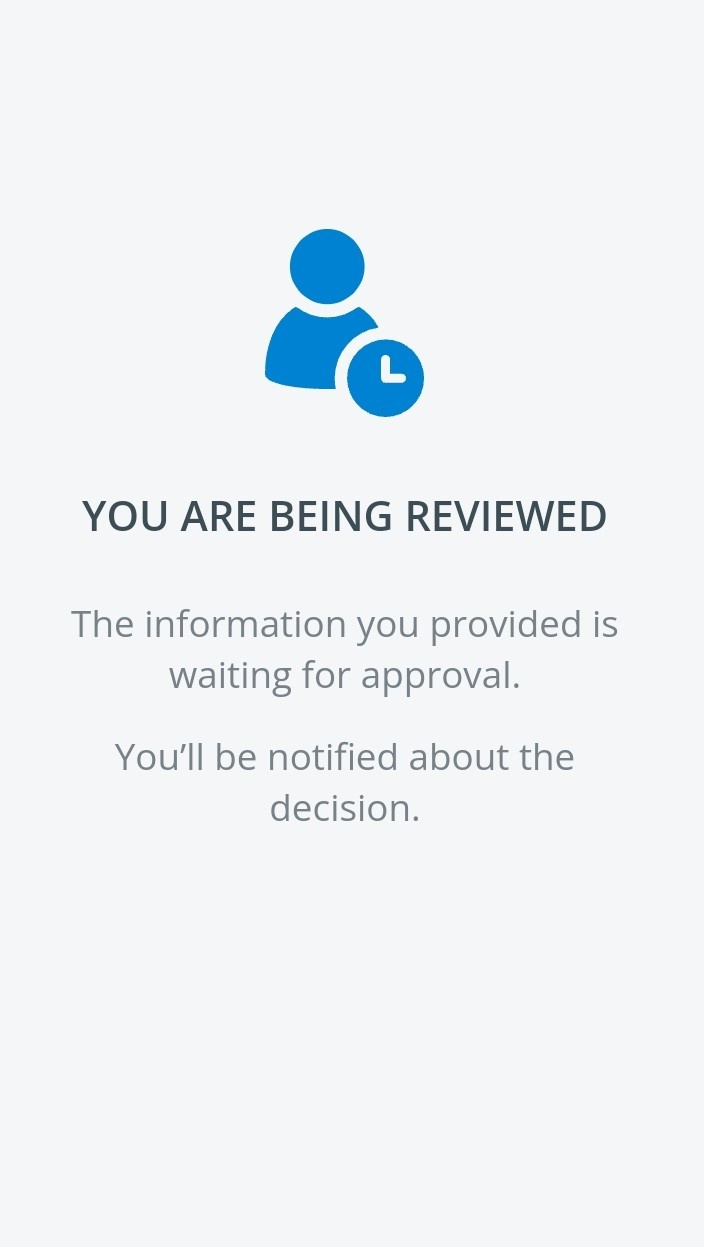
Info You will be notified of your enrollment status when approved/declined via the email address you have submitted in your application.
Info SPs can return to editing their Profiles any time they need to. Learn more about this on the How to Edit Your Profile page.
Tip For further information, visit our Standardized Patient Administration and Standardized Patient Administration - How to pages.
| Info | ||||||||||||||||||||||
|---|---|---|---|---|---|---|---|---|---|---|---|---|---|---|---|---|---|---|---|---|---|---|
| ||||||||||||||||||||||
|
Overview
Content Tools