Page History
| Warning |
|---|
| IMPORTANT: Access to the Calendar module is restricted to users with Admin, SRP or SRP (full control) privilege. Events can be edited by a user with either privilege. However, in Case of users with SRP privilege, any modification made with respect to either time, repetition, Activity or room settings has to be (re-)approved by a user with Admin or SRP (full control) privilege. |
- Access the Calendar module and select either view.
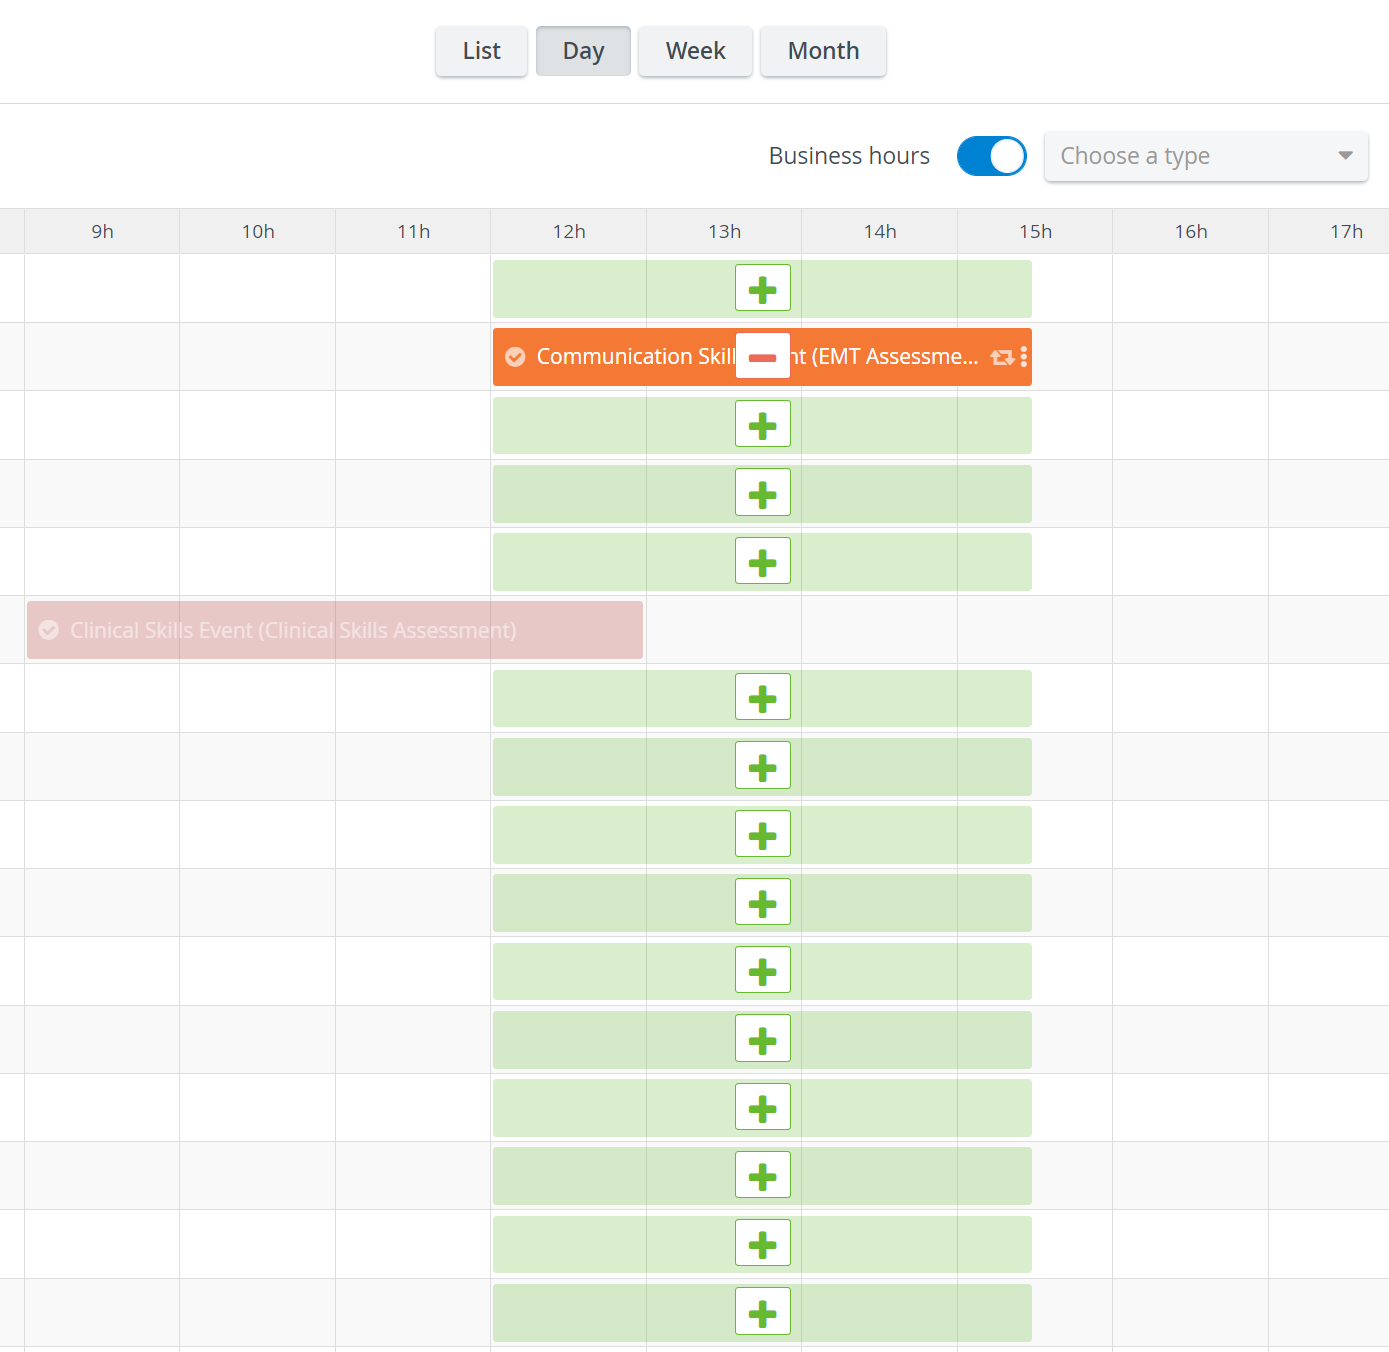
Scheduling displayed paled indicates that the operating user has limited privileges and thus no access to that specific scheduling.
| Warning |
|---|
Events that have timeslots scheduled can only be edited in Advanced Scheduling, thus appearing paled even for users with the necessary privilege(s). |
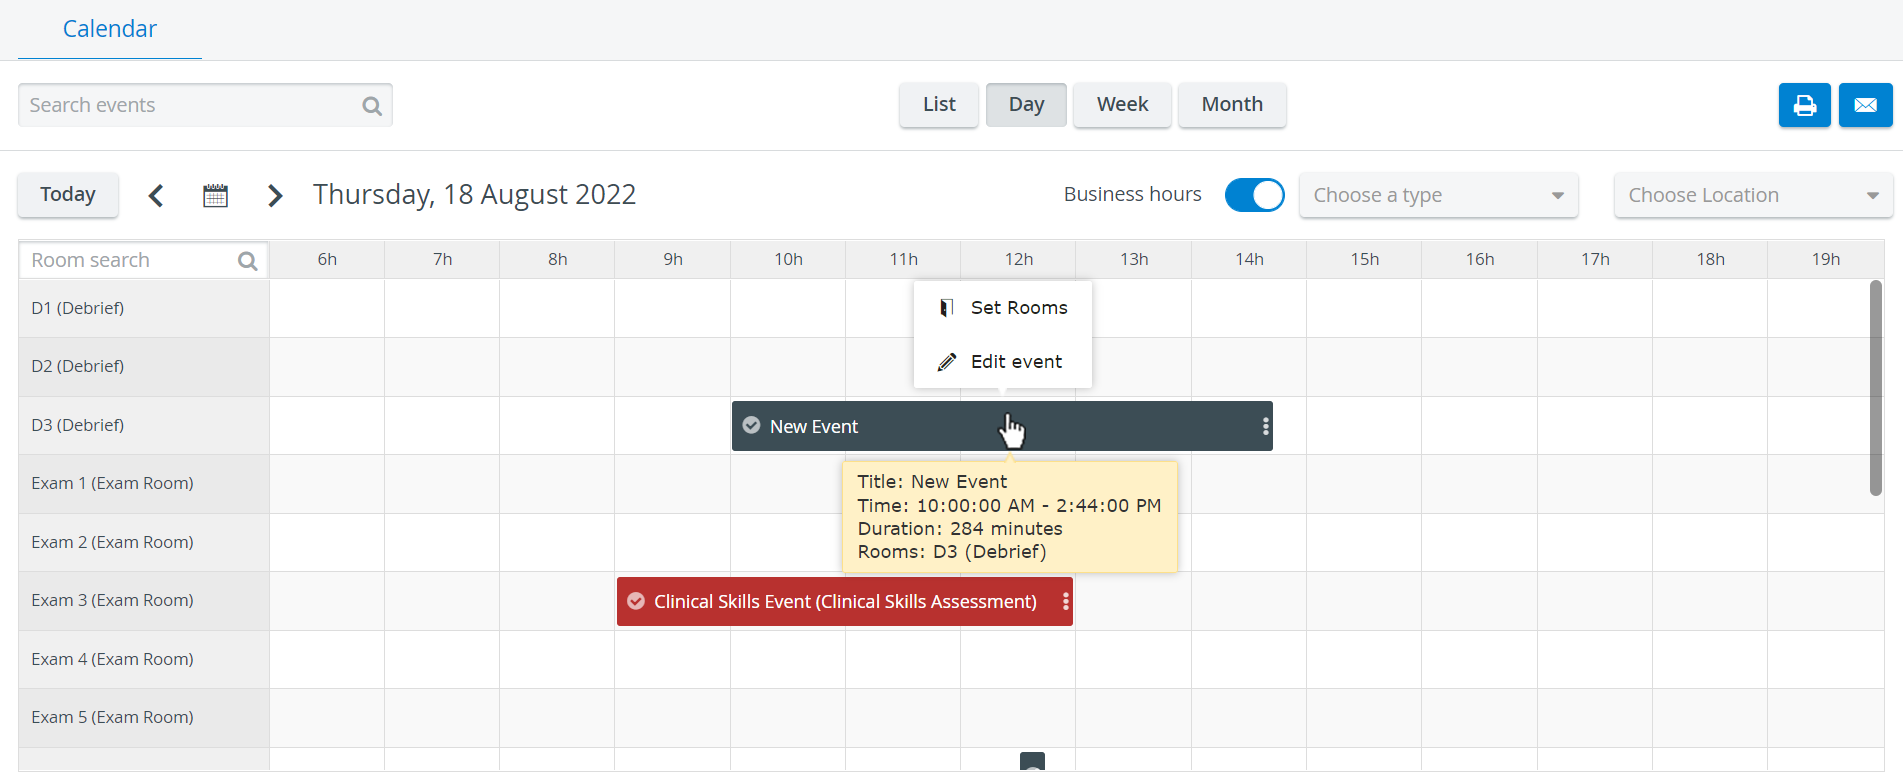
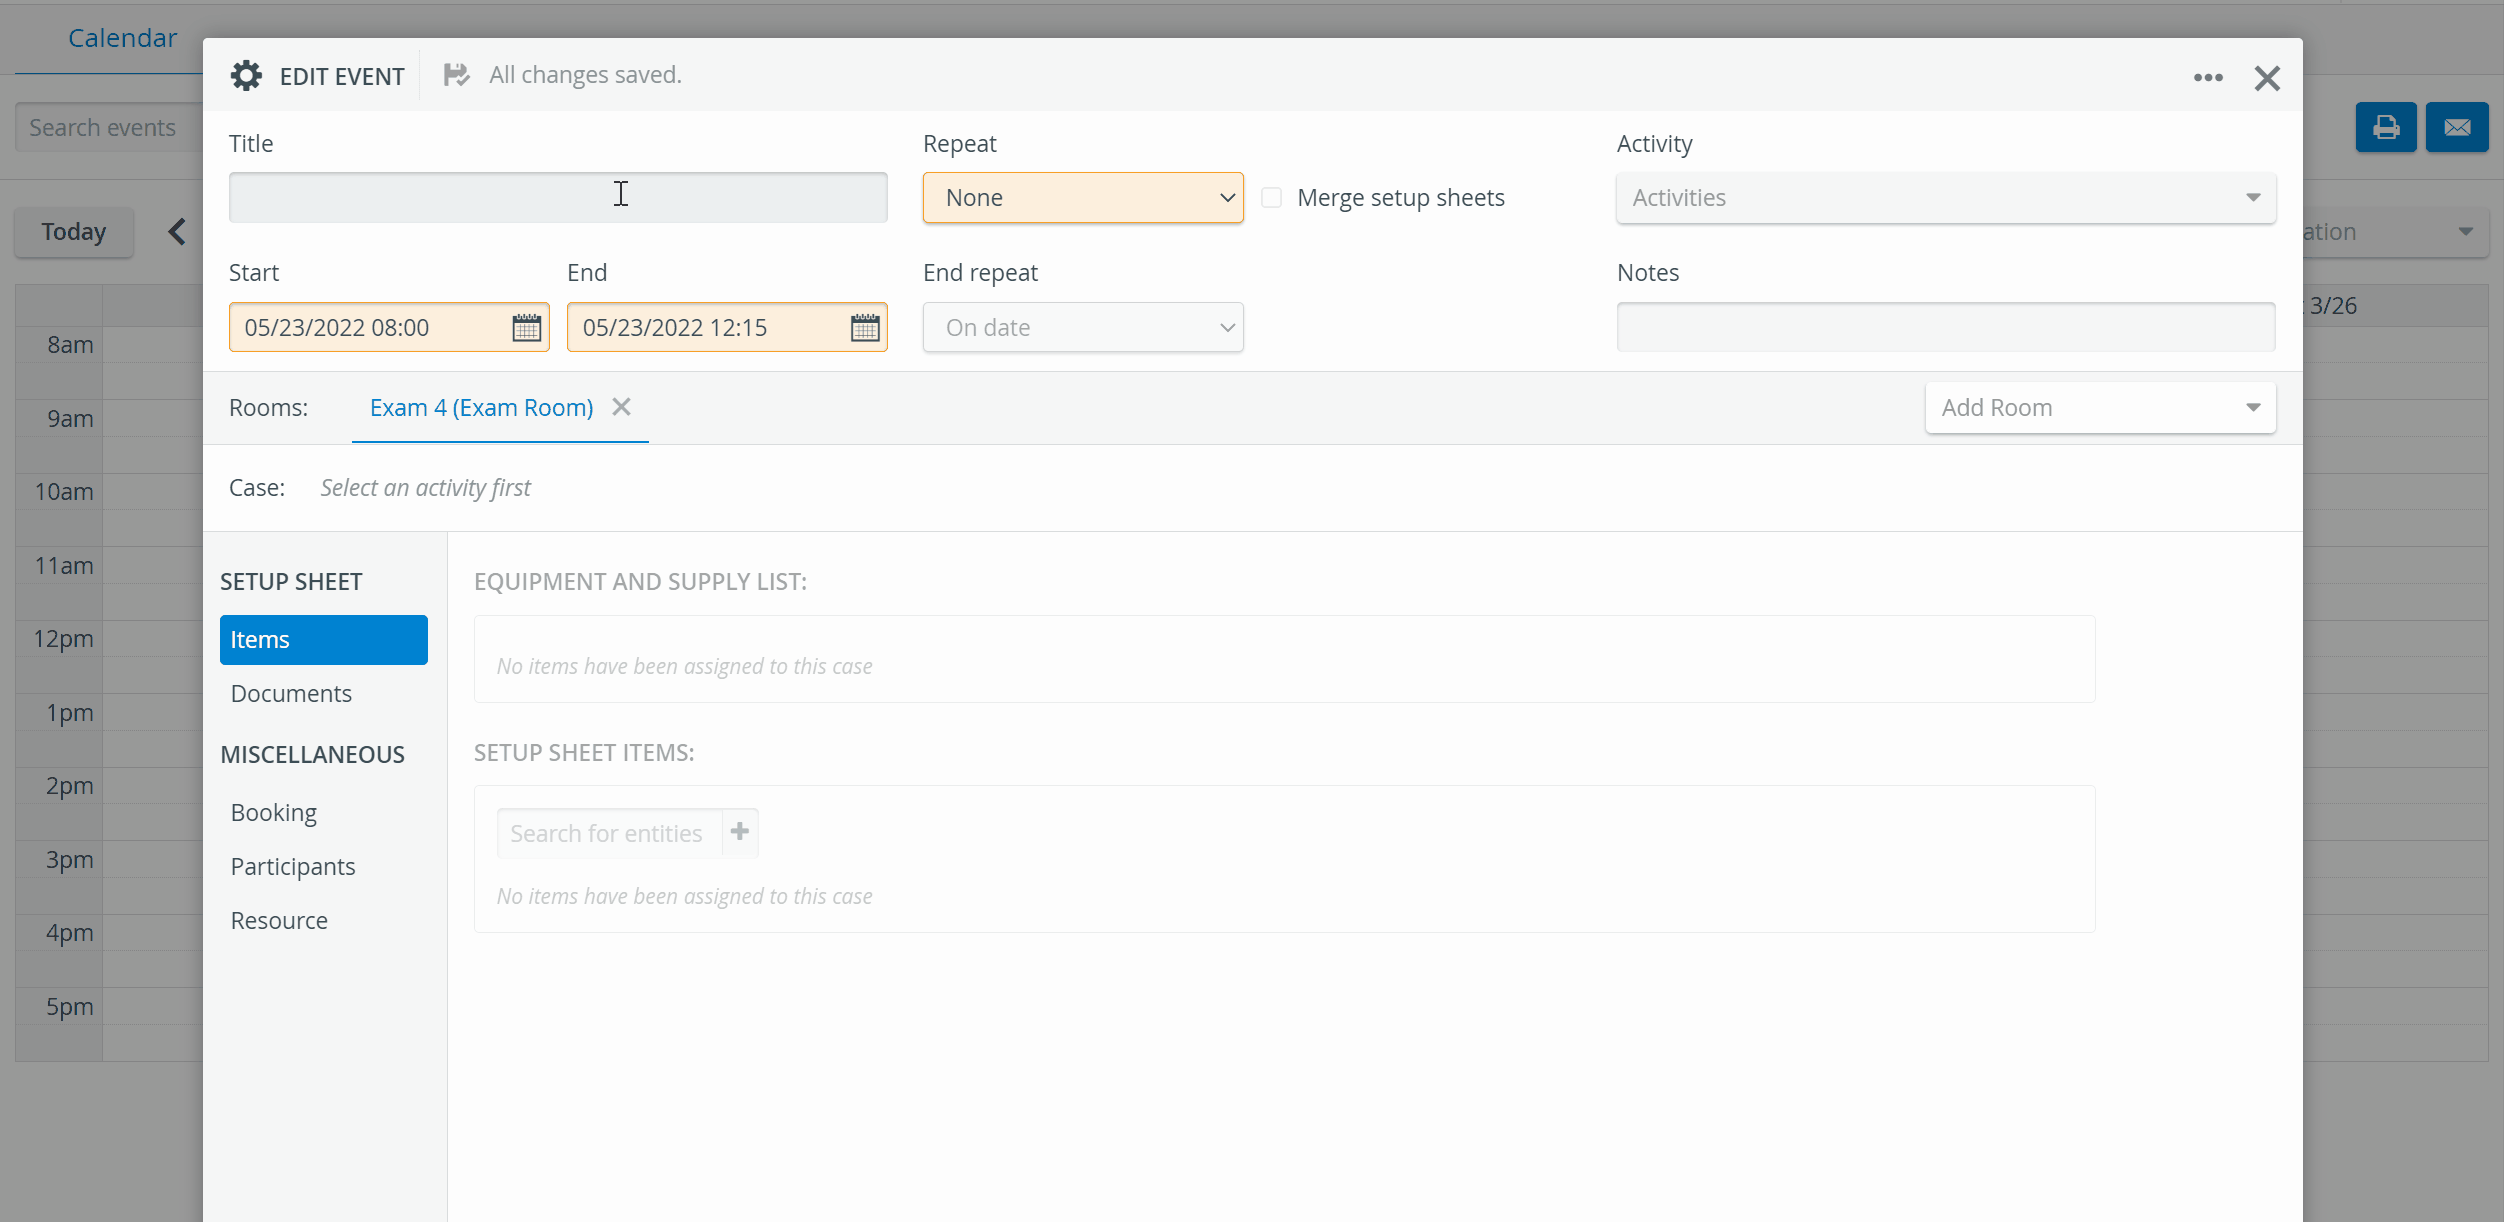
2. Single-click the Event intended to be edited.
In Day view, clicking the desired Event once prompts two options to appear: Edit Event and Set Rooms.
Click Edit Event to open the Edit Event pop-up window. The Edit Event pop-up window appears.
| Note |
|---|
| Set Rooms provides a direct way to add further rooms to the Event and/or remove the original room. |
| Tip |
|---|
By double-clicking on the Event intended to be edited, the Edit Event pop-up opens directly. |

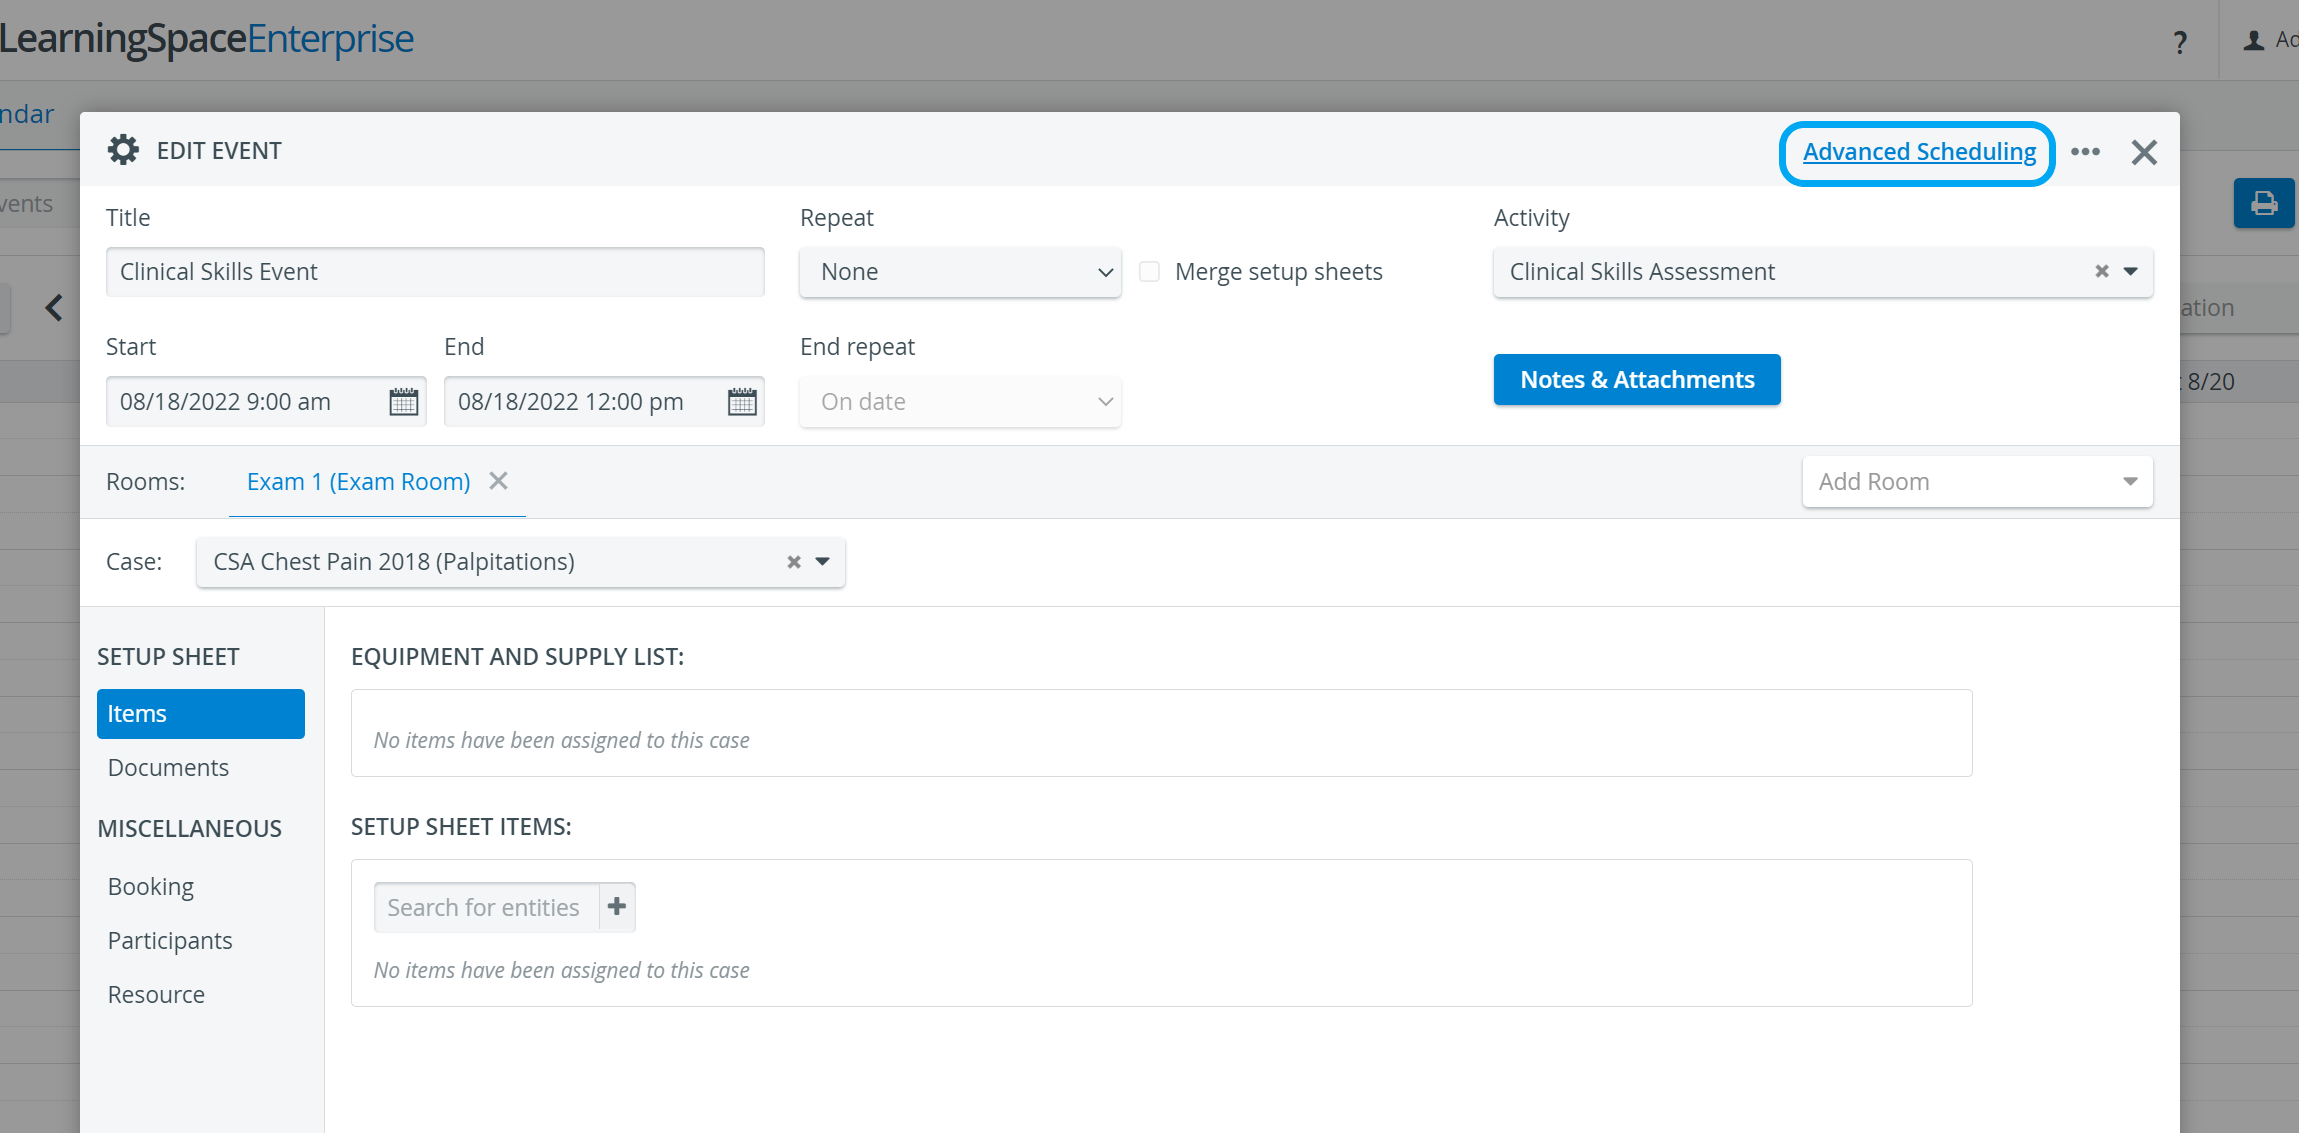
3. Edit the title using the cursor or any other data by using the respective drop-down menus.
| Warning |
|---|
| If the Activity is changed, all Cases from all stations will be deleted, as Cases are assigned to the Activity. |
4. Add further rooms or delete an already assigned one by clicking the X next to its name.
5. Change a Case by deleting the assigned one and adding another from the Case drop-down.
| Note |
|---|
| Only those Cases are offered in the drop-down list that have been assigned to the Activity within which the Event is scheduled. |
| Tip |
|---|
| If the Activity including the Event has more Cases assigned to it and the Event takes place in more rooms, the Apply same Case to all rooms option is offered below the Case drop-down. |
6. Remove participants by clicking the X next to their names or remove all added participants by clicking the trash bin icon in the bottom right corner of the panel. Add others via the Add Participant field.
| Note |
|---|
| Participants can be individual users or groups as well. |
7. If desired, remove resources by clicking the X in their fields or remove all added resources by clicking the trash bin icon in the bottom right corner of the panel. Add others via the Add Resource field.
8.Changes are saved automatically.
Document upload to Events
Document upload is possible to Events via the Calendar module, without a Setup sheet being added to the Event (if the Inventory manager module is enabled).
| Note |
|---|
Documents uploaded to Events this way are only displayed in the Calendar, not in the Inventory module. |
| Info | ||||||||||||
|---|---|---|---|---|---|---|---|---|---|---|---|---|
| ||||||||||||
|
| Tip |
|---|
For further information, visit our Calendar Module and Calendar - How to pages, or watch our Calendar Module Training Videos. |
Overview
Content Tools