Page History
CAE LearningSpace can accommodate CAE and third-party simulators. Connecting a simulator to the system can be done on the Simulators tab.
| Table of Contents |
|---|
All CAE LearningSpace systems can be capable of capturing any simulator's signals. Depending on the LearningSpace system you are using, there are different hardware configurations required:
- Wireless connection to a CAE simulator:
- UltraPortable: USB WiFi adapter, included with the UltraPortable
- ONE appliance:
- LearningSpace Enterprise/Essentials/Experience: 2 wireless antennas of the ONE appliance
- LearningSpace Intuity: USB WiFi adapter, included with the ONE appliance
- Server appliance: a CAE Wireless Bridge is required, (optional accessory)
Warning If connected directly to a network (without using a Wireless Bridge), the simulator will not be detected and the setup will not function as intended.
- Wired connection to a CAE simulator:
- UltraPortable: dedicated Ethernet connection, on the back of the laptop on the left
- ONE appliance: dedicated Ethernet connection, labelled "#2" or "Sim"
- Server appliance: a CAE Wireless Bridge is required, (optional accessory)
Warning If connected directly to a network (without using a Wireless Bridge), the simulator will not be detected and the setup will not function as intended.
- Capturing the waveform display of any non-CAE simulator:
- UltraPortable: using the USB FrameGrabber (AVIO.HD or DVI2USB), included with the UltraPortable
- ONE appliance: using the built-in Display Capture capability, using the DVI input
- Server appliance: a CAE DCU is required, optional accessory
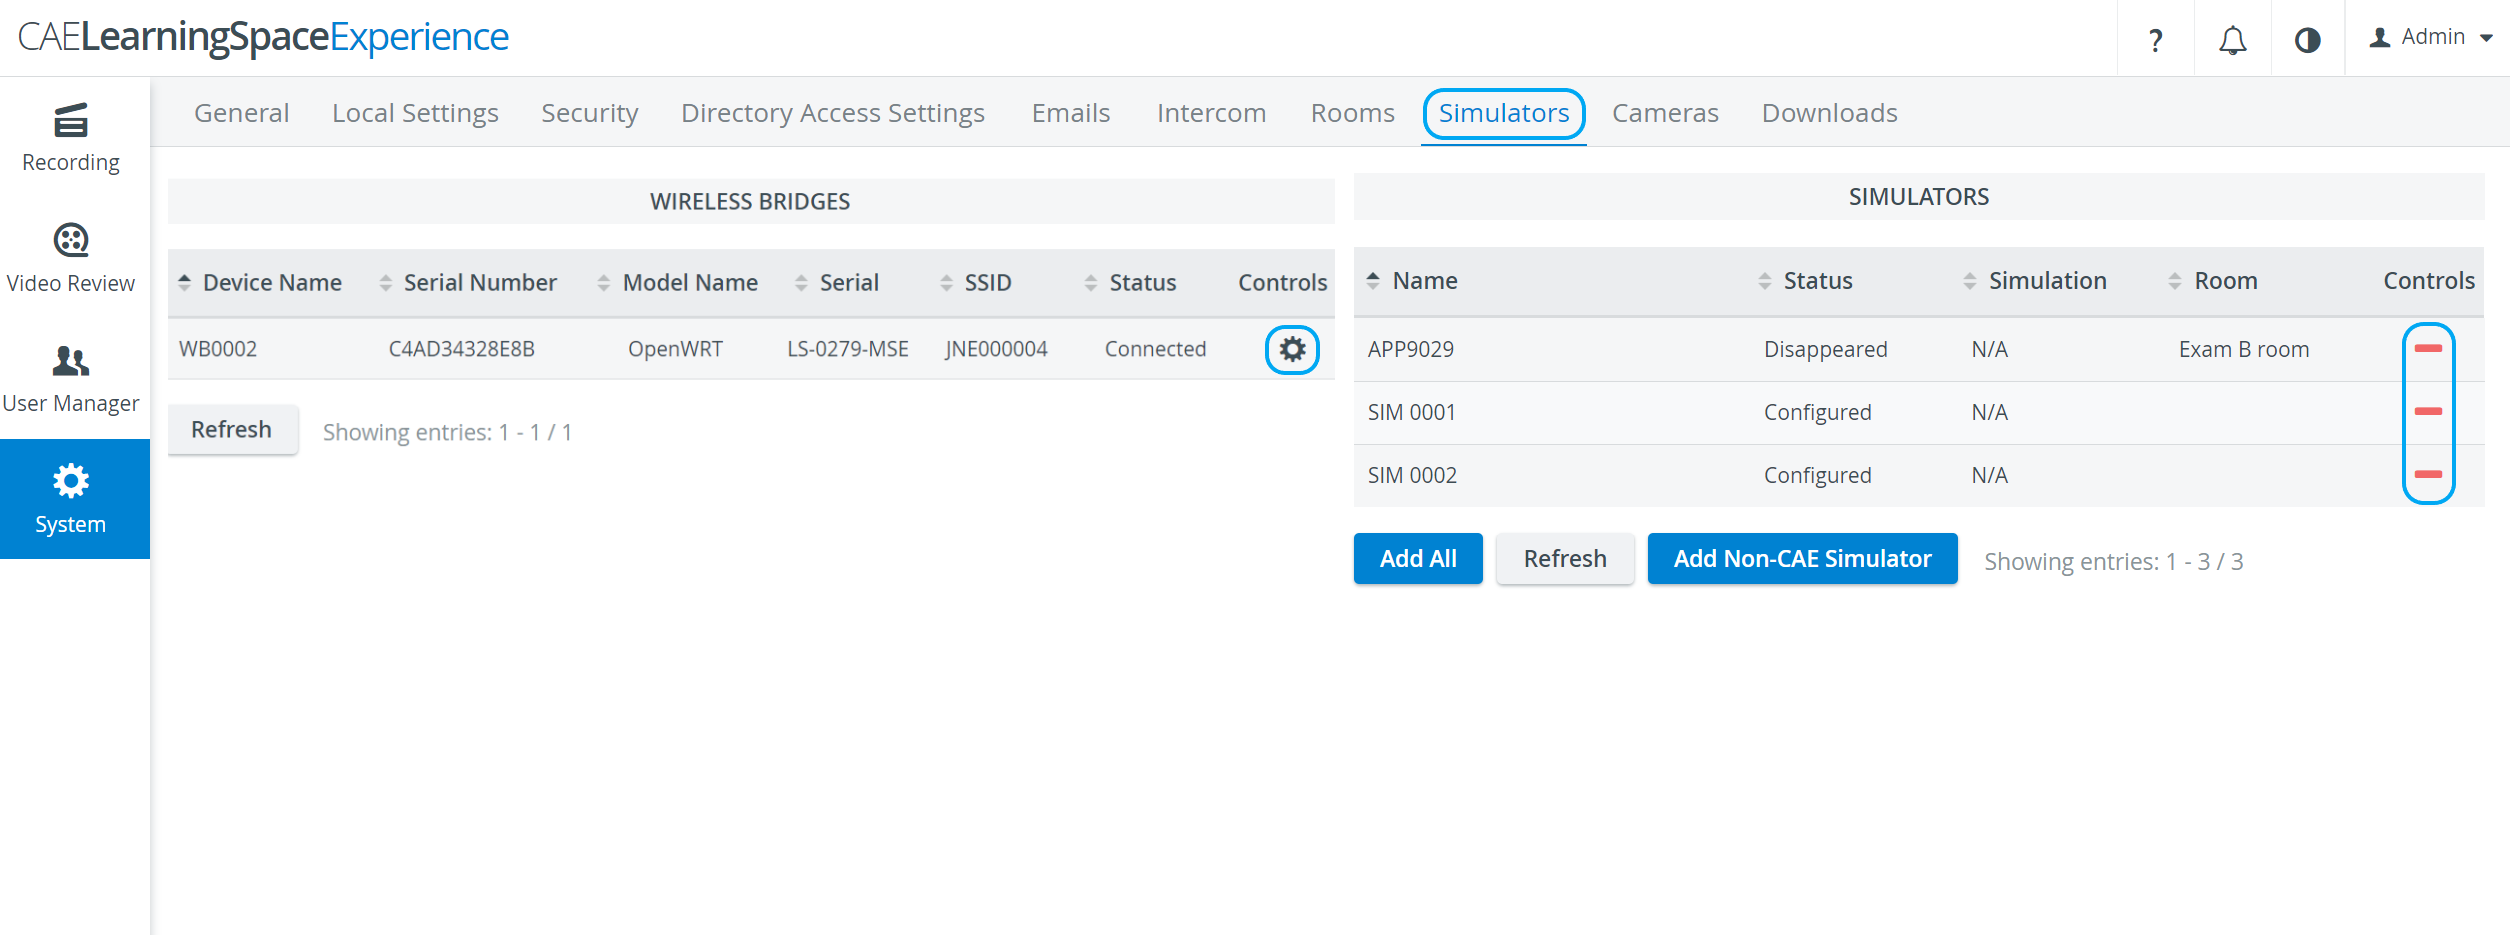
Connecting CAE simulators wirelessly
- First LearningSpace has to establish a wireless connection to the CAE simulator, to do this:
- Select the Controls cogwheel in the left side panel and select the wireless network of the simulator
- In case there are no Wireless Bridges listed on the left side panel, make sure that:
- For an UltraPortable: the USB WiFi adapter is plugged into the USB slot on the right side of the laptop
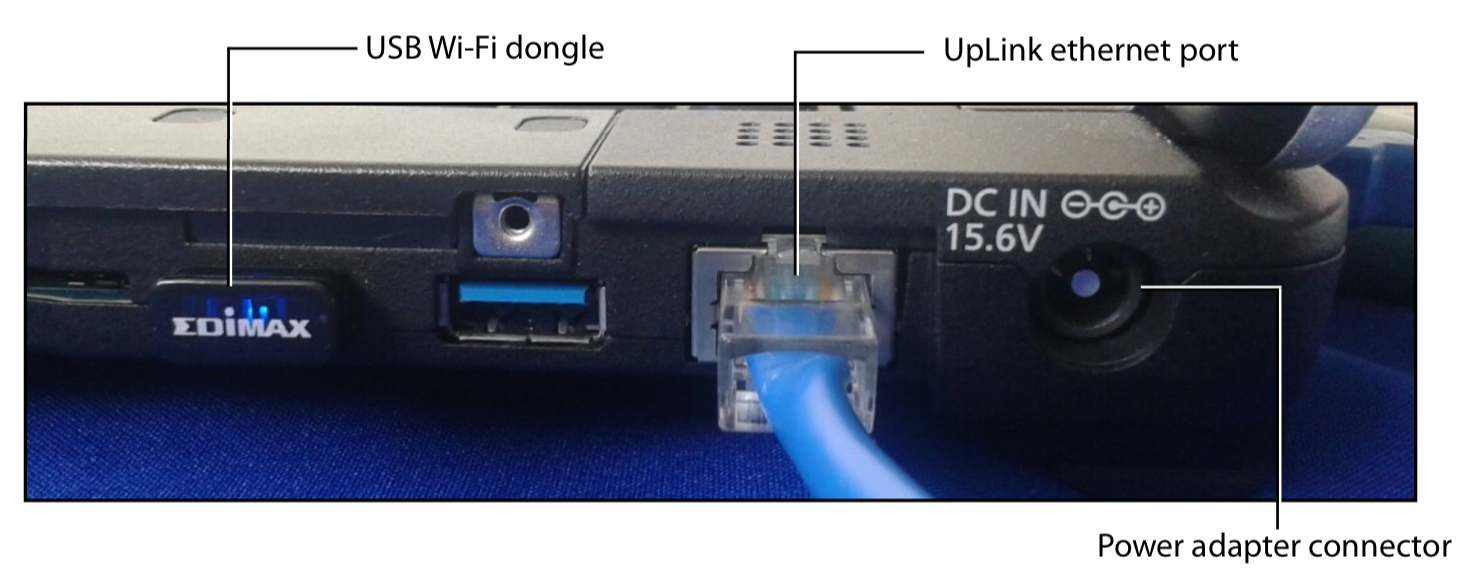
- For an UltraPortable: the USB WiFi adapter is plugged into the USB slot on the right side of the laptop
- In case the CAE simulator is not listed when trying to connect to the WiFi network:
- Make sure the simulator is powered on
- Move closer to the simulator
- In case there are no Wireless Bridges listed on the left side panel, make sure that:
- Connect to the selected CAE simulator
- The CAE simulator will show up within 10-30 seconds on the right side panel
- After adding the simulator using the + icon, you can add the simulator to the desired room, using the Rooms tab.
Connecting CAE simulators using a wired connection
- When a simulator is connected to LearningSpace using an Ethernet connection and is turned ON
- It is listed in the Simulators panel of the tab within 10-30 seconds.
- Click the desired icon in the Controls column to add or remove the simulator.
- To add the simulator to the desired room, use the Rooms tab.
| Note |
|---|
A Wireless Bridge is necessary for setting up a correct connection. Exception: ONE appliances, UltraPortable units, where a dedicated Ethernet port is available on the device (See above). |
| Warning |
|---|
If connected directly to a network (without using a Wireless Bridge), the simulator will not be detected and the setup will not function as intended. |
Connecting third-party (non-CAE) simulators
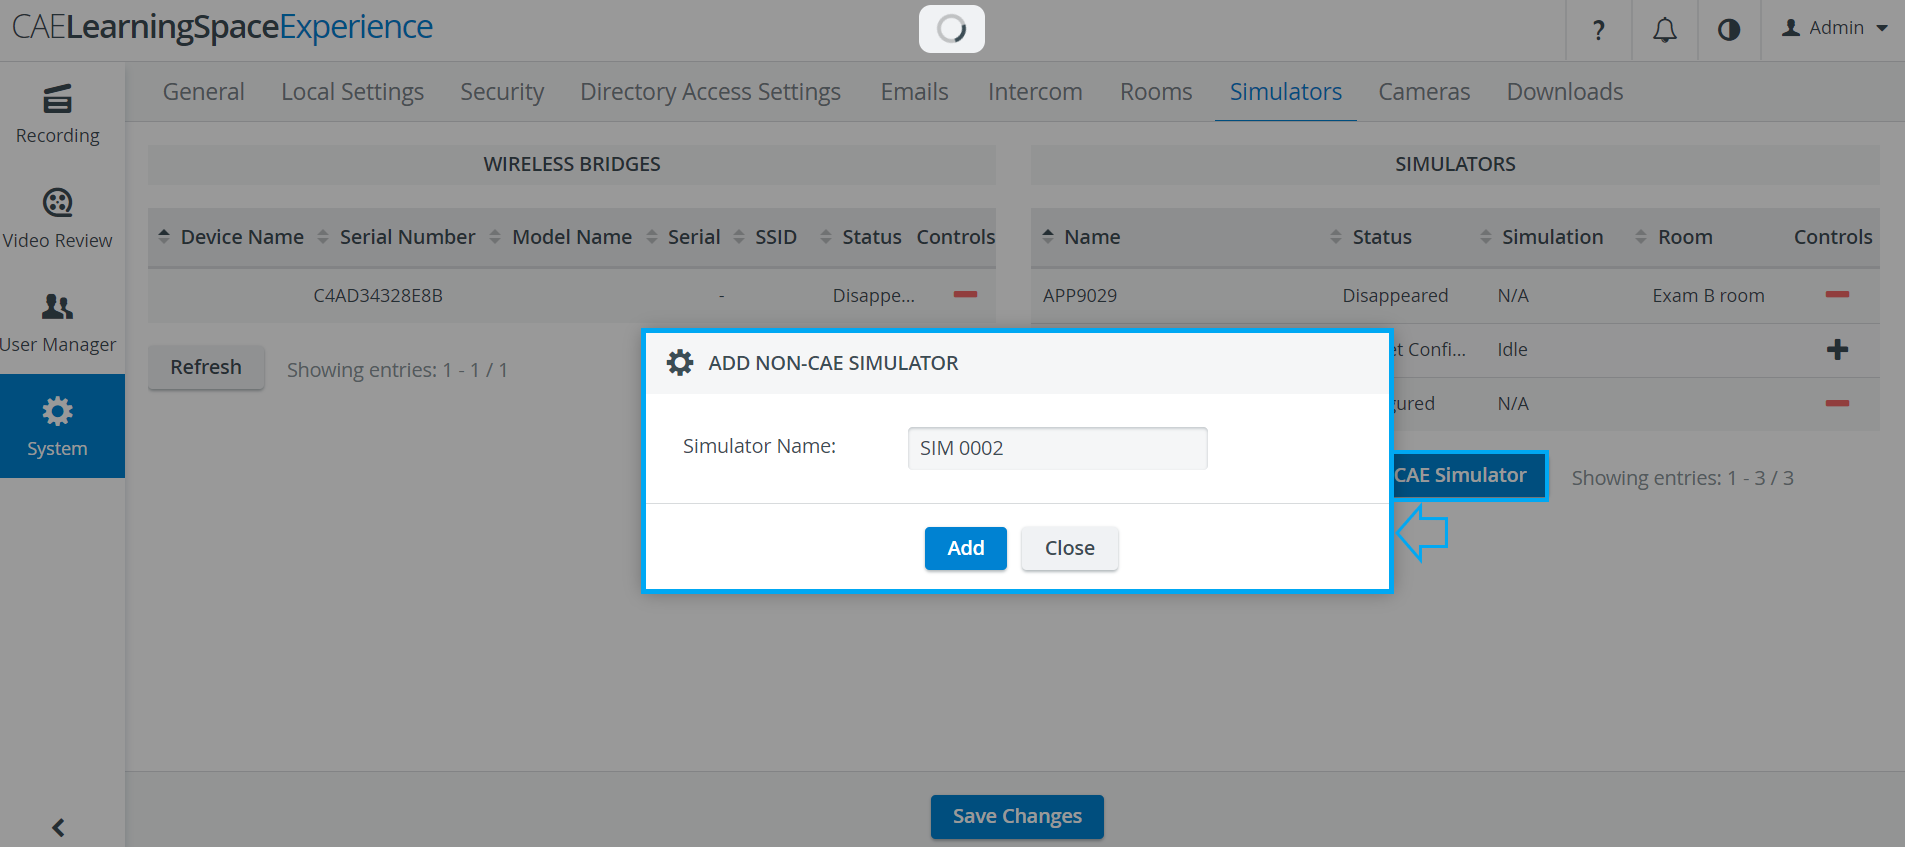
- Third-party (non-CAE) simulators are captured using display capture technology
- Take the video output of the waveform display of the third-party simulator (it can be VGA, DVI, HDMI)
- Run a video cable to the input of the device and convert the connector if required (e.g. VGA to DVI adapter):
- UltraPortable: DVI input of the USB FrameGrabber
- ONE appliance: DVI input of the ONE appliance
- Server appliance: DVI input of the USB FrameGrabber of the CAE-DCU
You have to locate the DCU on the Cameras tab, and add it to a room on the Rooms tab.
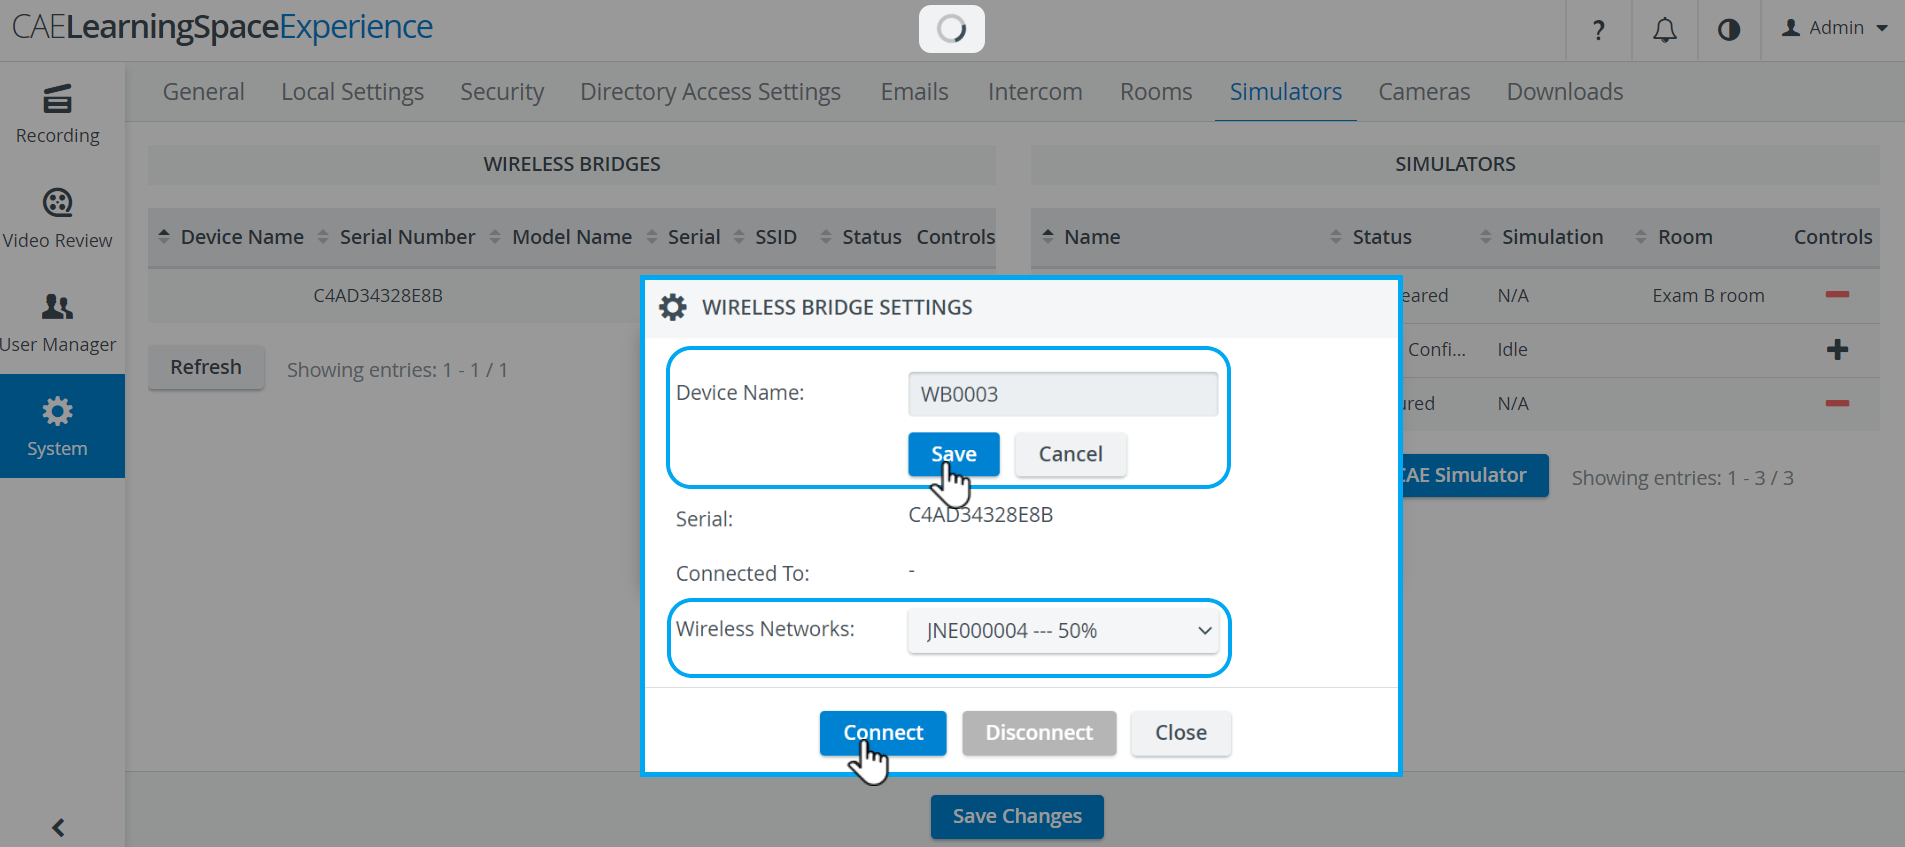
How to name and/or connect Wireless Bridges
The Wireless Bridge Settings pop-up can be opened via the Controls cogwheel ![]() .
.
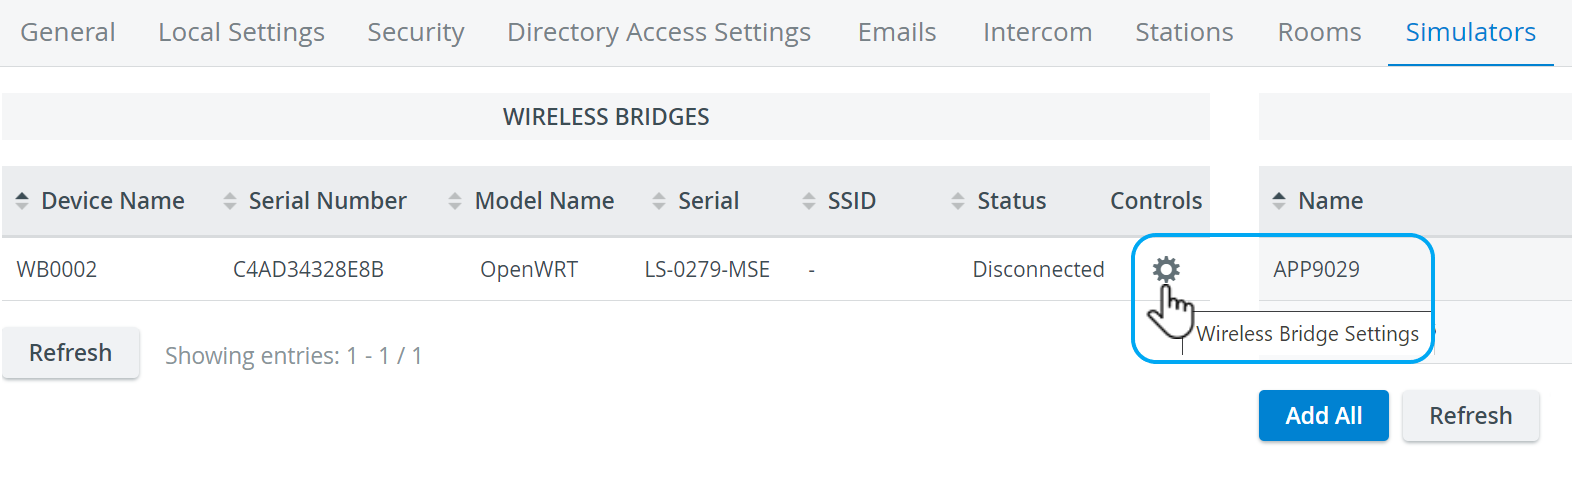
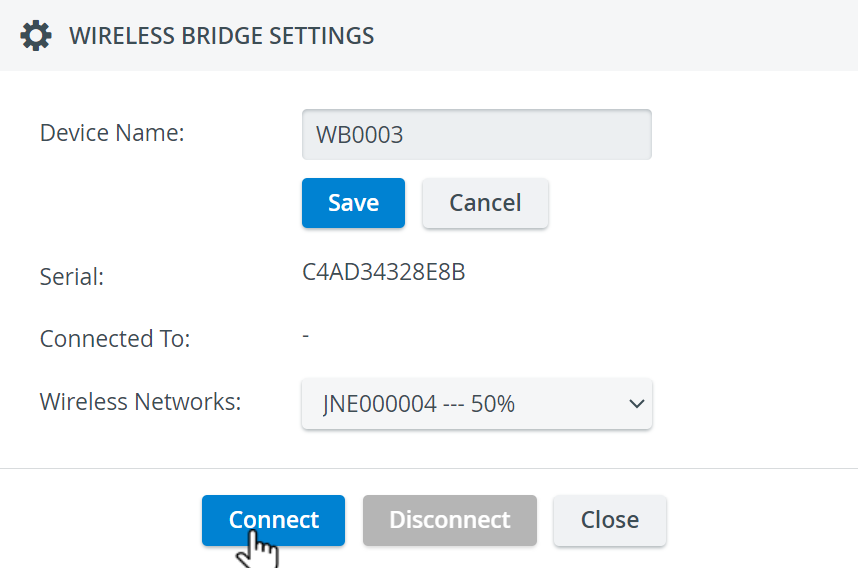
Here, Device Name can be added to wireless bridges for easier detection and distinction, and they can be connected to available wireless networks as well.
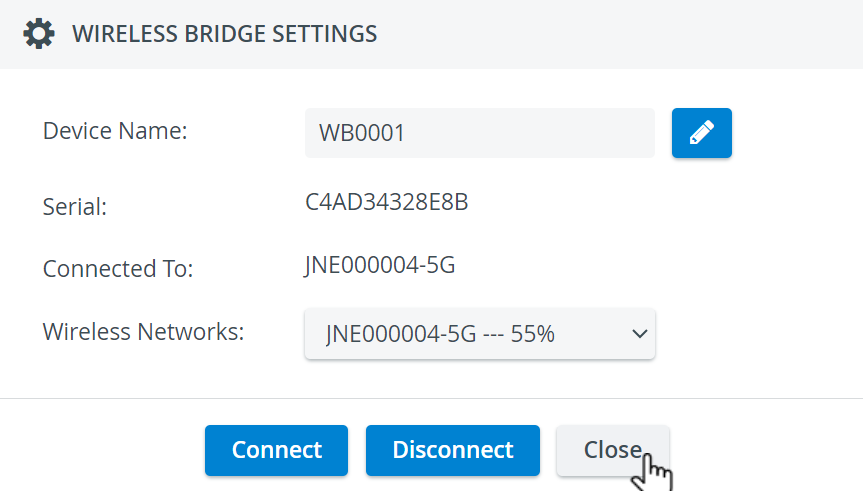
| Note |
|---|
The Device Name field becomes editable by pressing the blue pencil icon |
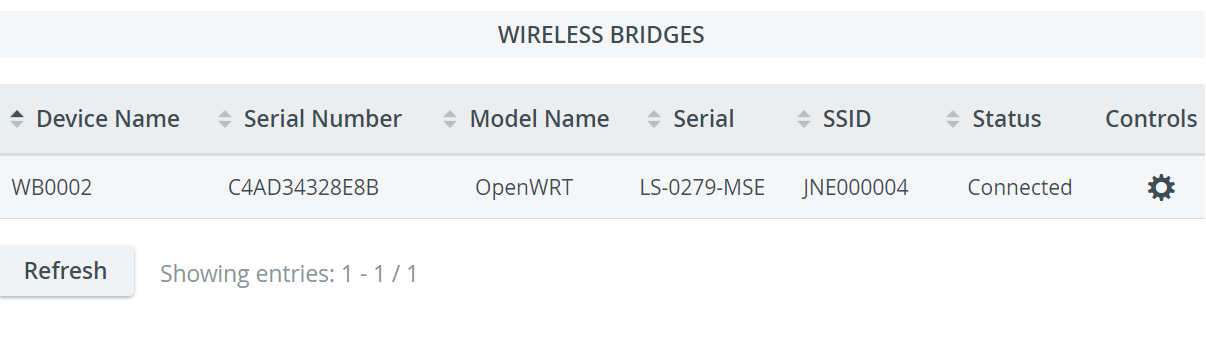
By pressing Connect, the bridge connects to the selected wireless network:
| Note |
|---|
IMPORTANT: Pressing Connect will not save modified Device name (if Save is not pressed prior to that). |
- Modifying Device name → Pressing Save → Pressing Close → Device name gets modified
- Modifying Network → Pressing Connect/Disconnect → Pop-up gets closed and action is performed
- Pressing Close without Save or Connect → no changes are performed
| Tip |
|---|
For more information visit the related System Module pages. |
Overview
Content Tools