Page History
| Warning |
|---|
If your layout is different in your Single Room View, you probably have the Legacy version. For the user guide of Legacy pages please go here. |
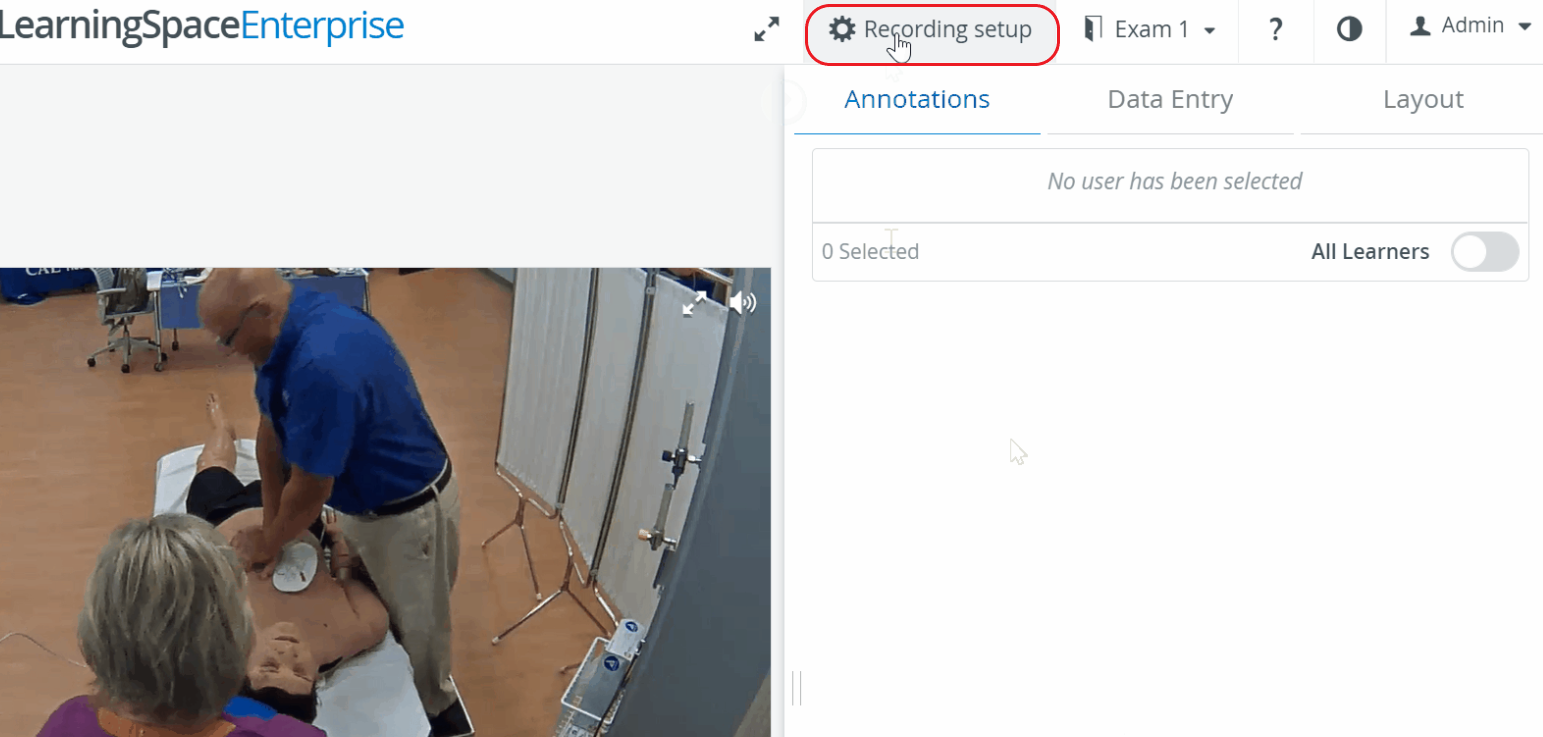
- Access the Video review screen for the desired video.
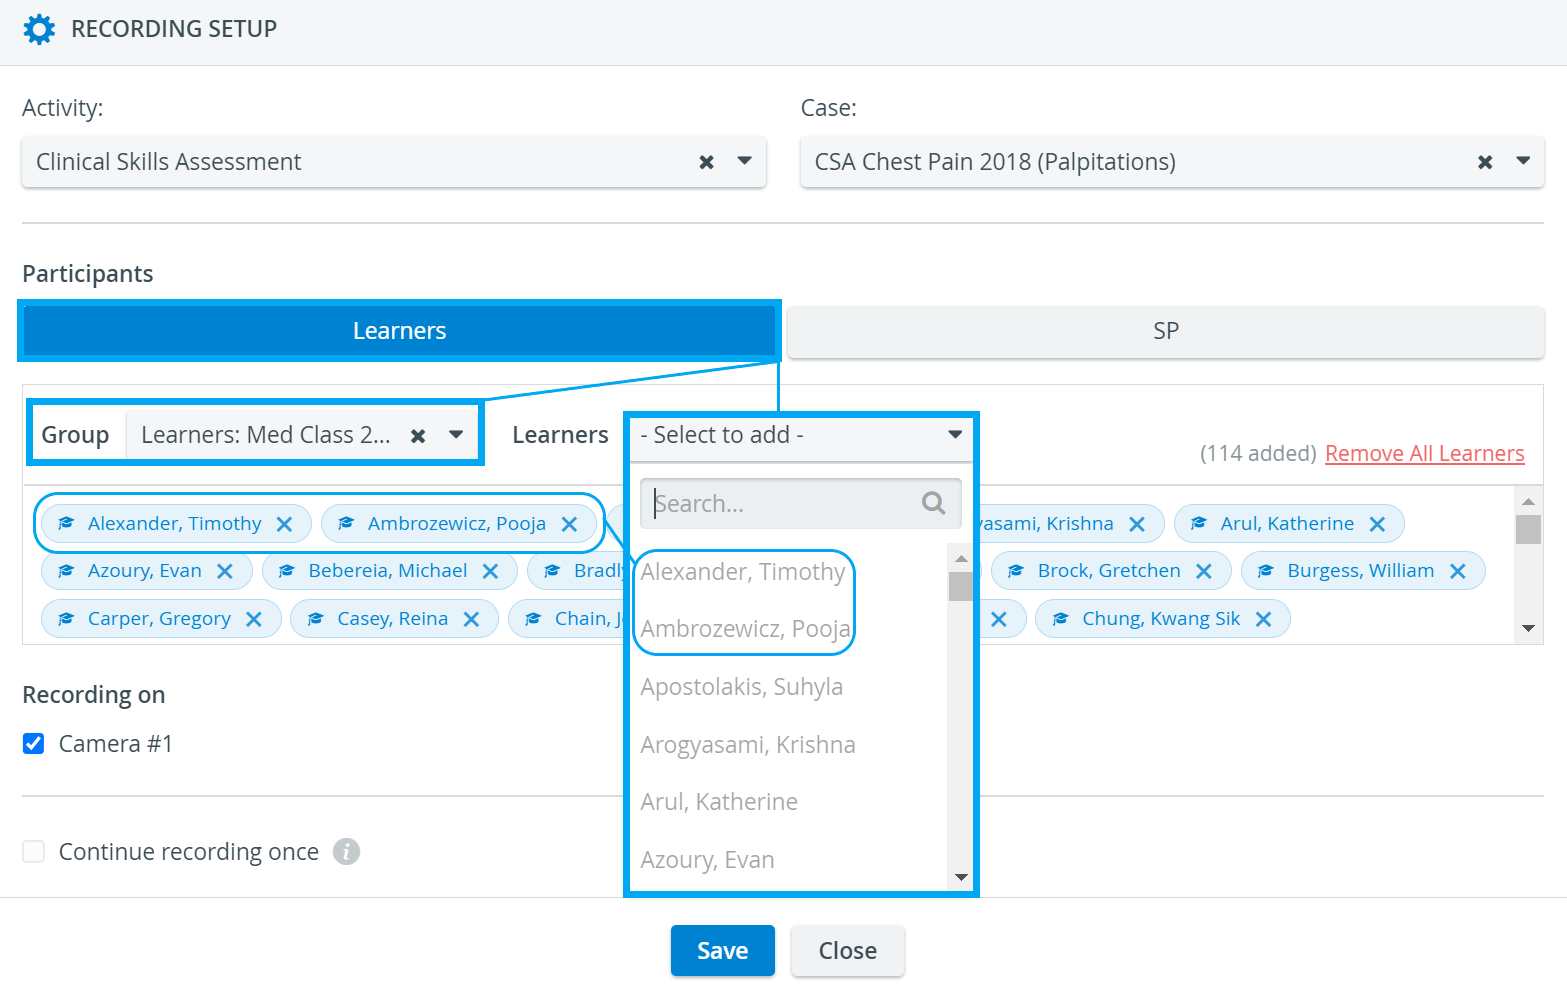
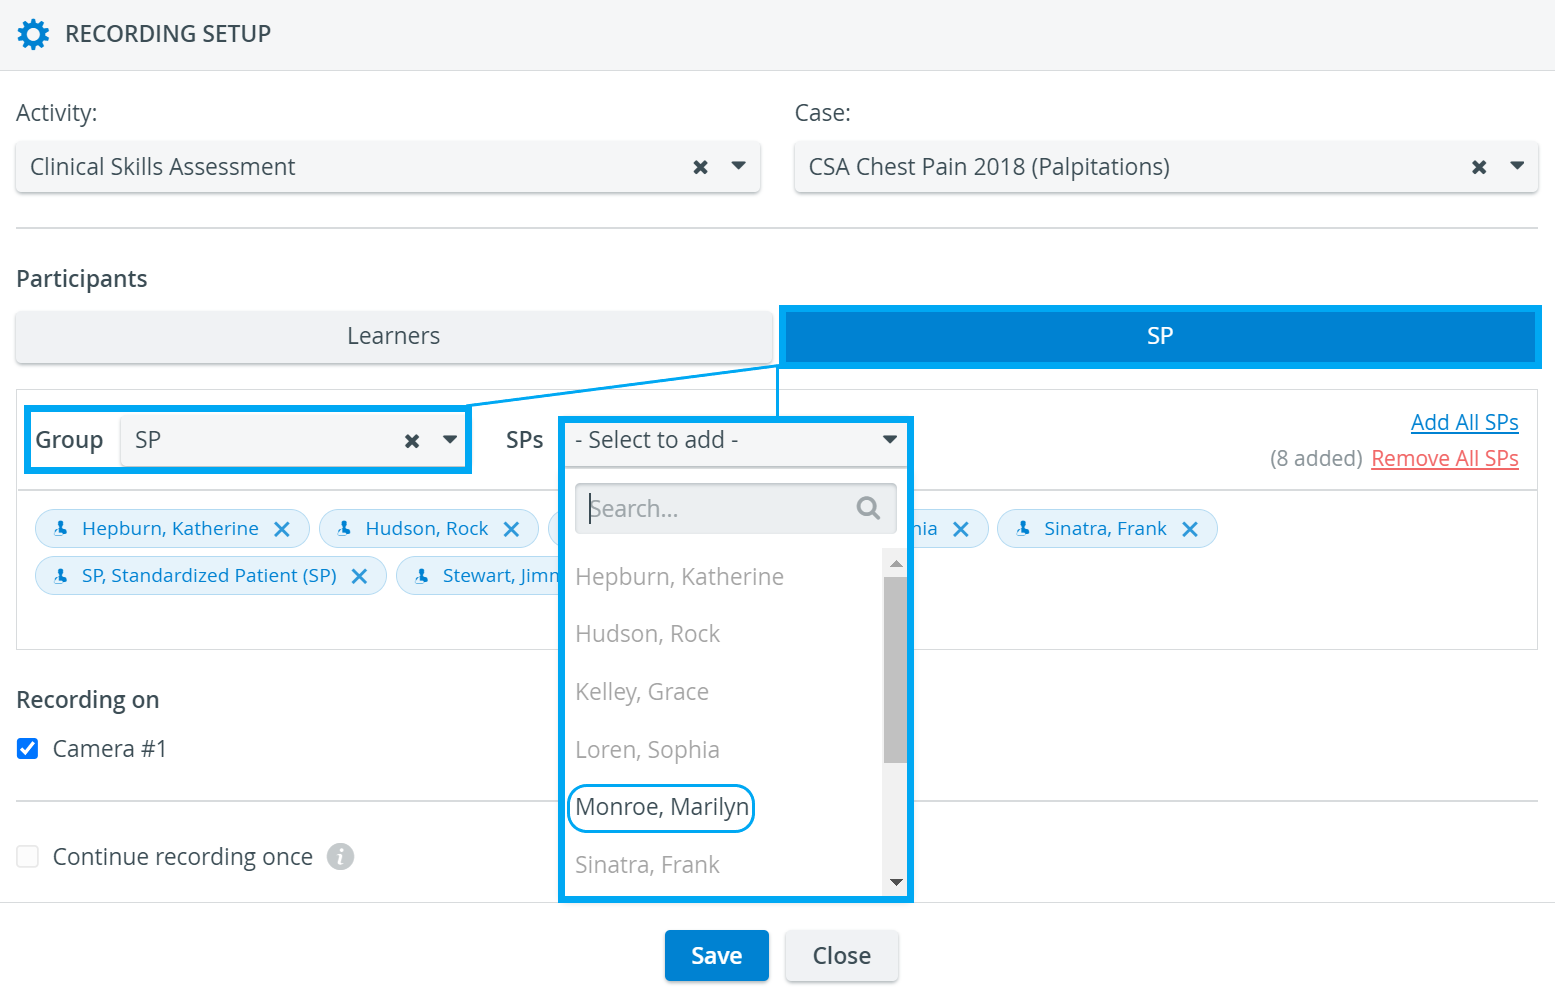
The Recording Setup pop-up appears on the right upper side of the recording window.
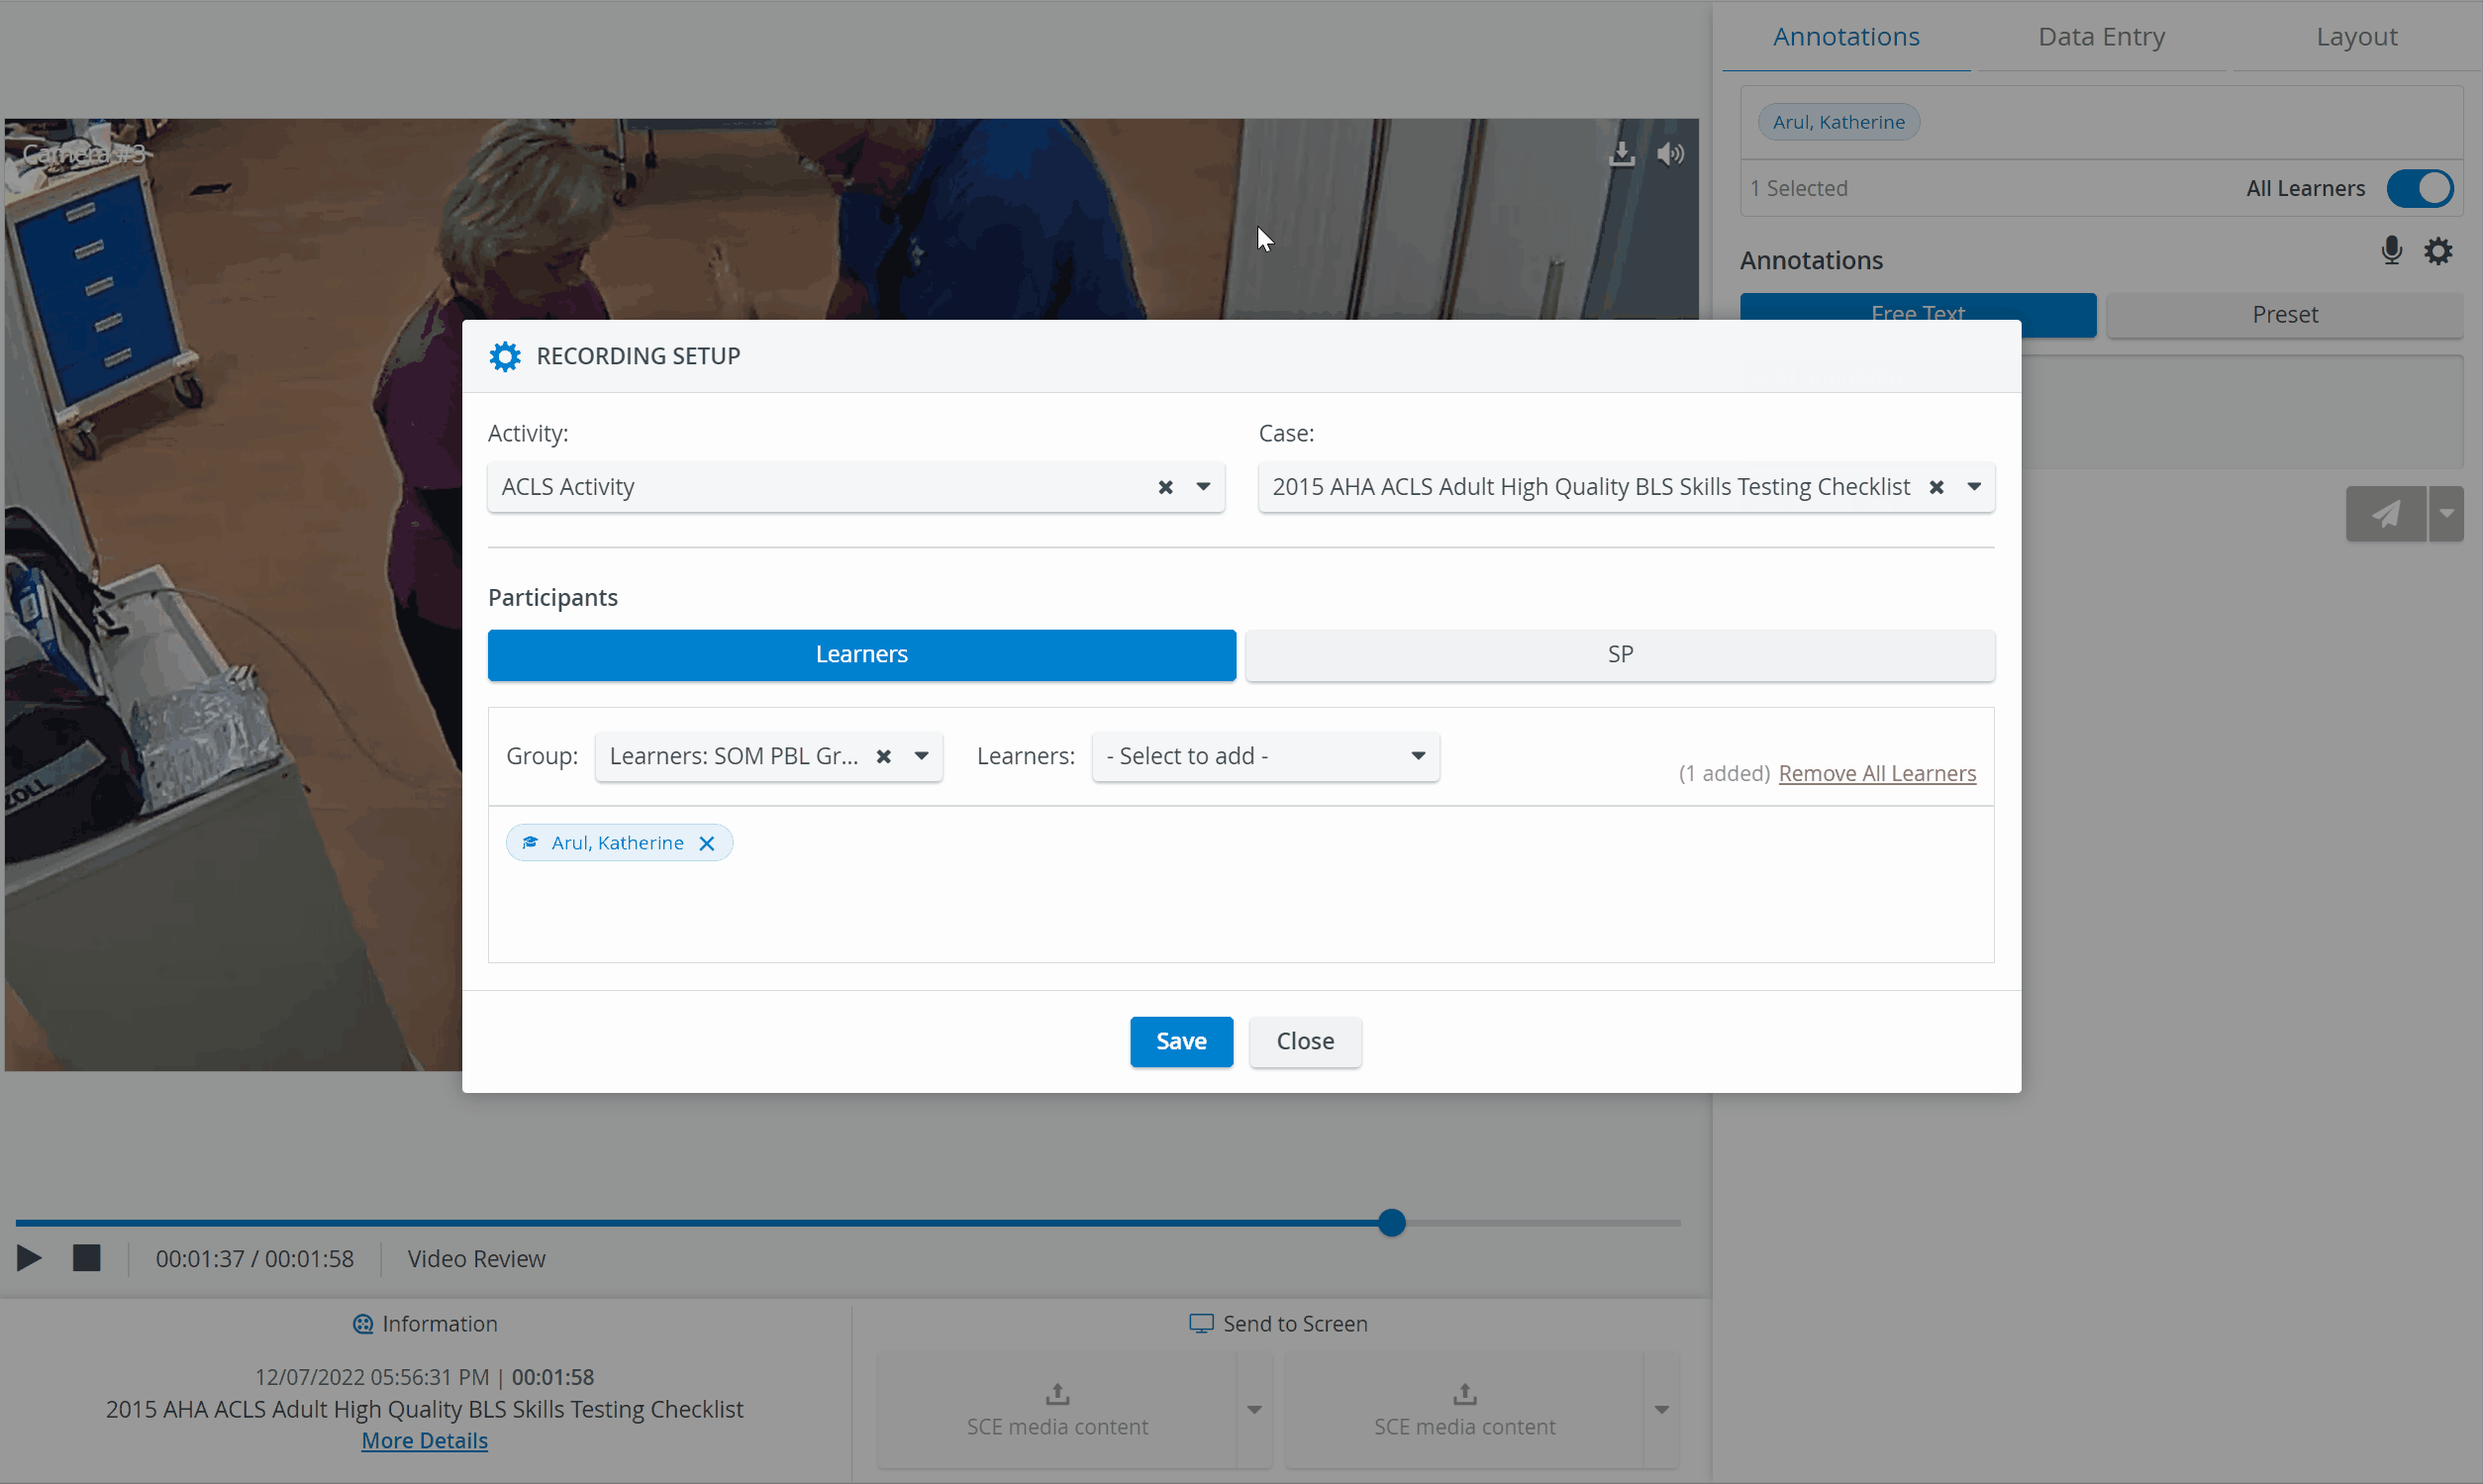
In this pop-up, you can select Activity, Case and Participants (groups and individual users) for the recording, from the respective dropdowns:
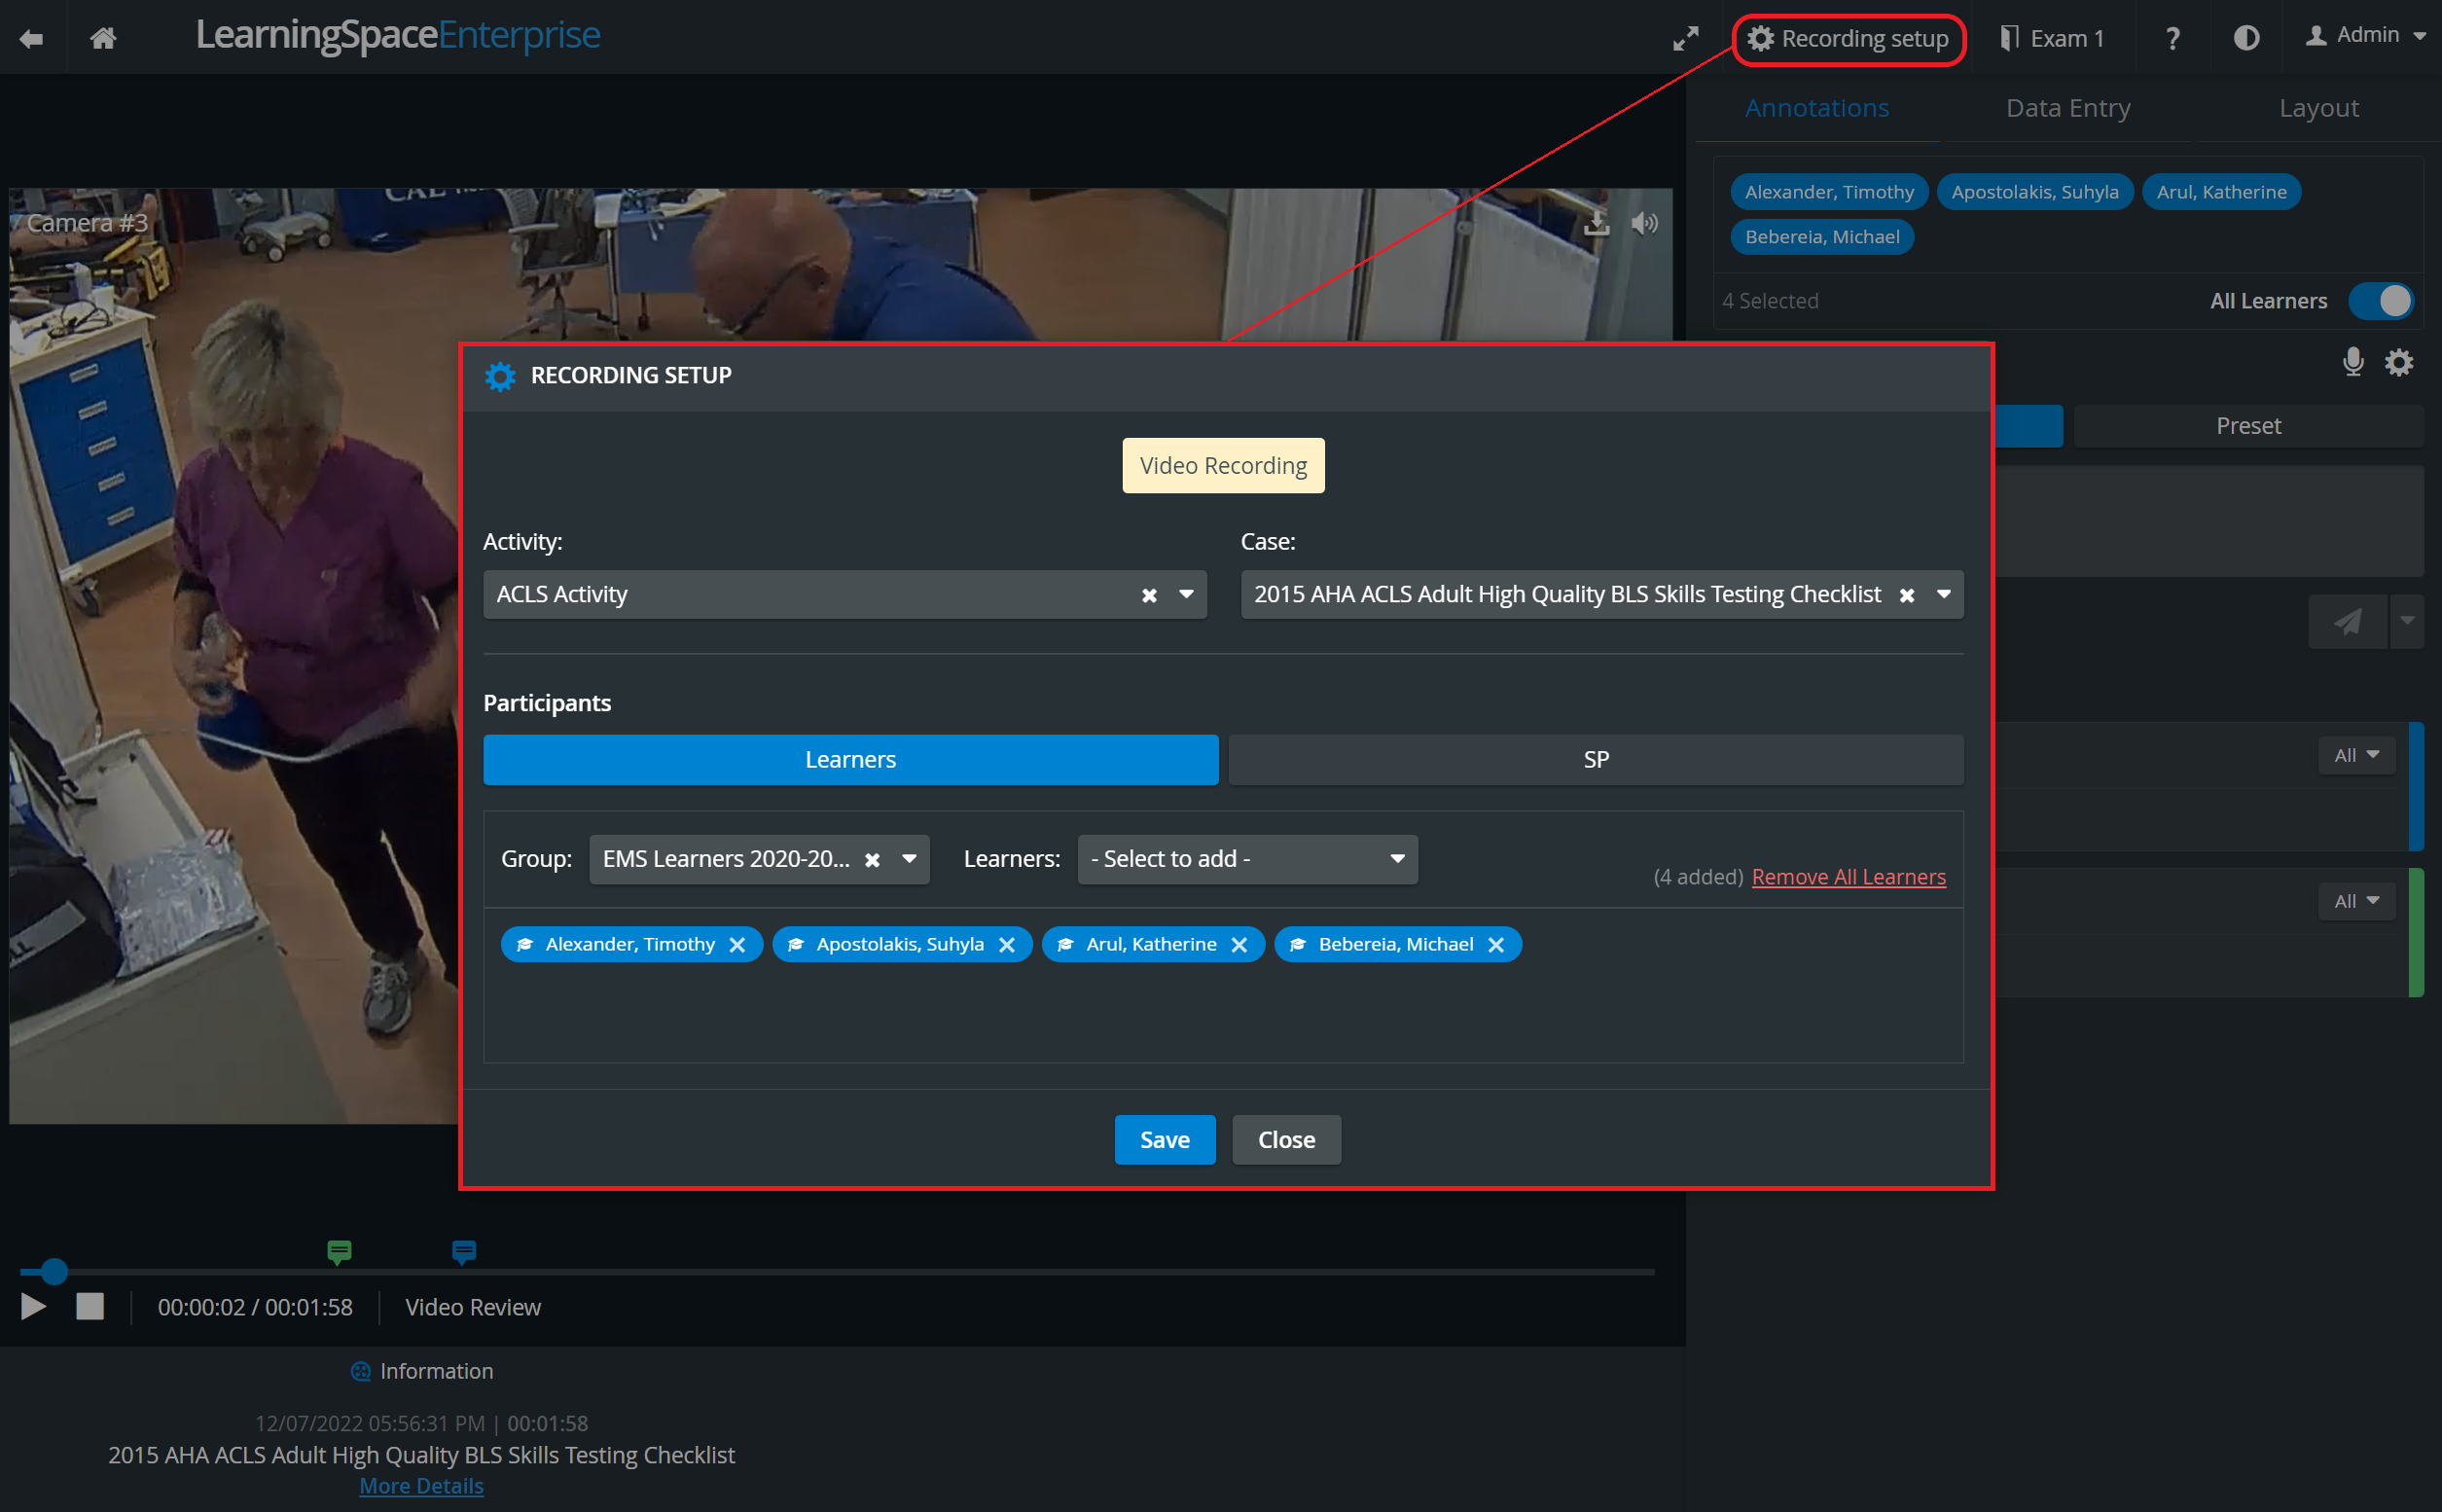
2. Select an Activity from the Activity drop-down menu to change the Activity associated with the video.
3. To set the Case the video is associated with, use the Case drop-down menu.
4. Select from the Group drop-down menu to change the Group associated with the video.
5. To choose learners and SPs associated with the video, use the Learner and SP drop-down menus respectively.
The name of each participant selected appears in a blue box at the bottom of the Recording Setup panel.
| Note | ||
|---|---|---|
| ||
|
| Info |
|---|
Selected participants show up as 'disabled' (greyed out) in the Learners/SPs dropdowns. |
| Info | ||
|---|---|---|
| ||
Participants who have not been selected, are active in the dropdown and thus can be selected. |
| Tip |
|---|
| Delete any participant previously assigned to the video by clicking the X mark in their name field. |
| Info |
|---|
For more information, visit our Video Review pages. |
Overview
Content Tools