The Cameras tab contains the list of available cameras. Here you can manage the cameras and audio devices detected by your CAE LearningSpace system.
If a device is detected you can add it to Learning Space by clicking on the plus sign ![]() . With the Add All button, all devices can be added to the system at once.
. With the Add All button, all devices can be added to the system at once.
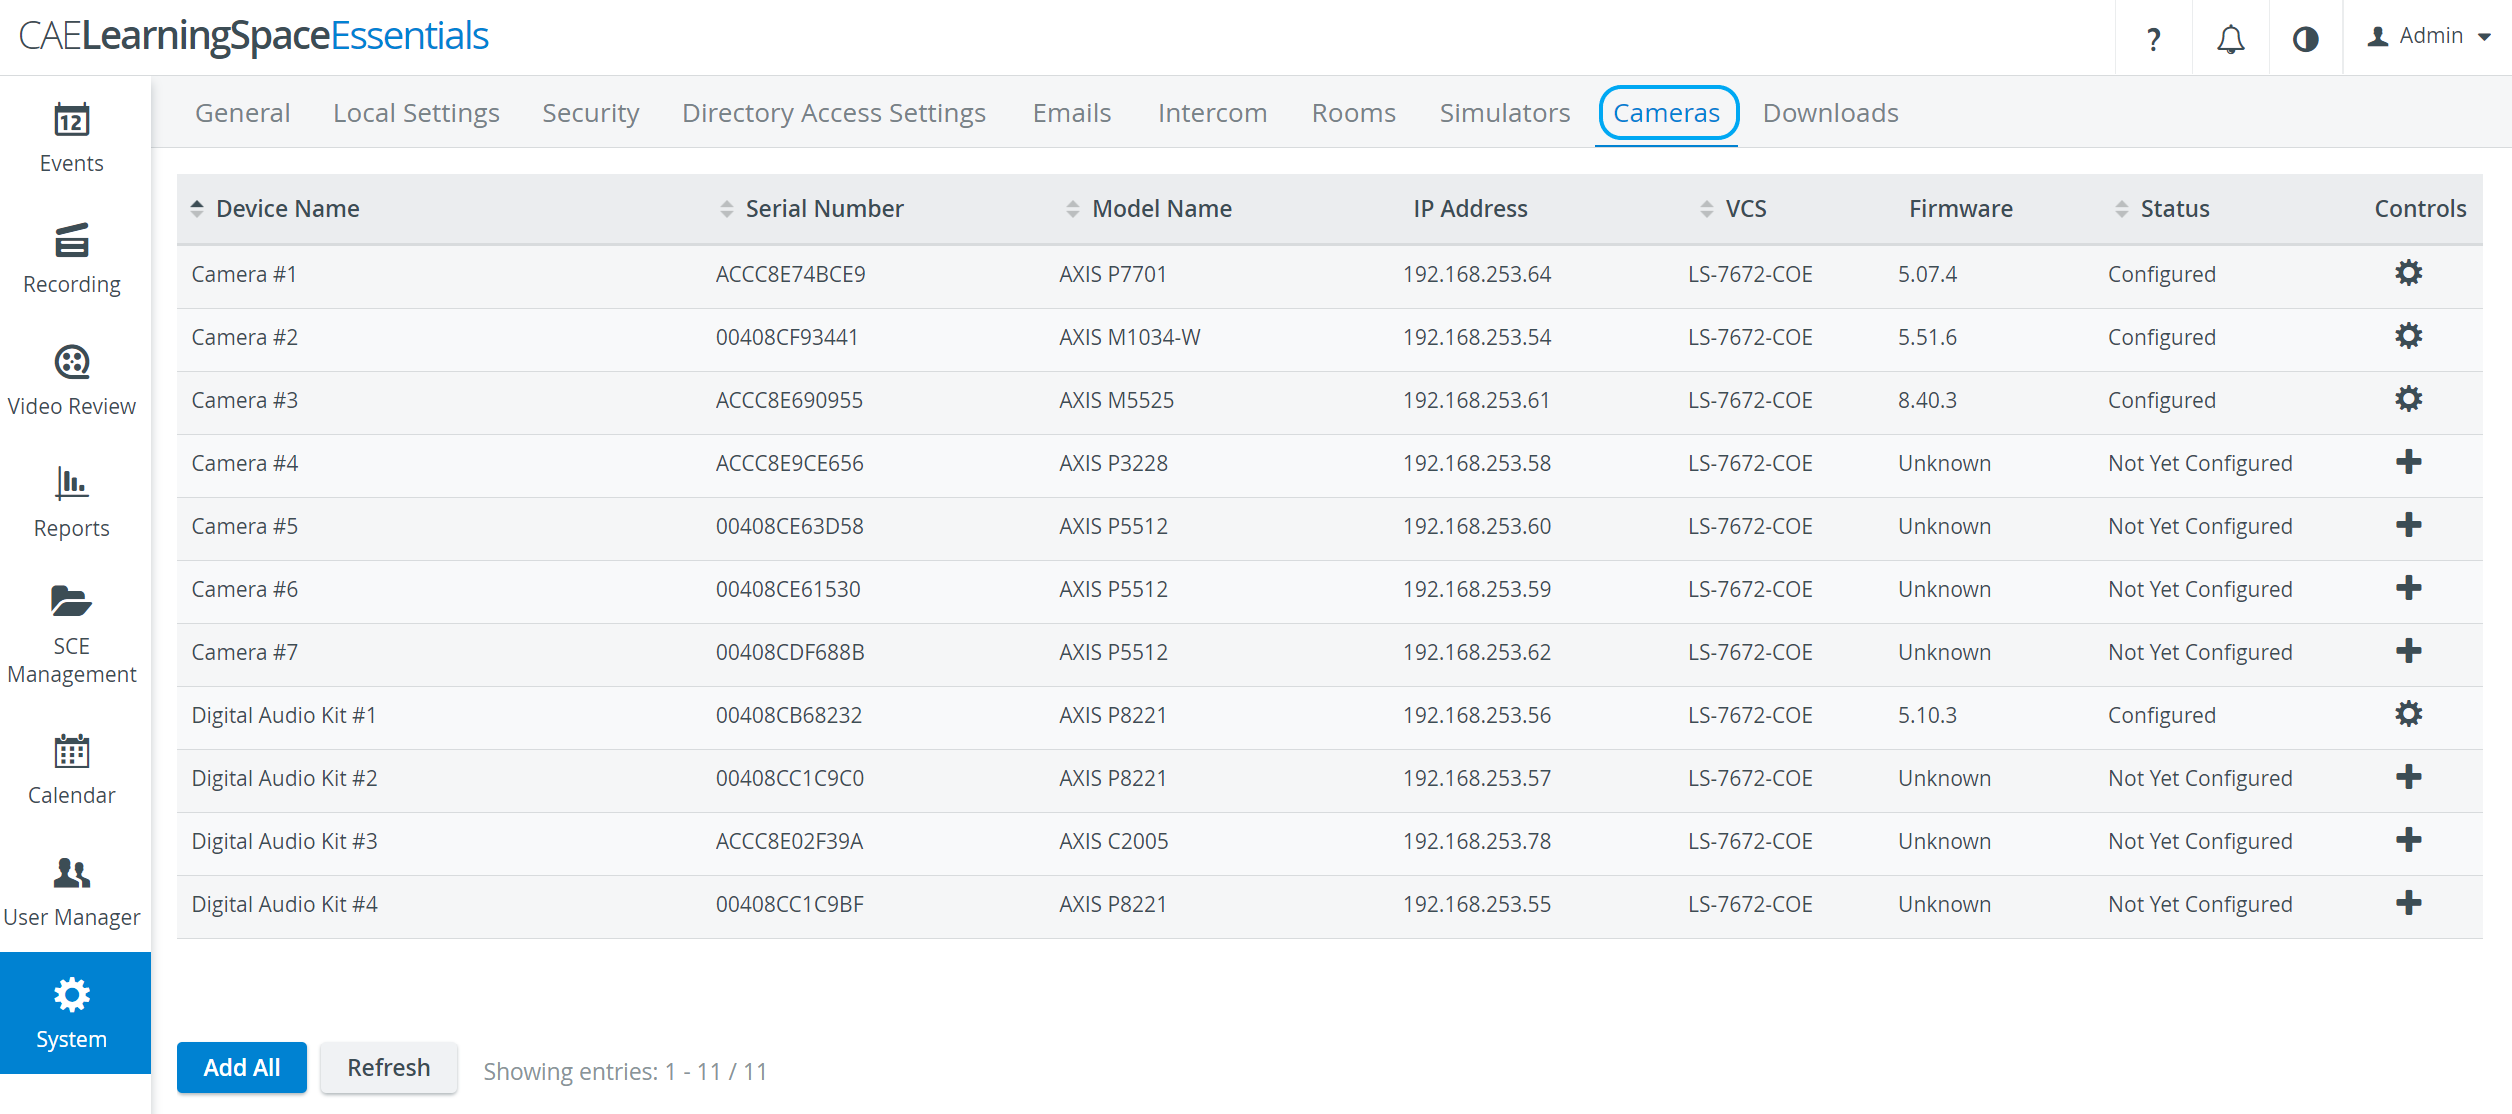
Once devices have been added, the plus sign ![]() will turn into a cogwheel icon
will turn into a cogwheel icon ![]() .
.
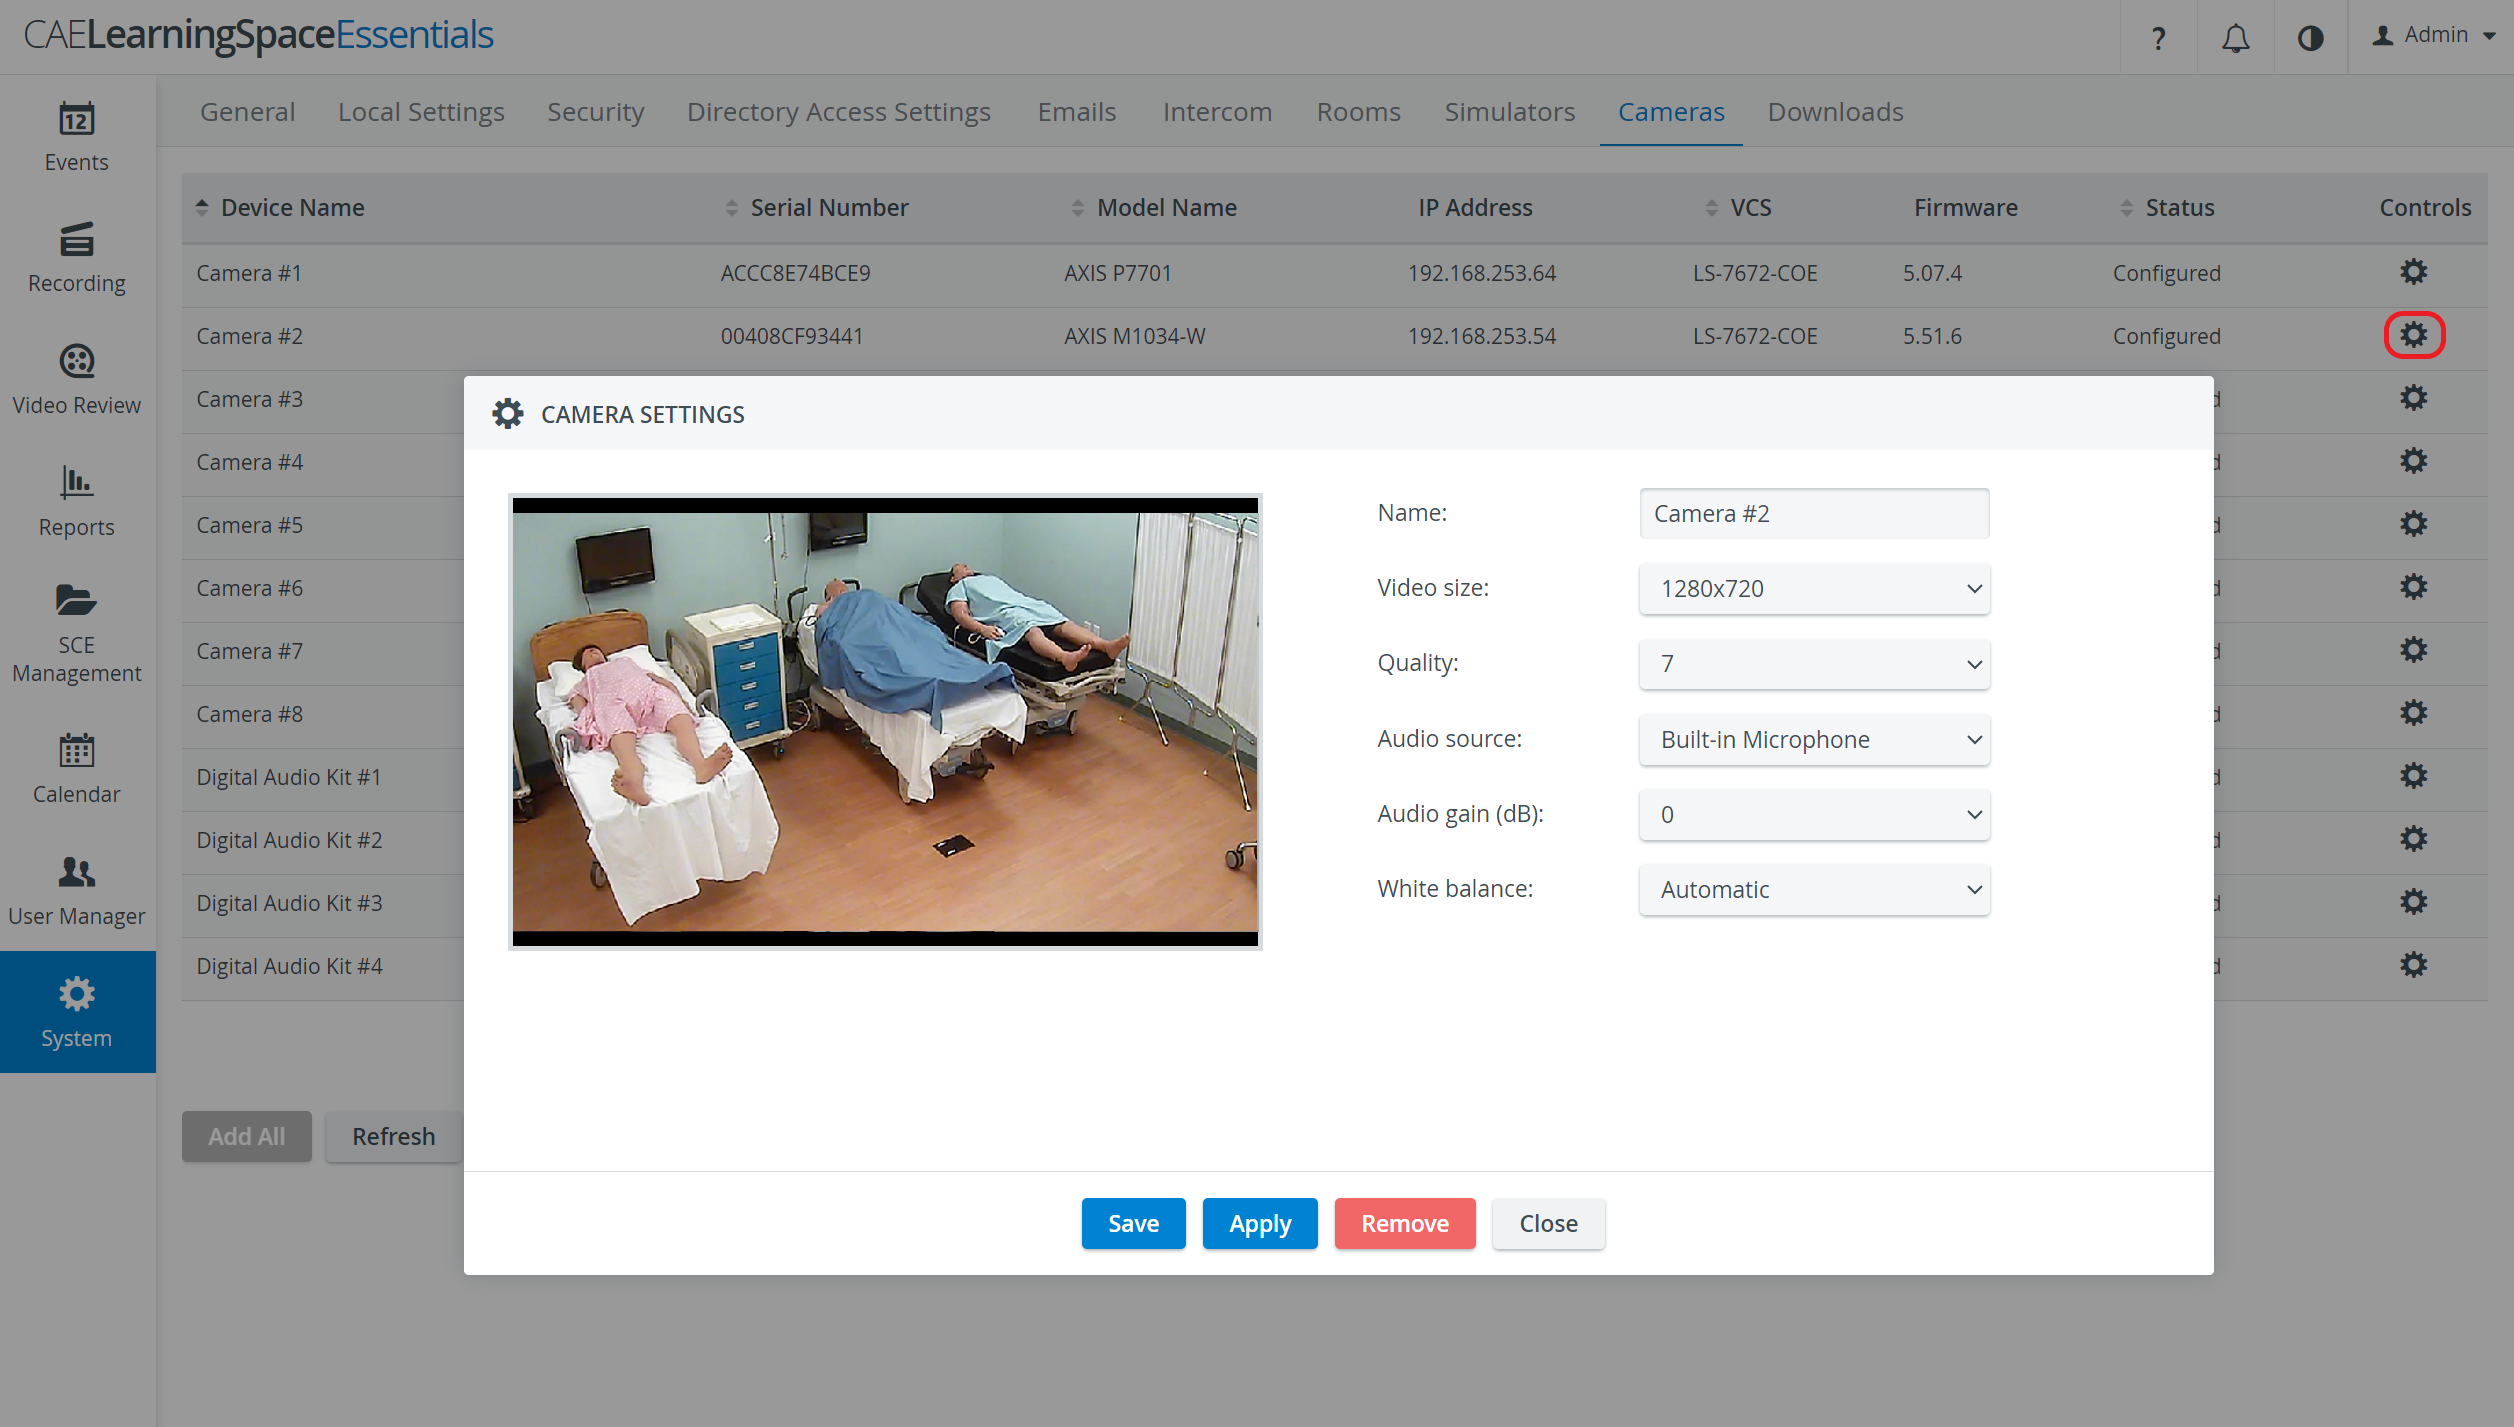
You can configure a camera by clicking on the cogwheel and opening the Camera Settings window.
- Camera controls: on the left you can see a live feed of the currently selected camera, you can change the cameras position by clicking on the screen
- Camera zoom: you can change the cameras zoom by hovering the mouse in the camera feed and rolling the scroll wheel
For more details on connecting cameras, see How can a camera be connected to the system?
The cogwheel in each row of a configured camera prompts the Camera Settings window to open, where the following settings can be specified: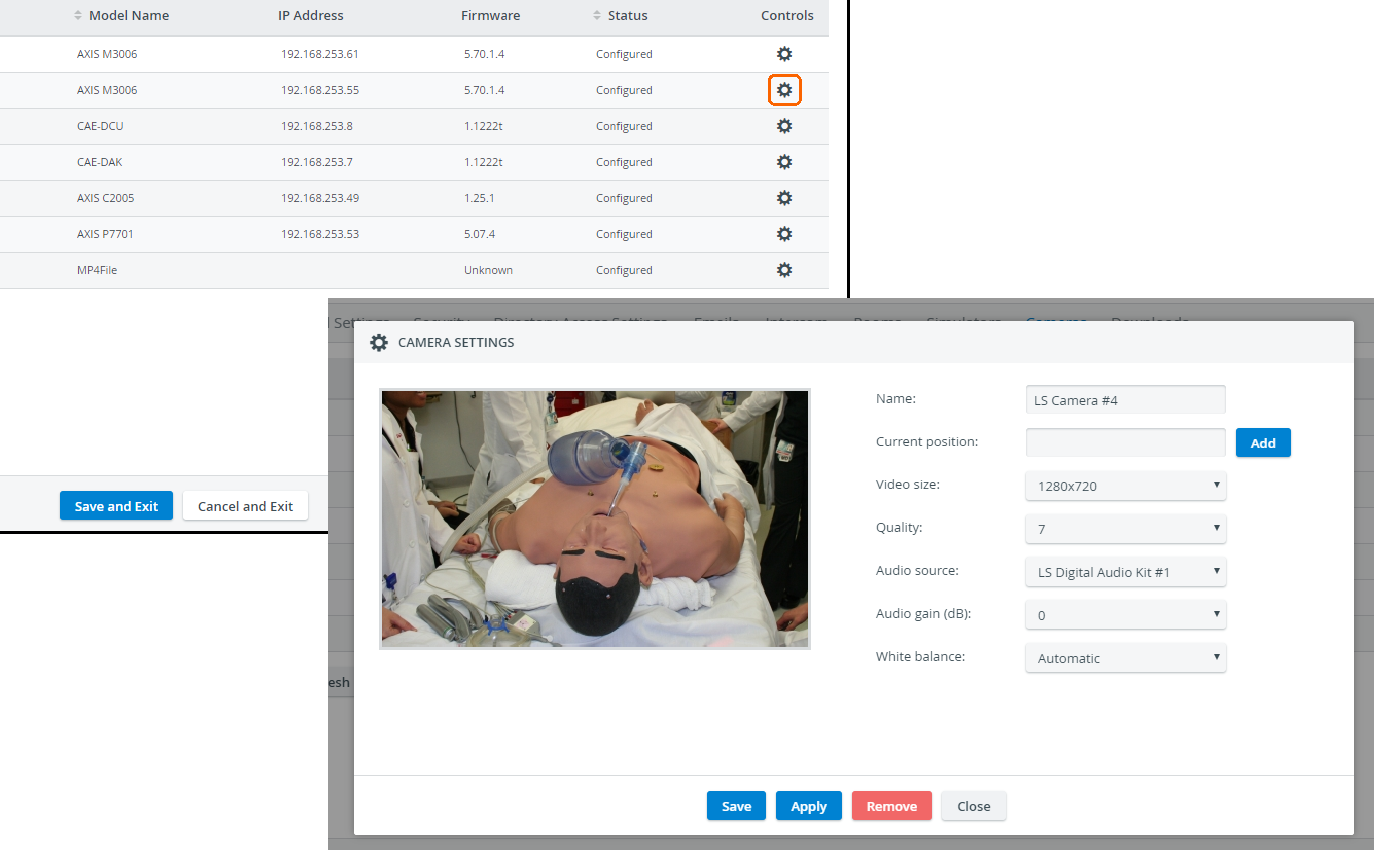
- Name - camera name for distinction
- Autofocus - only for PTZ cameras: when checked, the focus is set automatically when using pant-tilt-zoom
- Current position - only for PTZ cameras: a preset position that can be saved by typing in a title then clicking the Add button
Once a new position is added, the 'Available positions' drop-down appears with a Go to and a Remove button, activating or deleting the selected position respectively.  How to Save a Camera Position in System
- Video size - video resolution supported by the camera and LearningSpace
The recommended video size (aspect ratio) is 16:9 (e.g. 1280x720).
The sizing of camera streams might not be optimal with a 4:3 video size (an additional black bar/stripe might be visible at the upper and lower edges of the screen).
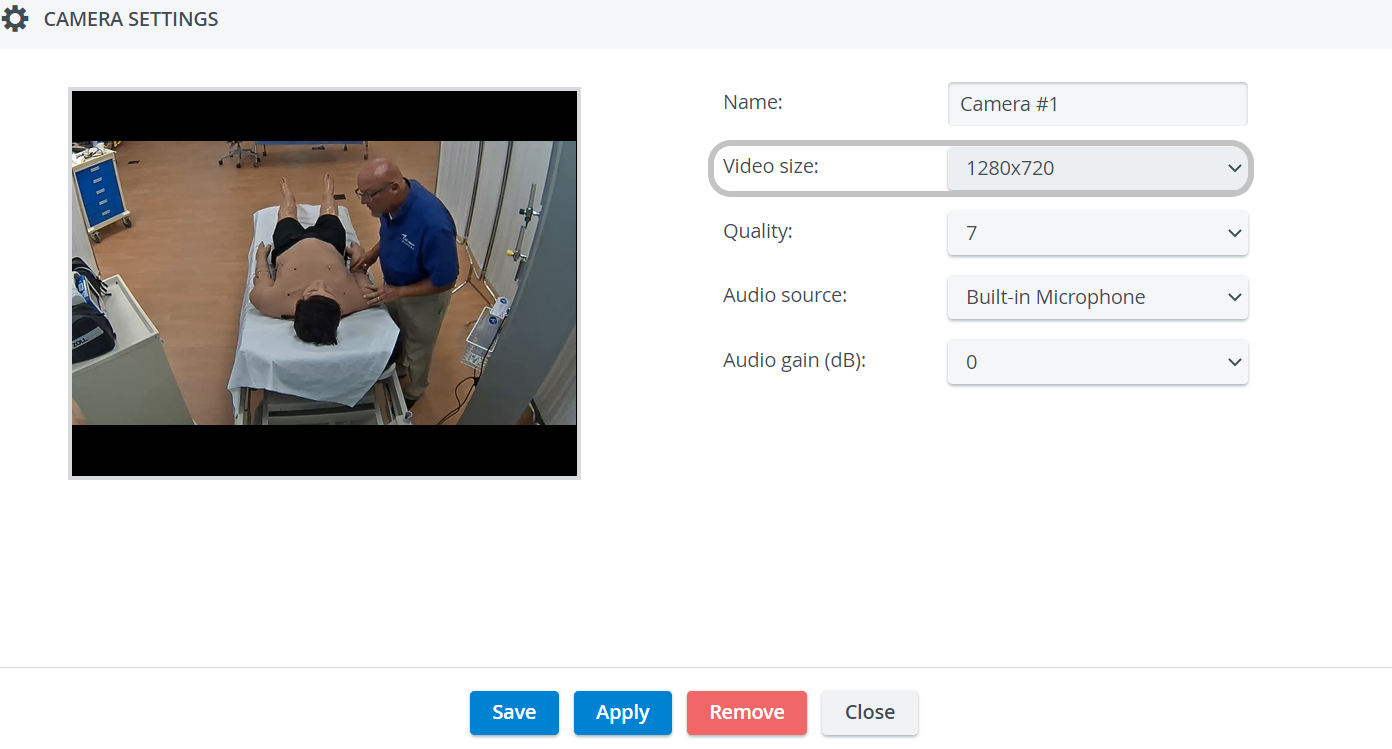
- Quality - the quality of the camera image on a 10 scale (the lower the worse is the camera image but the smaller is the recording size)
- Audio source - source of audio for the camera feed. If available, built-in microphone will be the default audio source.
For cameras without built-in audio, one of the external audio sources has to be selected from the Audio source drop-down, in order the camera to be able to be assigned to a room within LearningSpace.
In case the "use without audio" option is selected, you can assign the camera to a room but the videos will be recorded without audio, which means that in this case audio track will not be recorded.

- Audio gain (dB) - volume setting for the audio source (built-in mic or selected source): you can change the volume of the audio by increasing or lowering the audio gain
- White balance - adjustment of the intensity of white color in the camera feed: how should the camera handle light exposure (change the image if it is too bright or too dark)
Normally, the 'Automatic' setting is optimal, it should only be changed under special circumstances.
- Upside down - for ceiling-mounted PTZ camera types, checking this setting allows for switching the original (ceiling) perspective: it flips the camera image by 180 degrees.
Speaker Settings 
The cogwheel in each row of a configured speaker (Digital Audio Kit, DAK) prompts the Camera Settings window to open, where the following settings can be specified:

- Name - Speaker name for distinction
- Audio gain (dB) - controls the sensibility of the integrated microphone of the speaker
- Speaker gain (dB) - controls the speaker output volume
For further information, visit our System Module and System - FAQ pages.
Overview
Content Tools