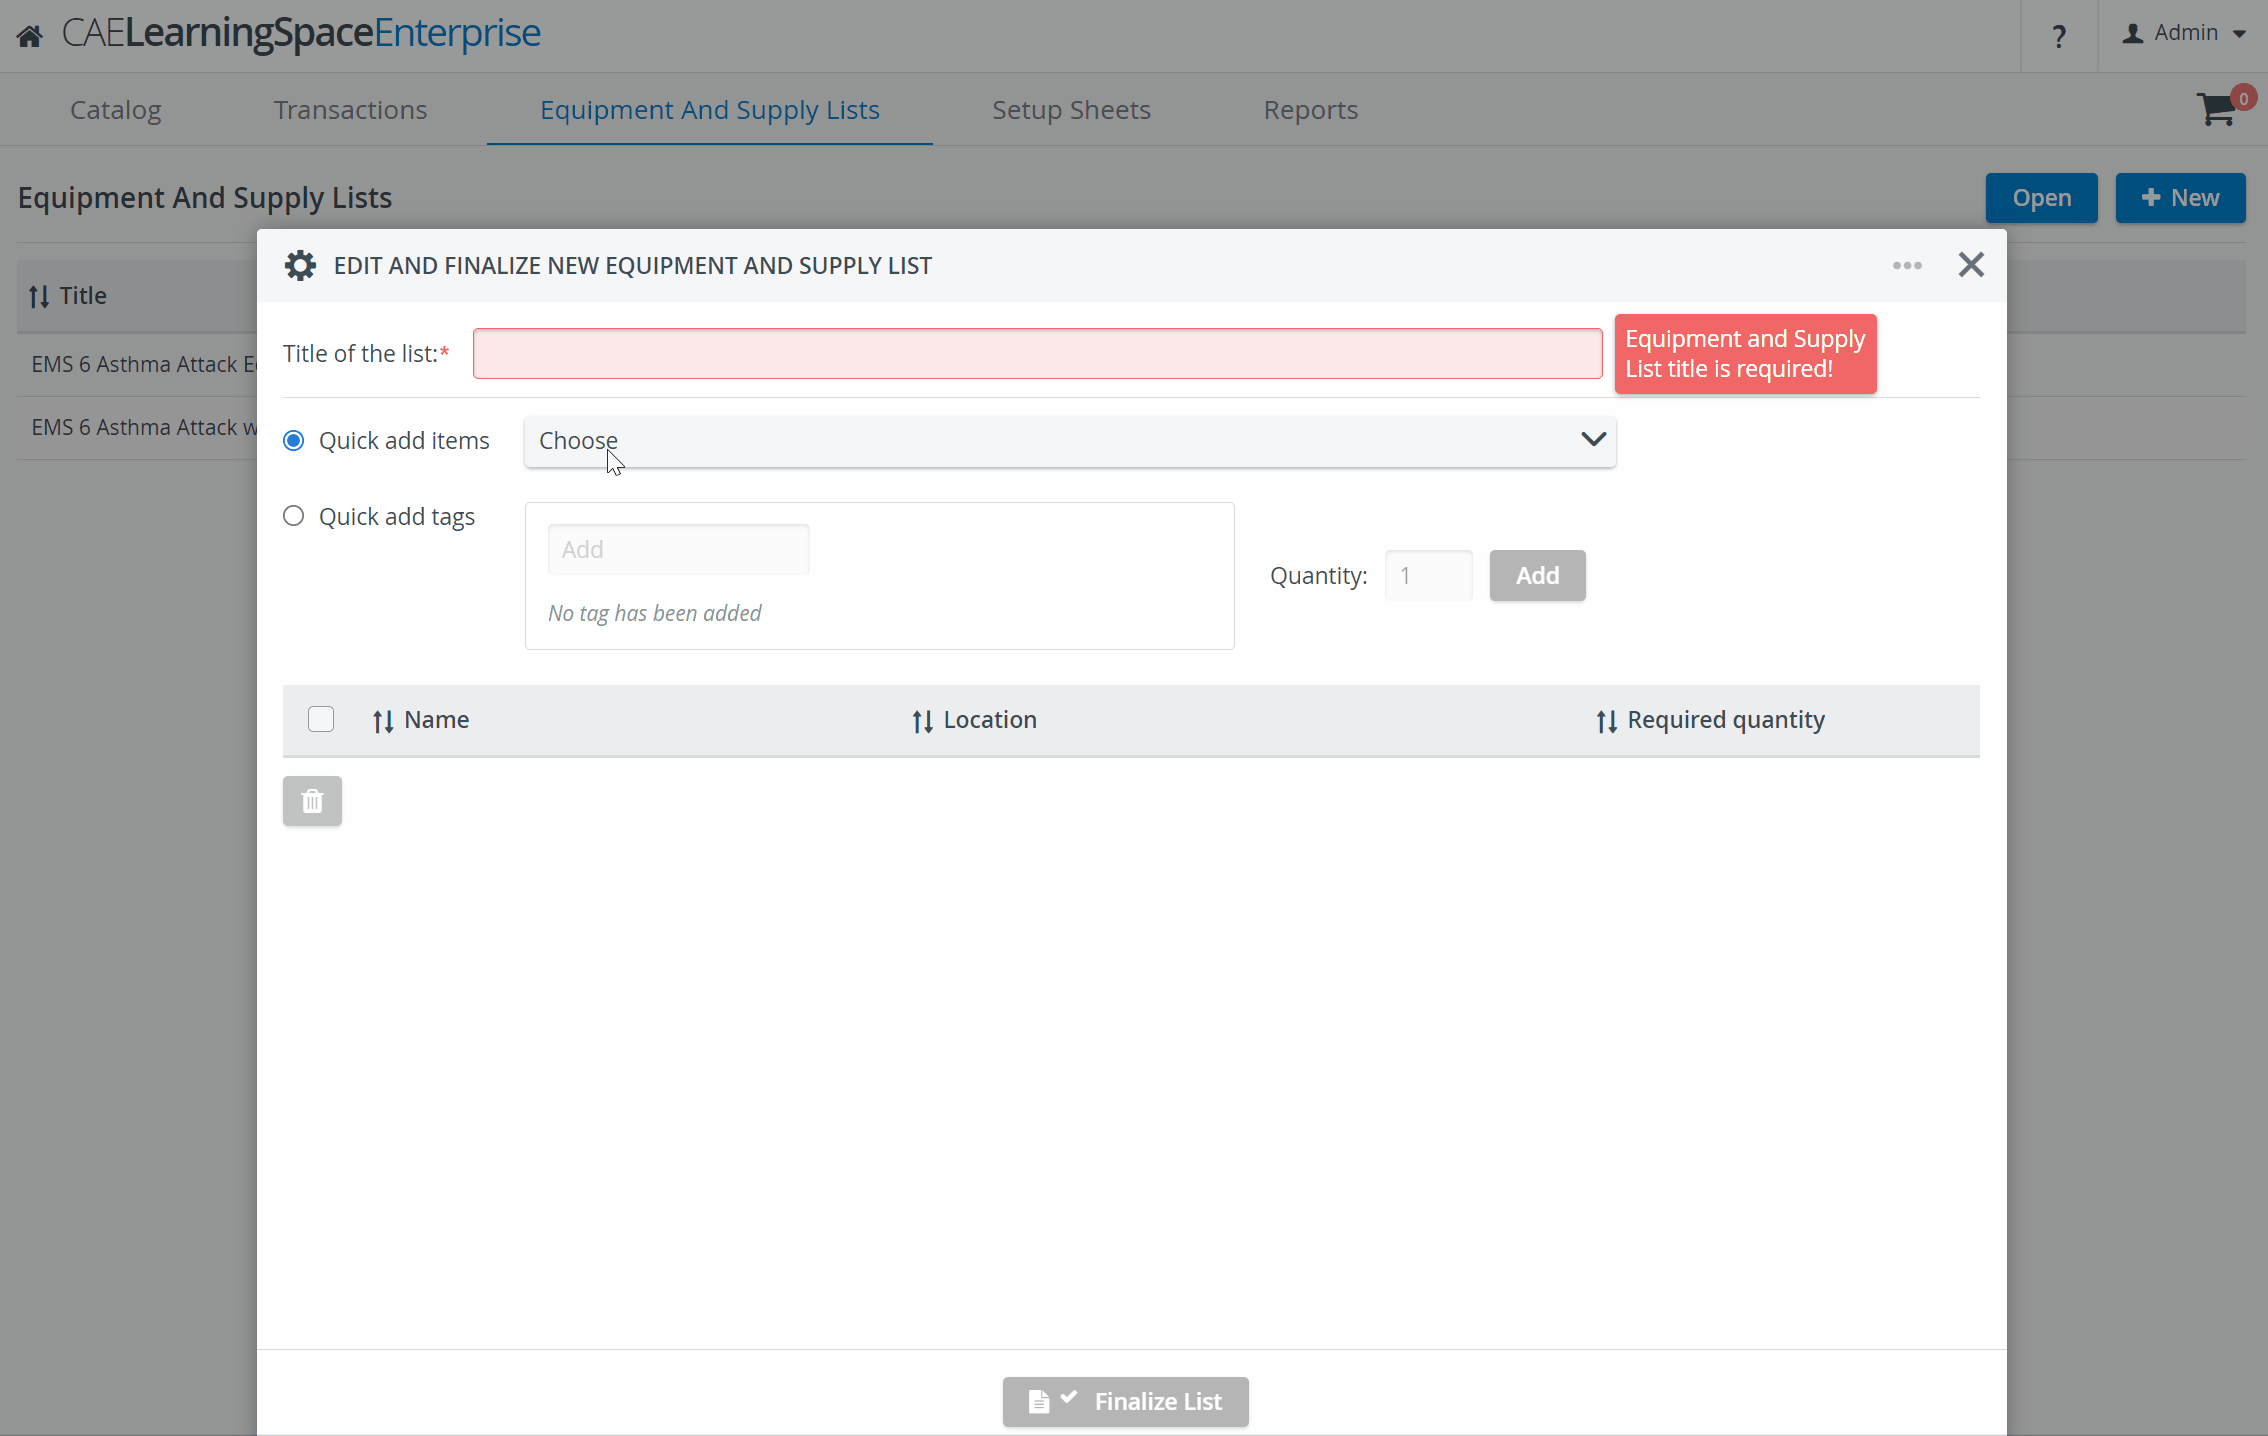
- Go to the Equipment and Supply List tab inside the Inventory module.
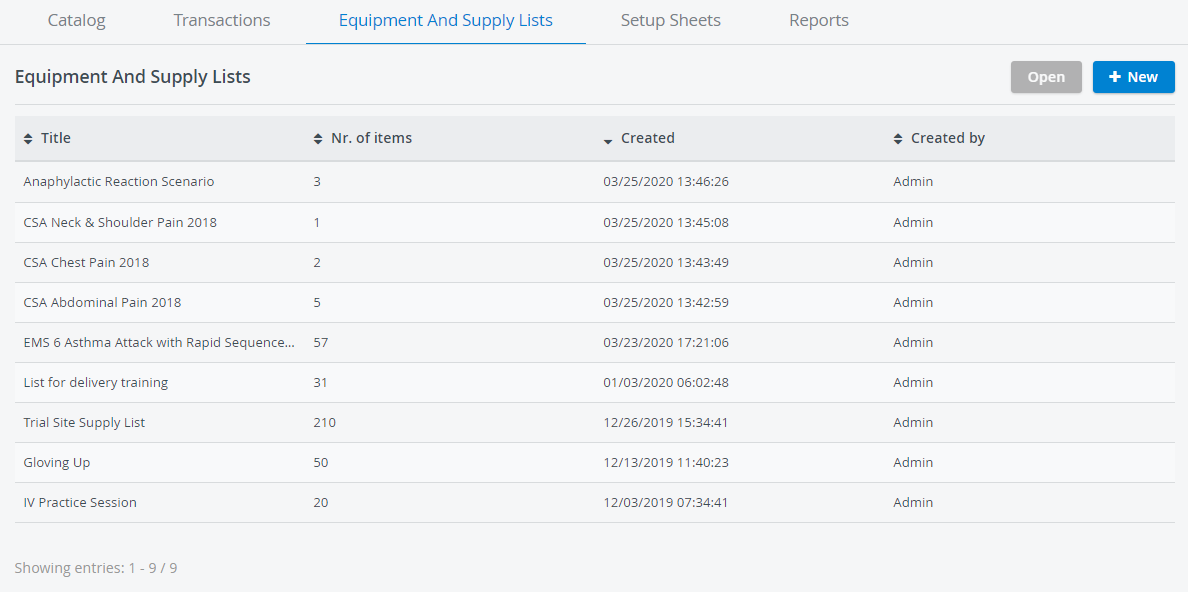
Click +New on the right. The Equipment and Supply List editor will open.
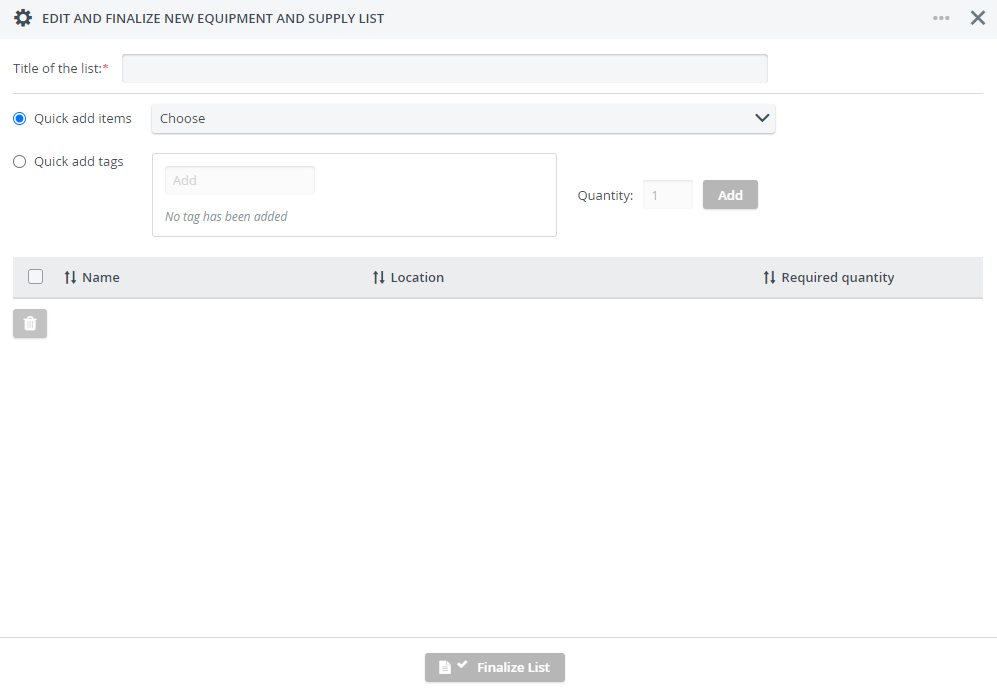
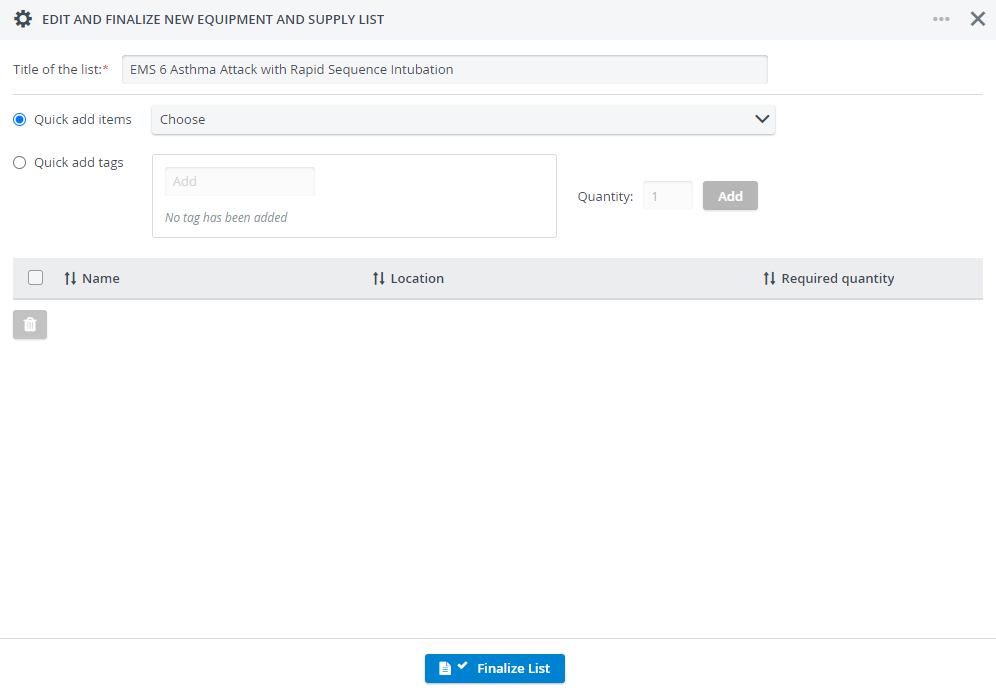
Add the title of the new list (required).
A warning message is displayed if no title is added to the list or if an already existing title is selected.
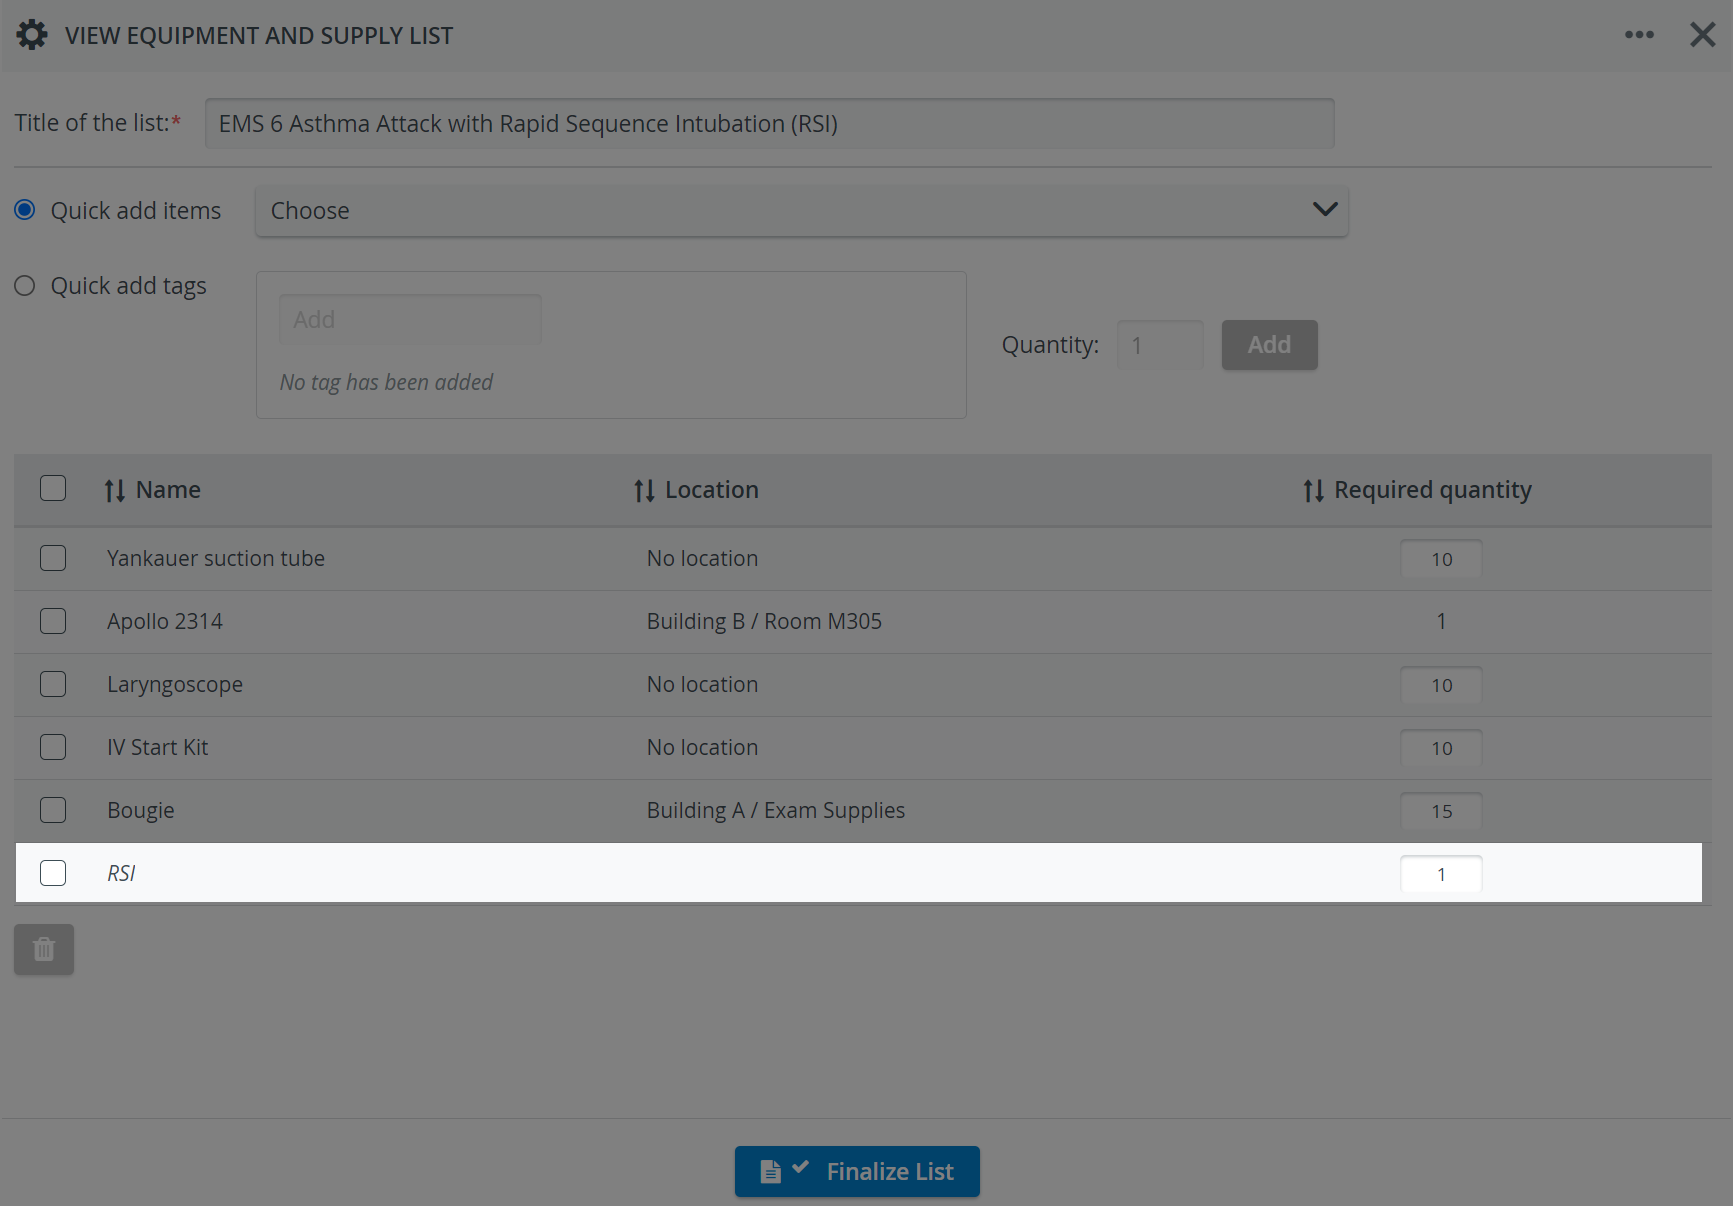
Use the Quick add items drop-down to add any specific item.
Start typing the name of an item to filter results.
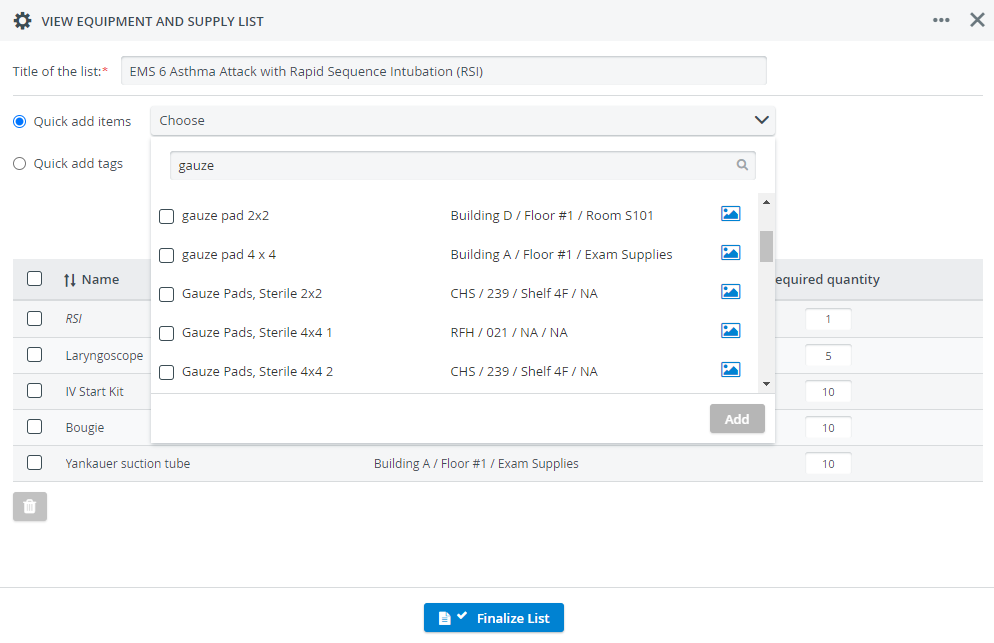
Hover over the gallery icon to display the photo of an item (if there is any added).

Click the checkbox in front of an item's name to select it.
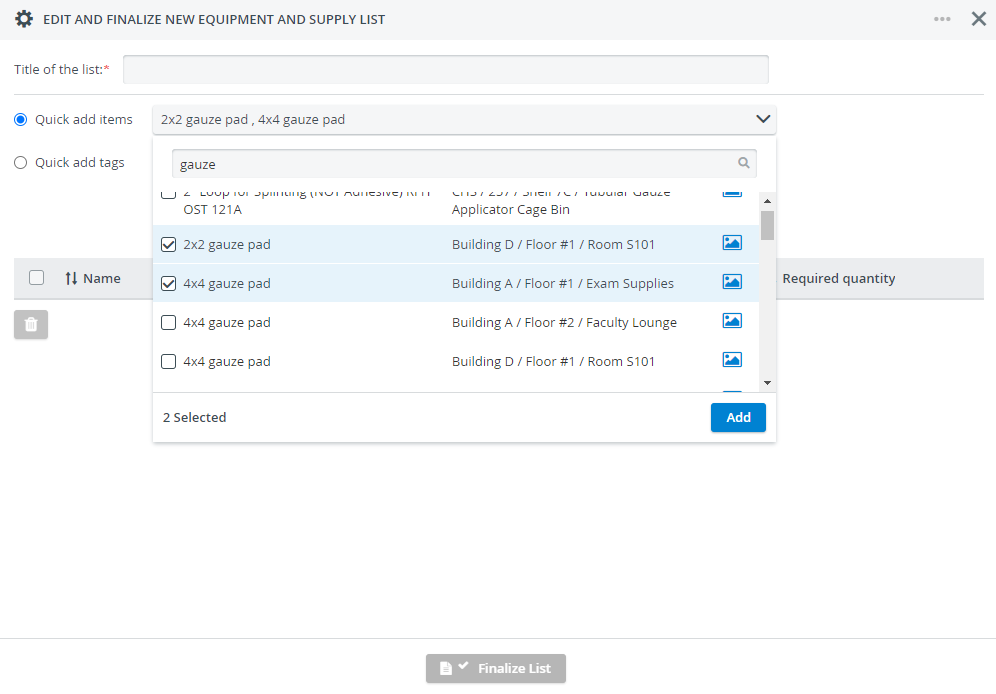
You can select multiple items.
Add the selected items to the list by clicking the Add button. The selected items will be added to your list right away.
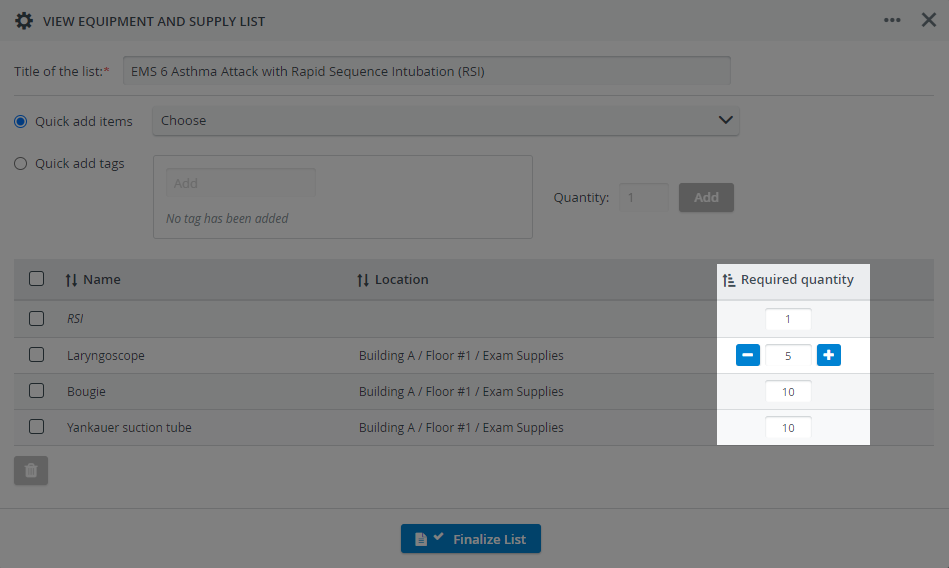
- After items have been added to the Equipment and Supply List, you can adjust the required quantity by using the - and + icons; or by typing the quantity in the text field.
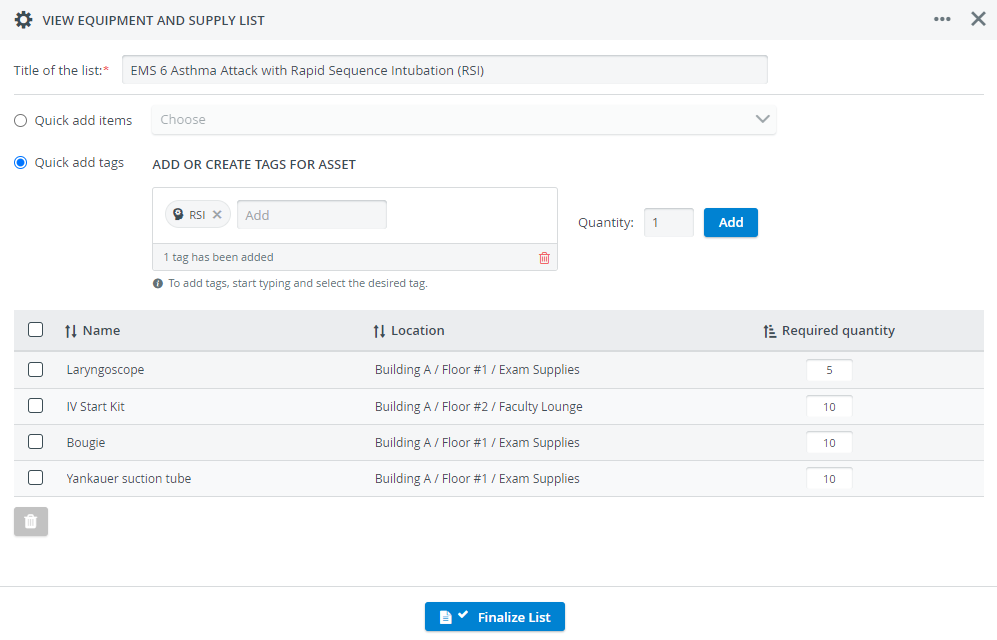
Tagged assets can be added to the list by typing the tag name in the Quick add tags field, then selecting the appropriate match.
A tag represents every asset labeled with that specific tag. Apply tags if you do not want to add one particular asset to the list. Learn more about Asset Tagging.
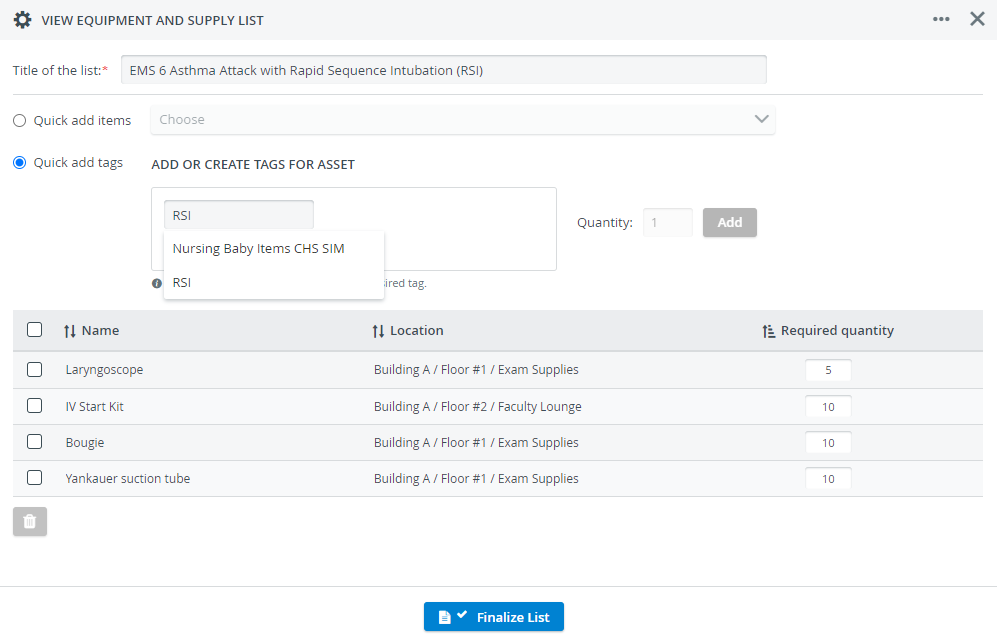
- After selecting the asset tag, modify the quantity if needed, and click Add to include it in your Equipment and Supply List.
Click on Finalize List to save your changes once you are done with assembling your list of required items.
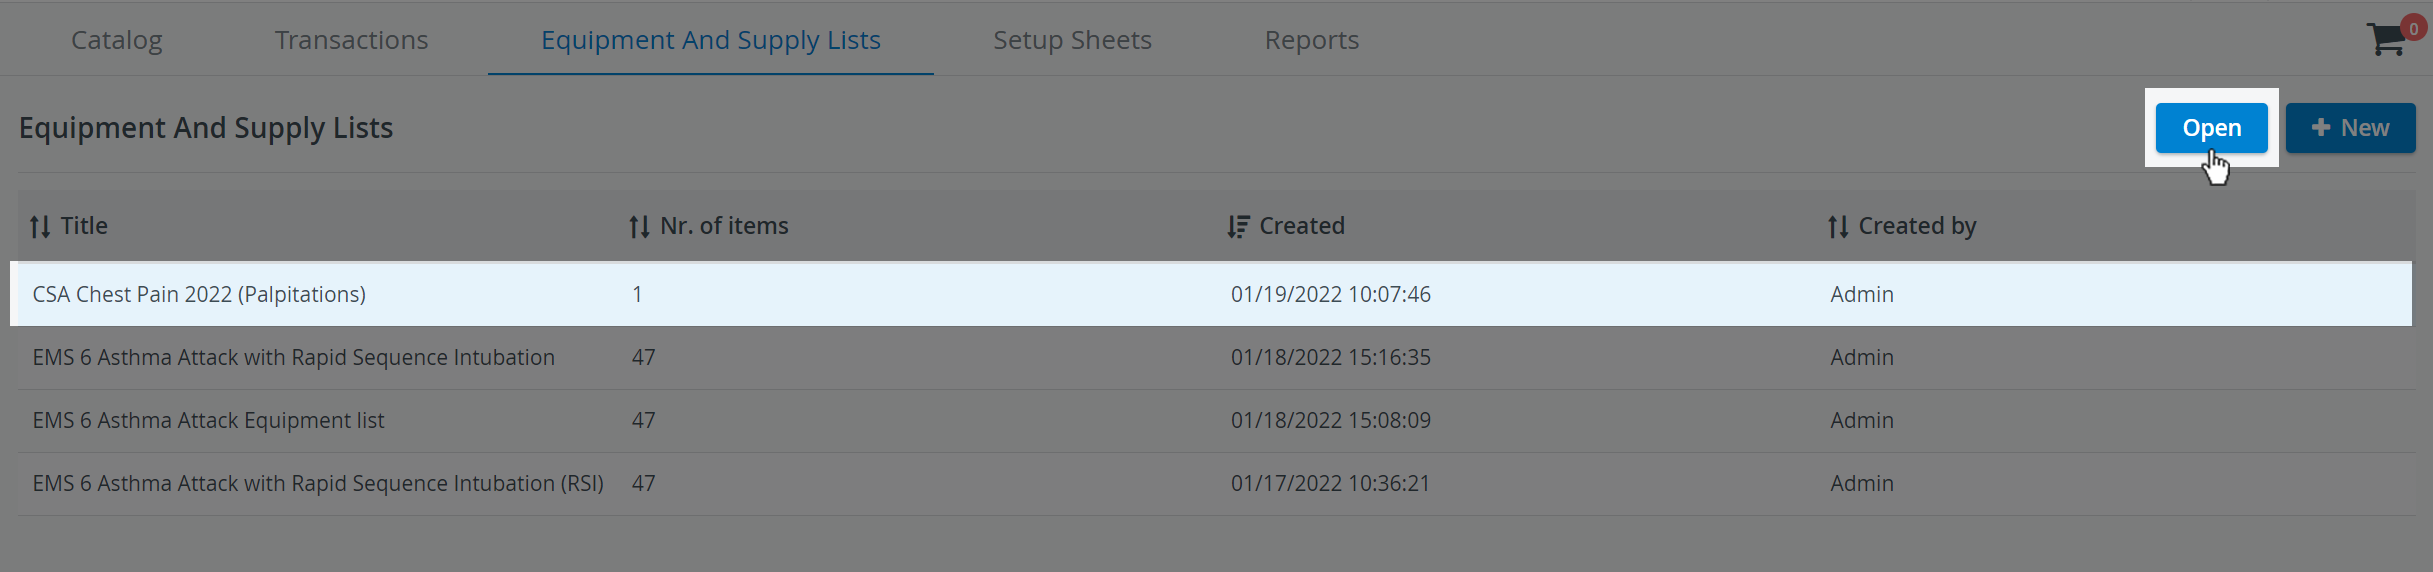
Follow the same steps when editing an existing Equipment and Supply List. To open a list for editing, select one and then click Open.
View related Training videos here (Setup Sheets).
Learn more on the Inventory Manager and our Inventory - How to pages.
Overview
Content Tools