Place your most valuable pieces of equipment in this category. Assets can only be registered one by one in order to keep track of their whereabouts and follow their lifecycle with the most precision.
Lost or broken items can be deleted from the total quantity by Reconciliation.
| Icon |
|
|---|
Item Properties
Details
Add a description, general information and photos about your items in the Details tab:
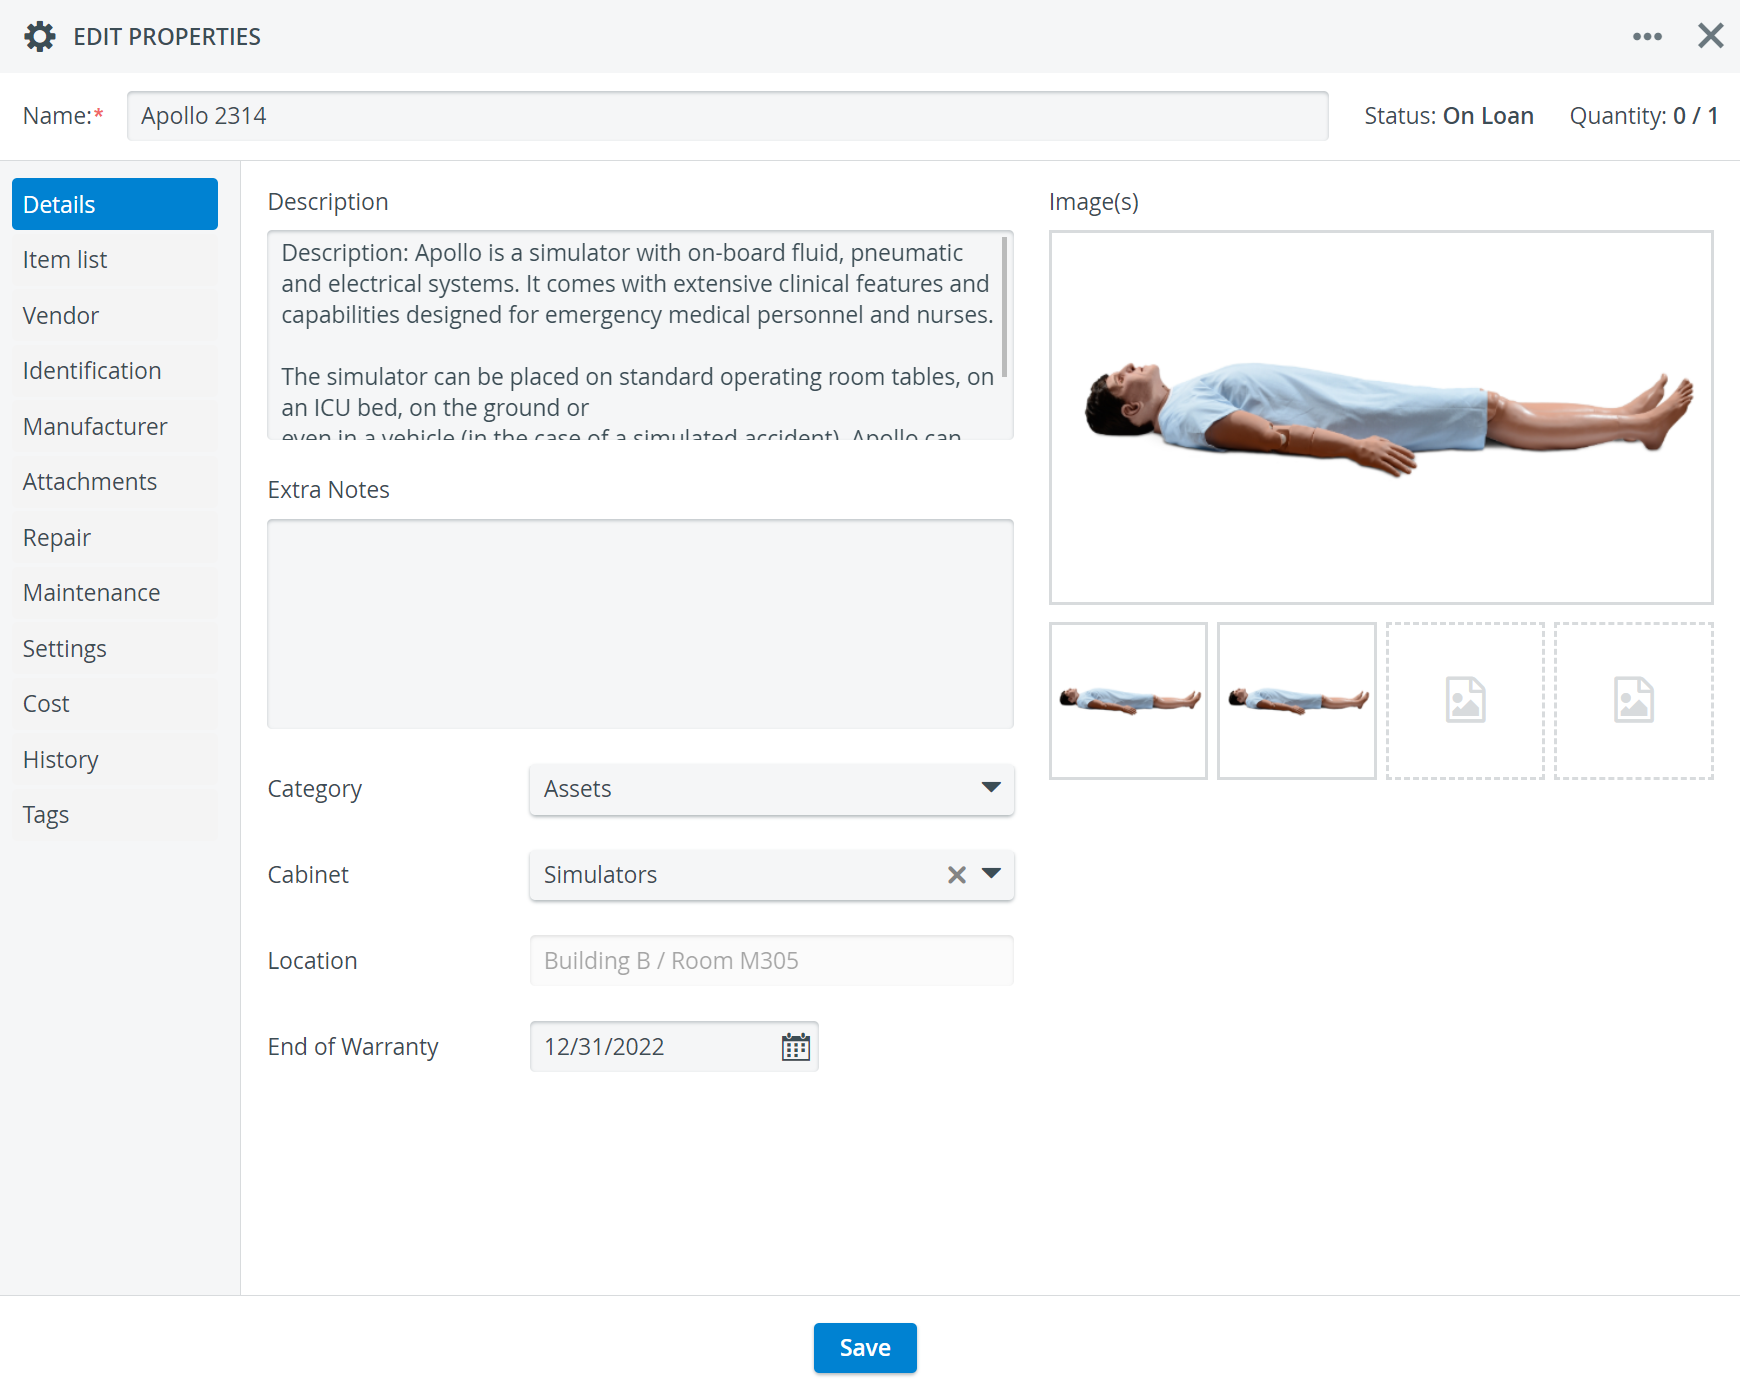
The 'End of the Warranty' date is filled in from the first Check-in of the asset where this information is required. ![]() Asset Check-In
Asset Check-In
- Move the item to a different cabinet with the Cabinet dropdown.
- Notes added to the Extra Notes field become searchable in the global inventory search field on the Catalog page.
- Every item, including existing items in your inventory, will get assigned a unique, searchable, system-generated ID number.
In any search field, you can look up items by complete or partial ID numbers.
Learn more about How to Detect Items in Your Inventory.
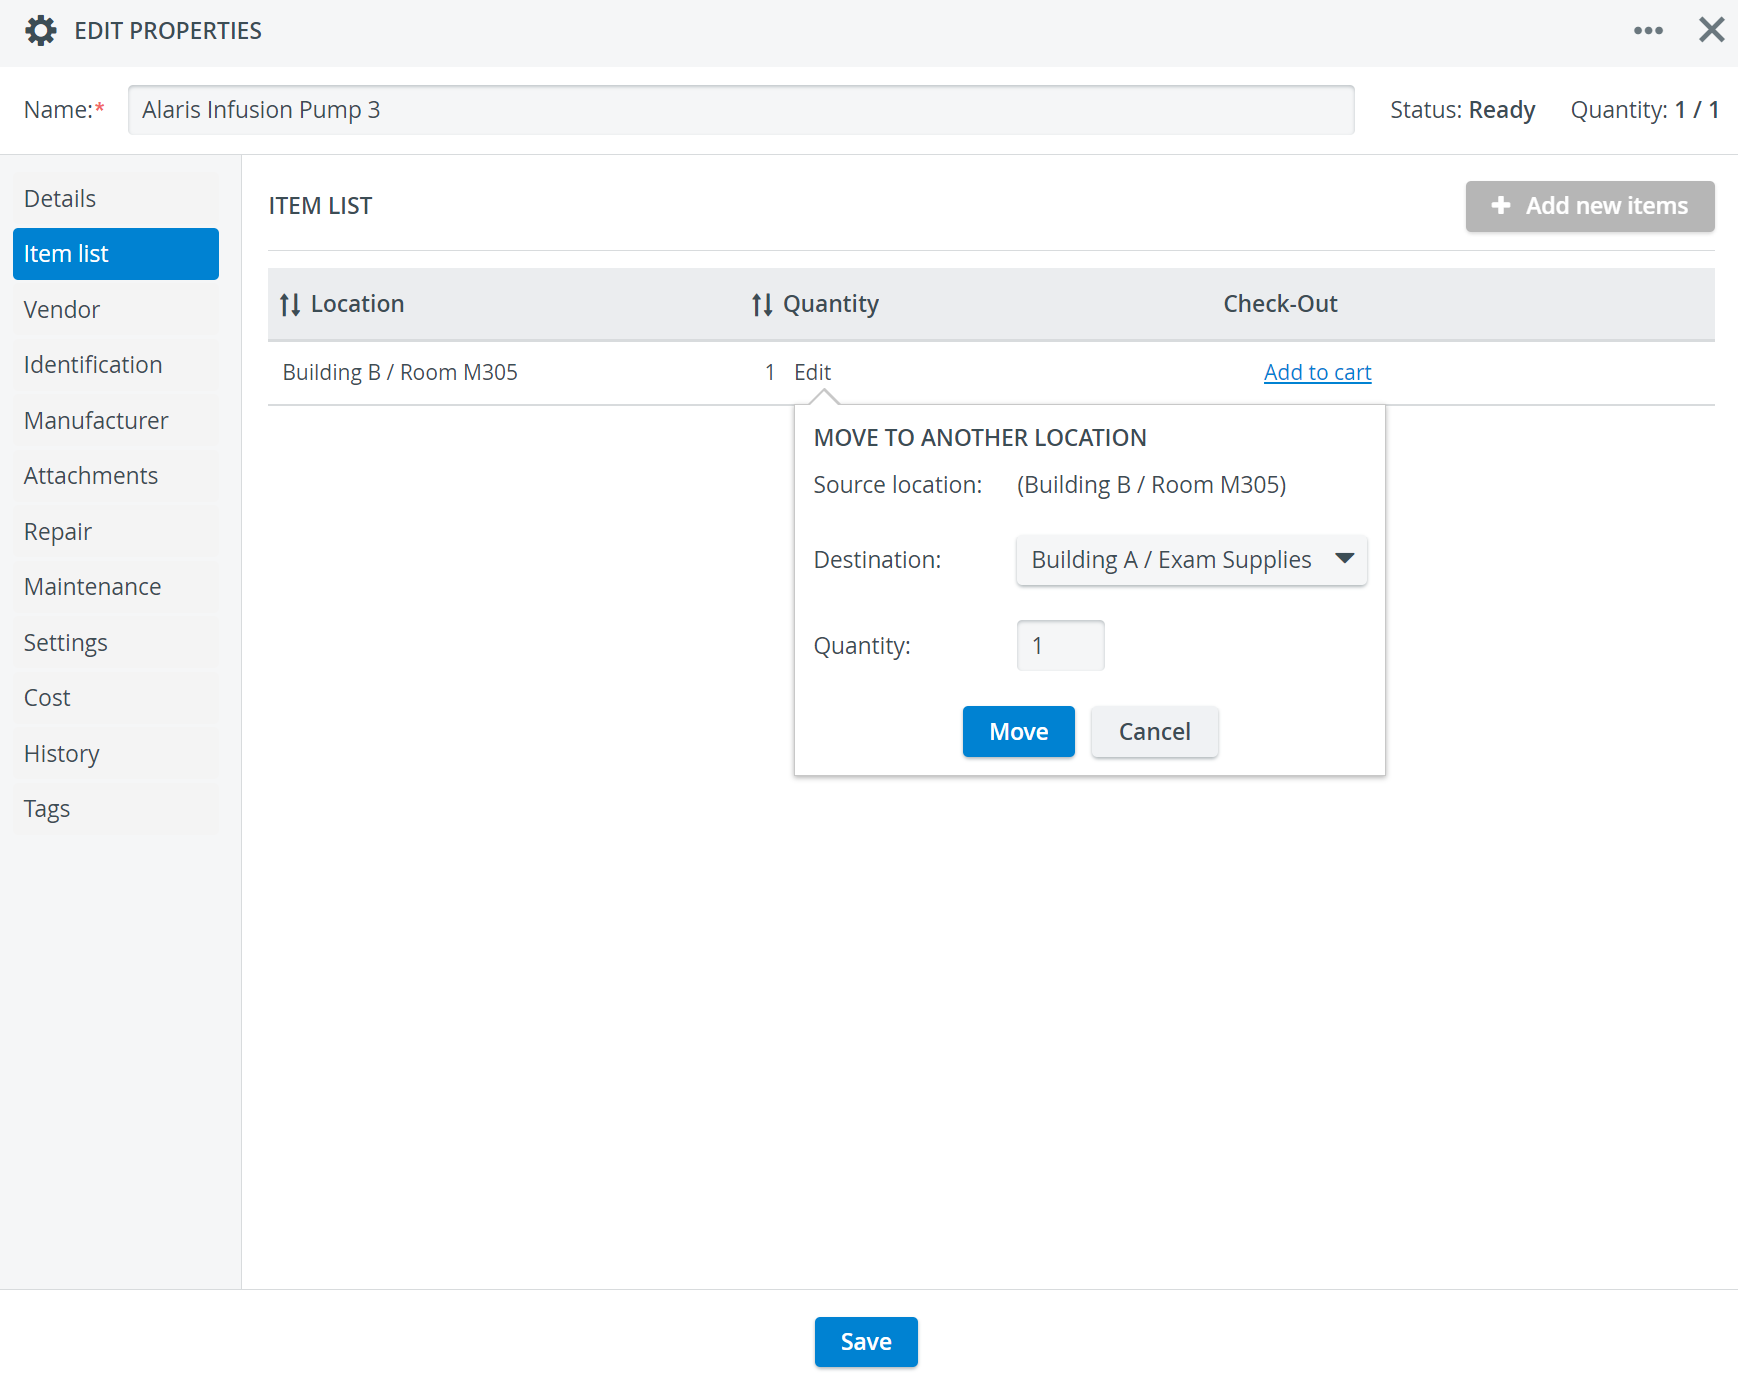
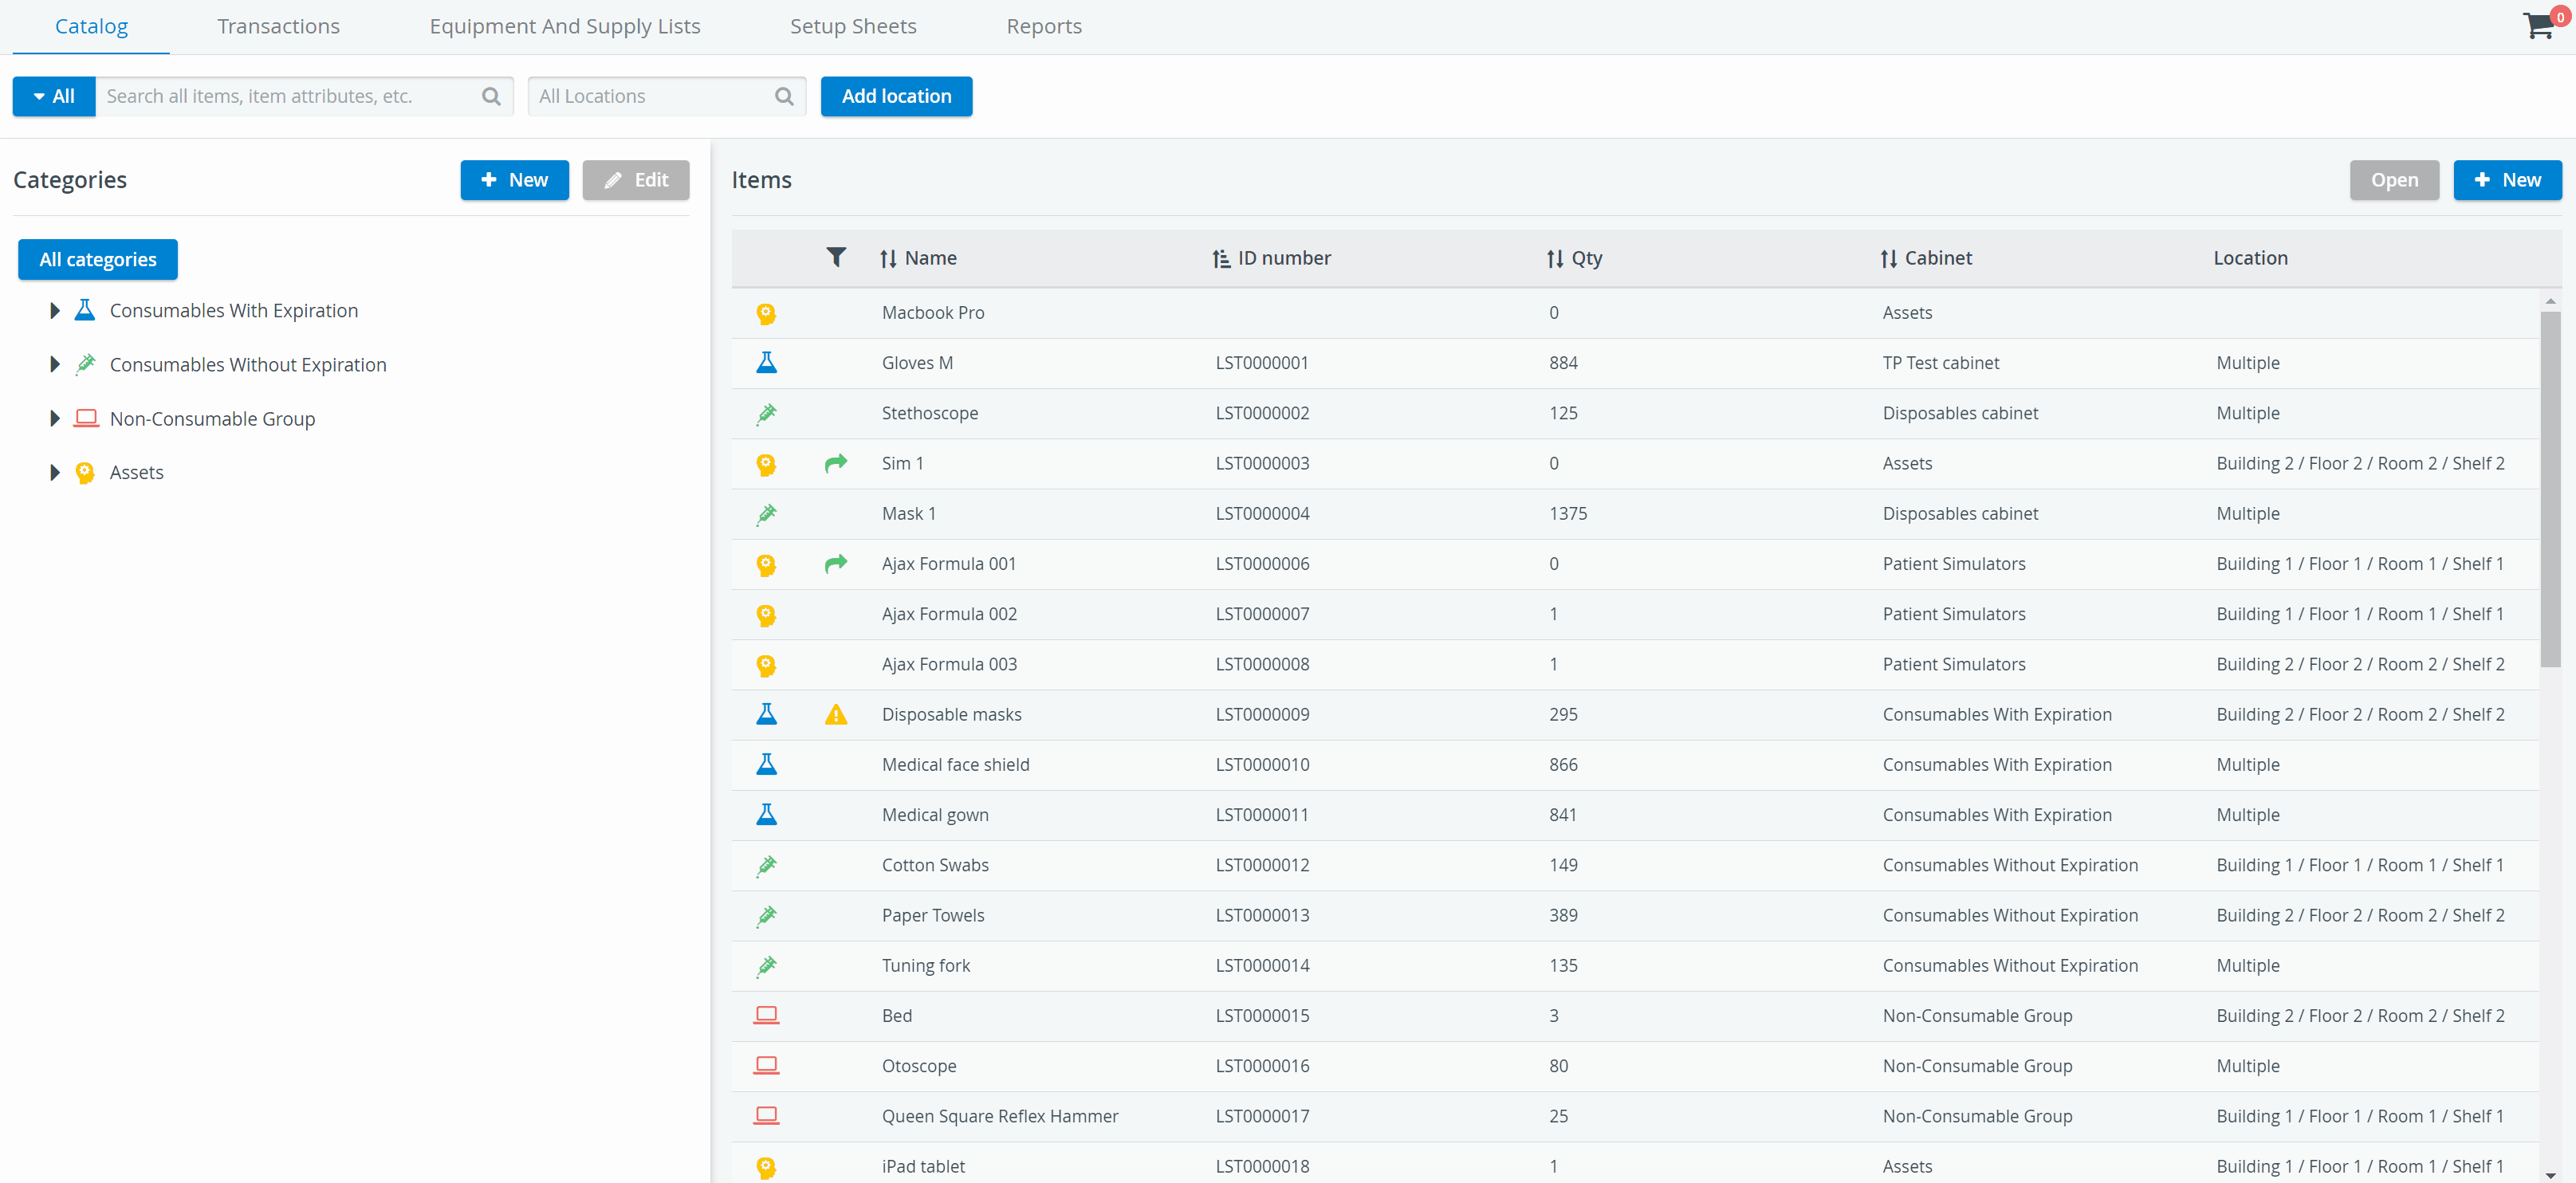
Item List
The Item List tab shows quick details (Location, Quantity) about your asset.
The Add new items button is only active as long as the Asset does not have a quantity yet.
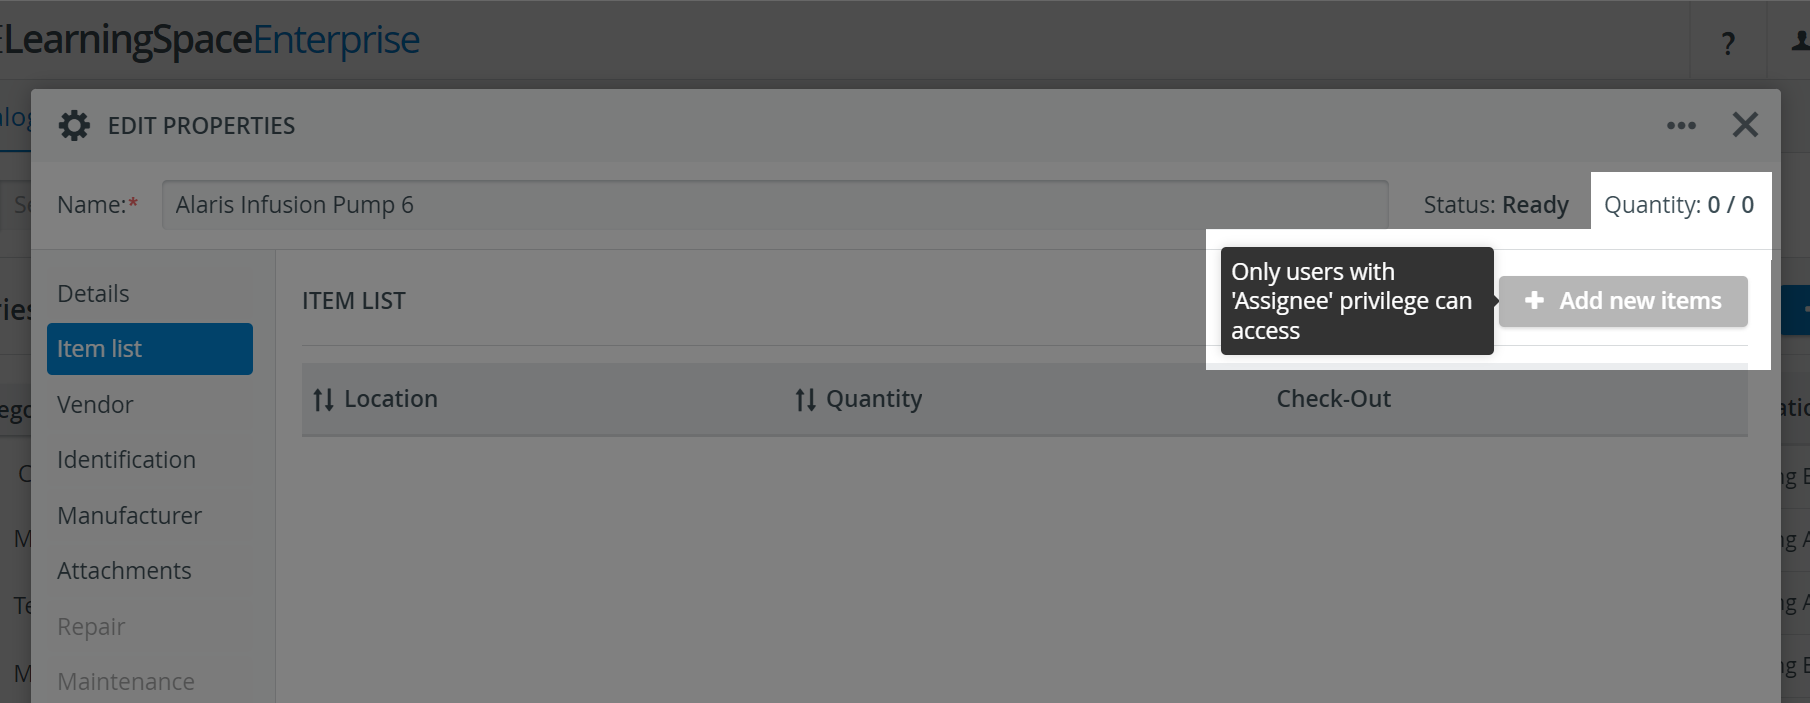
The + Add new items button is only available for users with Transaction Assignee privilege.
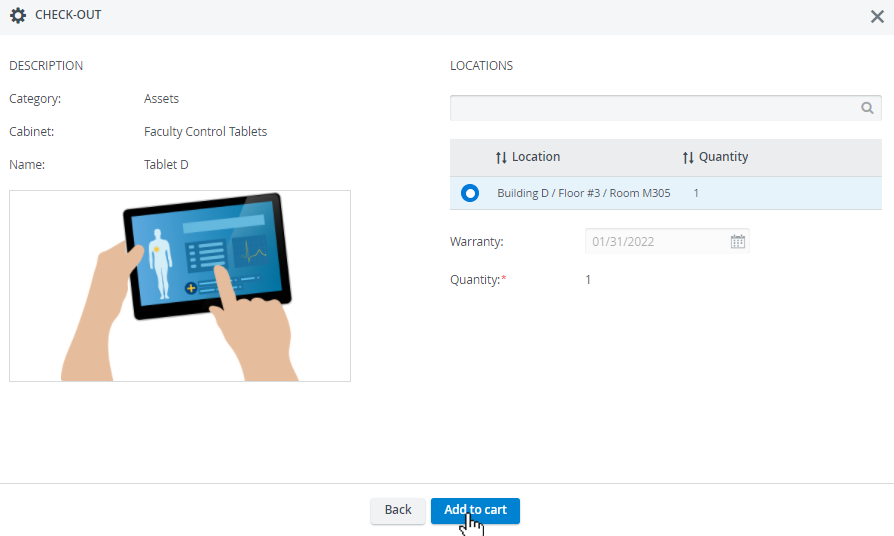
You can add items to check-out directly from Item List with the help of the Add to Cart option: this will open a new cart for Check-out where you can continue with the Check-out workflow.
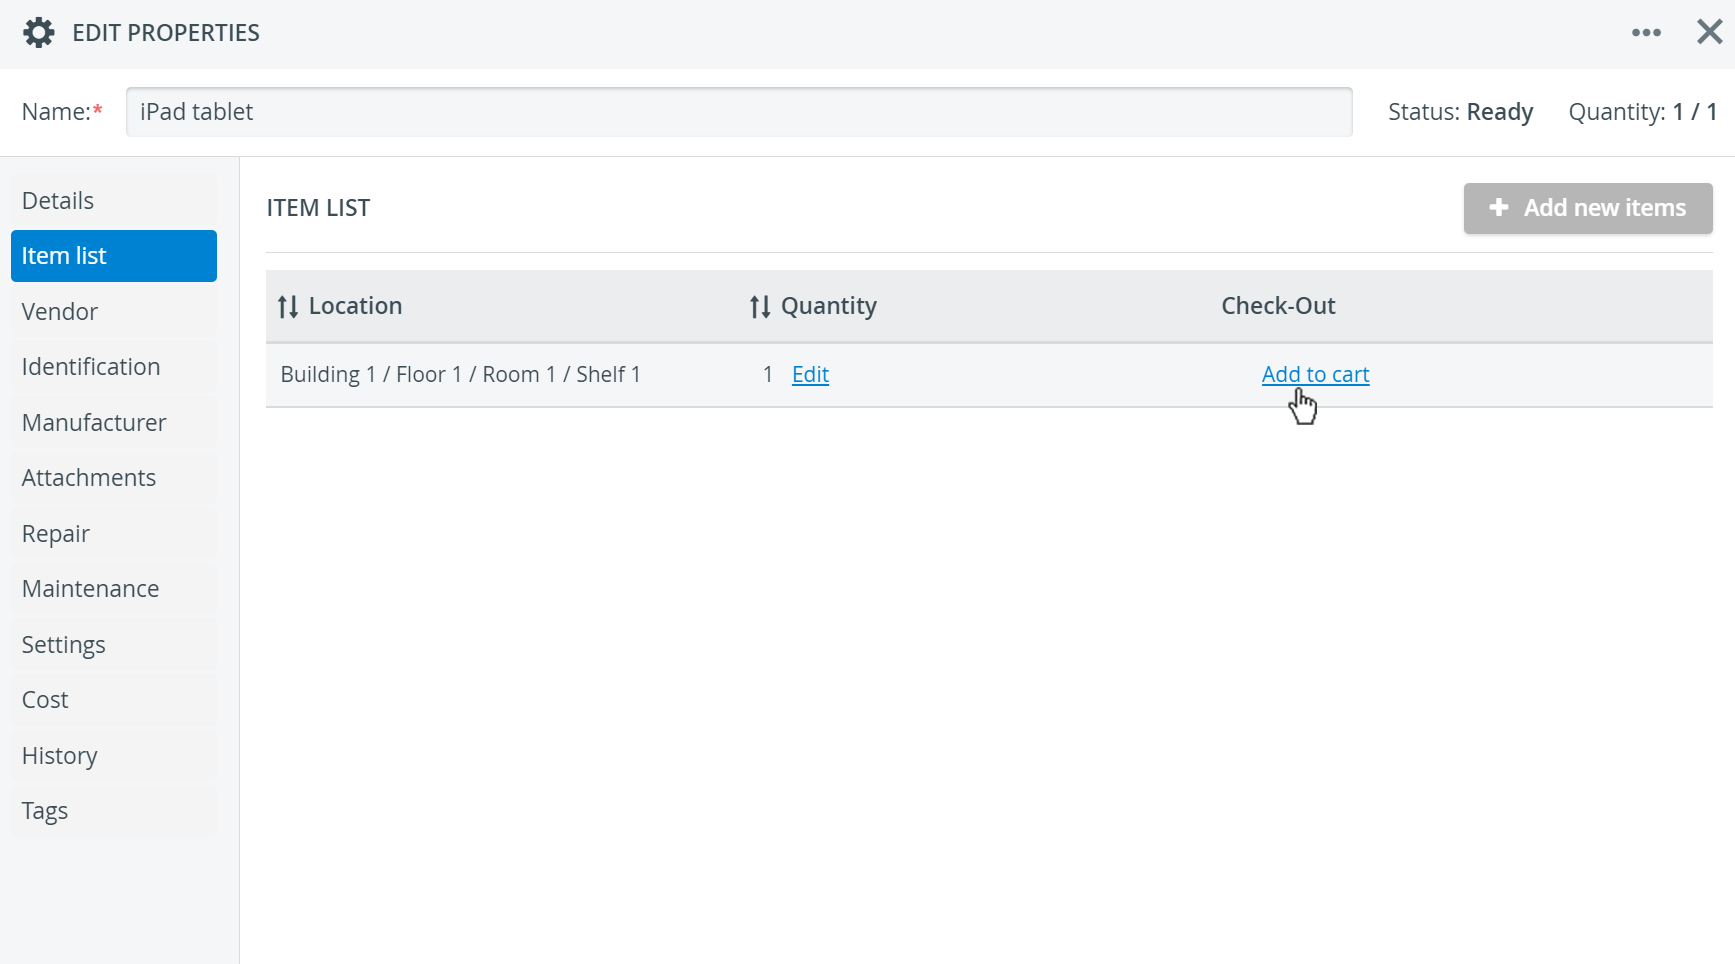
The Transaction Assignee privilege is not needed for the Add to Cart option.
You can also easily transfer an asset from one location to another with the help of the Move to another location feature, without conducting multiple transactions. Similar to easy check-in, the system will automatically create transaction logs (one check-in and one check-out) for any transfer made with this method.
Access the Move to another location option via the Edit button included at each location or batch:
Learn more about Transactions with Assets on the related Transactions pages ![]() Asset Check-In, Asset Check-Out and Asset Reconciliation.
Asset Check-In, Asset Check-Out and Asset Reconciliation.
Identification
In the Identification tab of Assets, you will find the item's unique ID Number and the + Add barcode option that allows you to add one or more barcodes to your item.
QR-code
Print the system-generated QR code of specific items to label your physical stock.
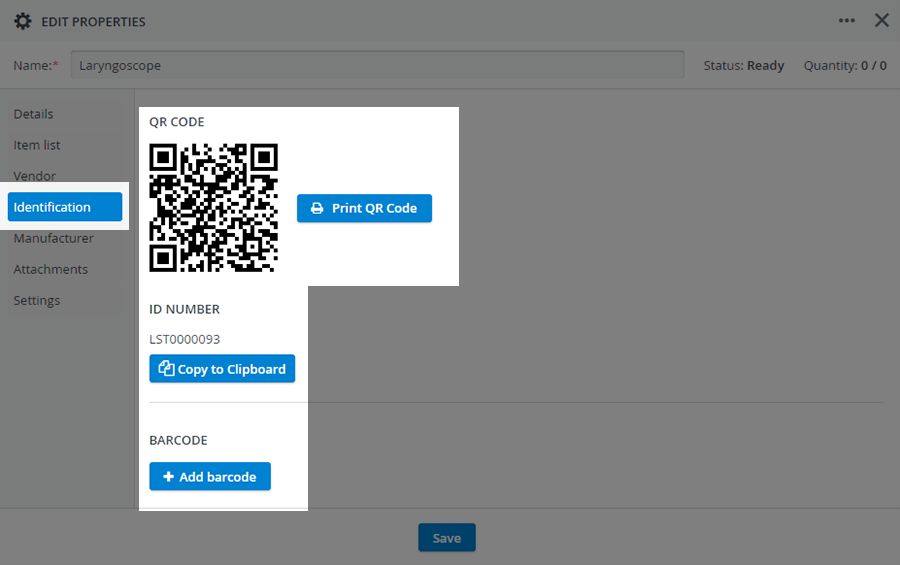
Apply one of the available scanning solutions to paste the barcode of your items. ![]() How to Detect Items in Your Inventory.
How to Detect Items in Your Inventory.
Make sure that the cursor is active inside the barcode field when scanning.
Warning When Assets Are Overbooked
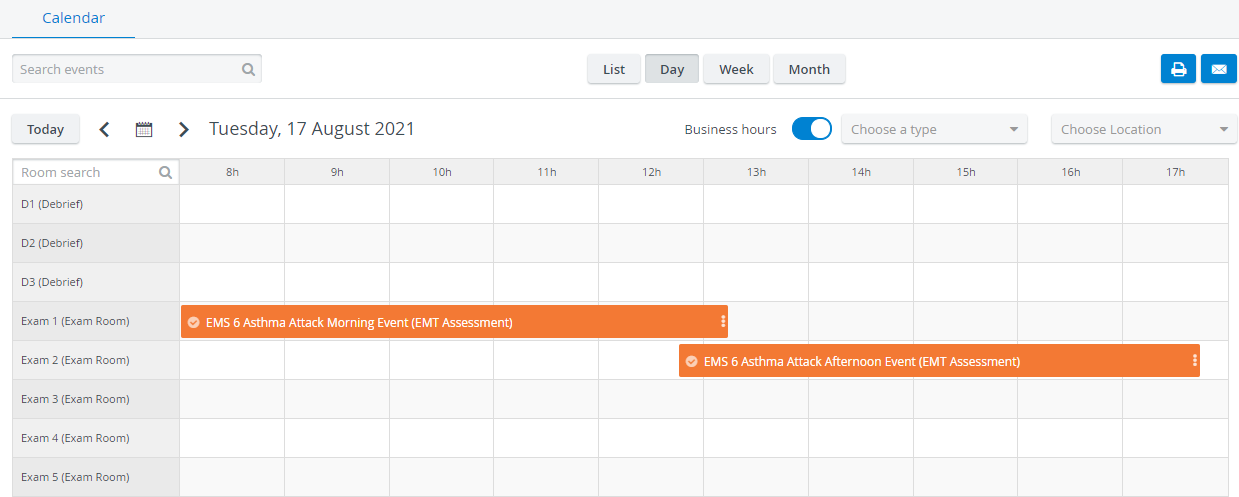
When setting up your events in the Calendar and creating Setup Sheets, the system will let you know if you have any overbooked Assets for events.
When adding the same asset by mistake
- to the same event planned in multiple rooms,
- or to more events taking place simultaneously
- or overlapping with each other,
the Setup Sheet inside each event will warn you that there is a booking conflict and will inform you about the asset's current status.
You can get the warning message displayed - along with information on the quantity - by hovering over the item highlighted in orange.
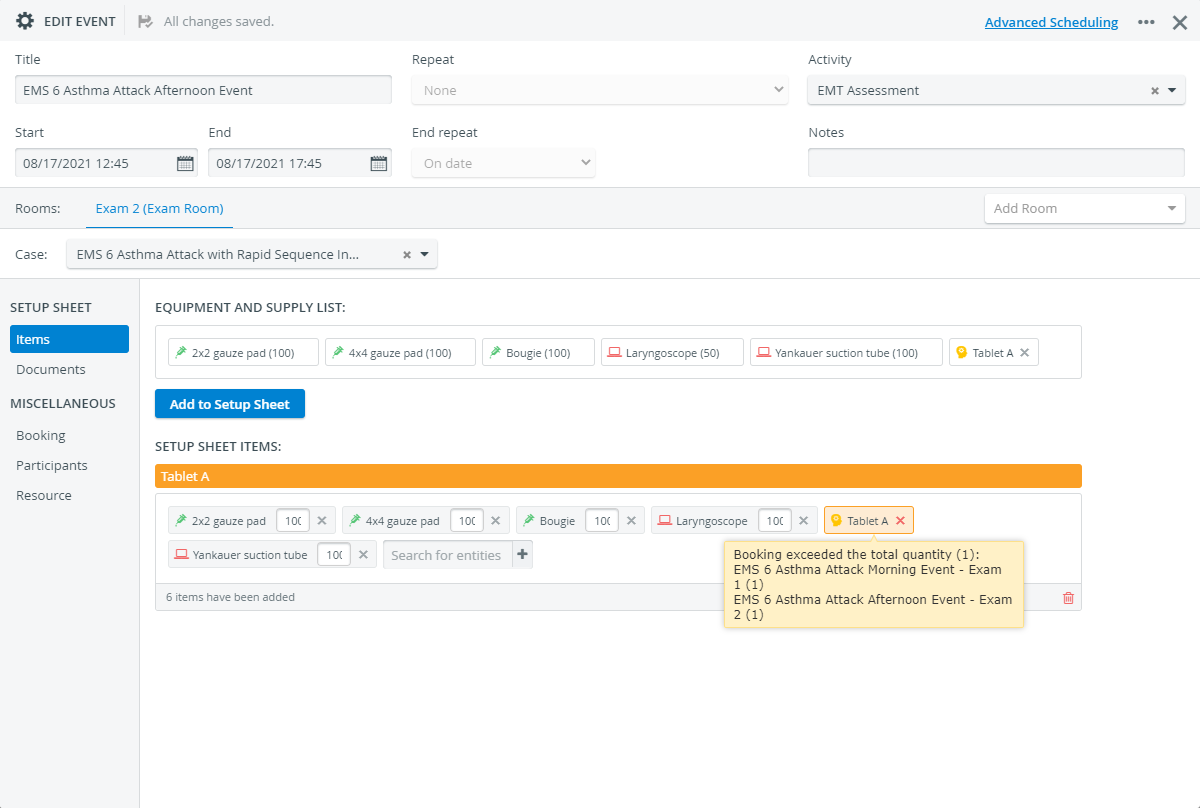
To resolve the issue, remove the asset from one of the events and select a different item.
Clicking the Add to Setup Sheet button repeatedly will multiple the amount of the items in the Setup Sheet.
In the case of overlapping events, an asset's potential booking conflict lasts from the start date of the first overlapping event until the end date of the last overlapping event.
Repair
In the Repair tab, you can issue a repair period for the asset: if an asset breaks down, you can set its status to "Under Repair" in the Catalog to reserve the item for repair.
You can set Start Date and Expected duration of the repair, along with the Root Cause of the asset being sent out for repair.
After the successful repair, use the Set ready option to make the item available for Transactions again.
During the Repair period, no transaction can be performed with the asset. ![]() How to Manage Asset Repair
How to Manage Asset Repair
Maintenance
In the Maintenance tab, you can schedule regular maintenance appointments to prevent the deterioration of your assets or reserve an asset for unexpected maintenance tasks. This way you reserve the item and suspend every inventory transaction with the asset for the time of maintenance.
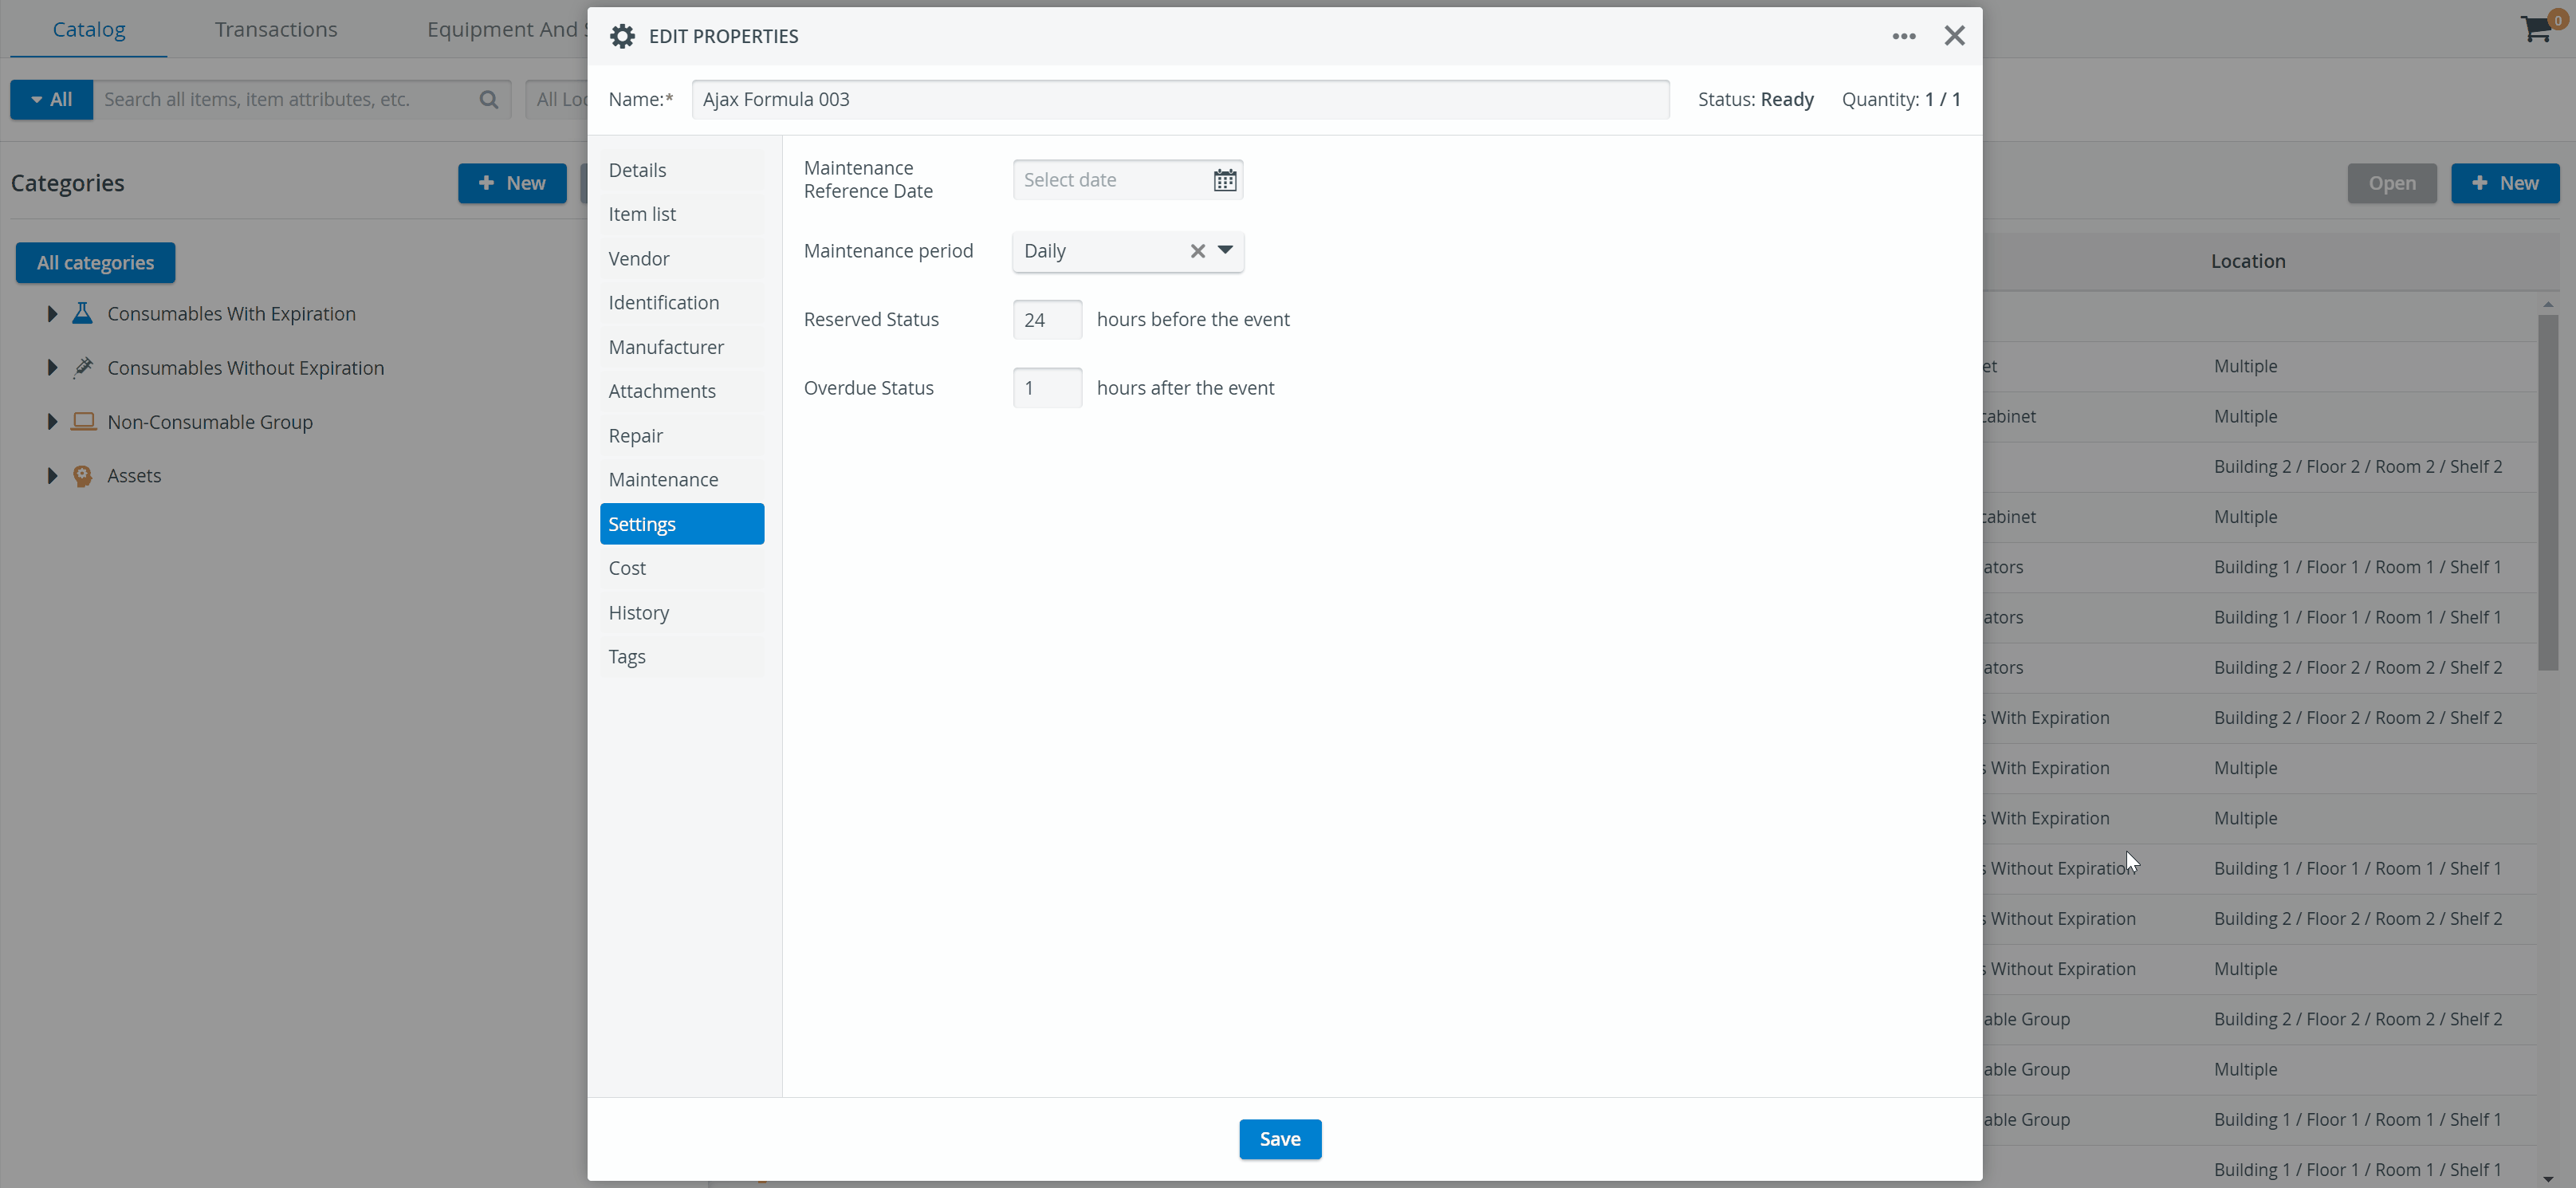
For a step-by-step guide on How to Manage Asset Maintenance, go to this page.
View related Training videos here.
Costs of Assets
You can add the cost of an Asset in the Cost field of the Cost tab. This tab also contains:
- a drop-down to provide the Unit of the item
- a Description field for notes
- and an option to enter Purchase Order Number(s) / PO Number for the item.
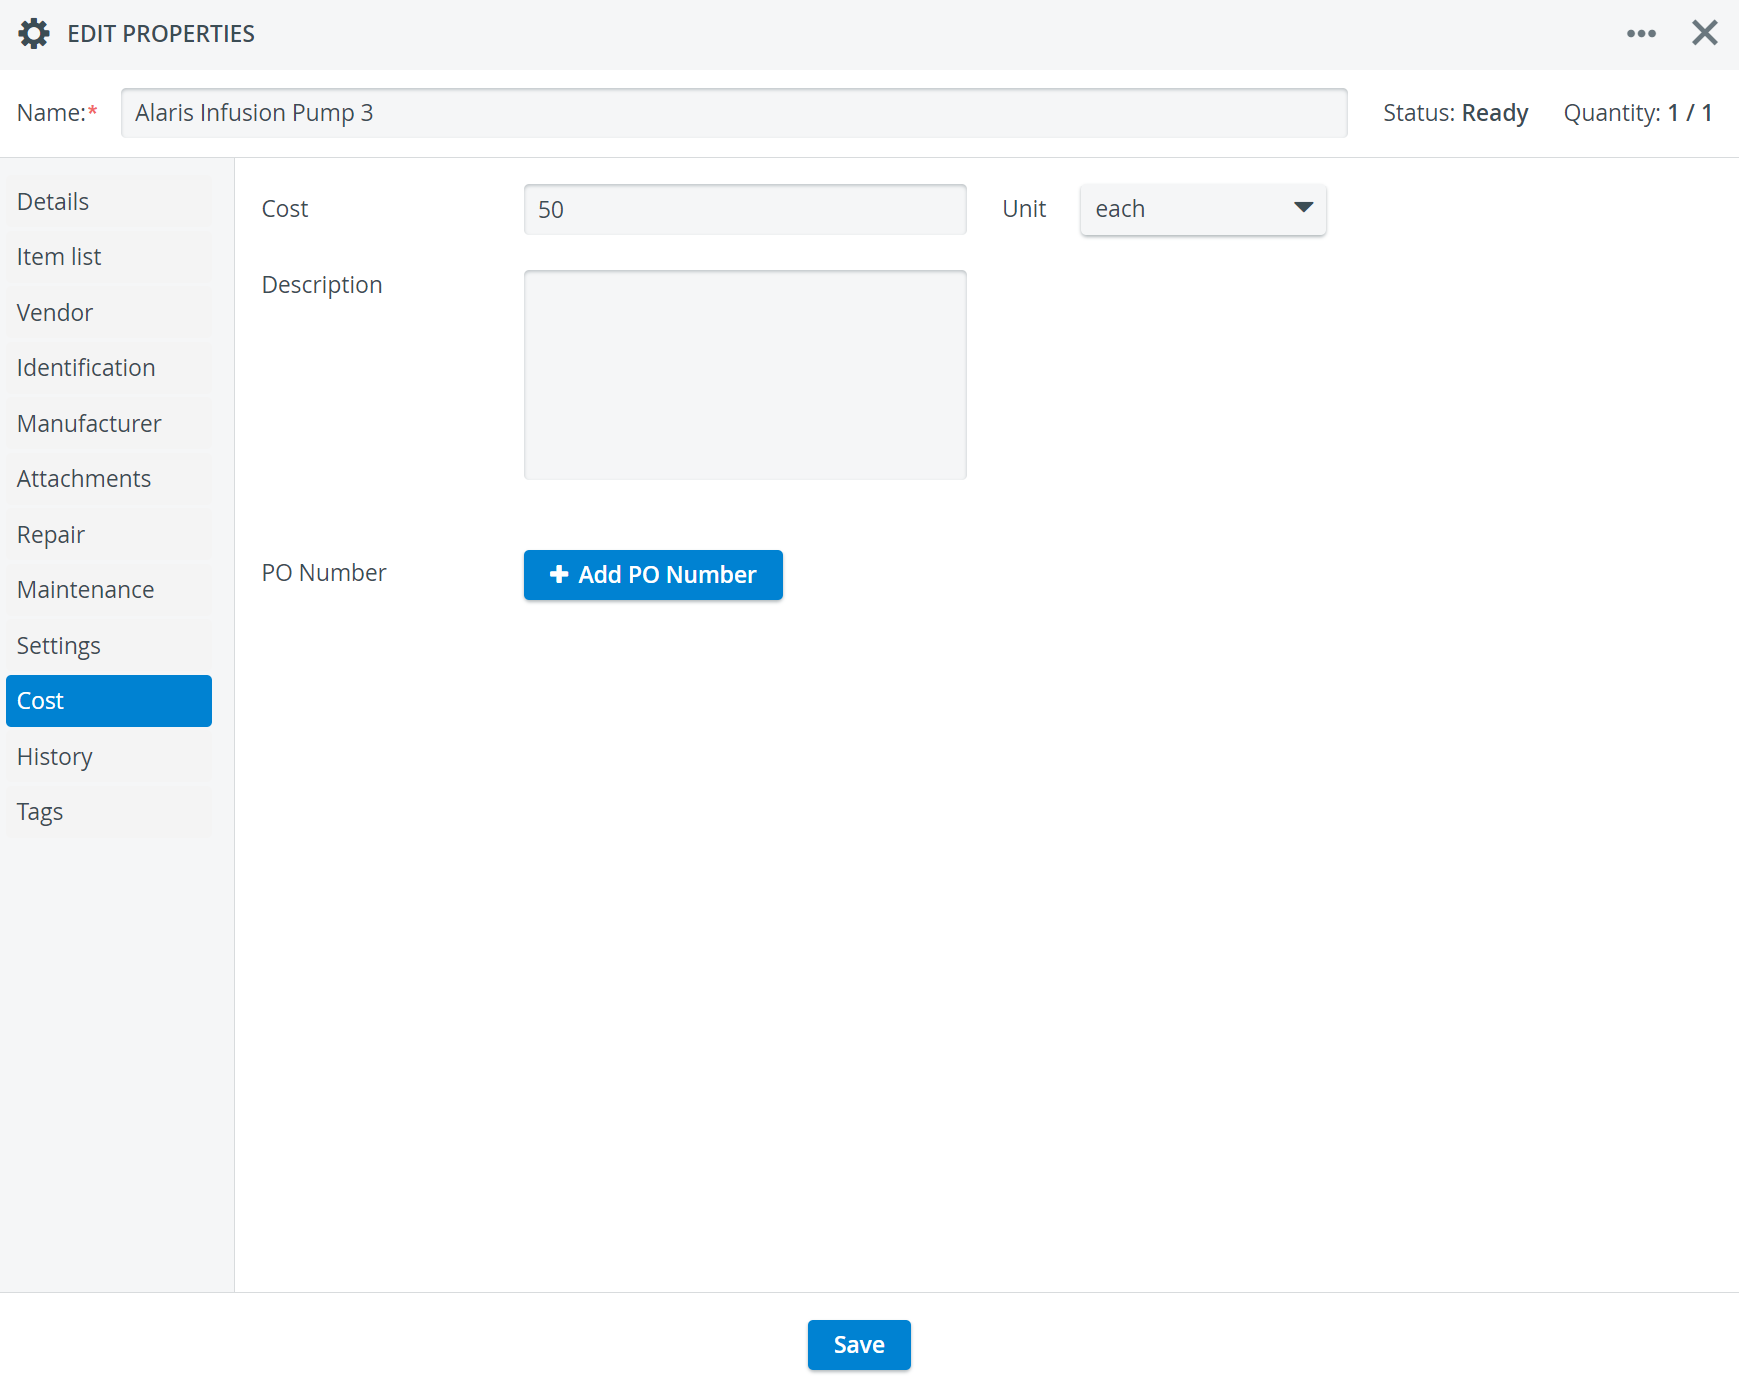
The Cost Report only lists costs and amounts of consumed "Consumable" items for scheduled events that occurred between a given timeframe. Costs of Assets are not listed in the Cost report.
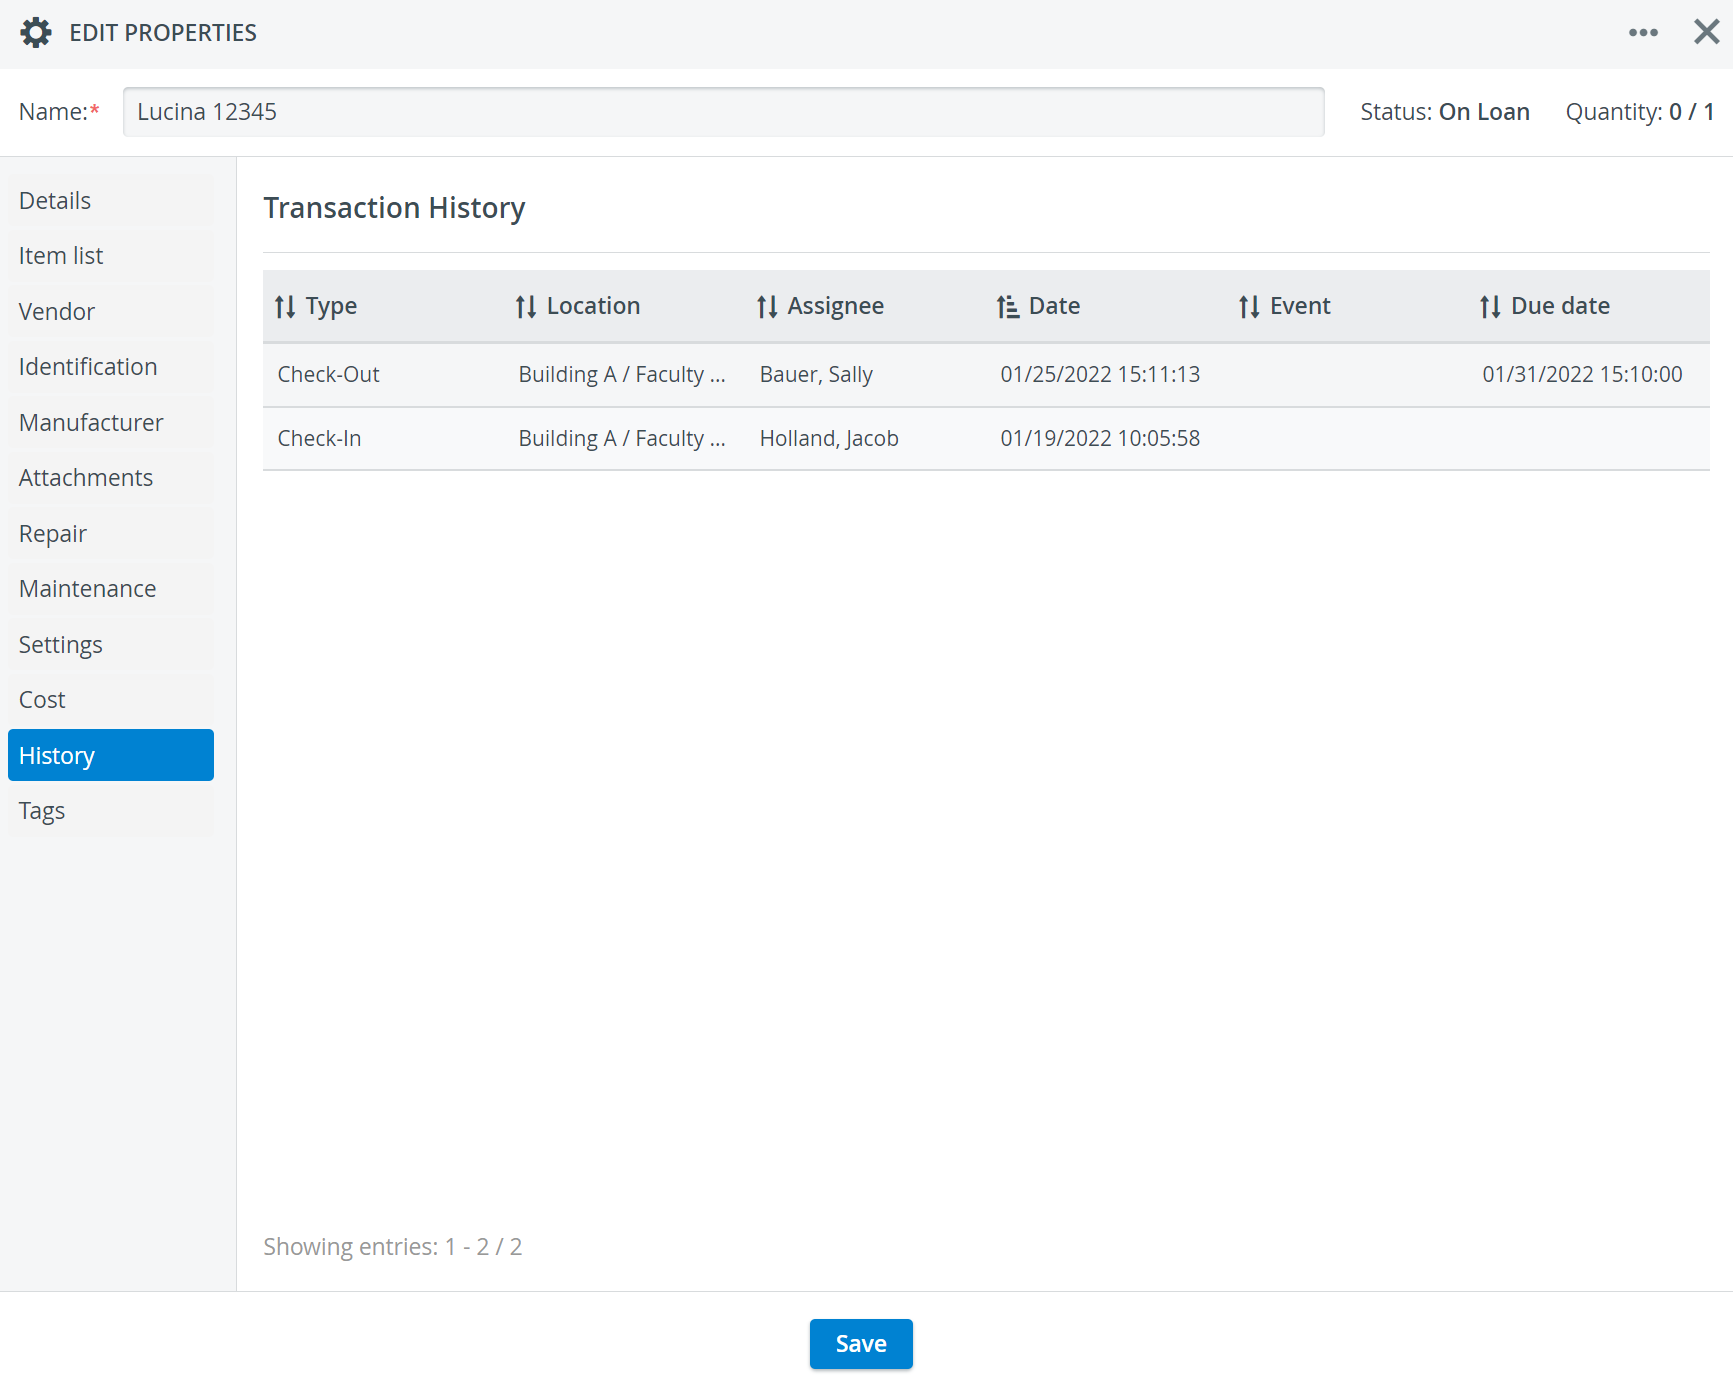
History
The History tab of Assets lists the Transaction history logs of an item. Each entry is timestamped and includes other important details such as:
- the Type of the Transaction,
- Storage Location,
- the name of the Transaction Assignee responsible for the equipment,
- the date of the Transaction,
- the title of the related Event,
- the Due date: by which the Asset needs to be returned to the stock.
Asset Tagging
When you are assembling Equipment and Supply Lists, you do not need to specify right away which asset you want to use for the scenario, you can temporarily select a tag and decide later about the actual asset.
When preparing the Setup Sheet of an event, you can pull up the list of assets labelled with the tag and select a specific asset.
You can add identical tags to multiple assets to place them into the same subgroup: an asset tag will represent every asset labelled with that specific tag.
You can add tags to assets to
- indicate their purpose, e.g. which scenario they will most likely be used in,
- label them by departments, etc.
An asset can be assigned multiple tags so your asset can be part of several subgroups at the same time.
In the Edit Properties window of a selected asset, go to the Tags tab to add tags to your asset.

By adding the same tags to multiple assets e.g. CSA to several simulators, you create a subgroup of simulators that can be selected for Clinical Skills Assessment scenarios when you are planning an event.
When assembling the Equipment and Supply List for a scenario, you don't need to decide right away which asset to use; you can add a tag instead that will allow you to choose from multiple assets labelled with that tag.
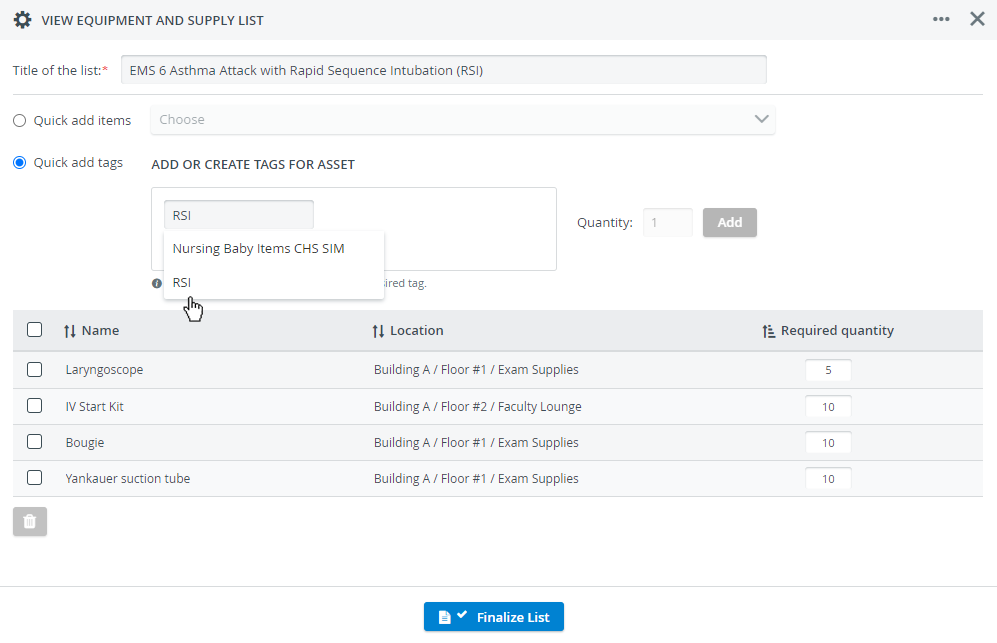
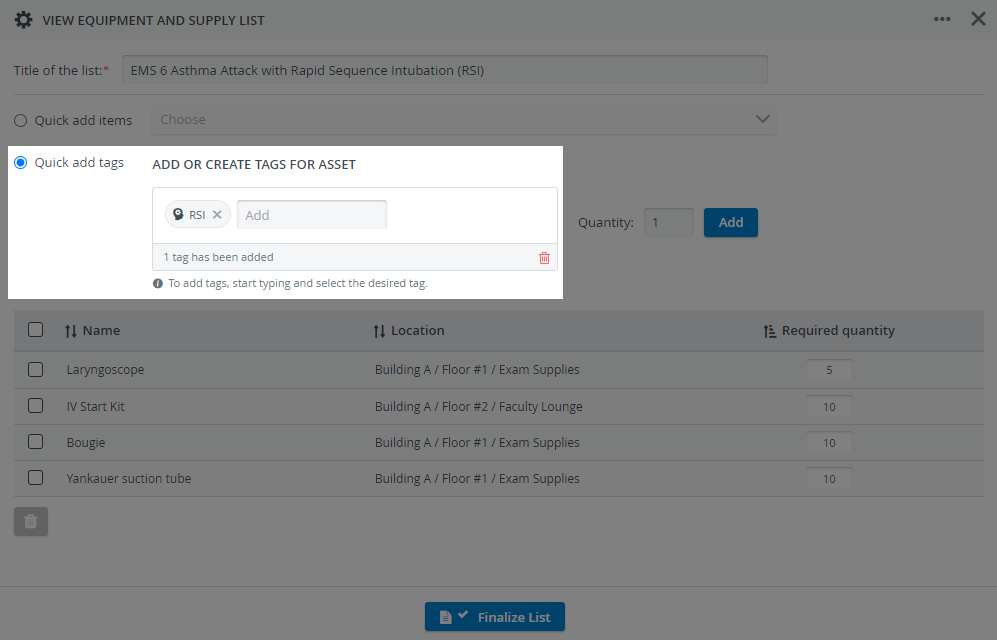
You only have to specify the asset when you are preparing the Setup Sheet of an event:
Important
Make sure that the asset you are selecting for the event is not tied to another event, and is or will be available for your current event.
Tip - Check Asset Availability
- Check the status of the selected asset in the Catalog tab. If the asset is in Ready status, you will have no problem checking out the event's Setup Sheet.
- If the asset is out On Loan, please contact the transaction assignee tied to the asset's latest check-out transaction in Transactions.
- Use the Forecasting report in the Reports tab of the Inventory module to get an overview of the supply and equipment needs of upcoming events.
Learn more about the Inventory Manager on our Inventory - How to pages, and watch the Inventory Manager Training Videos.
Overview
Content Tools