Page History
...
| Info |
|---|
Virtual room configuration in CAE LearningSpace is explained on the next page. |
Upgrade Your Zoom Account:
Change Your Plan
- Click on Upgrade in the User Type field on your profile next to your current subscription status.
You will be redirected to the Current Plans tab inside Billing. - Click on Upgrade Account.
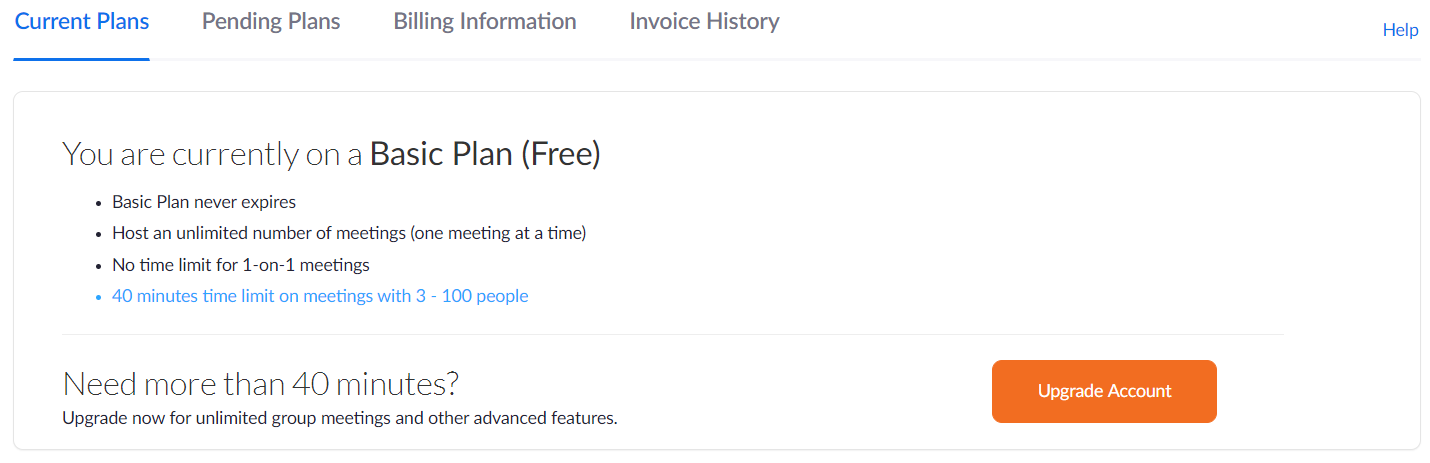
You will be redirected to the Plans & Pricing page. - Choose one of the recommended plans by clicking Buy Now.
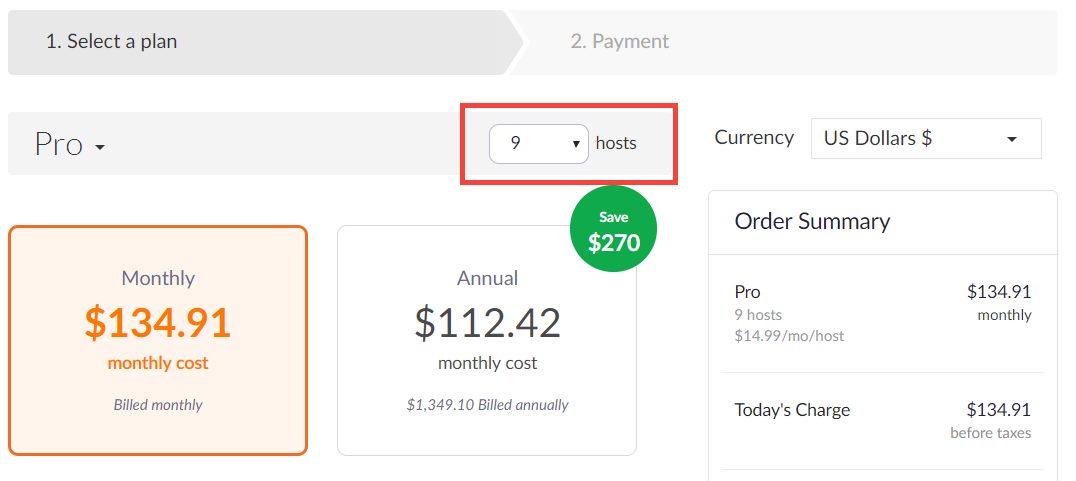
- Select Pro if you plan to configure 9 virtual rooms or less;
- Select Business if you want to configure 10 or more virtual rooms.
Select the number of hosts you want to purchase.
Info Zoom automatically calculates the monthly and annual fees afterwards.
Add Cloud Storage
CAE LearningSpace stores the recordings of virtual events temporarily in Zoom's cloud: the recording of a meeting is first saved to Zoom, then the video recording will be downloaded from the cloud through a secure HTTPS channel to the Video Review module.
Downloading virtual event recordings to CAE LearningSpace might take some time, so to ensure that your Zoom account has enough room to temporarily store every recording of a virtual event, we recommend purchasing the extra 100 GB/month/licensed host solution (as mentioned below).
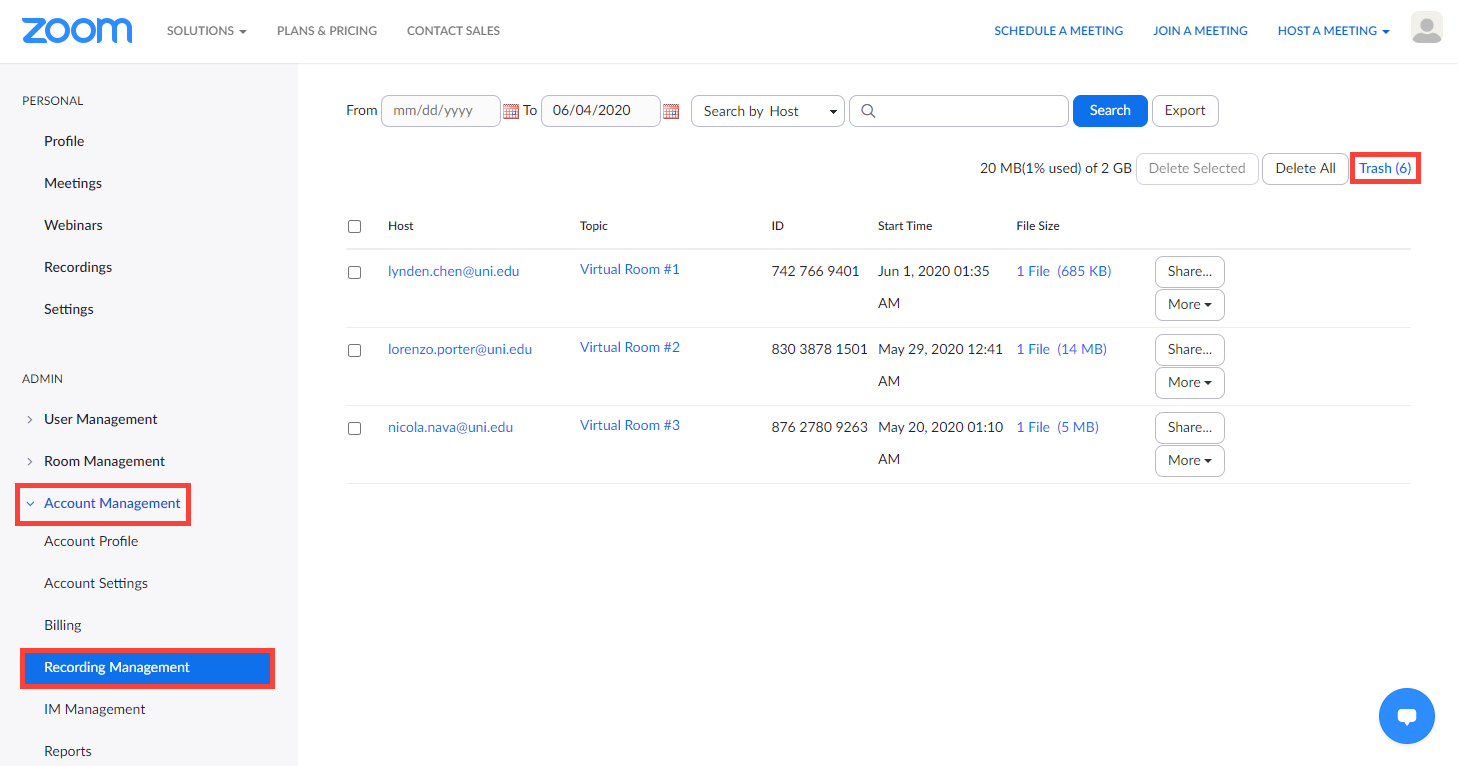
By default, Zoom offers 1 GB/month free cloud storage per licensed user (starting from Pro subscription), which will most likely be exceeded while conducting a virtual event.Expand title What Happens to Recordings after Download? Once CAE LearningSpace has successfully downloaded virtual event recordings to the Video Review module, cloud recordings are moved to the trash folder in your Zoom owner account:
Tip Video recordings do not take up space from your cloud storage once they are in the trash folder.
The recordings will be stored for another 30 days until deleted automatically.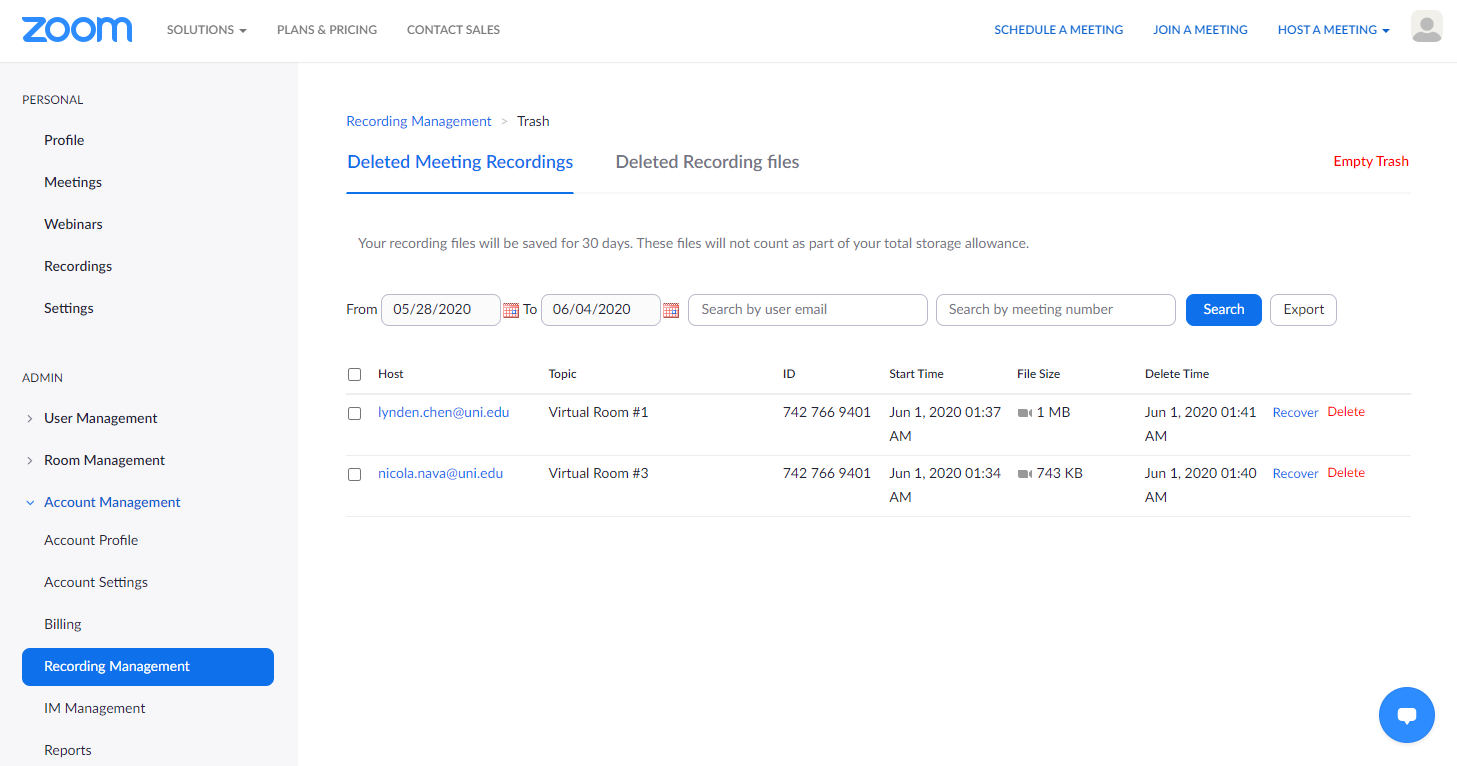
Note title In Case Recordings Get "Stuck" in the Cloud Downloading virtual event recordings from Zoom's cloud to CAE LearningSpace might take some time. Still, if you notice that the recordings have not arrived in the Video Review module within 6 hours, we recommend you retrieve the meeting recordings and upload it to CAE LearningSpace. Continue to this page for instructions on how to recover your recordings from Zoom's cloud.
Open Available Add-Ons and select Cloud Recording.
To accommodate the temporary recordings of (even) a day's worth of OSCE training/examination, purchase the extra 100 GB/month solution:
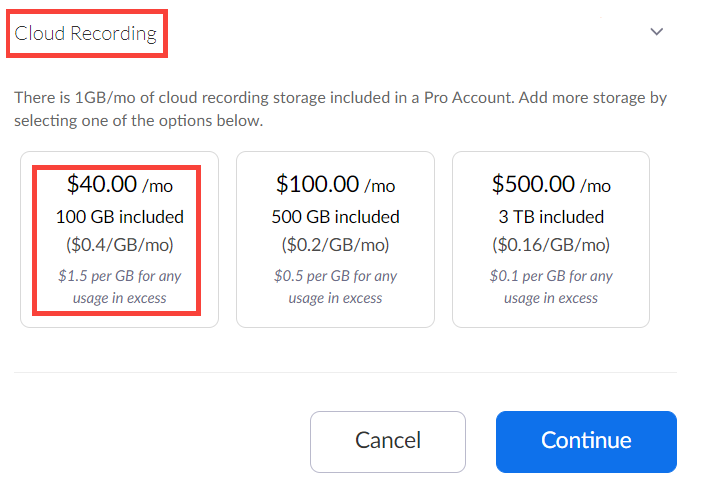
- After selecting the billing schedule and the extra cloud storage, click Continue.
- On the Payment tab, provide the
Billing Contact information
Info Beside basic details, the total employee count of your organization is required to continue.
- Payment Method, and
- Credit/debit card information.
- Once you are finished, click Upgrade Now. You will be presented with an Order Summary.
- Click Confirm to complete your purchase.
Zoom will confirm that your account has been upgraded successfully.
Following the Account Upgrade
Remove the License from the Owner Account
| Warning | ||
|---|---|---|
| ||
After upgrading your account, Zoom automatically sets the Owner user—you—to "Licensed". |
| Note | ||
|---|---|---|
| ||
CAE LearningSpace refuses to create a new virtual room and its user account in Zoom once your account runs out of licenses. |
...
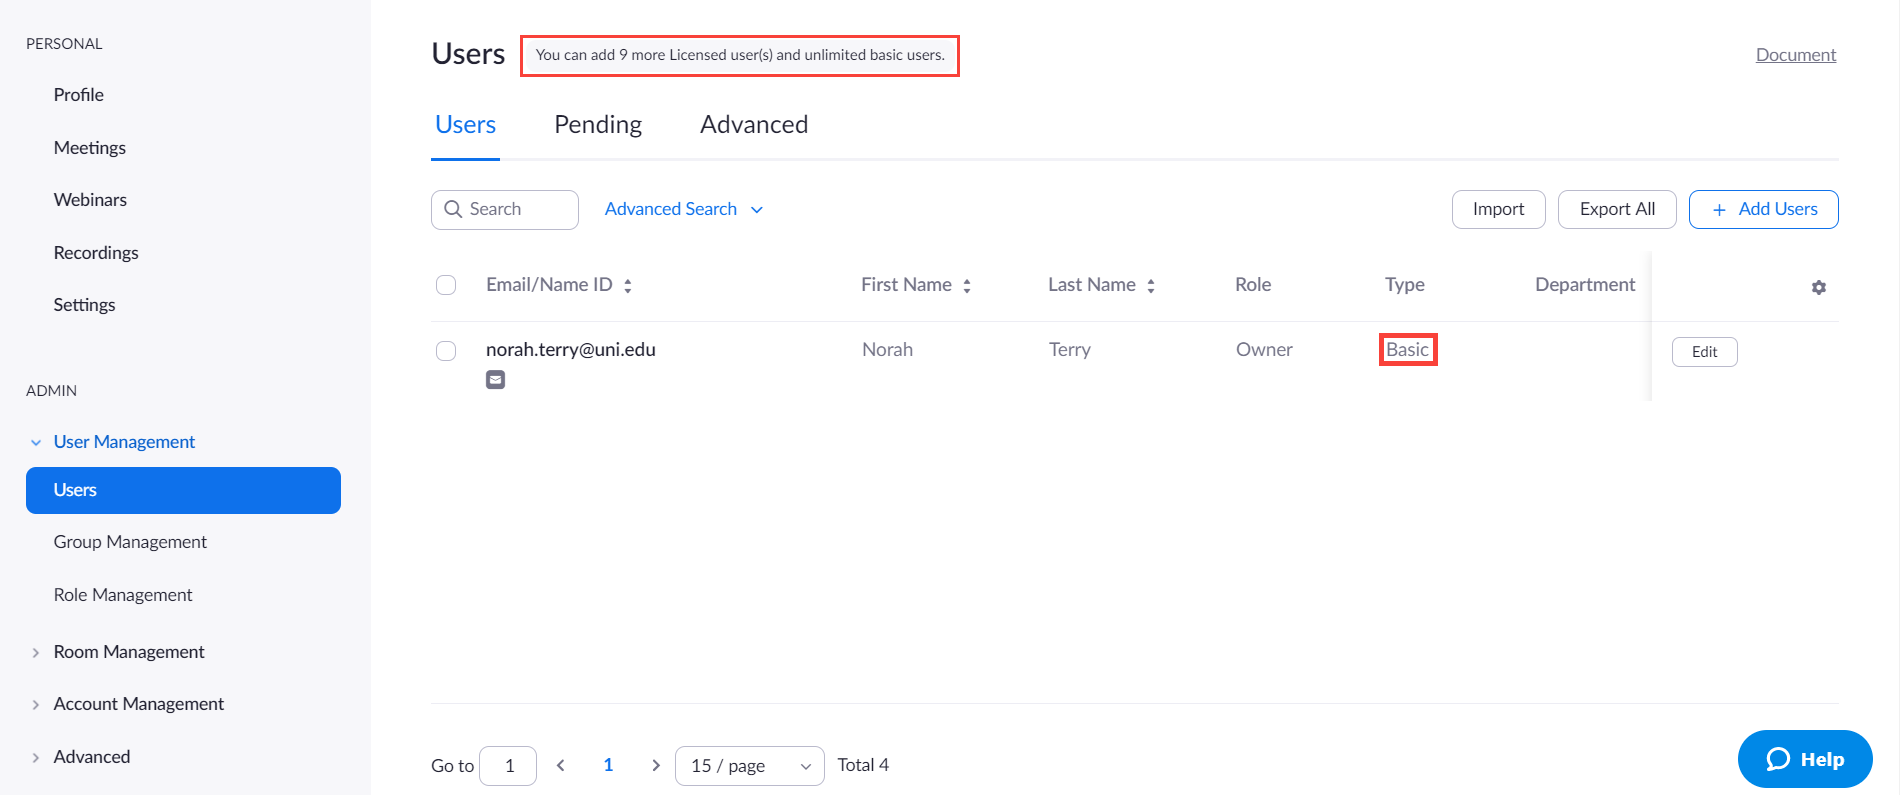
- Click on User Management in the sidebar next to your Zoom profile.
Select Users.
You will be presented with your owner account on the Users tab.Info In the header of the tab, you can see the number of remaining licenses you can assign to virtual rooms (here, the number of remaining licenses is 8 out of the total of 9).

- Click on Edit in the row of your owner account.
The user editor pop-up opens. - In the User Type row, select the Basic radio button to switch your account to basic and free up a license for a virtual room.
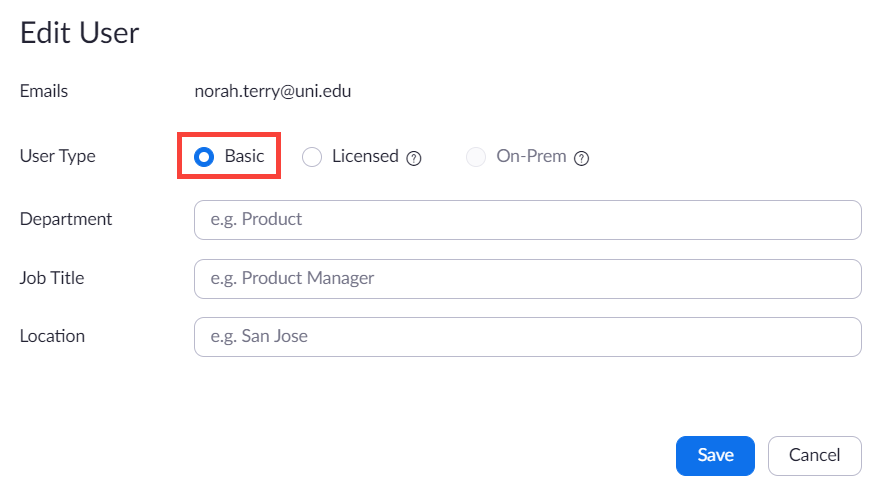
Click Save.
Your owner account type has changed to "Basic".Info In the header of the tab, the number of licenses you can apply increases by one (to 9 in our example).
Disable Waiting Rooms
| Info |
|---|
Zoom has enabled the Waiting Room feature by default in their May 2020 update. If waiting rooms are enabled, SPs need to admit each learner to the virtual encounter they are currently hosting. |
To disable this feature:
- Log into your Zoom owner account.
- Open Account Management on the left.
- Go to Account Settings.
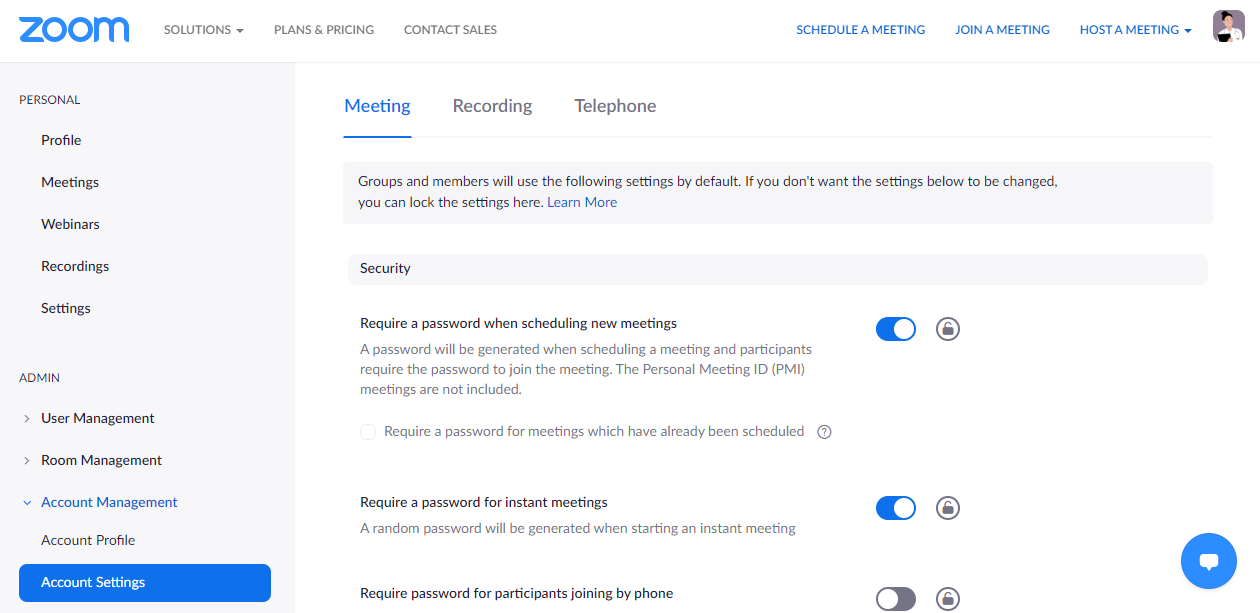
- On the Meeting tab, scroll down to the Waiting room setting.
You can find the setting right away in the Security section.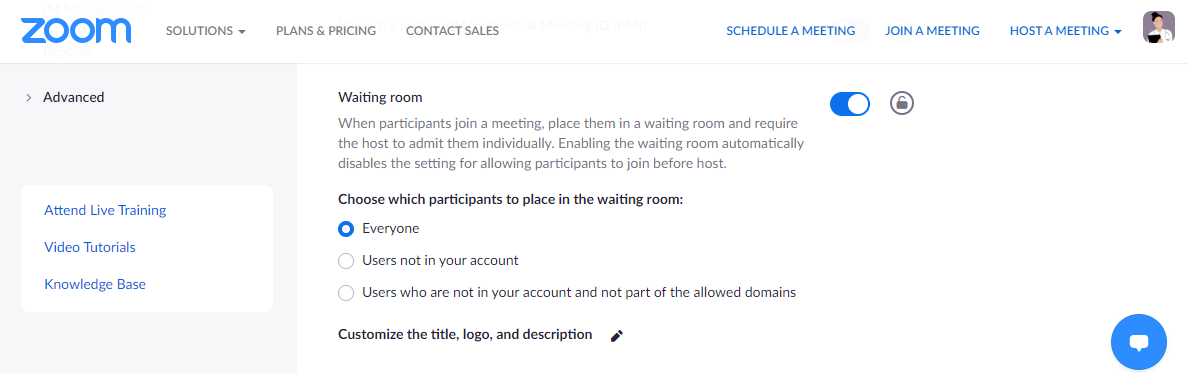
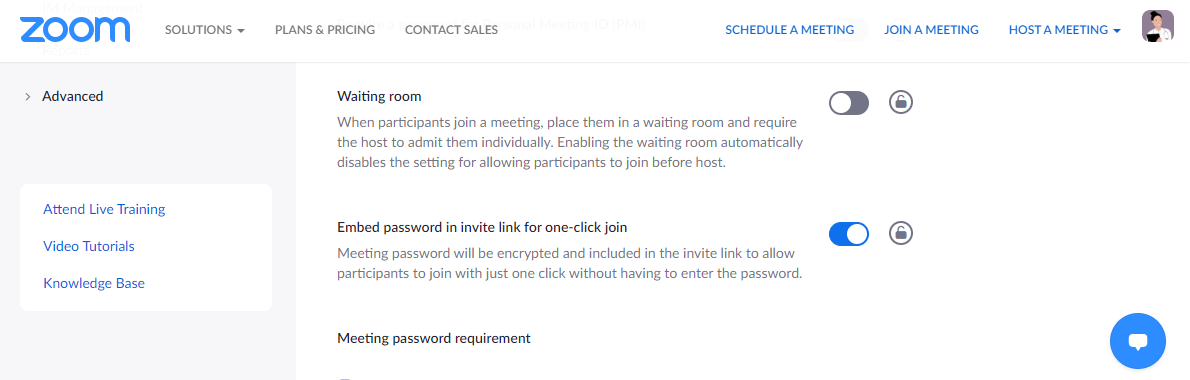
- Toggle the switch at Waiting room.
A dialogue will open where you have to confirm the setting: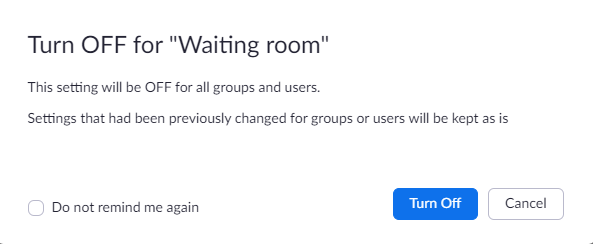
- Click Turn Off and your change will be saved automatically.
Enable Auto-Save for Chat Conversations
| Info |
|---|
Chat conversations are not saved along with virtual encounter recordings to CAE LearningSpace. |
| Tip |
|---|
Enable automatic chat saving to have chat conversations saved locally or to the cloud when SPs end their virtual encounters. |
Save Chats to the Cloud
| Info | ||
|---|---|---|
| ||
Save in-meeting chat messages while cloud recording is in progress. |
| Note | ||
|---|---|---|
| ||
Only those chat messages will be saved that were sent to everyone while the meeting was being recorded to the cloud. |
Saving chat messages to the cloud can only be enabled for each user separately:
- Log into your Zoom owner account.
- Open User Management on the left, then select Users.
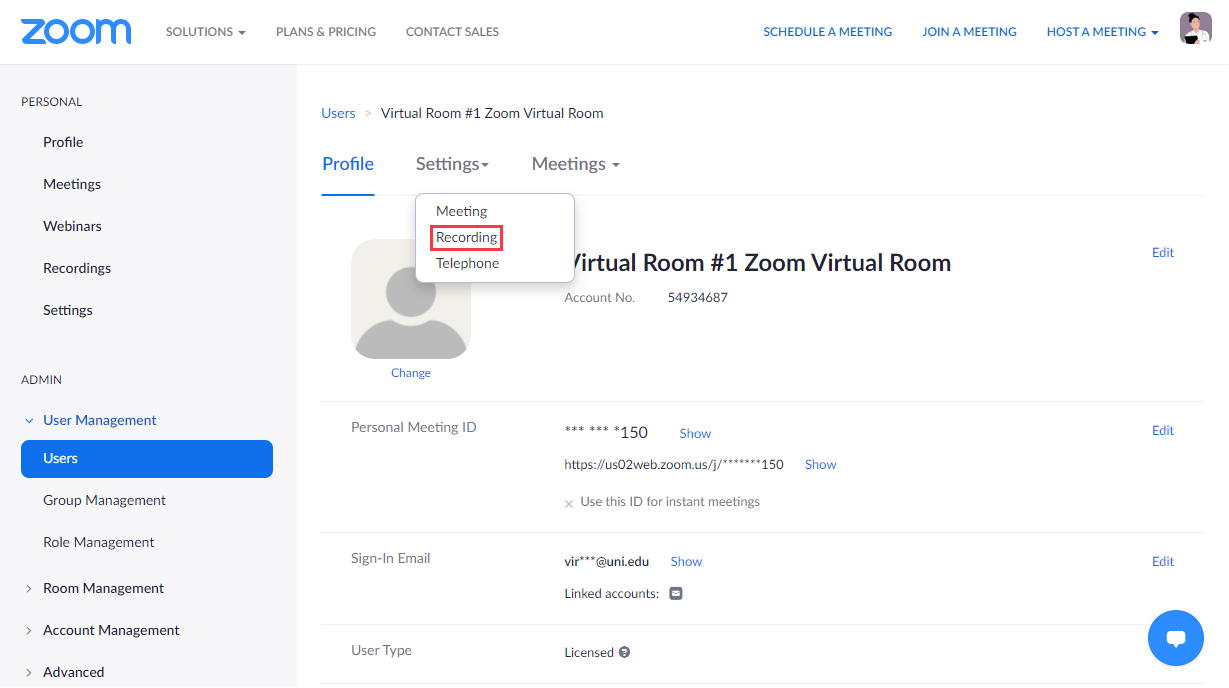
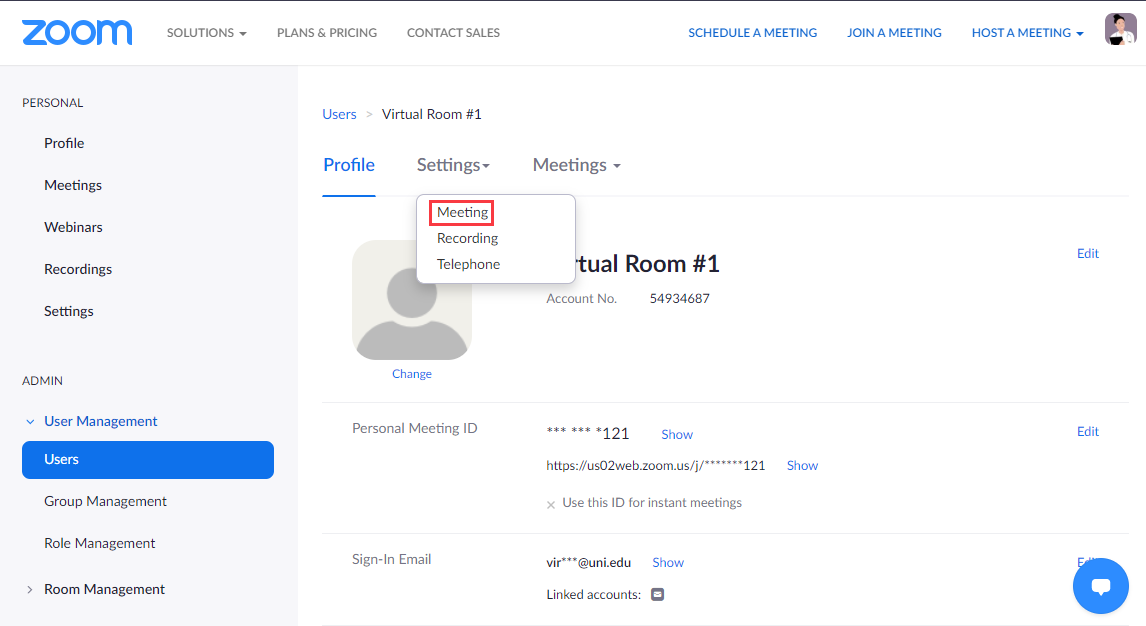
- In Users, click on the user account you want to modify.
You will be redirected to the user account's profile page. - Once there, open the Settings drop-down.
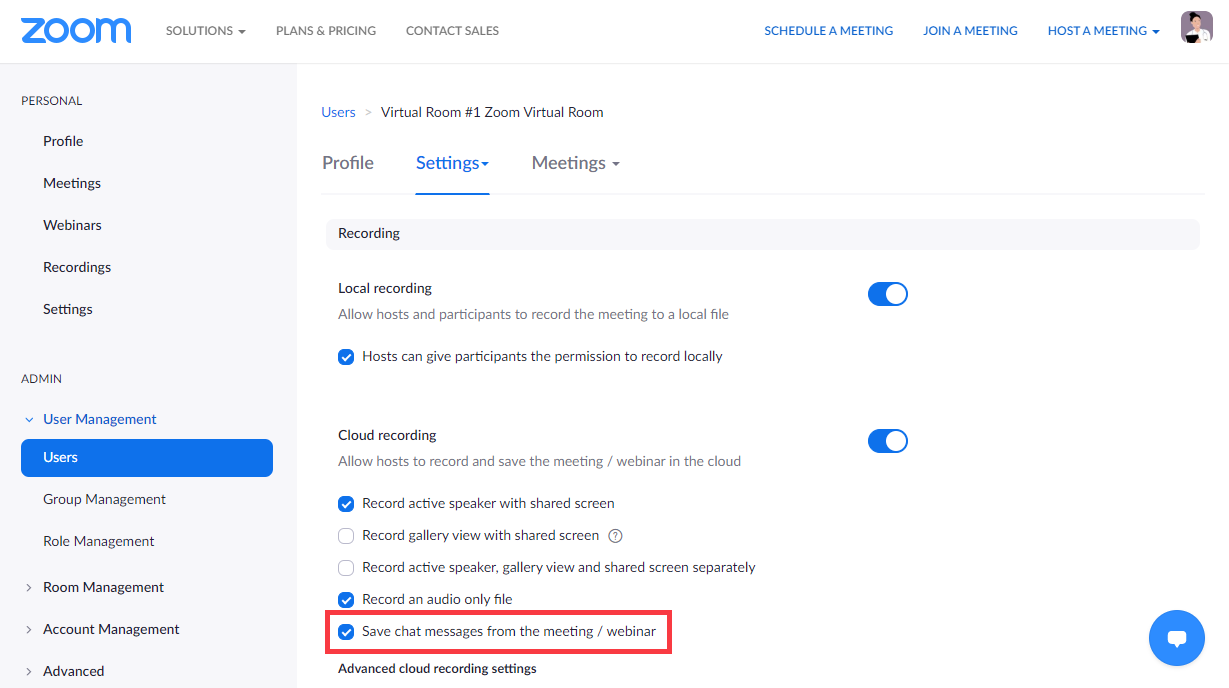
- Select Recording.
Scroll down to "Save chat messages from the meeting / webinar" and make sure the checkbox is selected.
Info When a new user is created in CAE LearningSpace using the JWT method, this checkbox is selected by default.
| Expand | ||||||||||
|---|---|---|---|---|---|---|---|---|---|---|
| ||||||||||
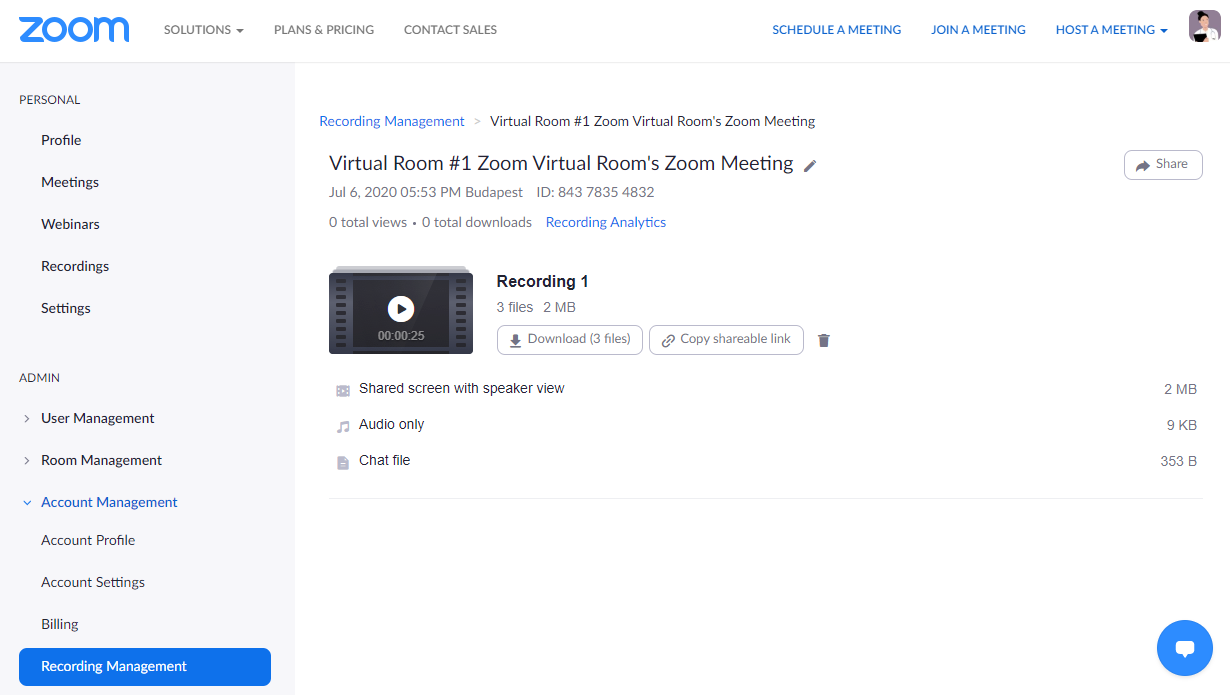
Chat files can be retrieved from the cloud storage in each licensed user account of a CAE LearningSpace virtual room:
However, once recordings arrive in the Video Review module from the cloud, Zoom moves the recordings to the Trash folder in the user account of the virtual room. If a recording is in the Trash folder, you will not be able to download the meeting recording and its attachments—such as chat history or the separate audio file of the recording—from Zoom. Deleted cloud recordings can be accessed for another 30 days after they were moved to the Trash:
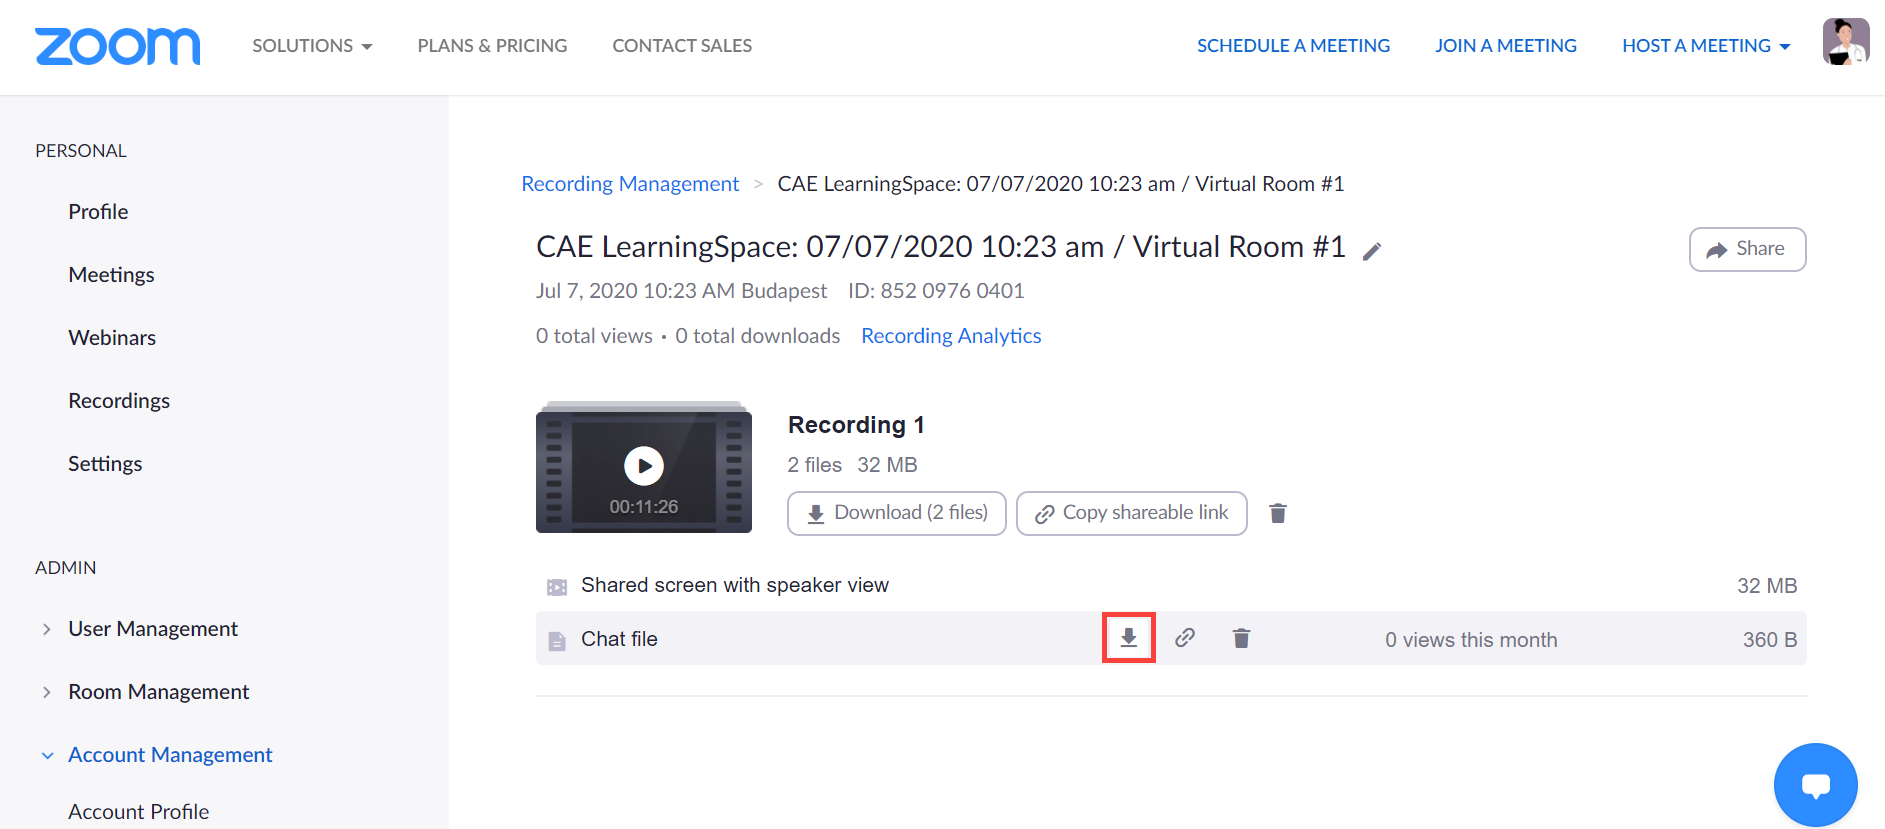
11. Hover over the chat file to view options.
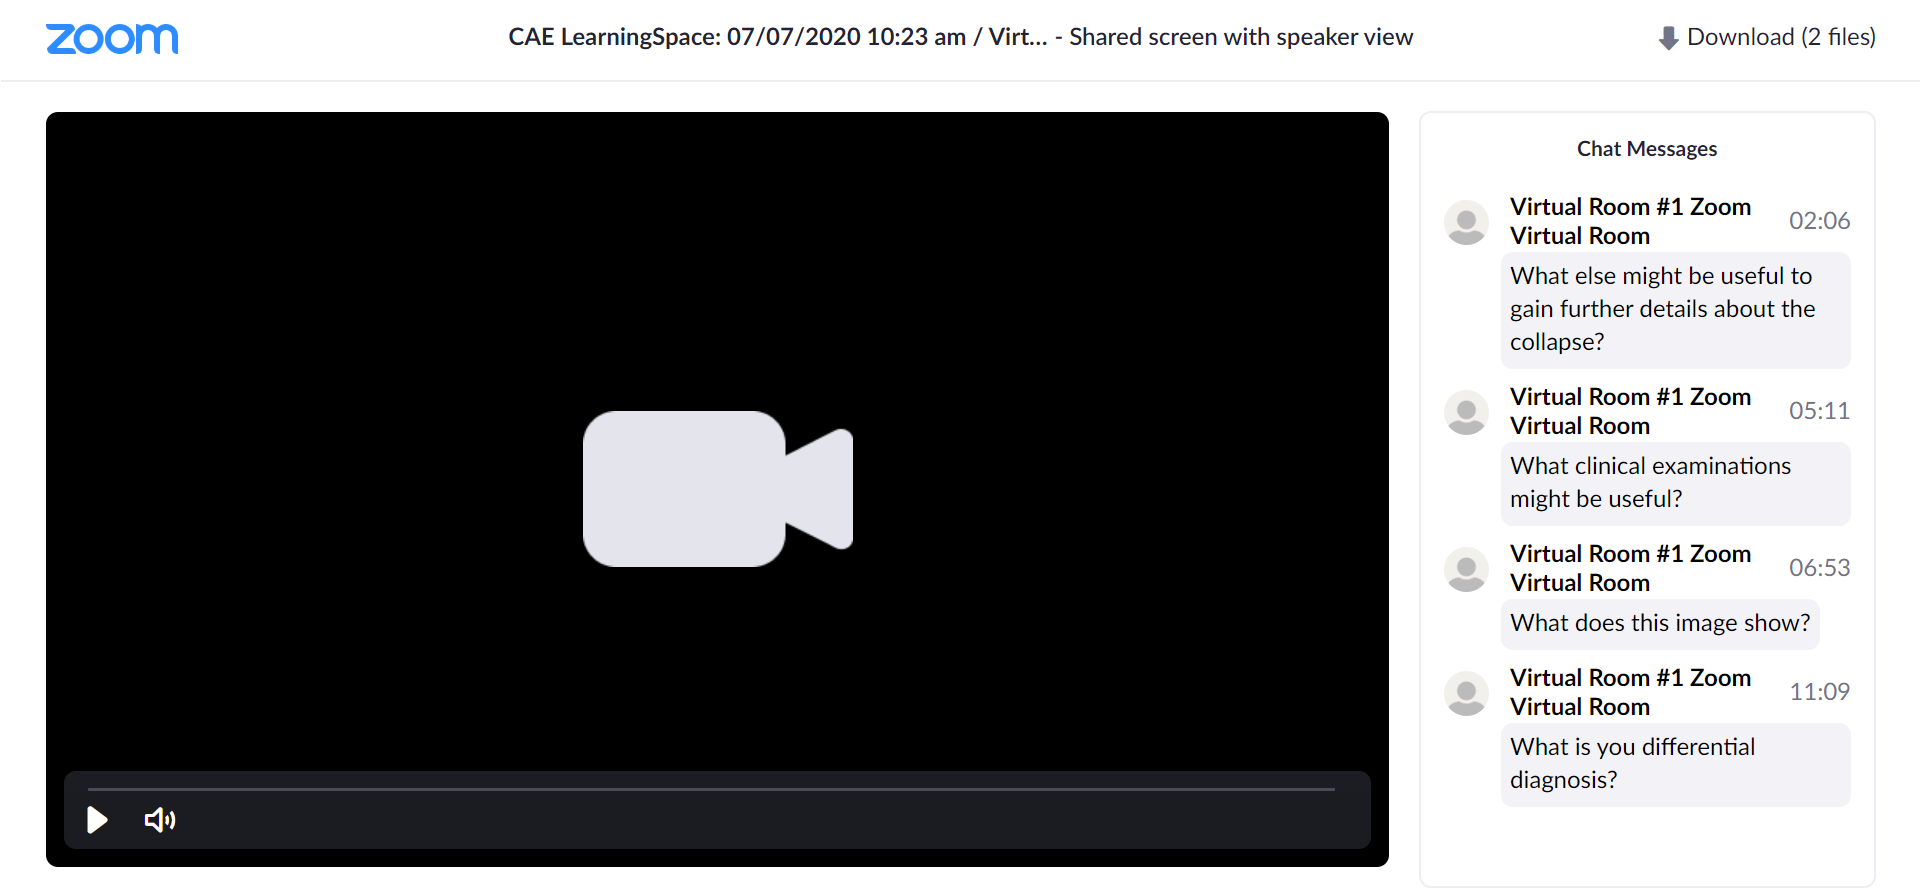
12. To display chat history side-by-side the meeting recording, open the video recording by clicking on its title:
|
Save the Chat Locally
| Info | ||
|---|---|---|
| ||
Set up auto-save in your Zoom owner account to apply the setting to every account registered as a User in the Zoom owner account. Every in-meeting chat message that the host receives directly—either one-on-one or sent to everyone—will be saved to the host's device when the meeting is ended to the default location specified by Zoom or a selected folder. |
| Tip |
|---|
The folder containing the downloaded chat file will open automatically when the meeting is ended. |
- Log into your Zoom owner account.
- Open Account Management on the left.
- Go to Account Settings.
- On the Meeting tab, scroll down to the Auto saving chats setting.
You can find the setting in the In Meeting (Basic) section.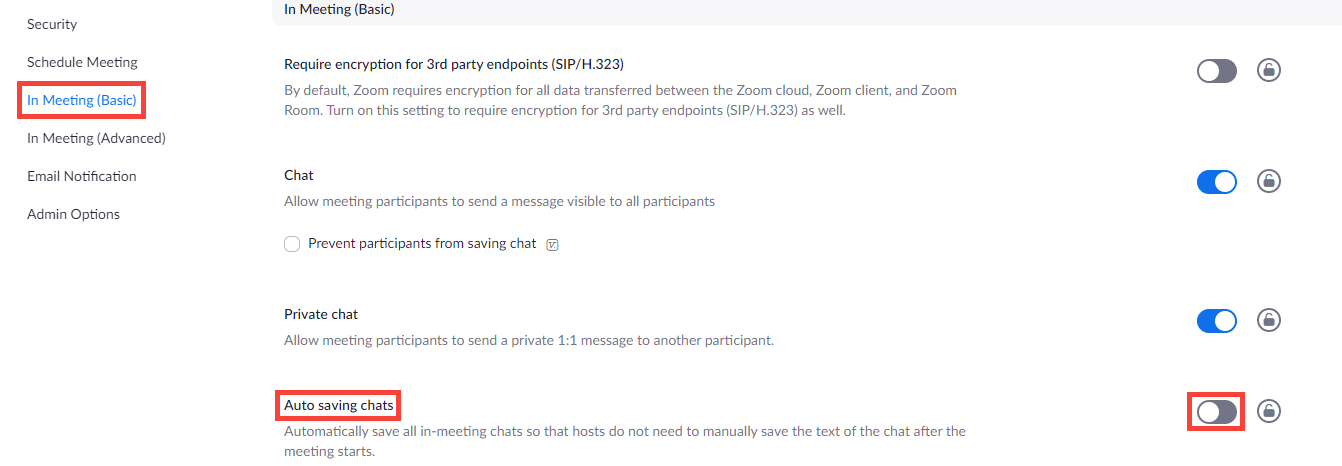
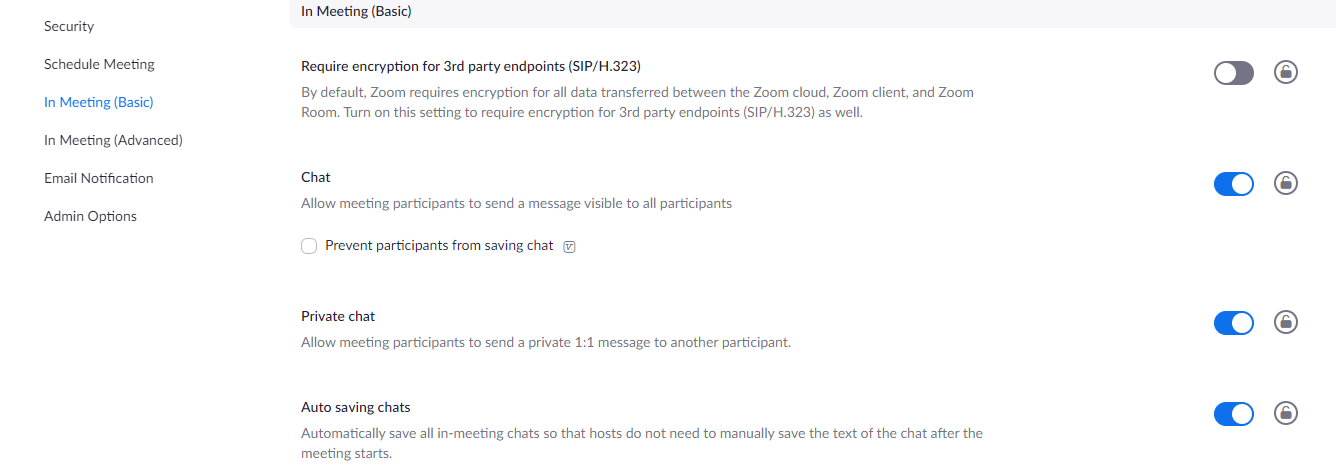
- Toggle the switch at Auto saving chats.
A dialogue will open where you have to confirm the setting: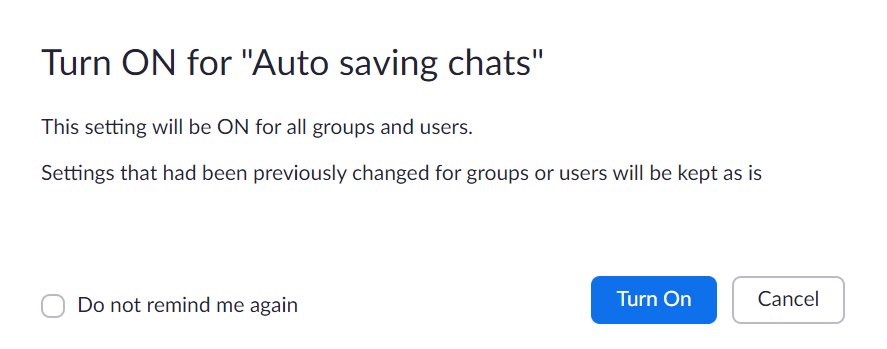
- Click Turn On, and your setting will be saved automatically.
| Tip |
|---|
In case you do not want to apply auto-save to every user in your Zoom owner account, you can manage user settings individually with User Management.
|
| Info | ||
|---|---|---|
| ||
Continue to this page to set up your virtual rooms. |
...
Overview
Content Tools