Page History
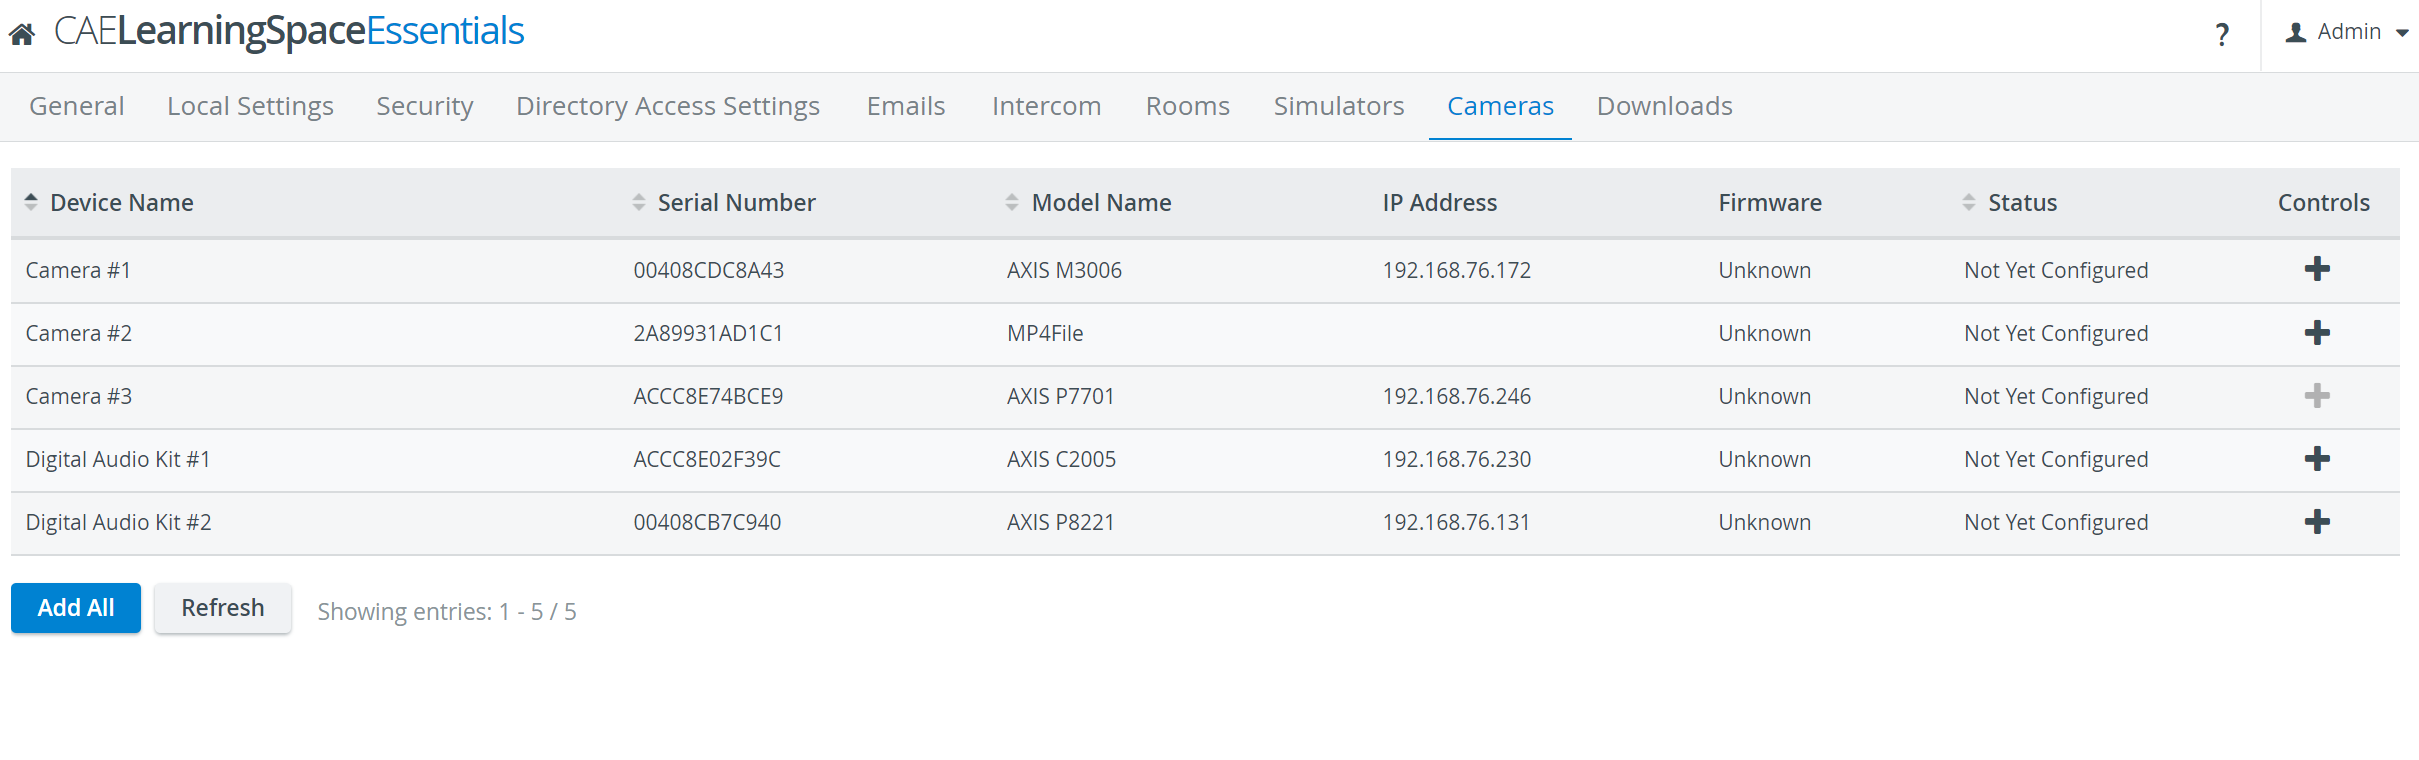
The Cameras tab contains the list of available cameras. Here you can manage the cameras and audio devices detected by your CAE LearningSpace system.
If a device is detected you can add it to Learning Space by clicking on the plus sign ![]() . With the Add All button, all devices can be added to the system at once.
. With the Add All button, all devices can be added to the system at once.
You can configure a camera by clicking on the plus sign ![]() on the right and opening the Camera Settings window.
on the right and opening the Camera Settings window.
- Camera controls: on the left you can see a live feed of the currently selected camera, you can change the cameras position by clicking on the screen
- Camera zoom: you can change the cameras zoom by hovering the mouse in the camera feed and rolling the scroll wheel
| Tip |
|---|
For more details on connecting cameras, see How can a camera be connected to the system? |
The cogwheel in each row of a configured camera prompts the Camera Settings window to open, where the following settings can be specified: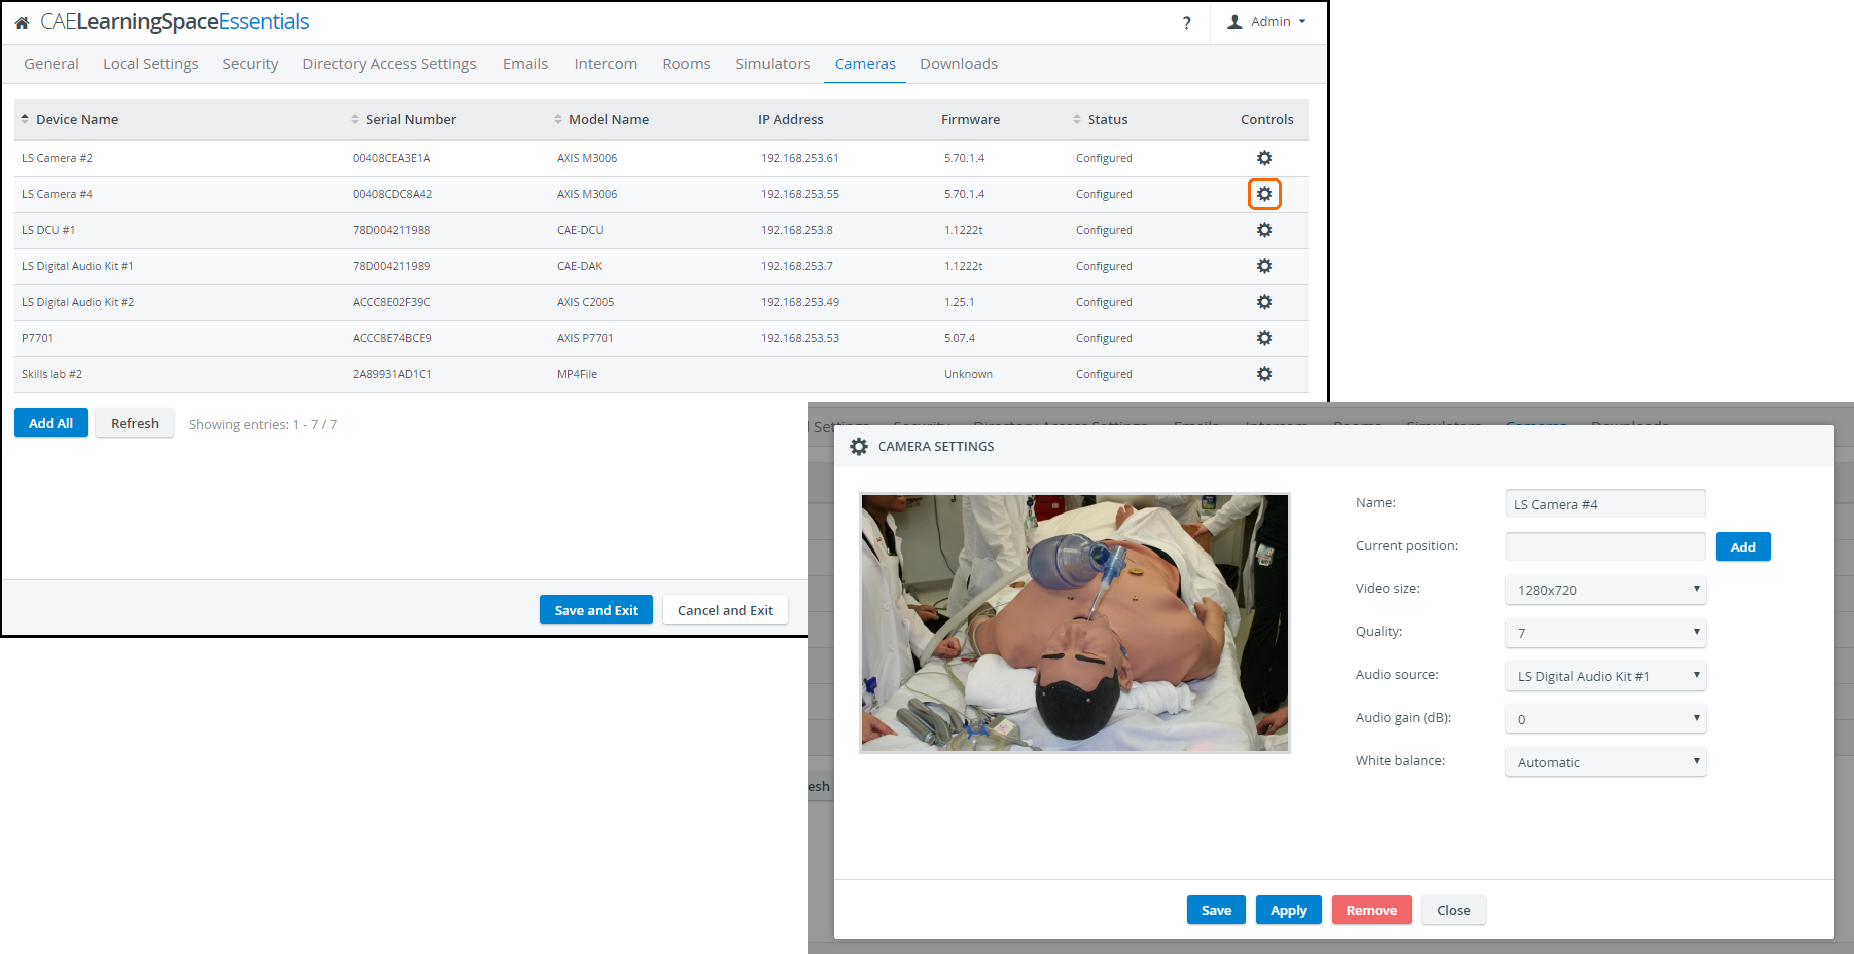
- Name - camera name for distinction
- Autofocus - only for PTZ cameras: when checked, the focus is set automatically when using pant-tilt-zoom
- Current position - only for PTZ cameras: a preset position that can be saved by typing in a title then clicking the Add button
| Info |
|---|
| Once a new position is added, the 'Available positions' drop-down appears with a Go to and a Remove button, activating or deleting the selected position respectively. |
- Video size - video resolution supported by the camera and LearningSpace
| Note |
|---|
The sizing of camera streams might not be optimal (images might be cut) with a 4:3 video size (aspect ratio). The recommended ratio is 16:9 (e.g. 1280x720). |
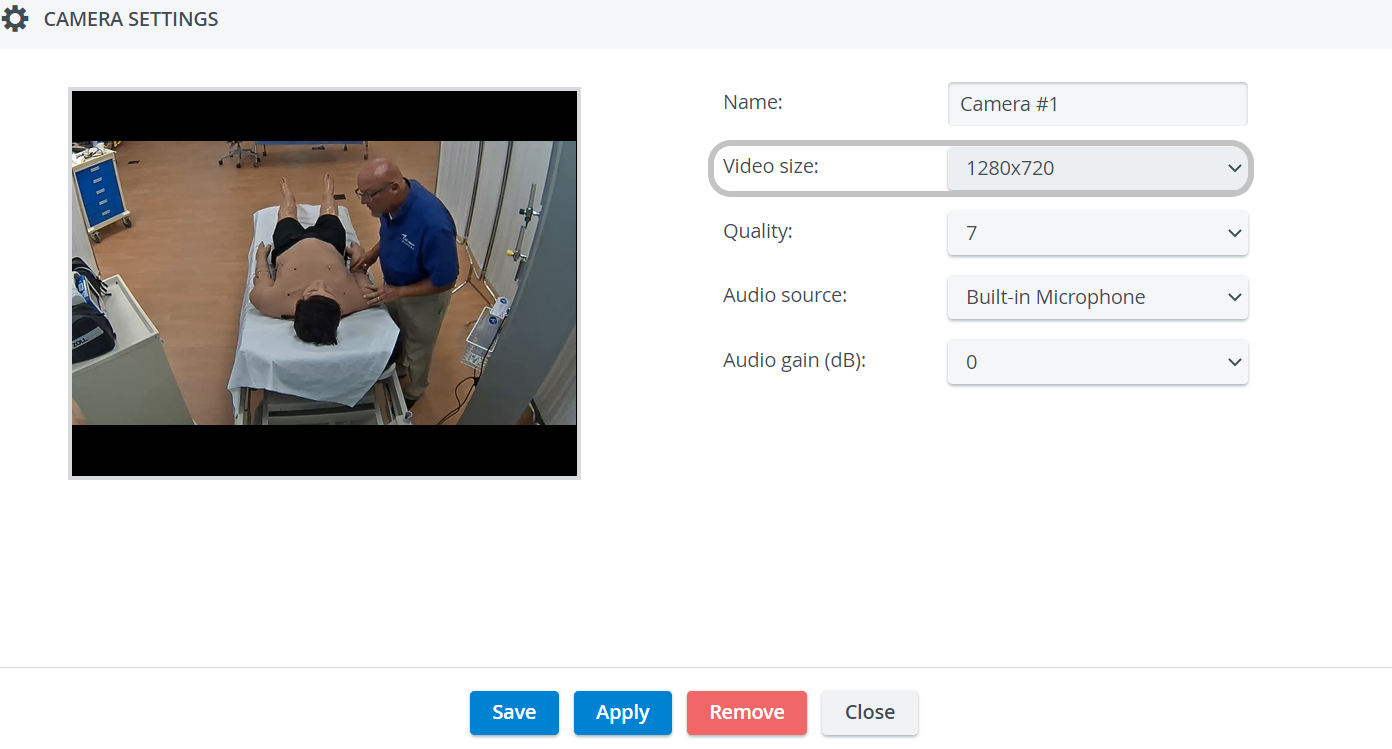
- Quality - the quality of the camera image on a 10 scale (the lower the worse is the camera image but the smaller is the recording size)
Audio source - source of audio for the camera feed. If available, built-in microphone will be the default audio source.
Info For cameras without built-in audio, one of the external audio sources has to be selected from the Audio source drop-down, in order the camera to be able to be assigned to a room within LearningSpace.
In case the "use without audio" option is selected, you can assign the camera to a room but the videos will be recorded without audio, which means that in this case audio track will not be recorded.
- Audio gain (dB) - volume setting for the audio source (built-in mic or selected source): you can change the volume of the audio by increasing or lowering the audio gain
- White balance - adjustment of the intensity of white color in the camera feed: how should the camera handle light exposure (change the image if it is too bright or too dark)
| Info |
|---|
| Normally, the 'Automatic' setting is optimal, it should only be changed under special circumstances. |
- Upside down - for ceiling-mounted PTZ camera types, checking this setting allows for switching the original (ceiling) perspective: it flips the camera image by 180 degrees.
| Info |
|---|
For further information, visit our System Module and System - FAQ pages. |
Overview
Content Tools