The Inventory module provides you with tools to manage the Repair of your Assets.
- Check an asset out for Maintenance.
- Keep a record of repair details for each repair.
Assets reserved for Repair are set in "Under Repair" status in the Catalog. During the repair period, no transaction can be performed with the asset.
Only assets that are currently in stock (quantity is 1/1, status is Ready) can be set for repair.
View related Training video here.
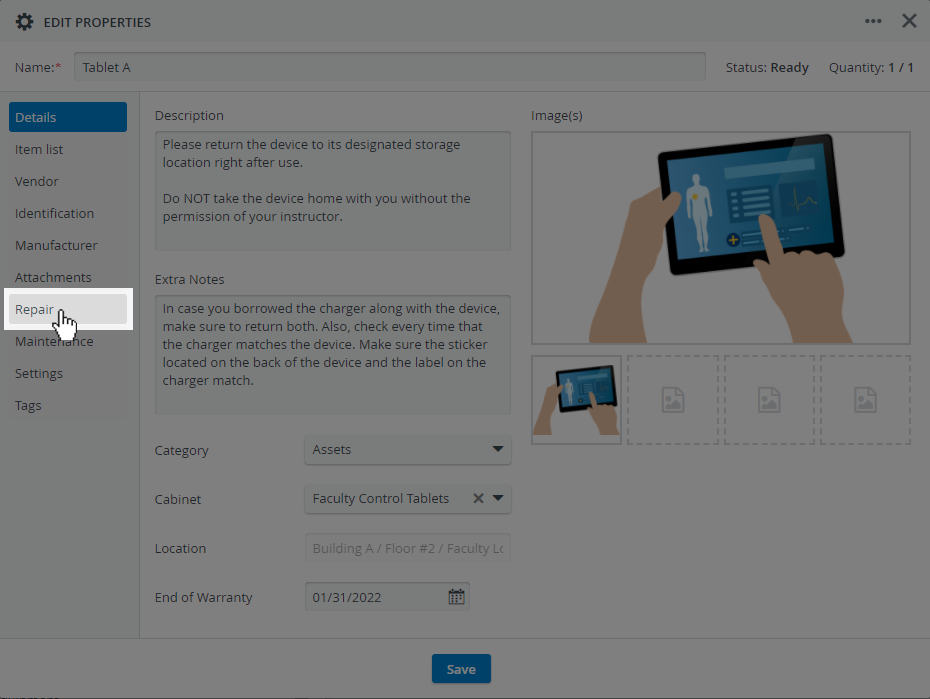
- Open the asset entry on the Catalog tab.
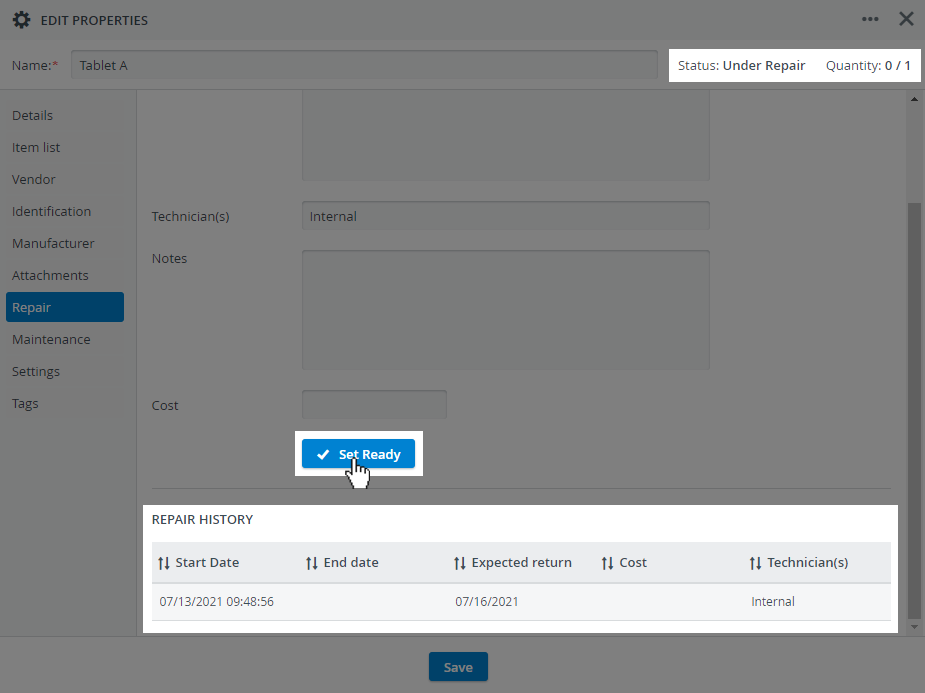
- In the Edit Properties popup, select the Repair tab.
You will be presented with a New Repair form in which you can add information about the repair.
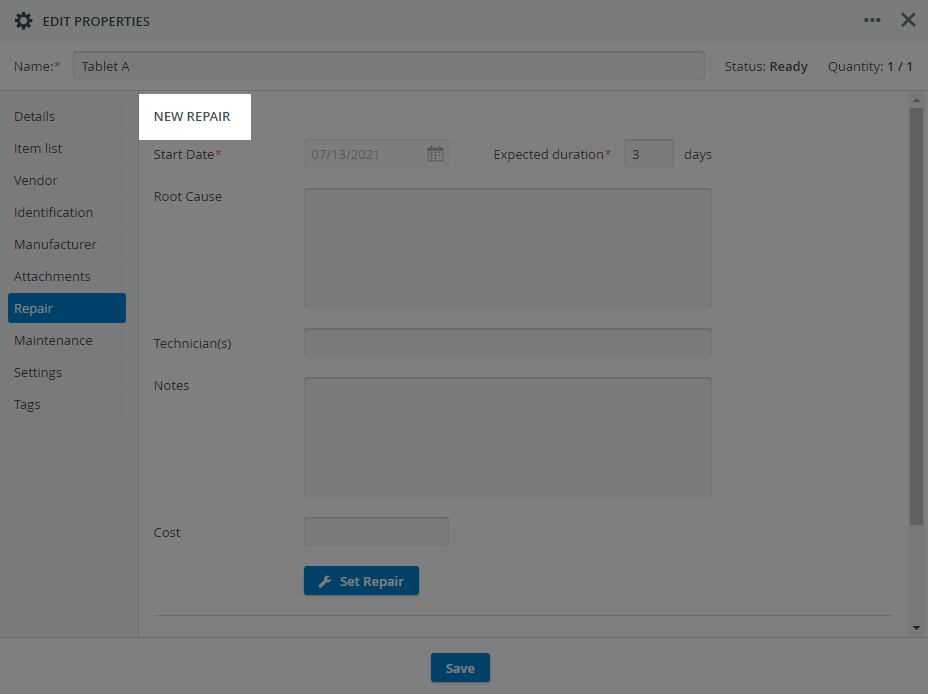
The Start Date displays the date the current repair beings. The date is always today’s date.
Enter the estimated duration (in days) of the repair in the Expected duration field.
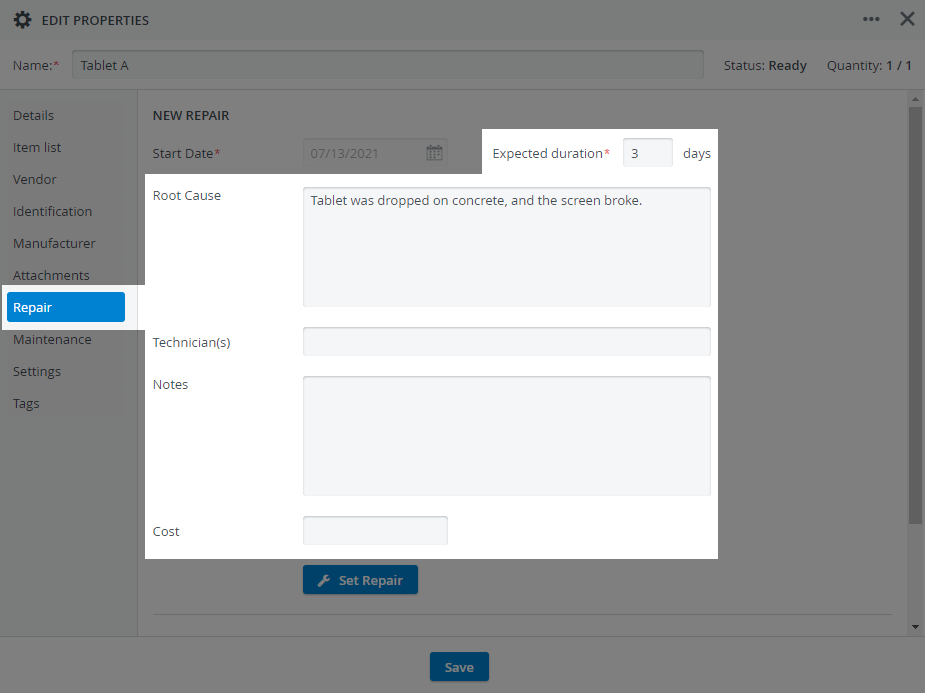
You can also add additional information about the repair, such as the root cause, repair technicians, notes about the repair, and the cost.
You will not be able to check the asset out for repair (the Set Repair button at the bottom of the form stay inactive) if you do not indicate the expected duration.
Click on the Set Repair button.
- The status of the asset will change to 'Under Repair'.
- The asset Quantity will change to 0/1, indicating that the Asset has been checked out for repair and is unavailable during the repair period.
- The repair record, with the expected return date, will be added to the Repair History at the bottom of the window for future reference.
- Click Save at the bottom of the item Edit Properties window to save the repair and return to the Catalog.
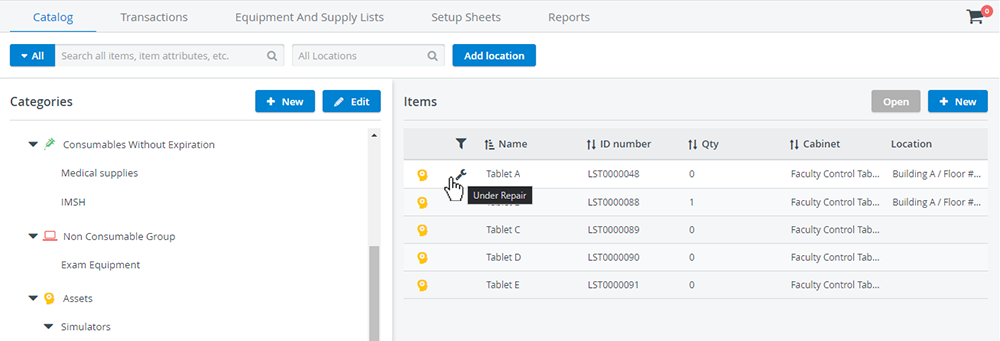
- A wrench icon is now displayed next to the Asset entry, indicating that the Asset is Under Repair; and the Quantity is now 0.
No transaction can be performed with the asset while it is checked out for repair.
Check an Asset in After Repair Has Been Completed
Assets must be checked in after repair to make them available for use.
- To check the asset back in, open the asset entry in the Catalog.
- On the Repair tab, click the Set Ready
- The status of the Asset (in the upper right corner) will change to Ready.
- And the asset Quantity will change to 1/1, indicating that the asset is now available for use.
- The record in the Repair History updates to display the repair end date.
- To update other information in the repair record, click the record to select it. The record information will be displayed in the work area.
- Update with additional information as needed.
- Click Save in the Edit Repair window to save the updated record.
- And then click Save at the bottom of the Edit Properties window when you are done.
In the Catalog, the wrench is no longer displayed, and the quantity returns to 1, indicating that the asset is ready for use.
Learn more about the Inventory Manager on our Inventory - How to pages, and watch the Inventory Manager Training Videos.
Overview
Content Tools