From our 2022 Summer release, the Single Room View (SRV) of CAE LearningSpace Enterprise will have a much cleaner, more easy-to-use user interface on both the Recording and Video Review pages, and by so, increasing efficiency and enhancing user experience.
See what is changing in your CAE LearningSpace Enterprise environment with this new release:
List of Enhancements of the Single Room View
The SRV layout re-organized
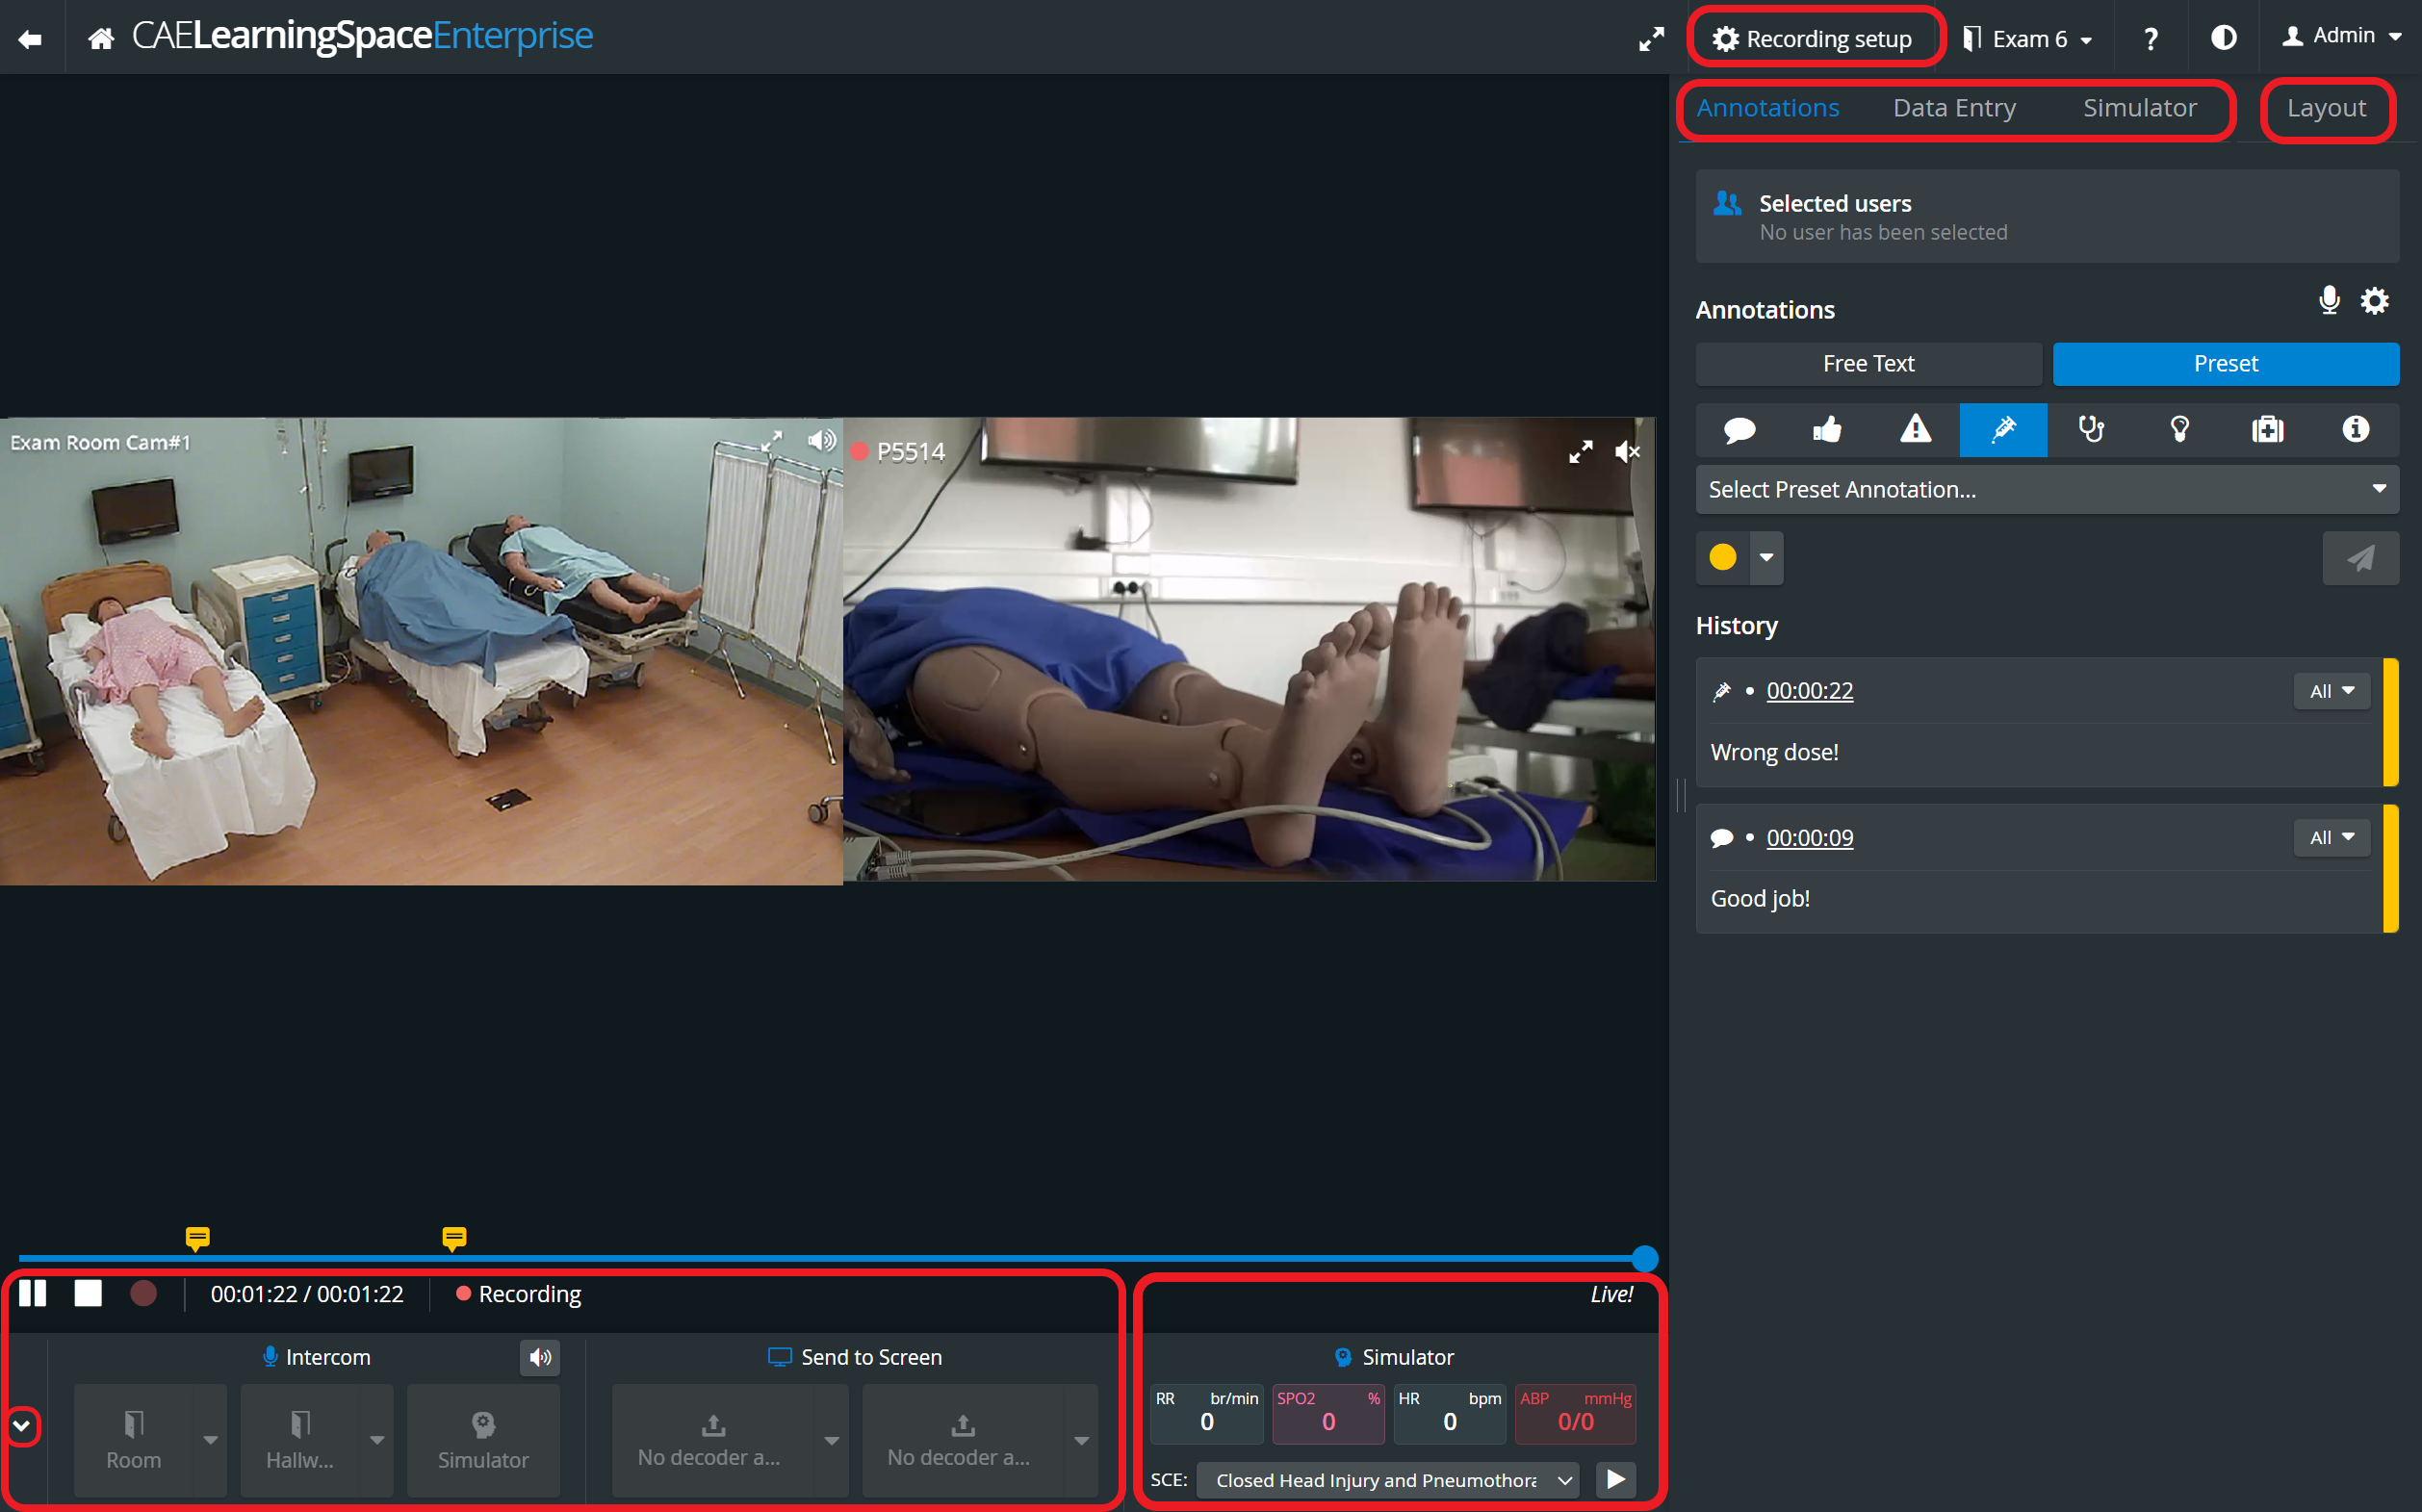
The user interface of the Single Room View becomes re-organized for more efficiency in the following way:
Re-organized basic layout
- Video player has been moved to the left hand side
- Annotations and Data Entry tab has been moved to the right side, Simulator Control has been added
- Record control has been renamed to Recording setup
- Intercom and Video control section has been moved to the bottom
- Send to Screen option and Simulator Panel (widget) has been added at the bottom
- Bottom panel can be minimized
Layout tab
IMPORTANT CHANGE: With this new release, Layout is saved as part of the User’s settings and it is no more saved as part of the Room’s setup.
This means that, while there is no option to have someone set up a custom layout for a given room to be shared with everyone, each user will see their own custom setup and they will not overwrite each other.
Layout settings section
In the new Single Room View layout, users can choose from the following views to get the most convenient and suitable layout for their aims: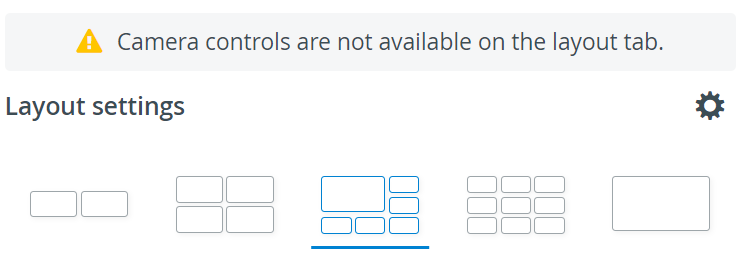
- Double view (2x1)
- Quad view (2x2)
- Pinned view (1+5) - one feed is highlighted
- 3x3 view
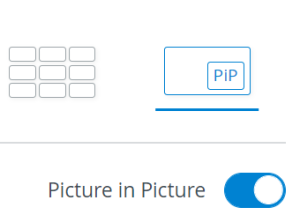
- Single view - Picture-in-Picture view can be switched on
For new rooms, before saving unique/individual/ personalized layouts, all media sources are displayed in the optimal layout by default.
While Layout tab is active, the on-screen Camera controls (e.g. PTZ) are disabled due to the drag-and-drop feature.
Updates to Full screen mode:
Camera layout can be put to full screen mode with slider component at bottom
Slider is available on 1-video full screen mode
Media section
Cameras and Media related to simulators (physio panel, waveforms, ctg) added to a room are available here.
Drag-and-drop functionality
Media source (Camera feeds, Physio apps) can be moved into the layout or into the Media section as desired, using drag-and-drop. This way, only the selected media sources can be presented to the viewers.
By default, recording will apply to all media - whether it is added to the video player section or not. This can be overwritten in the Recording setup section.
Picture-in-Picture
One desired camera feed/media source can be displayed in a focussed way, while (four?) other media sources are displayed in the corners of the view.
***gif**

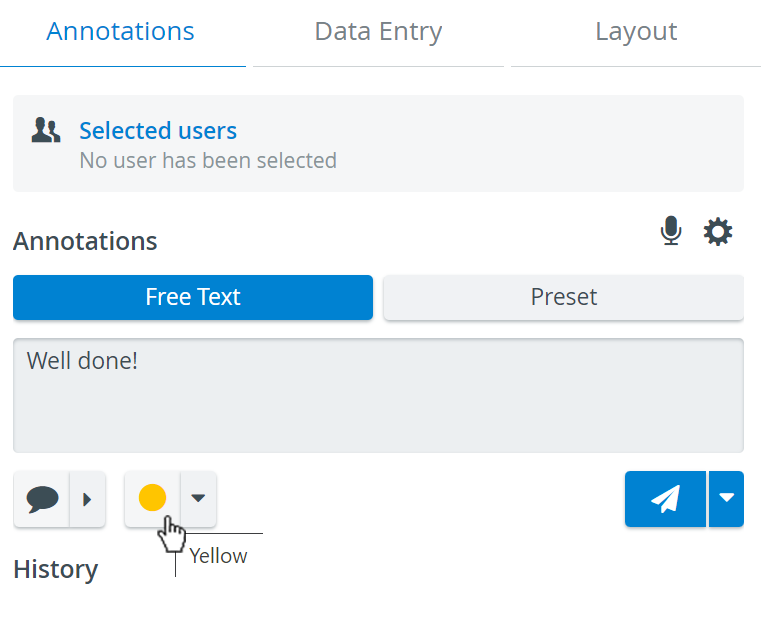
Annotation section re-designed
From this new release, LearningSpace users can
pre-select the color of a free-text annotation
- pre-select the color of a preset annotation
- choose a category for an annotation/preset in an easier way
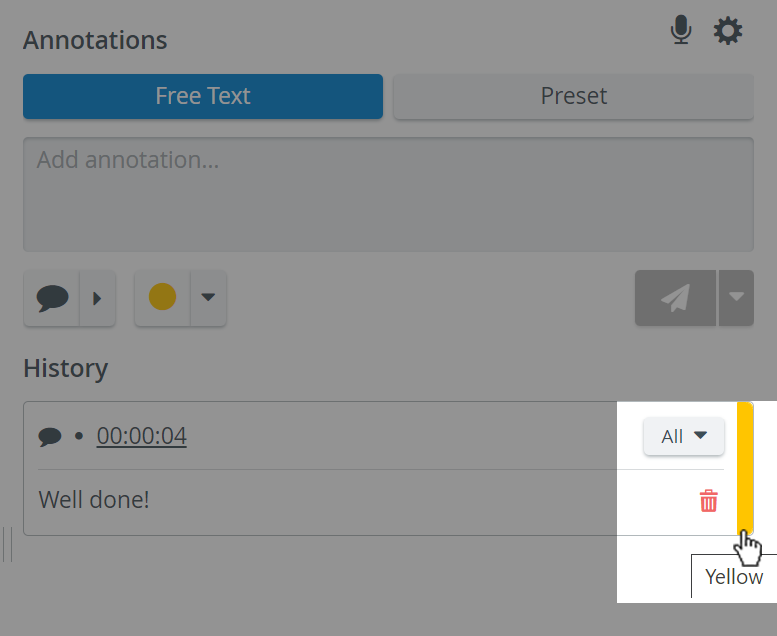
- see the "All" phrase on the card, if annotation is added to “All learners” (the name of all learners will not be displayed separately on the annotation card).
The time of typing the first character will be displayed as the timestamp of an annotation.
Color name of annotation
The name of the color of an annotiation is displayed when hovering over the annotation on the timeline to comfort colorblind users.
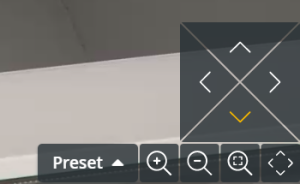
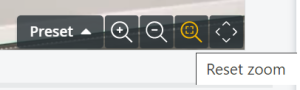
PTZ functionalities
With the new release, new ways of pan-tilt-zoom (PTZ) functionalities are introduced.
- Click&pull ptz (??): click in the centre video and pull the camera into the desired direction. The movement of the camera will stop by releasing the mouse.
- Scroll-to-zoom (zoom-in and zoom-out by scrolling on the mouse)
- Pan-tilt-move (camera will move in the direction of the part clicked)
- Zoom-area (camera zooms into the area drawn by the user)
- Move and reset buttons
***gif ***
Playback
During live recordings the following enhancements can make video review easier:
- Recording can be paused or played back by dragging the slider to the desired point on the video slider.
Video can be paused and slider can be dragged after 30 seconds have passed from the start of recording. Before that time the pause button is greyed out and the slider cannot be moved. (warning message???)
- Both current and live timestamp are displayed next to each other in the video record panel. Live view can be switched back to by pushing the Go Live button.

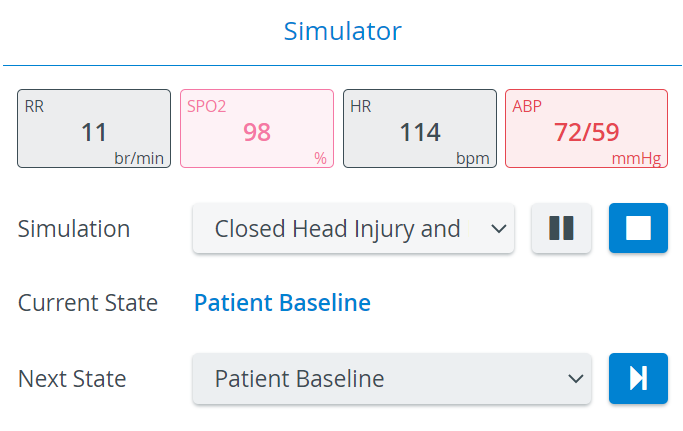
Simulator panel
Simulator panel ('widget') is introduced in the Recording panel. When a simulator is connected and assigned to a room, the SRV (single room view) of then Recording module will have Simulator panel displayed. The Simulator panel provides information about
- the main physiological data,
- the simulation scenario running on the manikin: including the Case Title, the actual ('Current') and the upcoming ('Next') States.
The Simulation scenario can be
- played

- stopped

- paused

- changed (by selecting another scenario from the drop-down)
- played
The Next State drop-down menu allows for moving onto a selected State. ![]()
***replace with gif from Ent! ***
Simulator Control tab
CAE Healthcare simulators associated with a room display their respective Waveform and Simulator Log in the Single Room View and get recorded along with the camera feed when REC ![]() is started.
is started.
***replace with proper screenshot for Ent ***
Installing and connecting a simulator can be done within the System module.
The Waveform and Sim Log display figures in synchrony with the video feed.??

Intercom via Simulator
From this release, Intercom can be used via Simulators as well, within CAE LearningSpace Enterprise: announcements can be sent to the simulator's head ("patient speaking"), by pushing the Simulator button in the Intercom area.
**replace with proper screenshot***
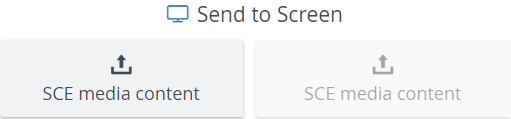
Send to Screen option
With the help of a decoder (**more info'**)), given media can be sent to a display in the room. Although this section is always visible, it is only useful when using Maestro simulators (***link to CAE page?**) in the room. (Not working right now??)
Picture files can be sent to different display monitors by clicking the corresponding button. There are two kinds of output for the Send to Screen function:
- display monitor
- TouchPro patient monitor of the JUNO simulator

The Send to Screen option requires the following technical setup to be completed:
- monitor/ decoder and/or JUNO simulator connected and assigned to the room (within the System Manager)
- content uploaded (??? or Maestro)
- event scheduled in the room with specific Case
 assigned (if other than TouchPro)
 ***proper screenshot needed***
IMPORTANT: Content can only be uploaded either within a Case ??? (for the display monitor) or via Maestro (for the JUNO).
In case of the former, for the content to be available, the CASE including that content has to be assigned to the recording. A CASE ? can only be linked to a recording through scheduling an event, as a consequence, Send to Screen feature is only possible via an Event for recording.
If a JUNO simulator is connected, content uploaded via Maestro will be available for sending.
Overview
Content Tools