Creating a new group
At Groups, on the left click + New to create a new group.
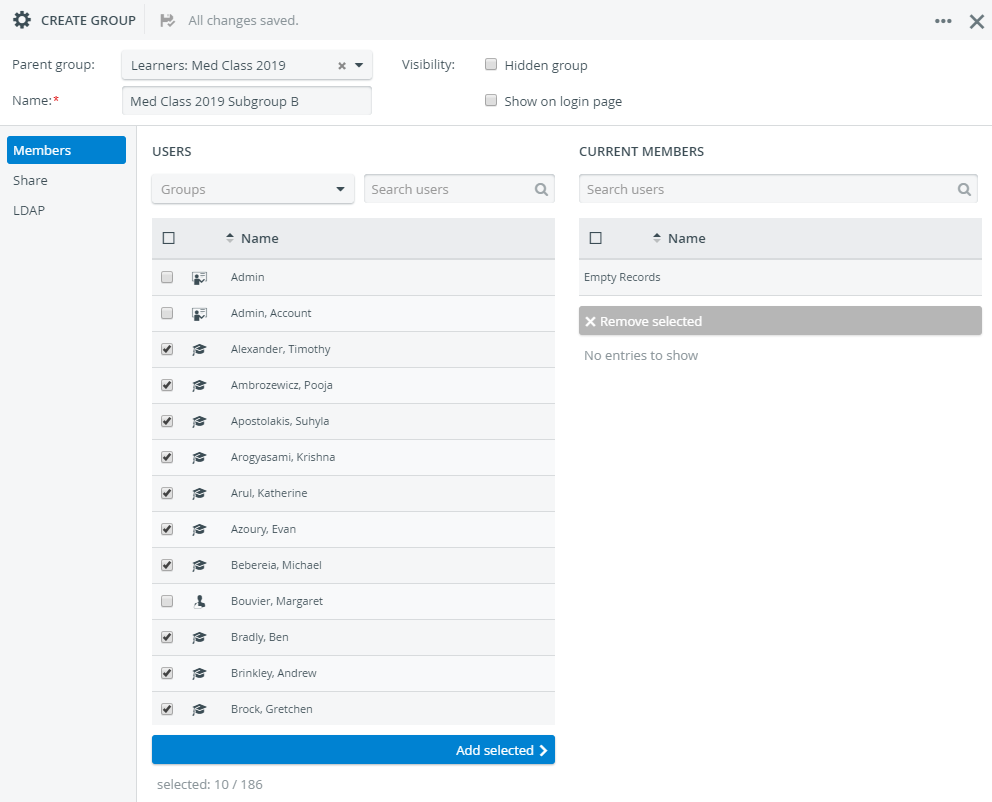
Naming a new group is mandatory. Also, to save and have it appear in the group menu on the left, you have to add at least one user to the new group:
- On the Members tab, select the users (under Users) you would like to include in your new group
![]() You can filter by groups with the drop-down menu or search users in the mini search bar.
You can filter by groups with the drop-down menu or search users in the mini search bar.
- The Add selected button at the bottom becomes active
- Click Add selected, and the selected users will be transferred under Current Members.
You can remove users from a group any time with selecting them and clicking Remove selected.
You can select a parent group from the drop-down menu in the header. Each group can be nested into any other group; there are no restrictions.
If you close the editing window and take a look at the Groups tab, you may see drop-down arrows in front some groups: it means that a group is a parent group that includes subgroups.
![]() Steps for editing an existing group are the same. To open a group for editing, select one from the group menu and click Edit group.
Steps for editing an existing group are the same. To open a group for editing, select one from the group menu and click Edit group.
Hidden groups (Group visibility)

If you do not need certain groups at the moment, you can remove them from the group menu without deleting them.
Selecting the Hidden group checkbox, the group will not appear in the group menu on the left of Groups & Users.
You can restore a group at any time when you need to.
By ticking the Show on login page checkbox, the user group will be displayed on the Legacy login page.
See also What can be "hidden" in LearningSpace, how and for what purpose?
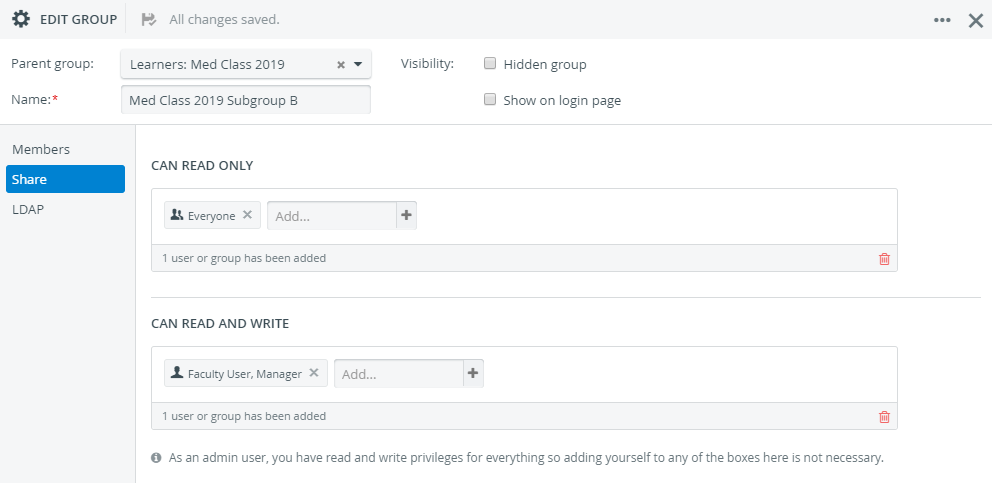
Sharing
Group sharing is different from group visibility.
Each group's accessibility can be set in Share.
You can choose between sharing the group with particular users to let them
- View only: Add users or groups under CAN READ ONLY. Any user included here with access to the User Manager can view the group, but can't edit it.
- View and edit: Add users or groups under CAN READ AND WRITE. Any user included here with access to the User Manager can edit the group.
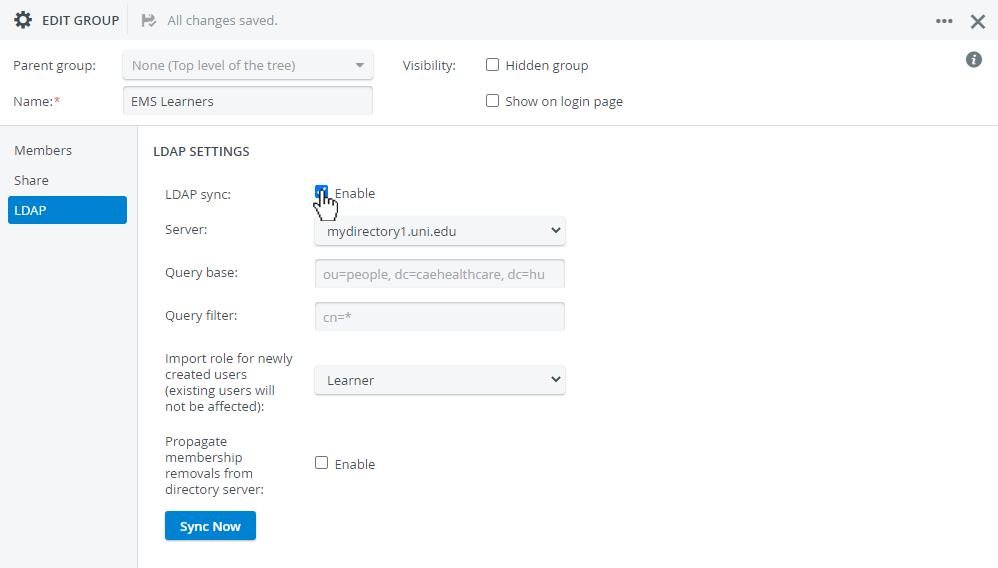
LDAP settings
If LDAP synchronization is configured, you can import users with ease from your directory server(s) into a user group in LearningSpace Enterprise.
Find out more about user synchronization at How to Import and Synchronize Users from Your Directory Server.
For further information, refer to our User Manager and User Manager - How to pages.
Overview
Content Tools