For an introduction to Advanced Scheduling, please visit the How to Understand Concepts within Advanced Scheduling page.
![]() In the case of scheduled Events, learners need to be assigned to one of the rounds of an event in order to complete the Cases required of them.
In the case of scheduled Events, learners need to be assigned to one of the rounds of an event in order to complete the Cases required of them.
To create learner assignments within an event, use the features of the Activity Scheduler page after
- creating the event,
- its timeslots
- and setting up the station(s) for the event.
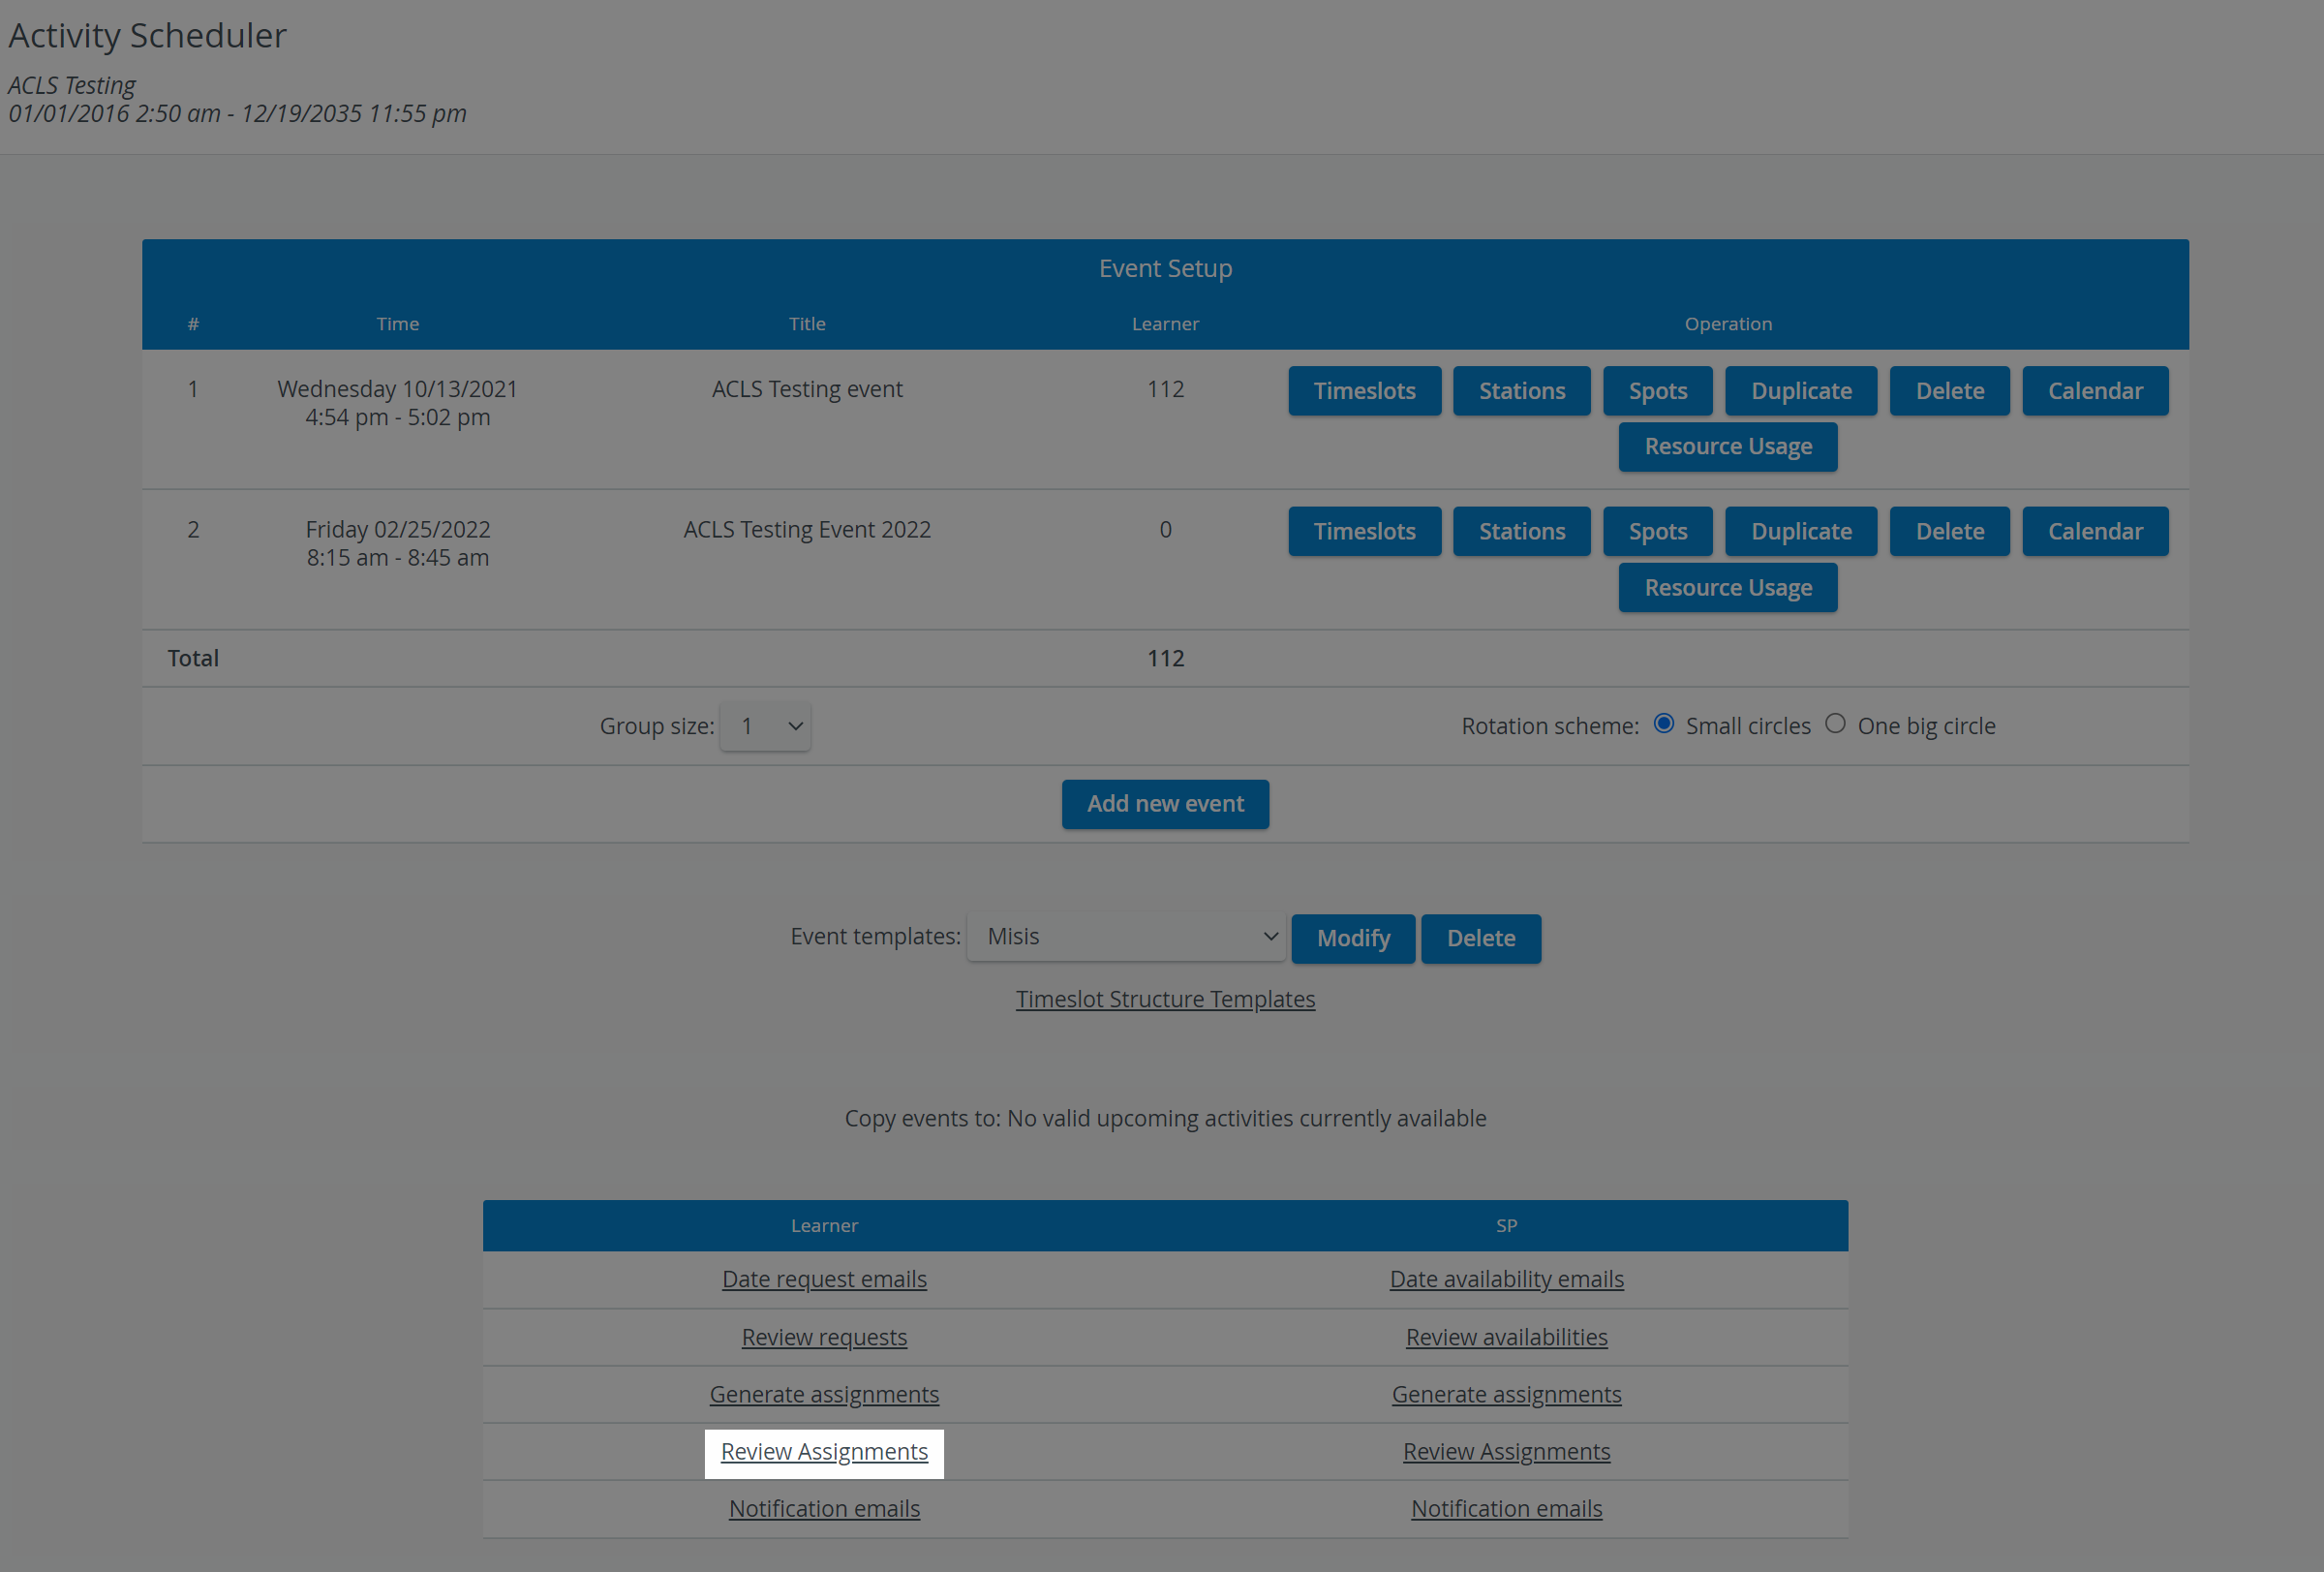
![]() There are 5 options located at the bottom of the page that can help you with learner scheduling:
There are 5 options located at the bottom of the page that can help you with learner scheduling:
- Send Date Request Emails: You can survey learners' availability with Date Request Emails through which they can sign up to preferred rounds (appointments within an event).
- Review Date Request Emails: The system summarizes the submitted round requests on the Review Date Request Emails page.
- Generate Assignments: You can use the collected round requests on the Generate Assignments page to assign learners automatically to one of their preferred rounds or you can schedule learners manually.
- Review Assignments: You can view the latest learner assignments on this page. Learner assignments are not final, you can always reschedule learners on the Generate Assignments page if needed.
- Send Notifications: Use the Send Notifications option to send out confirmation emails to learners about their finalized round assignments.
Tip
In case you haven't used Date Request Emails, the system can still generate automatic assignments randomly.
In case you haven't received appointment requests from all of your learners, automatic assignment will still take into account the requests of learners who did respond to your date request email while assigning the rest of the learners randomly.
Sending Learner Date Request Emails
- Access the Activity Scheduler page of a selected Activity.
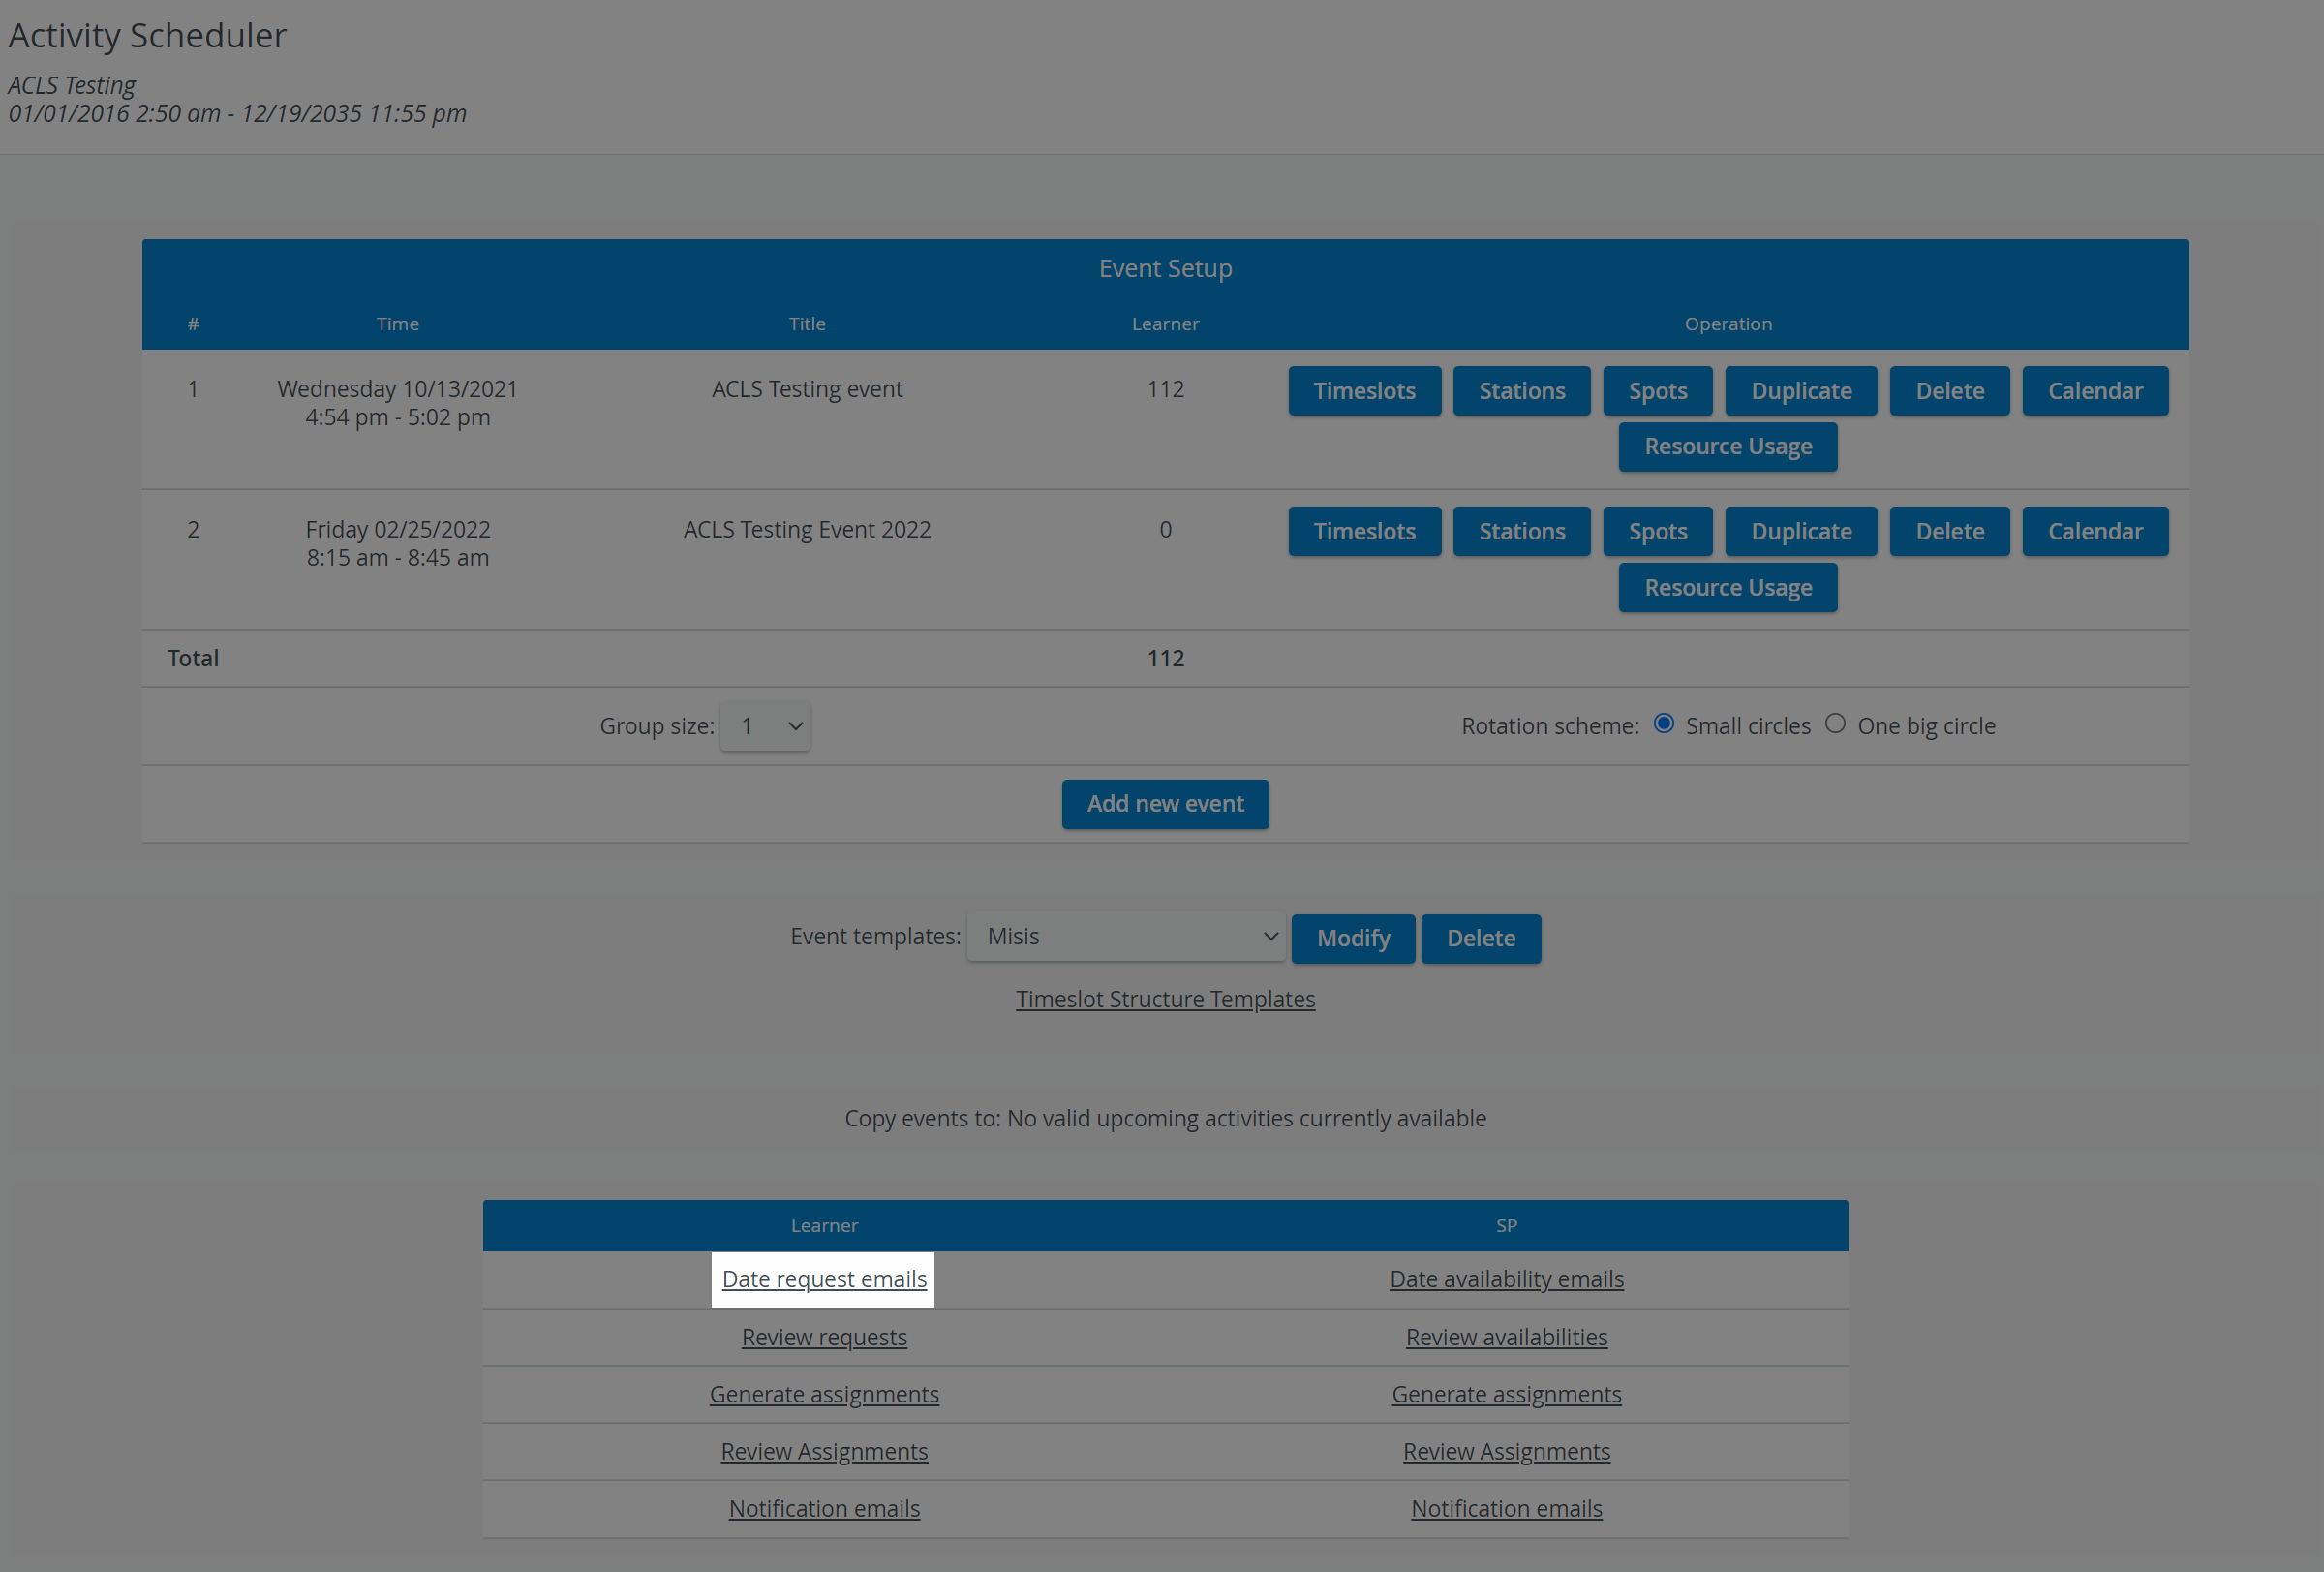
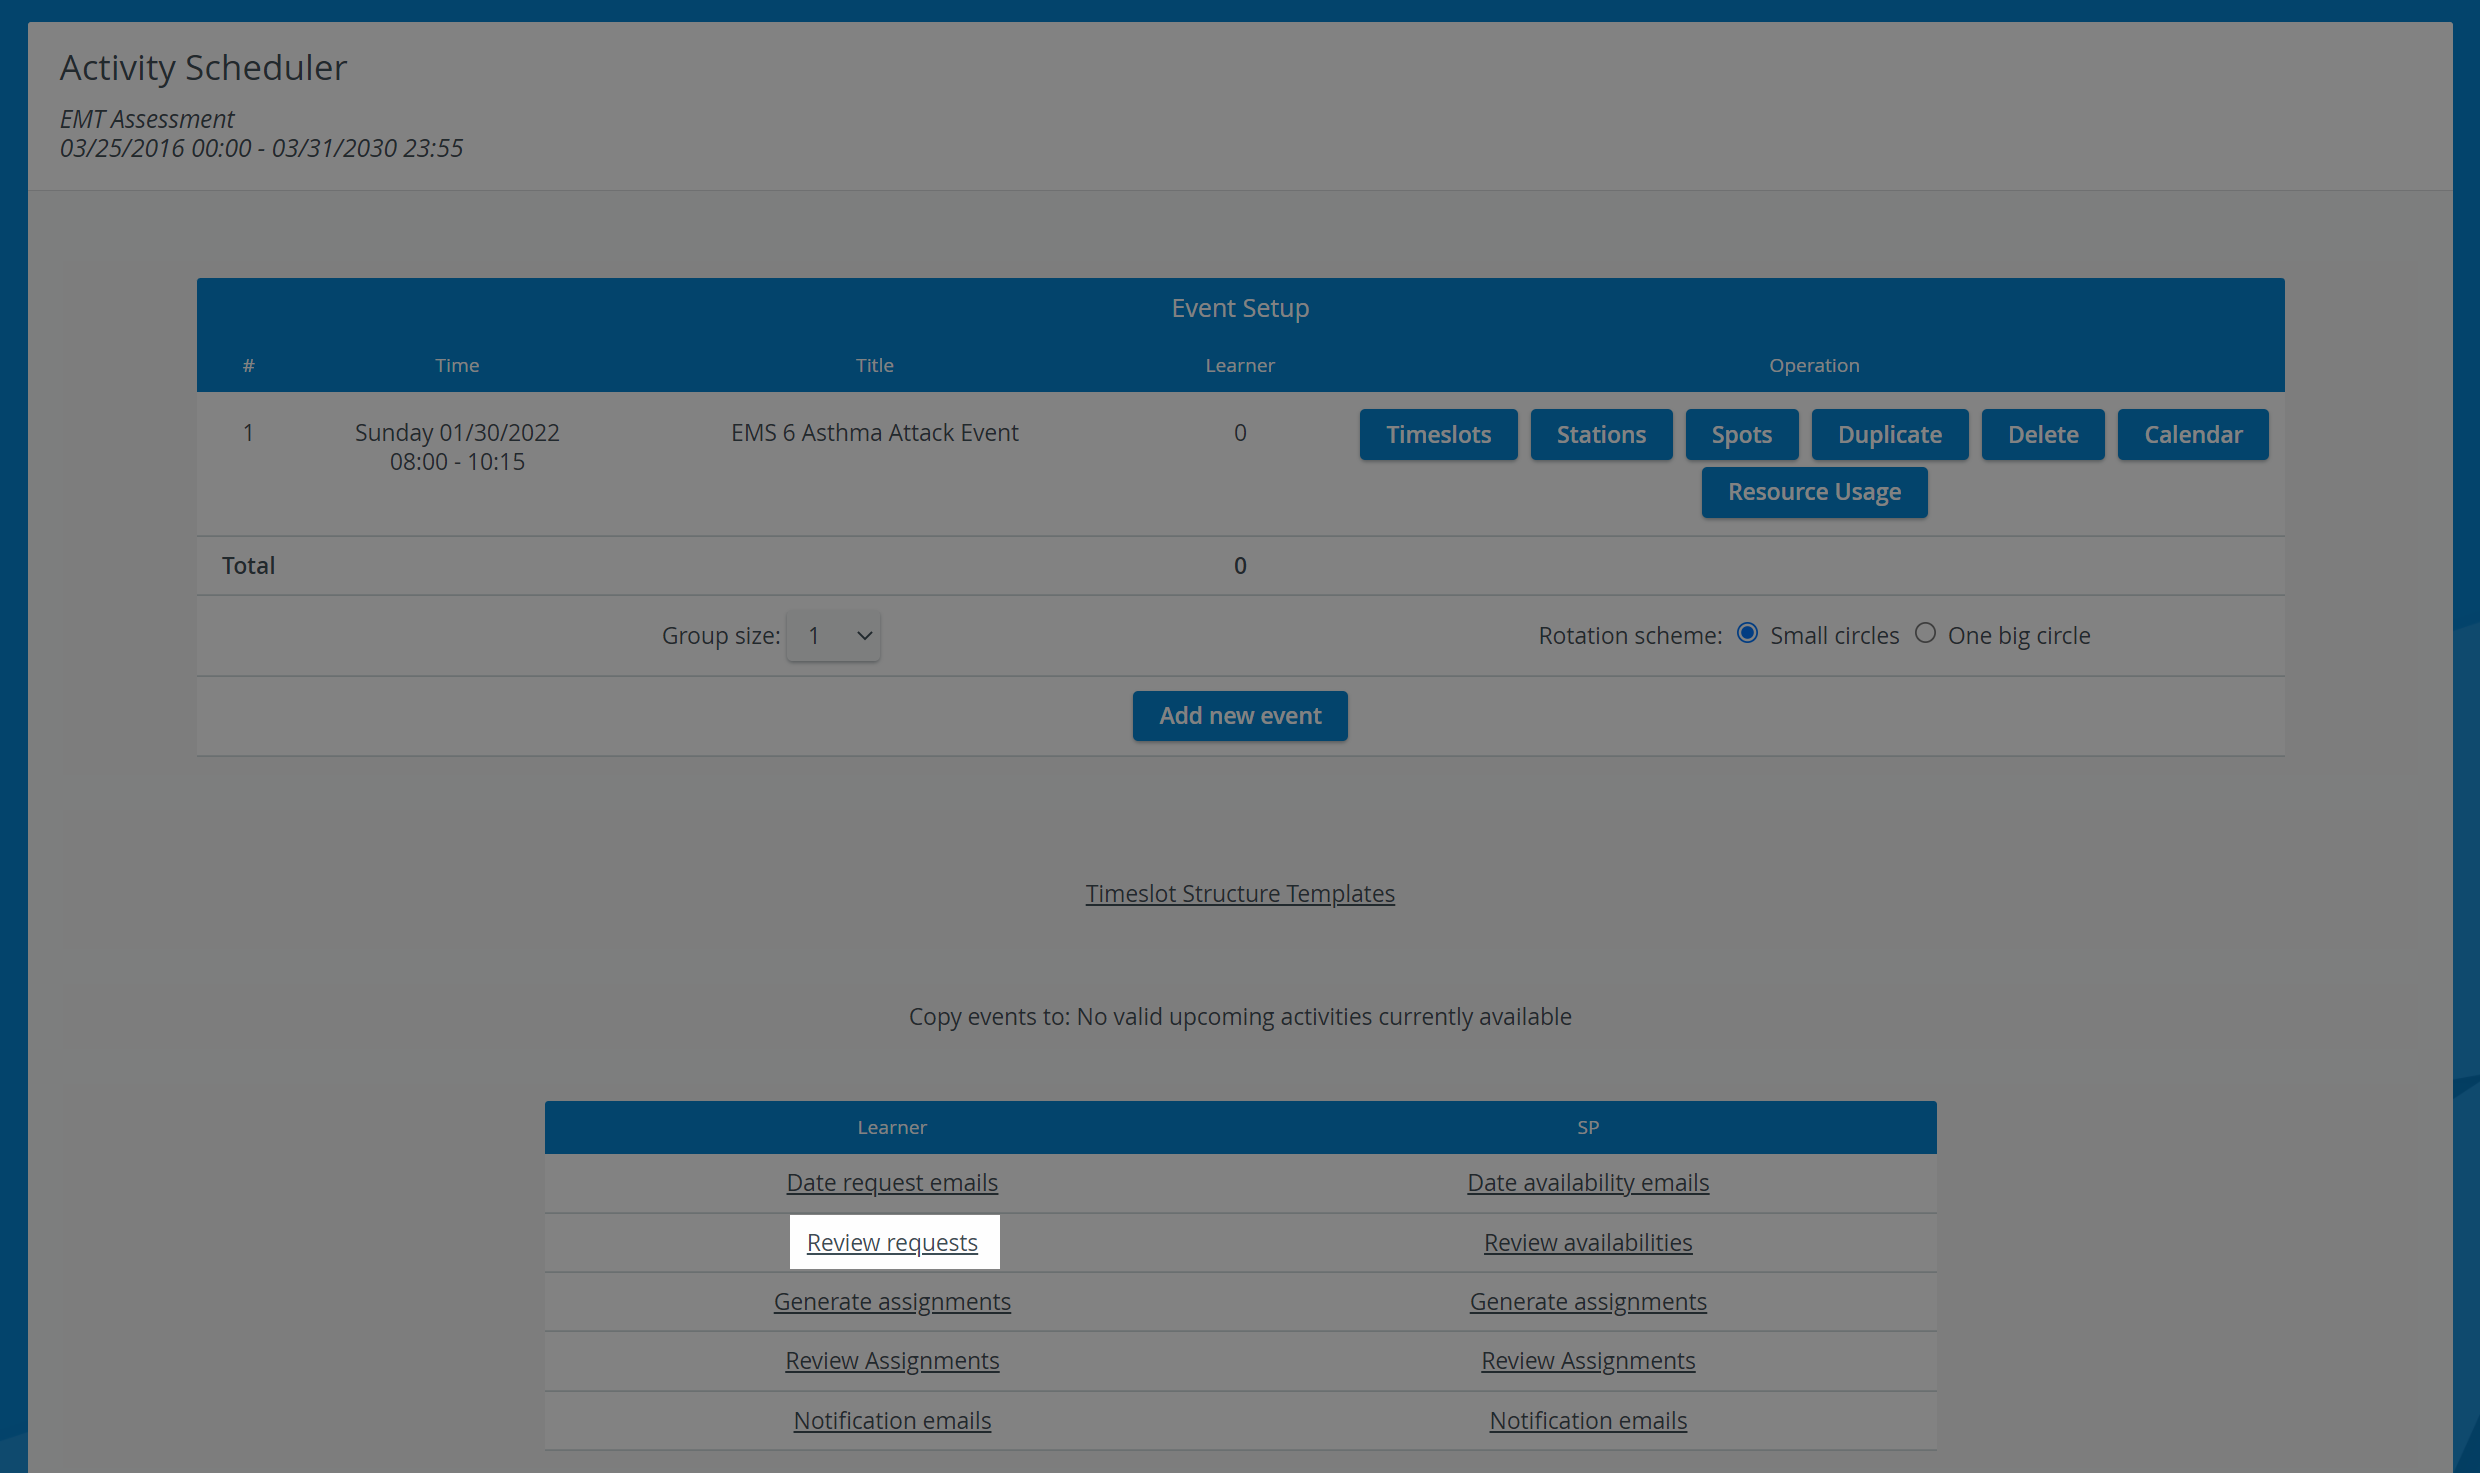
Scroll down to the bottom of the screen to the panel with the Learner and SP columns. Click on Date request emails in the Learner column:
You will be redirected to the Scheduling (Date Request Emails) page where you can edit your email.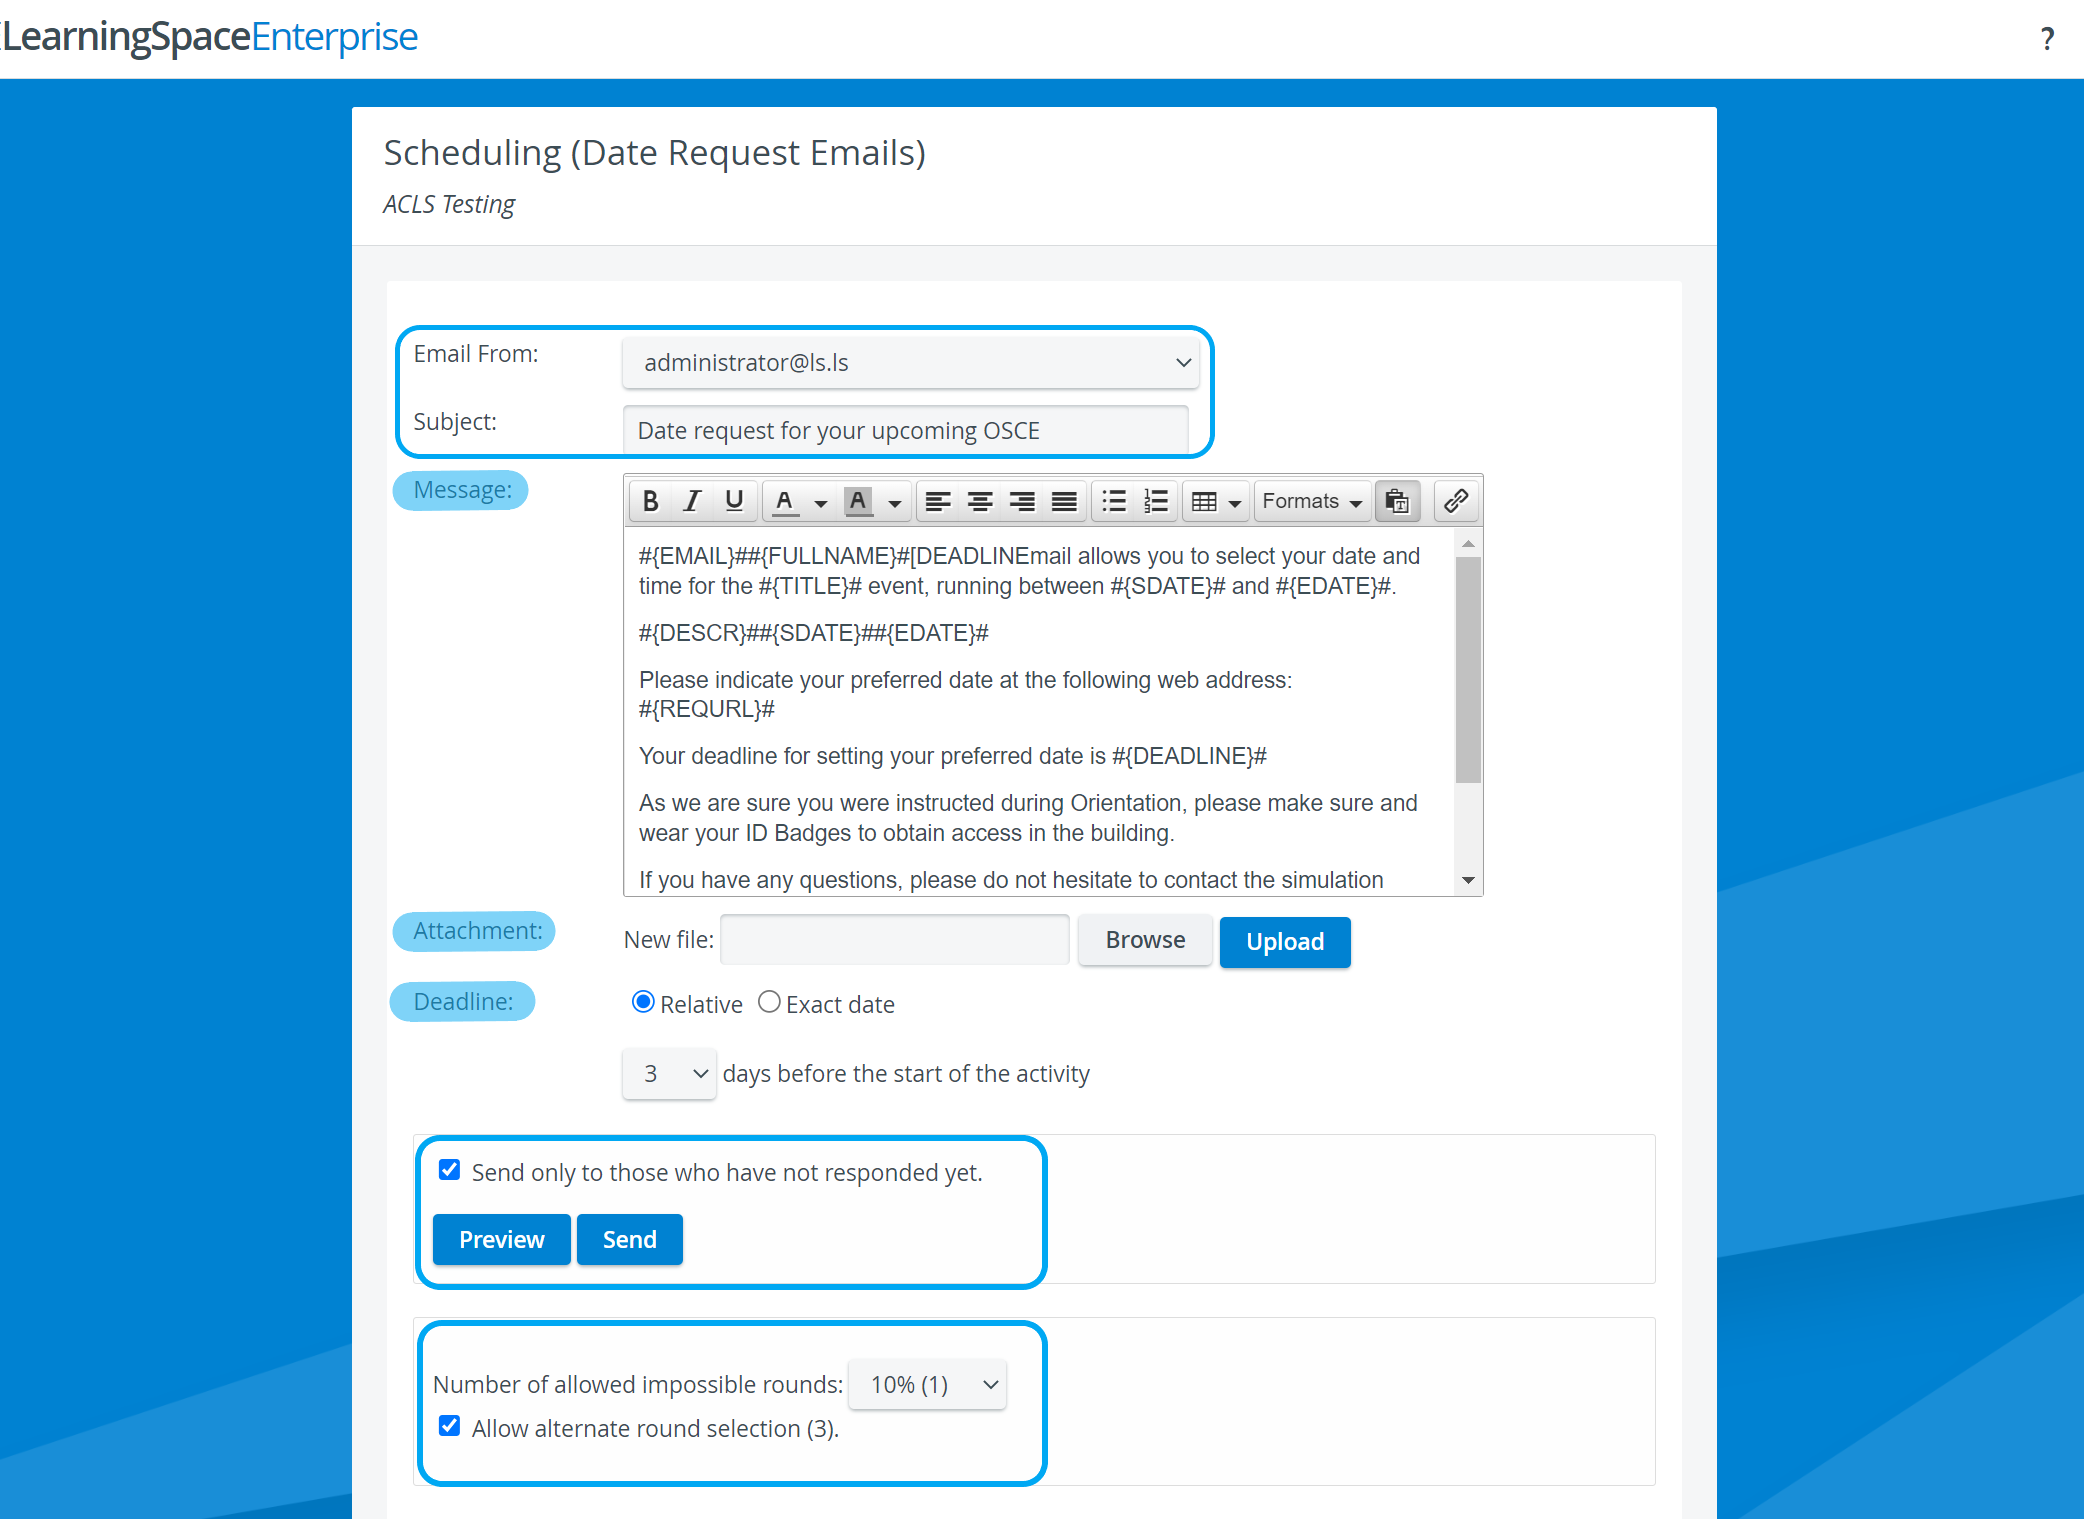
Select a from address in the Email From drop-down.
To set up further from addresses, go to the Emails tab in System Manager.- Enter the subject of your email in the Subject field.
- Edit the message body of your email in the Message field.
If the Learner date request email template was set up in System Manager, you may notice that the message body contains snippets of text surrounded by hashtags and curly brackets:#{TITLE}# | #{FULLNAME}# | #{EMAIL}# etc.
 These snippets are referred to as merge tags in the system. Merge tags personalize the emails you send out to your recipients:
the system automatically replaces the merge tags with the corresponding unique data of your recipient once they receive your message.
To apply merge tags, set them up and save them in the default email templates in Emails — find out more here. - Use the Attachment field to attach a file:
- Browse for a file on your computer.
- Once selected, Upload your selected file.
- Your attachment will appear as a link in the Attachment section which you can open for viewing.
- You can also Remove your attachment.
- Set up a Deadline for learner responses:
- You can set up the response deadline relative to the start date of the entire Activity—
 not the event.
  This option can be useful if you are planning the learner assignments of upcoming (not yet running) Activities.
 - Switch to Exact date if your Activity is already running to select any deadline of your choice.
- You can set up the response deadline relative to the start date of the entire Activity—
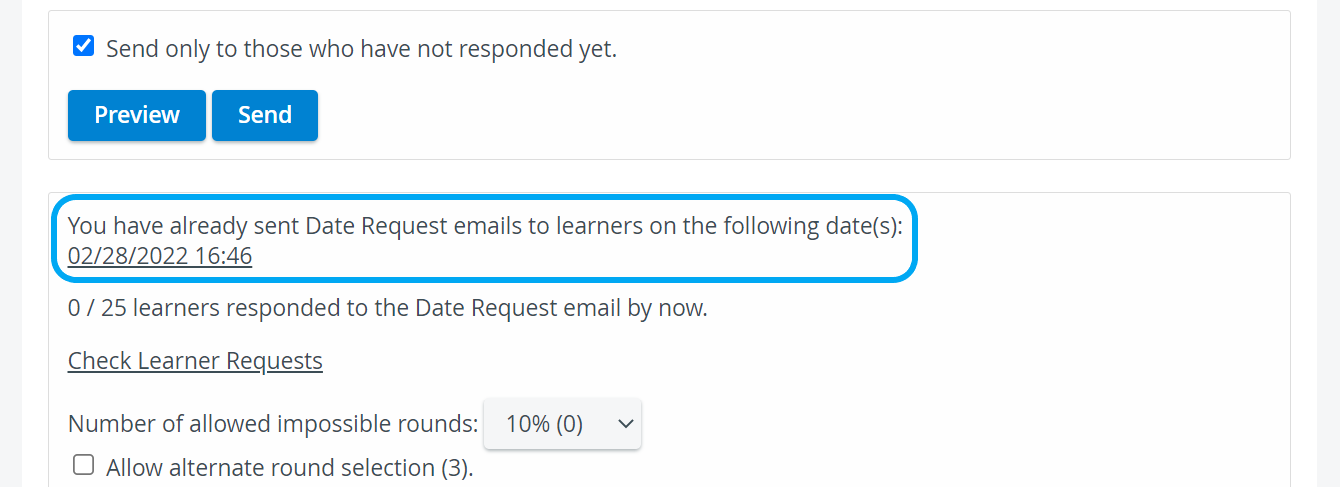
Optional: Check the Send only to those who have not responded yet box.
Tip
Apply this option when you send out emails repeatedly and you already have learners who have responded.
- Optional: You can set up the percentage of rounds a learner can skip. The learners are allowed to flag a round as 'impossible to make it' up to the percentage you have defined in the drop-down.
The number of rounds a learner can skip depends on how many rounds were set up when creating the timeslots of the event. - Click on Preview to see how your email will be displayed to each of your recipients.
The Email Preview page displays your message by each user.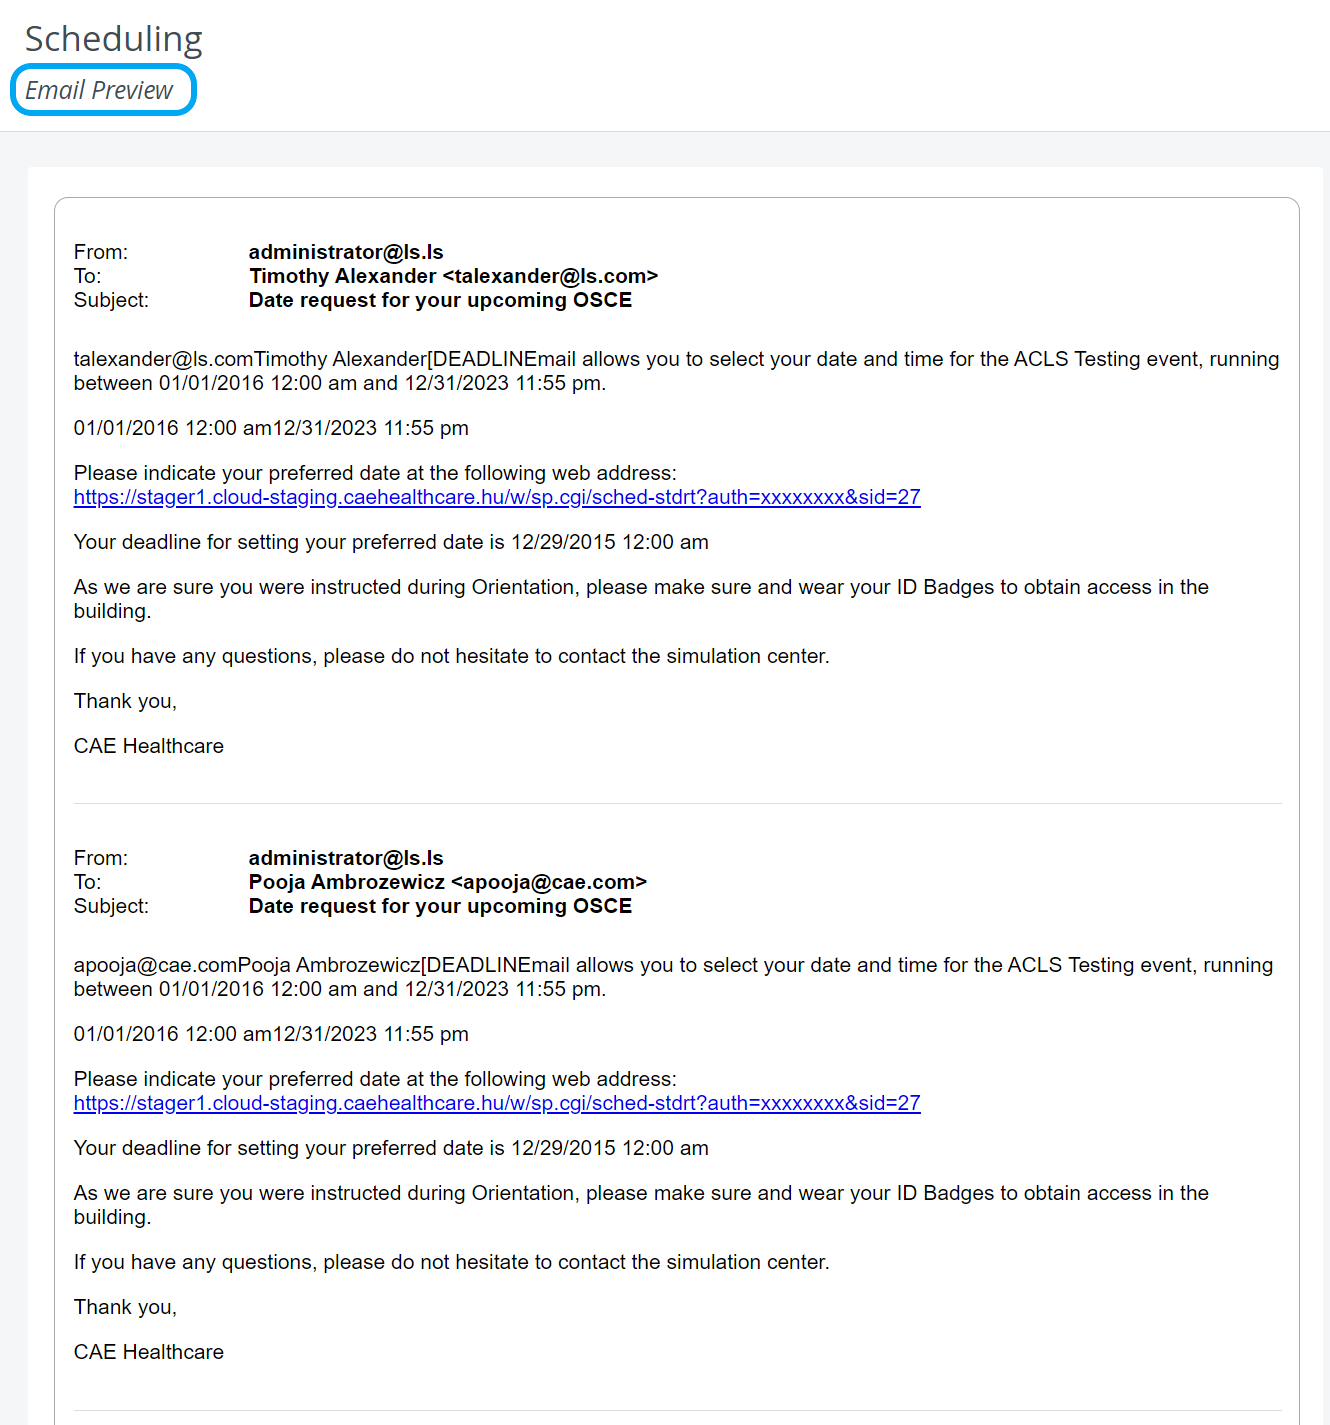
- Return to email editing with the top-left back arrow.
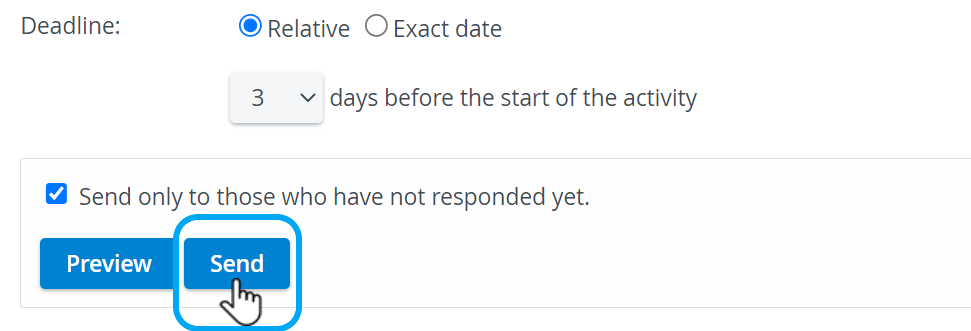
Click Send.
Note
Date request emails are only sent out to learners who aren't scheduled to any round yet. To check which learners are scheduled, go to the Generate assignments or the Review Assignments pages.After you have sent out the date request emails, the system will log the time and date of sent emails:
Review Date Requests
On the Review Learner Requests page, you can only view the cumulative list of learner responses submitted so far. To assign learners to rounds, go to Generate Assignments.
- Go to the Activity Scheduler page of the Activity.
- Click Review request in the Learner column:
- You will be redirected to the Scheduling (Review Learner Request) page where you can view the date requests of each learner.
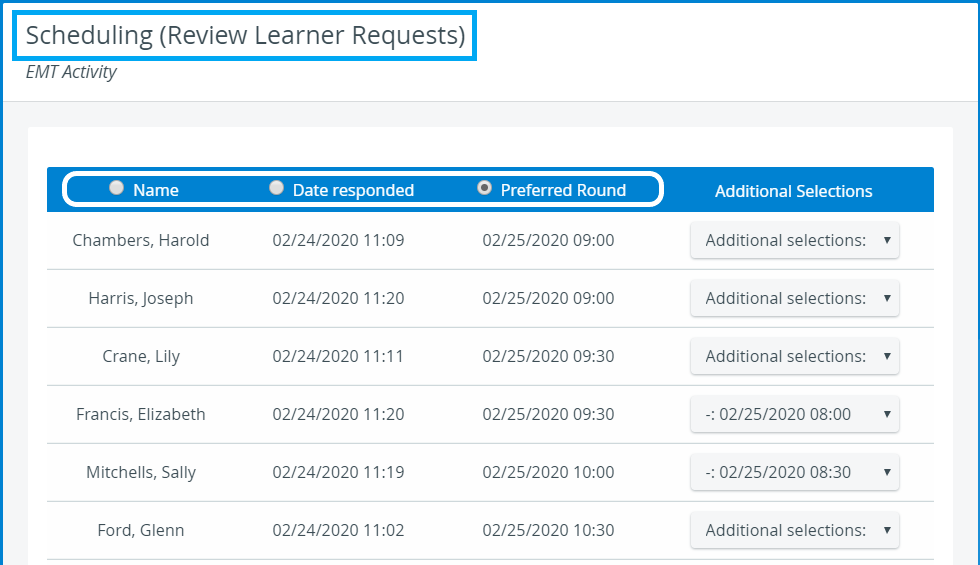
- Select the corresponding radio button to sort learners by their Names, the Date they responded, or their Preferred Round.
Generate Assignments
- Go to the Activity Scheduler page of the Activity.
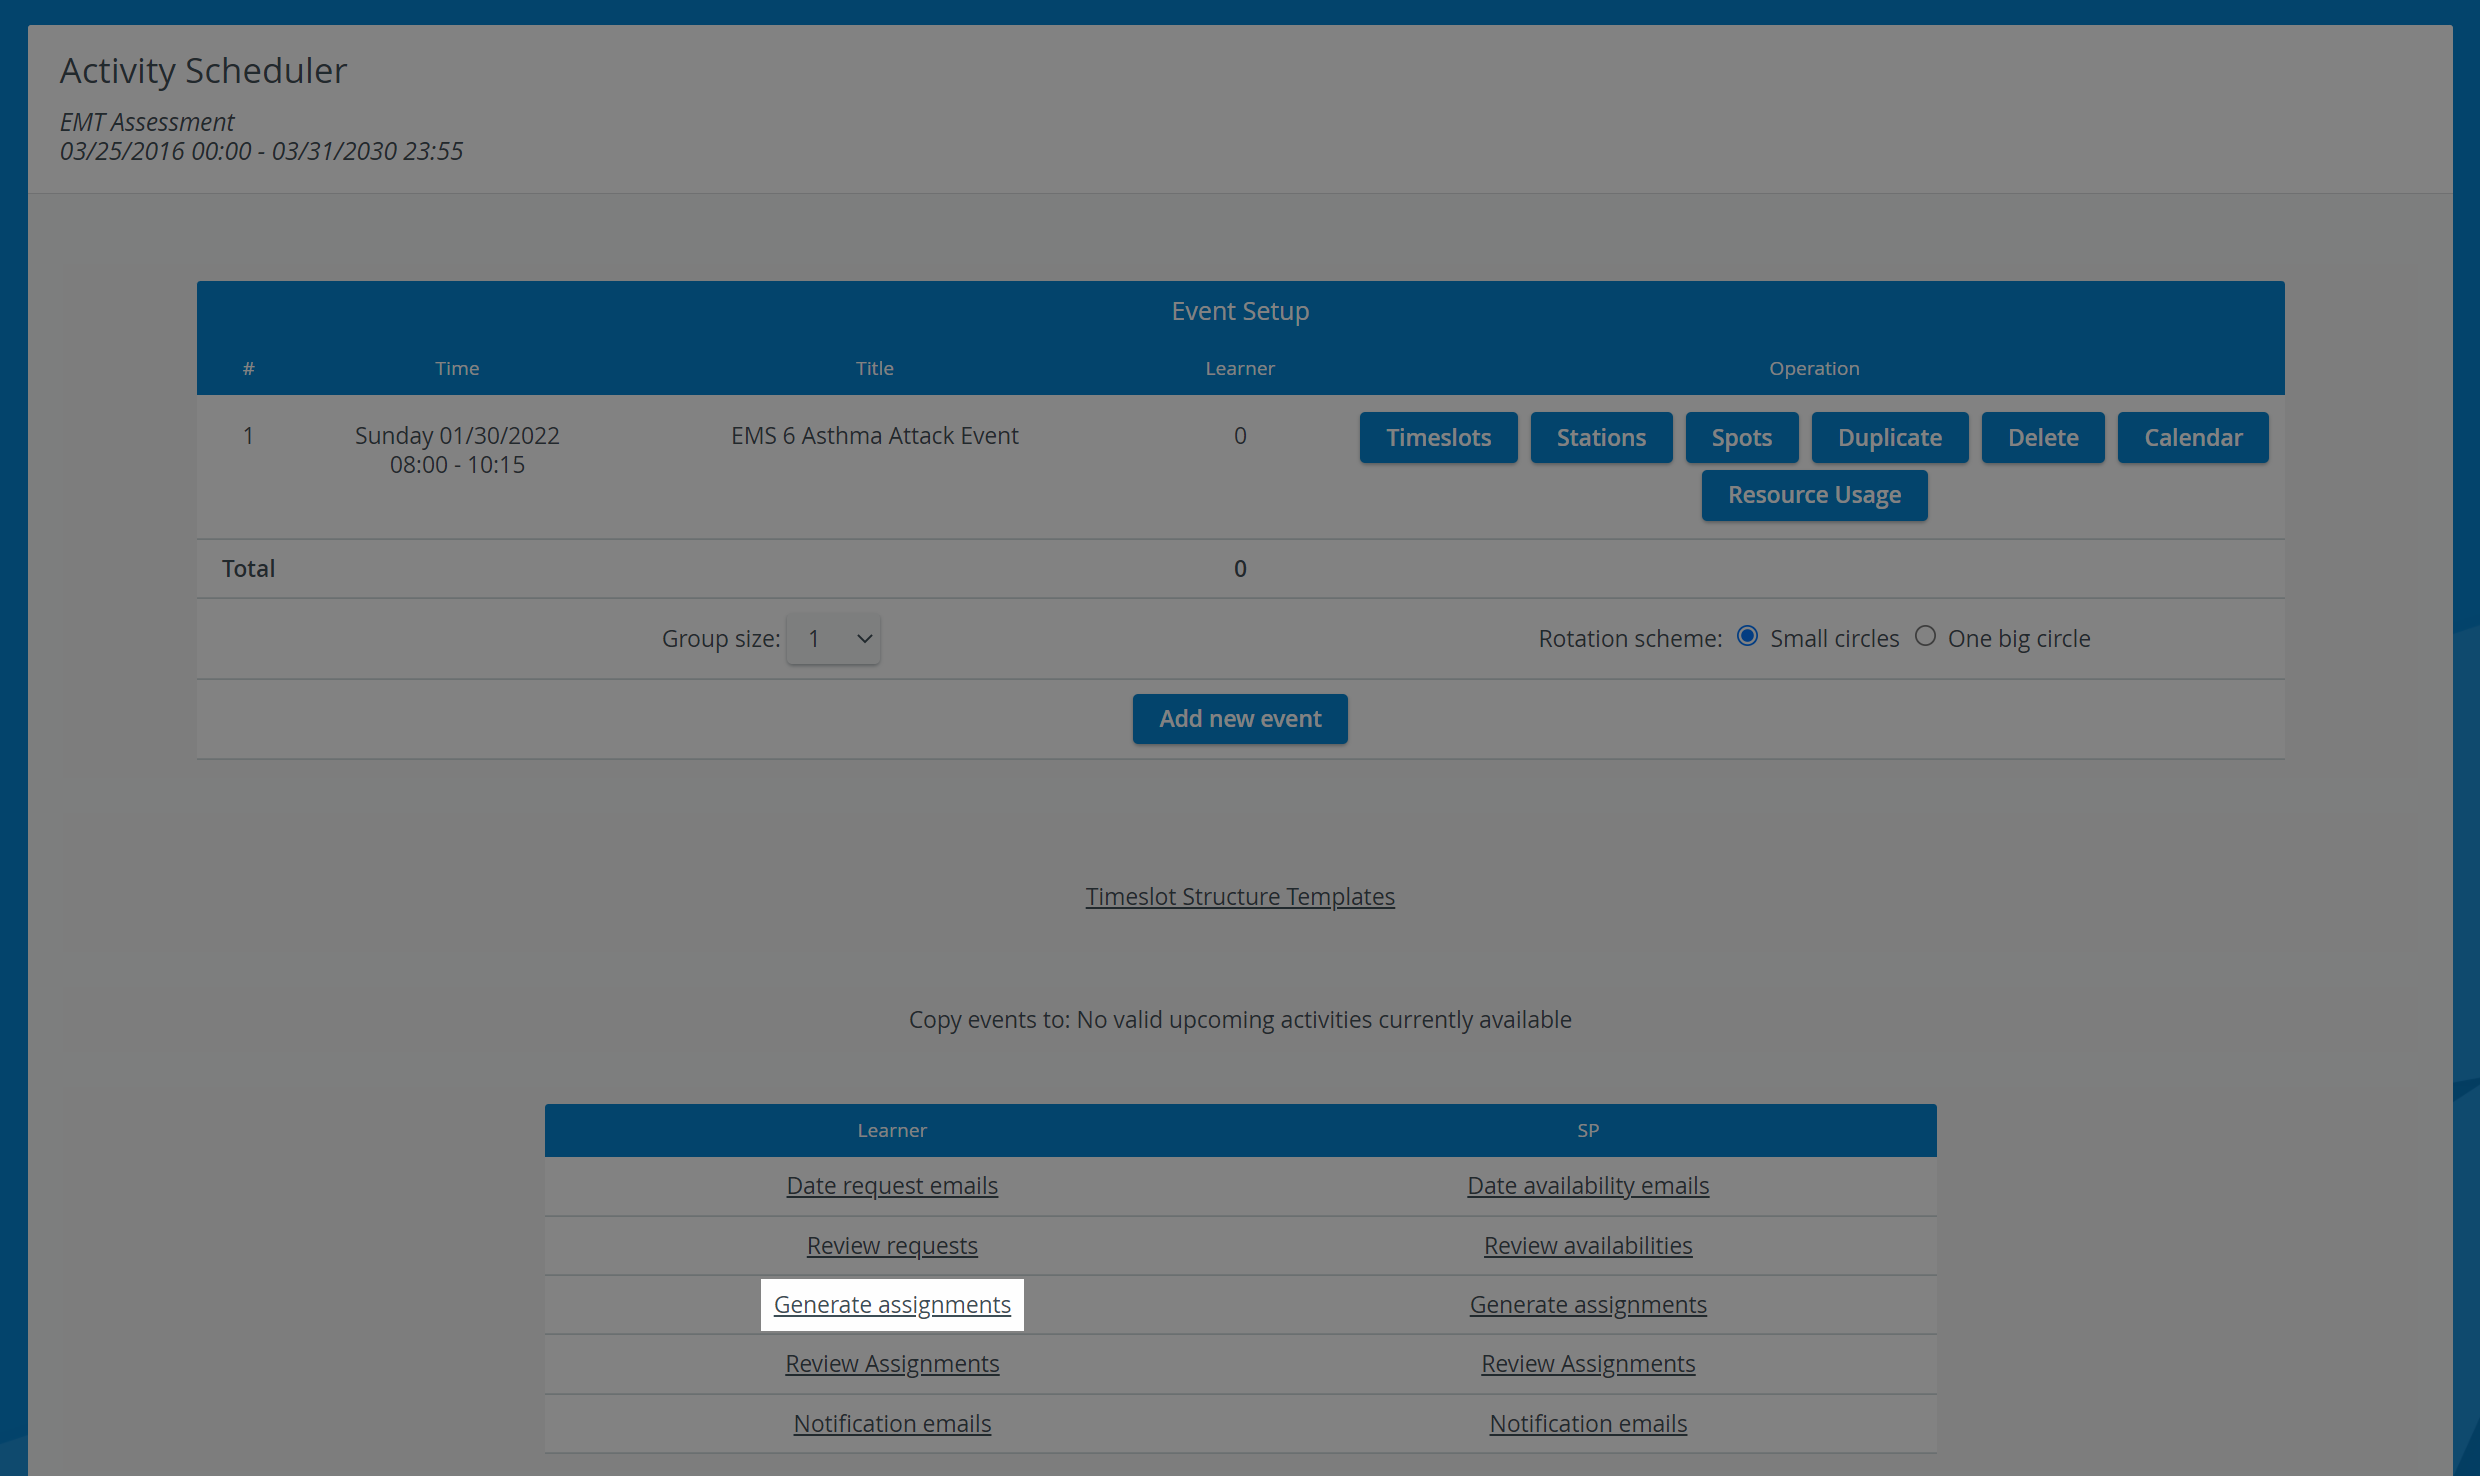
- Click Generate assignments in the Learner column:
- You will be redirected to the Scheduling (Learner assignments) page where you can manage the round assignments of your learners.

- Choose between two round assignment options:
Manual assignment
Scroll down to the Unassigned tab where you will find every learner of the Activity who hasn't been assigned yet to the event.The violet background always means that learners do not have valid round assignments yet.
Click on a drop-down to display every round of the event.
You can assign a learner to any round of your choice, or you can approve requests: [x] next to an interval means that the learners requested that particular interval.
Meanwhile, the [-] means that the learner cannot make it.Once you have selected an interval, the learner will be immediately assigned to the selected round.
The learner will be assigned to the round with a validated spot if their background is blue.- If there is not enough spots for the learners assigned to the round, some of them will appear with violet background which means they do not have a guaranteed spot.
Automatic assignment
Apply or disable the following checkboxes during Automatic Assignment: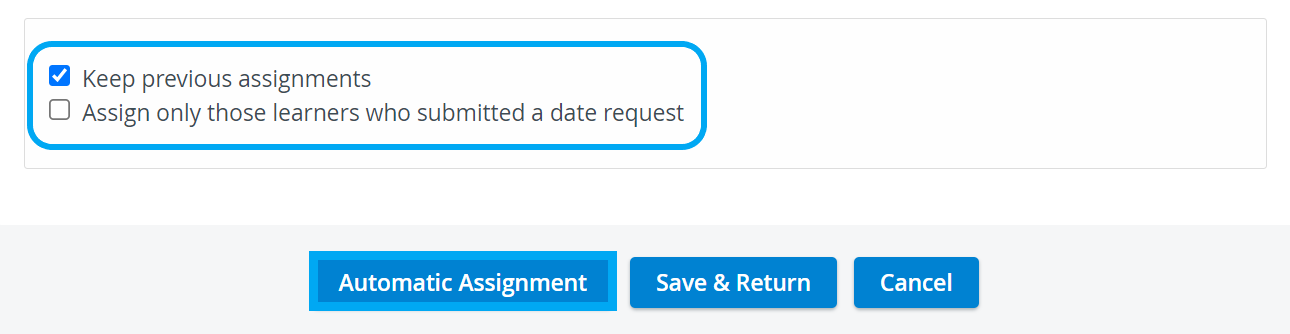
Keep previous assignments: when this option is applied —it is checked by default—the automatic assignment will not reschedule the learners who already have valid spots.
Assign only those learners who submitted a date request: the system will assign only those learners who submitted their round preferences through the Learner Date Request email.
If this option is unchecked, every learner will be assigned to a round, even those who haven't responded to the date request emails yet.The system always applies the submitted learner date requests during Automatic Assignment.Click on Automatic Assignment.
Click Save & Return to save your assignment settings.
You will be redirected to the Activity Scheduler page.To send date request confirmation emails to learners, got to Notification emails.
Review Assignments
- Go to the Activity Scheduler page of the Activity.
- Click Review assignments in the Learner column:
You will be redirected to the Scheduling (Review Learner Assignments) page where you can check the round assignment of each learner.
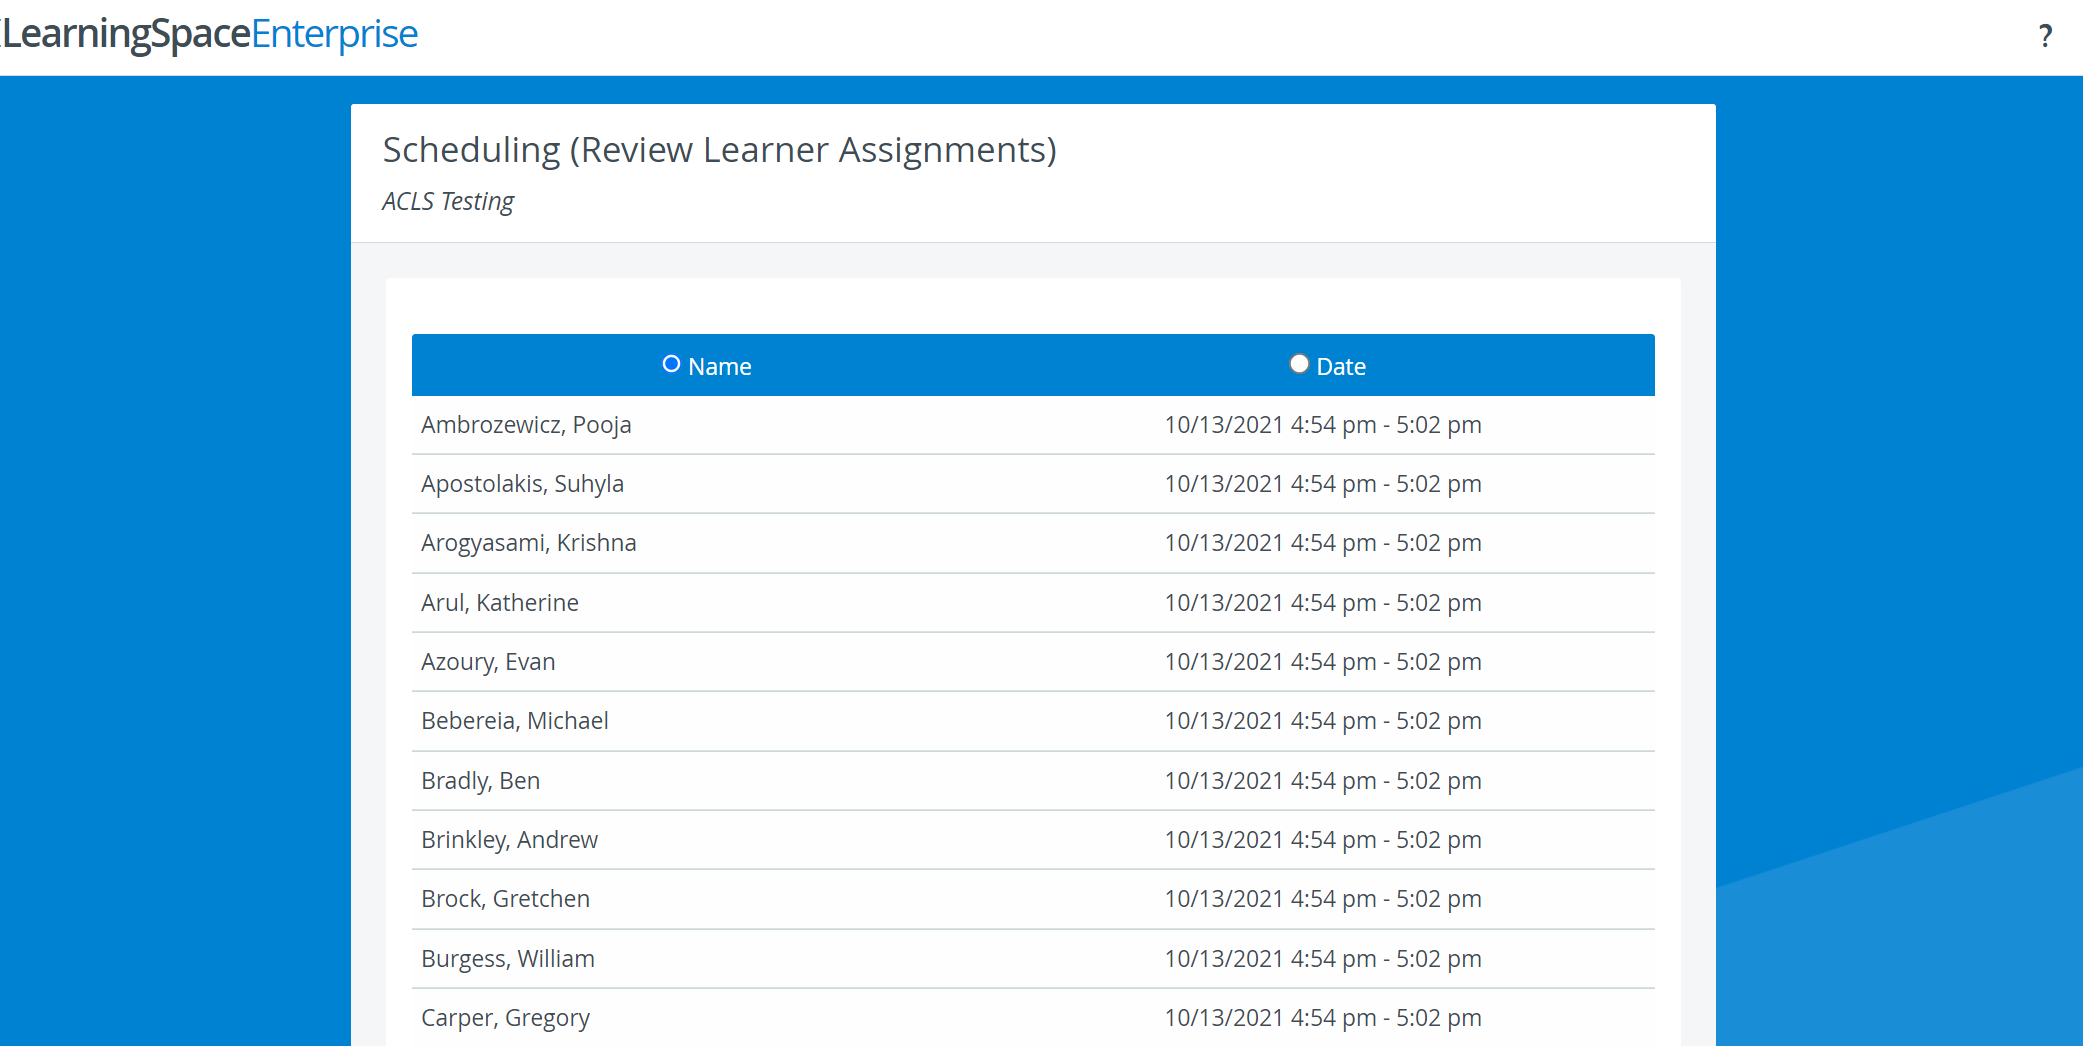 By default, the learners are sorted by their last names. Select the Date radio button to sort learners by date.
Sending Notification Emails
Date Confirmation Email
Every learner who is assigned to a round of the event — even with a non-valid (violet) spot— will receive this email.
- Go to the Activity Scheduler page of the Activity.
- Click Notification emails in the Learner column:

- You will be redirected to the Scheduling (Learner assignments) page where you can edit the notification email you are going to send out to the learners.
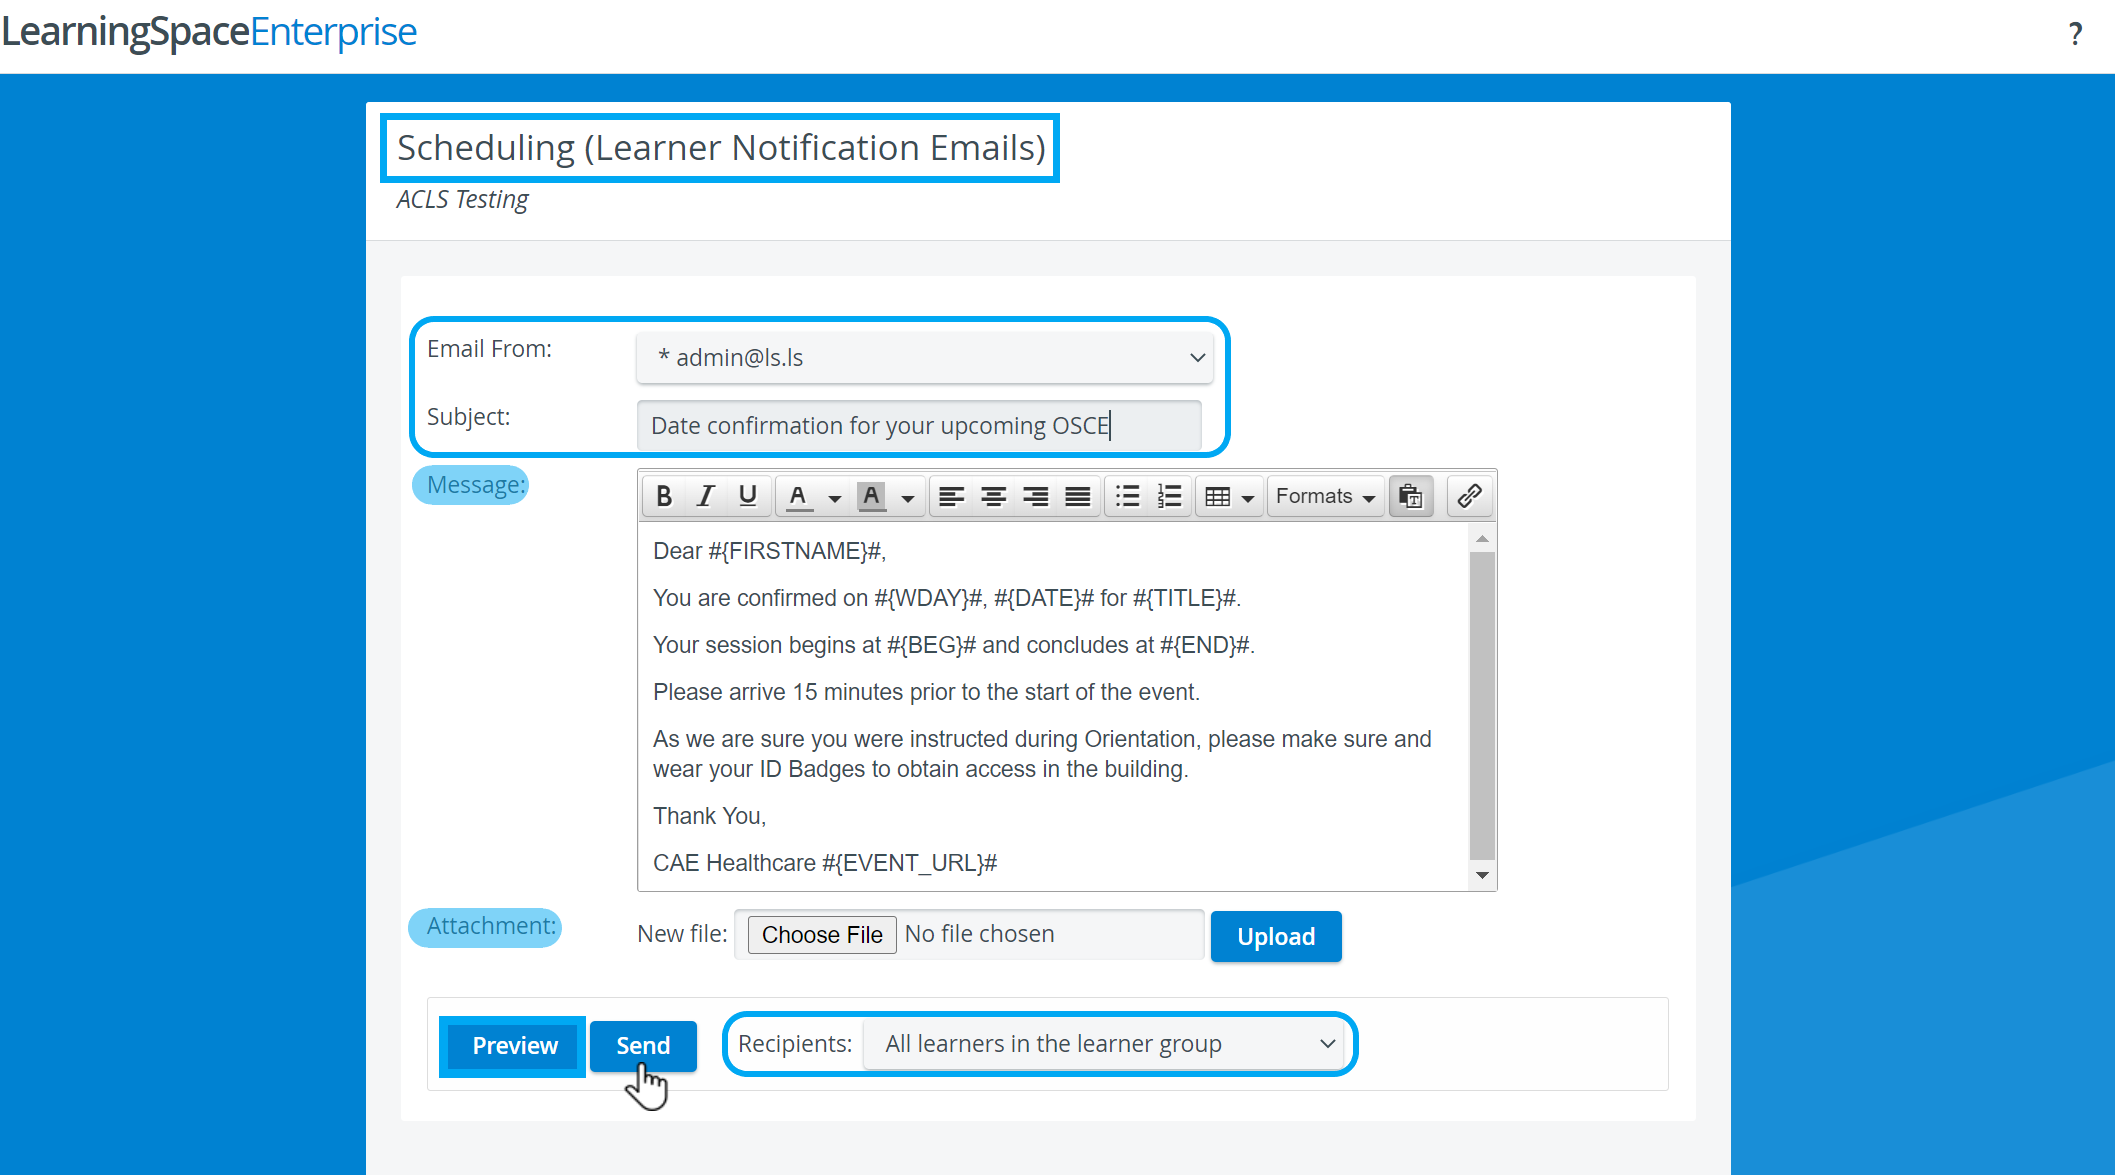
Select a from address in the Email From drop-down.
To set up further from addresses, go to the Emails tab in System Manager.- Enter the subject of your email in the Subject field.
- Edit the message body of your email in the Message field.
If the Learner date request confirmation template was already set up in System Manager, you may notice that the message body contains snippets of text surrounded by hashtags and curly brackets:#{TITLE}# | #{FULLNAME}# | #{EMAIL}# etc.
- Use the Attachment field to attach a file:
- Choose a File from your computer.
- Once selected, Upload your selected file.
- Your attachment will appear as a link in the Attachment section which you can open to view.
- You can also Remove your attachment.
- Select a recipient group from the Recipients drop-down.
- Click on Preview to see how your email will be displayed to each of your recipients.
The Email Preview page displays your message by each user.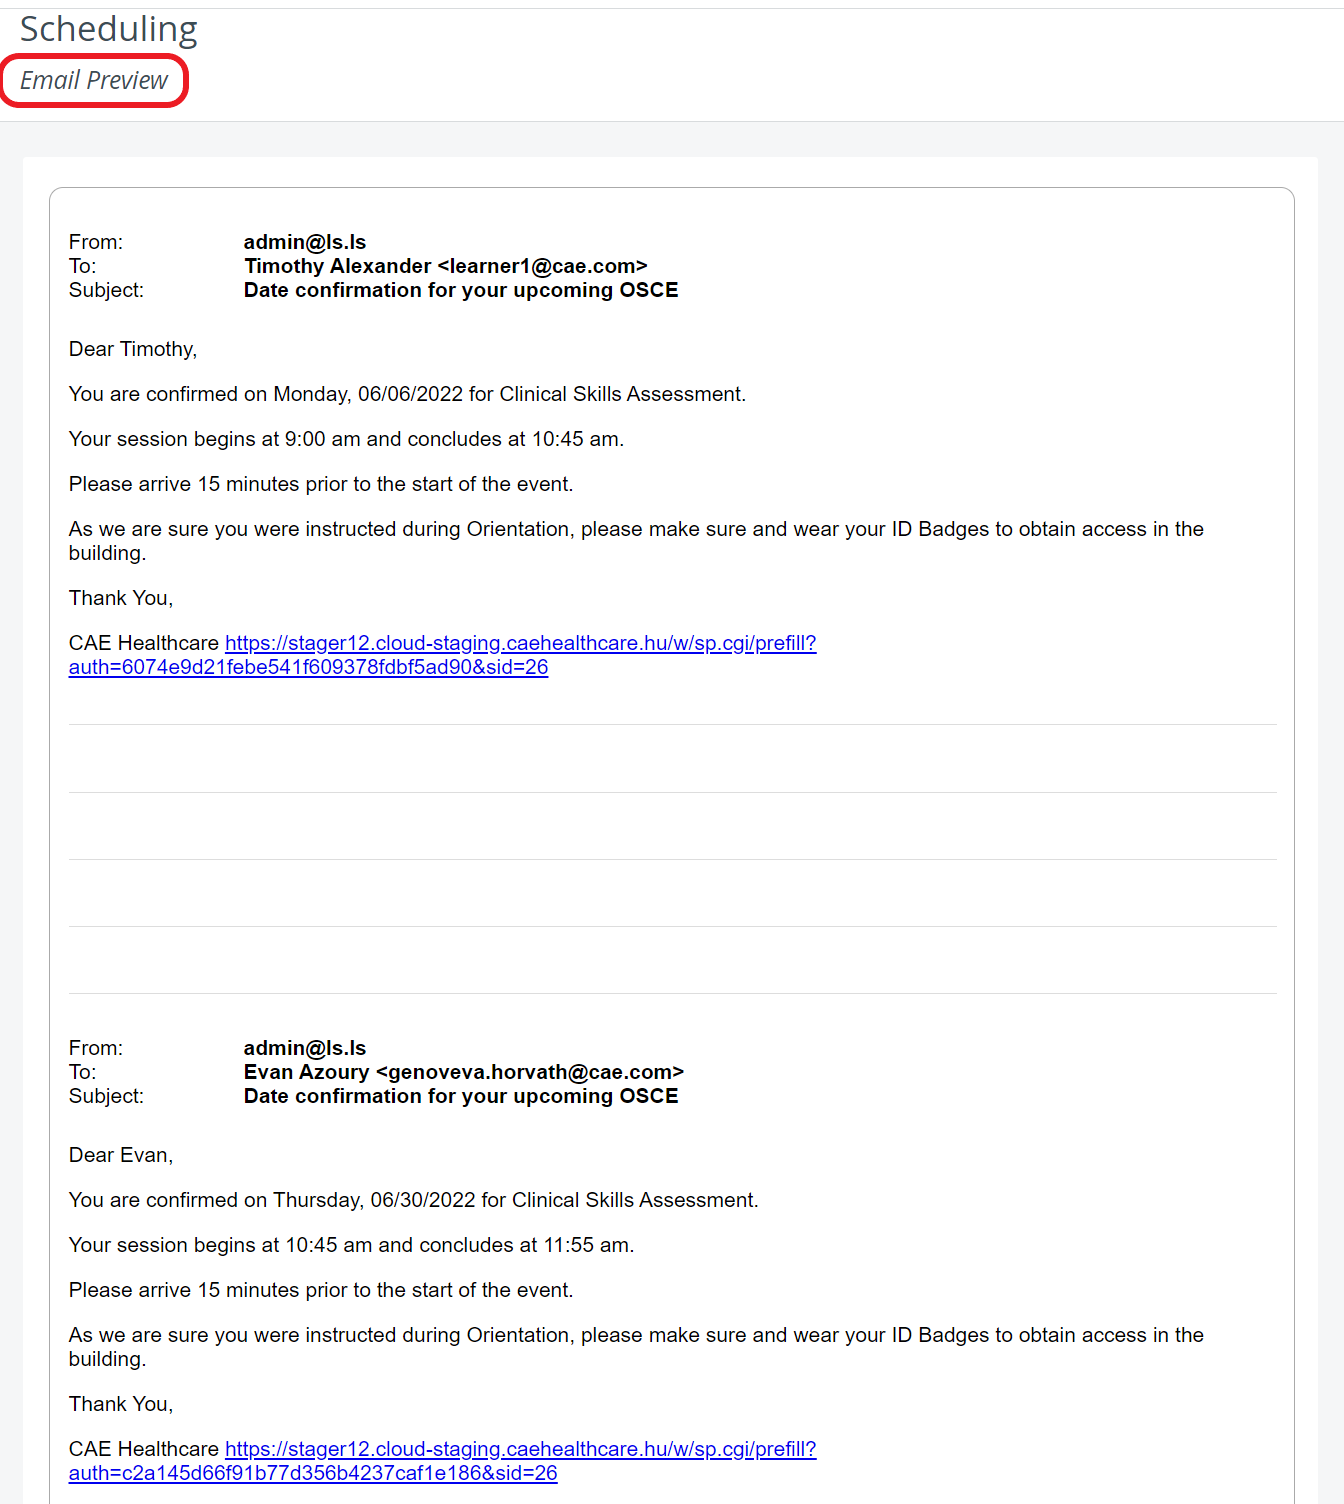
- Return to email editing with the top-left back arrow.
- Click Send.
After you have sent out the notification emails, the system will log the time and date of sending.

For further information, visit our Advanced Scheduling pages, and view our Activity Manager Training Videos.
Overview
Content Tools