Important Note for Enterprise Lite Users
This feature is to be used with in-campus audiovisual (AV) inputs. Hence, it is not available for LearningSpace Enterprise Lite, as the solution is used for web-conferencing-based virtual simulation encounters only. To unlock this feature, please upgrade to the LearningSpace Enterprise solution.
LearningSpace can accommodate and third-party simulators. Connecting a simulator to the system can be done on the Simulators tab.

All LearningSpace systems can be capable of capturing any simulator's signals. Depending on the LearningSpace system you are using, there are different hardware configurations required.
- Wireless connection to a simulator:
- UltraPortable: USB WiFi adapter, included with the UltraPortable
- ONE appliance:
- LearningSpace Enterprise/Essentials/Experience: 2 wireless antennas of the ONE appliance
- LearningSpace Intuity: USB WiFi adapter, included with the ONE appliance
- Server appliance: a Wireless Bridge is required (optional accessory)
If connected directly to a network (without using a Wireless Bridge), the simulator will not be detected and the setup will not function as intended.
- Wired connection to a simulator:
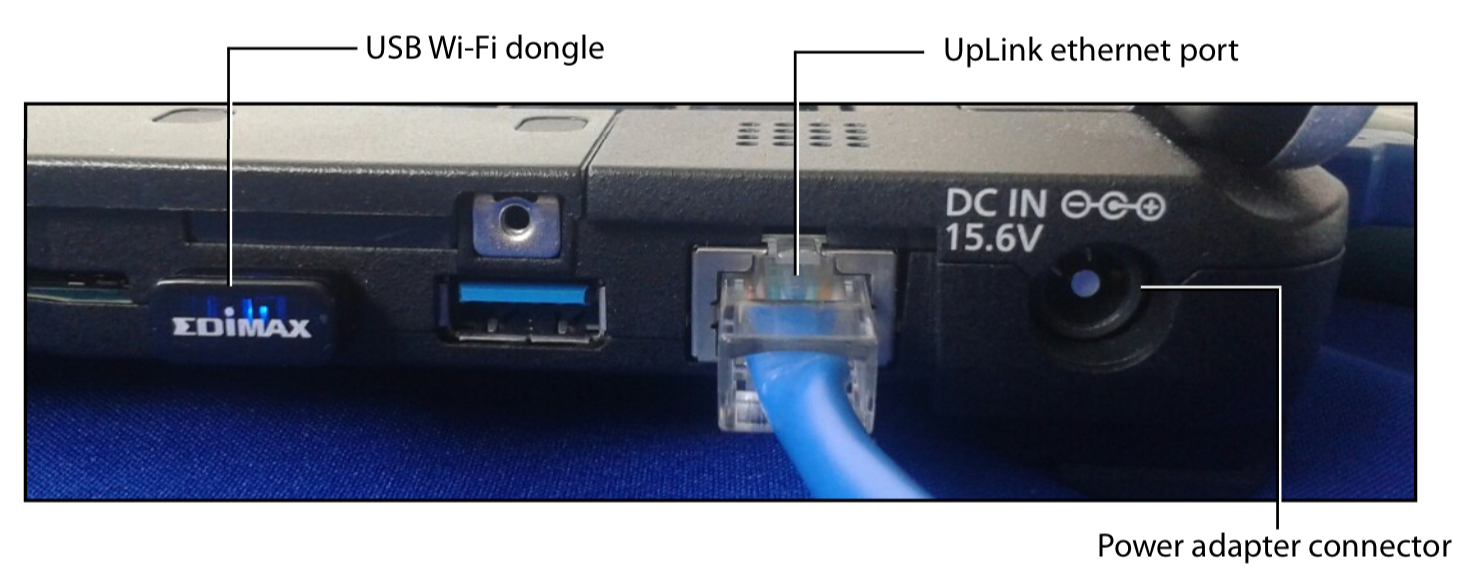
- UltraPortable: dedicated Ethernet connection, on the back of the laptop on the left
- ONE appliance: dedicated Ethernet connection, labeled "#2" or "Sim"
- Server appliance: a Wireless Bridge is required (optional accessory)
If connected directly to a network (without using a Wireless Bridge), the simulator will not be detected and the setup will not function as intended.
- Capturing the waveform display of any non- simulator:
- UltraPortable: using the USB FrameGrabber (AVIO.HD or DVI2USB), included with the UltraPortable
- ONE appliance: using the built-in Display Capture capability, using the DVI input
- Server appliance: a DCU is required, optional accessory
Connecting simulators wirelessly
- First LearningSpace has to establish a wireless connection to the simulator, to do this:
- Select the Controls cogwheel in the left side panel and select the wireless network of the simulator
- In case there are no Wireless Bridges listed on the left side panel, make sure that:
- For an UltraPortable: the USB WiFi adapter is plugged into the USB slot on the right side of the laptop
- For an UltraPortable: the USB WiFi adapter is plugged into the USB slot on the right side of the laptop
- In case the simulator is not listed when trying to connect to the WiFi network:
- Make sure the simulator is powered on
- Move closer to the simulator
- In case there are no Wireless Bridges listed on the left side panel, make sure that:
- Connect to the selected simulator
- The simulator will show up within 10-30 seconds on the right-side panel
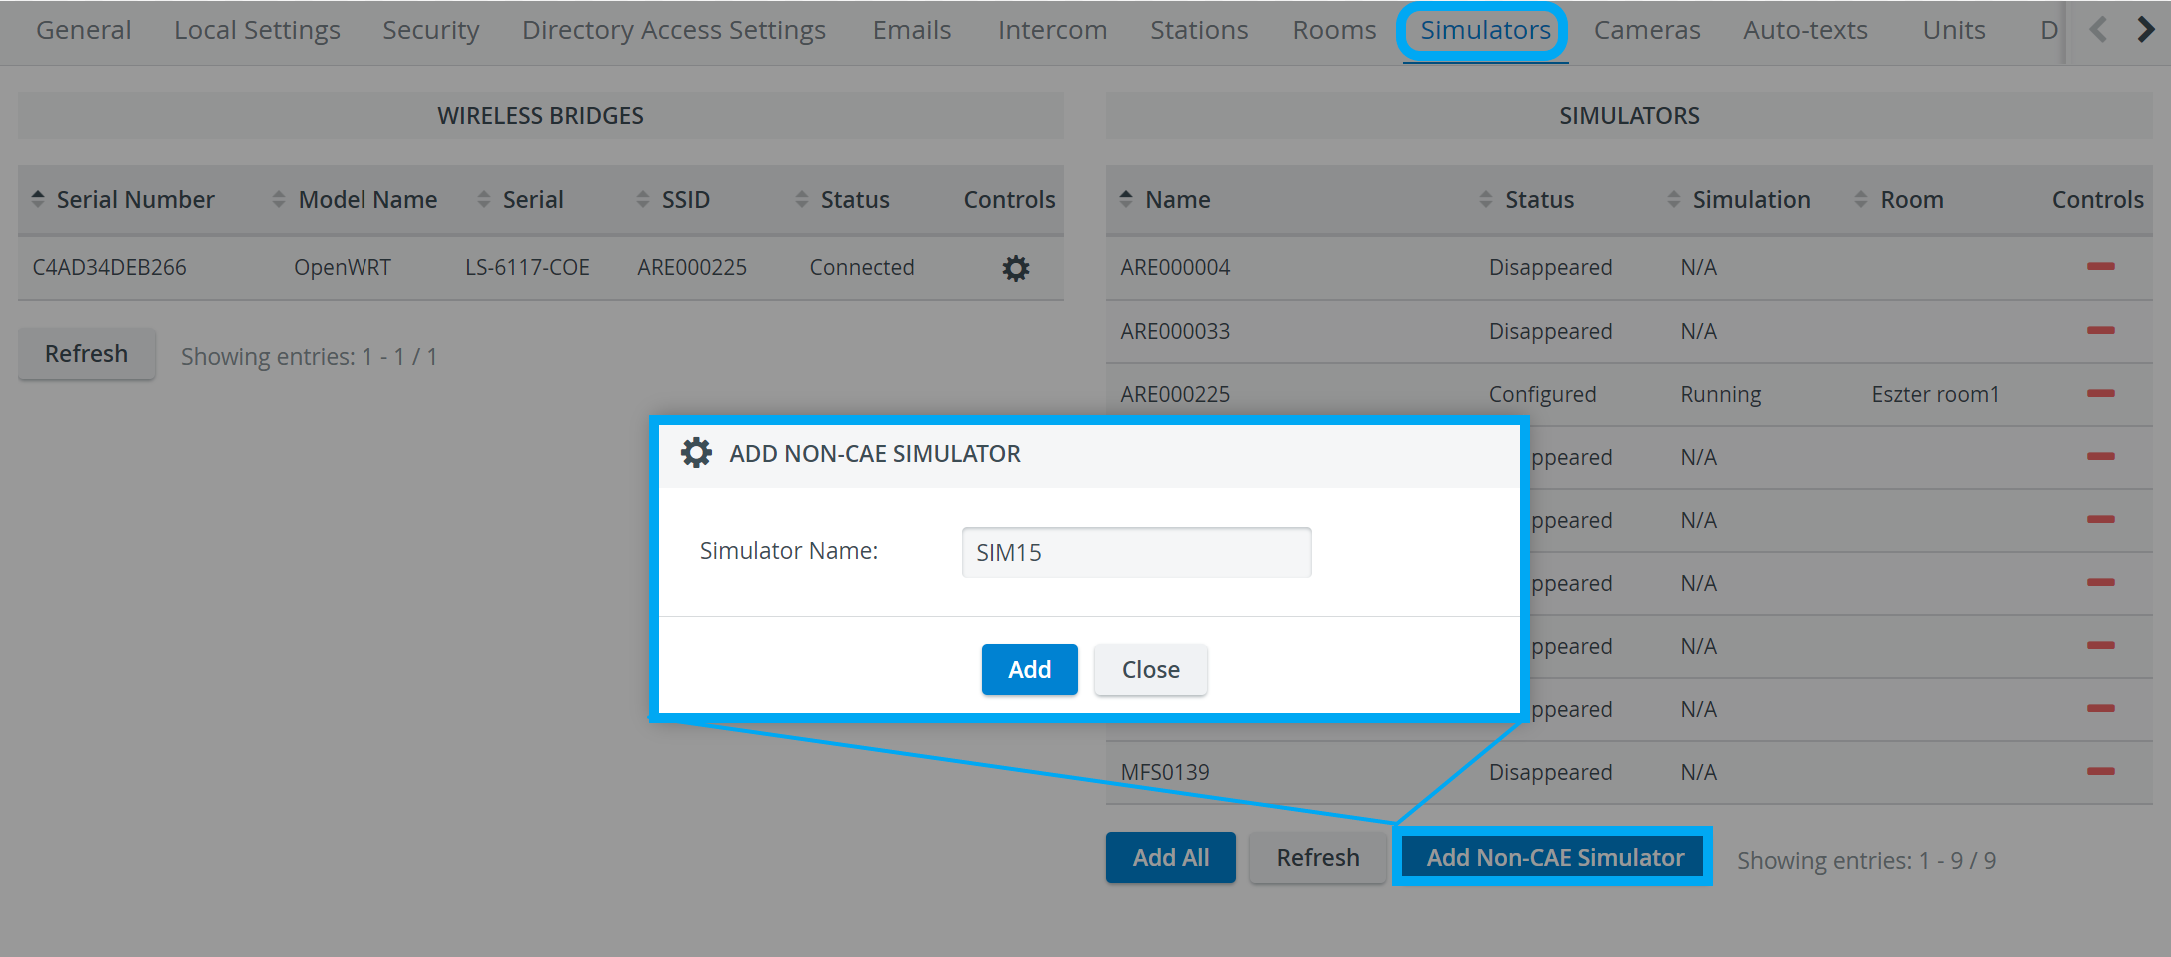
- After adding the simulator using the + icon, you can add the simulator to the desired room, using the Rooms tab.
Connecting simulators using a wired connection
- When a simulator is connected to LearningSpace using an Ethernet connection and is turned ON
- It is listed in the Simulators panel of the tab within 10-30 seconds.
- Click the desired icon in the Controls column to add or remove the simulator.
- To add the simulator to the desired room, use the Rooms tab.
A Wireless Bridge is necessary for setting up a correct connection (exception: ONE appliances, UltraPortable units, where a dedicated Ethernet port is available on the device (See above).
If connected directly to a network (without using a Wireless Bridge), the simulator will not be detected and the setup will not function as intended.
Connecting third-party (non-) simulators
LearningSpace can accommodate and third-party simulators. Connecting a simulator to the system can be done on the Simulators tab.
- Third-party (non-) simulators are captured using display capture technology
- Take the video output of the waveform display of the third-party simulator (it can be VGA, DVI, HDMI)
- Run a video cable to the input of the device and convert the connector if required (e.g. VGA to DVI adapter):
- UltraPortable: DVI input of the USB FrameGrabber
- ONE appliance: DVI input of the ONE appliance
- Server appliance: DVI input of the USB FrameGrabber of the -DCU
- You have to locate the DCU on the Cameras tab, and add it to a room on the Rooms tab.
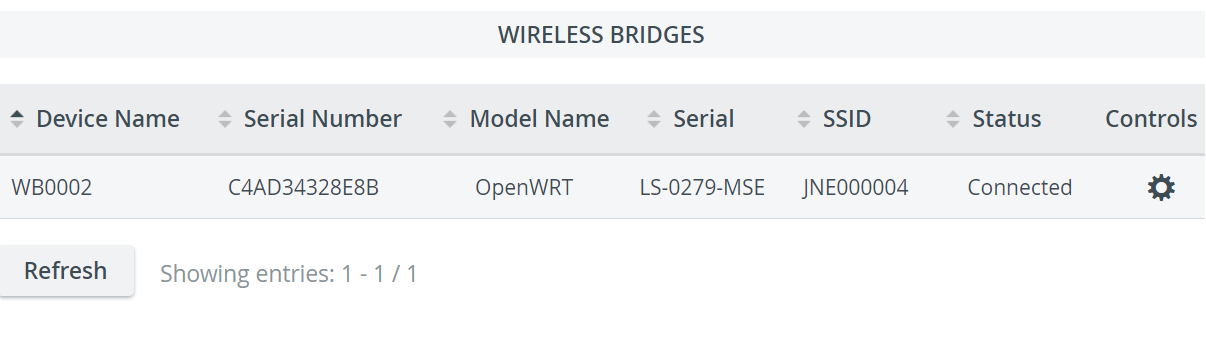
How to name and/or connect Wireless Bridges
The Wireless Bridge Settings pop-up can be opened via the Controls cogwheel ![]() .
.
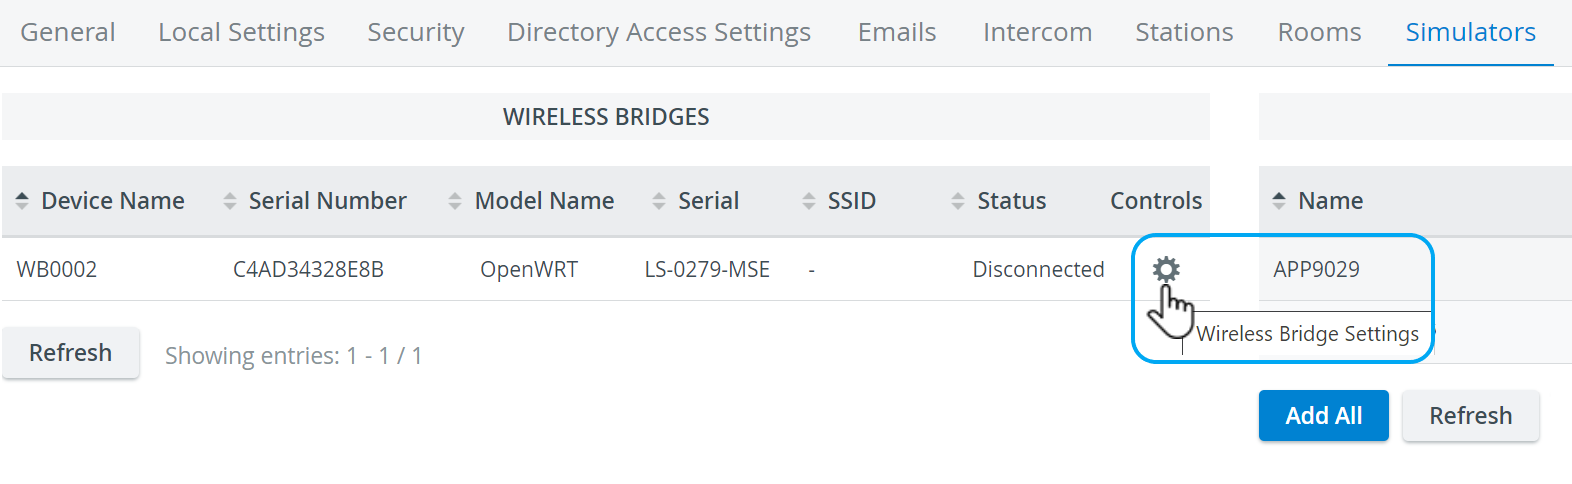
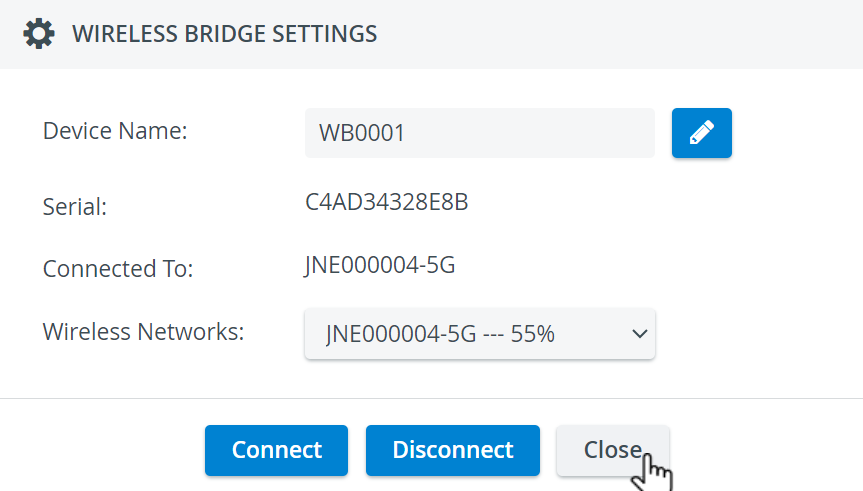
Here, Device Name can be added to wireless bridges for easier detection and distinction, and they can be connected to available wireless networks as well.
The Device Name field becomes editable by pressing the blue pencil icon ![]() .
.
By pressing Connect, the bridge connects to the selected wireless network:
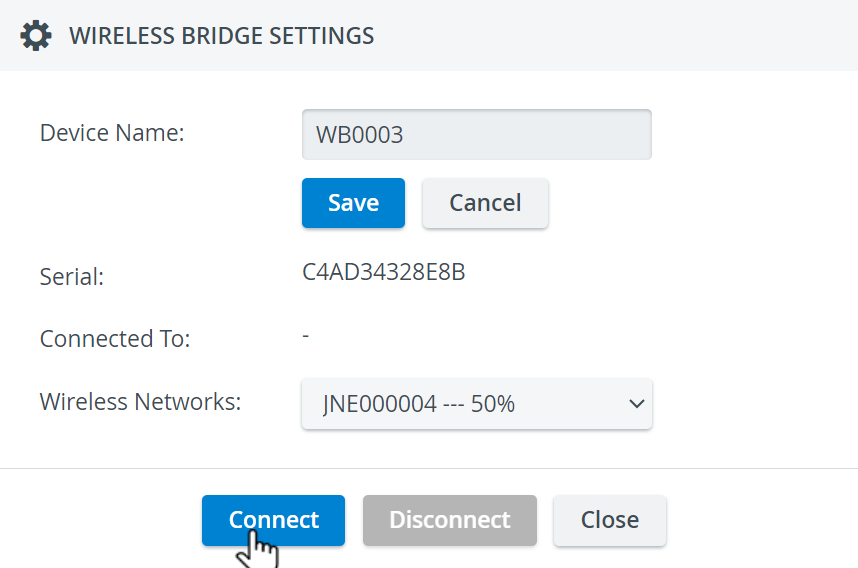
IMPORTANT: Pressing Connect will not save modified Device name (if Save is not pressed prior to that).
- Modifying Device name → Pressing Save → Pressing Close → Device name gets modified
- Modifying Network → Pressing Connect/Disconnect → Pop-up gets closed and action is performed
- Pressing Close without Save or Connect → no changes are performed
Learn more on our System Manager pages or download our PDF document.
Overview
Content Tools