Page History
On the Rooms tab, rooms can be added, modified or deleted.
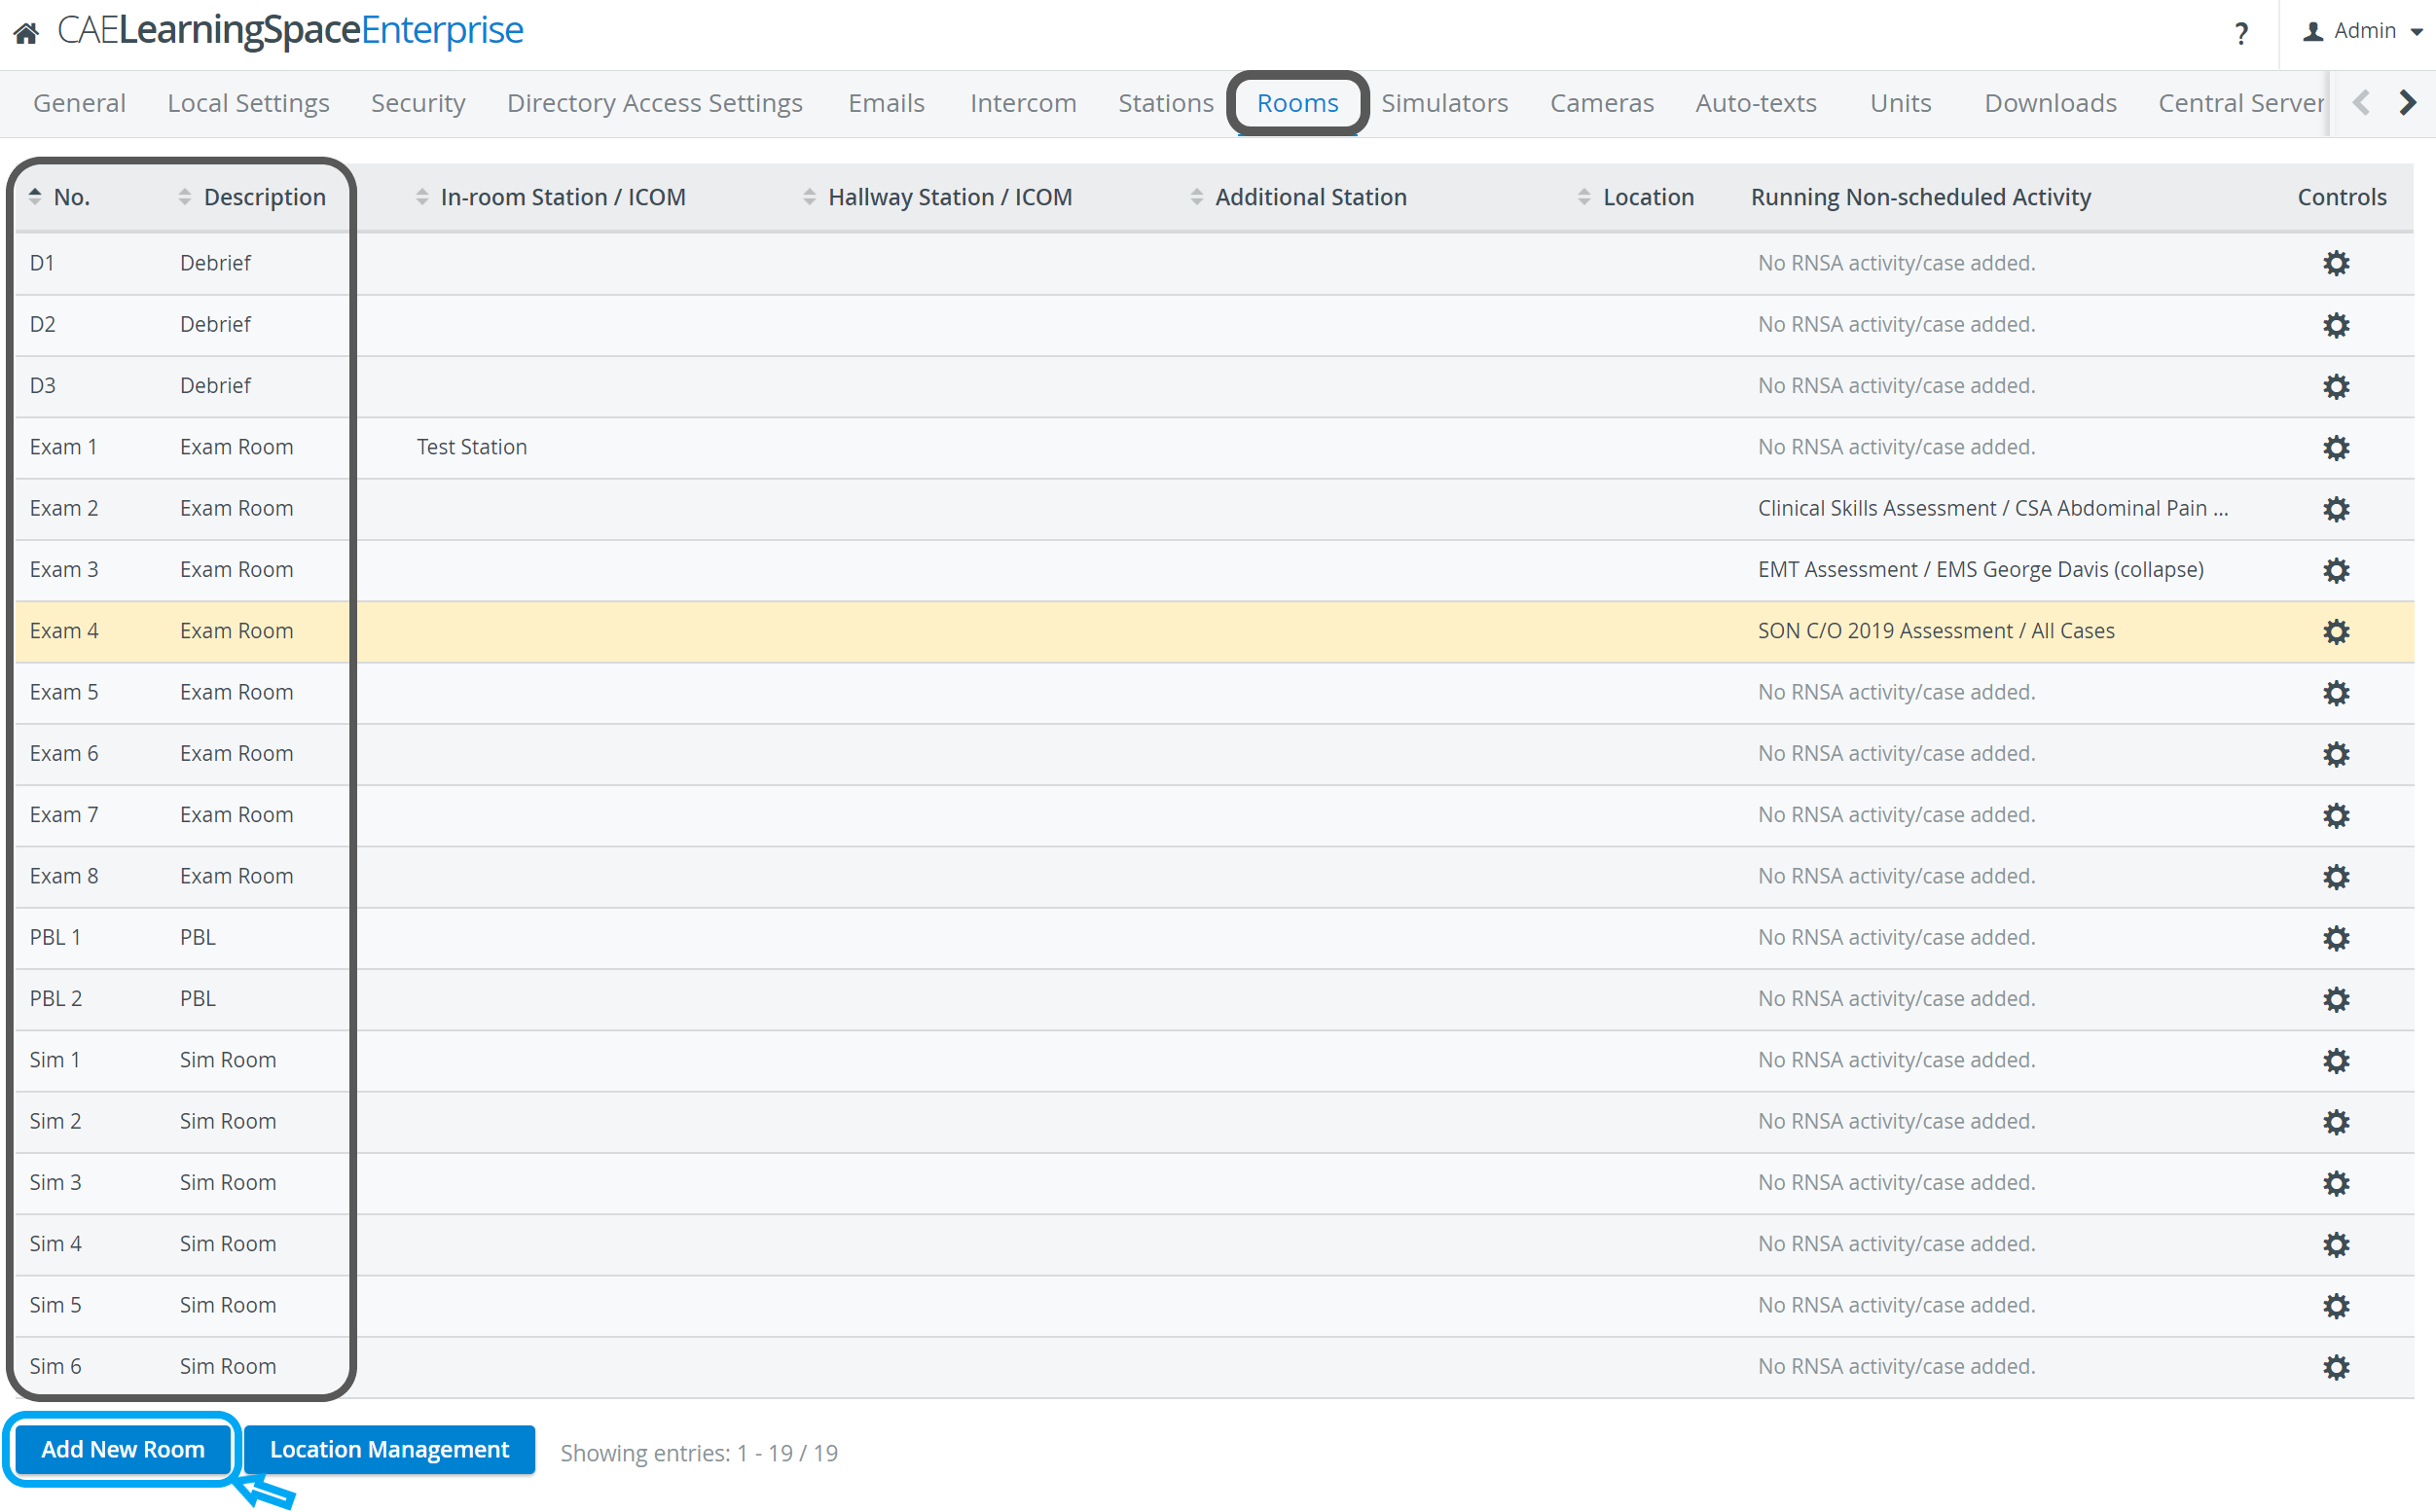
New room can be added by clicking the Add New Room button then typing in the number/ name and description of the room in the corresponding fields of the prompted pop-up.
All the available rooms are listed, with their editable settings accessed by clicking the cogwheel icon ![]() in the Controls column.
in the Controls column.
The icon opens the Room Settings pop-up where all devices can be assigned to the room, including cameras, manikin andintercom device.
| Tip |
|---|
| See details on How to Manage Rooms. |
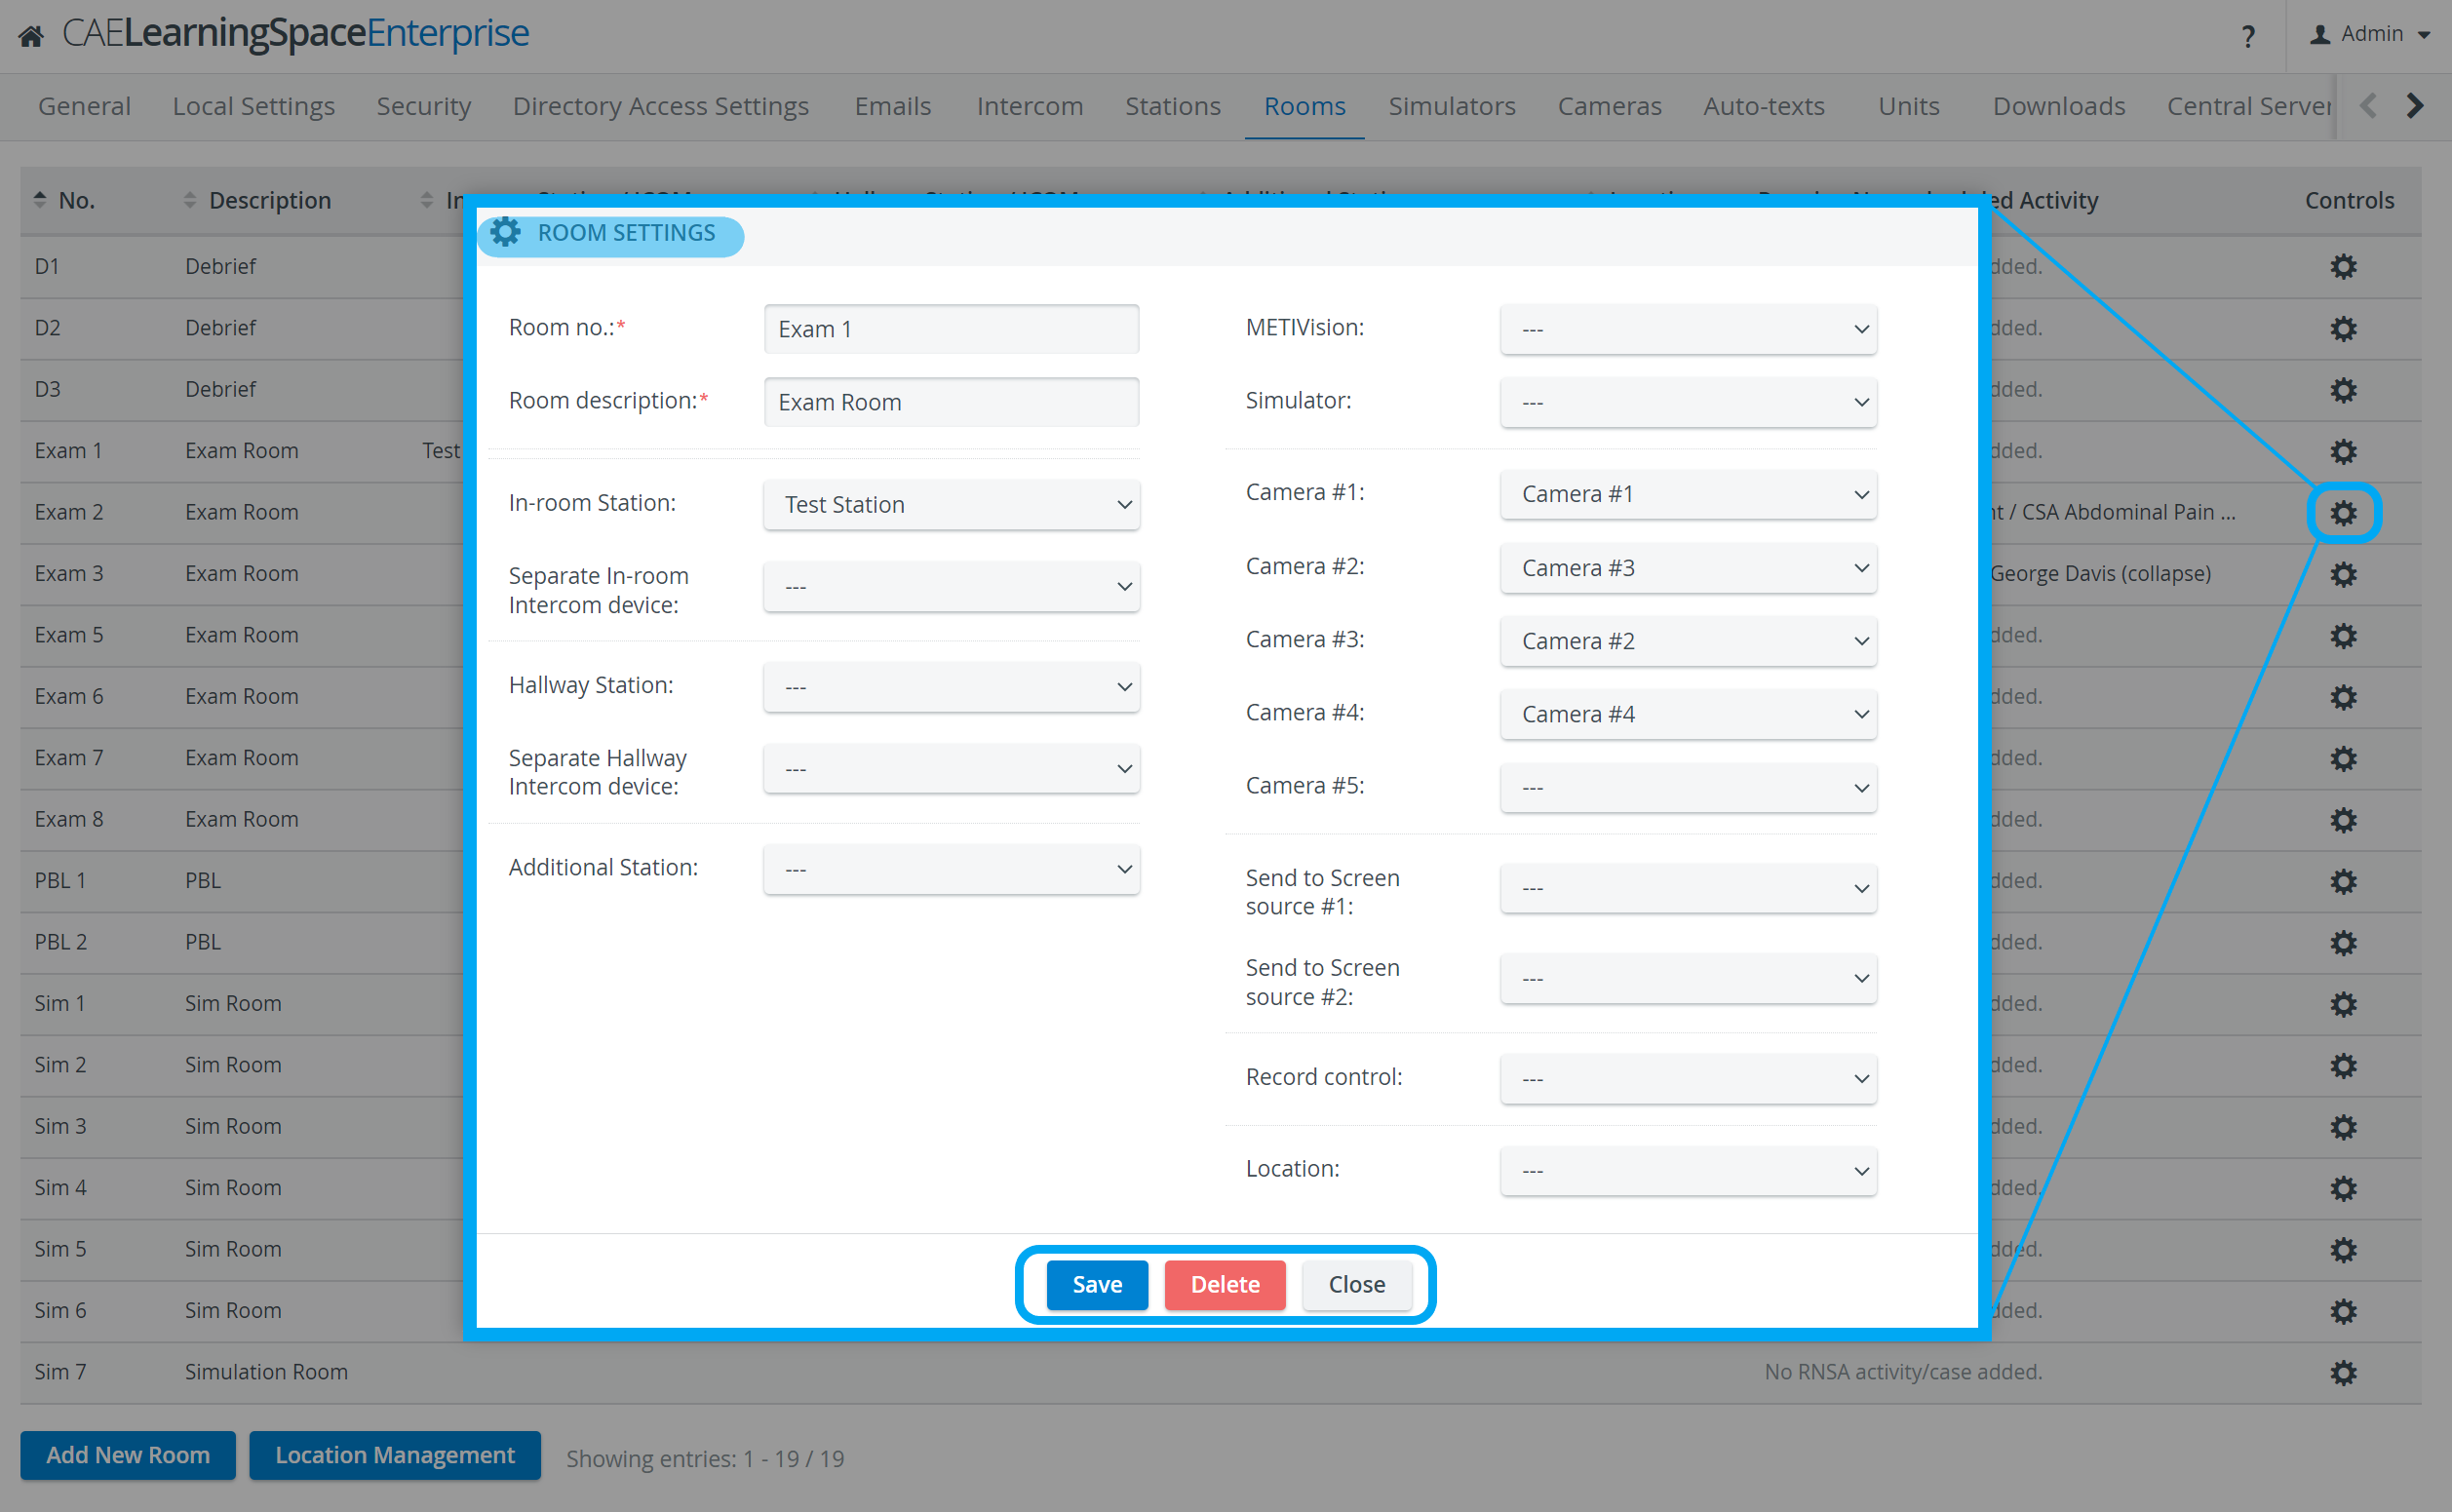
Room Settings pop-up
The pop-up can be opened by clicking the cogwheel next to the desired room and allows for the specification of the following settings:

Room no.: either a number or a name by which the room is to be distinguished
Room description: the type of the room (e.g. simulation lab, skills lab, auditorium etc.)
In-room Station: computer designated for SP data entry
Separate In-room Intercom device: device for in-room intercom announcements
Hallway Station: computer designated for learner data entry (submitting Pre- or Post-Encounter Learner Part)
Separate Hallway Intercom device: device for intercom announcements outside the room
Additional Station: computer designated for display functions
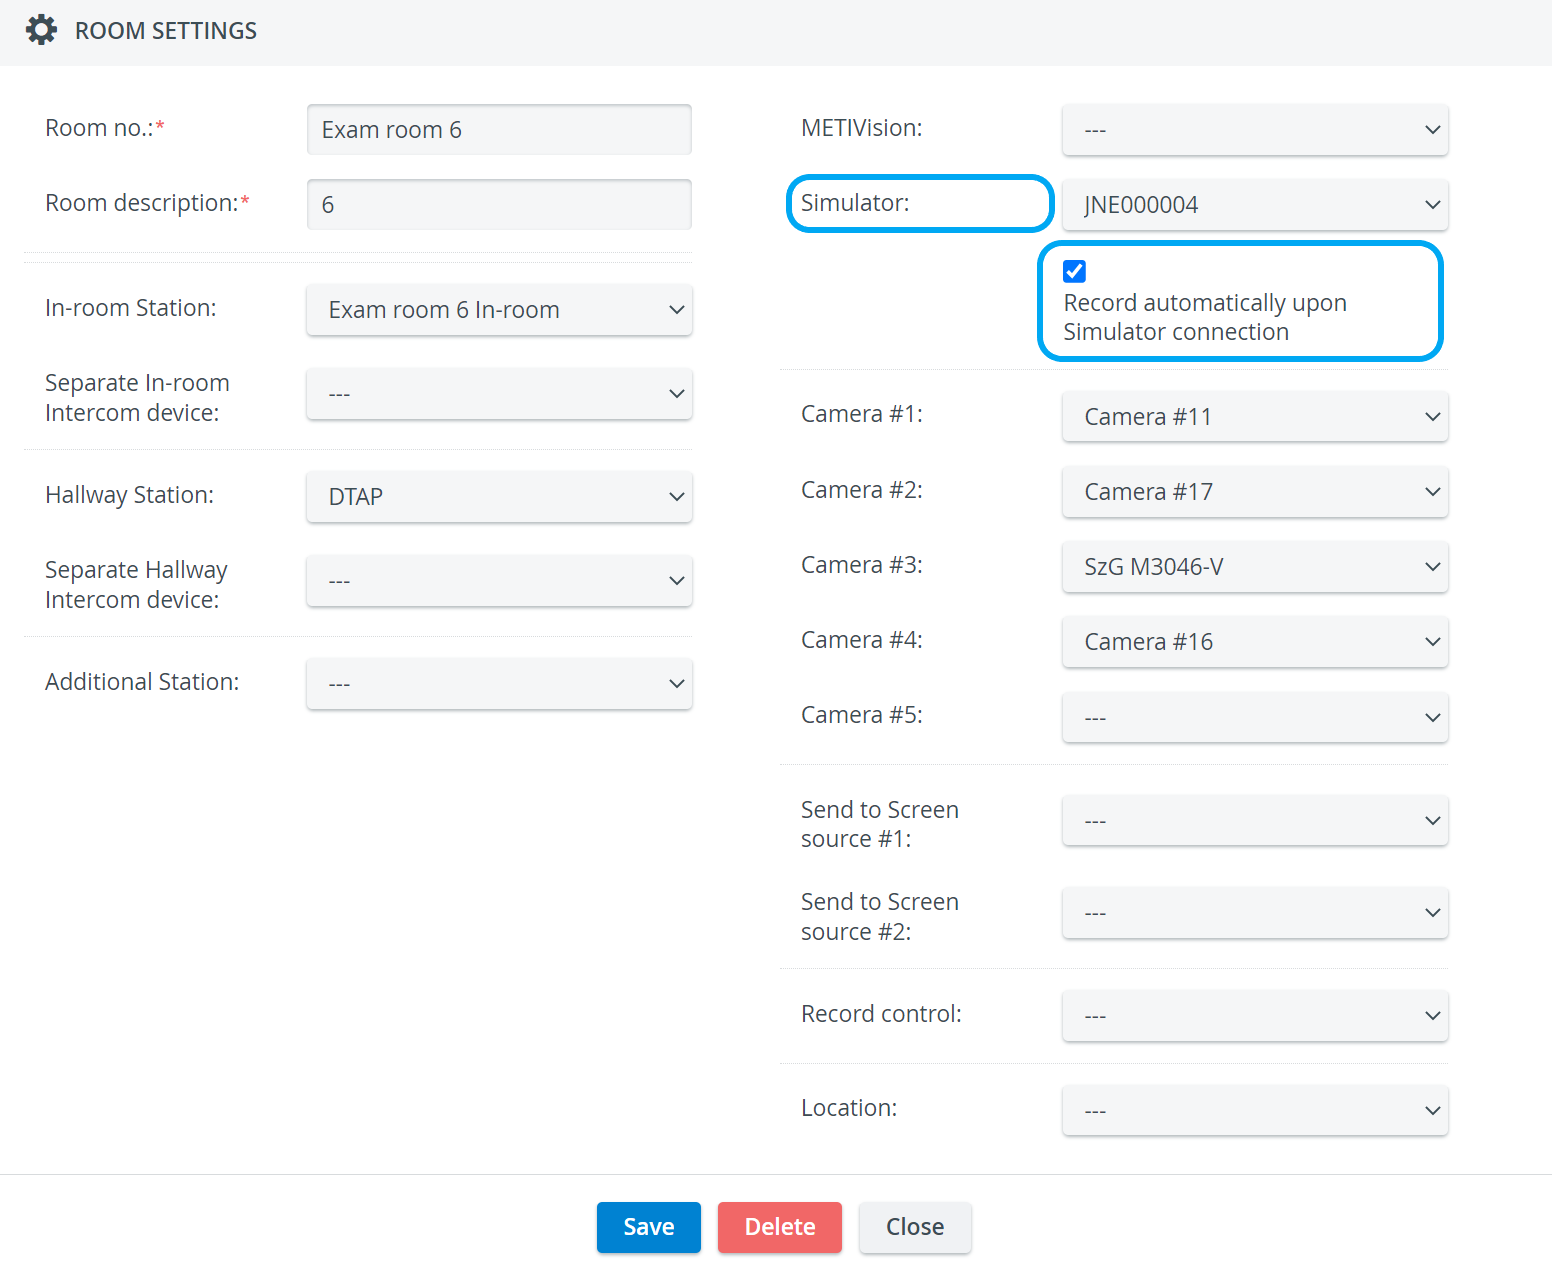
Simulator: selecting one of the available simulators located in the room
| Warning |
|---|
In case If a Simulator is selected from the respective drop-down and the Record automatically upon simulator connection option is activated here, recording will immediately startonce a Simulator is selected from the respective drop-down and in the Recordingmodule oncesimulation is started in the Recording module. |
Camera #1-5: assigning a maximum number of 5 configured cameras
Record control: assigning a tactile REC button to the room (which is physically located in the room and can be pressed to start a recording)
Location: determining a location (building, site etc.) where the room belongs
| Warning | ||
|---|---|---|
| ||
This feature is to be used with in-campus audiovisual (AV) inputs. Hence, it is not available for CAE LearningSpace Enterprise Lite, as the solution is used for web-conferencing based virtual simulation encounters only. To unlock this feature, please upgrade to the CAE LearningSpace Enterprise solution. |
| Info |
|---|
Find step-by-step guides for System manager related processes on our System - How to pages. |
Overview
Content Tools