On the Rooms tab, rooms can be added, modified or deleted.
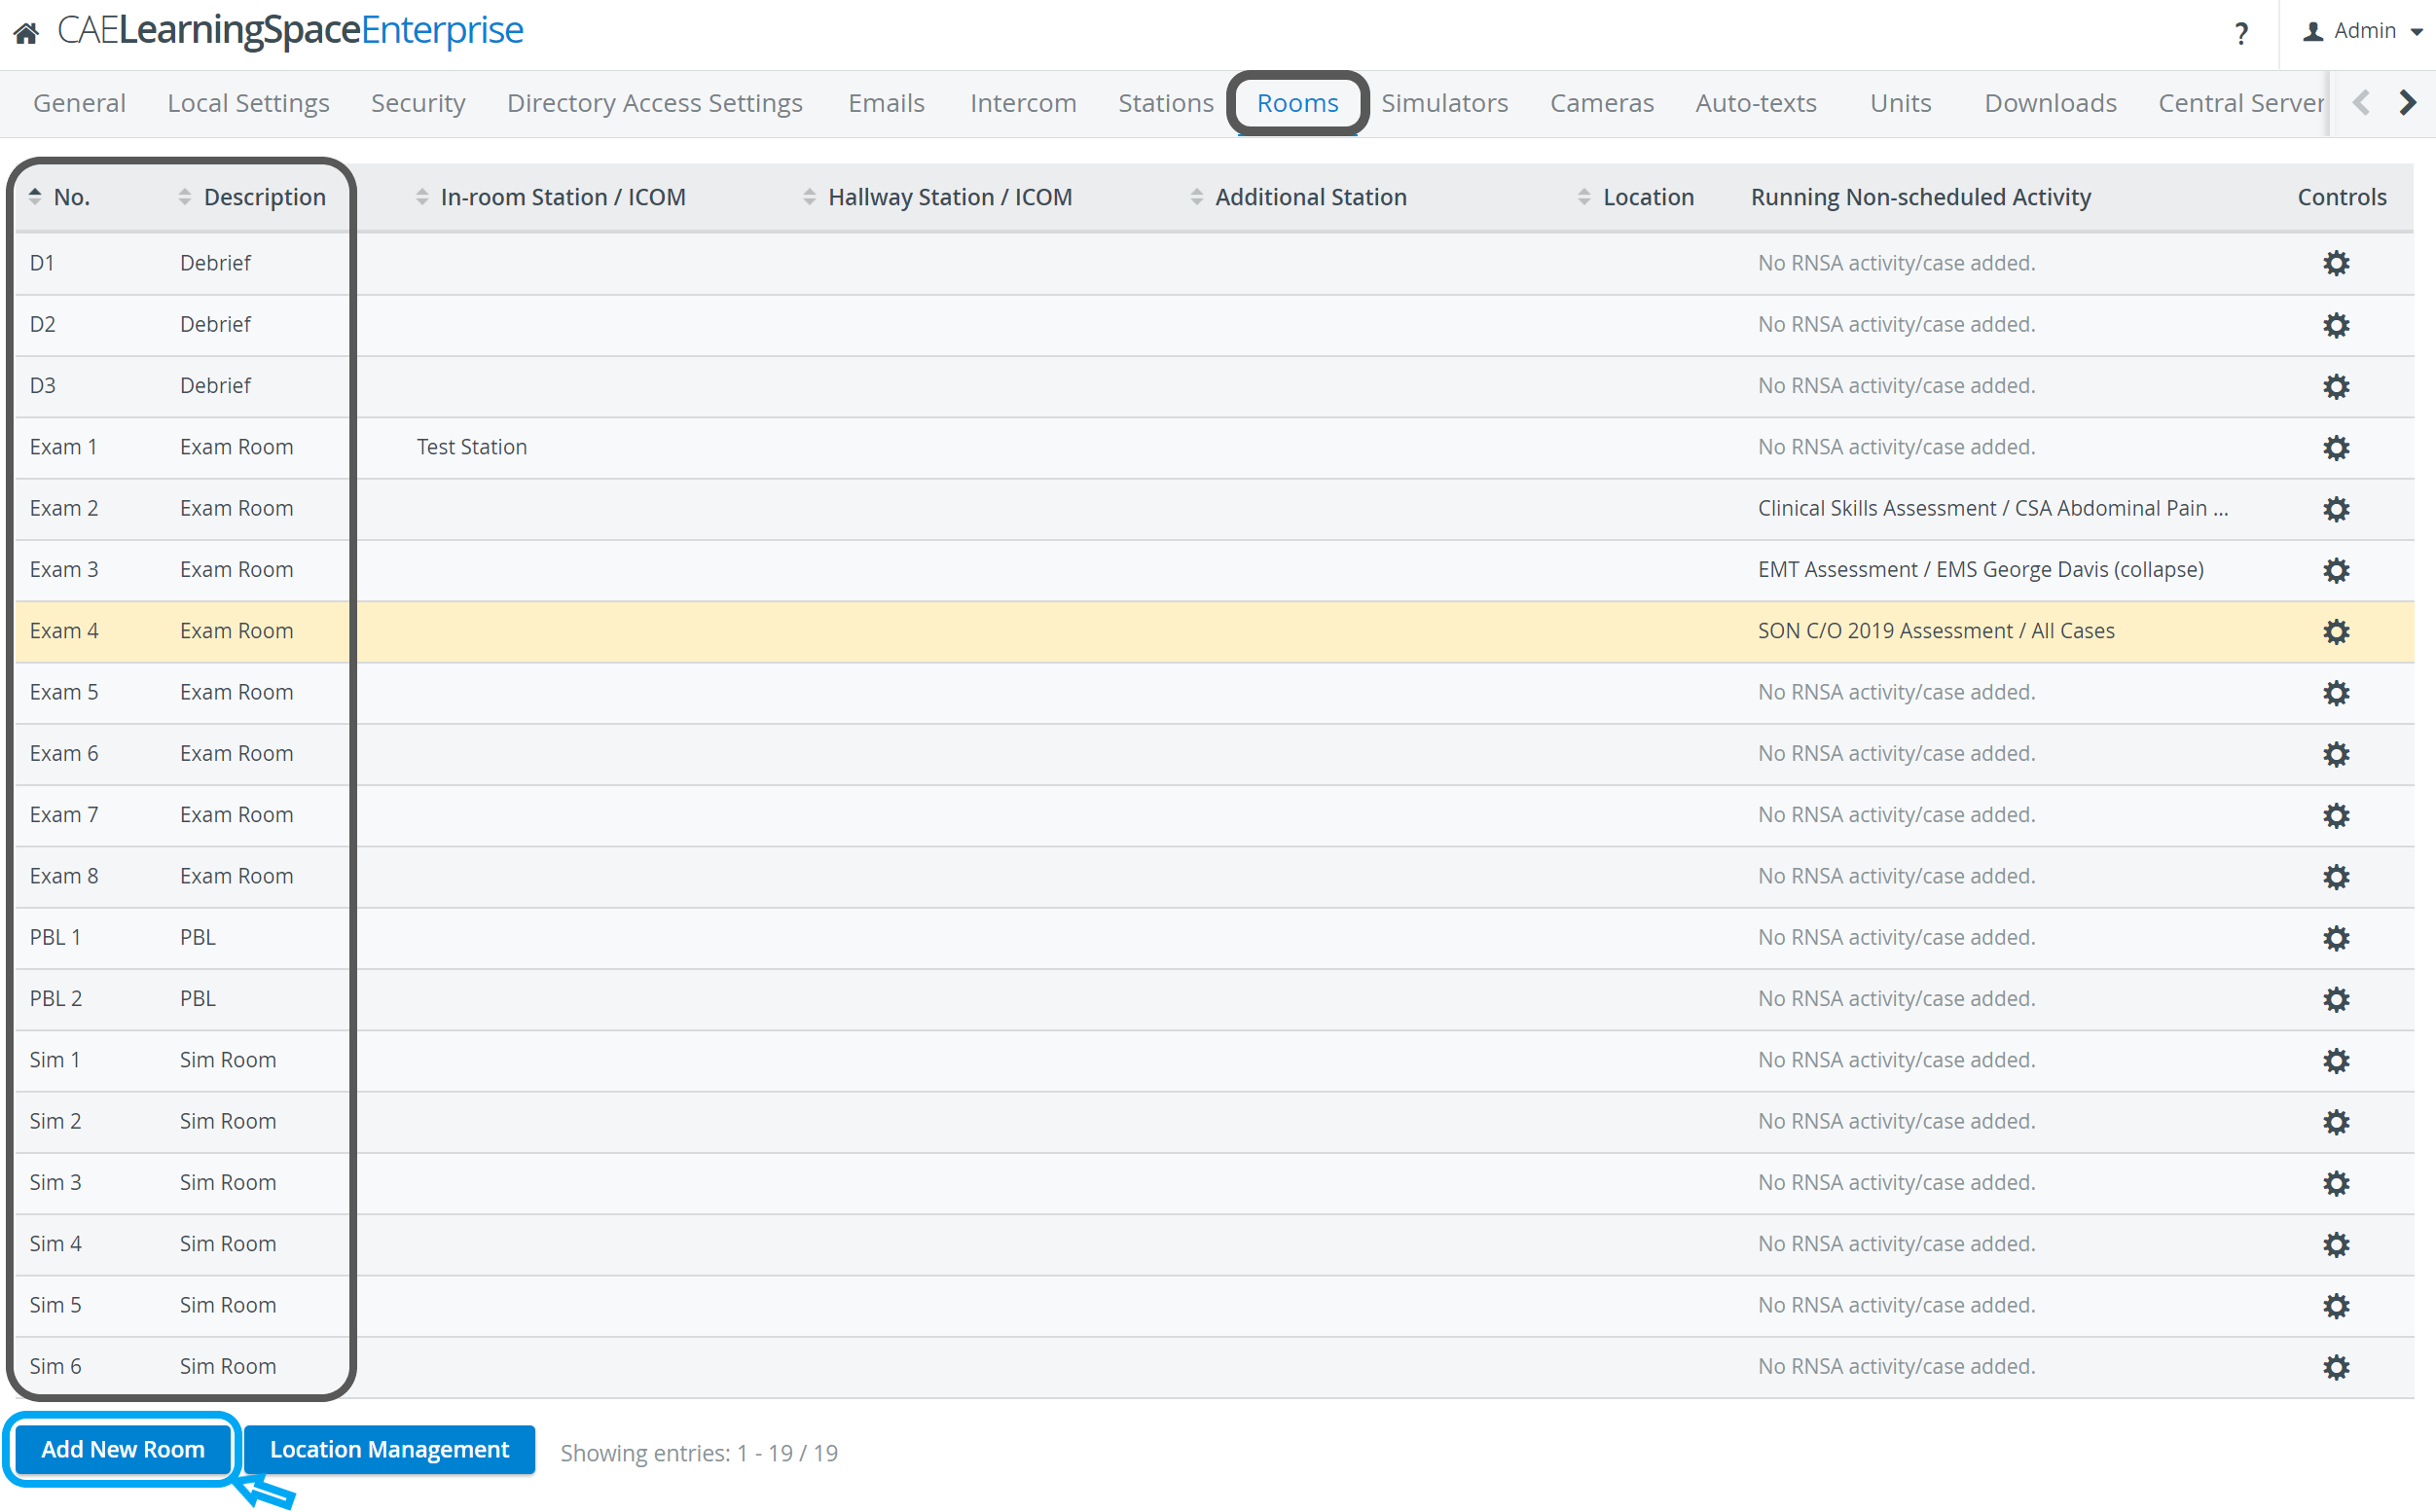
New room can be added by clicking the Add New Room button then typing in the number/name and description of the room in the corresponding fields of the prompted pop-up.
All the available rooms are listed, with their editable settings accessed by clicking the cogwheel icon ![]() in the Controls column.
in the Controls column.
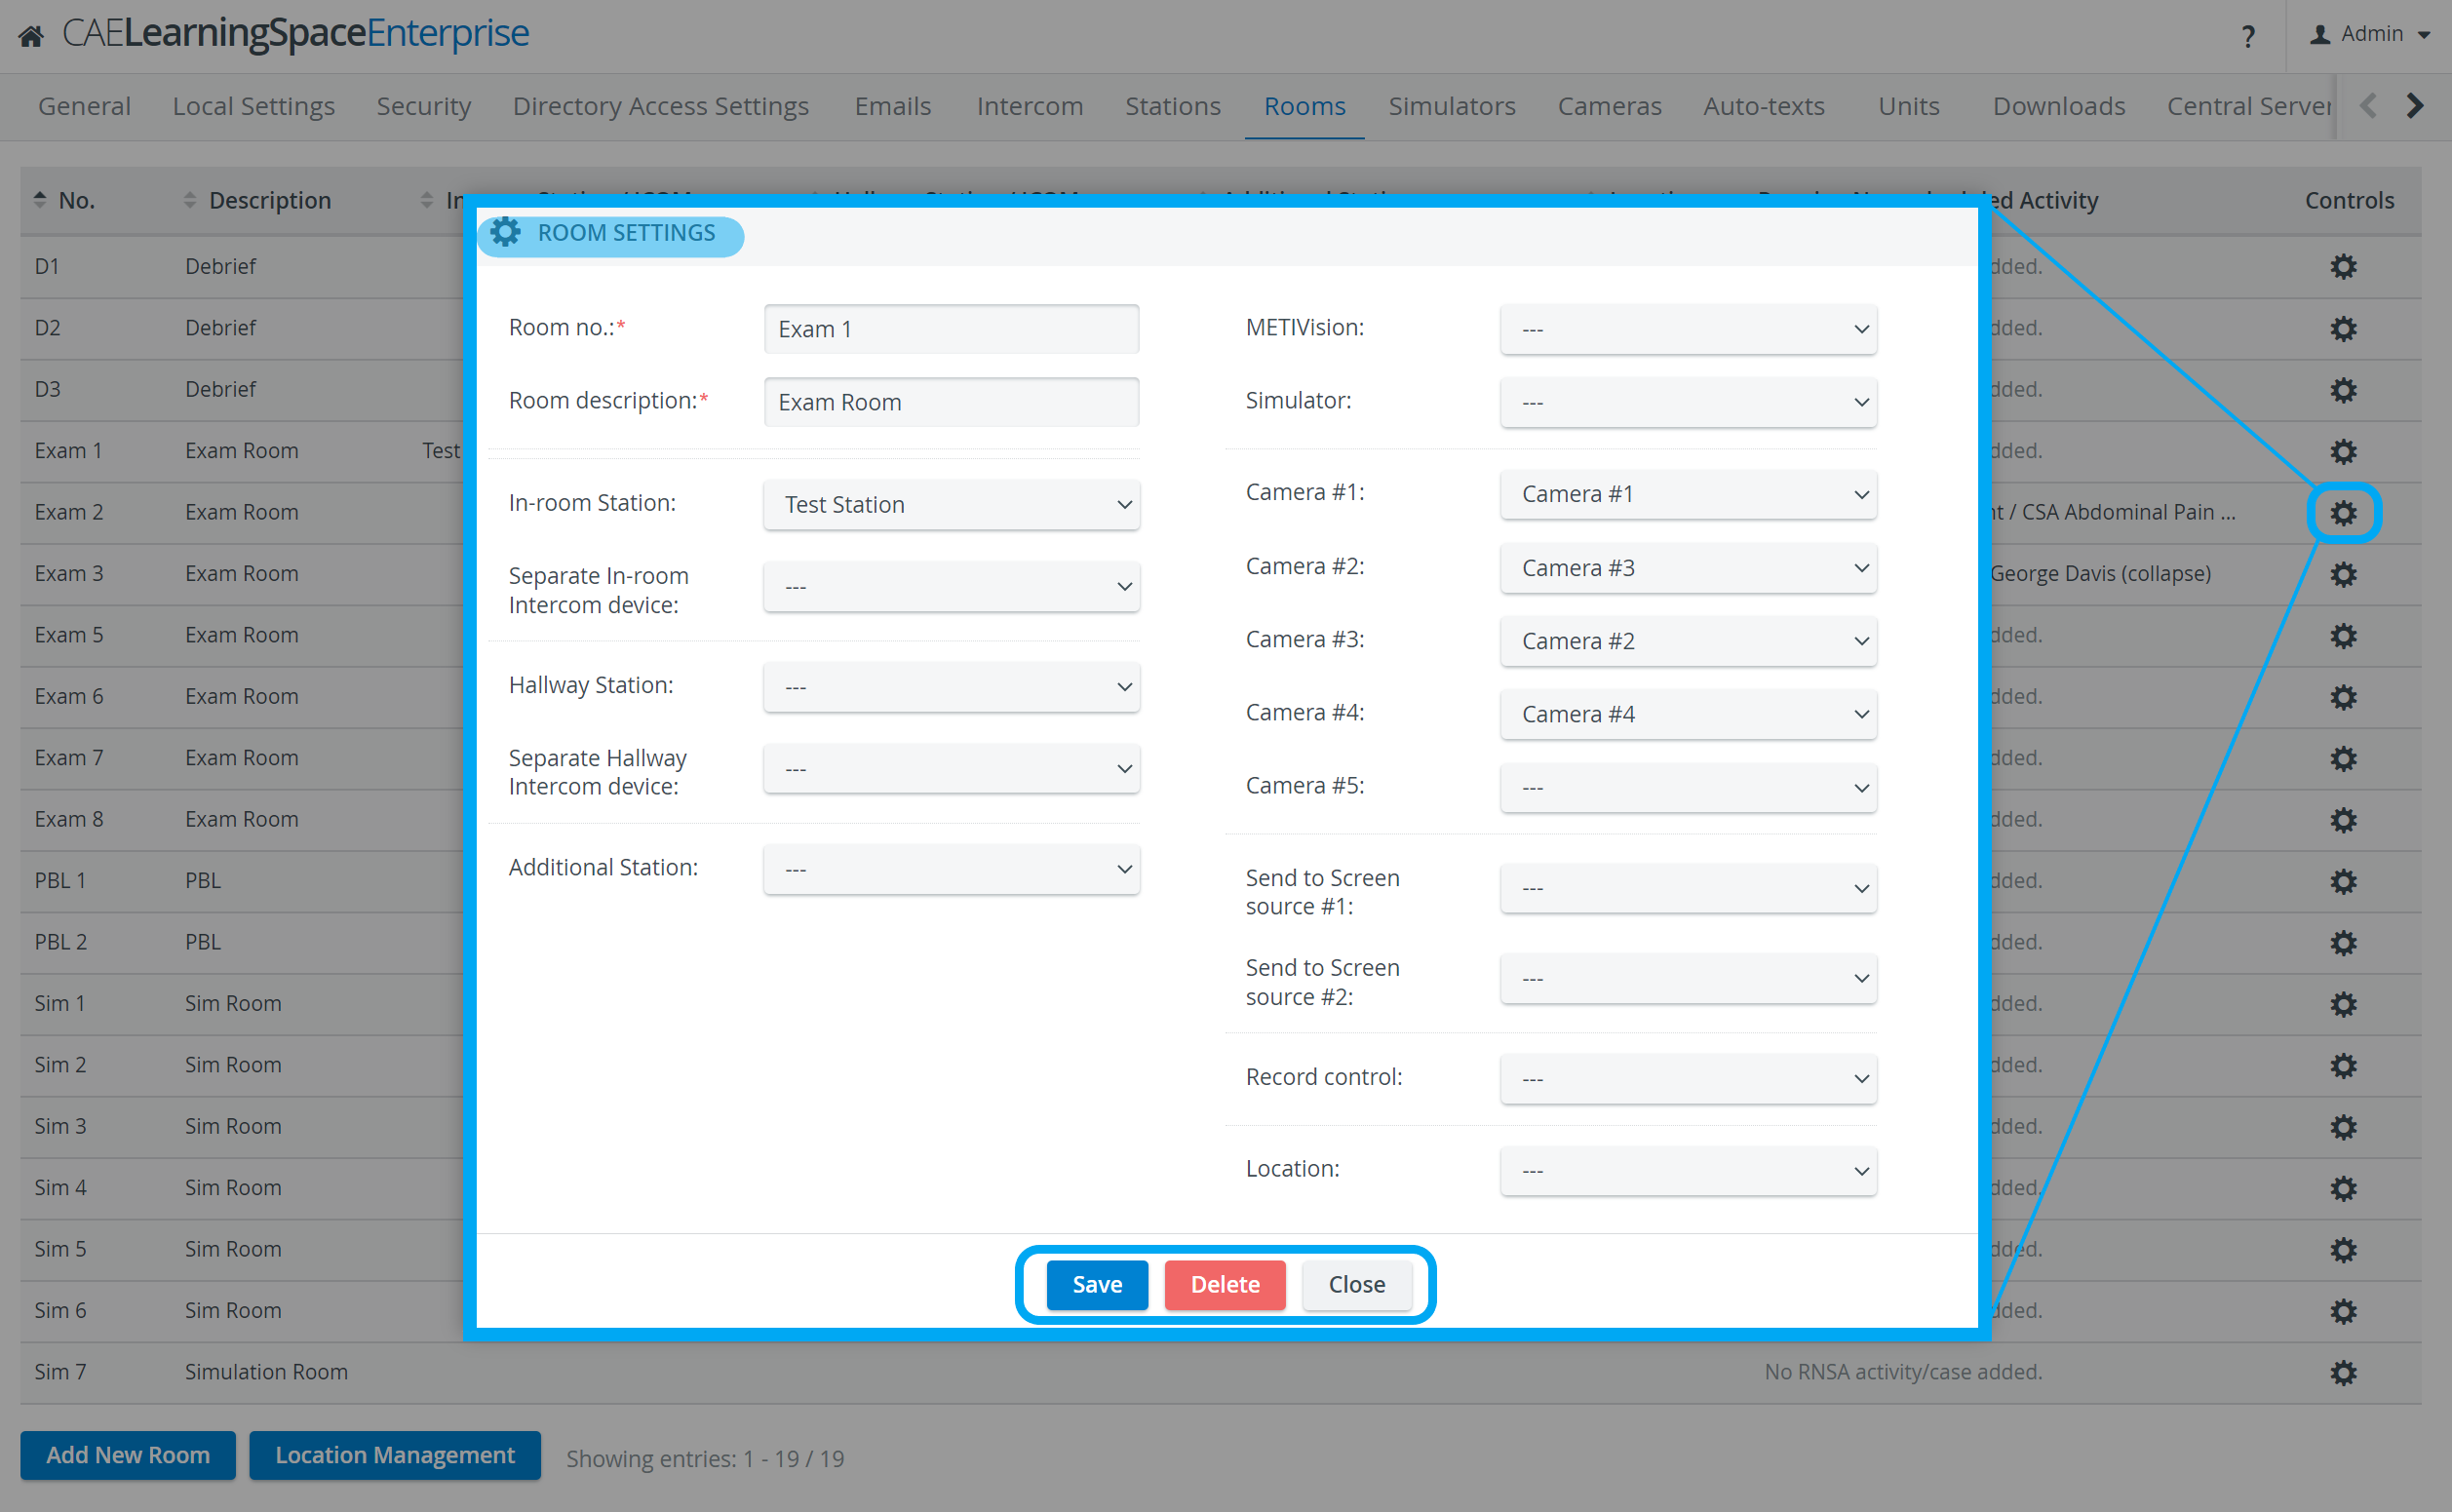
The icon opens the Room Settings pop-up where all devices can be assigned to the room, including cameras, manikin and intercom device and more.
One device can be assigned to one room at a time.
See details on How to Manage Rooms.
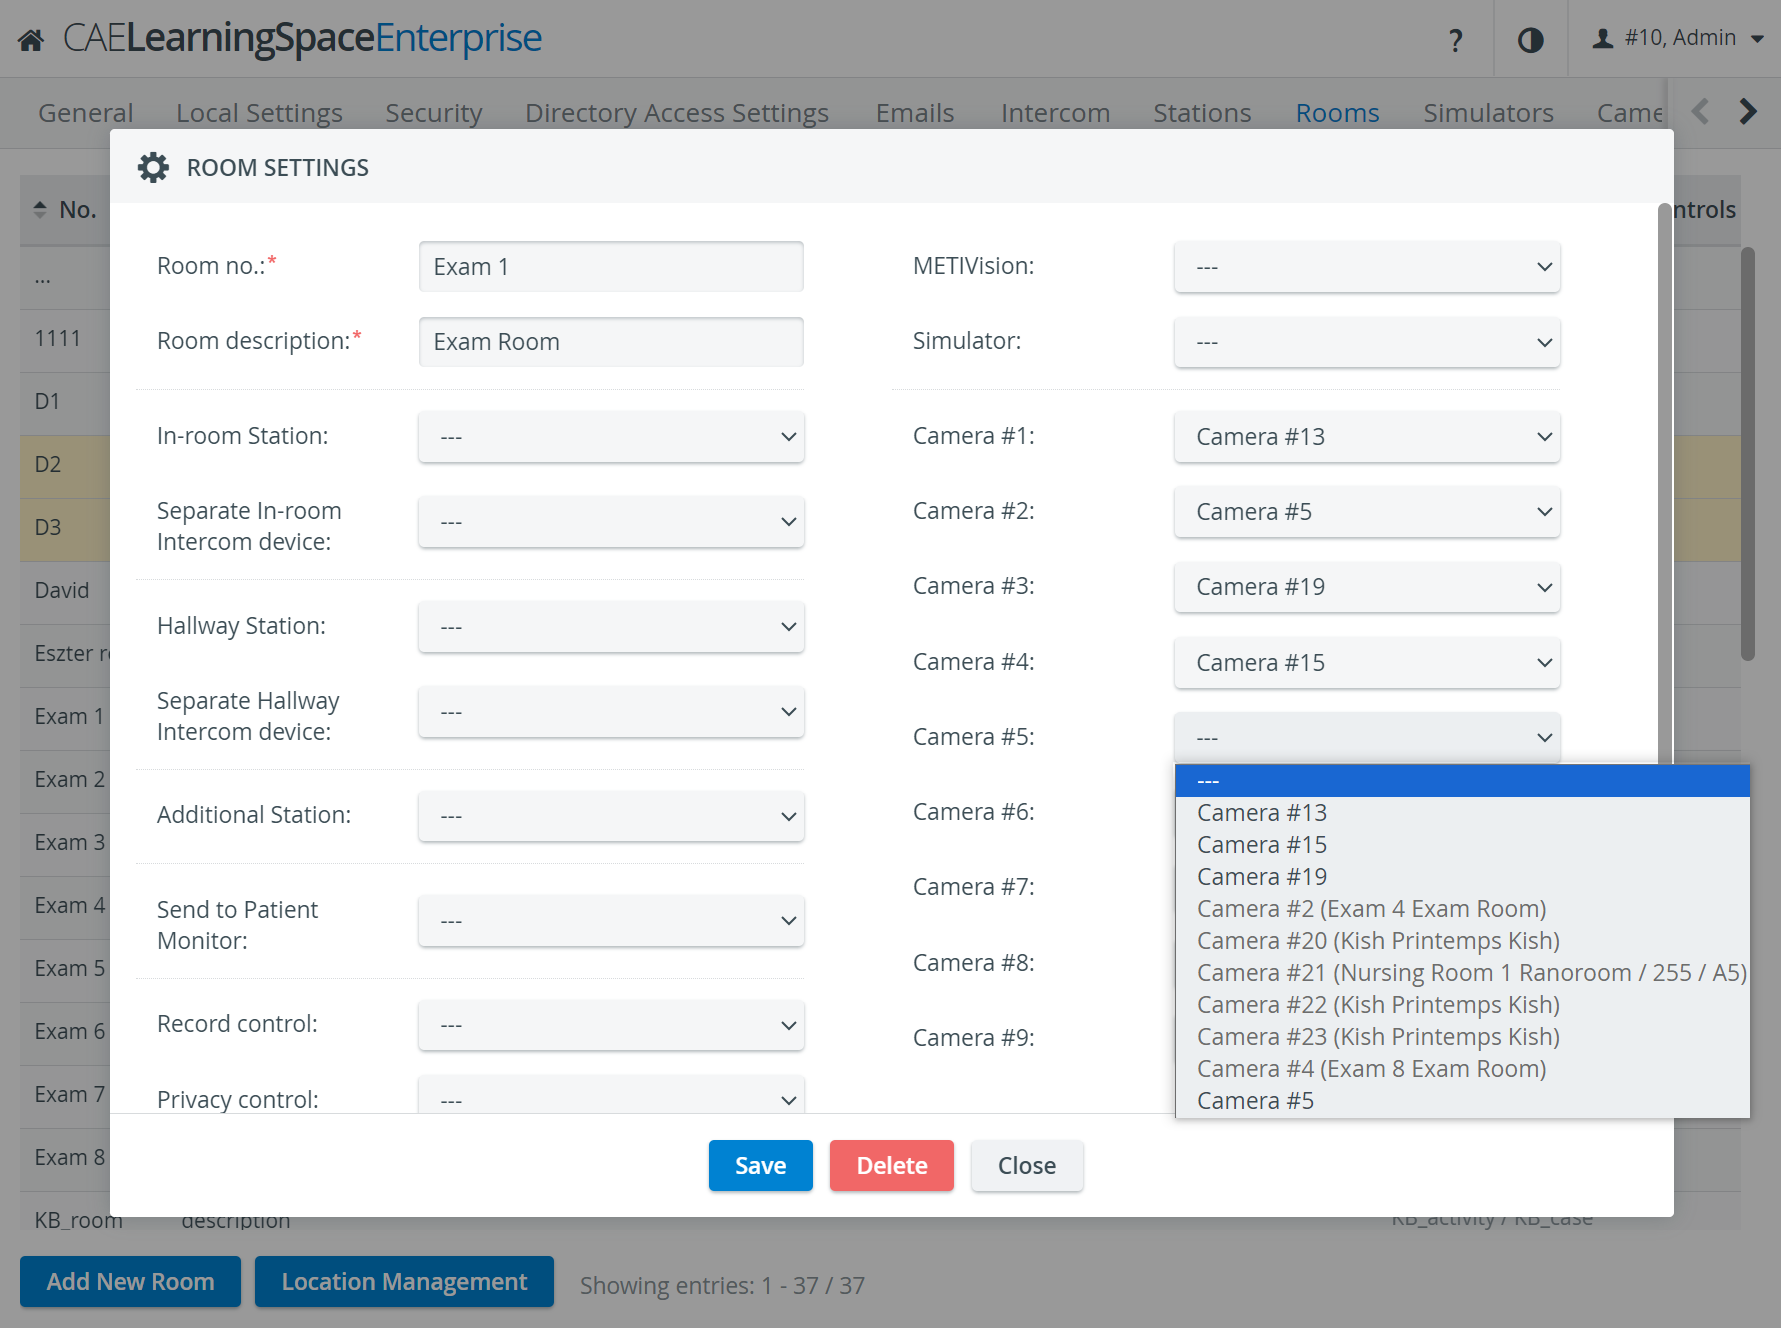
Room Settings pop-up
The pop-up can be opened by clicking the cogwheel next to the desired room and allows for the specification of the following settings:
Room no.: either a number or a name by which the room is to be distinguished
Room description: the type of the room (e.g. simulation lab, skills lab, auditorium etc.)
In-room Station: a client computer designated for SP data entry
Separate In-room Intercom device: device for in-room intercom announcements
Hallway Station: computer designated for learner data entry (submitting Pre- or Post-Encounter Learner Part)
Separate Hallway Intercom device: device for intercom announcements outside the room
Additional Station: computer designated for display functions
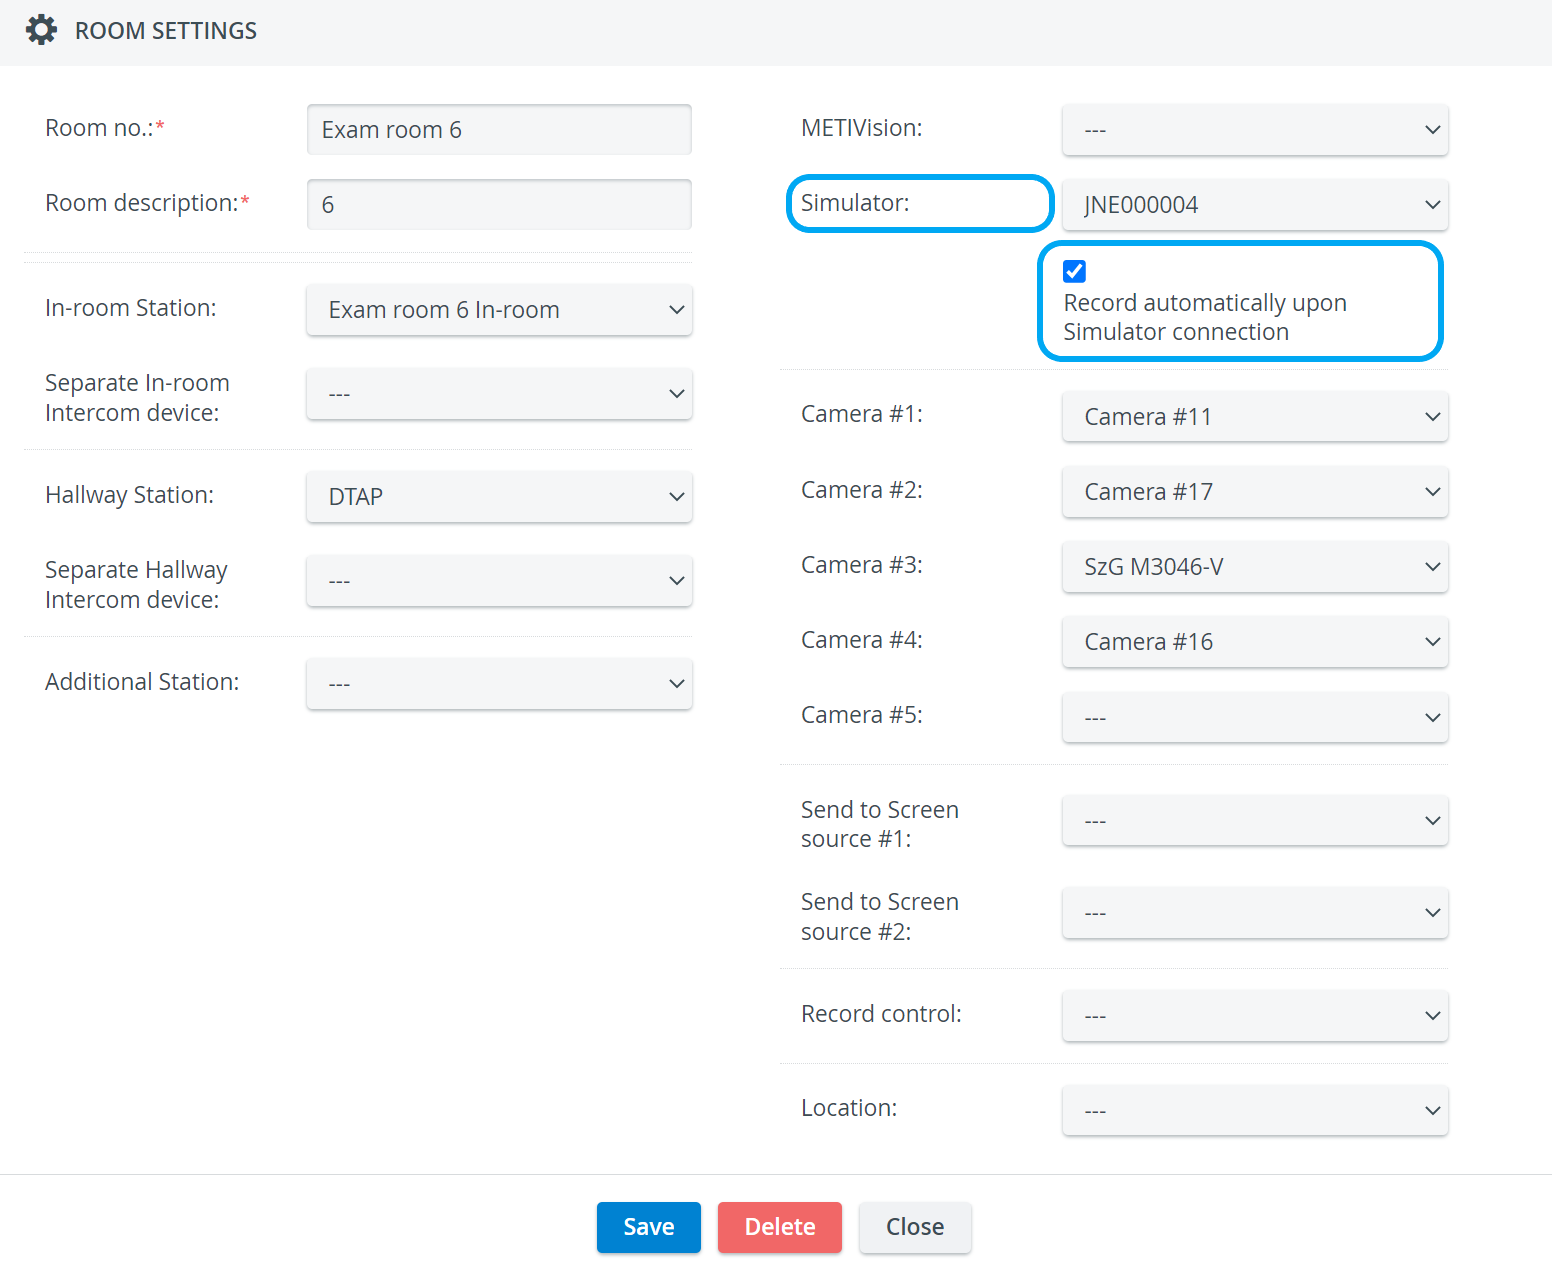
Simulator: selecting one of the available simulators located in the room
If a Simulator is selected from the respective drop-down and the Record automatically upon simulator connection option is activated here, recording will immediately start in the Recording module once simulation is started.
Camera #1-5: assigning a maximum number of 5 configured cameras
Record control: assigning a tactile REC button (Push-button) to the room (which is physically located in the room and can be pressed to start a recording)
Location: determining a location (building, site etc.) where the room belongs
9-camera feed in Single Room View
In the latest versions of LearningSpace, #6 #7 #8 #9 optional camera selector dropdowns have been added to the Room editor of the System manager.
It allows the Single Room View's (SRV) 3x3 layout to be used with camera feeds only.
The feature needs to be enabled on the backend and can be configured for a maximum of 9 cameras. Please turn to your IT team to have the feature enabled and configured according to your needs!
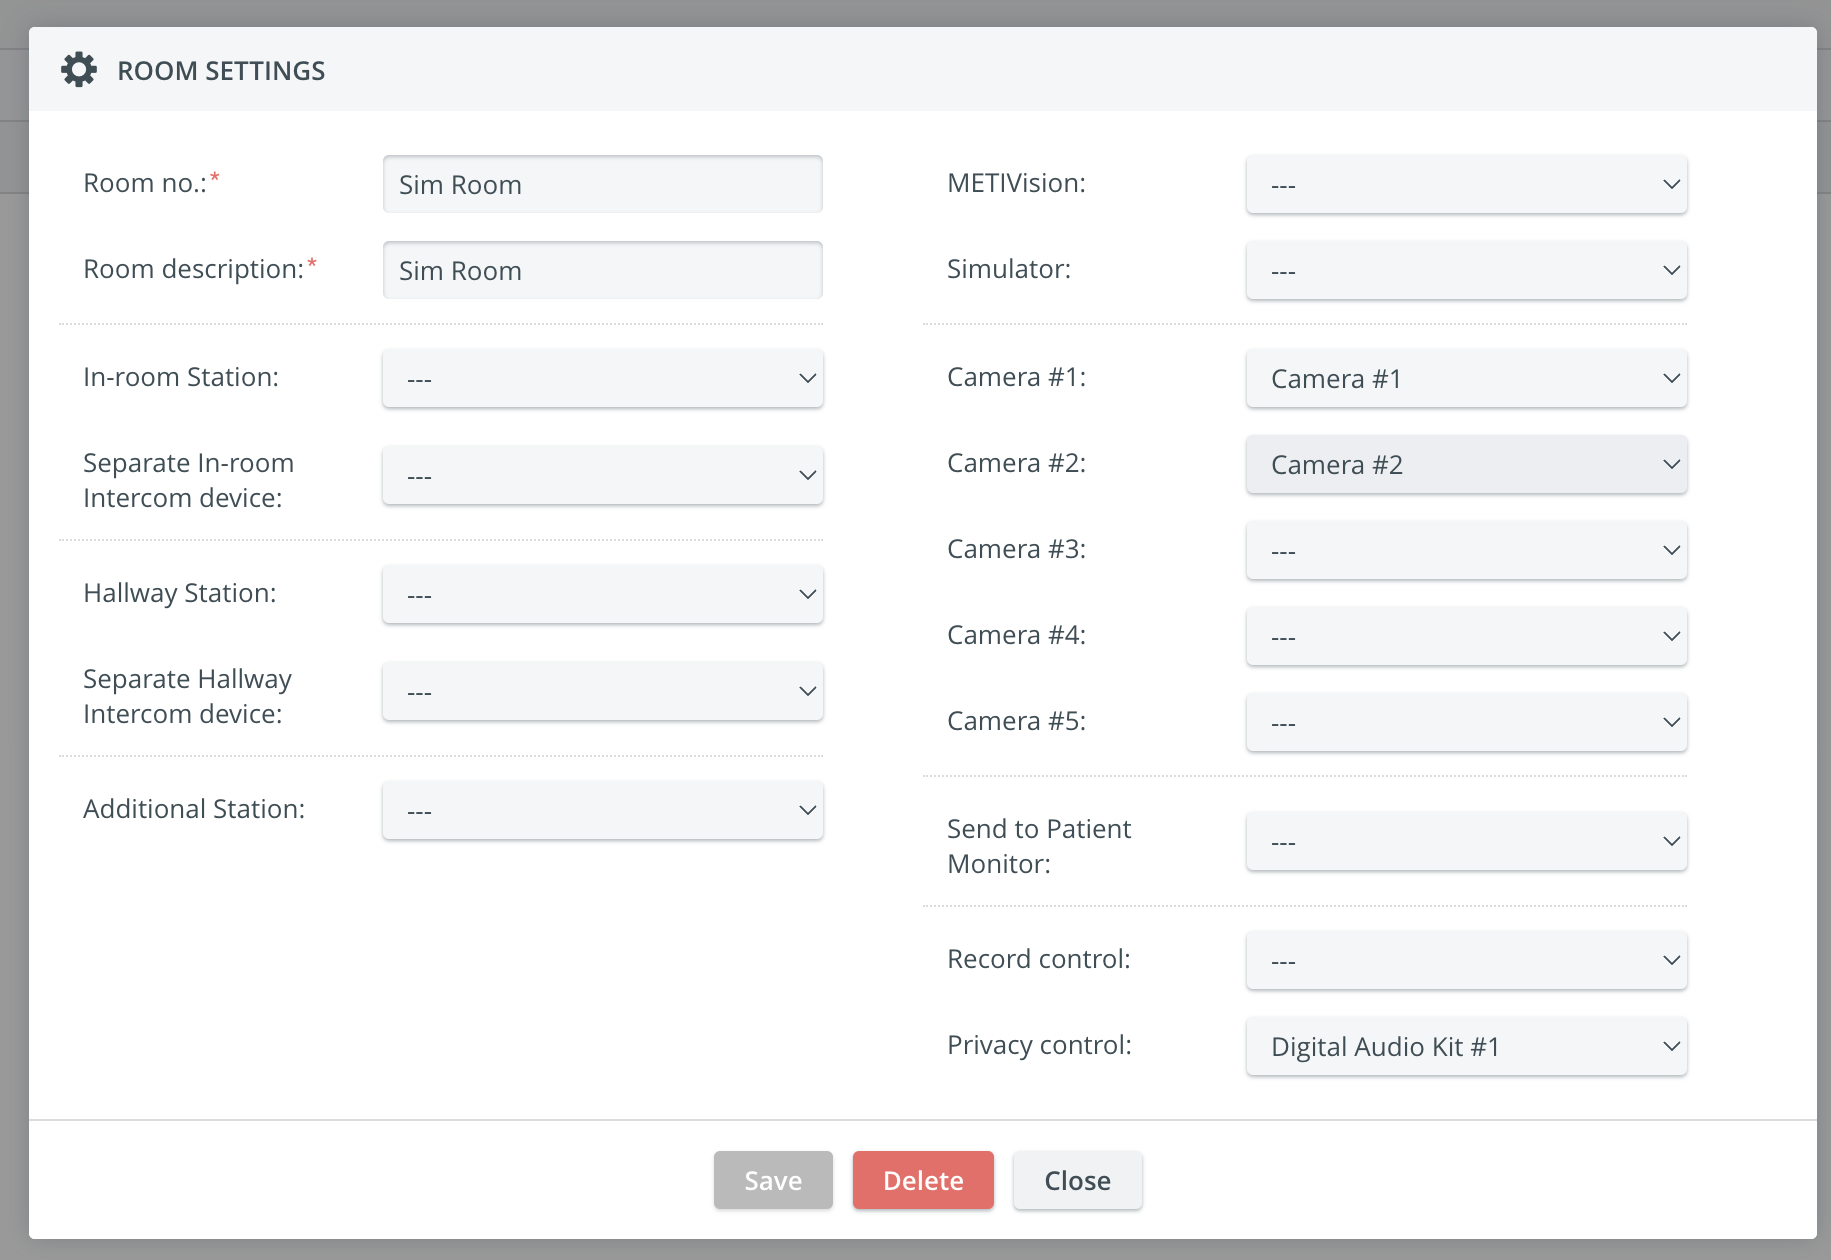
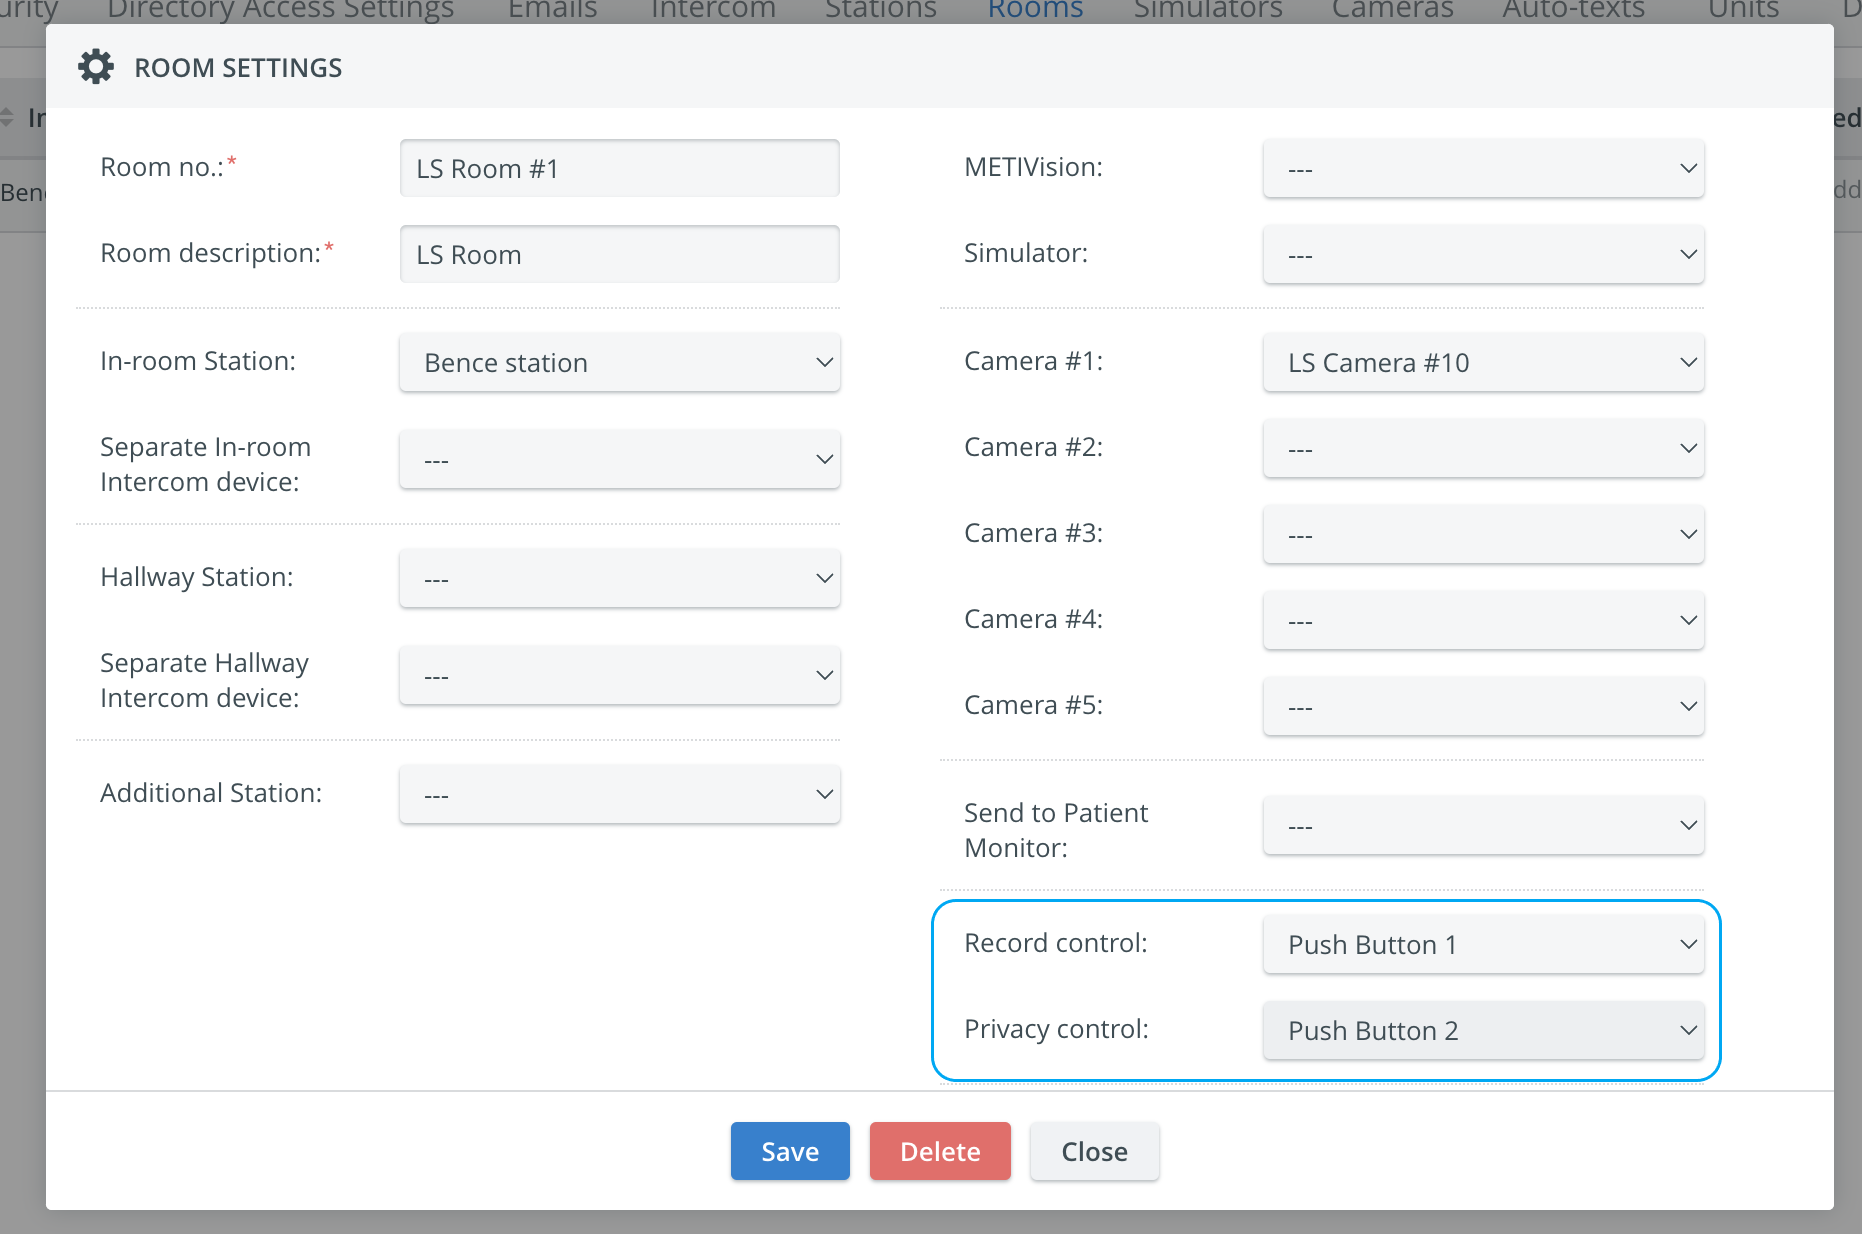
Push-Button activation of the Privacy Mode
In the latest versions of CAE LearningSpace Privacy mode can also be controlled by using a Push-button within the physical rooms. Once a Push-button has been connected to a DAK (Digital Audio Kit) physically, and the DAK is configured on the Cameras tab, it can be selected as a
- Record control device
- Privacy control device
from the following two drop-downs of the Room Settings pop-up:
A Push-button hardware can only be assigned to a room once. Once assigned, it cannot be selected from the other drop-down any longer - otherwise the following error message comes up:

![]() One Push-button can only be added to one room within the system.
One Push-button can only be added to one room within the system.
- In case two DAKs are being used with two Push buttons (one DAK/one Push button) → record control and privacy control can be used simultaneously.
- By utilizing only one DAK device and one Push button → either record or privacy control can be managed by the Push button.
![]() For more information go to How to Manage Privacy Mode for SP Users.
For more information go to How to Manage Privacy Mode for SP Users.
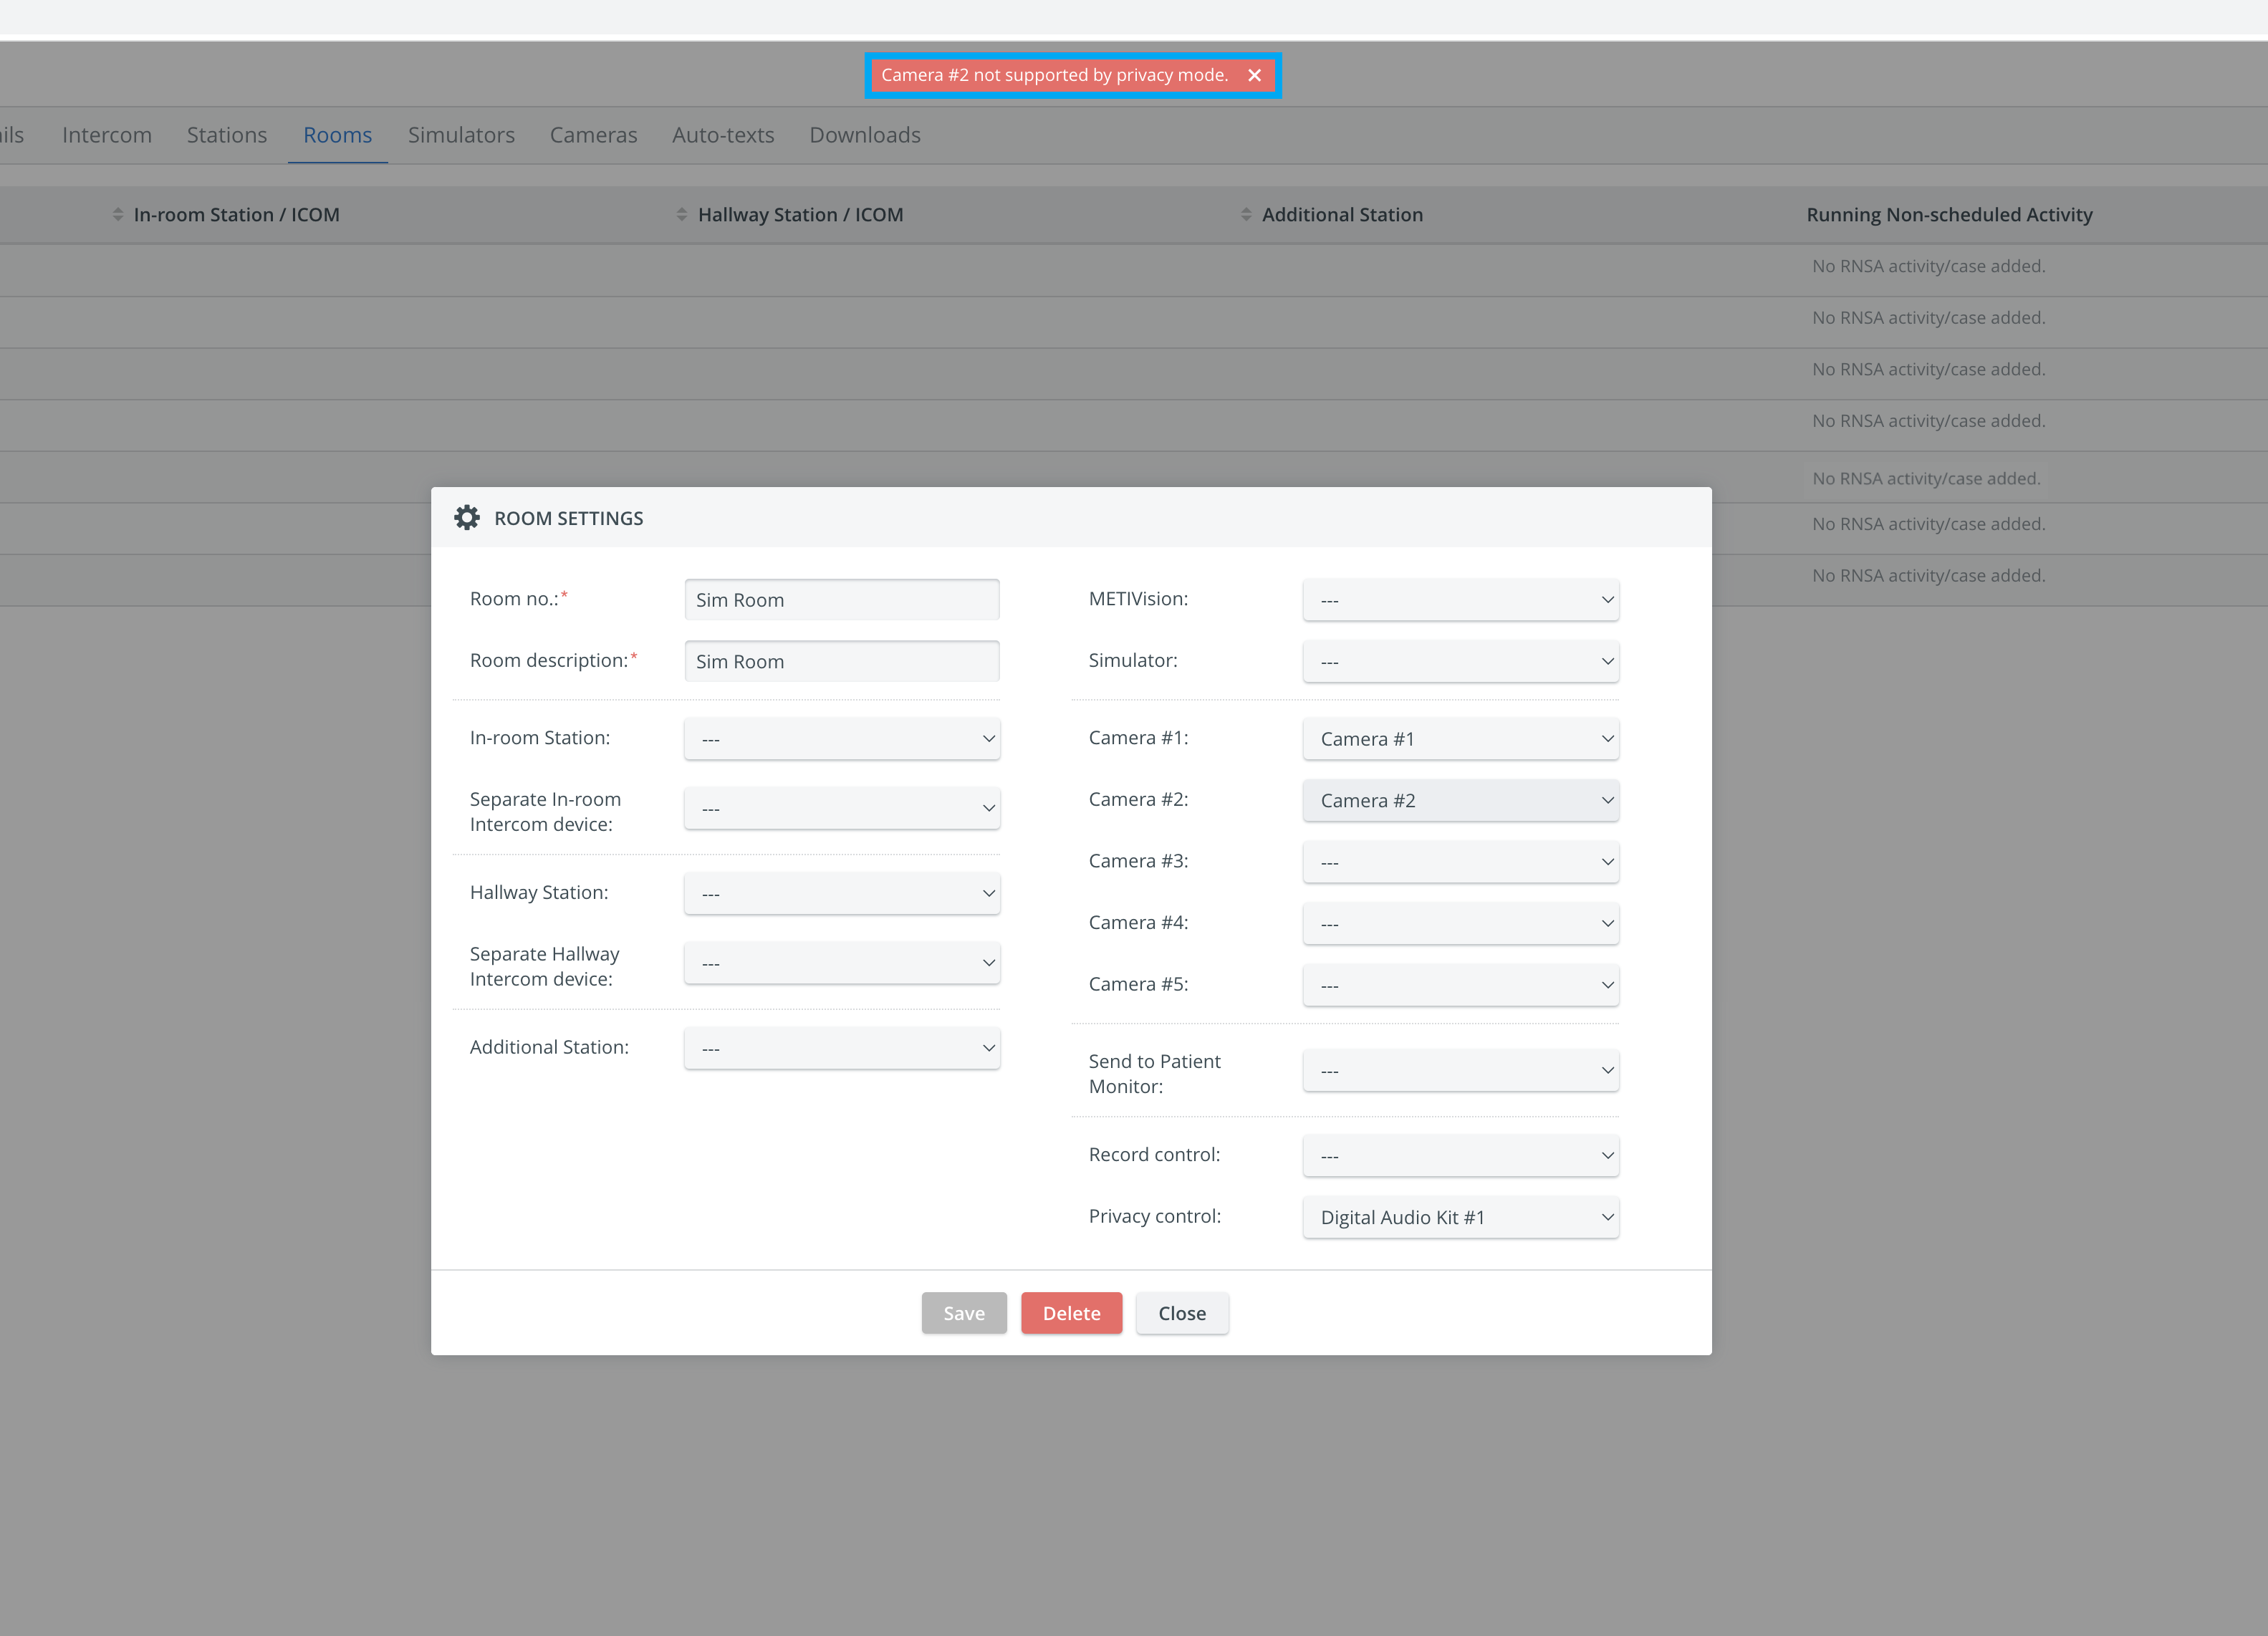
![]() In case any of the Cameras within the room do not support Privacy Mode, the following warning message appears:
In case any of the Cameras within the room do not support Privacy Mode, the following warning message appears:
Important Note for Enterprise Lite Users
This feature is to be used with in-campus audiovisual (AV) inputs. Hence, it is not available for CAE LearningSpace Enterprise Lite, as the solution is used for web-conferencing based virtual simulation encounters only. To unlock this feature, please upgrade to the CAE LearningSpace Enterprise solution.
Find step-by-step guides for System manager related processes on our System - How to pages.
Overview
Content Tools