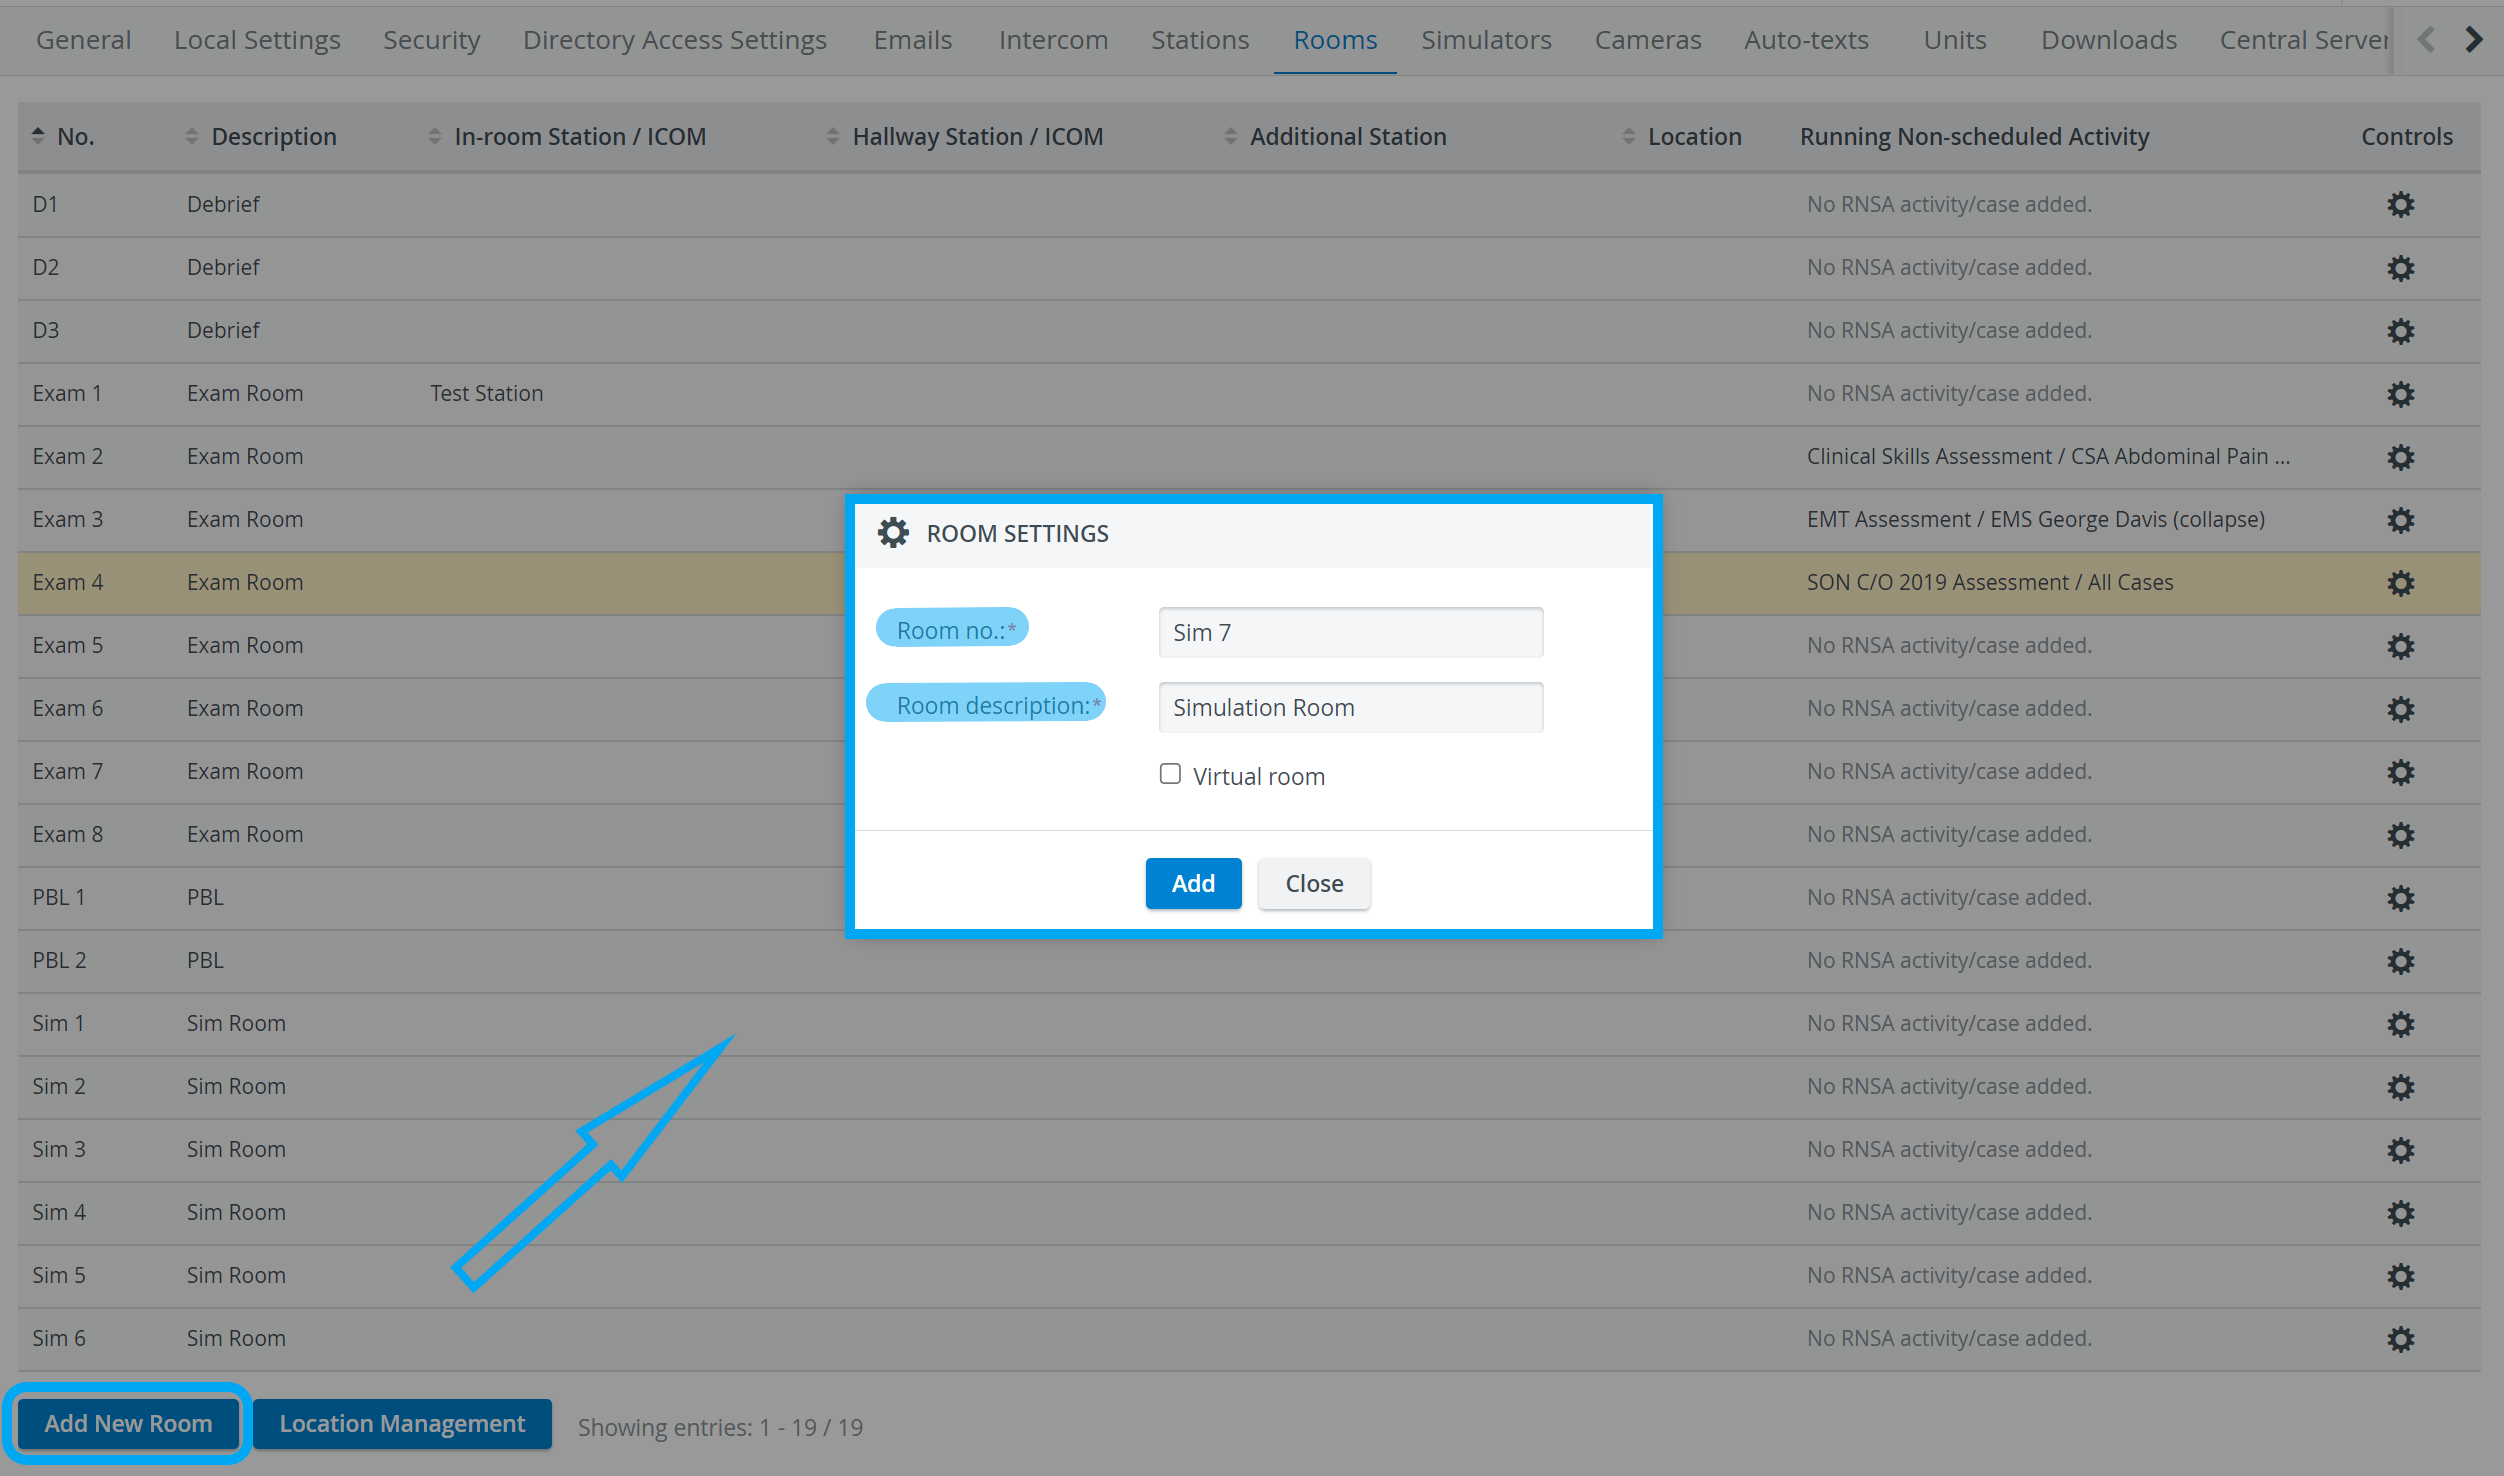
Adding Rooms
- On the Rooms tab, click the Add New Room button.
The Room Settings window appears. - Enter the room number and room description, then click the Add button.
The Room Settings additional information window appears.
NOTE: LearningSpace allows for separate Intercom device to be assigned, independent from the Station assignment.
3. Enter additional information as desired.
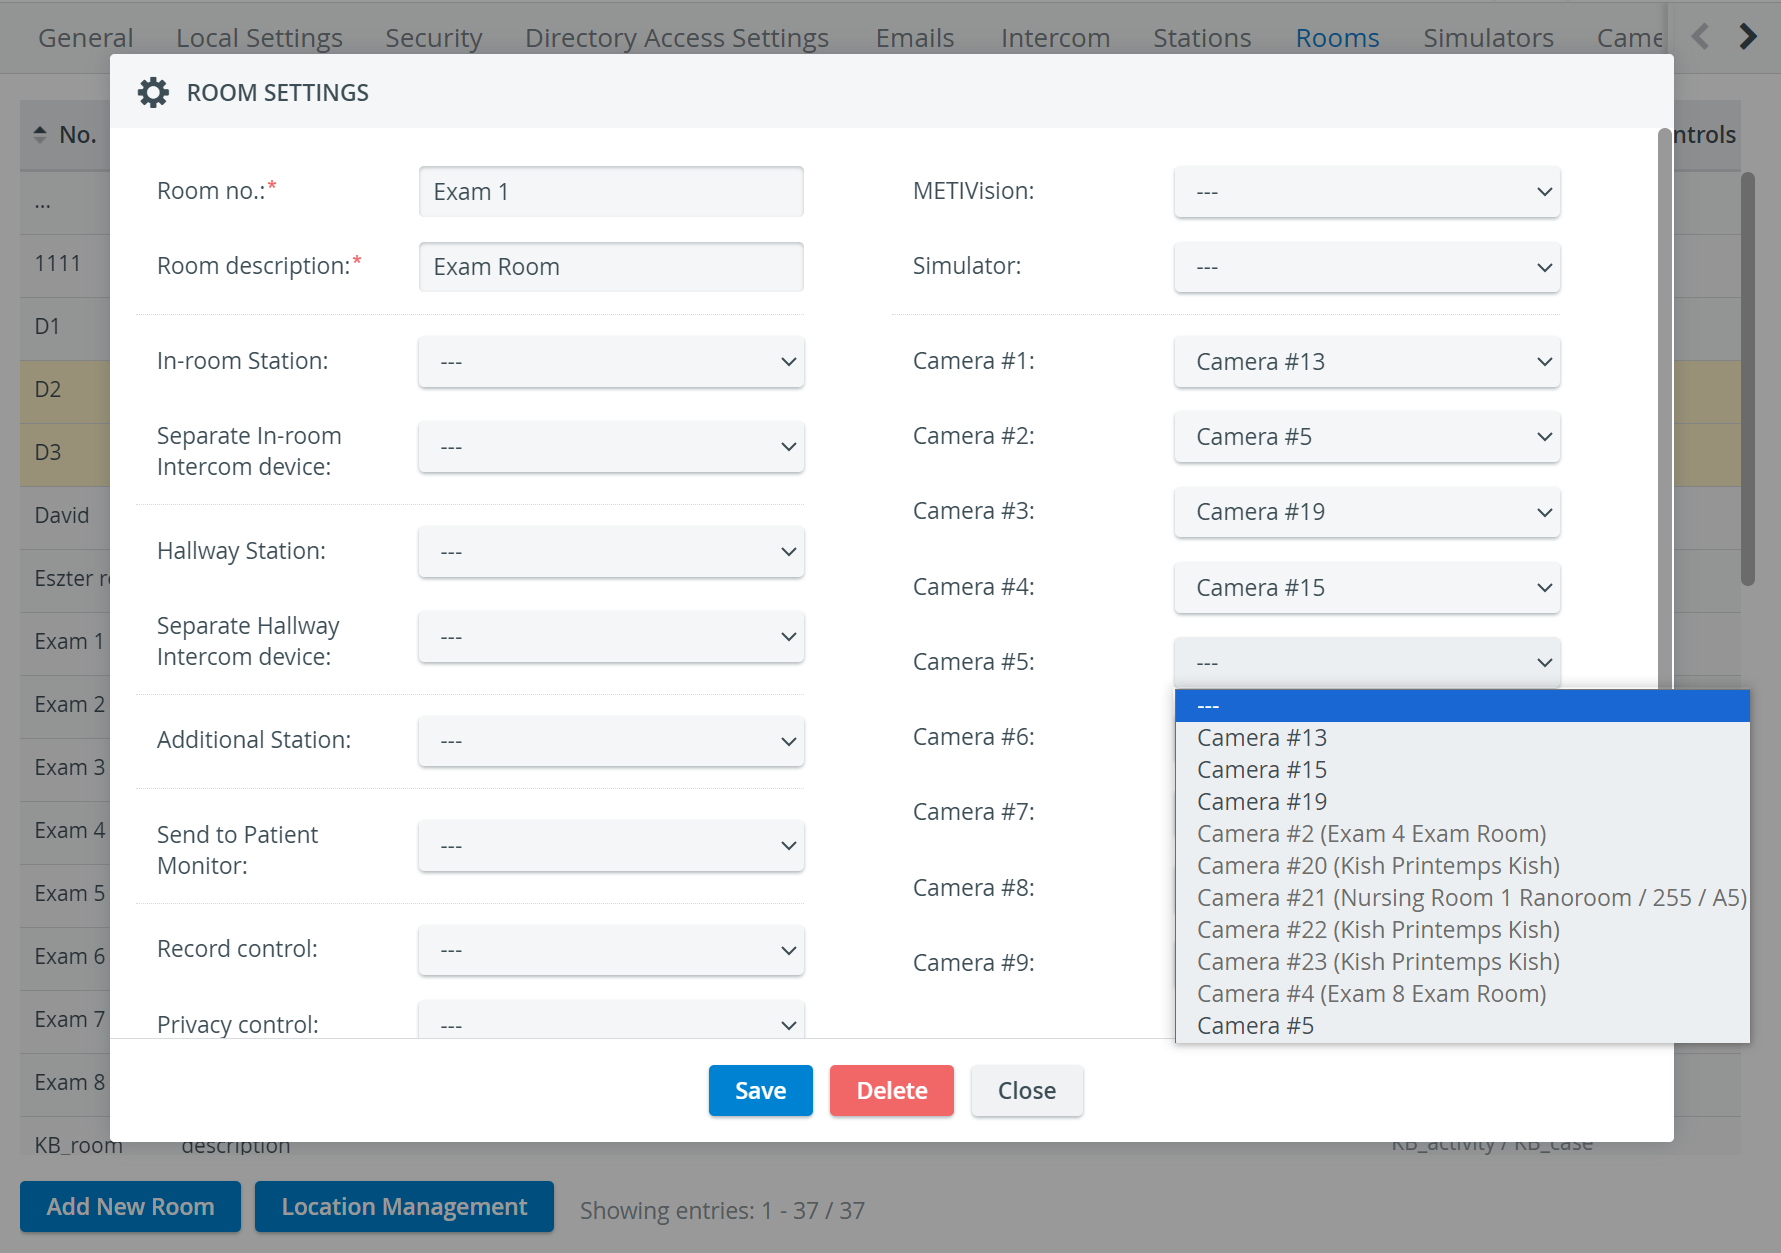
NOTE: Additional room setting information can be added or modified at any time by clicking the cogwheel for a desired room.
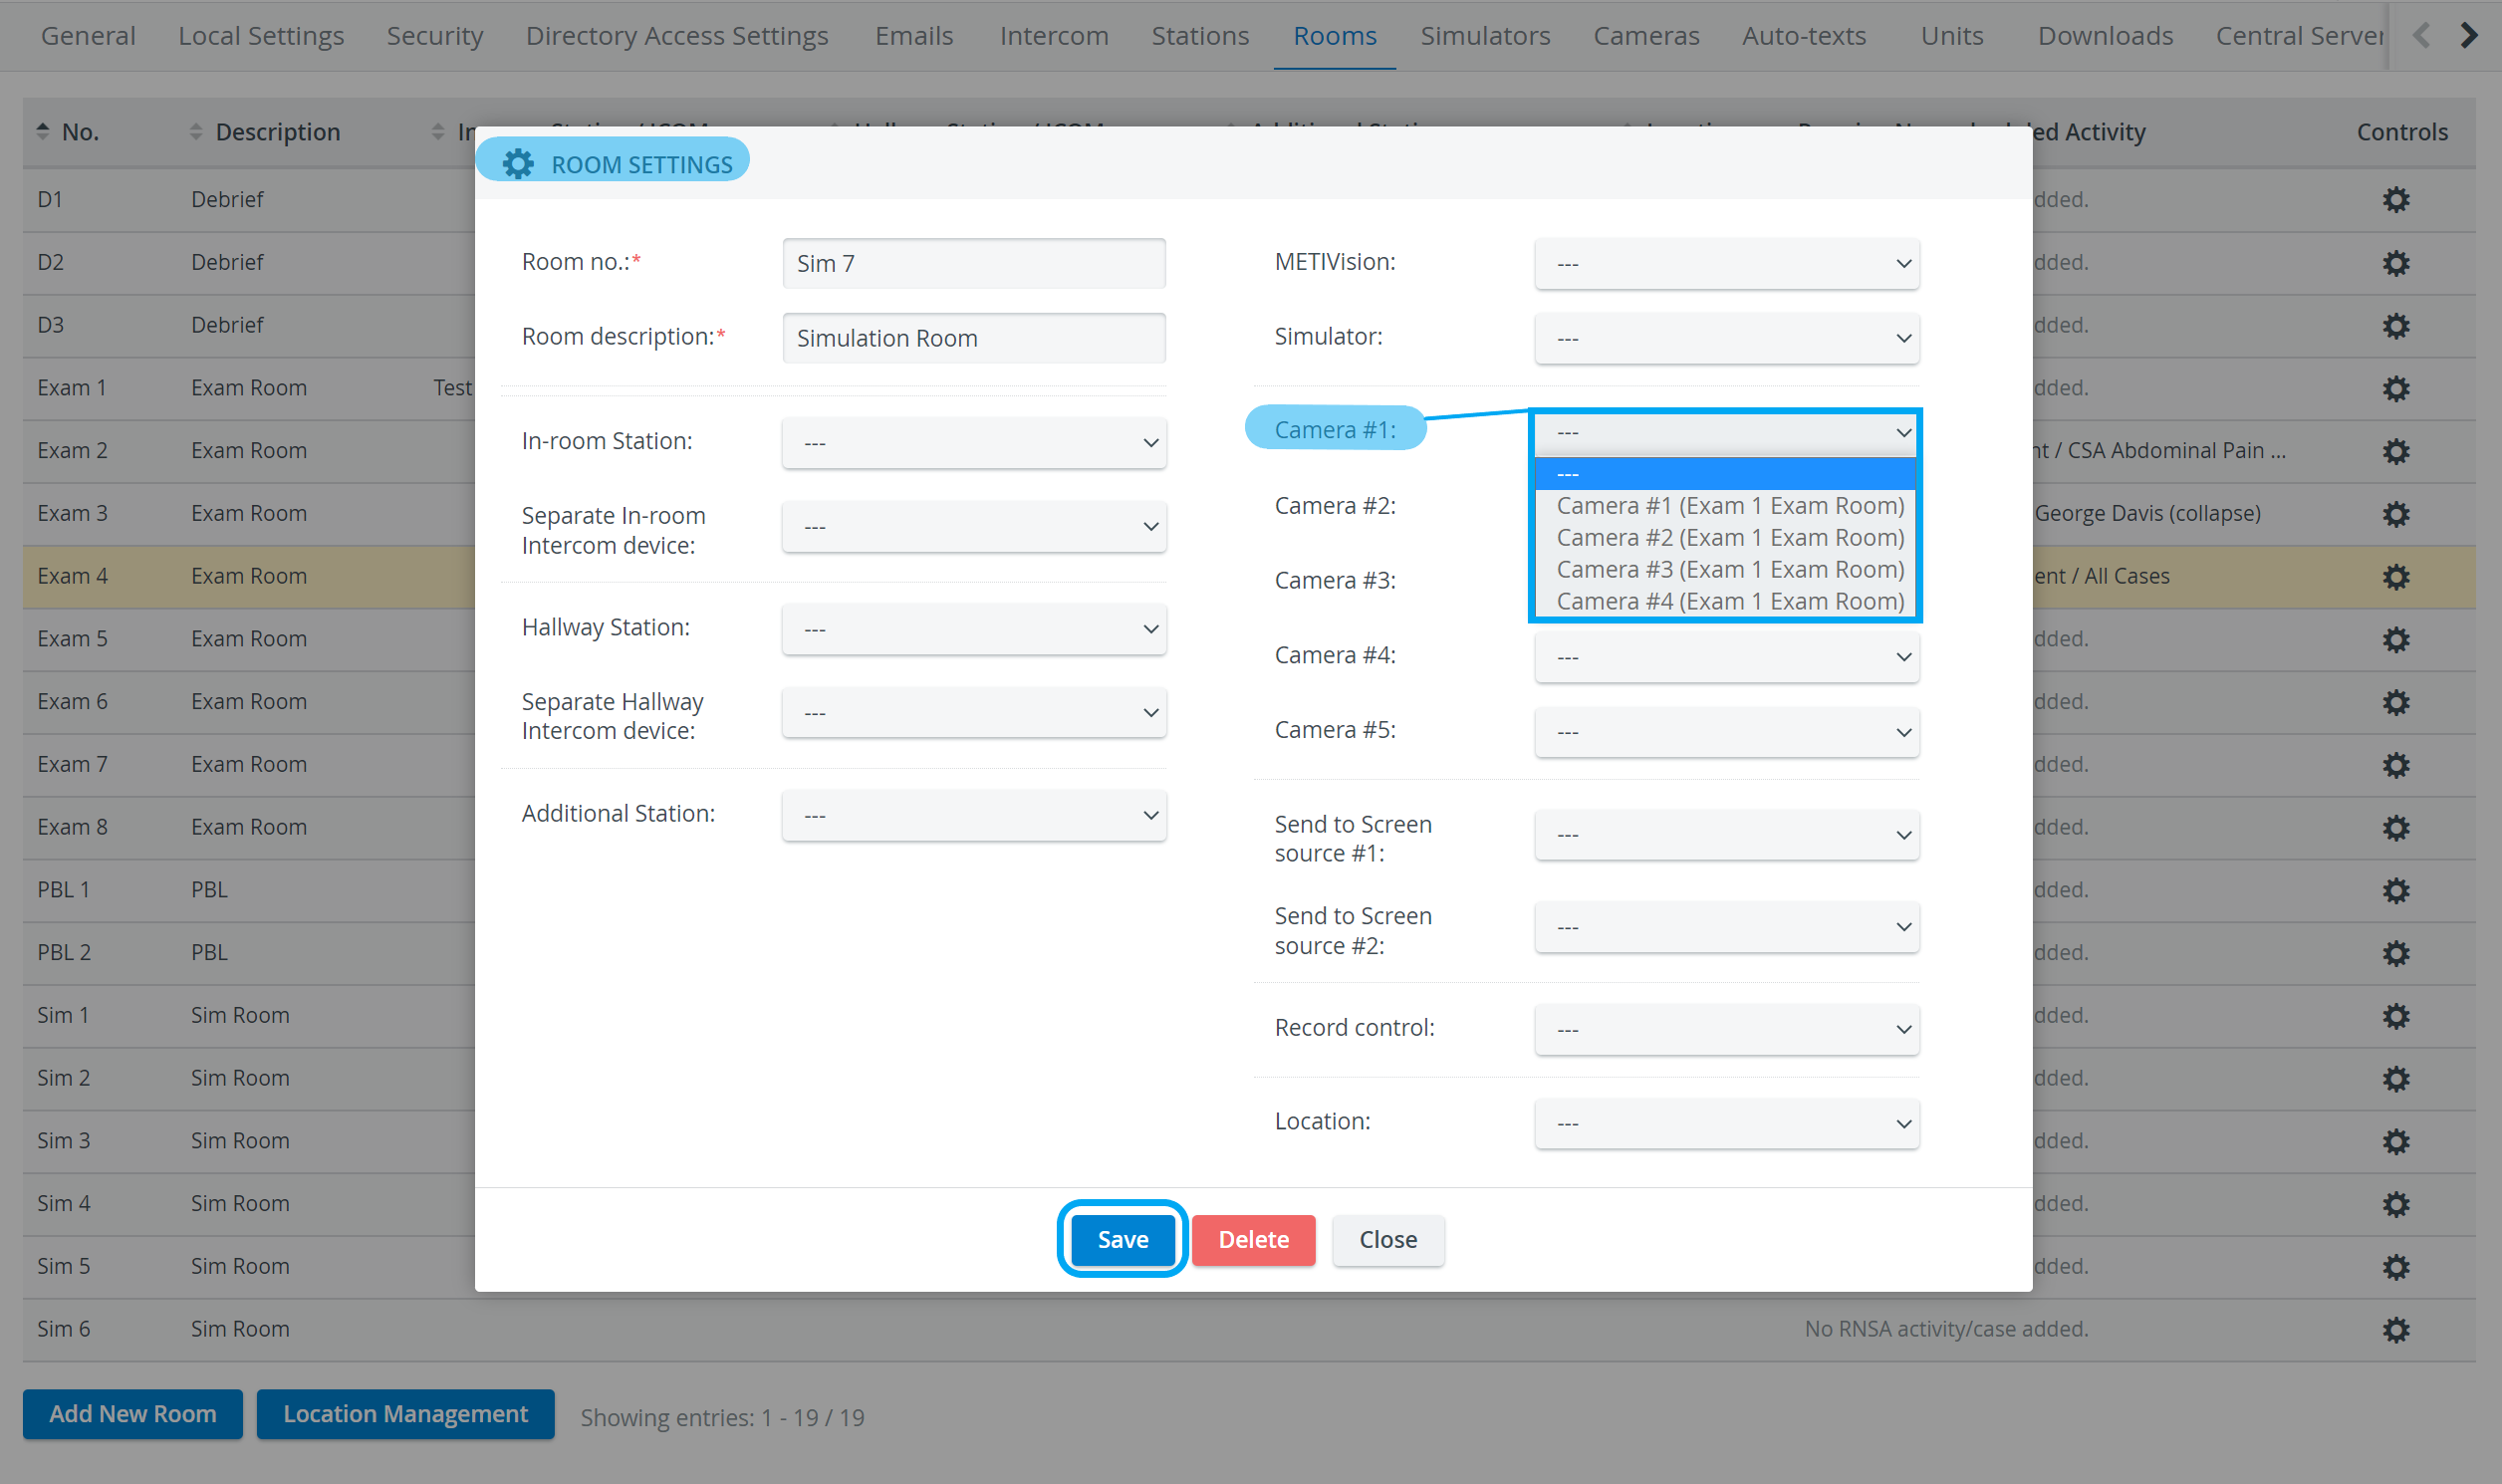
4. Click Save to save the new room.
The room list appears with the new room added.
9-camera feed in Single Room View
In the latest versions of LearningSpace, #6 #7 #8 #9 optional camera selector dropdowns have been added to the Room editor of the System manager.
It allows the Single Room View's (SRV) 3x3 layout to be used with camera feeds only.
The feature needs to be enabled on the backend and can be configured for a maximum of 9 cameras.
Please turn to your IT team to have the feature enabled and configured according to your needs!
Modifying Room Information
- On the Rooms tab, click the cogwheel for the desired room.
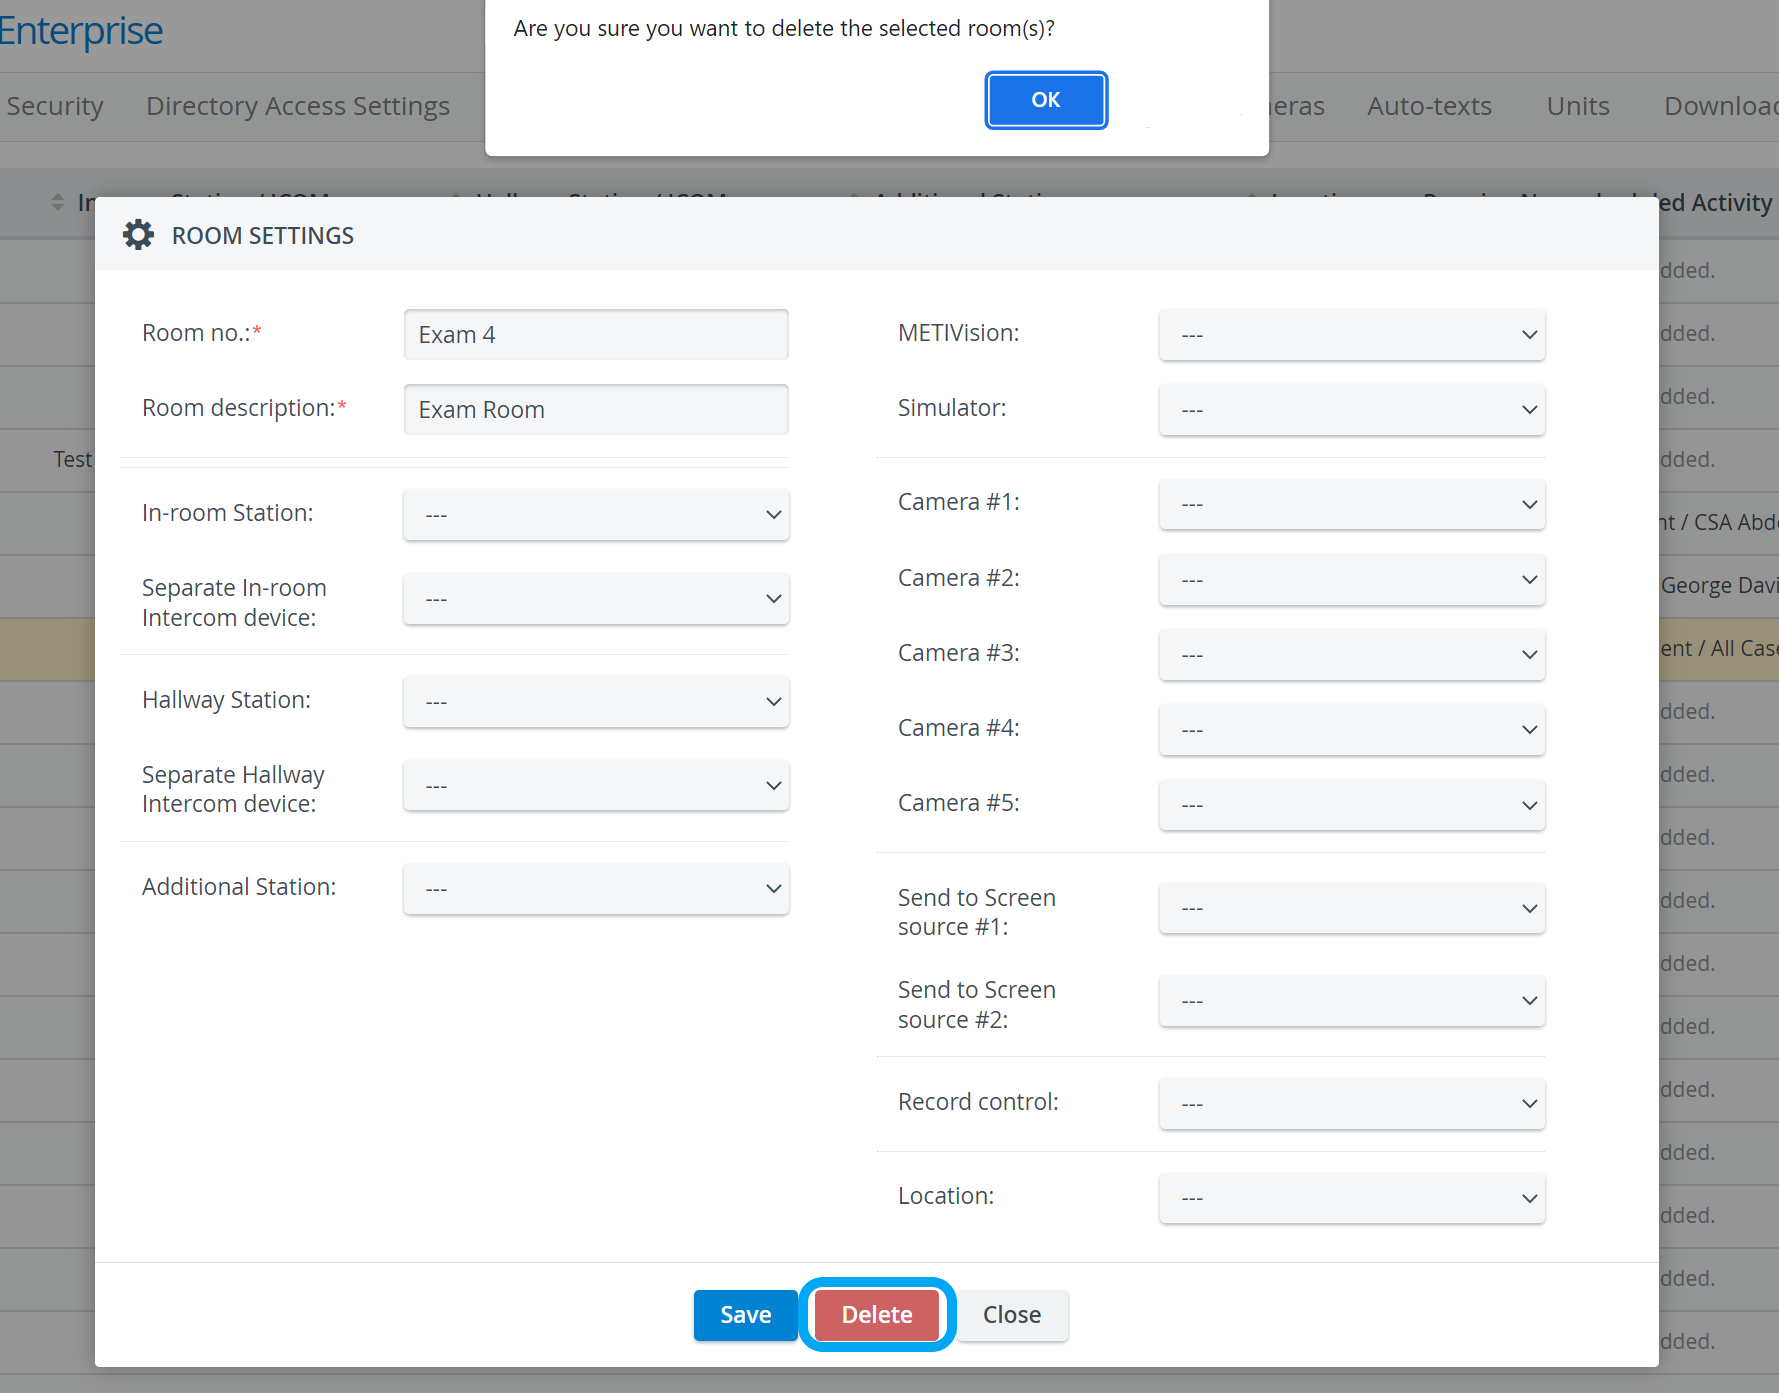
The Room Settings window appears. - Add or edit the information to associate with the room as desired.
- Click Save to save and close the window, or Close to close without saving.
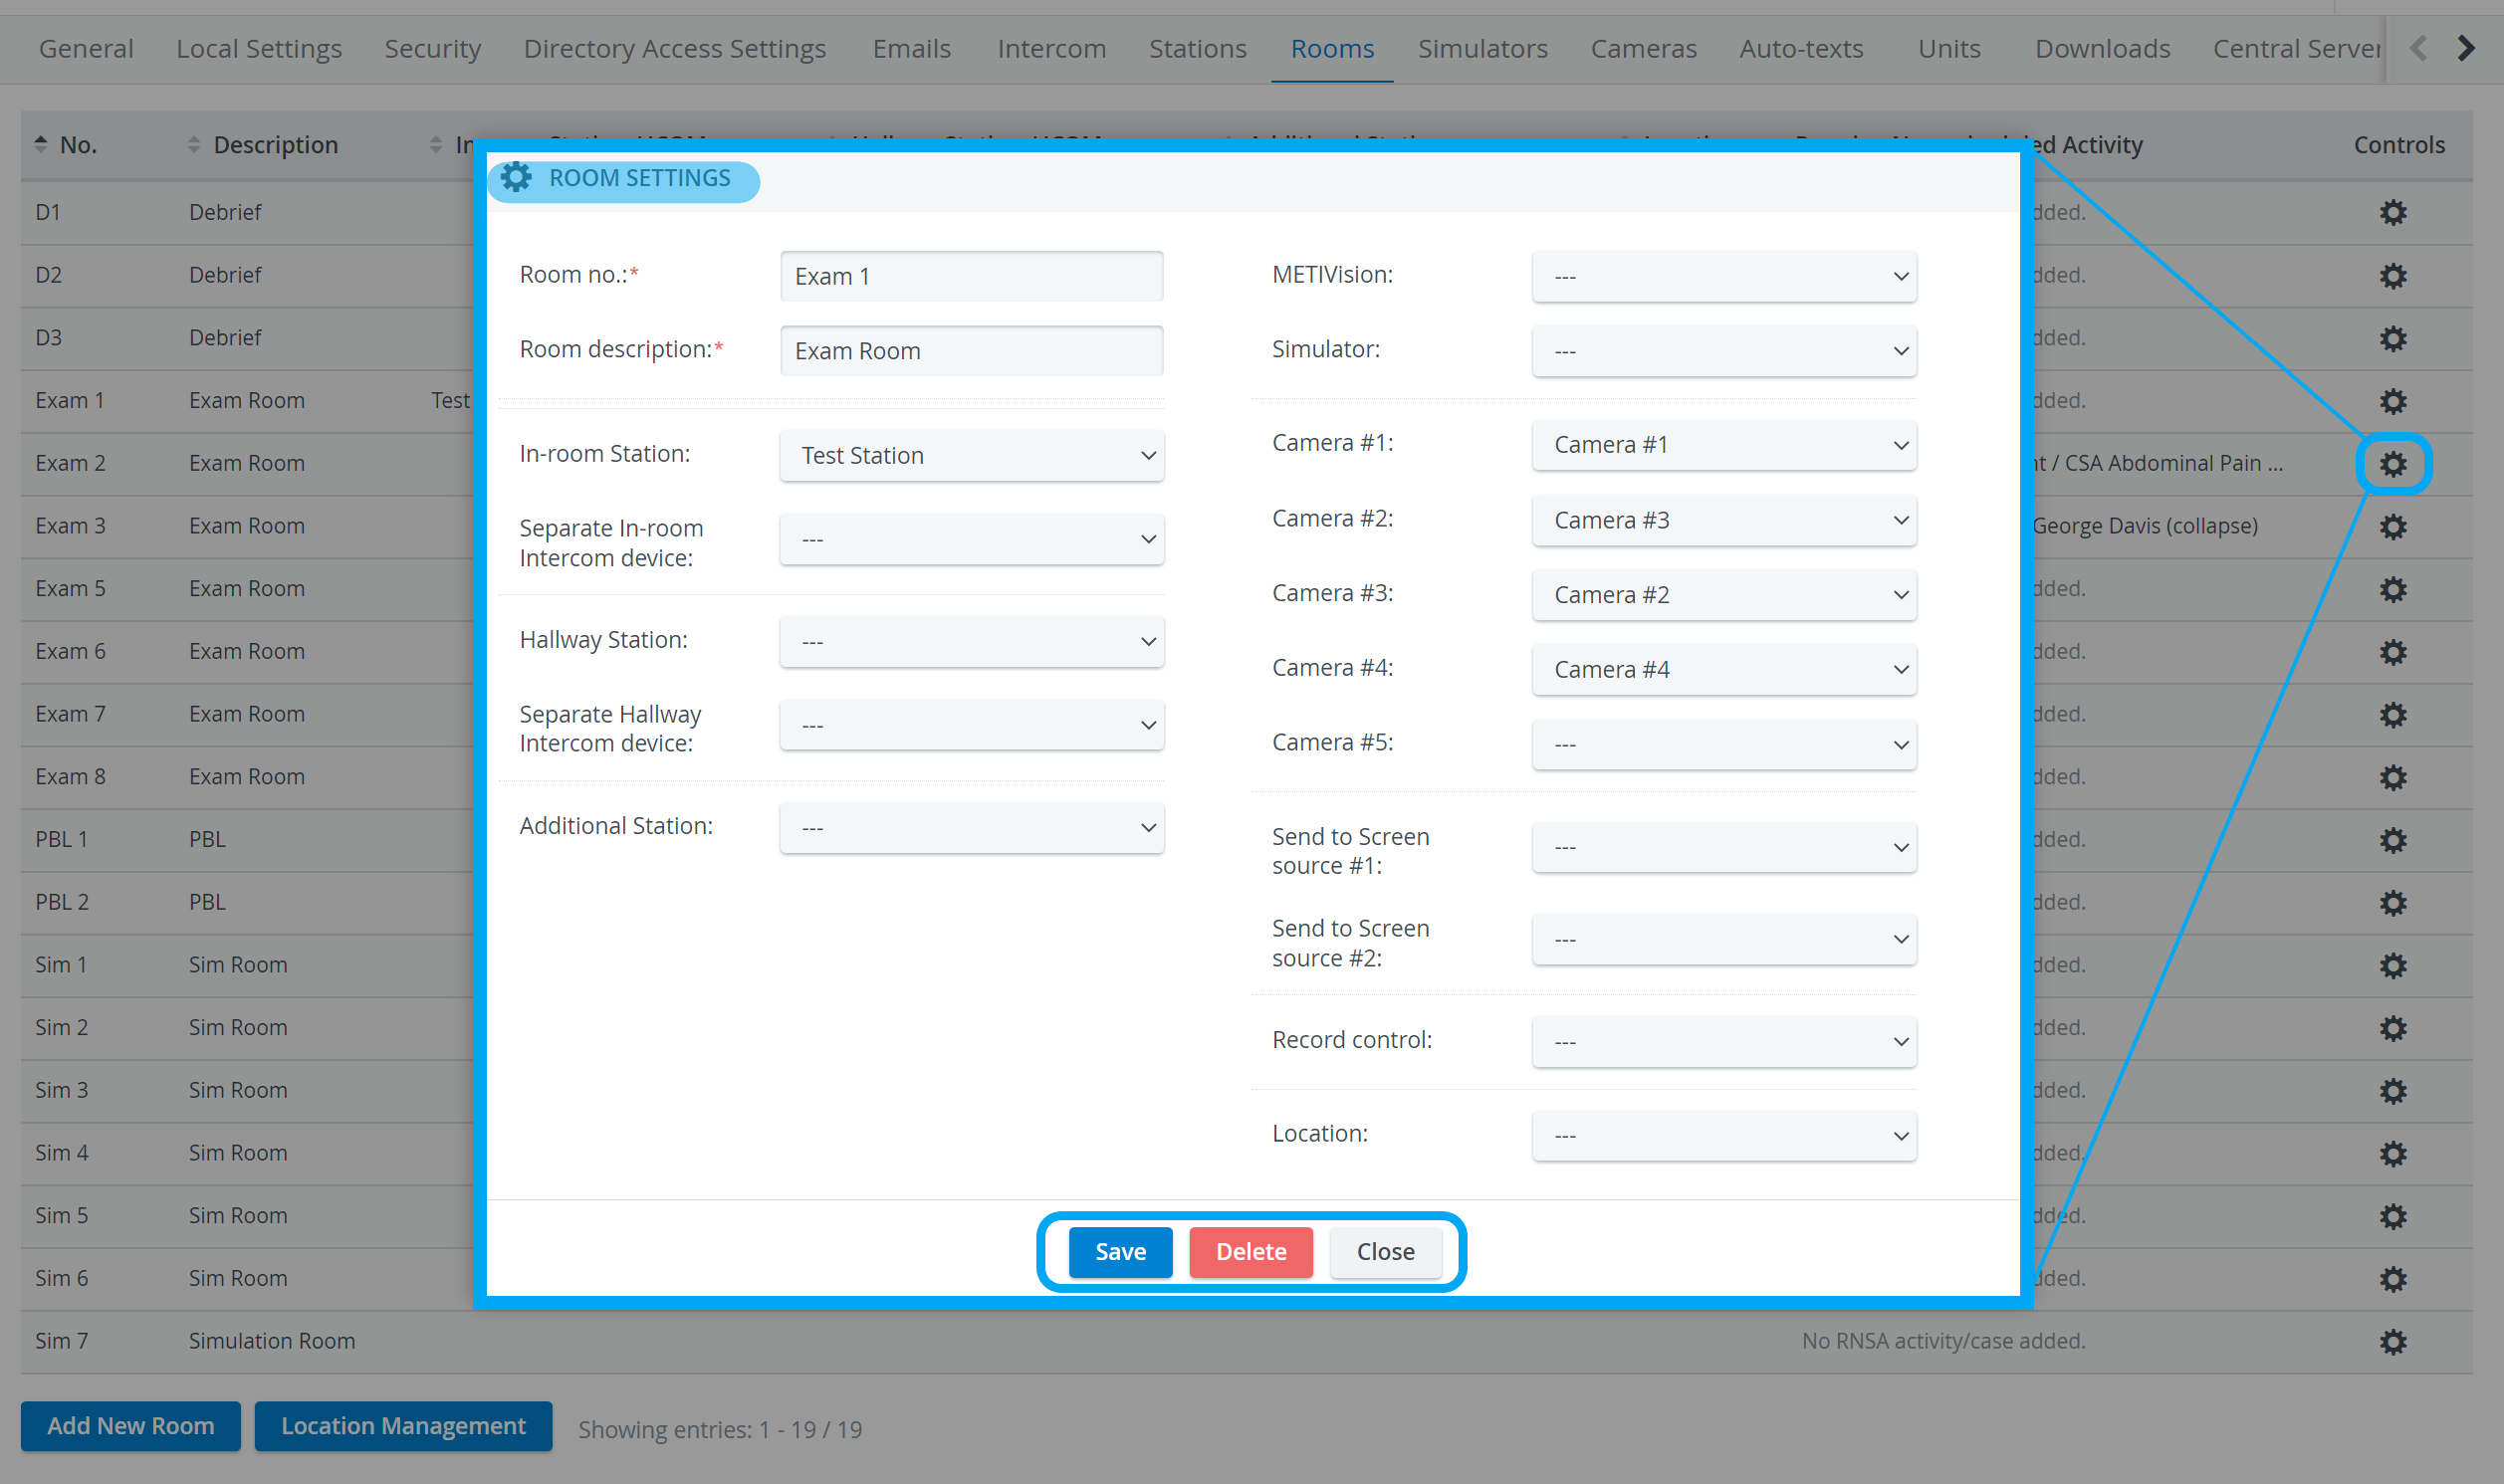
Deleting Rooms
- On the Rooms tab, click the cogwheel for the desired room.
The Room Settings window appears. - Select Delete to remove the room.
Click OK when the confirmation pop-up appears.
Learn more on the Rooms Tab page and our System Manager pages.
Overview
Content Tools