Released in the summer of 2022, the new Single Room View (SRV) of LearningSpace Enterprise, also called NextGen Room View has a much cleaner, a more easy-to-use user interface on both the Recording and Video Review pages, and by so, increasing efficiency and enhancing user experience.
If your layout is different in your Single Room View, you probably have the Legacy version. For the user guide of Legacy pages please go here.
Important Note for Enterprise Lite Users
This feature is to be used with in-campus audiovisual (AV) inputs. Hence, it is not available for LearningSpace Enterprise Lite, as the solution is used for web-conferencing-based virtual simulation encounters only. To unlock this feature, please upgrade to the LearningSpace Enterprise solution.
A re-organized SRV layout
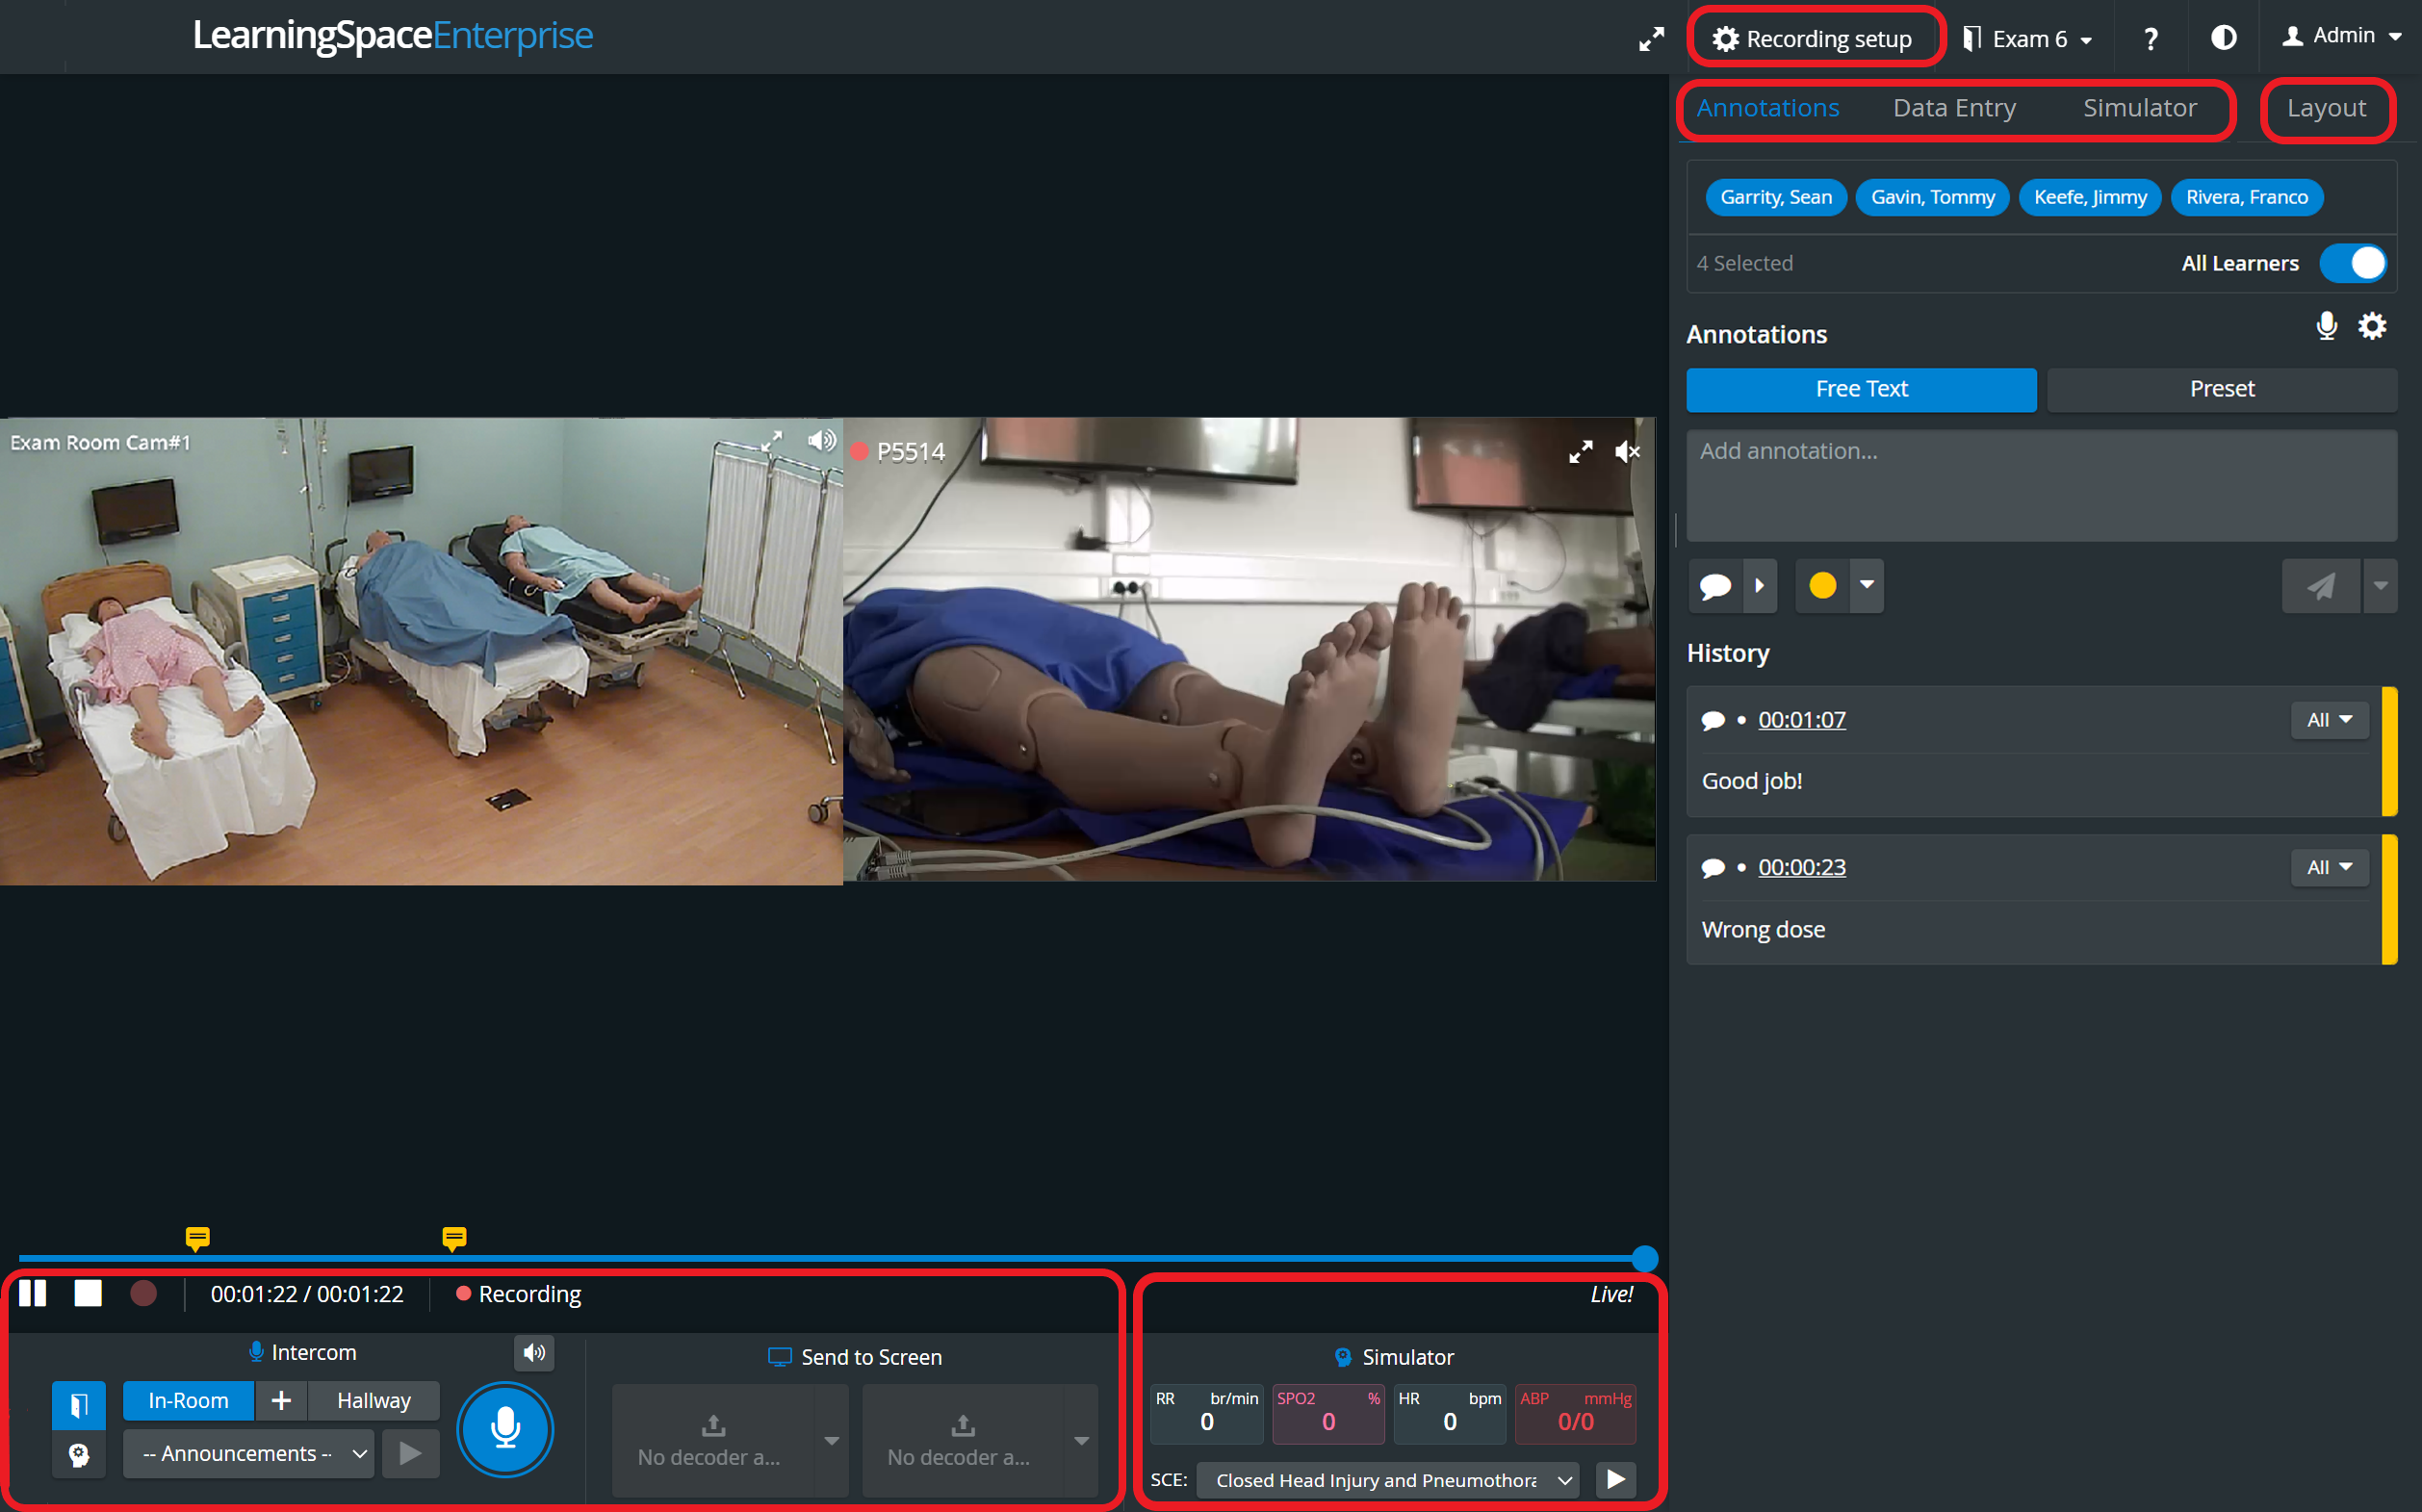
The user interface of the Single Room View got re-organized for more efficiency in the following way:
Basic layout
- Video player on the left-hand side
- Annotations and Data Entry tab on the right side
- Simulator Control and Layout tab available
- Recording setup (earlier Record control) available at the top
- Intercom and Video control section at the bottom
- Send to Screen option and Simulator Panel at the bottom
- Bottom- and side panel can be minimized with the toggle panel width/height option
Recording setup
In the new Recording setup pop-up Activity, Case and Participants (groups and individual users) can be selected for the recording, from the respective dropdowns:
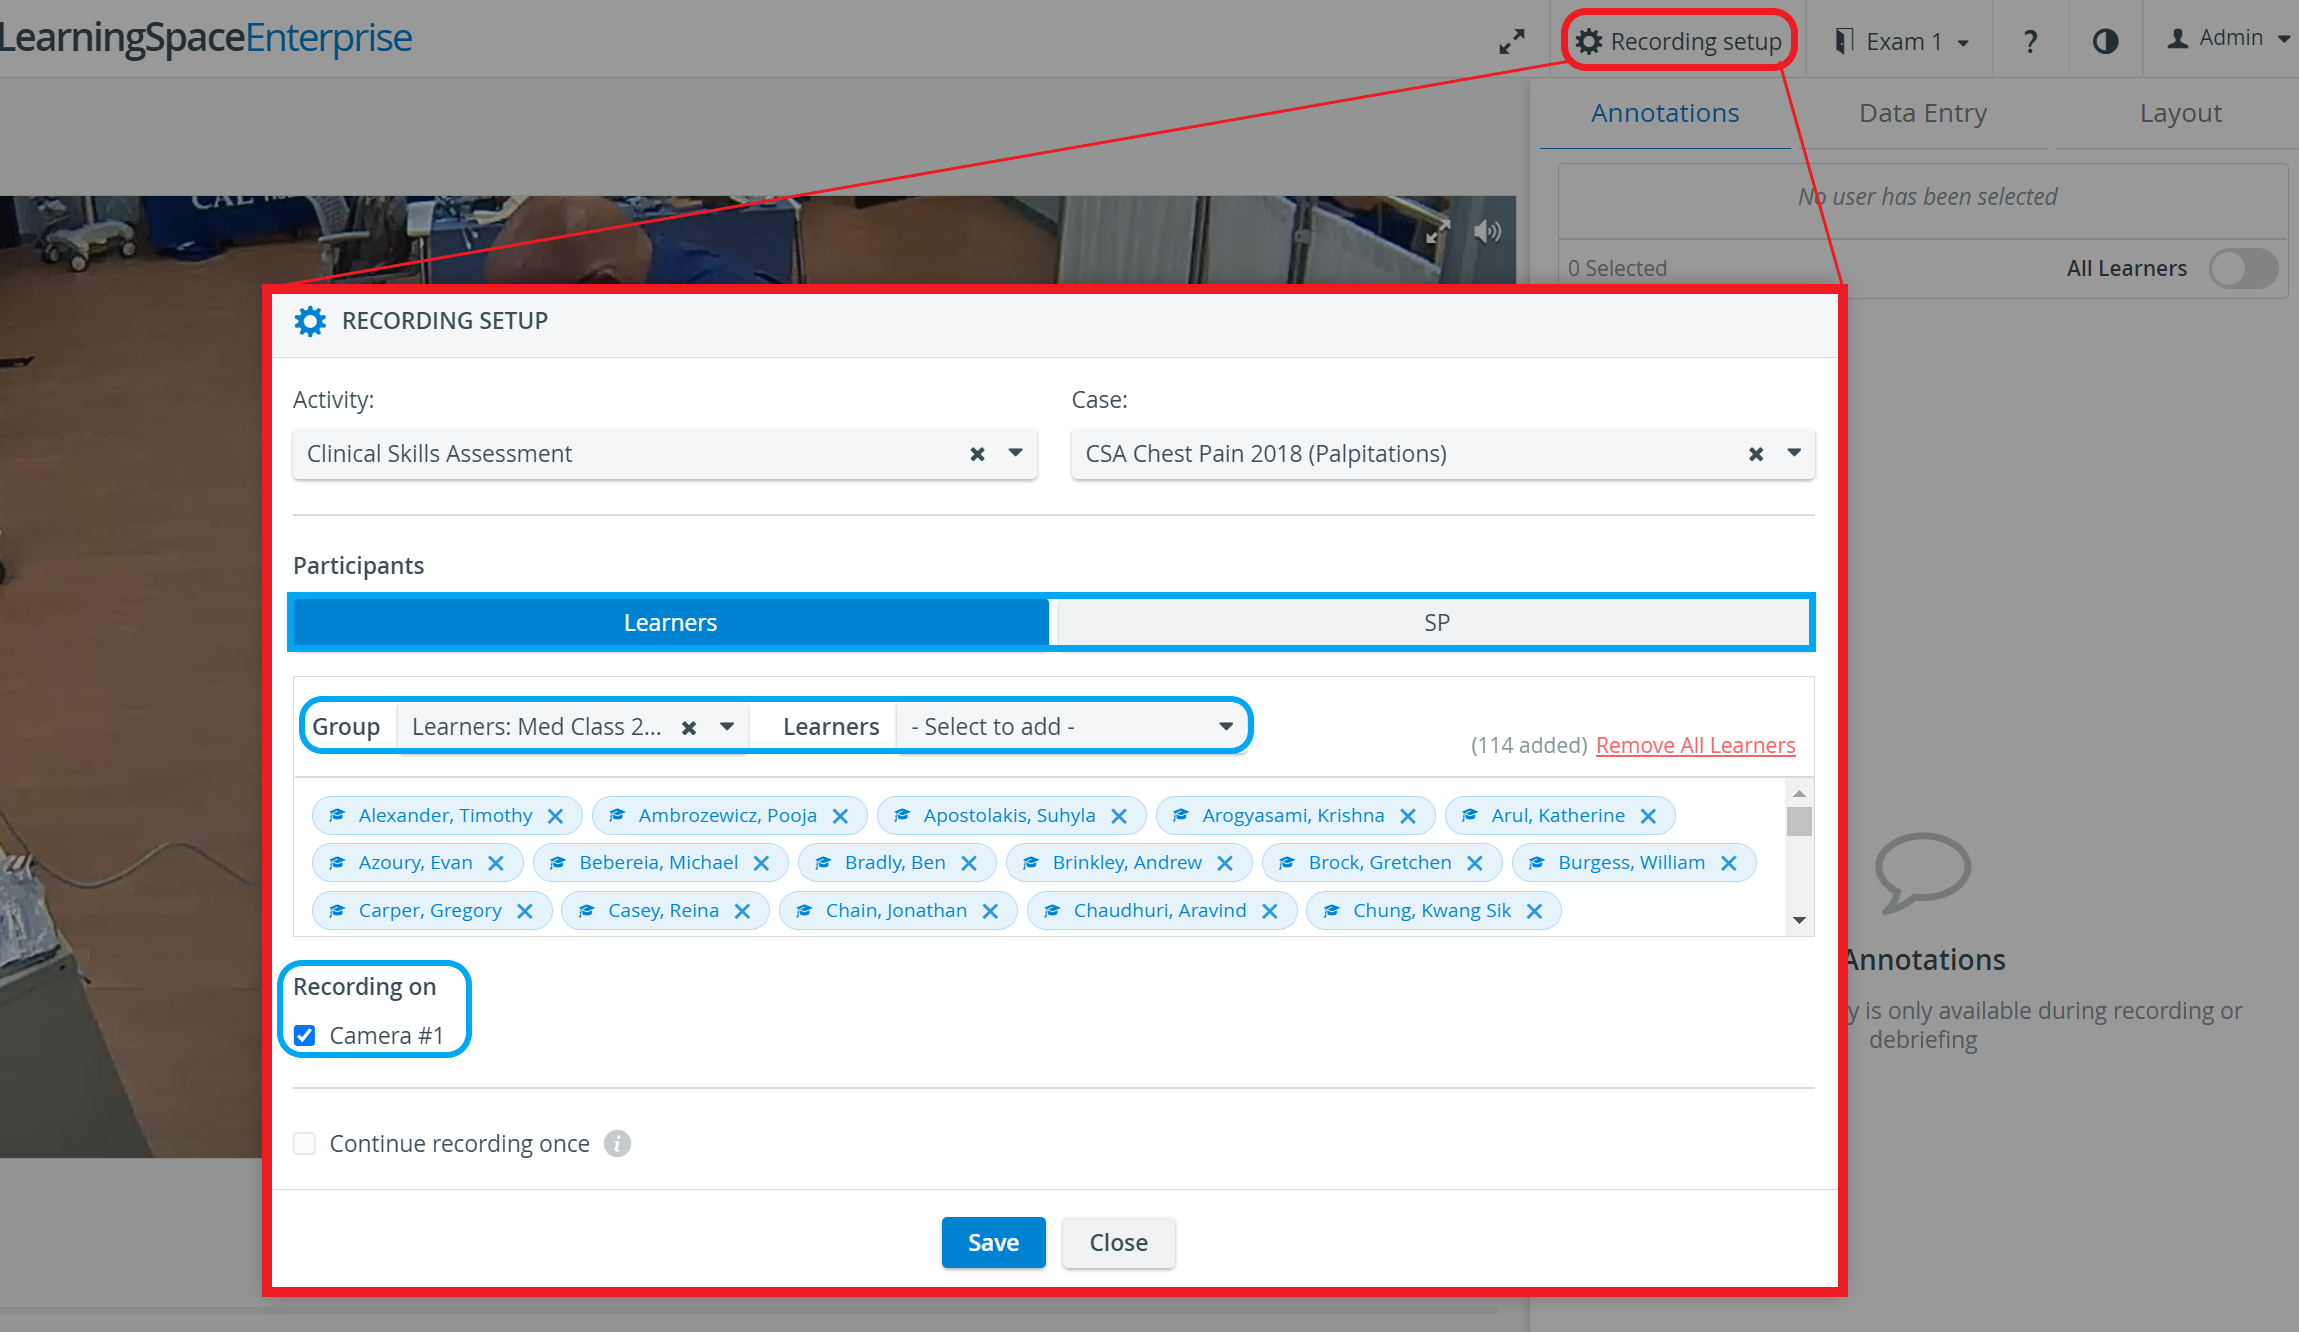
- Case selector only becomes active once Activity has been selected.
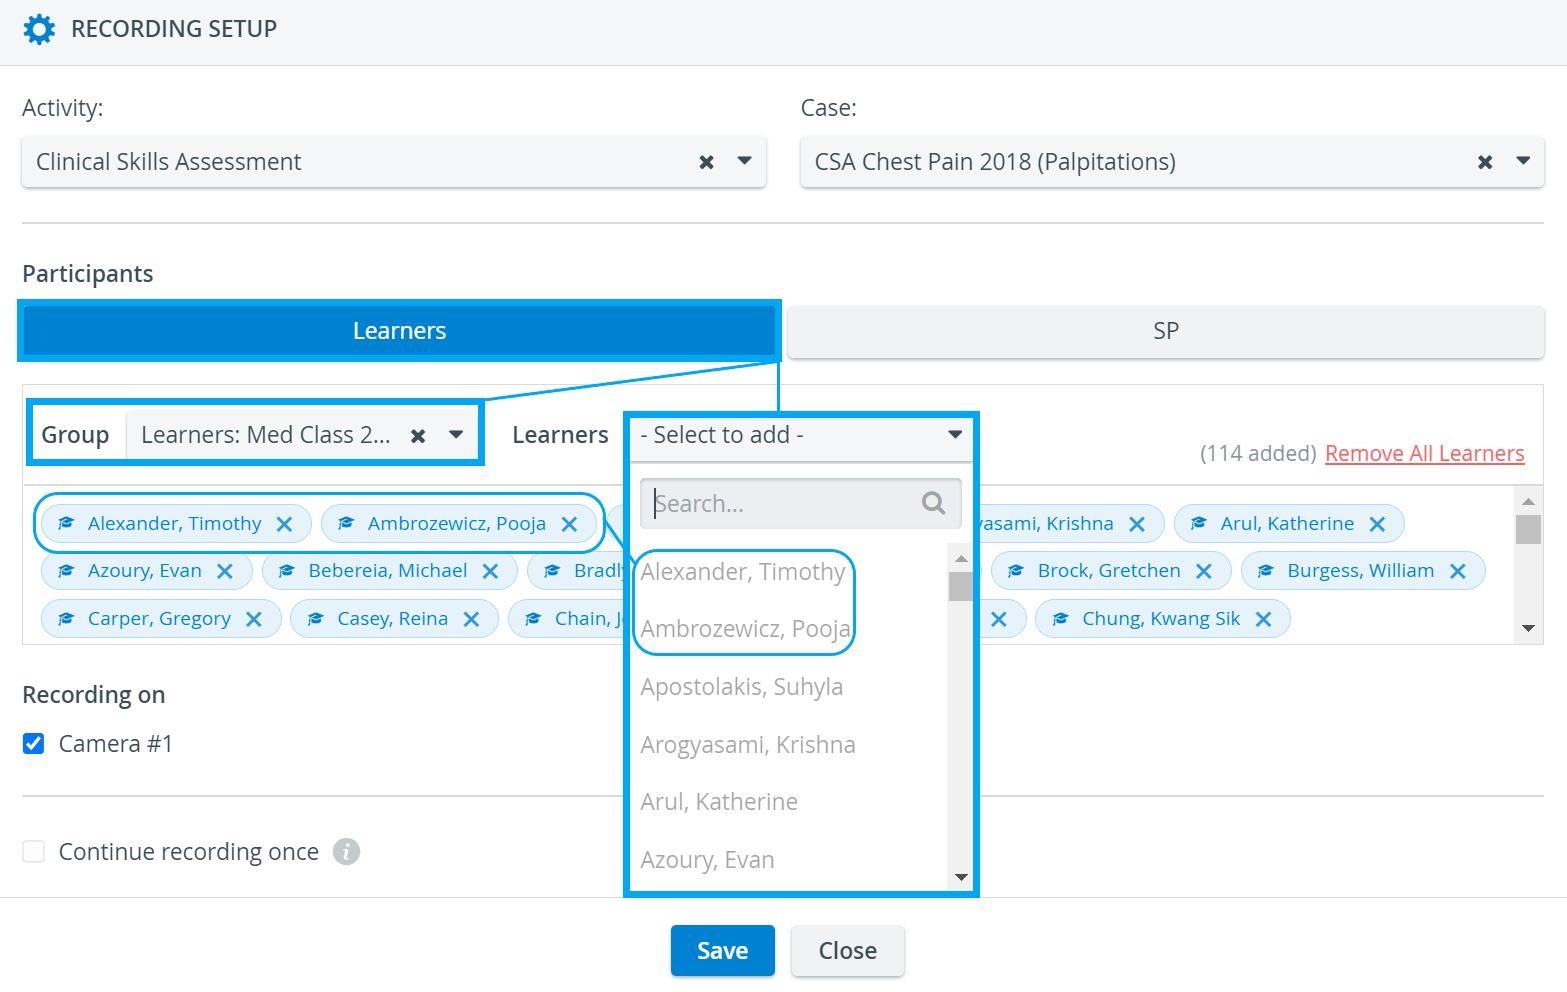
- Learners- and SPs dropdowns get active, once the respective Groups have already been selected.
![]() Learner and SP groups can be added to a recording without Activity or Case selected.
Learner and SP groups can be added to a recording without Activity or Case selected.
Selected participants show up as 'disabled' (greyed out) in the Learners/SPs dropdowns.
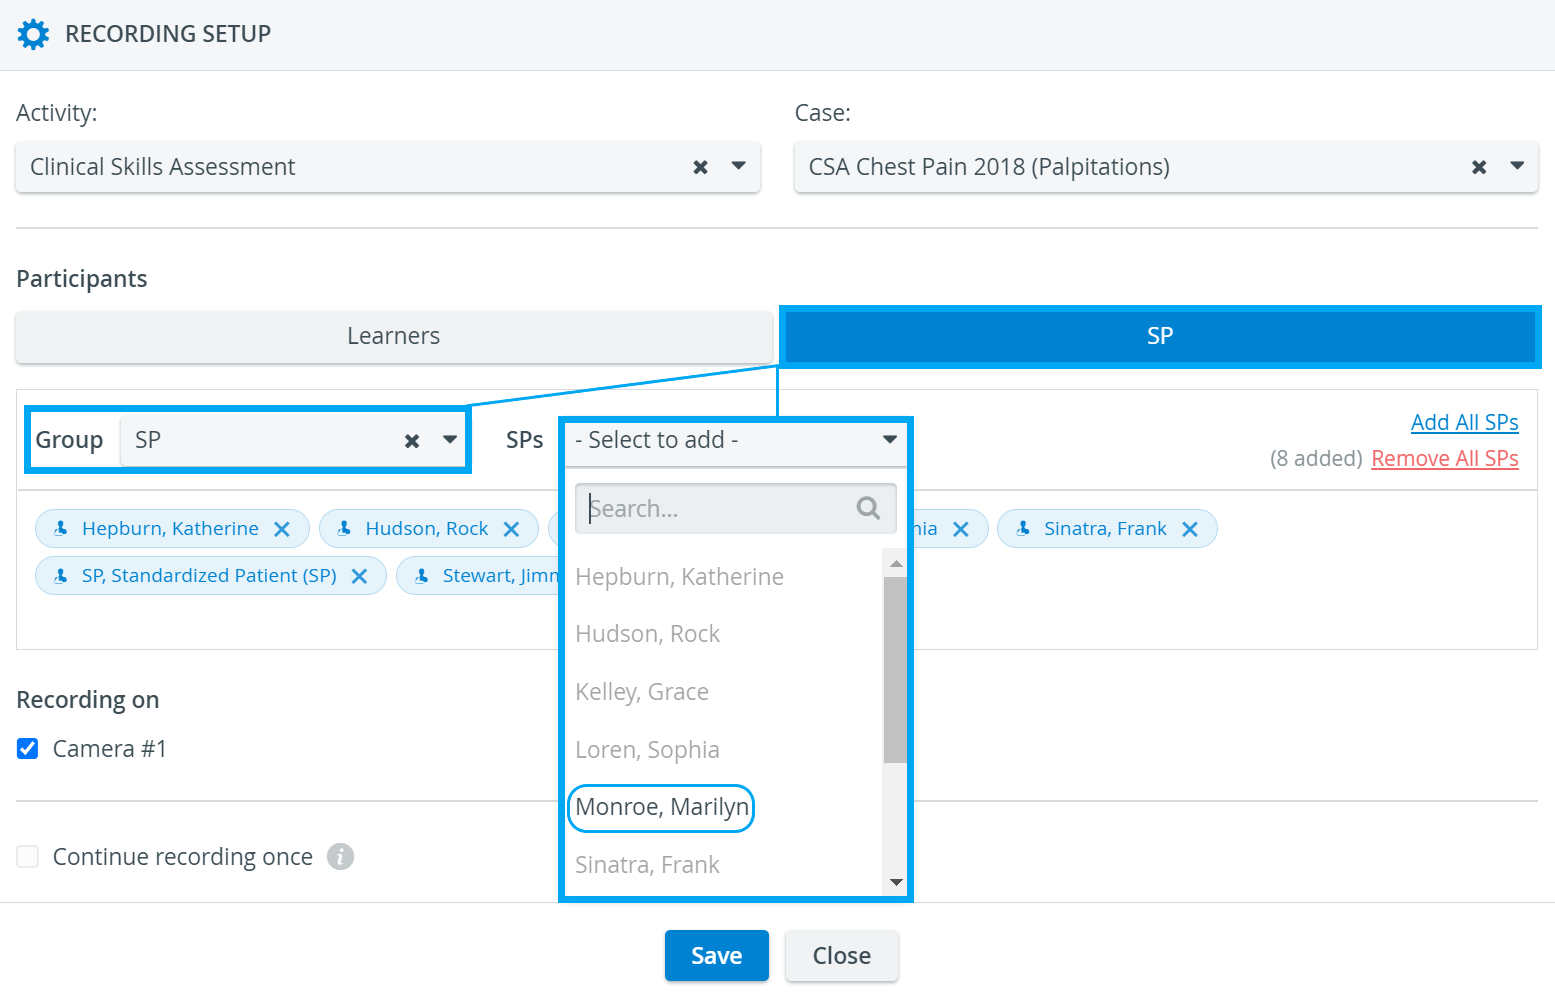
Under 'Recording on', the selected cameras for recording are room specific - not user-specific.
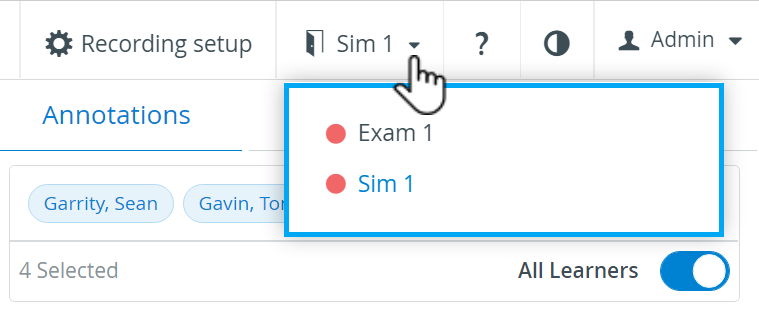
Room selection during Live recording
You can change between rooms with the help of the Room selector dropdown even during live recording:
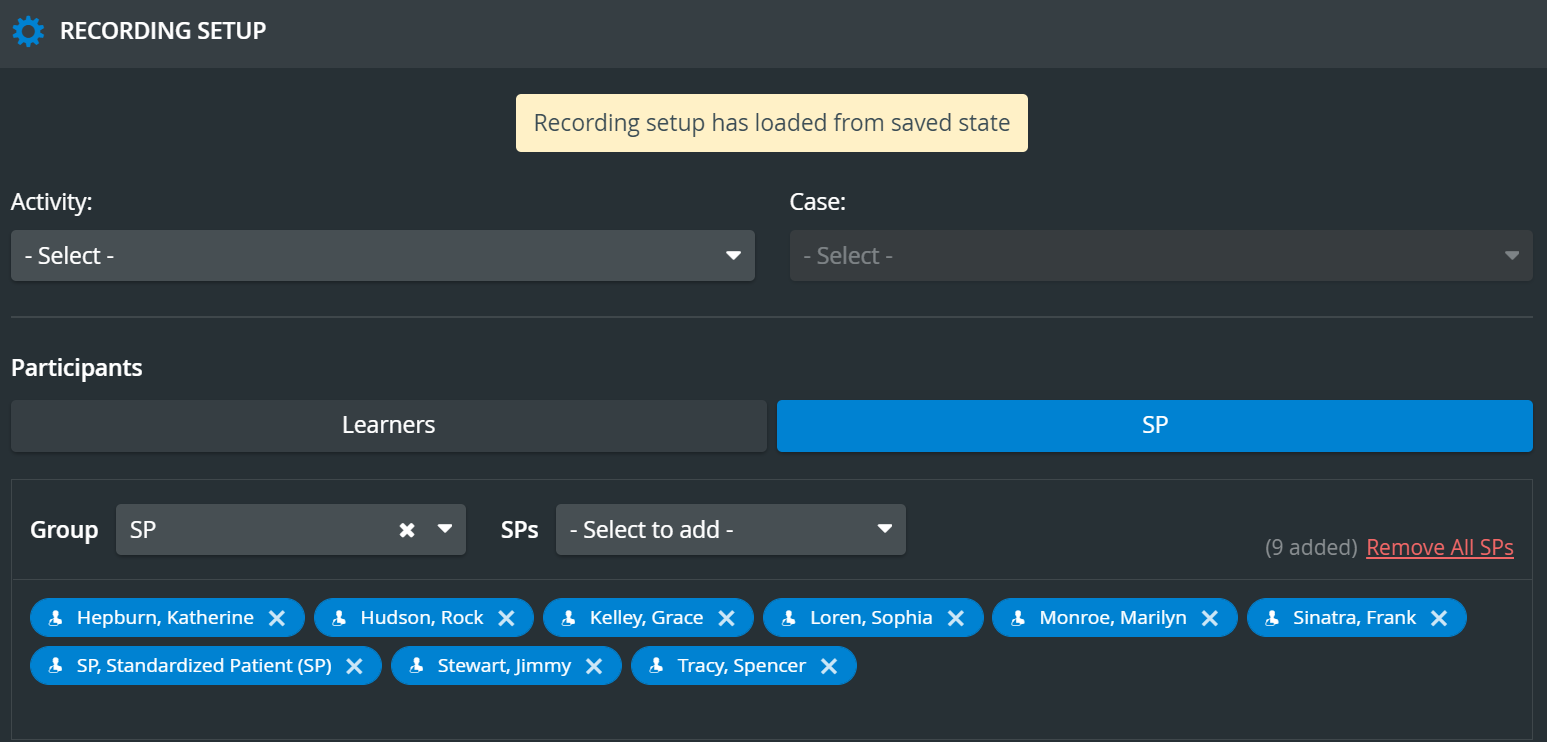
Different ways of Recording Setup
Recording can be started with
- with no Activity and/or Case selection.
- Recording setup loaded from the last saved state,
- Recording setup loaded from RNSA,
- by loading setup from Advanced Scheduling.

In case the recording was automatically started by a scheduled event, data in the Recording setup is displayed based on the scheduled settings (related to the current timeslot) and the following message is displayed: "Recordings have been started by Scheduling with the following settings". These settings cannot be modified during the recording.
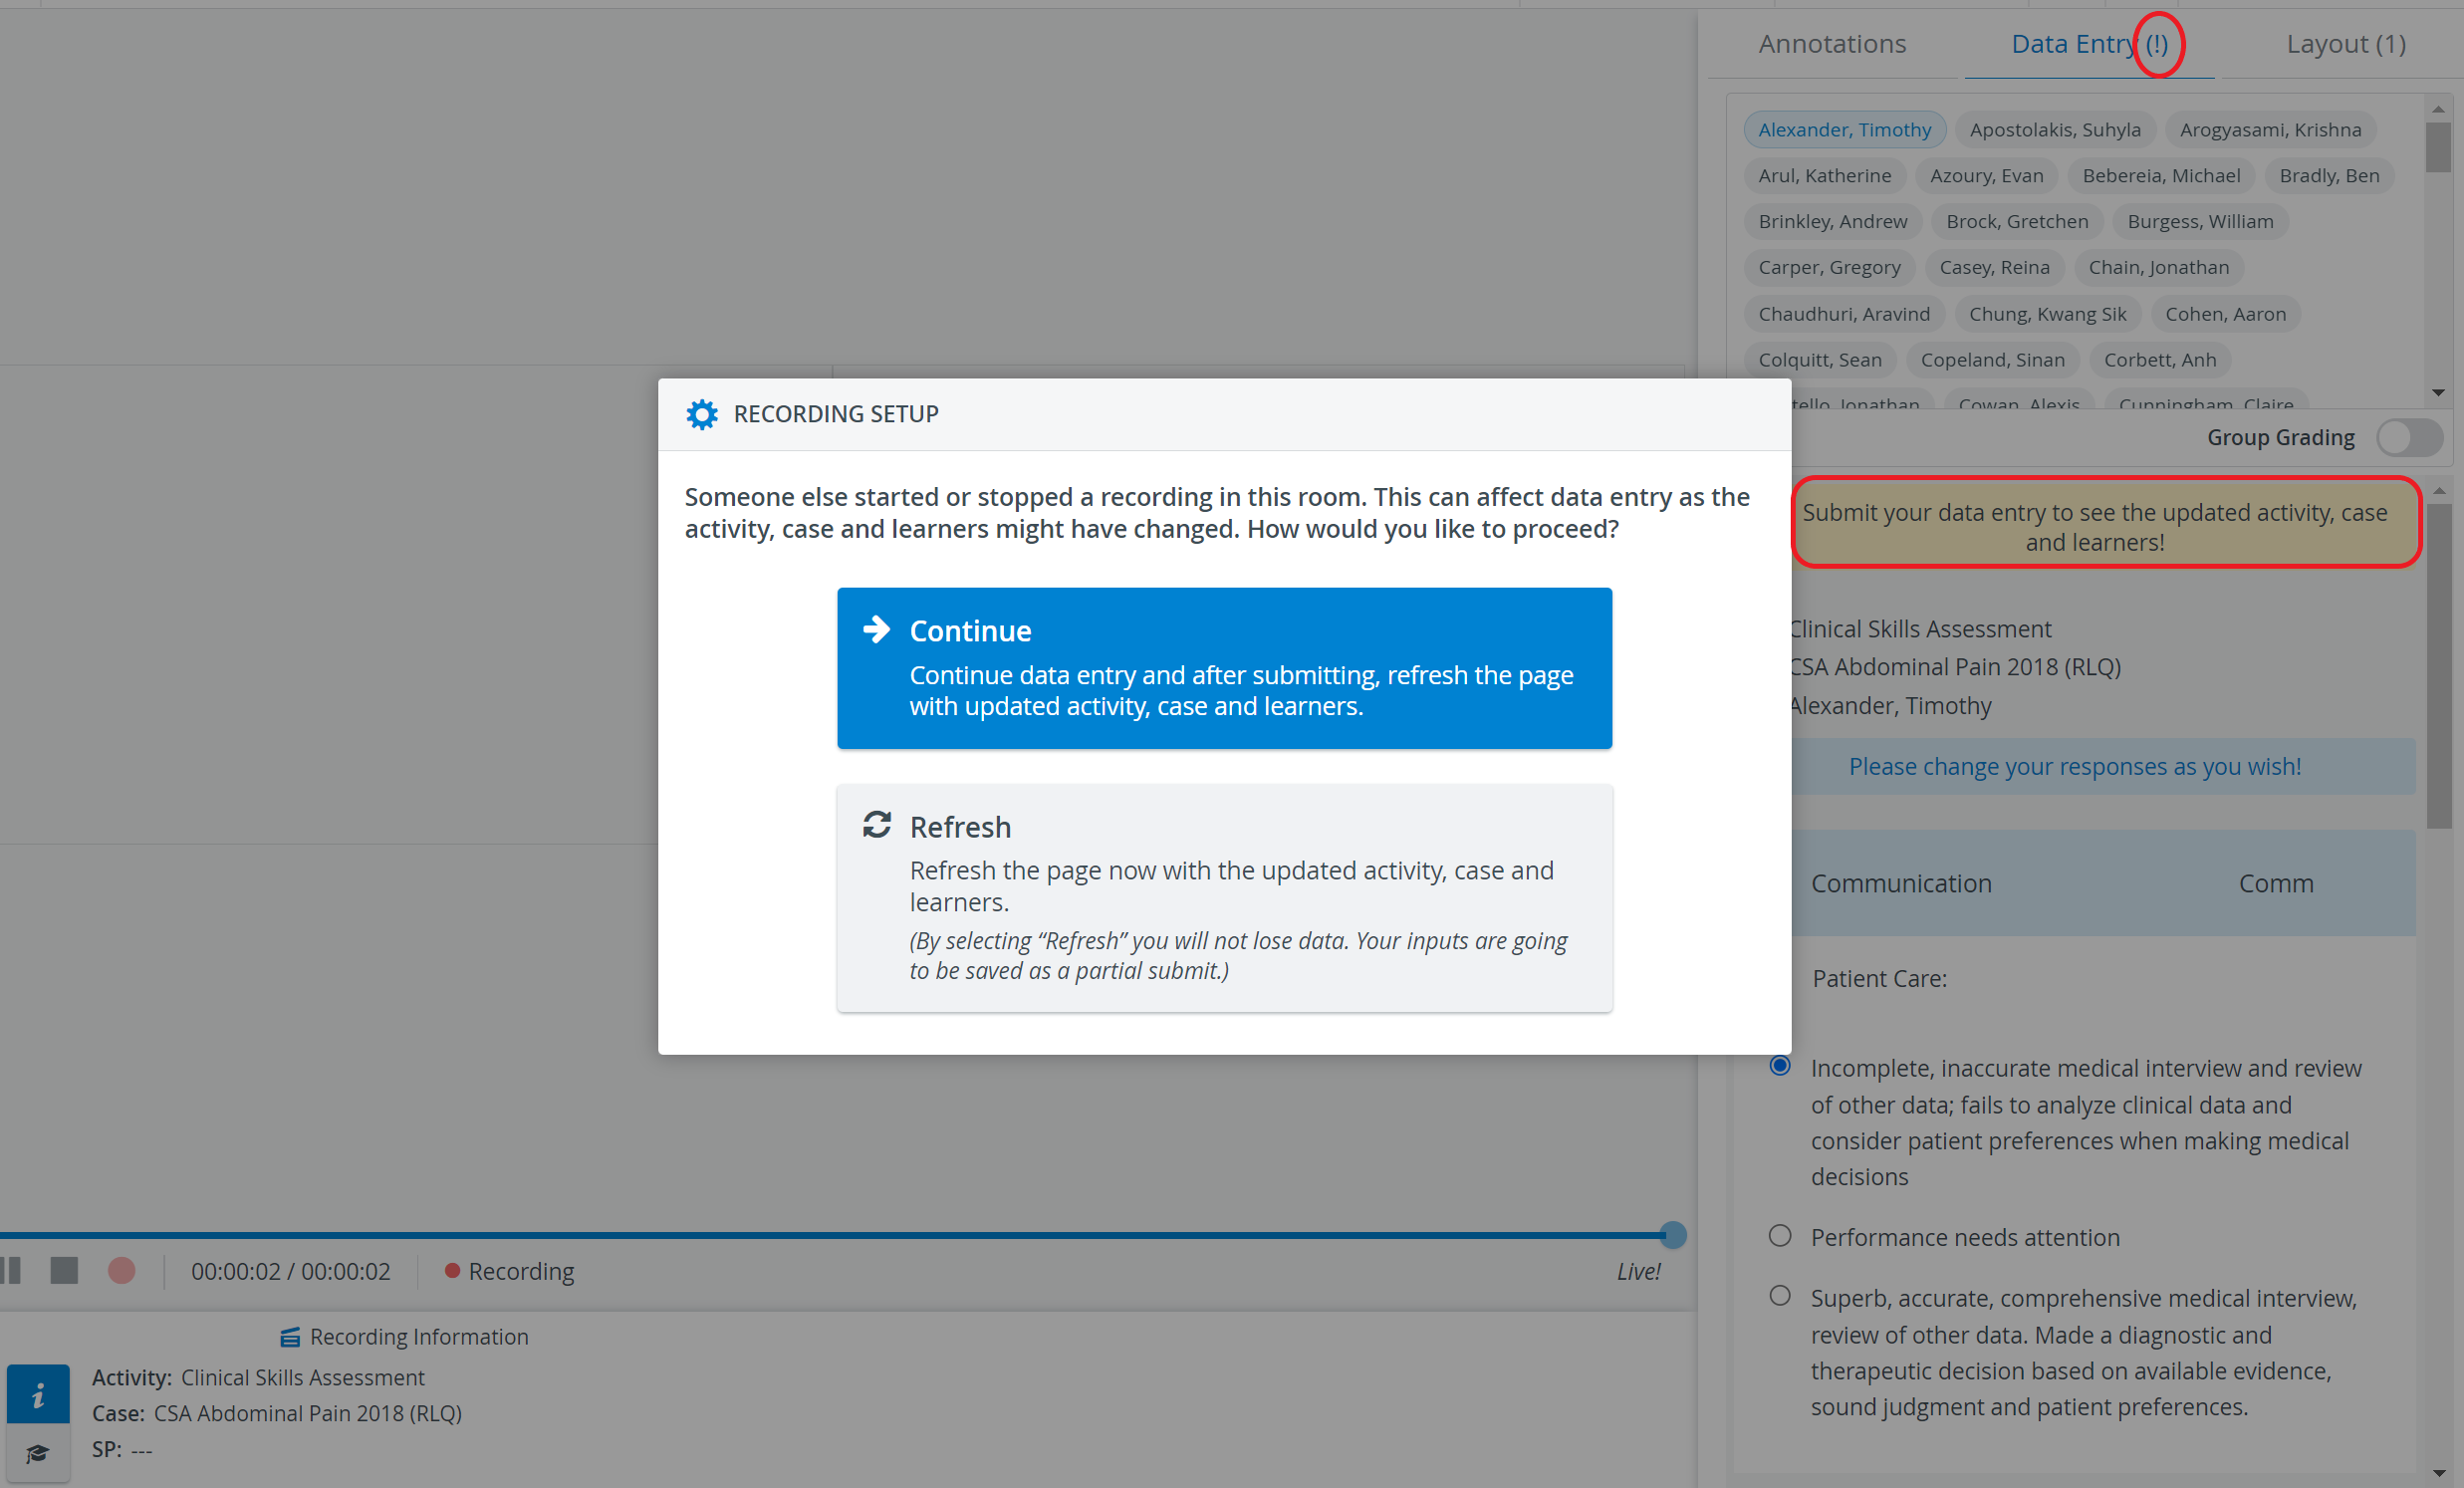
IMPORTANT
If multiple users are active in the same room in the Recording module, eg. start recording during other users are performing FON data entry, the system will warn these latter users and offer them two ways to proceed.
See details here.
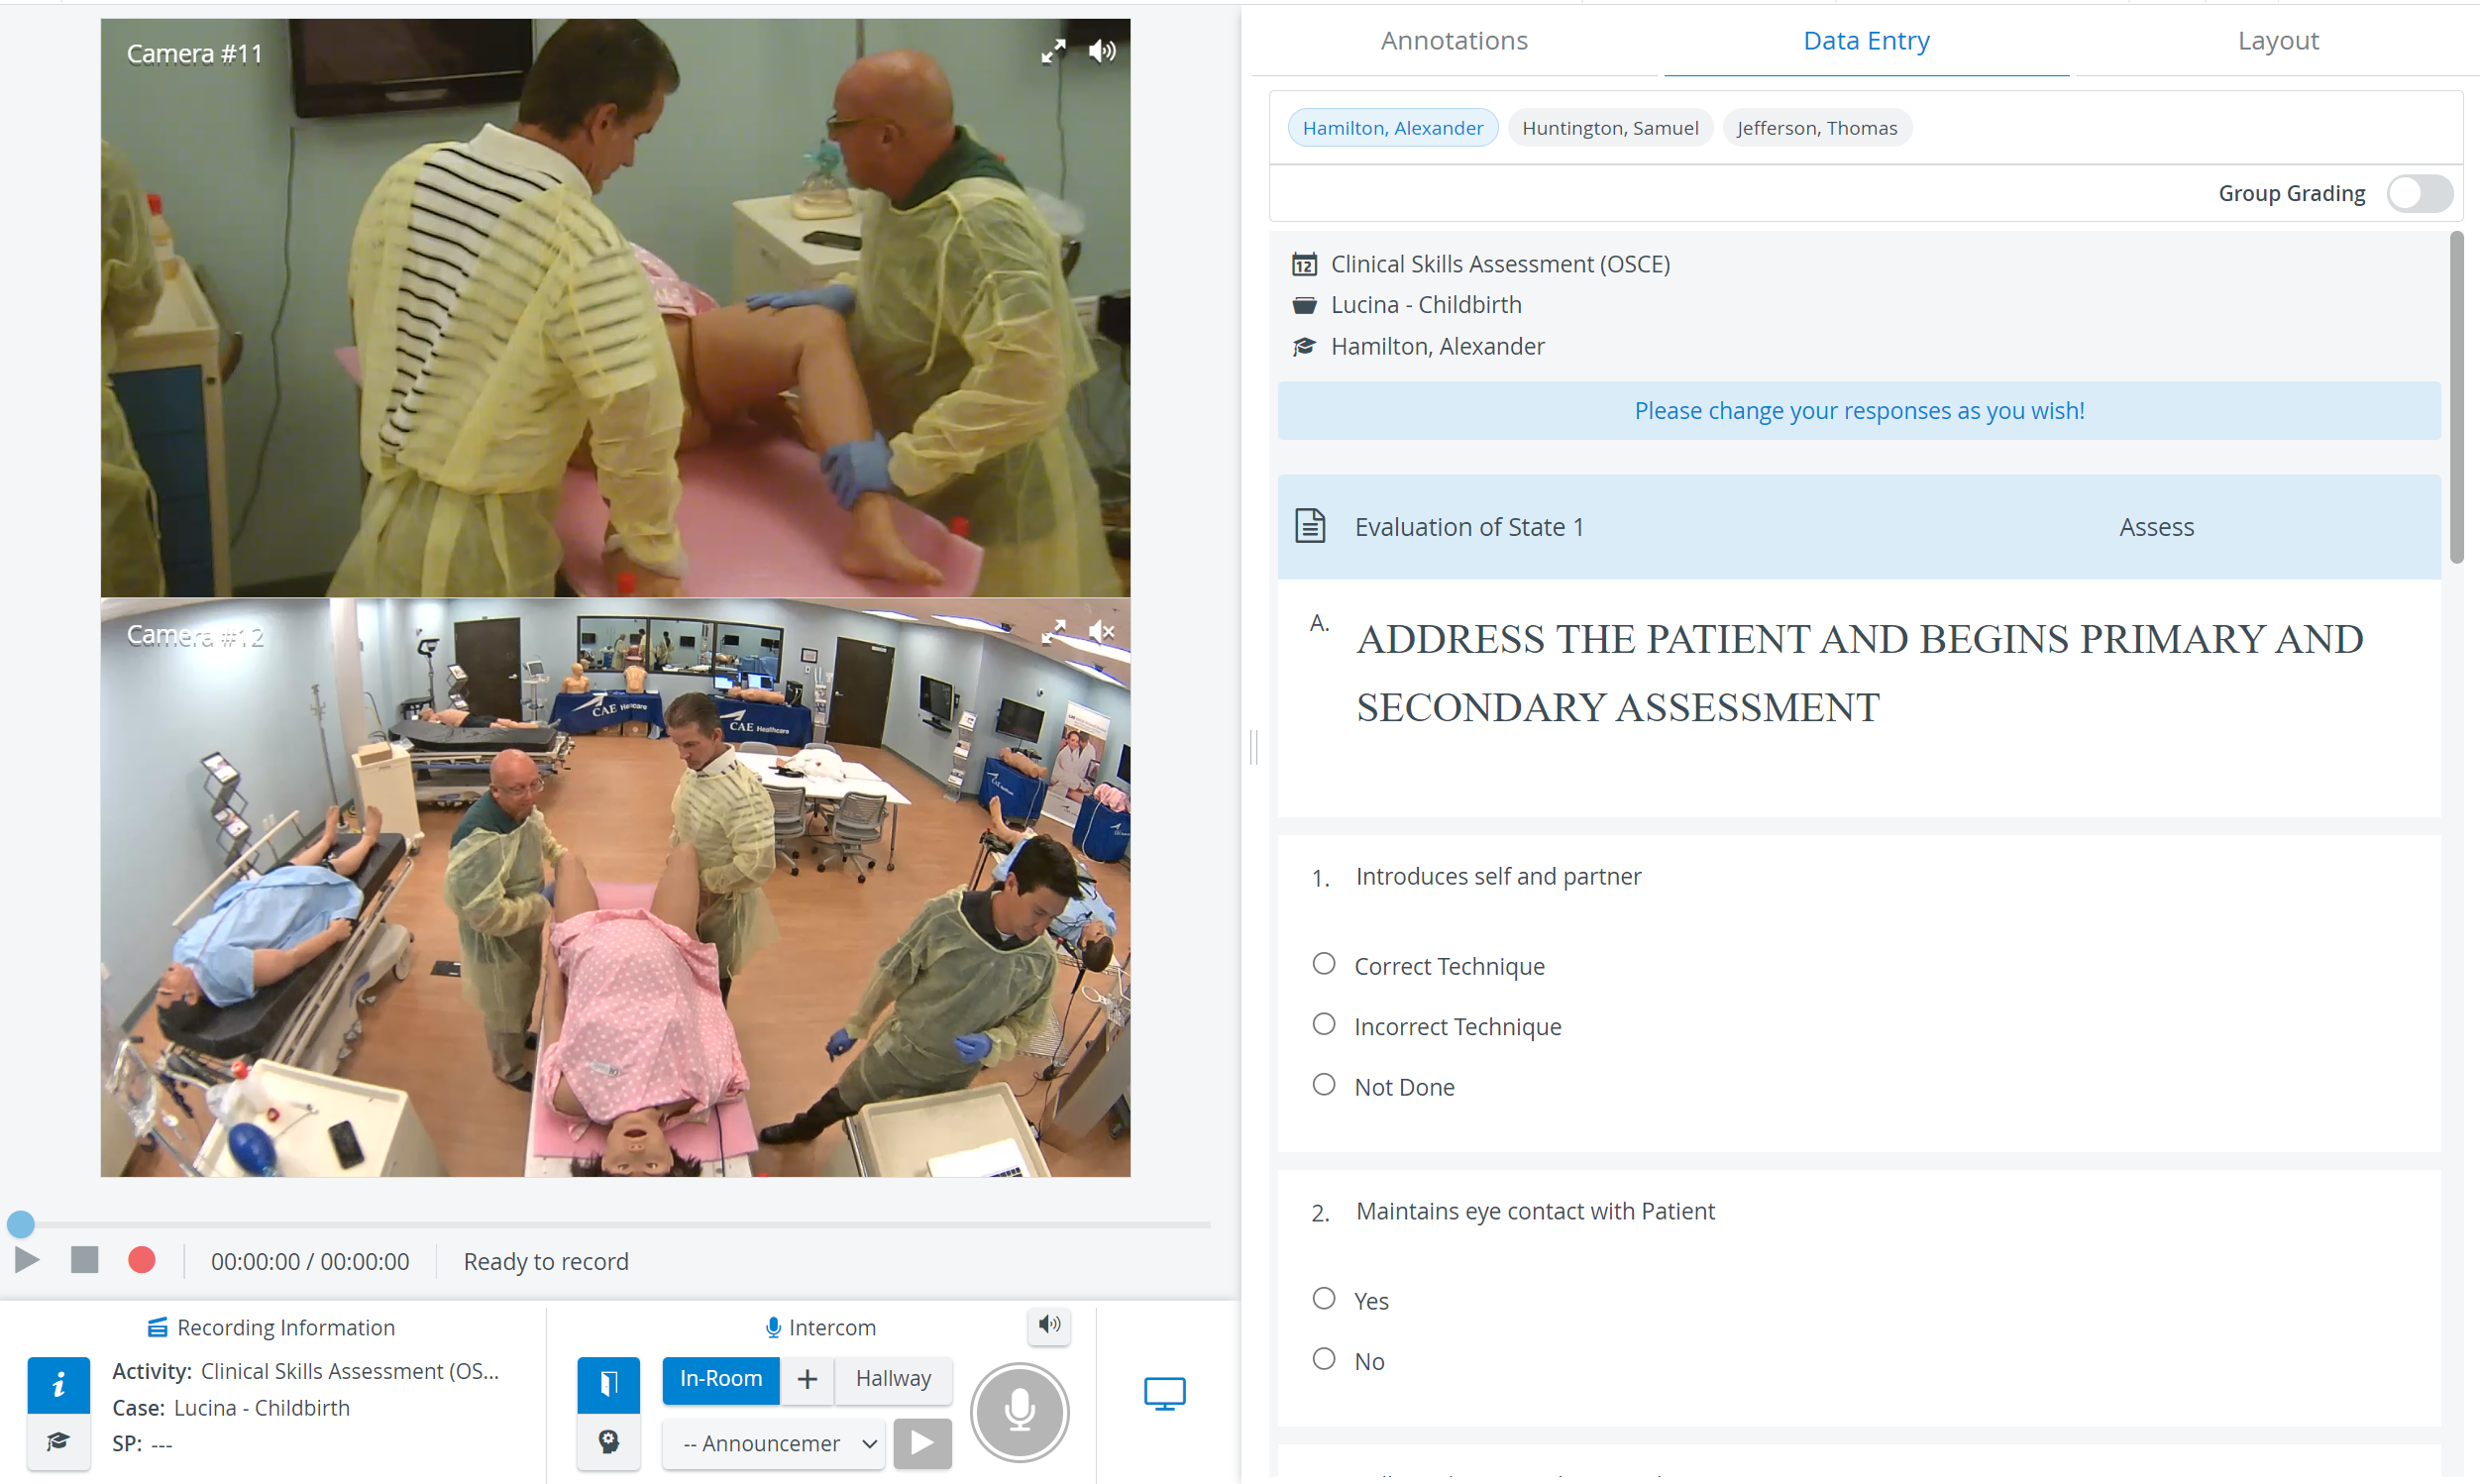
Recording Information widget during Live Recording
A Recording Information widget can be found at the bottom panel of the live SRV, displaying the following information related to the recording:
Activity
Case
SP
Learners
The information is displayed based on the Recording setup settings or the Scheduling.

By default, Activity, Case and SPs assigned to the recording are presented, under ![]() . The assigned Learners' names can be viewed by changing to the
. The assigned Learners' names can be viewed by changing to the ![]() icon.
icon.
Intercom via Simulator
In LearningSpace Single Room View, Intercom can be used via Simulators as well, within LearningSpace Enterprise: announcements can be sent to the simulator's head ("Voice of Patient"),
by selecting the Simulator button ![]() turning it into blue
turning it into blue ![]() and pushing the Push-to-Talk button in the Intercom area.
and pushing the Push-to-Talk button in the Intercom area.
See How to Set Up Conditions for Intercom.
Playback
During live recordings the following enhancements can make video review easier:
- Live stream can be paused with the pause button, and recording can be played back by dragging the slider to the desired point on the video slider.
Both current and live timestamps are displayed next to each other in the video record panel.
Live view can be switched back to by pushing the Go Live button.

Video can be paused and the slider can be dragged after 30 seconds have passed from the start of recording. Before that time the pause button is greyed out and the slider cannot be moved.

Mute/Unmute functionality during Live Recording
The mute/unmute functionality of the NextGen Room view operates as follows:
- General rule: the system only unmutes a camera when the user clicks on the unmute button OR if the user enters the Single Room View (live or review).
- 3-state click functionality for mute/unmute:
First click: unmutes the given camera stream and other unmuted streams stay unmuted too.
The icon on all unmuted streams changes to an icon showing that multiple streams are unmuted.Second click: mutes all other cameras (even the unmuted ones) and only the selected camera stream stays unmuted.
Third click: mutes the selected camera stream as well.

Toggle Panel Width and Height
With this functionality, the bottom- and side panels can be minimized in order to maximize the displayed camera- or media view.
The toggle reveals itself by hovering over the bottom- or side panel, or on the panel border lines. When activated (i.e. camera view is maximized), the toggle arrows are displayed constantly.
Vertical Double Layout
In some cases, two camera views need to be displayed on top of each other (i.e. in a single column) during recording.
In the latest version of LearningSpace the utilization of the space available in the Single Room View panels can be maximized and the panels on the right side (Annotations tab, Data Entry tab) or additional windows can be displayed in a larger size with the Vertical double layout feature:

For more information, visit our Recording - How to pages and watch the Recording Module Training Video.
Overview
Content Tools