For Users With Learner Privilege (Zoom)
This guide explains to medical students who have “Learner” privilege in CAE LearningSpace Enterprise how to attend virtual OSCE encounters and access checklists.
Download the PDF version here:
- Open your Google Chrome Browser.
- In the address bar, enter your CAE LearningSpace address given to you by your administrator.
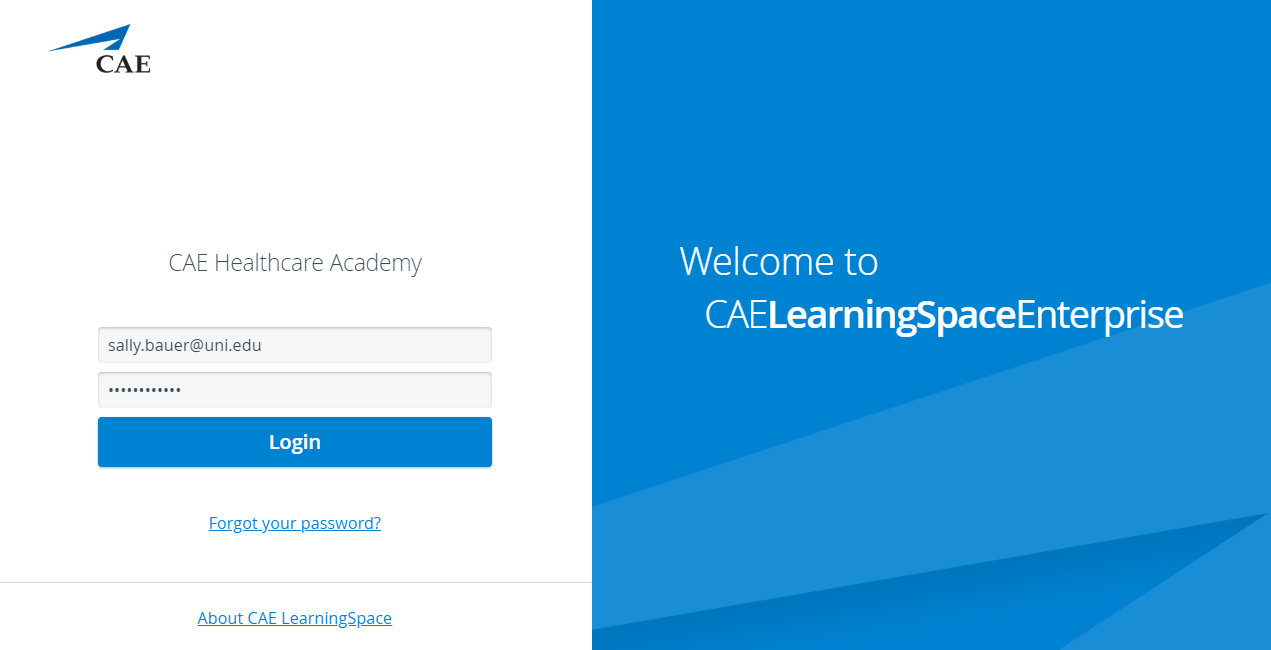
Enter your email address and password in the corresponding fields and click Login:
Single Sign-On
Or instead, use your university Single Sign-On (SSO) service if applicable.
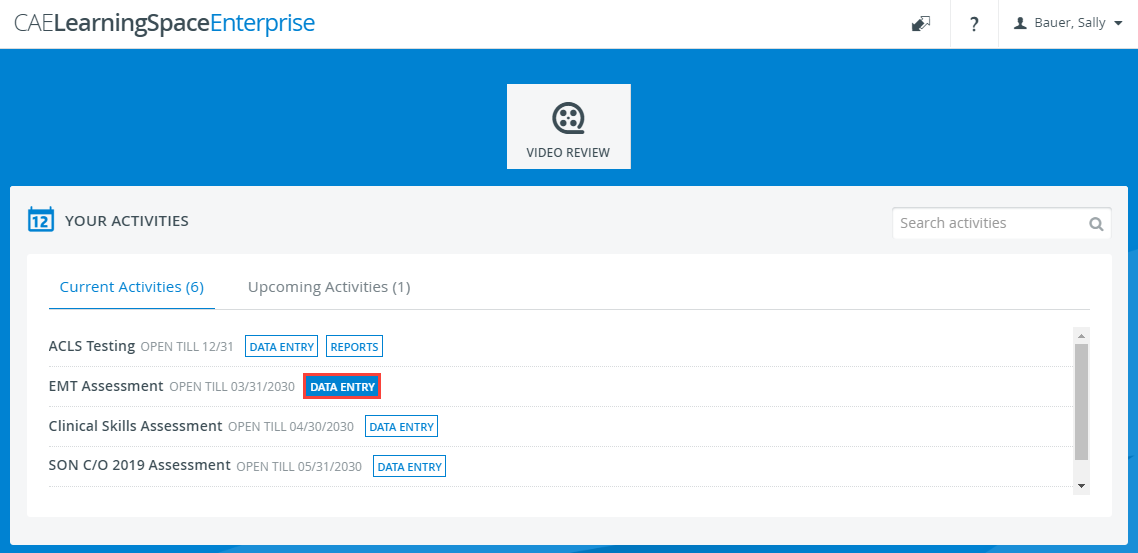
- Once you are logged into CAE LearningSpace, select Data Entry next to the activity you are currently testing on:
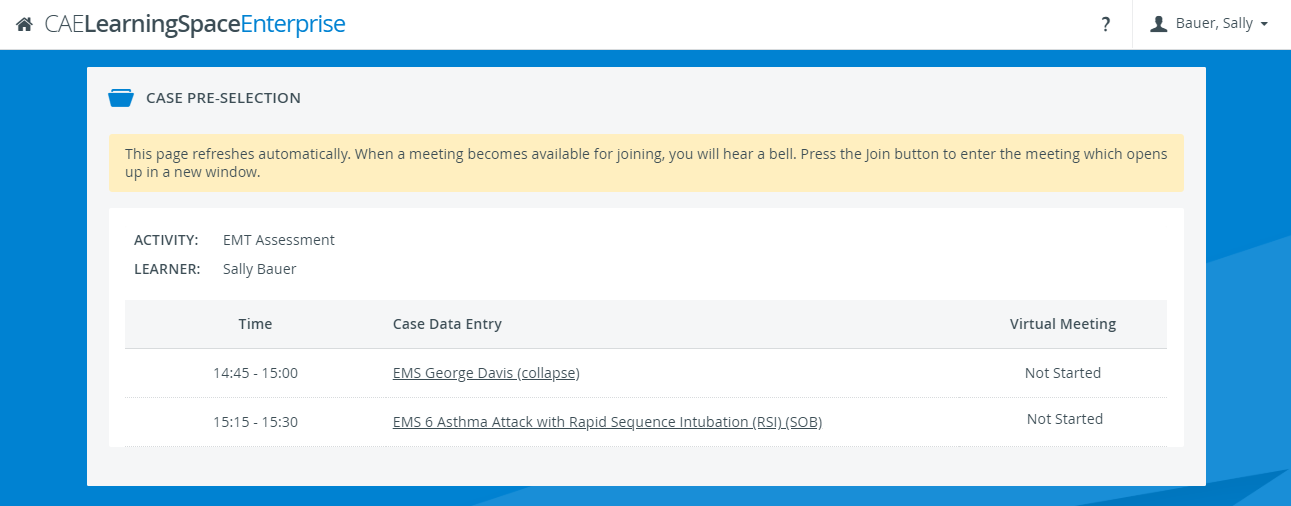
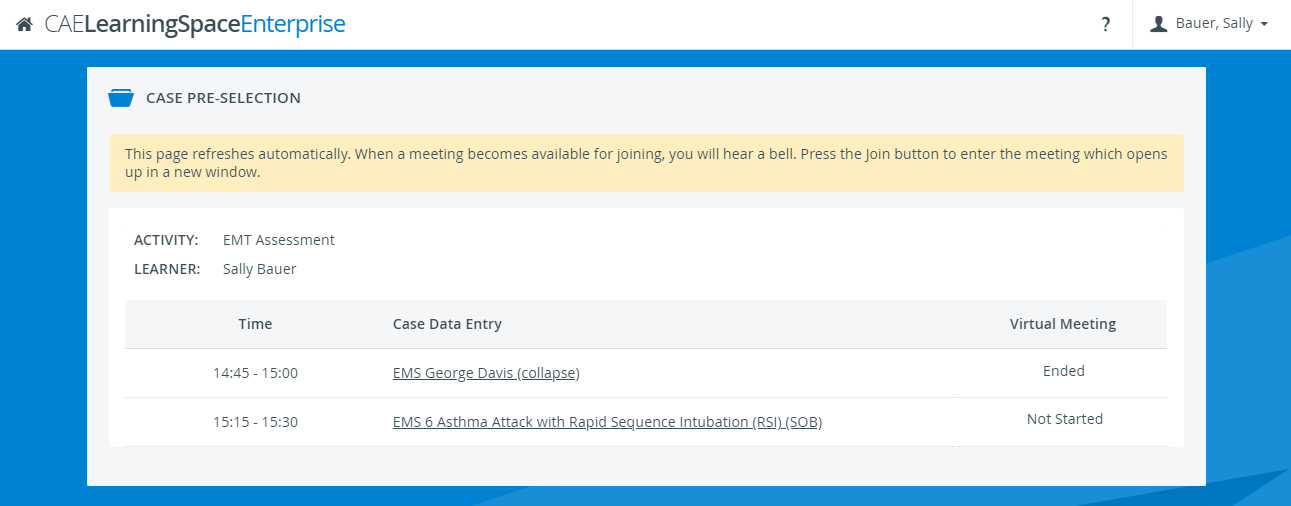
Once Data Entry is selected you will now be able to see Case Pre-Selection.
If the SP has not started the virtual encounter yet, Not Started will be displayed.
Click on the name of your upcoming case before your virtual meeting starts, to access the pre-encounter checklist.
Upon clicking submit on your pre-encounter checklist, you will be redirected to your Dashboard.
Click on Data Entry once again next to the activity you are currently testing on to return to your Case Pre-Selection page.
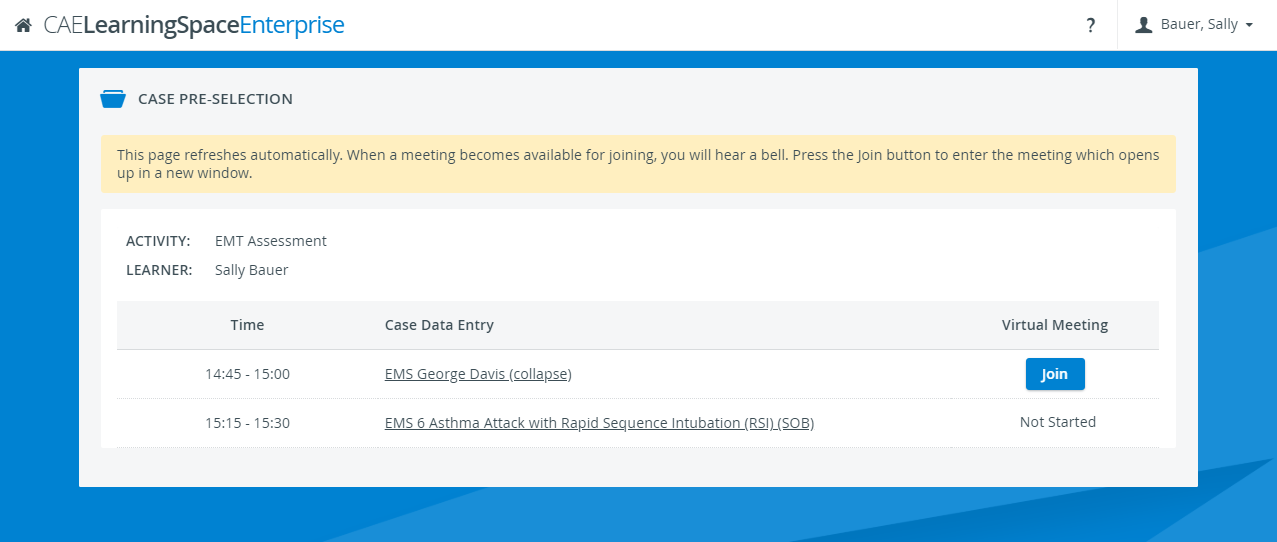
Wait for the SP to starts hosting the virtual encounter and the Join button to appear next to your upcoming case.
Your Case Pre-Selection page will constantly refresh itself. You will hear a short gong chime too once you can join your virtual meeting.
To begin the virtual encounter, click Join under Virtual Meeting for the time and case required.
Important - Before Joining a Cisco Webex Virtual Encounter
If CAE LearningSpace is integrated with Cisco Webex Meetings at your institution, make sure you are not logged into your personal Cisco Webex account.
Important
Choose and follow the instructions depending on the meeting application your institution integrated into CAE LearningSpace:
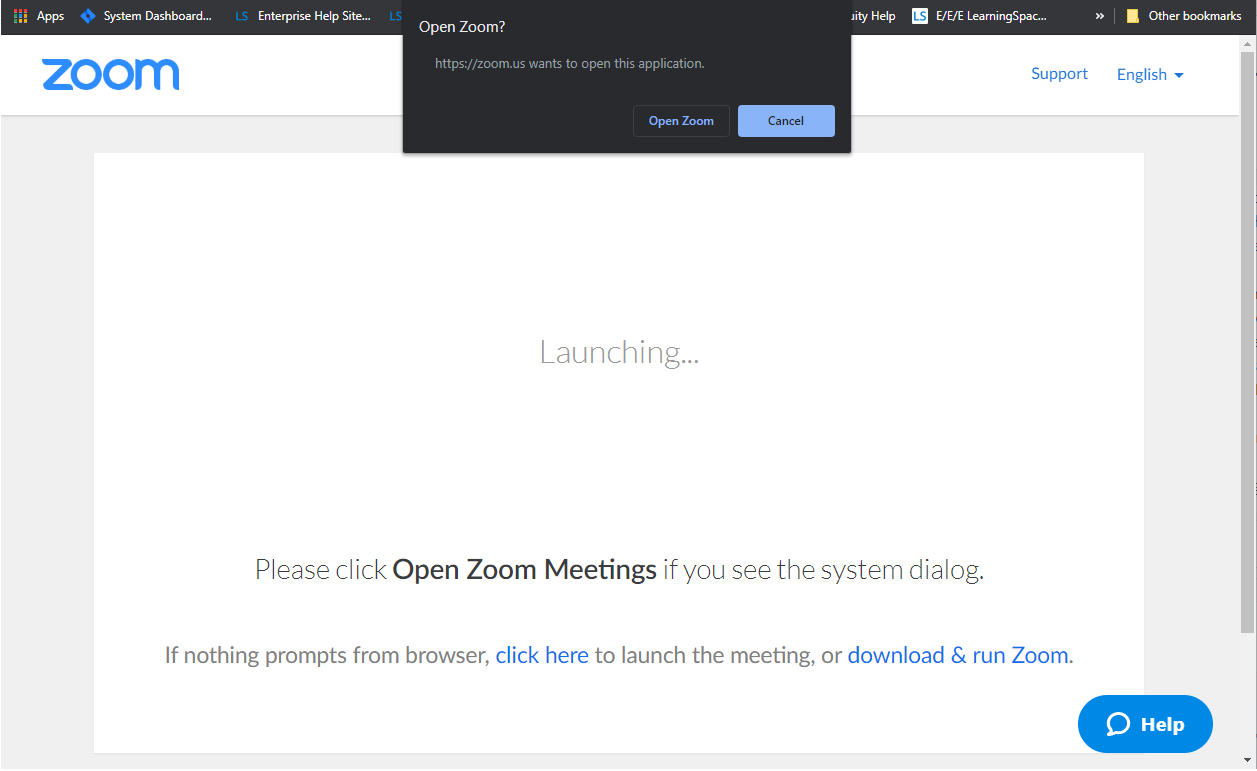
Pressing the Join button will redirect you to Zoom's Launch Meeting tab inside your browser:
Pop-Up Blocker
Disable the pop-up blocker in your browser.
When joining a Zoom meeting from CAE LearningSpace, you will be logged out of your personal Zoom account in your browser at all times (even if your personal account is the same as the one the current virtual event is running on). At the same time, you will stay logged into your personal account in the Zoom desktop application.
Launching Zoom For the First Time
In case you have trouble launching the application from your browser:
- Click on download & run Zoom to install Zoom's desktop client.
- Once the installation is complete, you will be informed by Zoom with the pop up at the top of your screen:
Once you are on the new tab, click Open Zoom Meeting and you will join the virtual encounter hosted by the SP.
Pressing the Join button will start Cisco Webex Meetings.
Click on Open Cisco Webex Meeting:
Pop-Up Blocker
Disable the pop-up blocker in your browser.

- The Cisco Webex Meeting application launches:

- Turn on your audio and video with the microphone and camera icons.
- Click Join Meeting
In case you have trouble launching the application:
- setup the desktop application
OR - join the meeting form your browser
Desktop Application
If you haven't installed the desktop app yet:
- Cisco Webex Meetings automatically downloads the desktop application's setup file (webex.exe) upon starting your meeting
OR - If downloading does not start, use the download link on the meeting's launch page to get the setup file

- Cisco Webex Meetings automatically downloads the desktop application's setup file (webex.exe) upon starting your meeting
- Run the setup file to install the desktop application.
Join the Meeting from Your Browser
Click on Join from your browser to open the Cisco Webex Meetings application in your browser.
As a participant, you will be asked by Cisco Webex to enter your display name and email address that is not associated with any existing Cisco Webex Meetings Online account.
Enter your details to continue to your virtual encounter.- The Cisco Webex site that you are currently connecting to—domain name ending: ".webex.com"—will ask for permission to use your camera and microphone.

- Click Allow.
Join the meeting from your browser.
 Turn on your audio and video with the microphone and camera icons.
After your meeting, make sure you receive a message from Cisco Webex Meetings that your meeting has ended.
When your virtual encounter has ended:
Your name will be automatically assigned to the virtual meeting recording. You can access your recordings in the Video Review module.
Stay on your Case Pre-Selection page to access your post-encounter checklist.
Click on the name of the case to start data entry.
Important
Your SP needs to end the meeting on their side to allow you access to your post-encounter checklist.
In case you are presented with the following message when trying to access your post-encounter checklist, contact your instructors for help: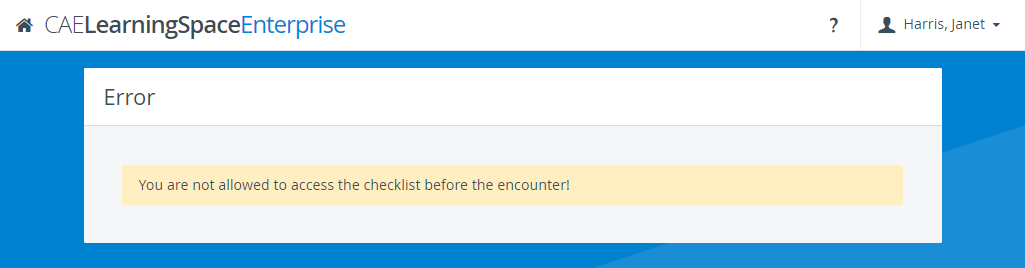
Repeat from step 5.a. until you have attended all of your virtual cases listed in your activity for the day.
Overview
Content Tools