Authorized workstations
Complete the following steps if you want to configure a computer as a workstation.
- Go to System
- Go to Stations tab.
- Click Add This Computer at the bottom.
The Station Manager window will open.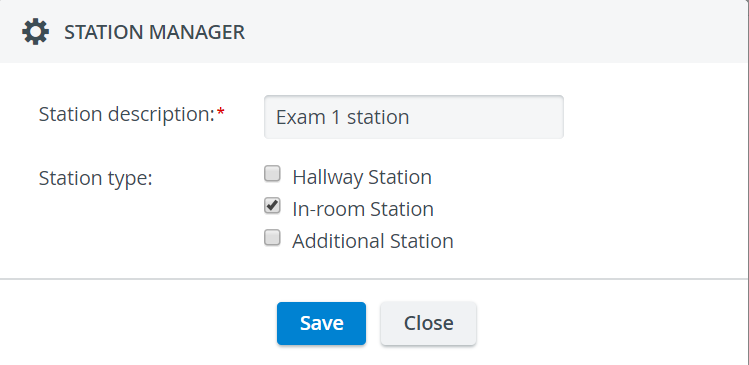
- Enter the name of the workstation and
- Select the function of the station:
- Hallway Station - A computer located outside the simulation room; for learners to submit checklists.
- In-room Station - A computer located inside the simulation room; for SPs to submit their checklists.
Additional Station - A computer to display information e.g., activities scheduled for the day room schedule or to upload data.
A new station can be granted multiple funcitons when added. The ultimate function of the stations is specified when the station is added to a room.
- Hallway Station - A computer located outside the simulation room; for learners to submit checklists.
- Save your settings.
The newly added workstation/computer will be highlighted in blue.
Assign a workstation to a room
- Go to the Rooms tab in System
- Select a room and click on the cogwheel of the room.
It opens Room Settings: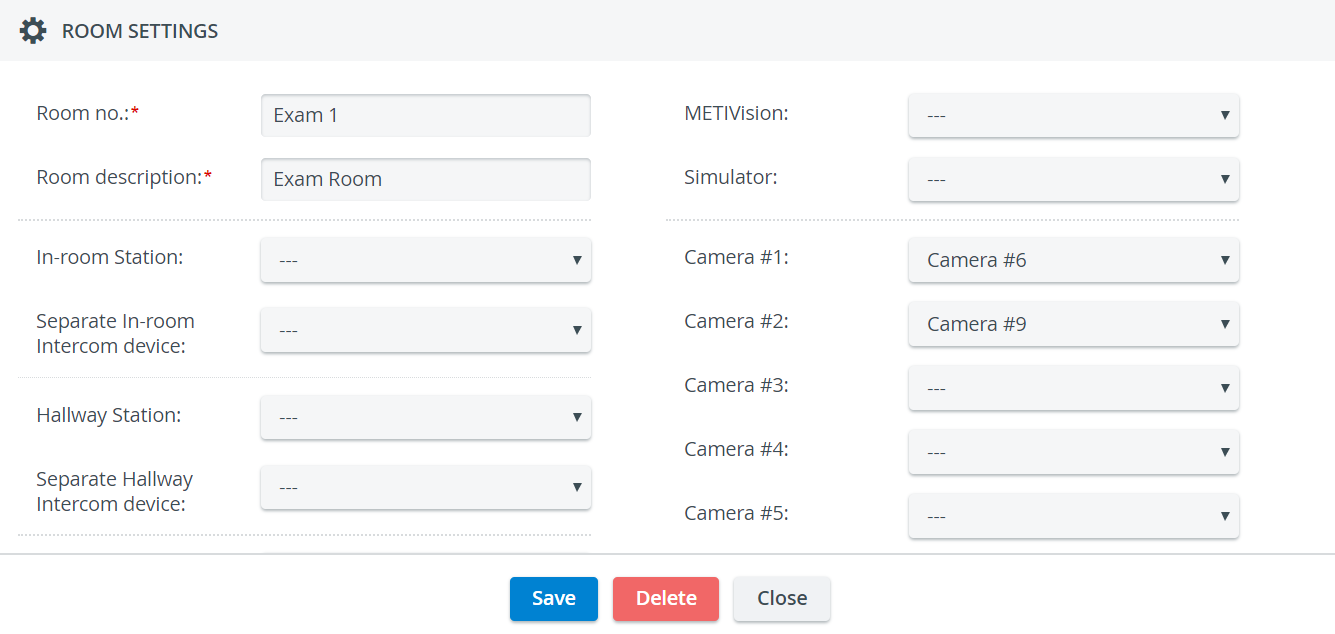
- Use the drop-downs on the left.
- Select the computer inside the room you want to use as the In-room station.
- Select the computer outside of the room you want to use as the Hallway station
Optional: Select an audio kit installed inside or outside of the room from the Separate In-room /Hallway Intercom device drop-downs.
An Additional Station can only be added to a room with either the In-room or Hallway drop-down depending on where it is physically located. The station can still be used as an Additonal Station.
- Save your settings.
Overview
Content Tools