Requirements for using the Learner Peer Evaluation (or 'Peer feedback') part:
- existing Peer Evaluation checklist in at least one of the Cases of the Activity,
- the Activity being running,
- the learner having access to at least one video recording associated with the Case in which the Peer Evaluation part is set up,
- the learner being assigned to the learner or group of learners for whom the Peer Evaluation checklist needs to be filled out.
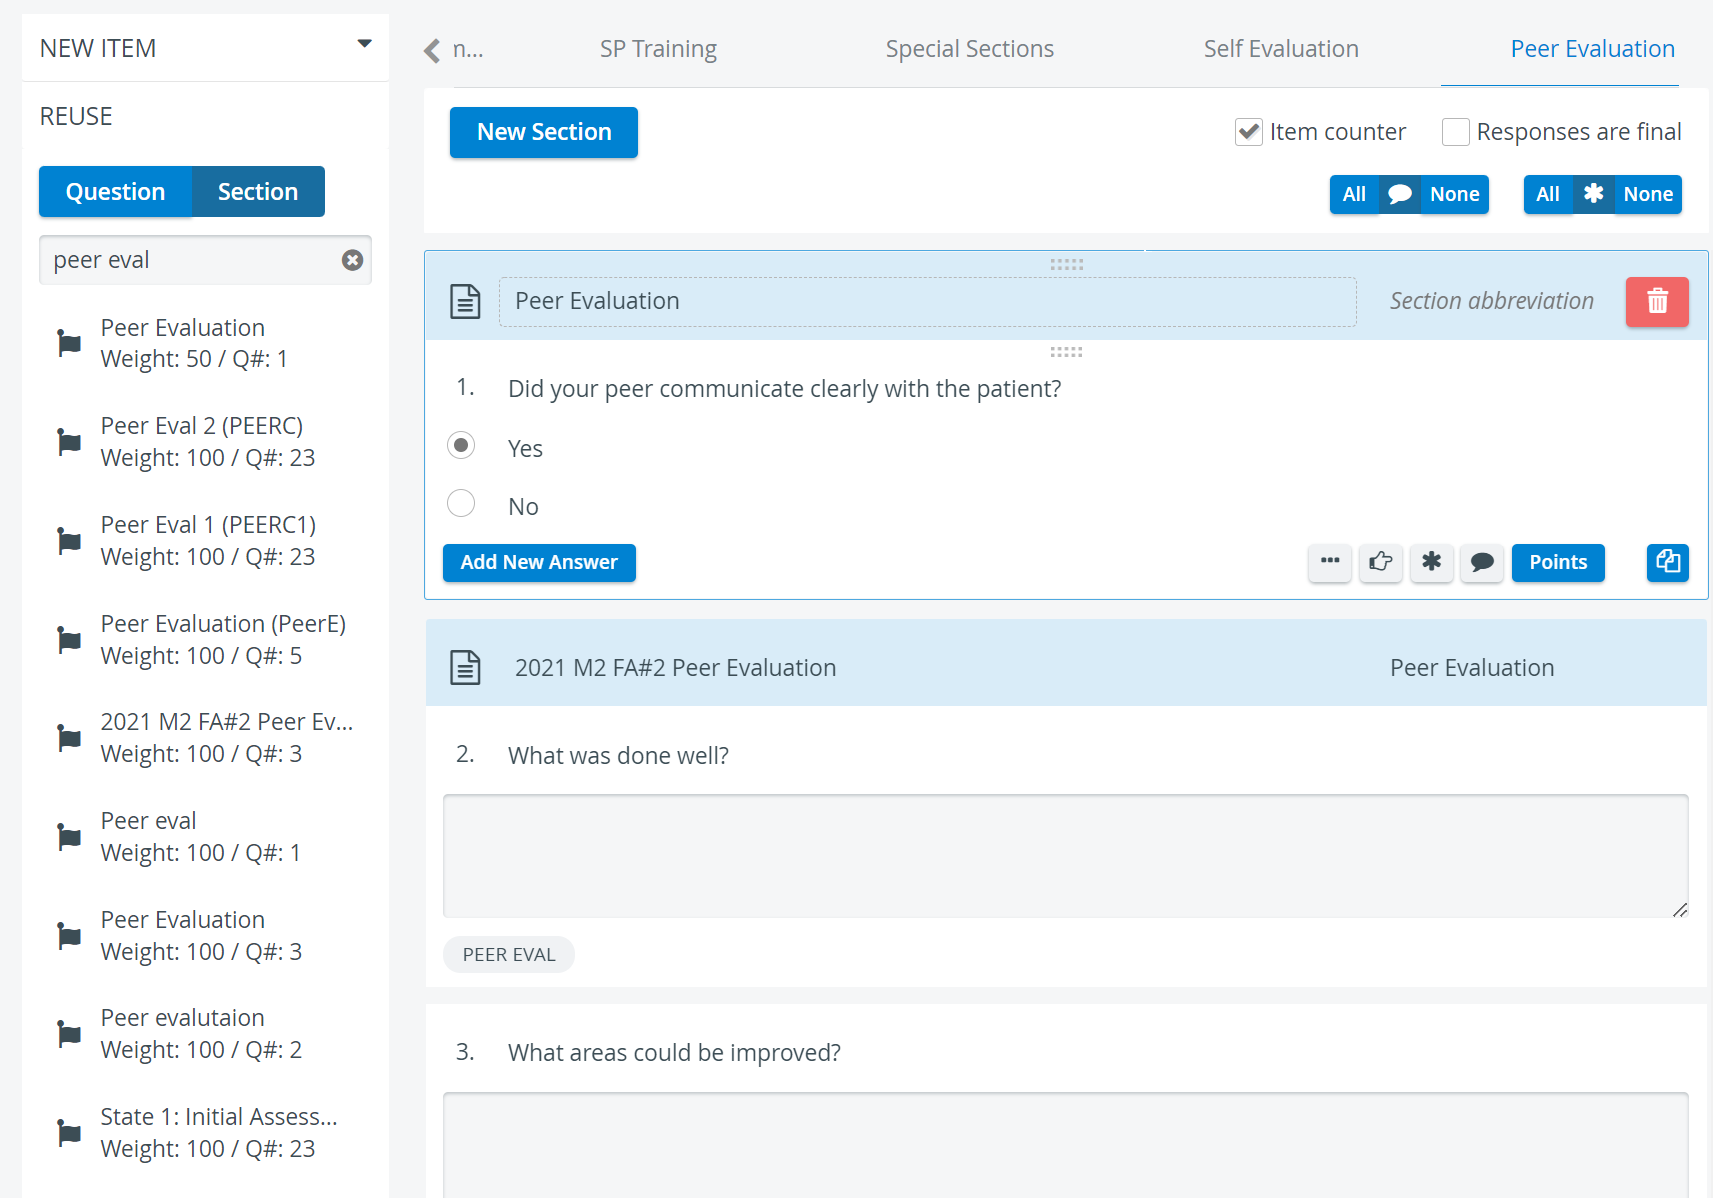
Creating a Peer Evaluation Checklist
- In the Cases module, open the Edit Case window for the Case intended to be used.
- Create a checklist on the Peer Evaluation tab of the Case Content page as described in How to Create a Section and How to Create Items.
See also How to Set Up Peer Evaluation.
Click the arrow on the right end of the tabs to have the Peer-Evaluation tab displayed.
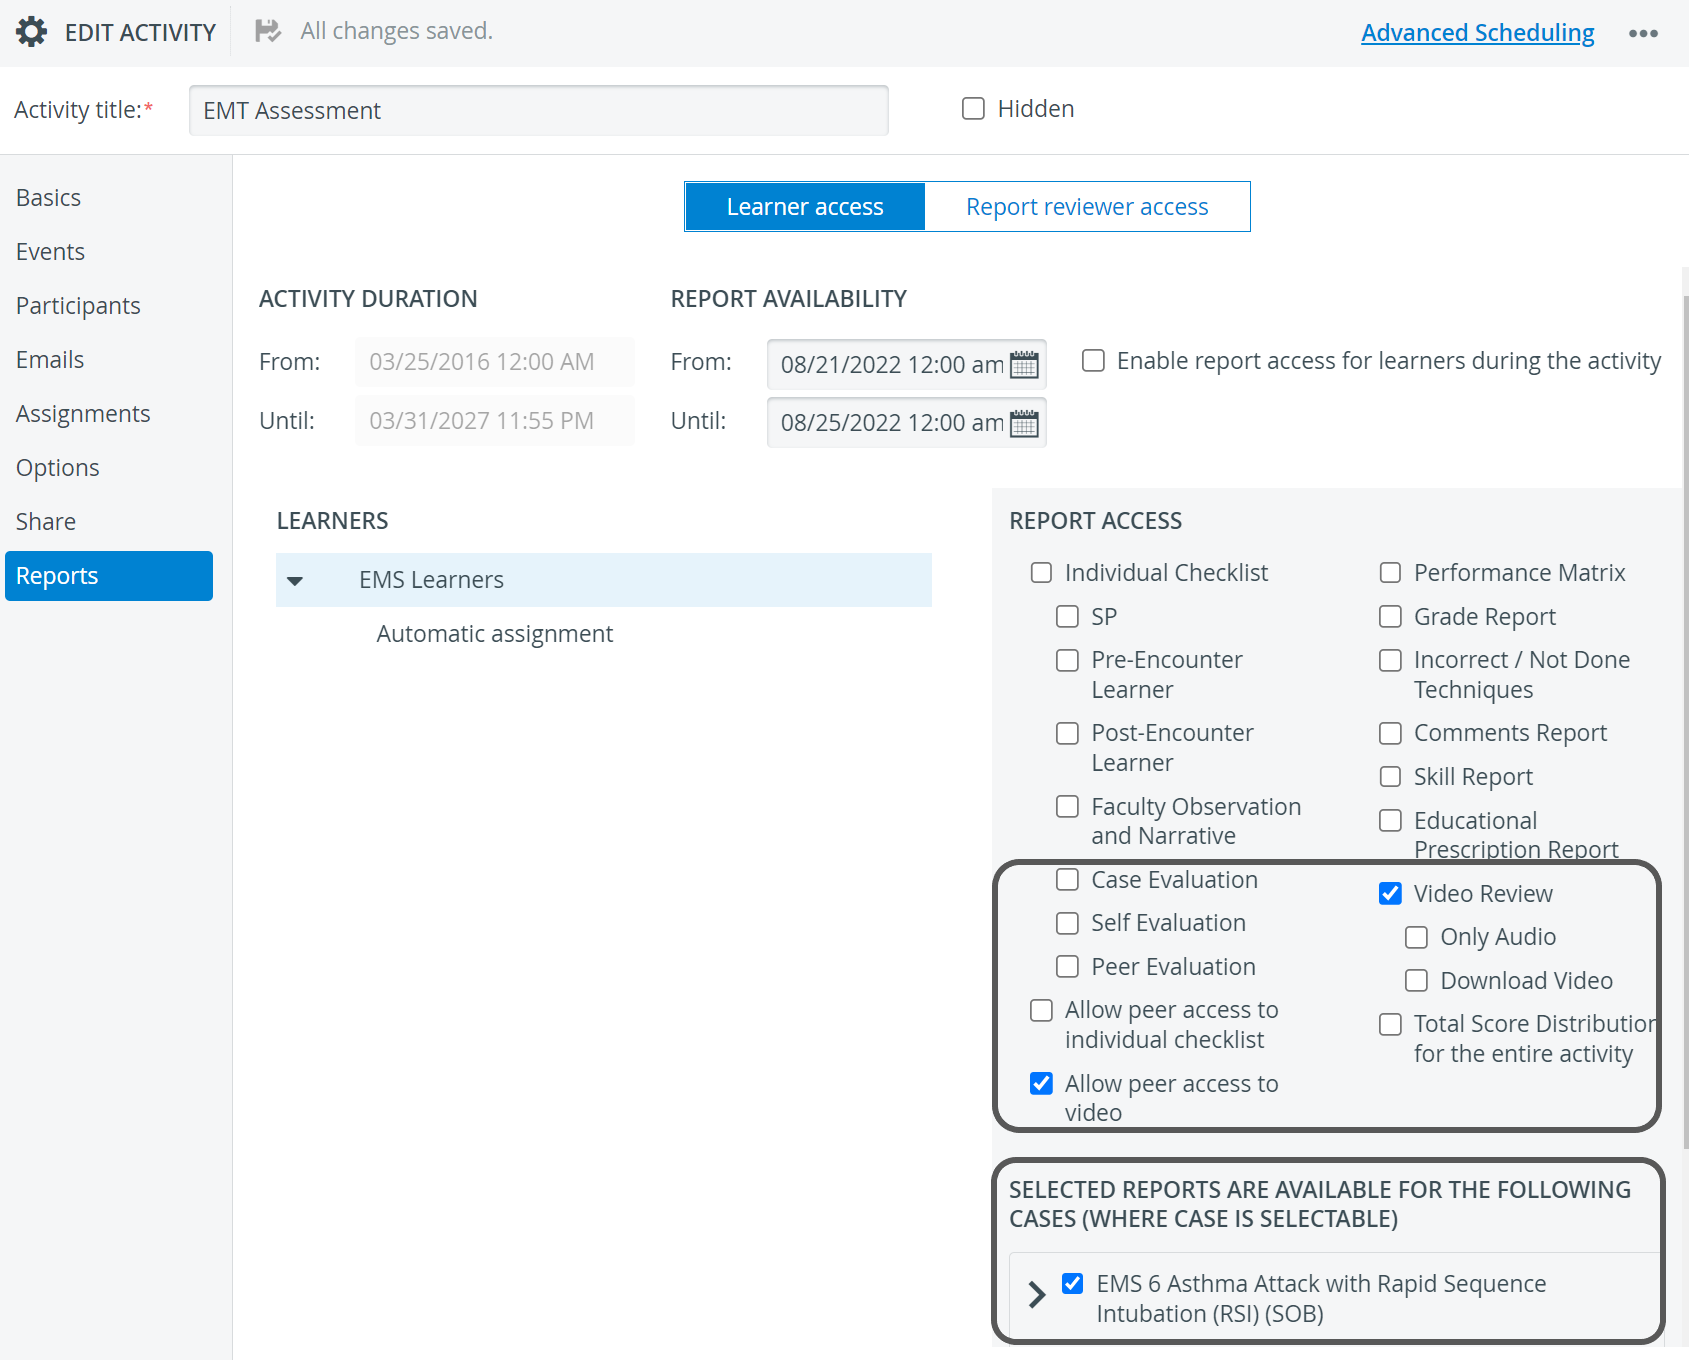
Setting Up Access
- To enable your learners to see their peers' video recordings, thus be able to fill out the Peer Evaluation checklist, access the Activities module.
- Open the Reports tab of the Edit Activity window for the relevant Activity.
- At Learner access settings, within the Report Access panel, check the boxes next to Allow peer access to video and to Video Review.
- In the Selected reports are available for the following Cases panel, check the box next to the Case containing the Peer Evaluation part.
Setting Up Assignment
- Access the Assignments tab of the Edit Activity window for the relevant Activity.
Switch to Learner - Learner relation and add as many Evaluator-Evaluee assignment groups as desired.
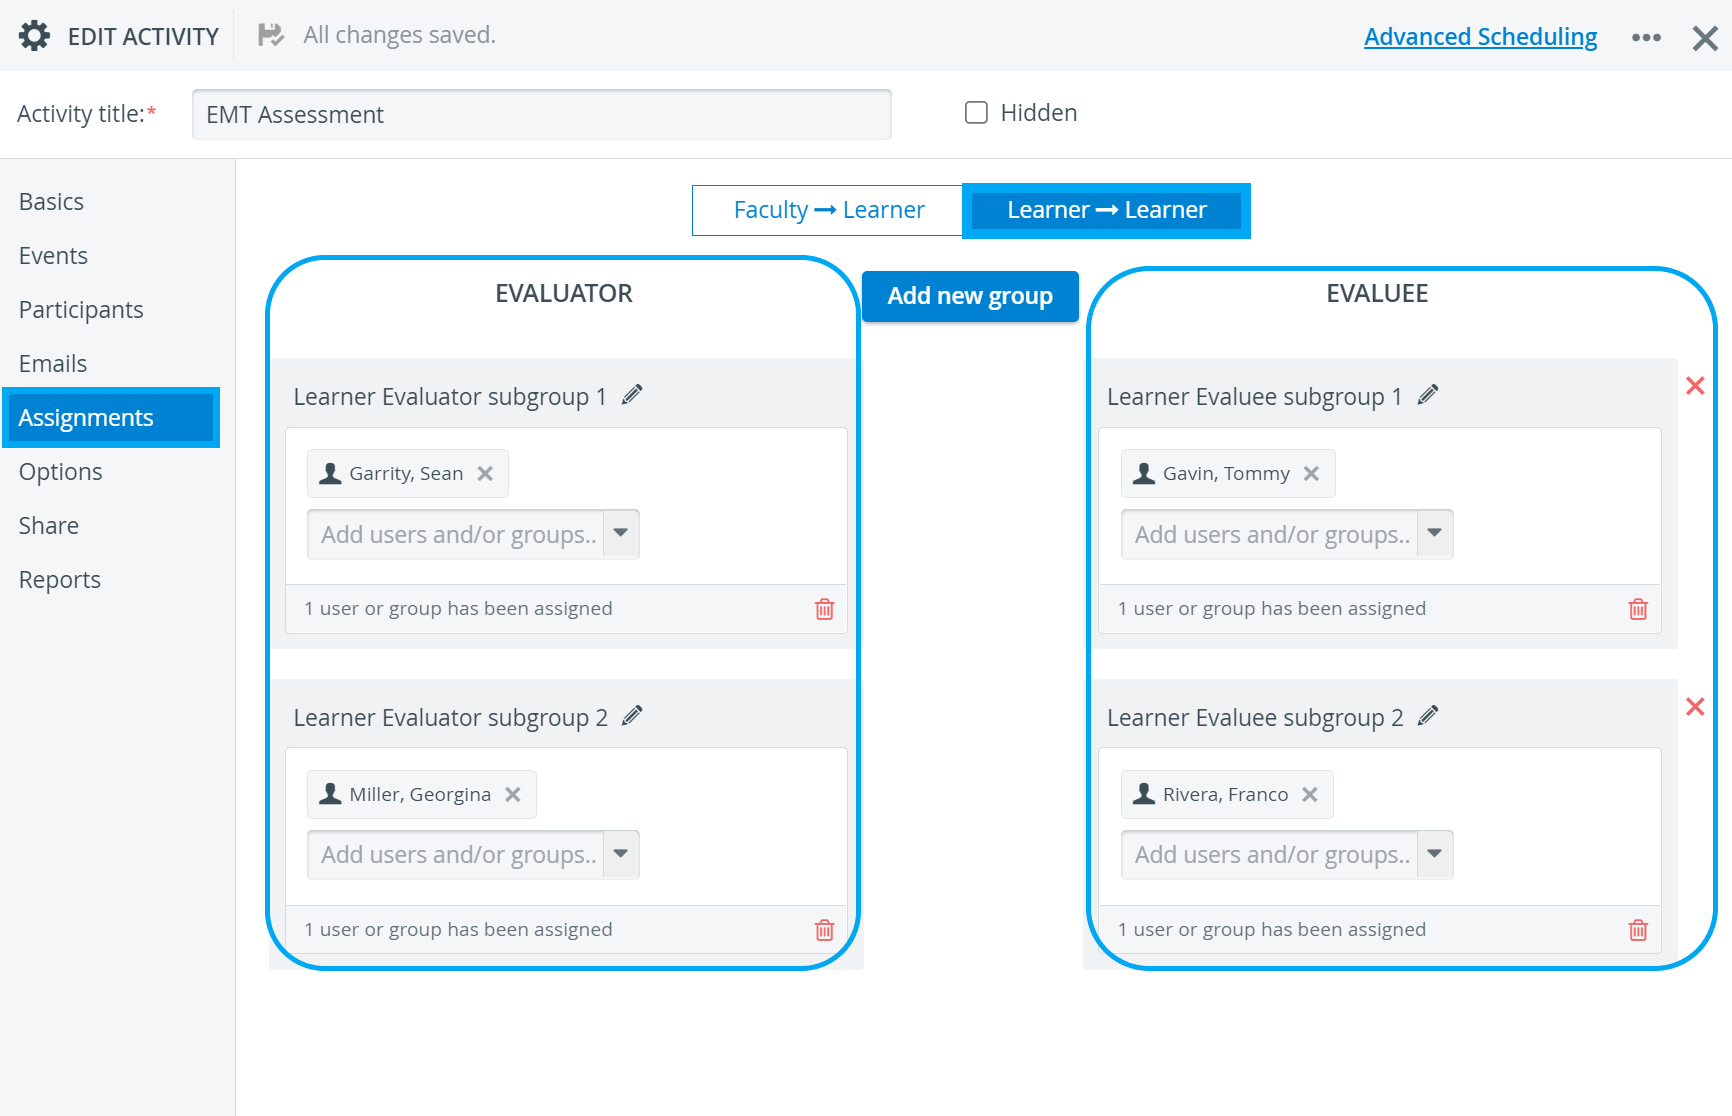
NOTE: Subgroups do not automatically result in mutuality. In case you wish that two learners mutually evaluate each other, each learner needs to be set up as evaluator and evaluee with regards of the other learner (peer).
With the above-listed requirements fulfilled, the Your Activities panel on the learners' Dashboard will contain a PeerEvaluation button next to the respective Activity. When clicking the button, the learnerS will be taken to the VideoReview page, where they will be able to do data entry for their peers.
IMPORTANT: When setting up an Activity and defining its end date, take into consideration the fact that after their event, learners will need time to fill out the Peer Evaluation part as well (eg. one more week).
The Data entry available for manually authorized workstations only setting on the Options tab of the Edit Activity pop-up window does not affect Peer Evaluation data entry. If an Activity is set up to be available from manually authorized stations only, learners will have to do their normal data entry at the authorized stations but will be able to do Peer Evaluations from any other station.
For further information, visit our Case Manager pages or watch our Case Manager Training Videos.
Overview
Content Tools