Page History
| Tip |
|---|
For an introduction to Advanced Scheduling, please visit the How to Understand Concepts within Advanced Scheduling page. |
After you have accessed the Activity Scheduler page, continue with the following steps to add new events to your selected Activity:
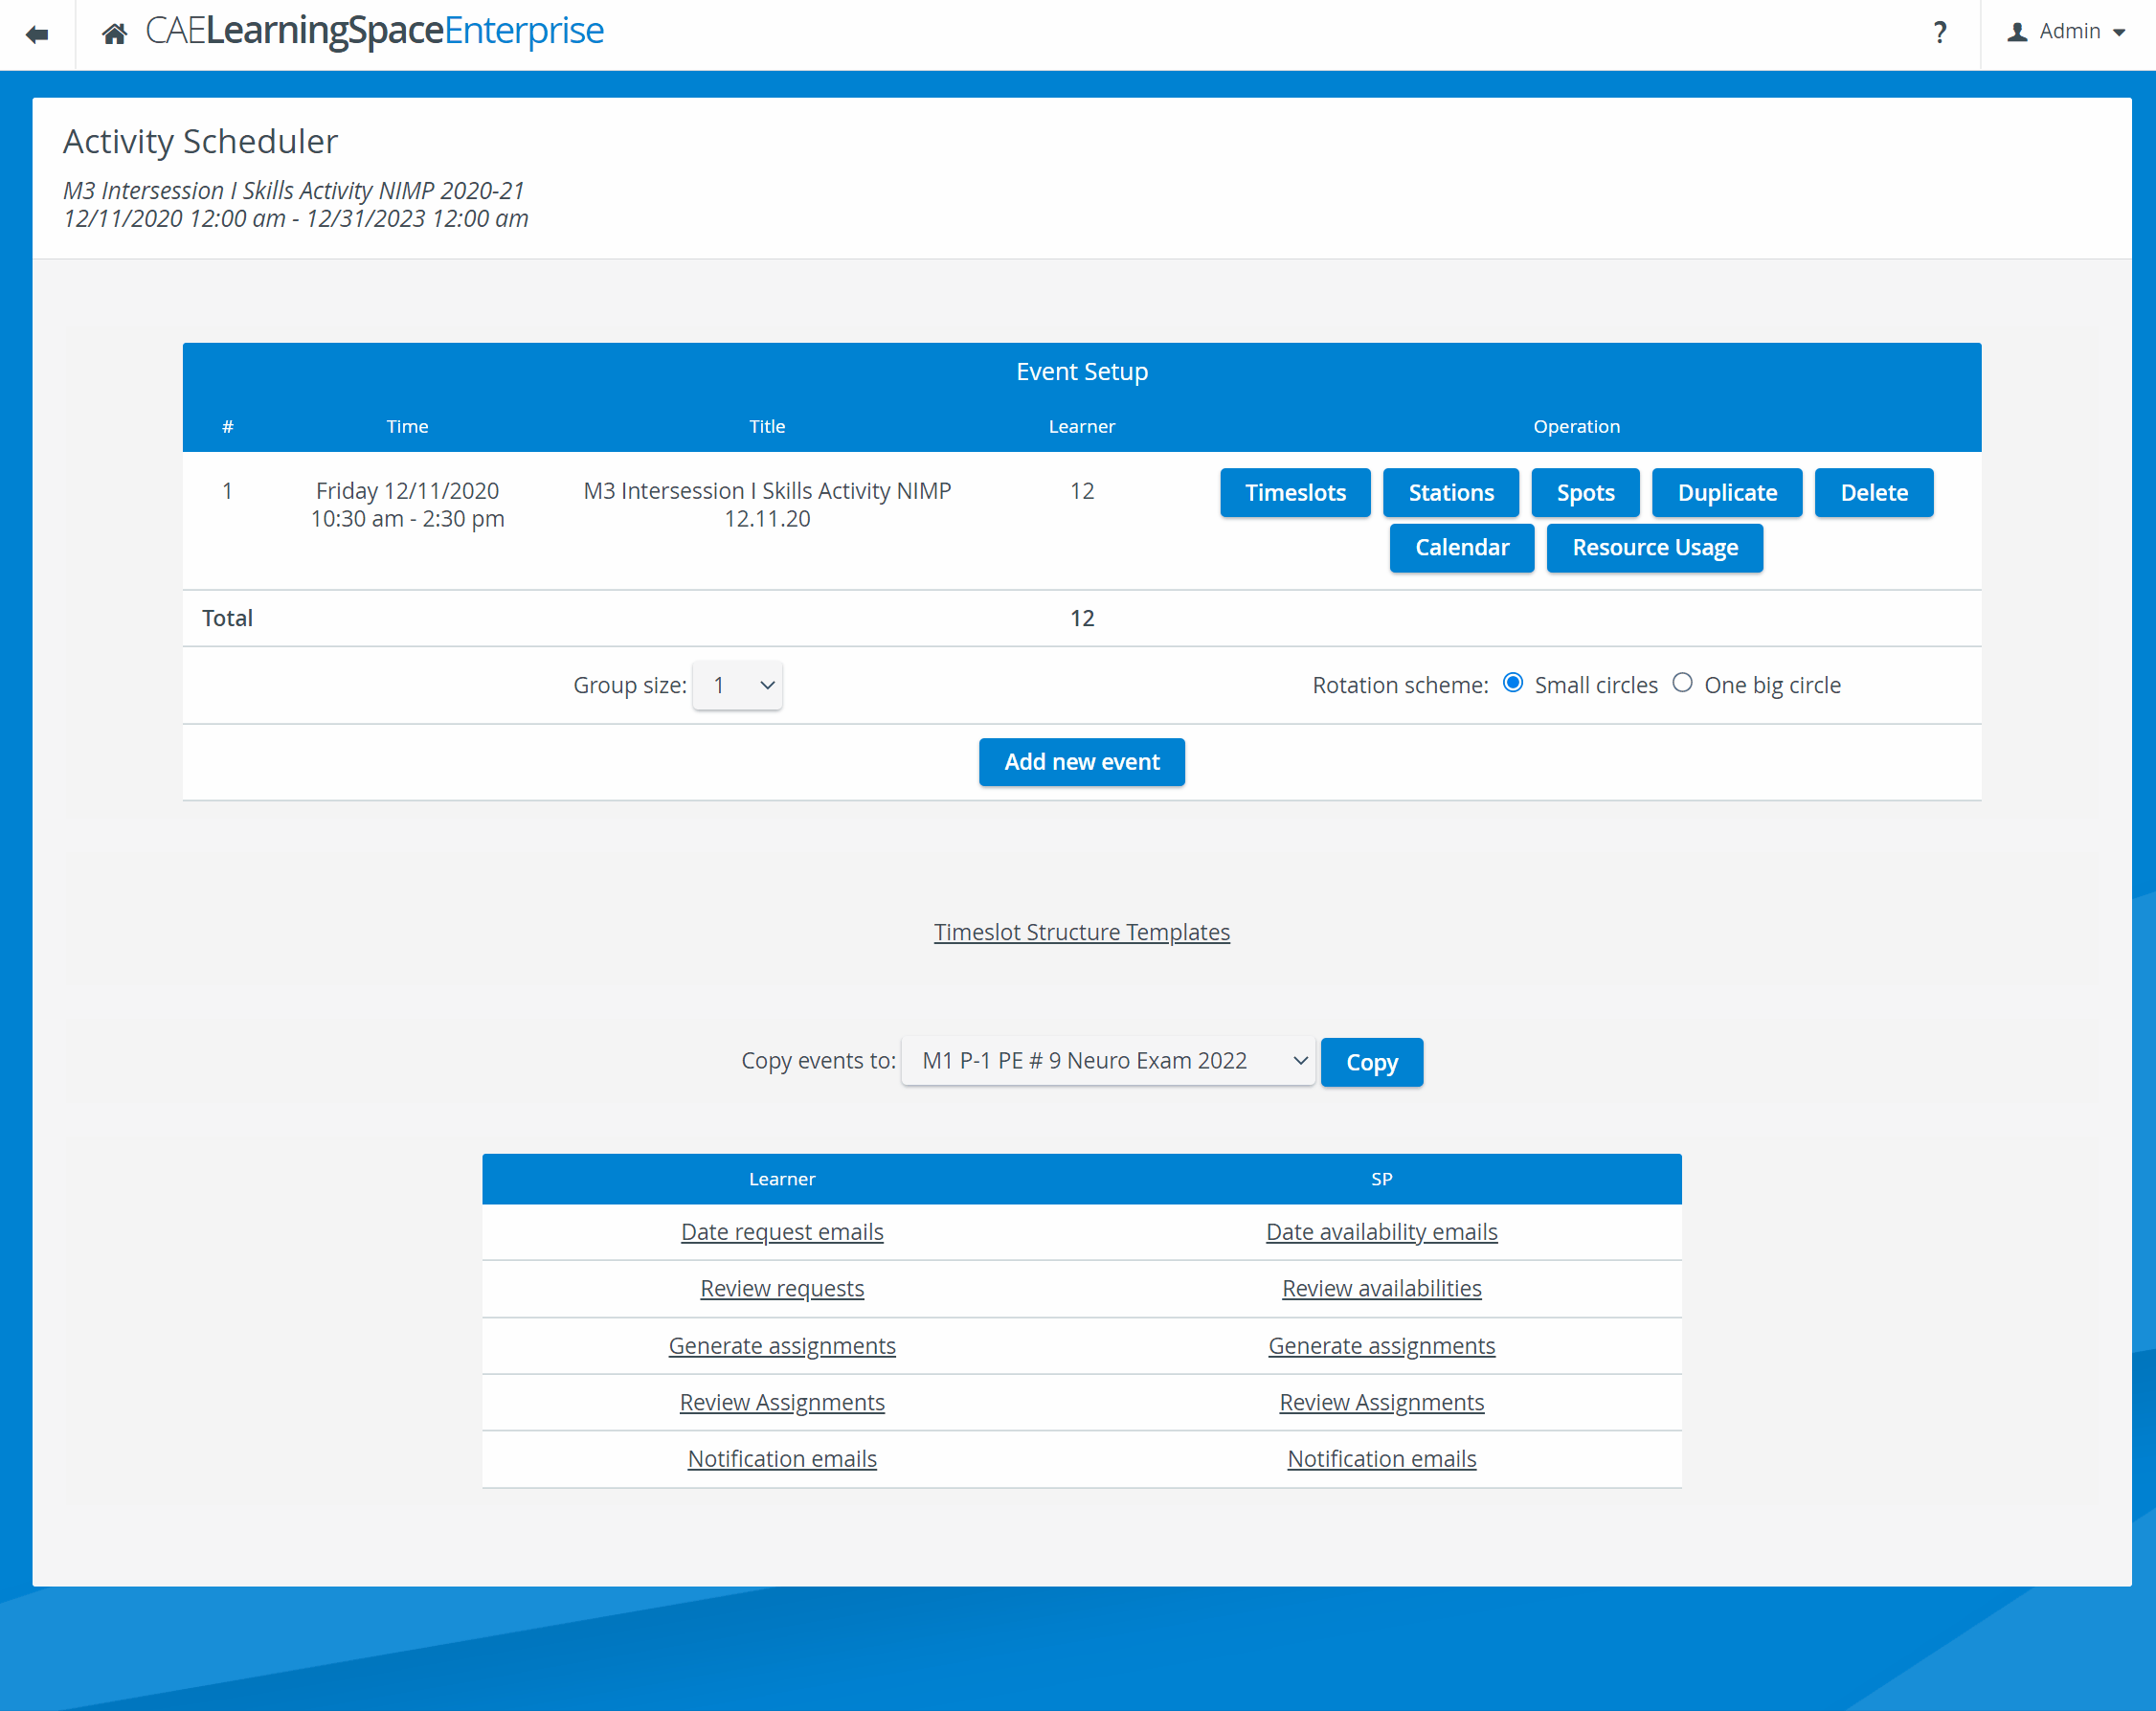
- On the Activity Scheduler page, select the Add new event button.
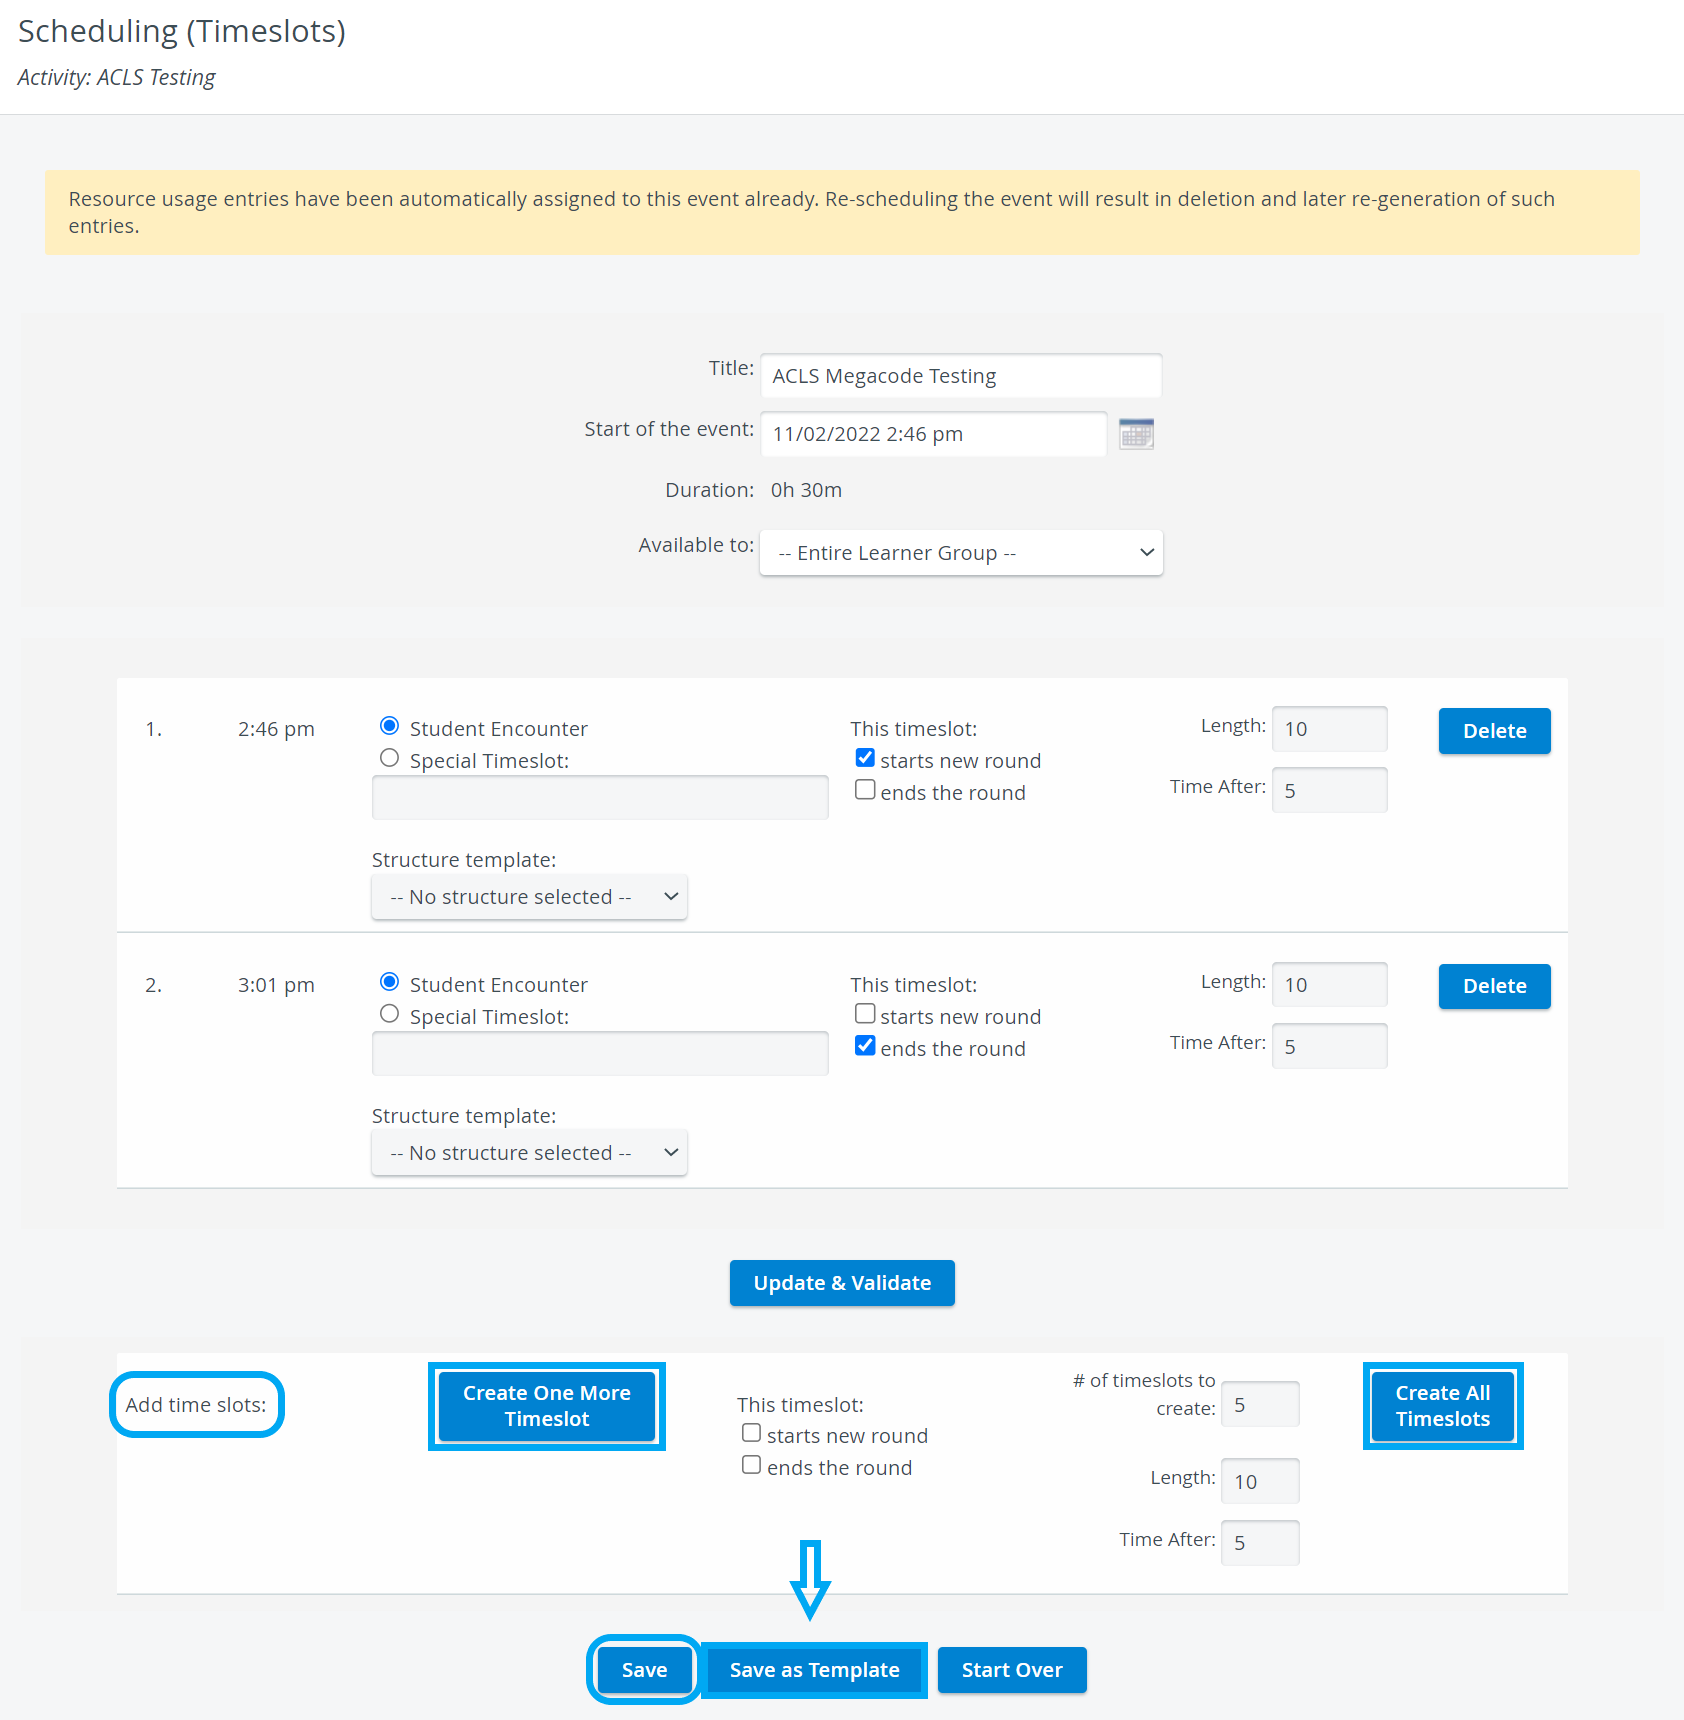
The Scheduling (Timeslots) page opens. - Name your new event in the Title field.
- Select the mini calendar icon
 of the Start of the event field to choose the start date of the event.
 - Click on a date in the calendar to select a day for the current month.
Adjust the hours and minutes with the horizontal sliders at the bottom.
Click Now to jump to the current time.Note title Important When setting the hour, watch out for the AM/PM periods. - When you are finished, click on Close.
The calendar pop-up closes and your new date setup is saved in the Start of the event field. - If needed, set the duration using the Duration slider.
After you have created every Timeslot of the event, the duration will be calculated automatically.
- Use the Available to drop-down menu to select a learner subgroup to which the event is available or leave it accessible for the Entire Learner Group.
- Choose a preset preset event templateor leave the default Custom template selection to set up a new event template.
| Note | ||
|---|---|---|
| ||
| If an event template is used, timeslots and rounds from the chosen template will be applied to the event. If the Template field is set to Custom, new timeslots and rounds must be set up manually. |
If you want to use an existing event template, select the preset template from the Template drop-down and click Save.
You will be redirected to the Activity Scheduler page.If you don't have an existing event template you would use, create a custom event template.
Click on the Create Timeslots button.
| Note | ||
|---|---|---|
| ||
|
The Add timeslots tab appears at the bottom while you remain on the Scheduling (Timeslots) page.
| Info |
|---|
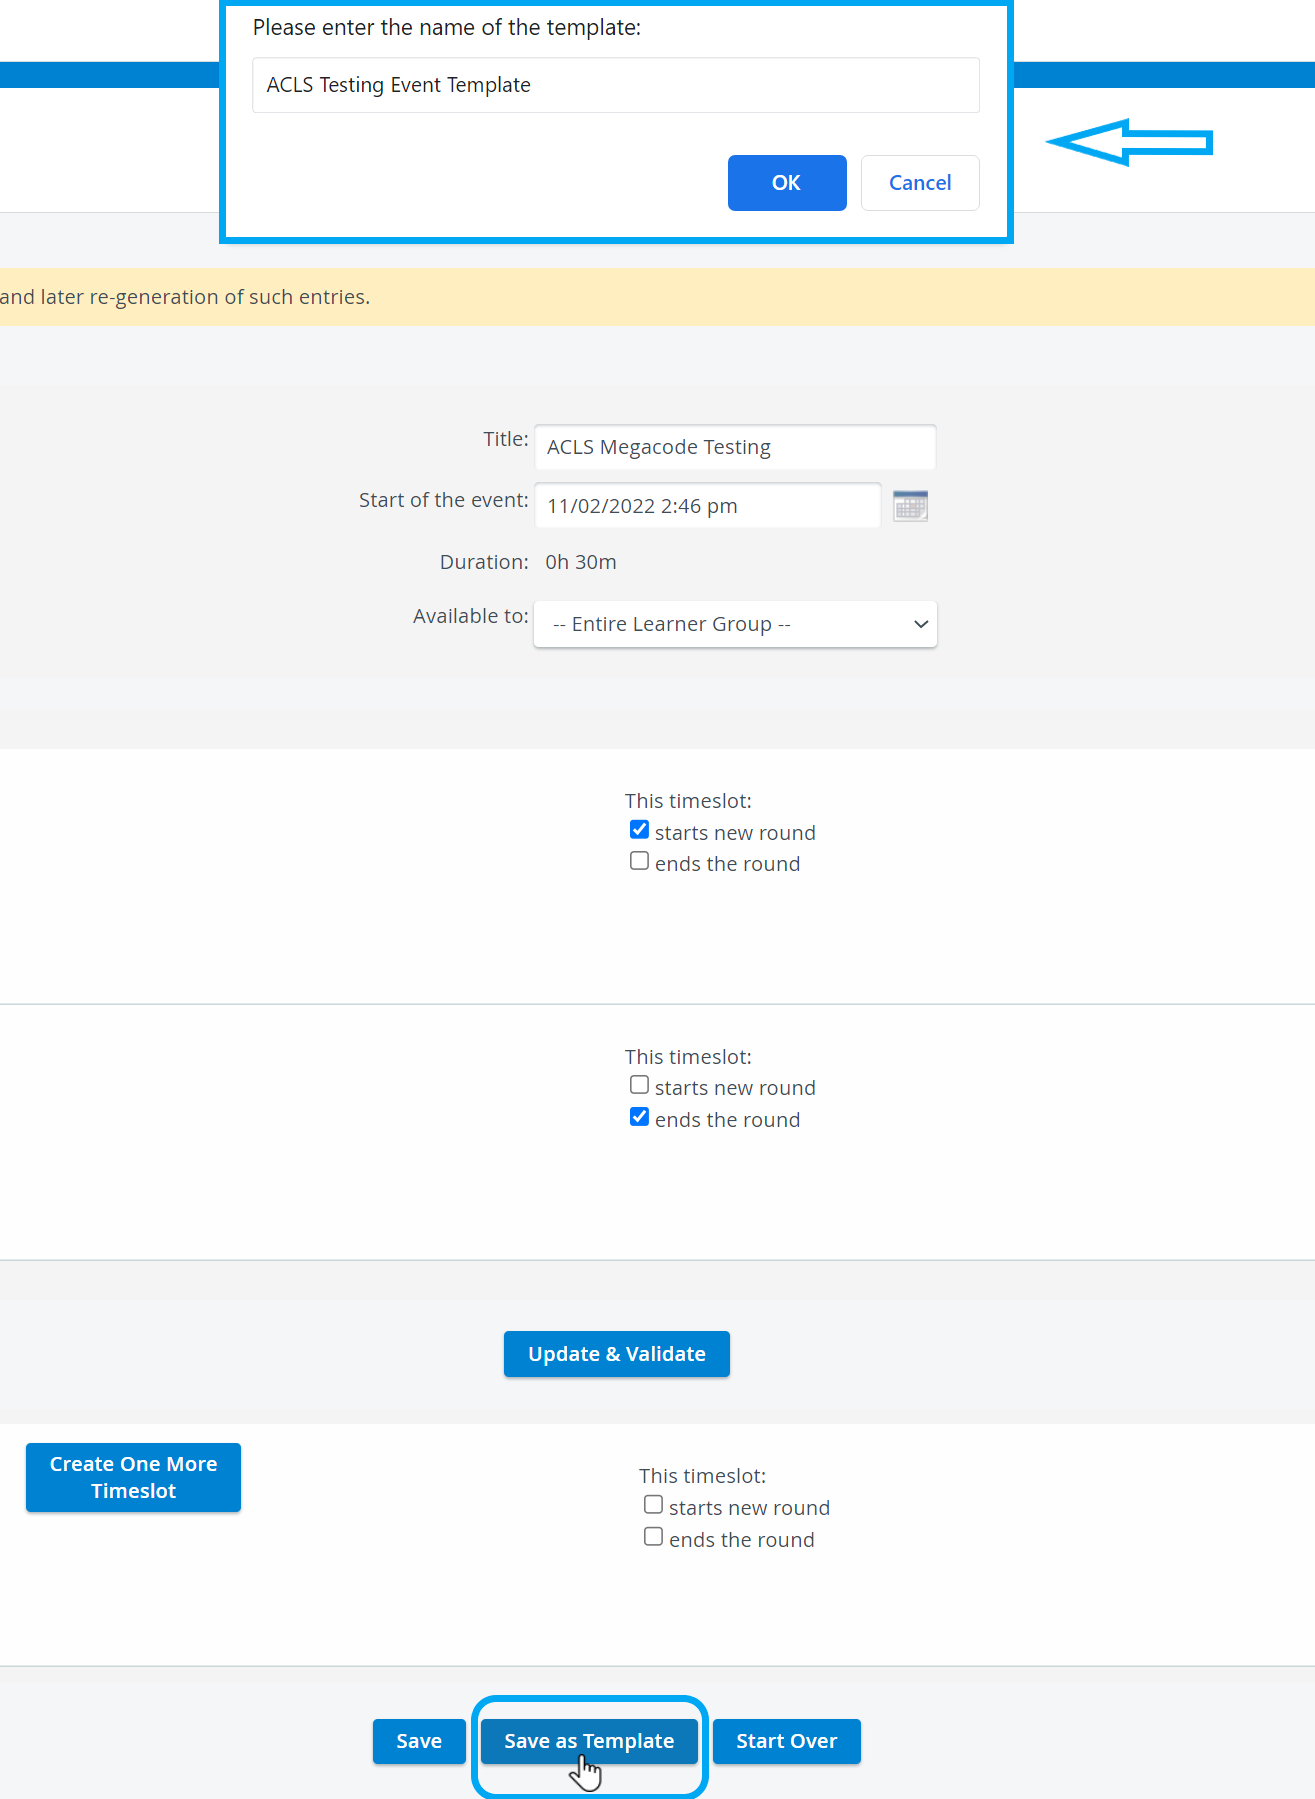
Event templates can be saved by using the Save as Template button, and entering a name for the template in the pop-up appearing at the top of the same page. |
| Note | ||
|---|---|---|
| ||
| Events can also be created via the Calendar module, but creating timeslots and assigning participants to the timeslots can only be completed via Advanced Scheduling. |
| Tip |
|---|
For further information, visit our Advanced Scheduling pages, and view our Activity Manager Training Videos. |
Overview
Content Tools