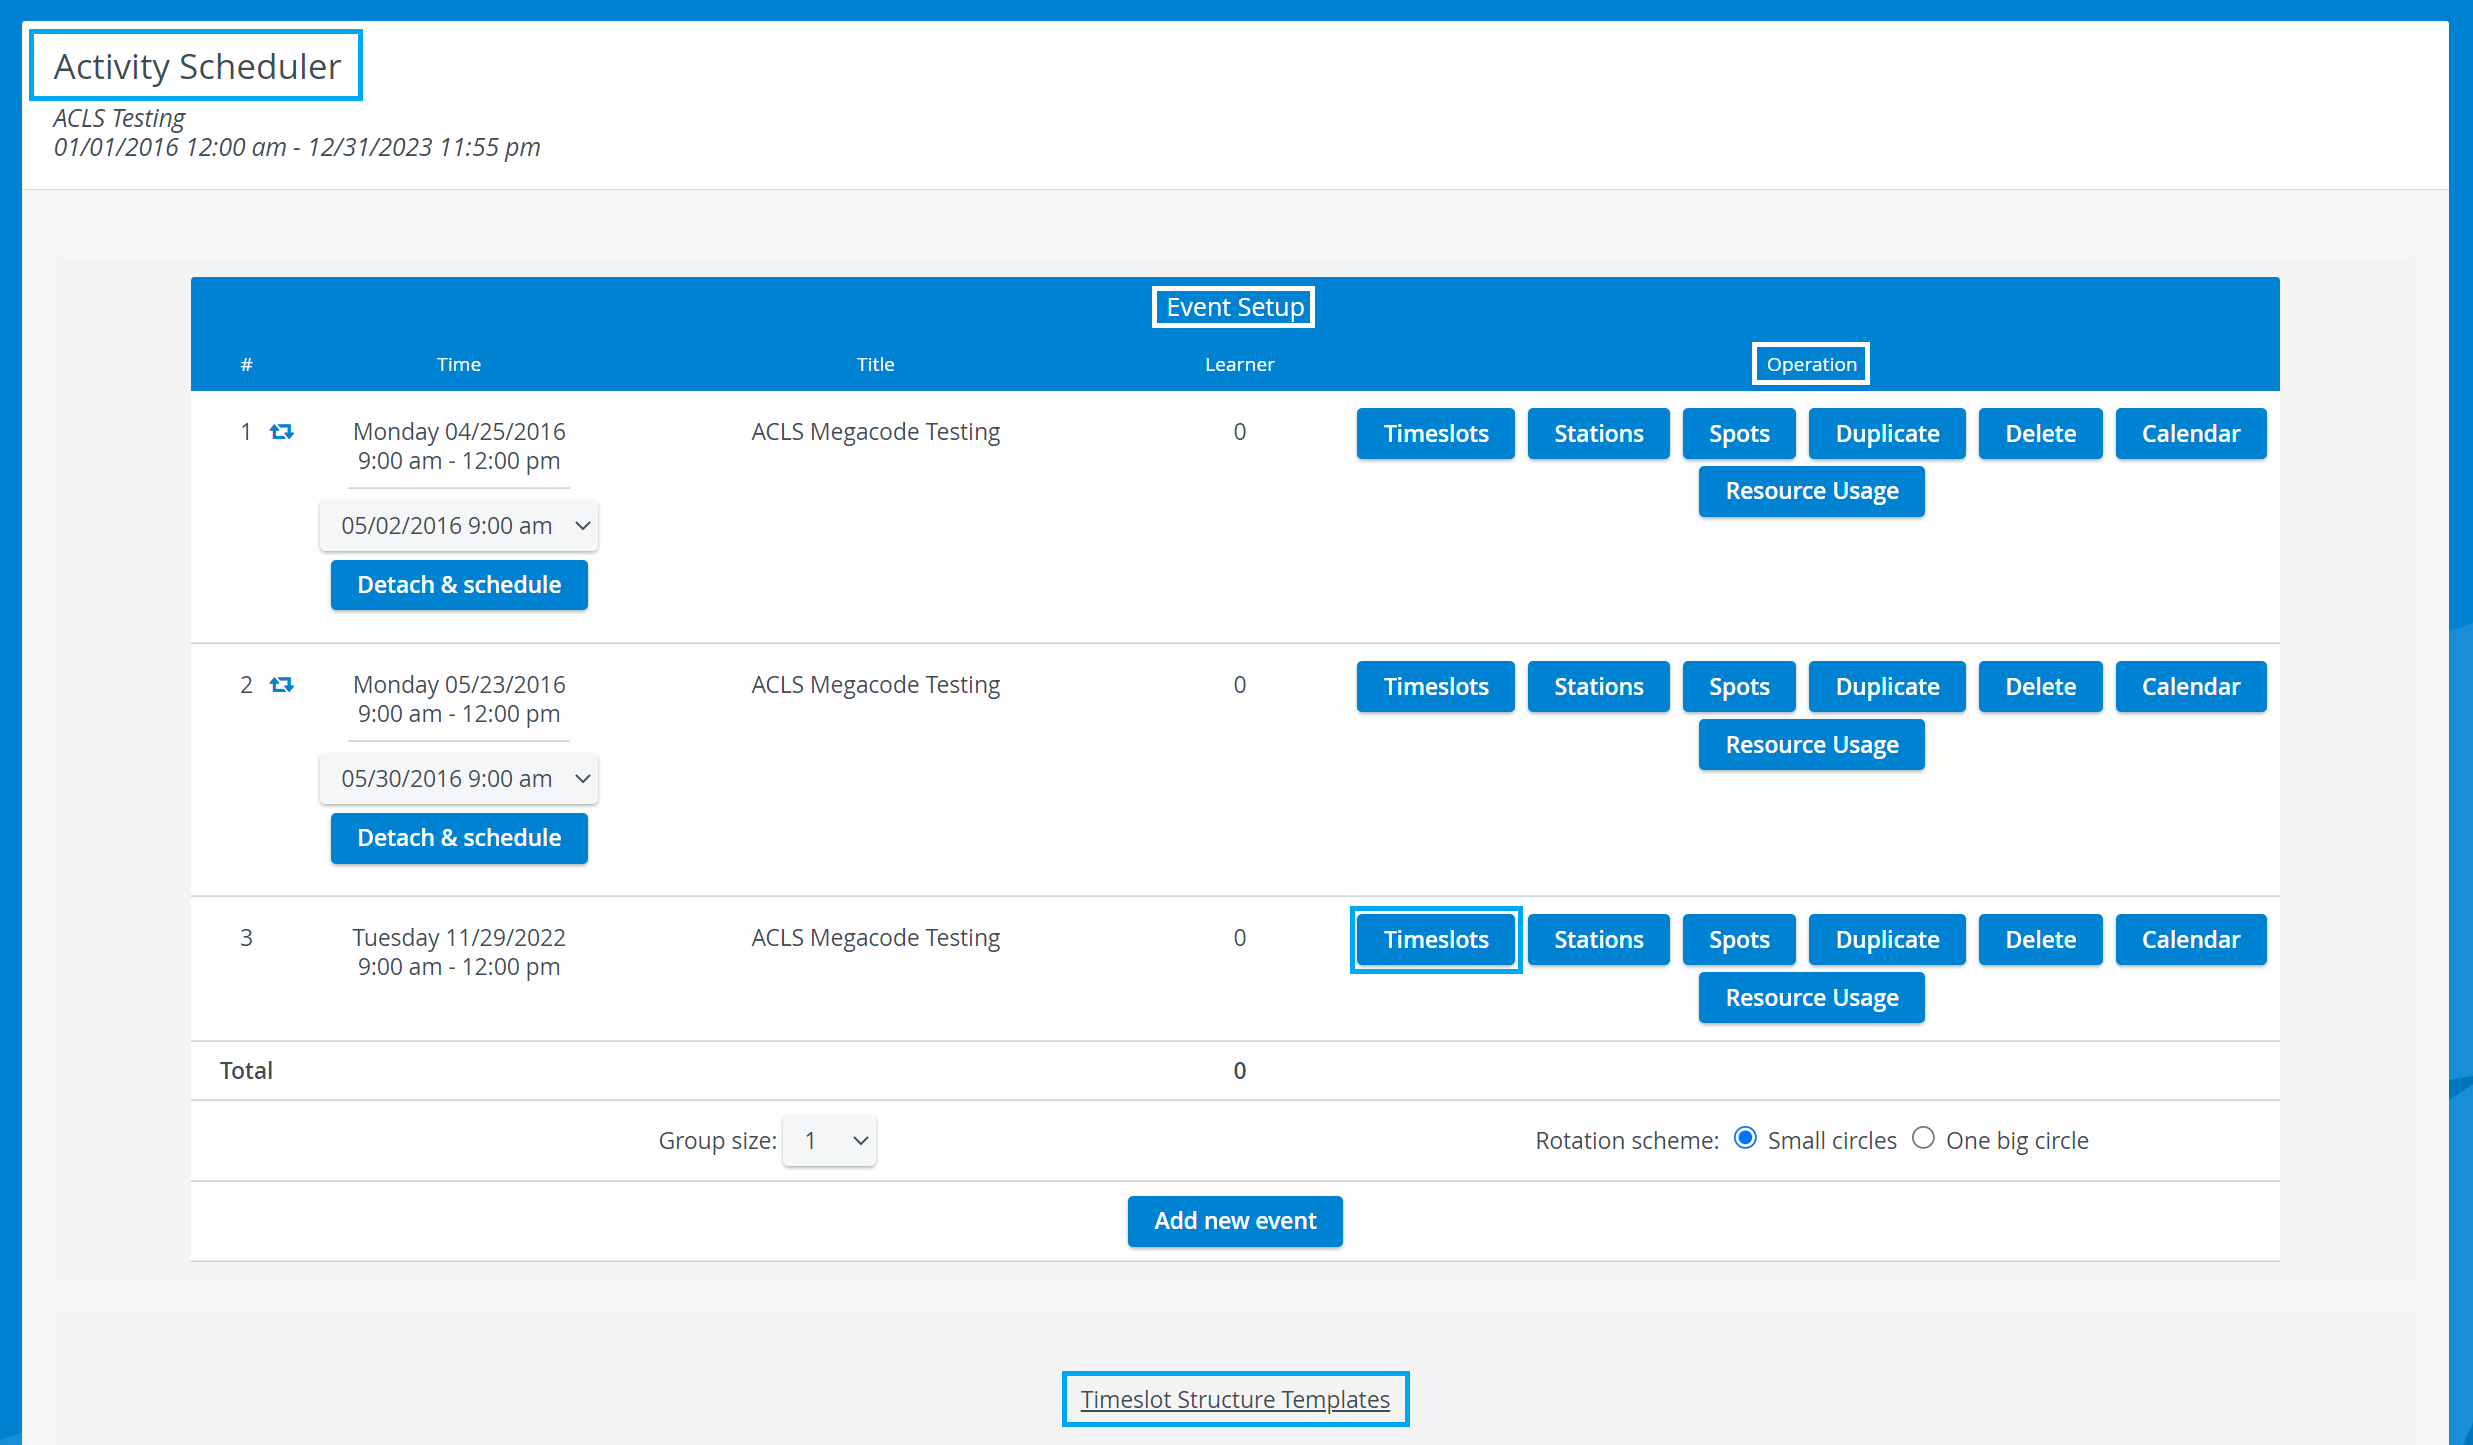
Create and manage the basic setting of a new event on the Activity Scheduler page within your selected Activity.
Modifying an Existing Event
The timeslots settings of an existing event can be accessed by clicking the Timeslots button. See Timeslot Creation.
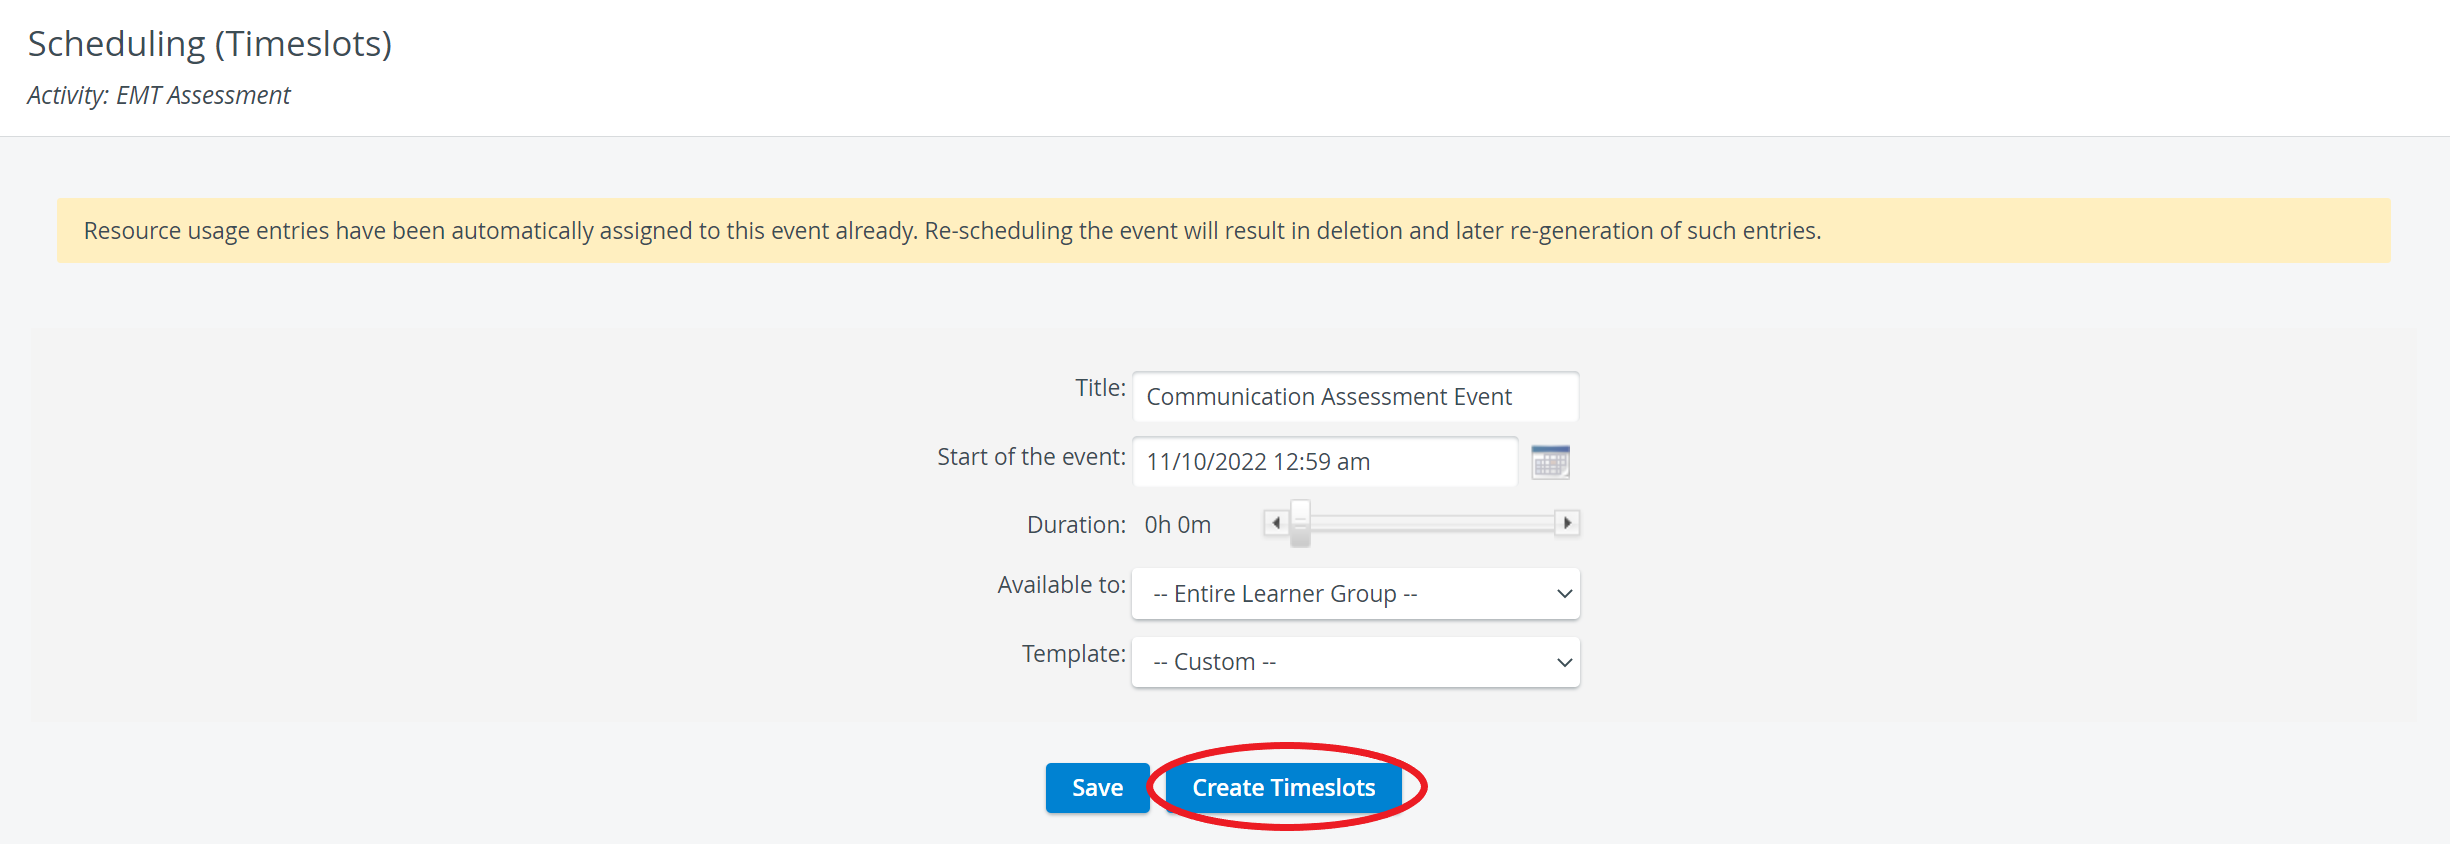
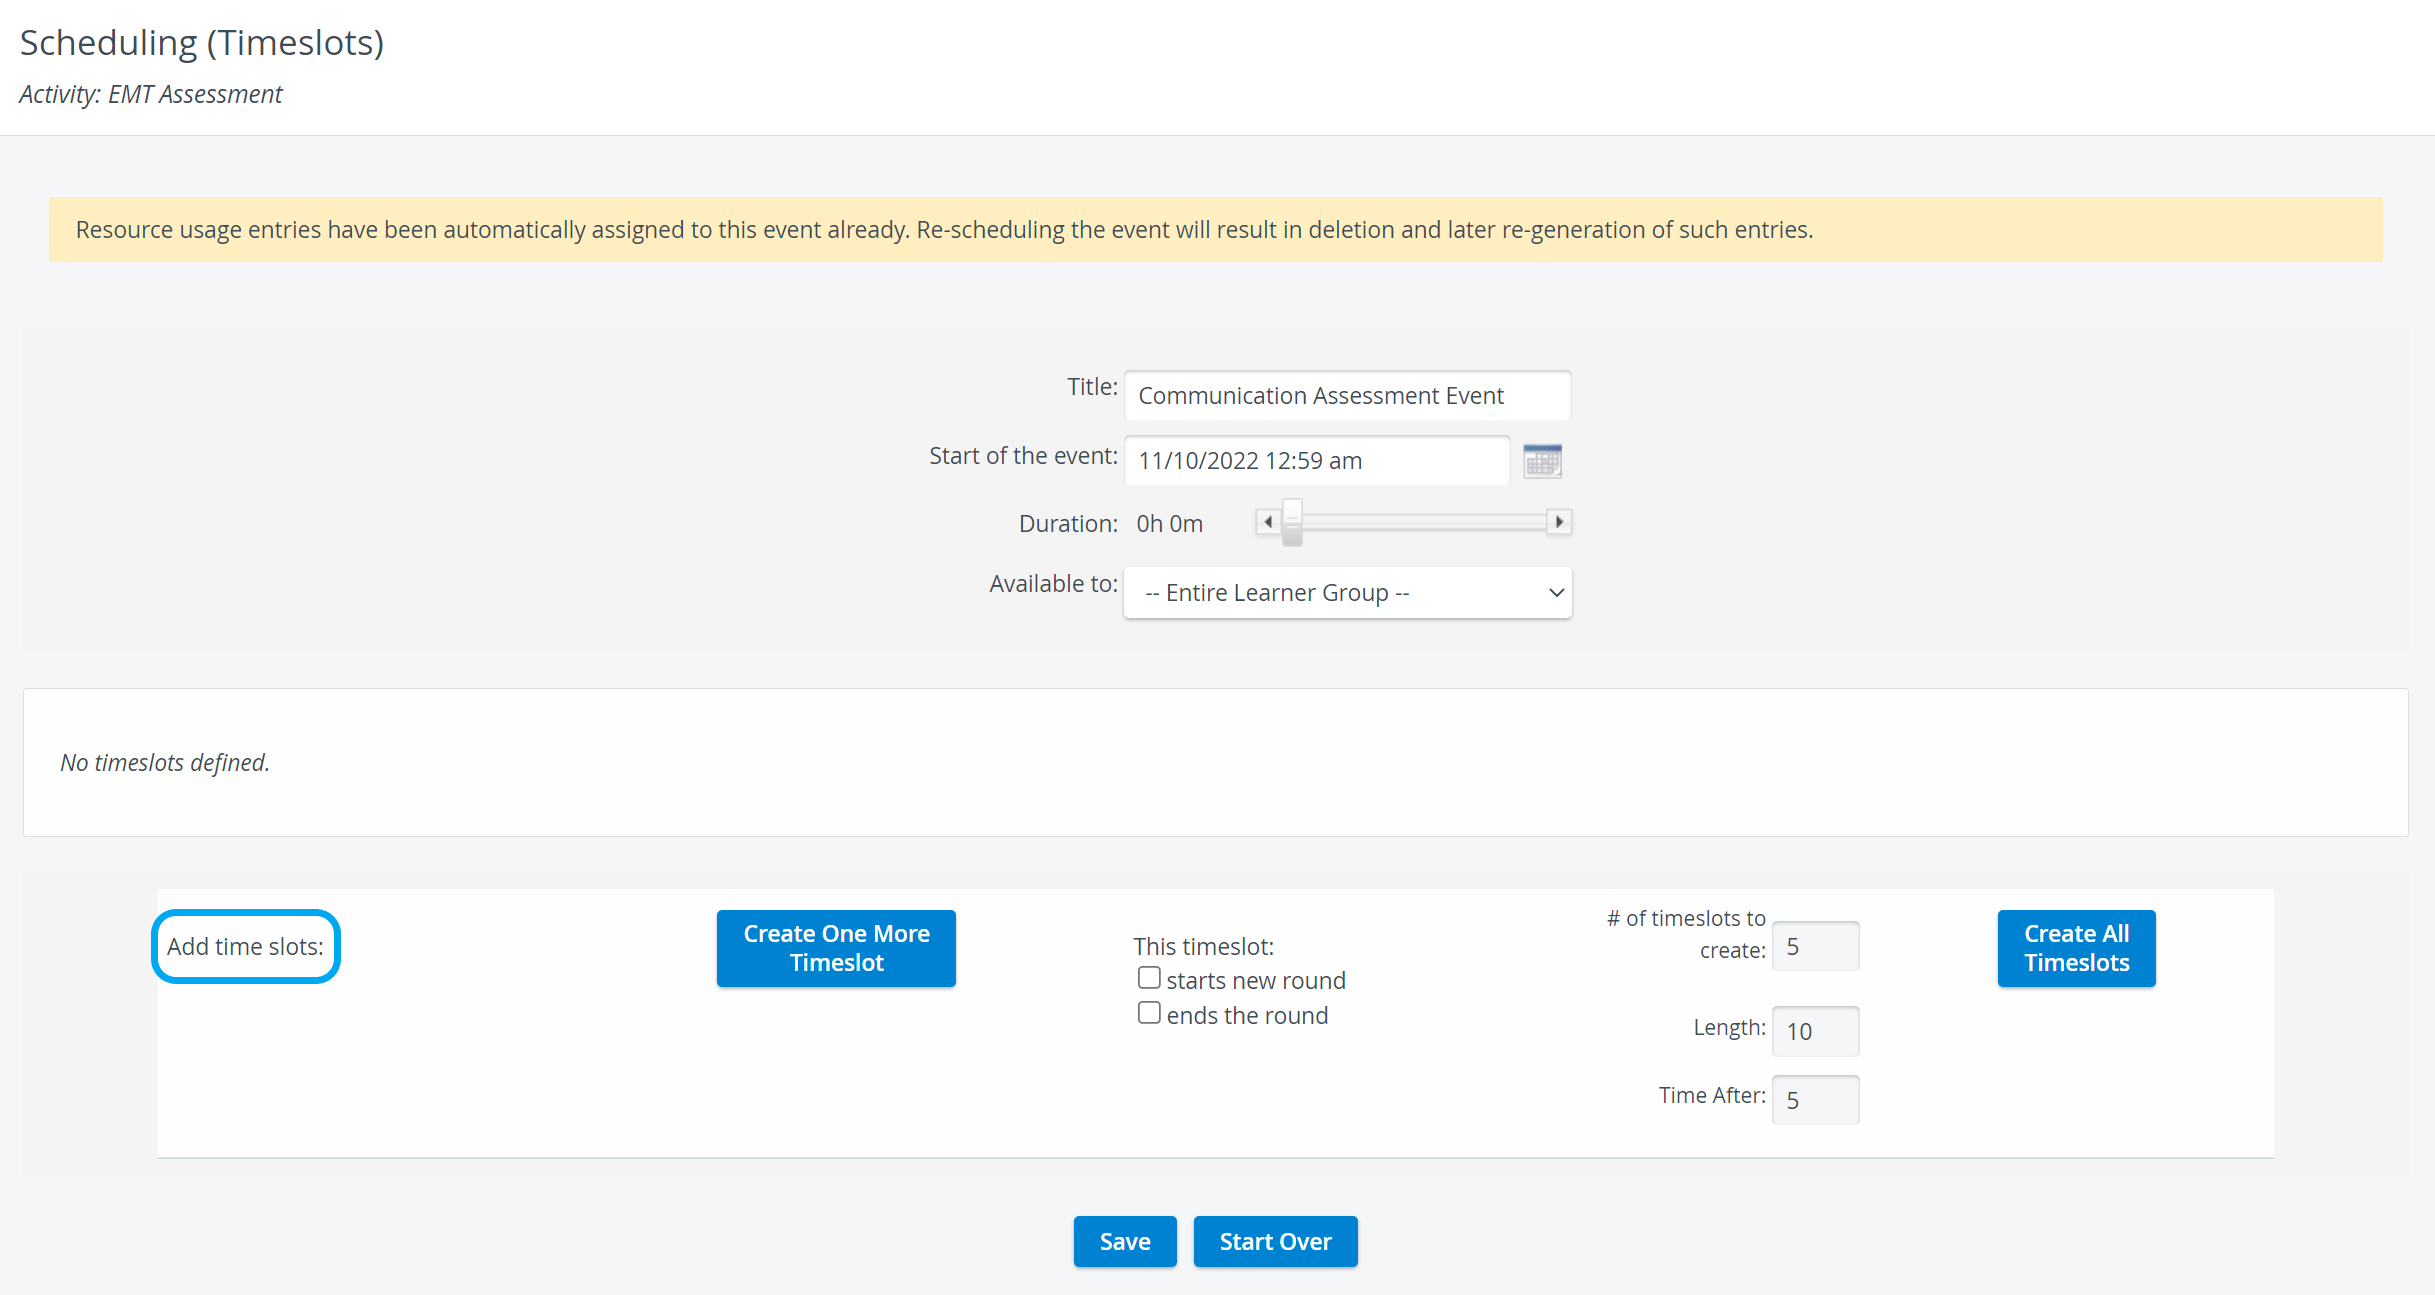
On the Scheduling (Timeslots) page, hit Create Timeslots. On the next page, the Add time slots tab will be displayed, if you are creating a scheduled event for the first time.
Date, starting time and duration of the event can also be adjusted in the respective fields, on the Scheduling (Timeslots) page.
Creating One Timeslot
- In the Length field, determine the lenght of the timeslot in minutes.
In the Time after field, you can define in minutes a brief transitional period after the timeslot. - Click the Create One More Timeslot button. → A new timeslot is created.
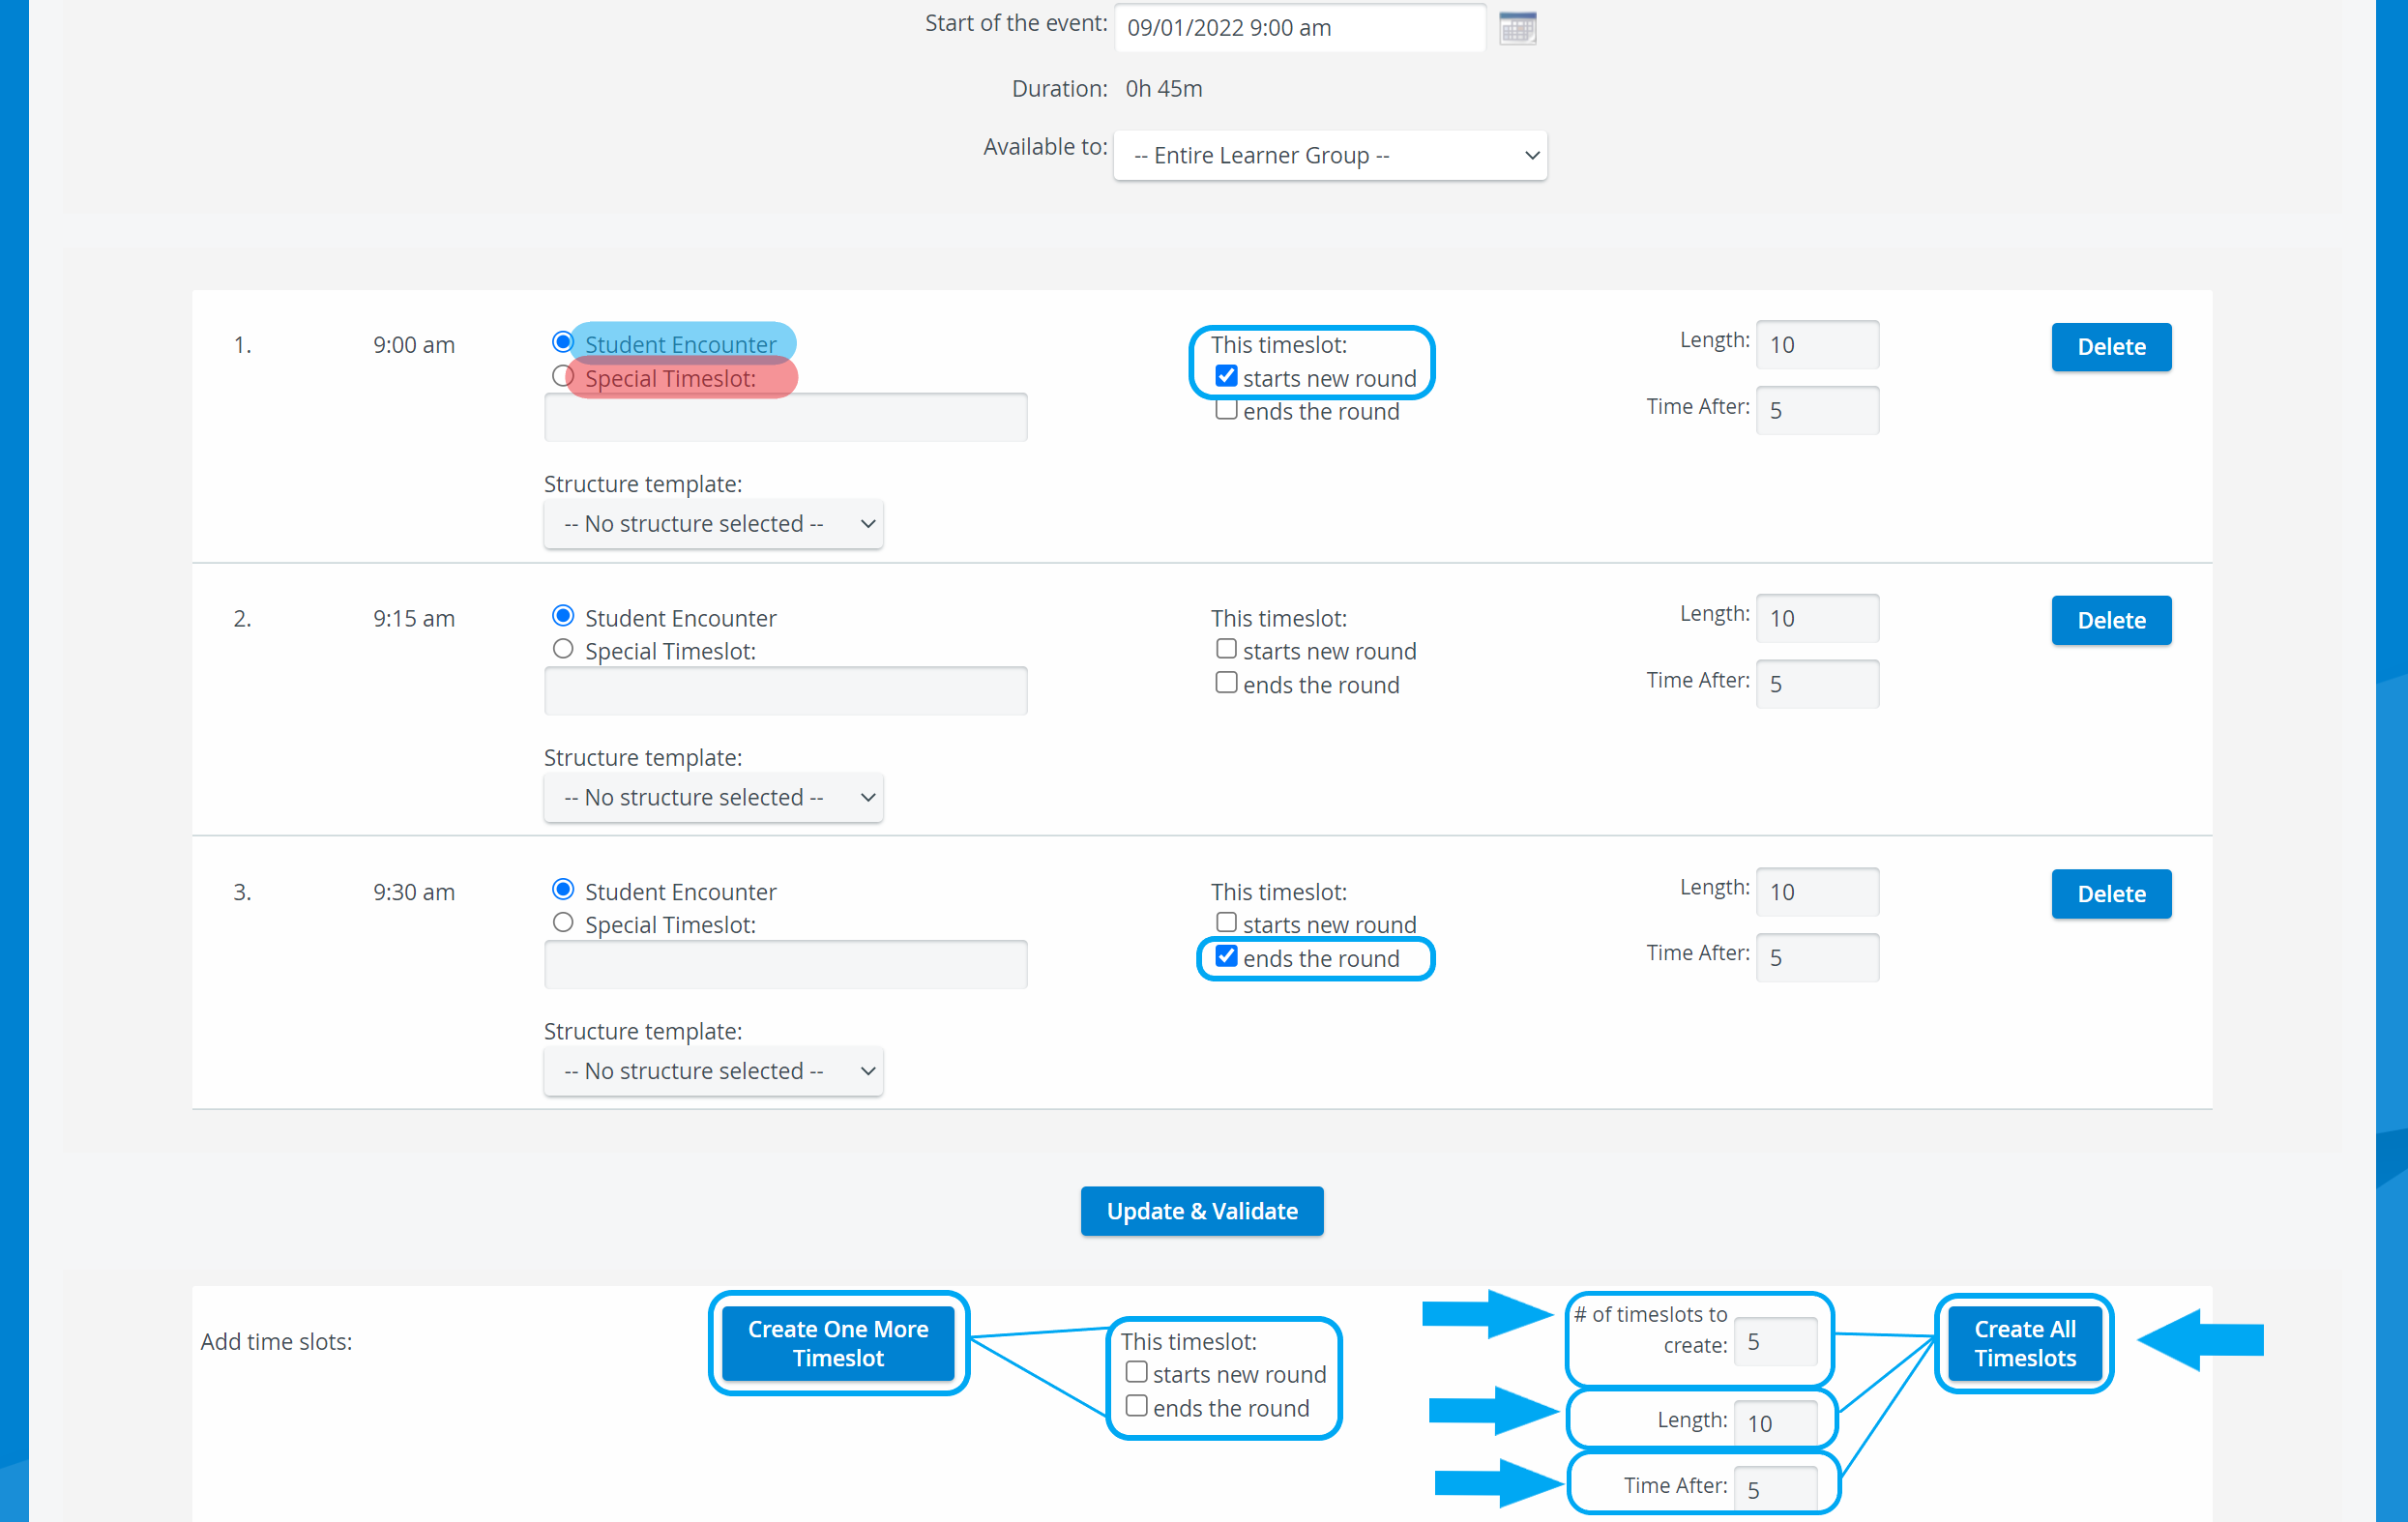
Determine if the timeslot is a Student Encounter or a Special Timeslot.
A Special Timeslot can be used for debriefing or taking breaks; enter a descriptive title for it.Use the checkboxes under "This timeslot:" to determine whether the timeslot starts or ends a round.
 Define round-starting and ending timeslots after all timeslots are created.
Important
When you want your round to consist of only one timeslot, the timeslot must be set up as the starting and ending round.
A special timeslot can not/does not need to be set as one separate round.
- To re-use preset timeslot structures and make scheduling more simple, select a Structure Template from the respective drop-down menu.
 A timeslot structure template is a template that can be set up to control recording and/or preset intercom announcements automatically within a timeslot.
 - To verify your timeslot settings, click Update & Validate before you save your setting.
The system will notify you if there are any invalid settings.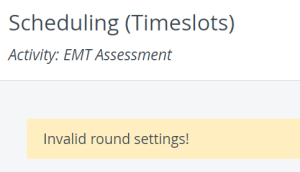
Once you are finished, click on Save.
Click the Save as Template button to save the timeslot setup for later.
You will be redirected to the Activity Scheduler page.
Adding Multiple Timeslots
By applying the Create All Timeslots option, you are essentially creating a round:
- Define the number of timeslots in the # of timeslots to create field.
- In the Length field, determine the lenght of each timeslot in minutes.
- In the Time after field, you can define in minutes a brief transitional period after each timeslot.
Click the Create All Timeslots button.
Your new round will be created with the starting and ending timeslot marked.Tip - Time Allocated to Timeslots
You can change the Length and Time after values of each timeslot at any time. Save your new settings with the Update & Validate to stay on the page, or click Save to be redirected to the Activity Scheduler page.
Determine whether timeslots are used for Student Encounter or are Special Timeslots.
 A Special Timeslot can be used for debriefing or taking breaks; enter a descriptive title for it.
In order to have valid round settings, Special Timeslots need to be inside a round too, no matter they are used for purposes other than encounters.
However, a special timeslot can not/does not need to be set as one separate round.Use the checkboxes under "This timeslot:" to determine which timeslot starts and which timeslot ends a round.
Select the starts new round checkbox to set up a timeslot as a starting timeslot.
Select the ends the round checkbox to set up a timeslot as an ending timeslot.
By specifying new starting and ending timeslots, you define new rounds.Define round-starting and -ending timeslots after all timeslots are created.
Important
Starting and ending timeslots are needed for valid round setup; if either of them is missing, the round setting will be invalid.
 A Student Encounter timeslot cannot be left out of a round, but Special timeslots can stand on their own.
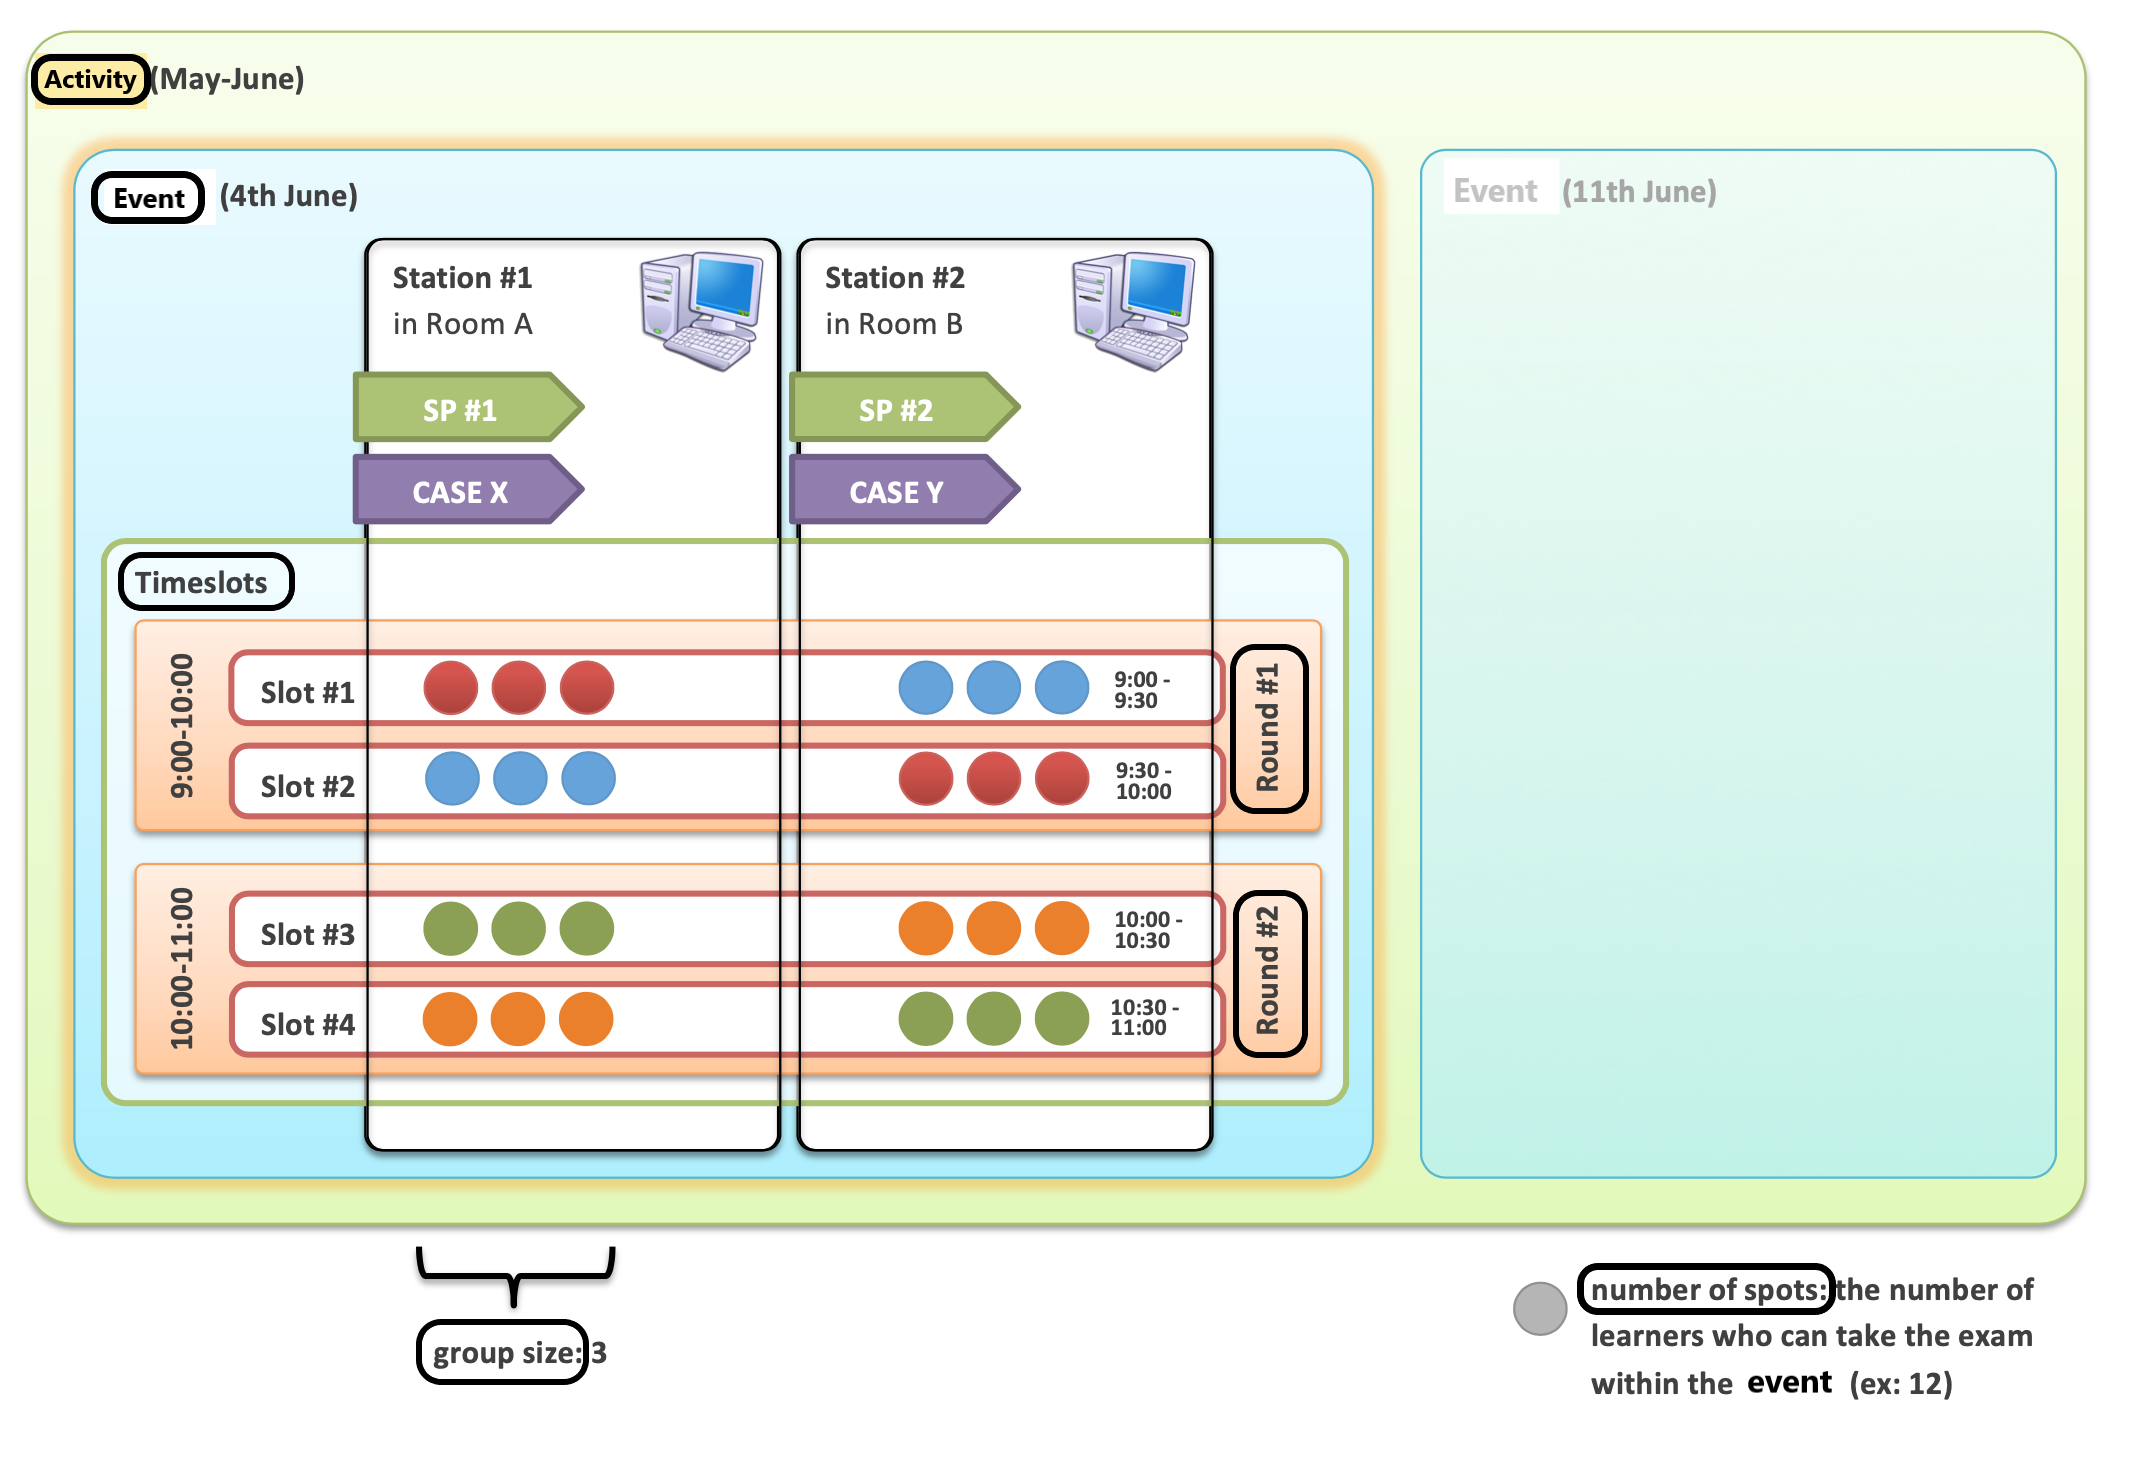
- To verify your timeslot settings, click Update & Validate before you save your setting.
The system will notify you in case of any invalid settings. - Once you are finished, click on Save.
Click the Save as Template button to save the timeslot setup for later.
You will be redirected to the Activity Scheduler page.
For further information, visit our Advanced Scheduling pages, and view our Activity Manager Training Videos.
Overview
Content Tools