Available to User Managers or Admins
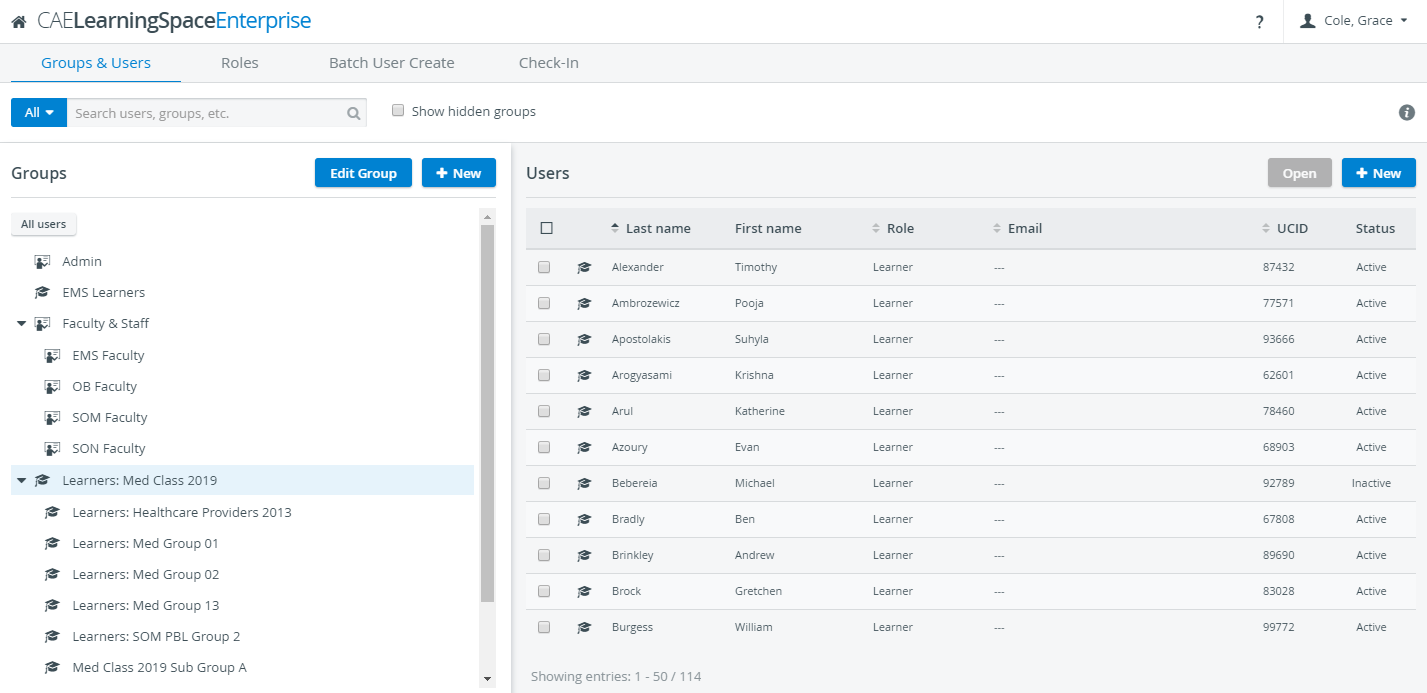
Entering Users, the Groups & Users tab opens first.
Groups and users are listed on the left and right side of the page respectively.
This section explains:
- How to create new groups and users
- Pictograms
- Search options in User Manager
Creating a new group
At Groups on the left click + New to create a new group.
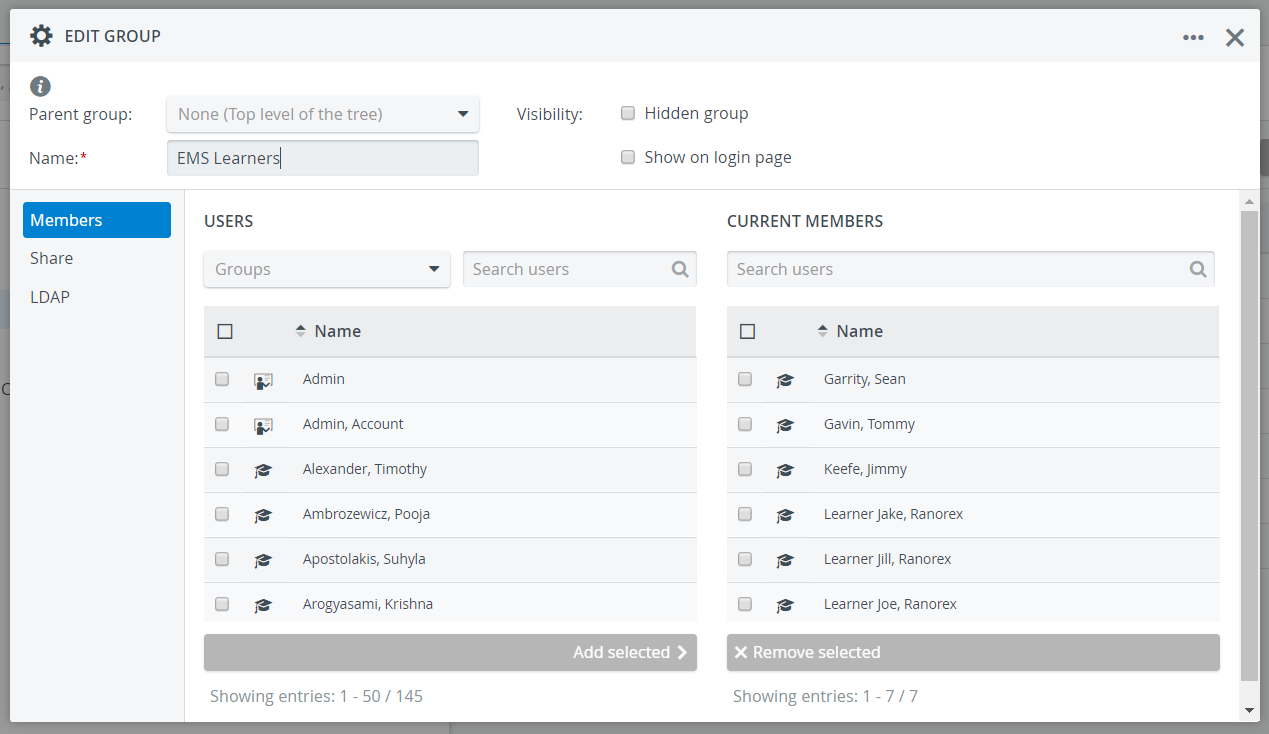
Naming the group is mandatory. Also, to save your new group, and have it appear on the left you have to add at least one user:
- On the Members tab, select the users (under Users) you would like to include in your new group
![]() You can filter by groups with the drop-down menu or search users in the mini searchbar.
You can filter by groups with the drop-down menu or search users in the mini searchbar.
- The Add selected button at the bottom becomes active
- Click Add selected and the selected users will appear under Current Memebers.
You can remove users from a group any time with selecting them and clicking Remove selected.
You can select a parent group from the drop-down menu in the header. Each group can be nested into any other group, there are no restrictions.
On the Groups tab, the drop-down arrow in front of a group's name means it's a parent group that includes subgroups.
Sharing
Each group's visibility can be modified at Share.

![]() Steps for editing an existing group are the same. To open a group for editing, highlight one and click Edit group.
Steps for editing an existing group are the same. To open a group for editing, highlight one and click Edit group.

Creating a new user
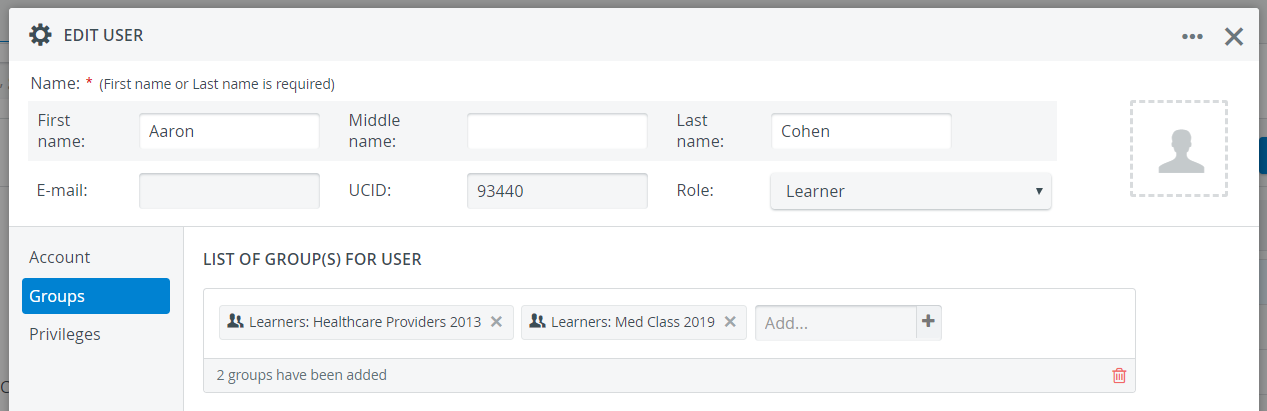
At Users on the right, click + New to create a new user account.
First or last name, email and password is mandatory. Once all these details are filled, the faded areas of the window become editable.
Tip
It is recommended to assign users with UCID for easy identification, but not required.
Roles can be also assigned later on: see more about role assignment here.
The 'All users' button located on top of groups can list every user on the right, even those who are not added to any group yet.
TIP: The system helps distinguish between different kinds of users and groups with pictograms.
Hover over the information tooltip on the right of the screen and see what each pictogram means.


Smart Search Bar
A smart search bar at the top left corner ensures quick access on the basis of specific users, groups or any further data that is available in the database.
Clicking the All button prompts a drop-down menu, where further search conditions can be added. You can filter which type of users you want to search.
There are additional search setting for SPs: you can select the SP's details, medical history, activity or the custom fields (if these are filled for the SP.)

Hidden Groups
By ticking the 'Show hidden groups' checkbox, the hidden groups will appear in the groups' list.
The visibility of a group can be set in the Edit Group pop-up window, in the header.

Group Membership
Users can be added to one or even more groups and be removed from groups as well.
Group membership can be determined in two ways:
- Create/ Edit Group pop-up - adding members to a newly or previously created group
- Create/ Edit User pop-up - adding previously created group(s) on the Groups tab
Overview
Content Tools