You can manage details for each user in the New/Edit User window.
Name, email address, university ID, role assignment and user photo are located in the header, while further settings can be edited in the following tabs:
- Account: personal data, including the status (Inactive) settings.
- Groups: manage the group membership of the user.
Privileges: here you can check which privileges your user holds according to its role.
- E-portfolio: here you can create printable reports of individual learners.
- Inventory: the Transaction assignee option can be enabled for the user on this tab. It is enabled by default for all newly created Learners.
This section explains
Creating a new user
At Users on the right, click + New to create a new user account. 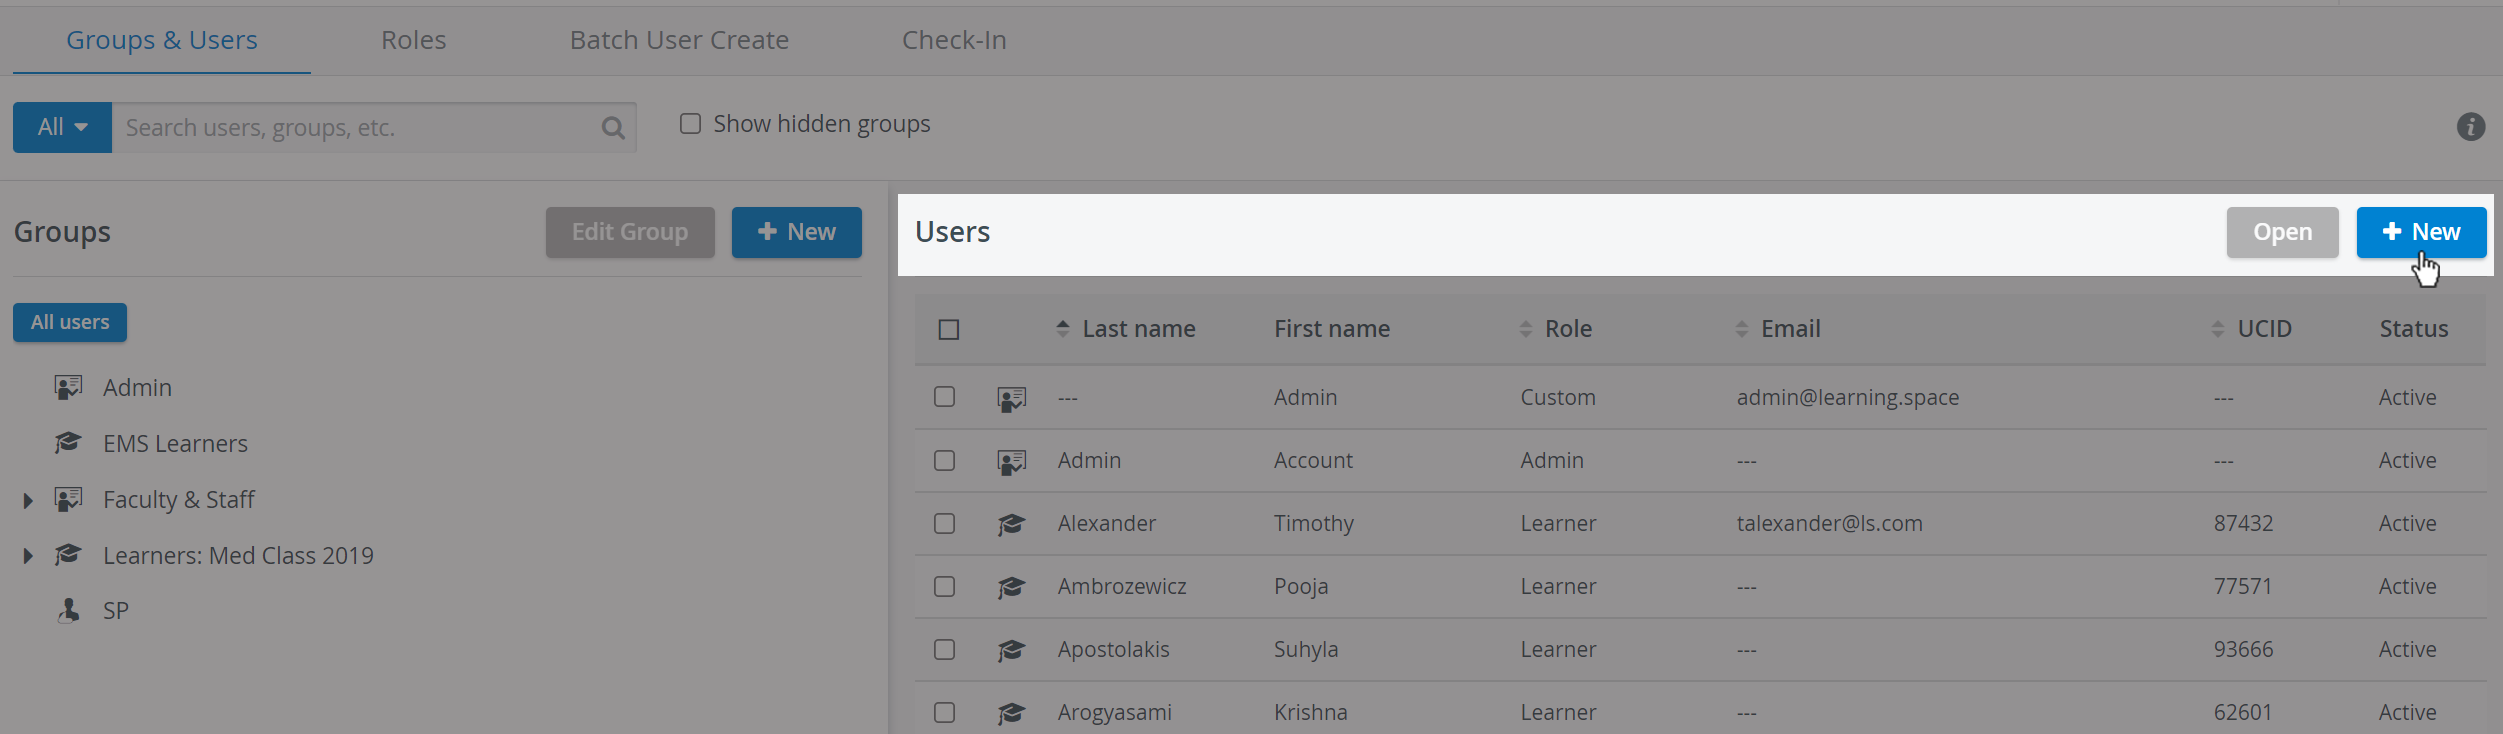
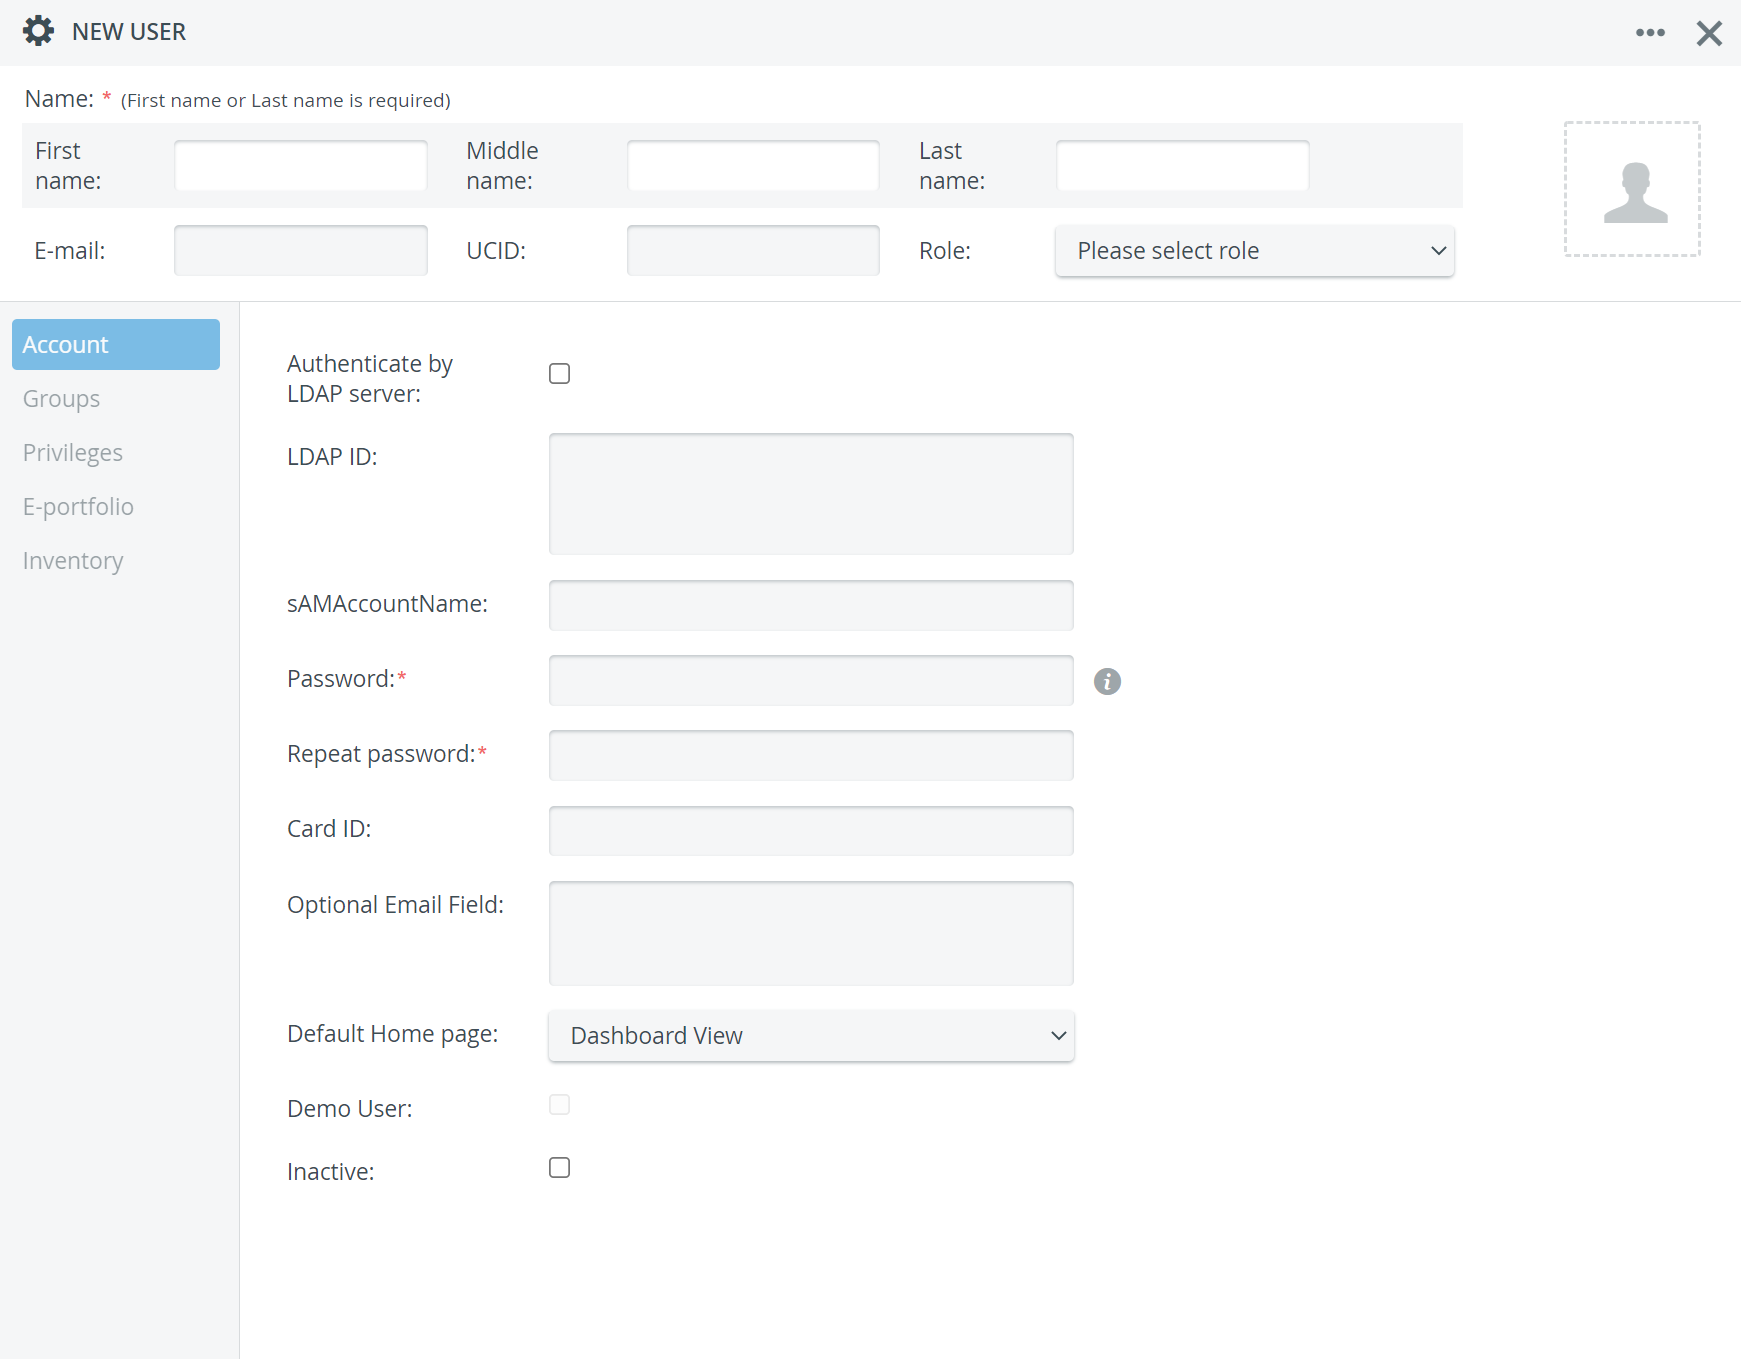
First or last name, email, and password are mandatory. Once all these details are filled, the faded areas of the window become editable.
Tip
It is recommended to assign users with a UCID for easy identification, but not required.
- Roles can also be assigned later on: see more about role assignment here.
- User profile pictures can be uploaded in the header of the Edit User pop-up. (See also how to upload multiple photoes with the help of the BUC feature here).
- Group membership of the user can be managed in Groups; find more information here.
- You can check a user's privileges or modify them in Privileges. Check how to manage privileges here.
Only users with Learner privilege have the E-portfolio tab.
User Managers cannot create Admin, System Manager, Room Manager and Learner History/SP Activity privilege users.
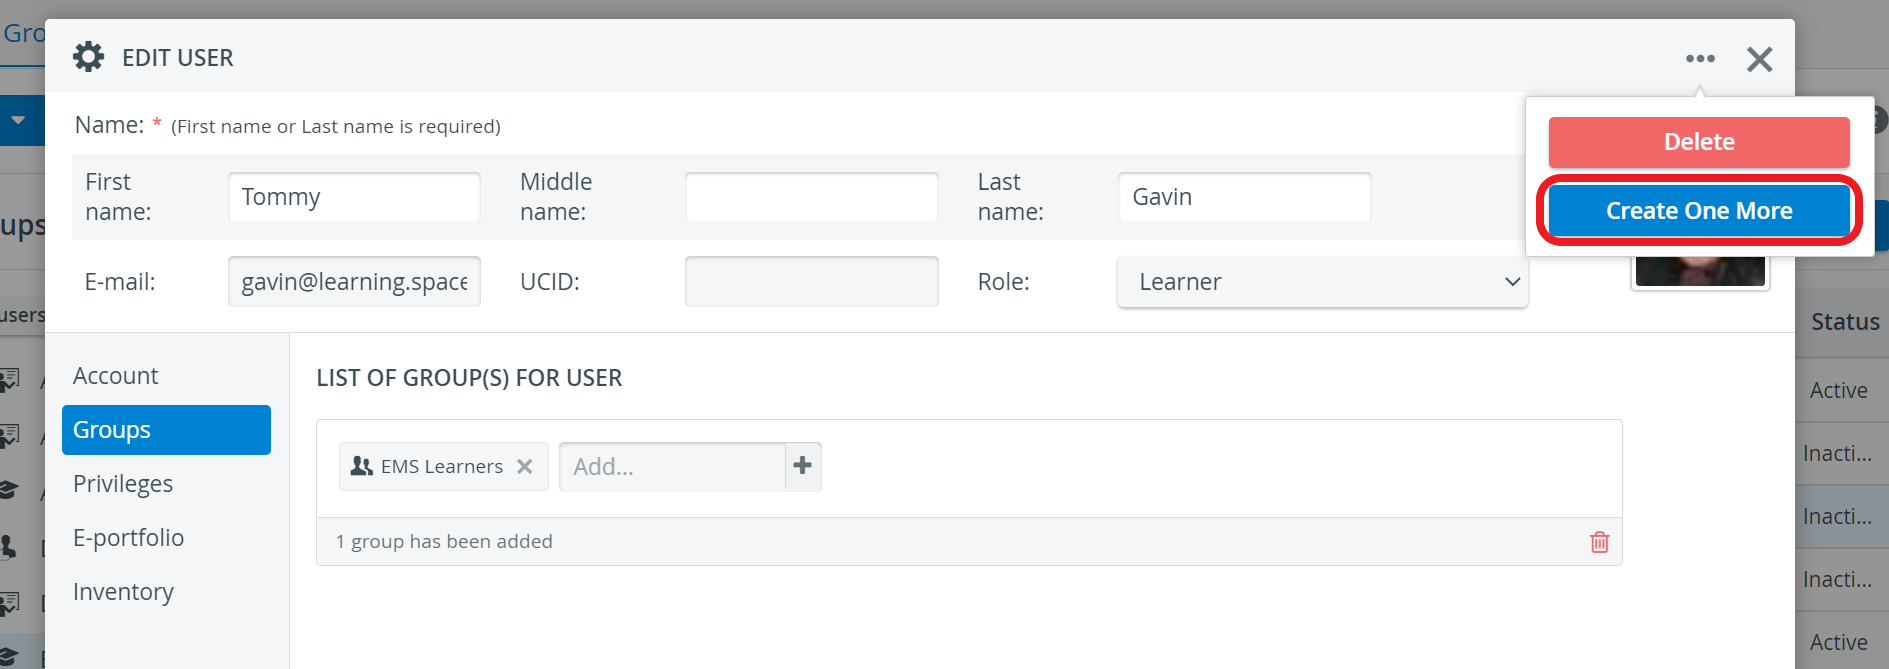
To create additional users, use the Create One More option available in the upper right corner of the pop-up.
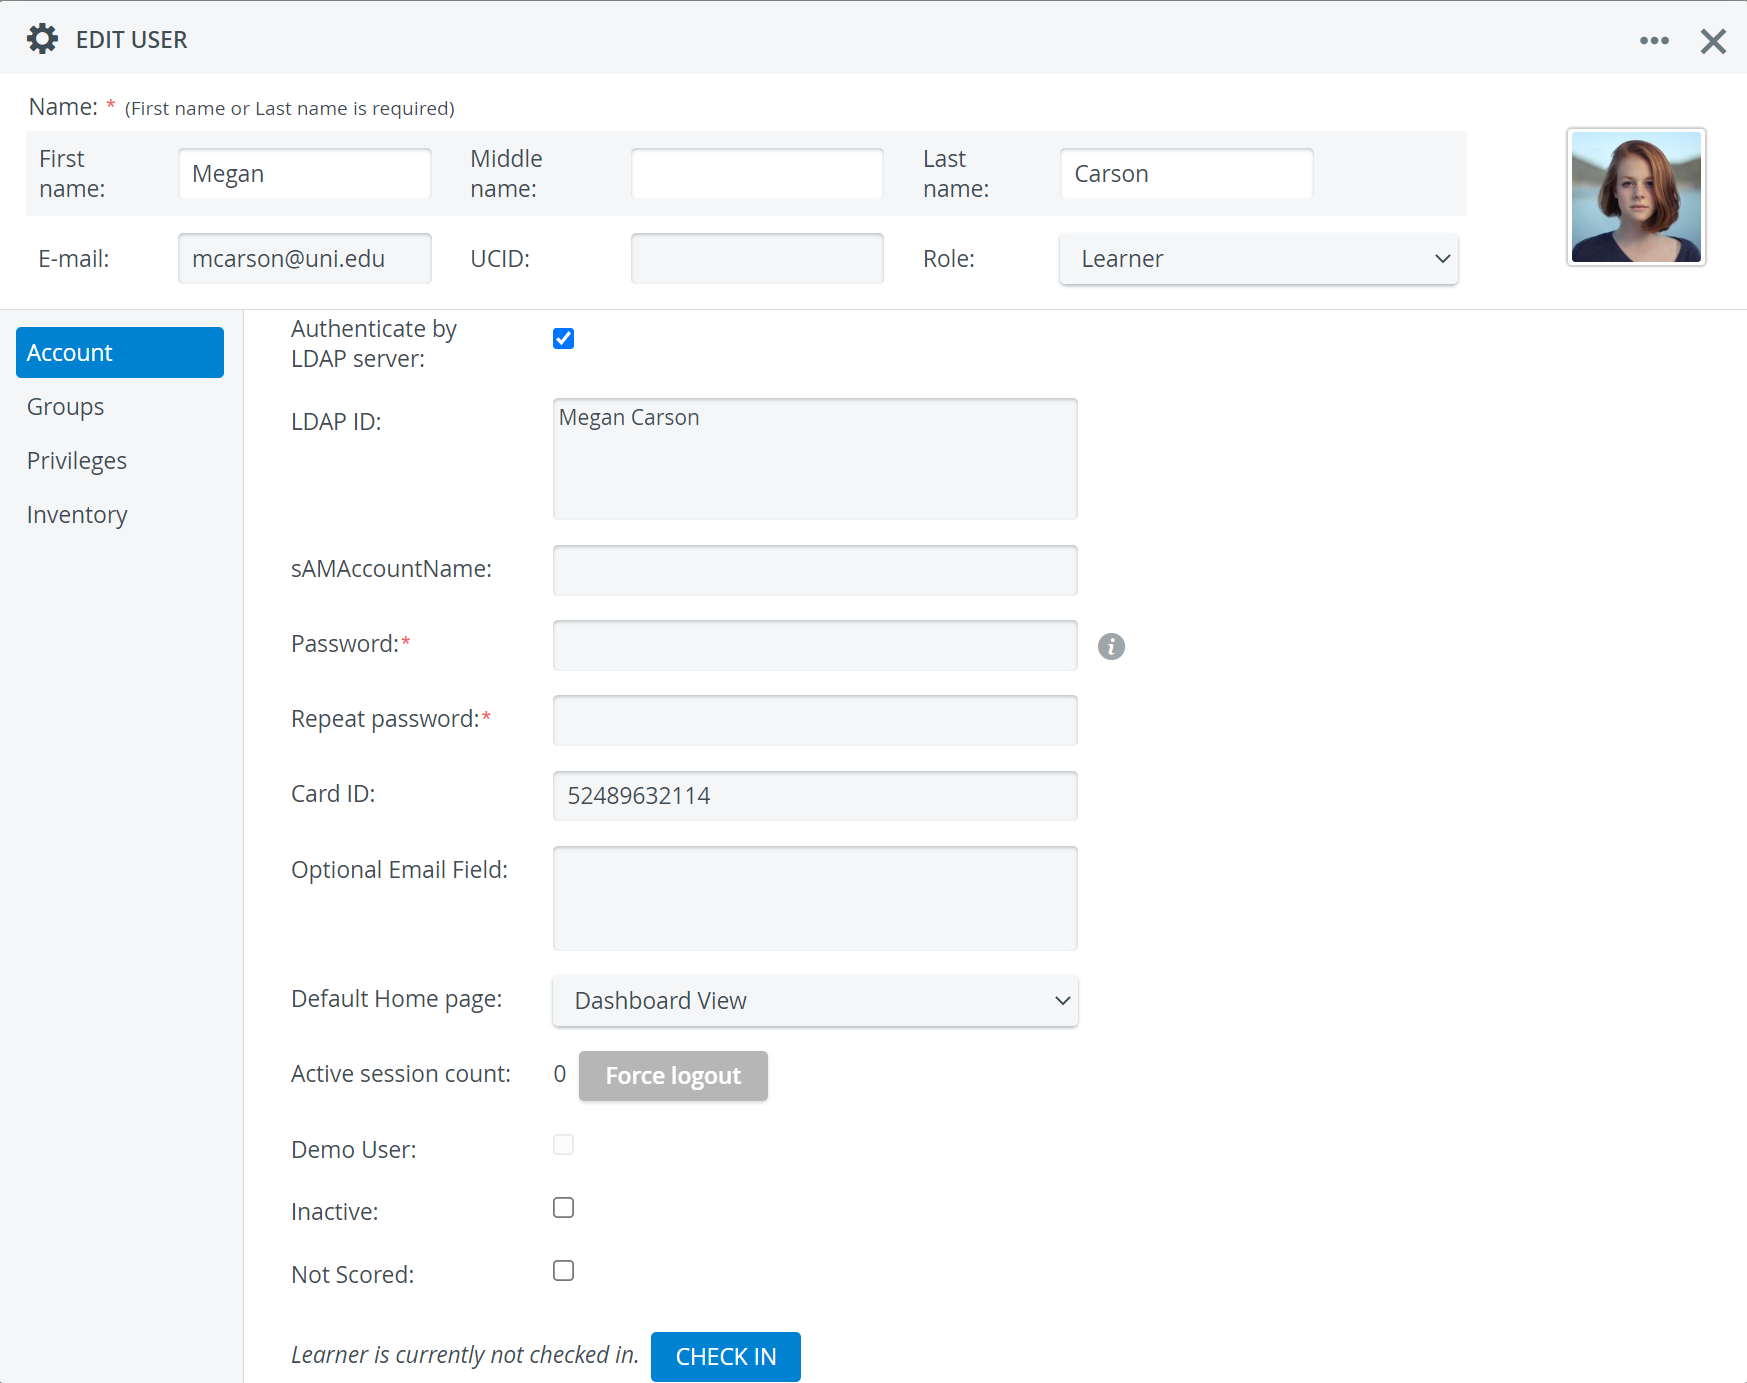
User LDAP Authentication
If a directory server is configured for user authentication, LDAP authentication can be set up for users in the Edit User window.
By switching on LDAP authentication, users can log in with their credentials stored on your directory server.
Warning
If LDAP authentication is switched on, users cannot log in with their LearningSpace Enterprise email and password and cannot modify them either.
Find out more about LDAP user authentication at How to Set Up a User for LDAP Authentication.
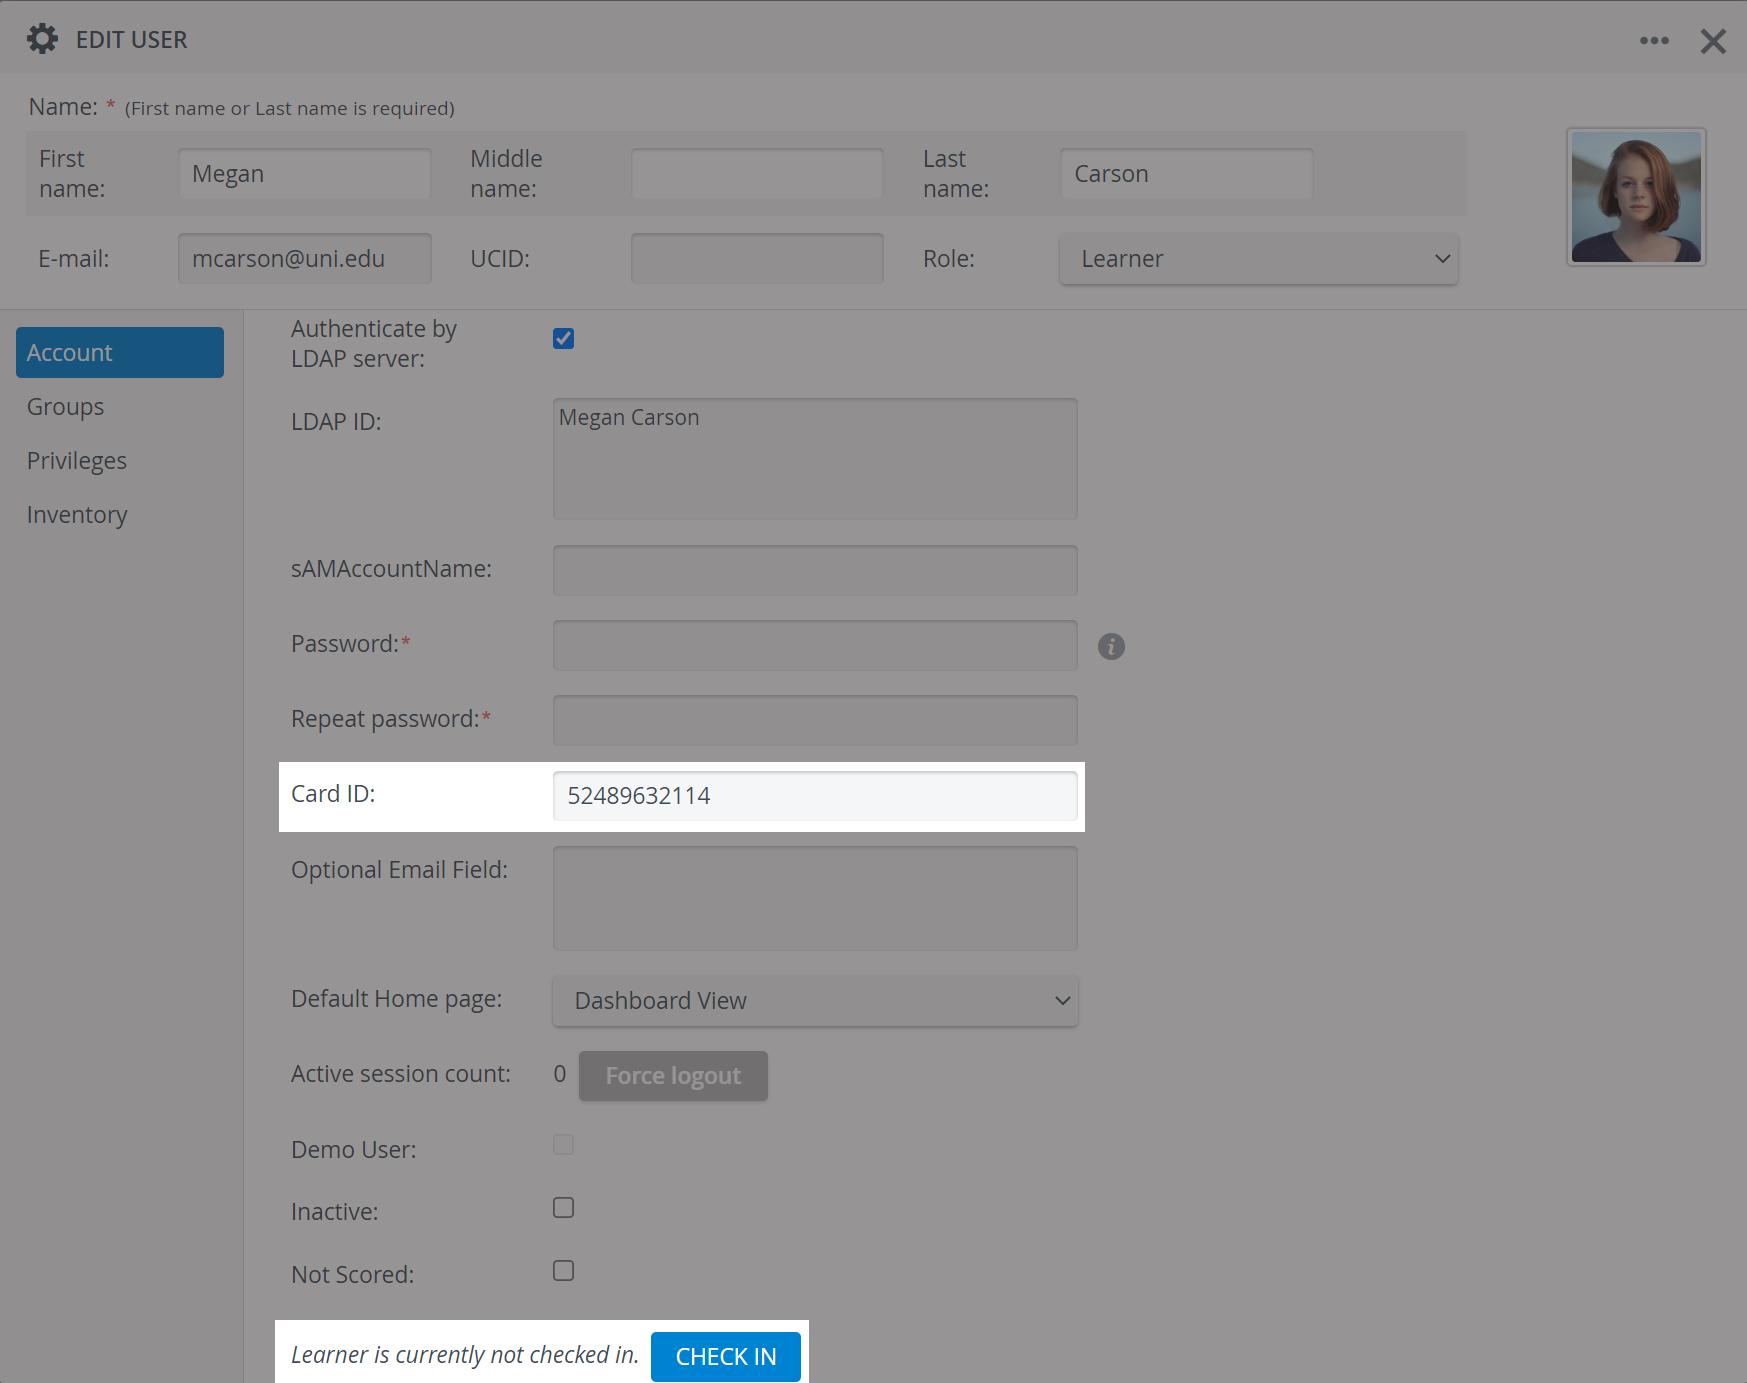
Card ID
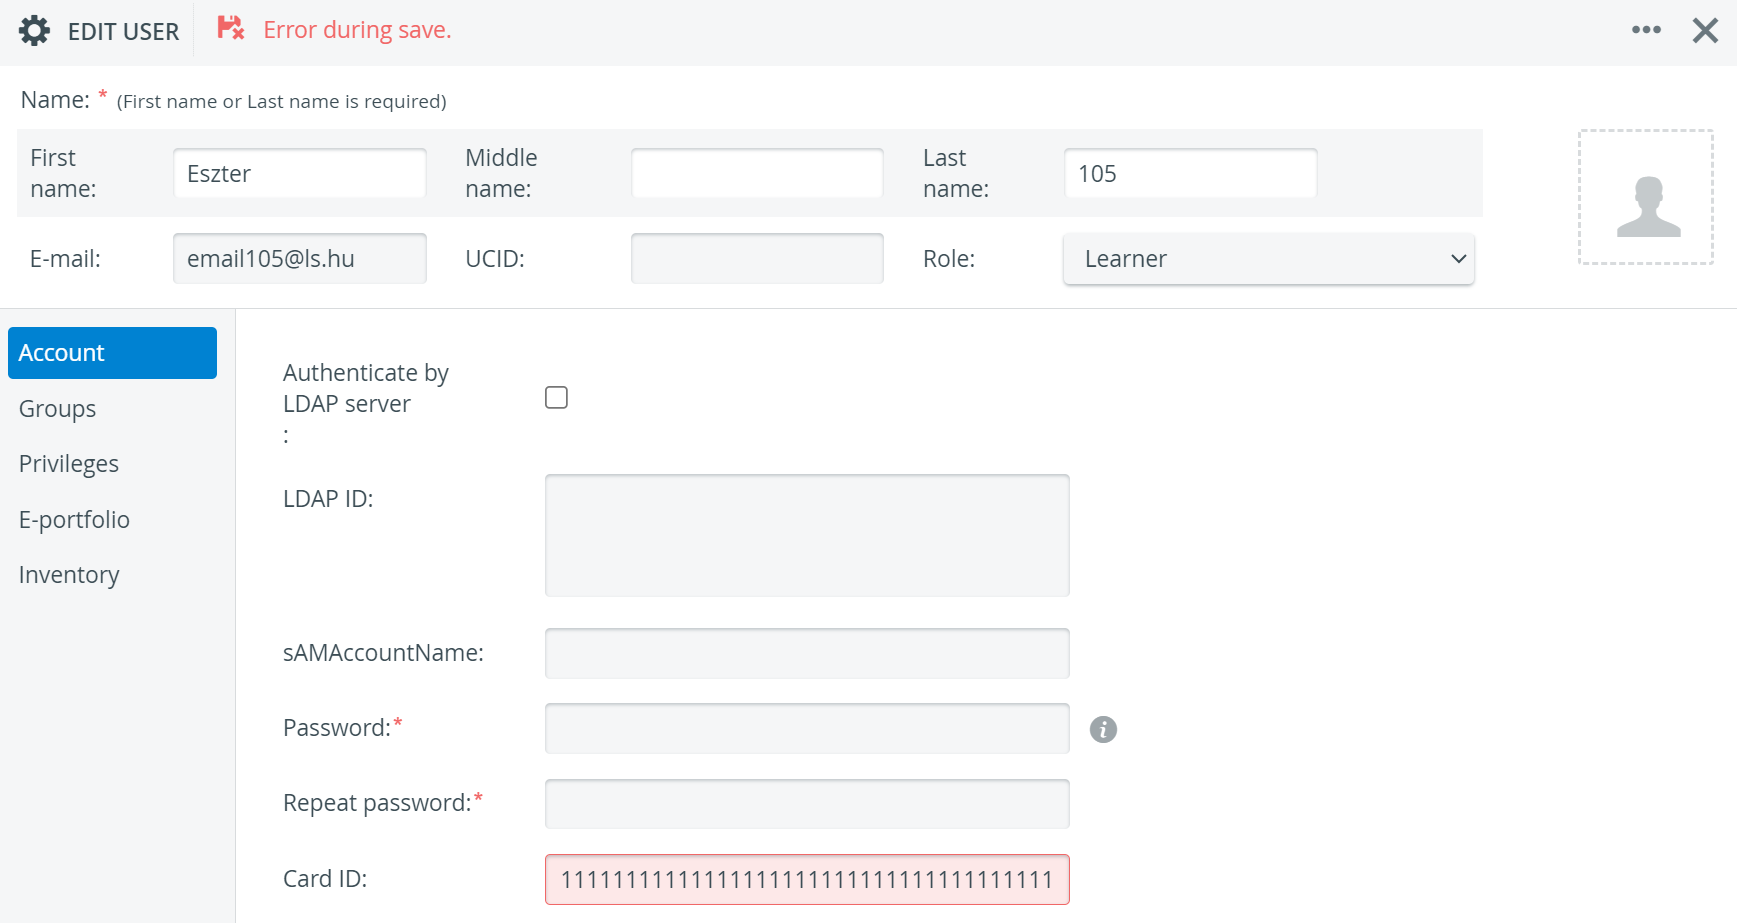
Character limit:
The Card ID cannot be longer than 127 characters - otherwise the following error message will be displayed:

In the Card ID field, you can enter the numeric equivalent of a barcode or a respective combination of numbers/characters related to the QR code associated with a Learner user account.
This way, LearningSpace will be able to identify a user based on this ID, in case the related QR code/barcode is printed out and used at the Kiosk or other type of Check-in Station: the Check-in Station will detect the barcode/QR Code and match it with the Learner user account it belongs to in LearningSpace.
![]() See more under How to use Card-based Login or Learner Check-In/Check-Out.
See more under How to use Card-based Login or Learner Check-In/Check-Out.
Card ID values can be added to multiple users with the Batch user create (BUC) feature of LearningSpace.
Groups
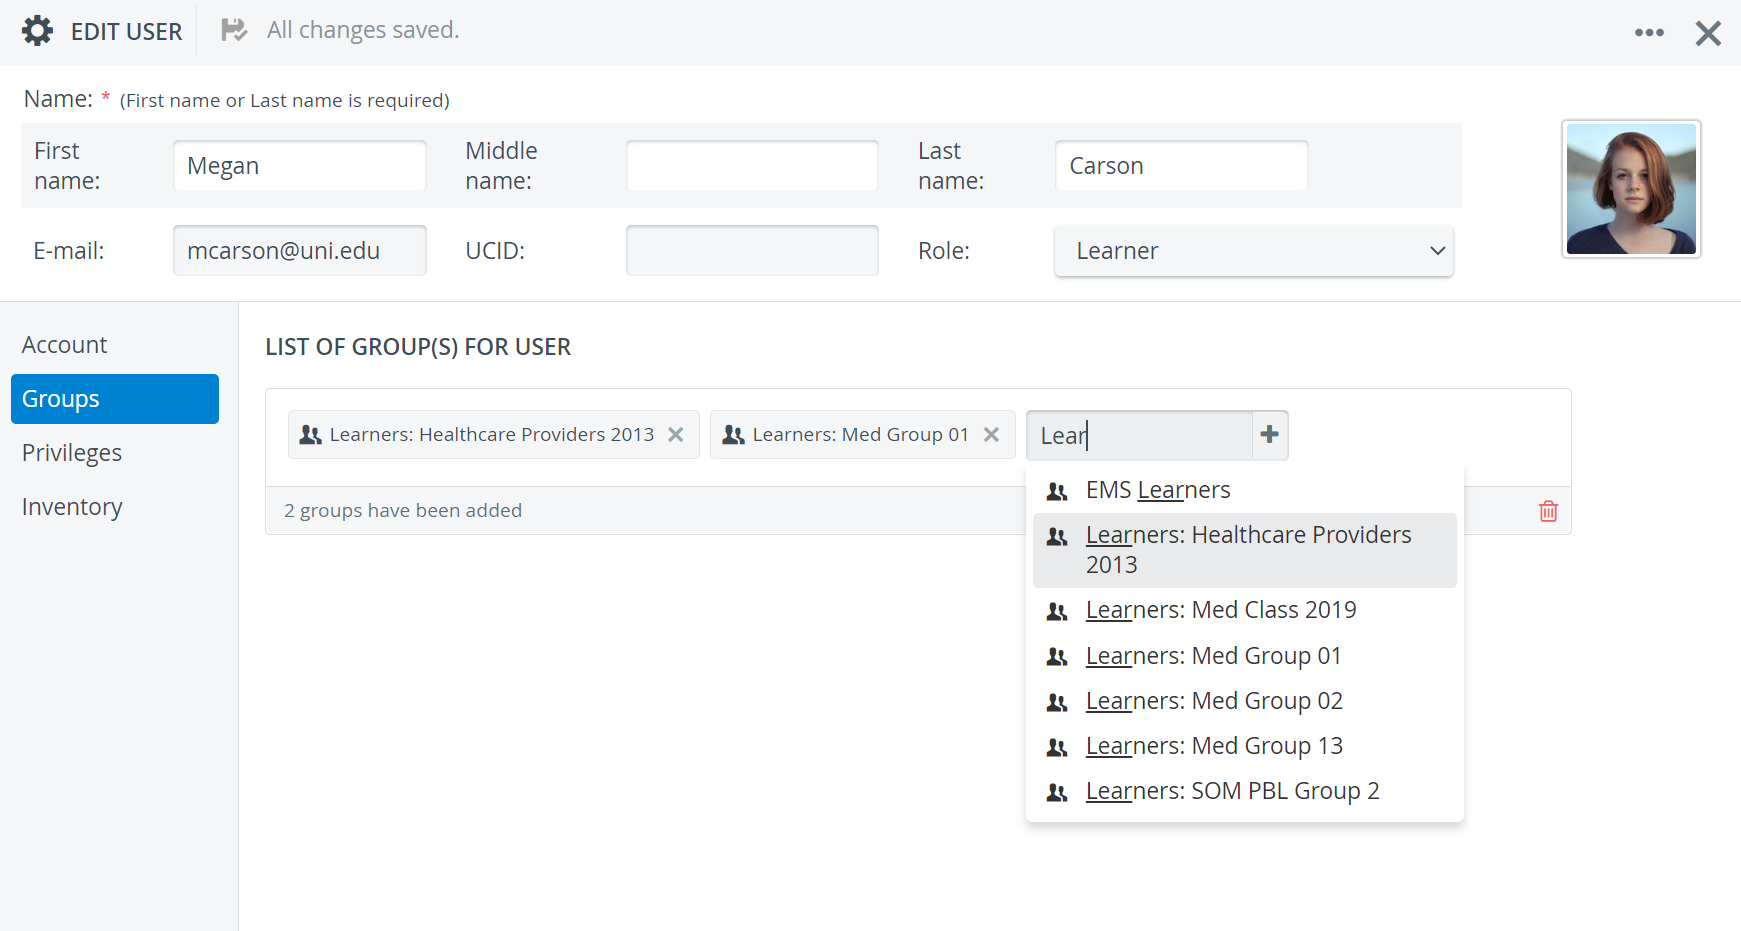
Every group is listed here which the user is currently a member of.
If you search and add a new group on this page, the user will be automatically added to the group as well.
Also, a user can be removed from a group by deleting the group from the list.
Roles & Privileges
Each user needs a role, and roles can only be assigned in the New\Edit User window.
Find out more about creating Roles here.
The system distinguishes between Roles and Privileges:
- Roles are the way to refer to the type of users (e.g., Learner, SP, Instructor, etc.).
- Privileges are the capabilities of users: Privileges limit what users can access in the system (e.g., what they see on their dashboard).
Roles vary from simple ones with one or a few privileges to complex ones with several privileges. You can either select a default role for a user or choose a Custom role and select the preferred privileges.
a. Default roles
Default roles can be selected from the Role drop-down menu in Accounts in the Edit Users tab. To check the privileges of each role, select a role, and go to Privileges.
![]() All privileges will be displayed for the role, but they cannot be edited.
All privileges will be displayed for the role, but they cannot be edited.
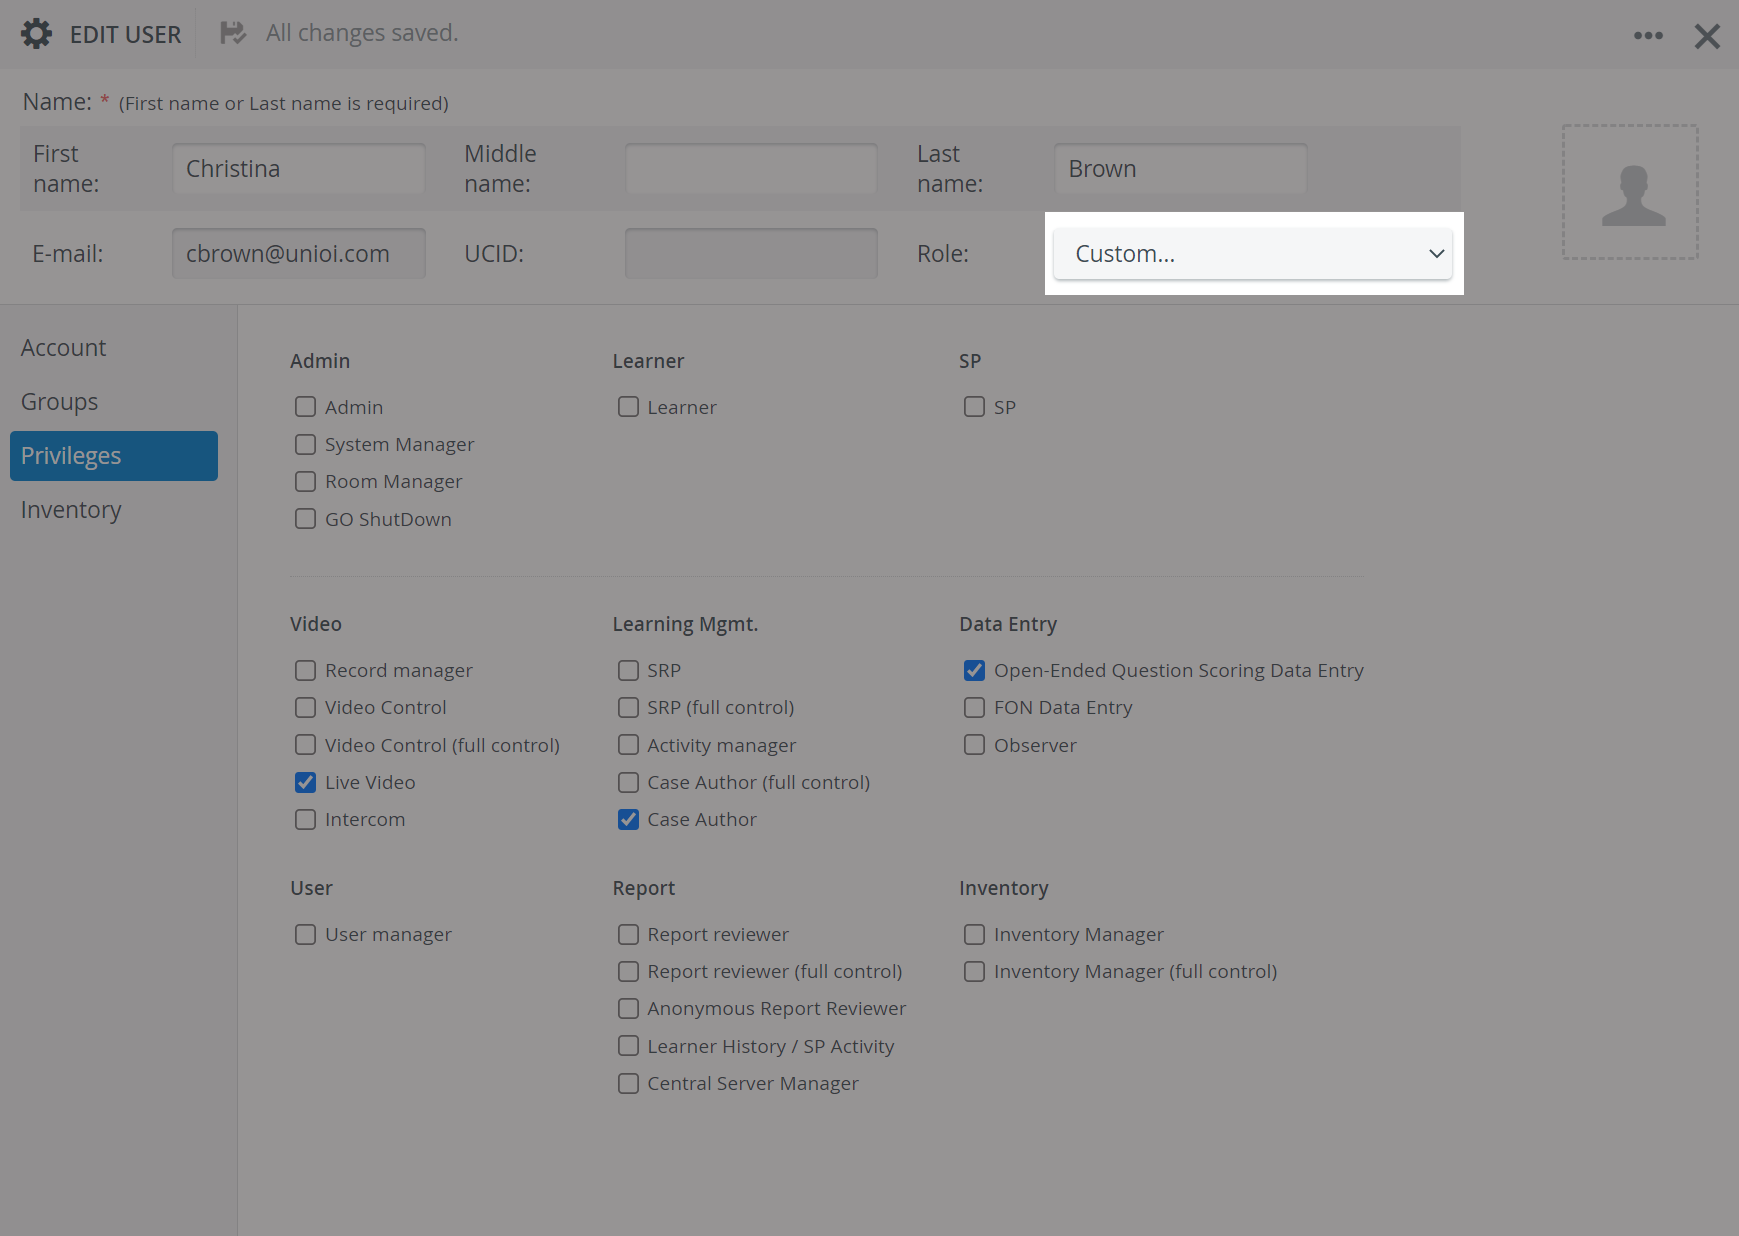
b. Custom roles
Using Custom, you can create a custom role for your user.
After selecting Custom from the Role drop-down in the Edit User tab, the view will change to Privileges. Select the privileges you want to grant to your user.
Custom roles set up in the New/ Edit User window will not be saved. Roles can only be saved for later at Roles.
Deleting users
For deleting users, click on the three dots available in the upper right corner of the pop-up, and hit Delete:
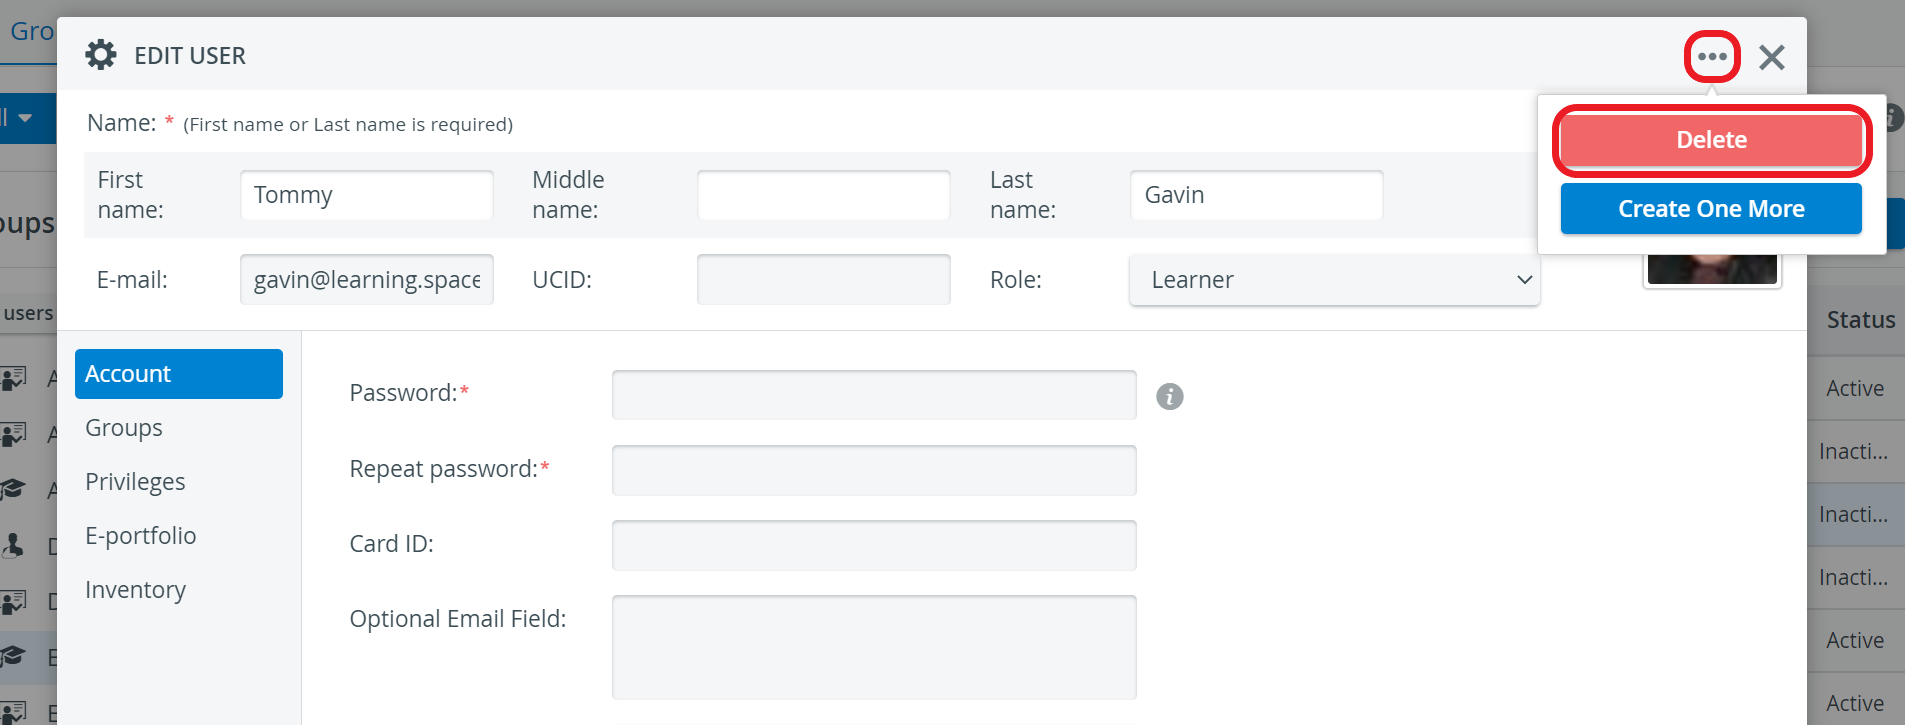
Deleting users will remove your ability to run reports or pull any data for those users. A better option is to make all these users "inactive": this will retain their data, but they will not be able to access the LearningSpace environment any longer.
Additionally, the user group these users belong to can be hidden, so it does not get listed on the user interface.
The easiest way to make users in a specific user group inactive is through the Batch User Create tool. See more information on the How to Edit or Delete Multiple Users page.
For further information visit our User Manager - How to pages.
Overview
Content Tools