Available to User Managers or Admins
Creating a new group
At Groups, on the left click + New to create a new group.
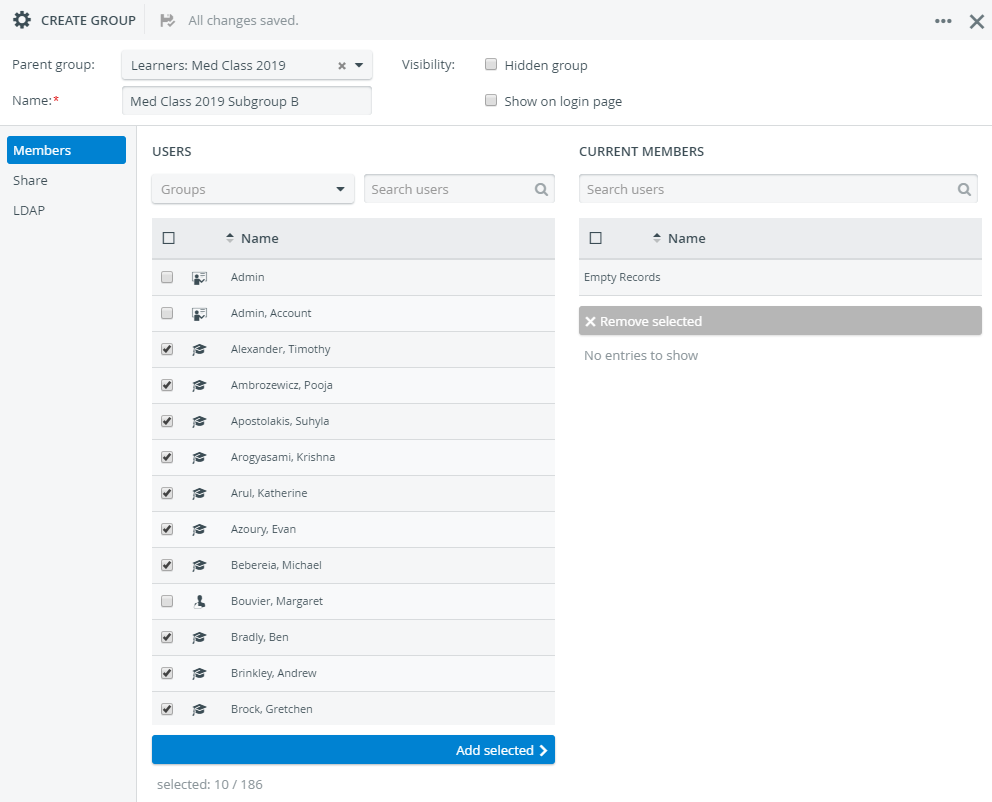
Naming a new group is mandatory. Also, to save and have it appear on the left you have to add at least one user:
- On the Members tab, select the users (under Users) you would like to include in your new group
![]() You can filter by groups with the drop-down menu or search users in the mini search bar.
You can filter by groups with the drop-down menu or search users in the mini search bar.
- The Add selected button at the bottom becomes active
- Click Add selected and the selected users will appear under Current Members.
You can remove users from a group any time with selecting them and clicking Remove selected.
You can select a parent group from the drop-down menu in the header. Each group can be nested into any other group, there are no restrictions.
On the Groups tab, the drop-down arrow in front of a group's name means it's a parent group that includes subgroups.
Sharing
Each group's visibility can be set in Share.
You can choose between sharing the group with particular users to
- View only: Add users or groups under CAN READ ONLY. Every user included here can view groups, but can't edit them.
- Editing: under CAN READ AND WRITE
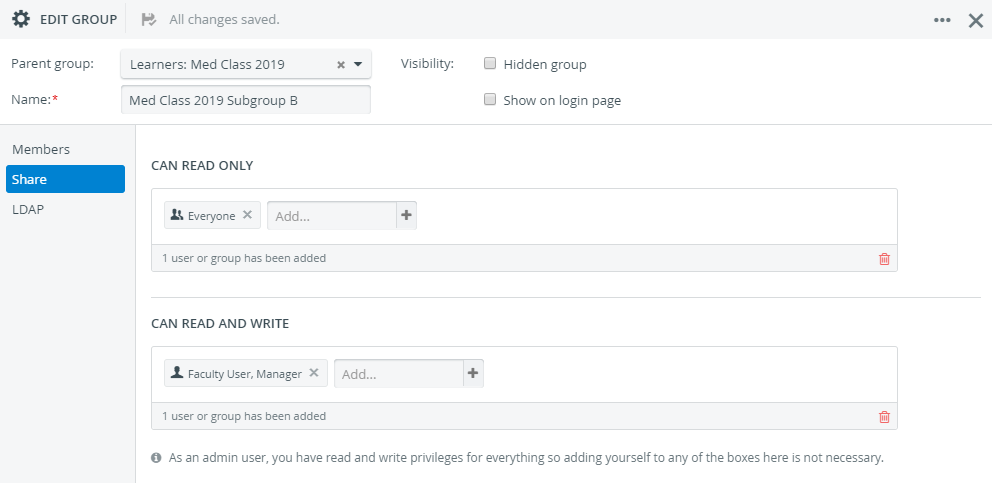
![]() Steps for editing an existing group are the same. To open a group for editing, highlight one and click Edit group.
Steps for editing an existing group are the same. To open a group for editing, highlight one and click Edit group.
Overview
Content Tools