Check in or out a specific item or multiple items in one go while assigning each transaction to a person responsible for the equipment.
The quantity of each item is automatically updated in Catalog.

Checking In Items
- To check in an item, click on the Check-in button located in the upper right corner of the transaction list.
- In the Check-in window, you first need to select the loanee responsible for moving your supplies and also specify the location where the loanee needs to go with the supplies.

- Next, you need to detect your item. Use your barcode scanner or simply start typing the name of your item.
 You can only look up items that have been registered in the Catalog before.
- Define the quantity of your item.
- Once you are finished, click Check-in.

- You will be directed to the Transaction summary page where you can check in new items for the same location with the New item button, or you can complete the check-in by clicking Finish transaction.

Checking Out Items
Reconciliation
You cannot decrease the total quantity of Non-Consumable items or Assets once you have checked them into your Inventory. But what happens when some of your supplies go missing from your storage location, they are not returned, or you just want to dispose of some of them.
The Reconciliation transaction can be applied for Non-Consumable of Asset items in case you would like to decrease the total quantity of your items to follow the actual amount of equipment in the possession of your institution.
You can reconcile items that are currently On Loan, or items that were located (or should have been located) in your storage room.
Also, select the reason for reconciliation.

![]() By reconciling an Asset, the item will altogether be deleted from the Catalog:
By reconciling an Asset, the item will altogether be deleted from the Catalog:

Consumables With Expiration 
Consumables With Expiration items can be checked in or checked out of the Inventory by identifying their batches.
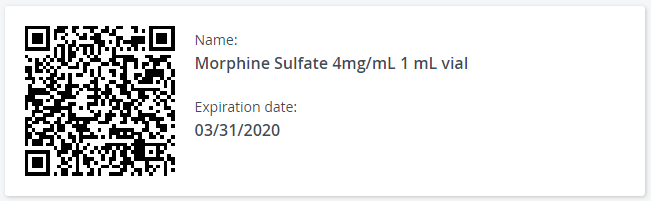
To identify a batch, you simply need to register the expiration date of the item you are checking in:

Once you have created a batch, the system will identify it with a unique QR-code that you can print and place on your physical items:
Upon check-out, you need to identify the batch you are about to check out.
Use your barcode scanner to scan the QR-code of your physical item (or just enter the expiration date from the QR-code label) to quickly identify your batch.
The gif below demonstrates the steps of checking out a Consumables With Expiration item manually.

![]() Consumables Without Expiration
Consumables Without Expiration
![]() Non-Consumables
Non-Consumables
![]() Assets
Assets
Overview
Content Tools