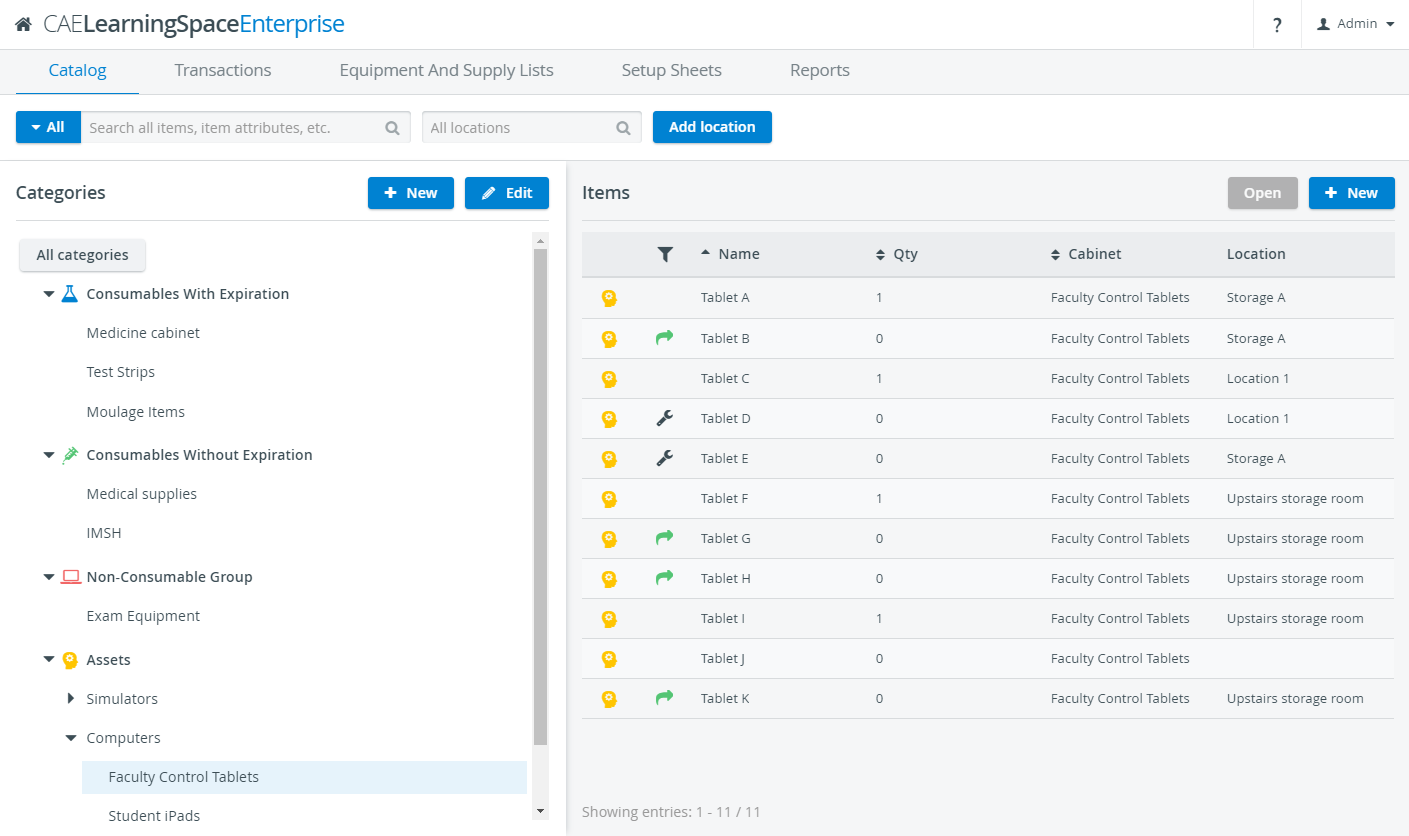
After accessing the Inventory module, you will land on the Catalog tab where you can view all of your supplies and equipment in a single pane.
The Items tab on the right provides a detailed overview of the current status of your inventory items including their exact quantity, status, category, and storage place.
On the left, you can see the four default Categories of the Inventory module:
![]() Consumables With Expiration
Consumables With Expiration
![]() Consumables Without Expiration
Consumables Without Expiration
![]() Non-Consumables
Non-Consumables
![]() Assets
Assets
You can filter your supplies by these categories or the cabinets created inside each category:

Categories
Categorize new items while adding them to the Catalog.
Inventory items are sorted into four categories. The categories vary from each other regarding certain item settings to fit the particularities of the different types of medical equipment and supplies you register in your inventory.
Consumables With Expiration 
The items of this category are identified by batches based on expiration dates.
The expiration dates of this type of consumable can be registered in the Transactions tab upon check-in.
Consumables Without Expiration 
These items are treated as disposables: the quantity of a consumable item simply decreases after check-out or increases upon check-in:

Non-Consumables
Non-Consumables are durable equipment that need to be returned to stock after use.
The quantity of each non-consumable item is expressed in a ratio: the currently-in-stock amount of the item per the total amount of the item.
In case of lost or broken items, you can always adjust the total quantity of a particular item with the Reconcile transaction.
Assets
Assets, as your most valuable pieces of equipment, can only be registered one by one in order to keep track of their whereabouts and follow their lifecycle with the most precision possible.
Besides from being On Loan ![]() , assets can be sent for Repair
, assets can be sent for Repair ![]() , or scheduled for regular Maintenance
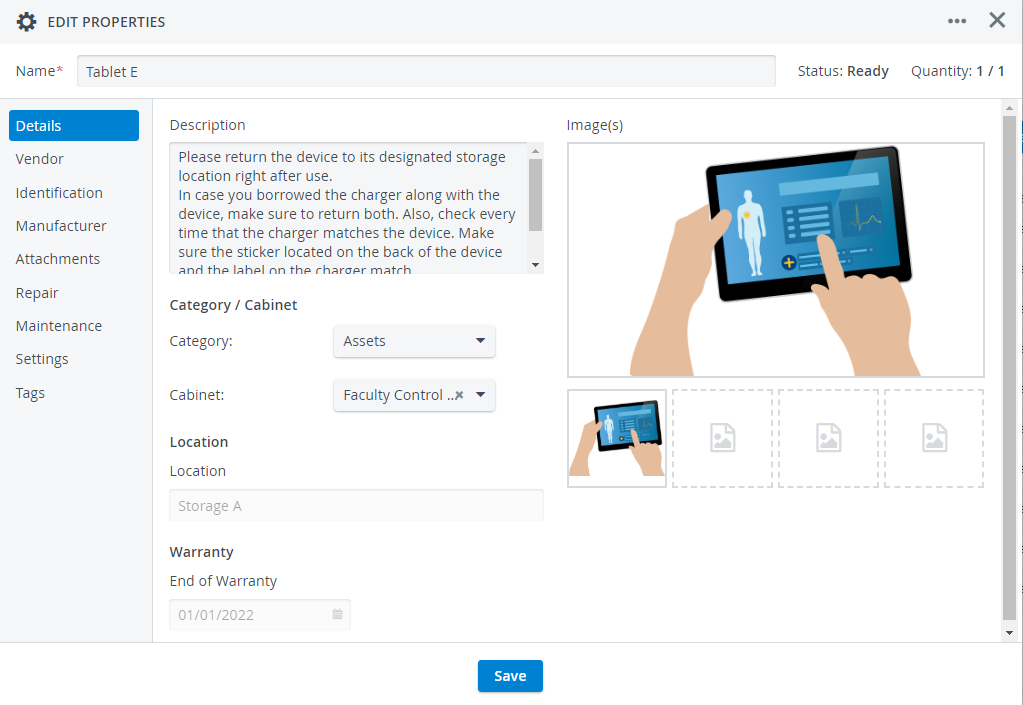
, or scheduled for regular Maintenance ![]() periods. When checking in an asset, you can also register the Warranty of the equipment.
periods. When checking in an asset, you can also register the Warranty of the equipment.
Asset Tagging
You can add tags to assets to indicate e.g. for what purpose, by which department, etc. they can be used.
You can also add the same tag to multiple assets to organize them into a subgroup. An asset tag will represent every asset labeled with that specific tag so that when you are assembling Equipment and Supply Lists, you don't need to be specific about the asset you want to use for the scenario, and when preparing the Setup Sheet of an event, you can draw the list of assets labeled with the given tag and simply select one.
In the Edit Properties window of a selected asset, go to the Tags tab to add tags to your asset.
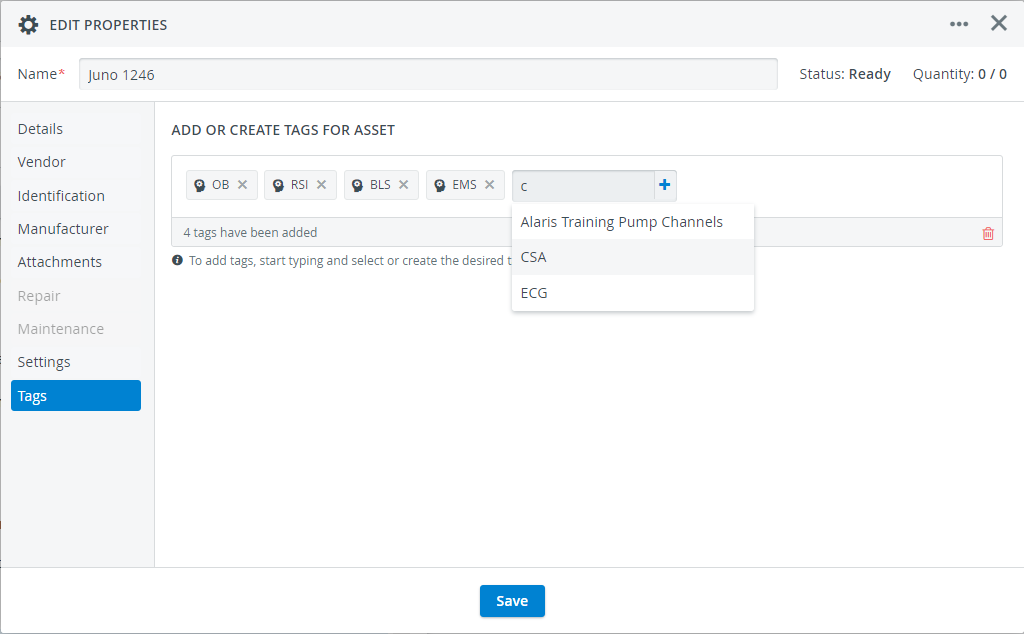
By adding the same tags to multiple assets e.g. CSA to several simulators, you create a subgroup of simulators that can be selected for Clinical Skills Assessment scenarios when you are planning an event.
When assembling the Equipment and Supply List for a scenario, you don't need to decide right away which asset to use; you can add a tag instead that will allow you to choose from multiple assets labeled with that tag.
You only have to specify the asset when you are preparing the Setup Sheet of an event:
Important
Please make sure that the asset you are selecting for the event is not tied to another event, and is or will be available for your current event.
Tip - Check Asset Availability
- Check the status of the selected asset in the Catalog tab. If the asset is Ready, you will have no problem checking out the event's Setup Sheet.
- If the asset is out On Loan, please contact the transaction assignee tied to the asset's latest check-out transaction in Transactions.
- Use the Forecasting report in the Reports tab of the Inventory module to get an overview of the supply and equipment-needs of upcoming events.
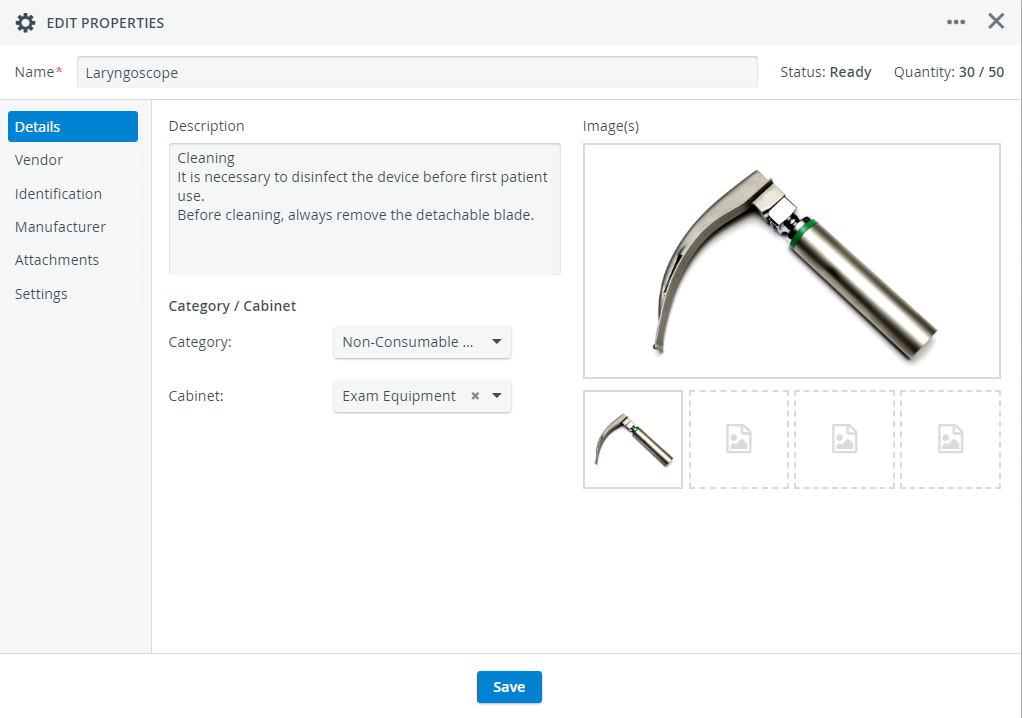
Item Properties
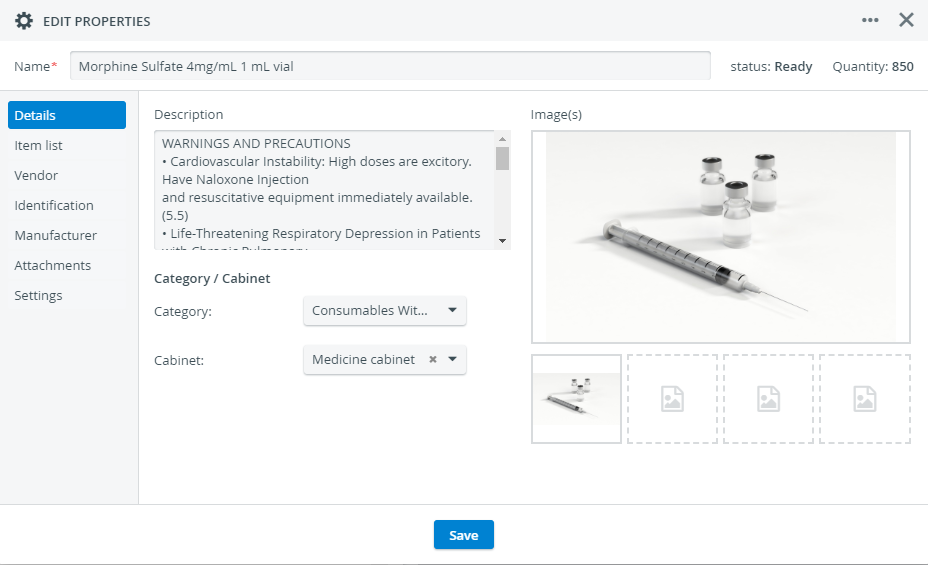
Edit the properties of your items: add a description, an image, or a barcode for the fast identification of each item.
Consumable With Expiration Item Details:
Asset Details & Warranty:
Adding a barcode to a new or existing item:
In the Identification tab of a selected item, click on + Add barcode, then apply one of the available scanning solutions to read the barcode of your item.
Make sure that the cursor is active inside the barcode field when scanning.
QR-code Identification
Print the system-generated QR code of specific items to label your physical stock.

Important
You can only look up an item by QR code if it has been registered in the Catalog and its QR code has been placed physically on the item.
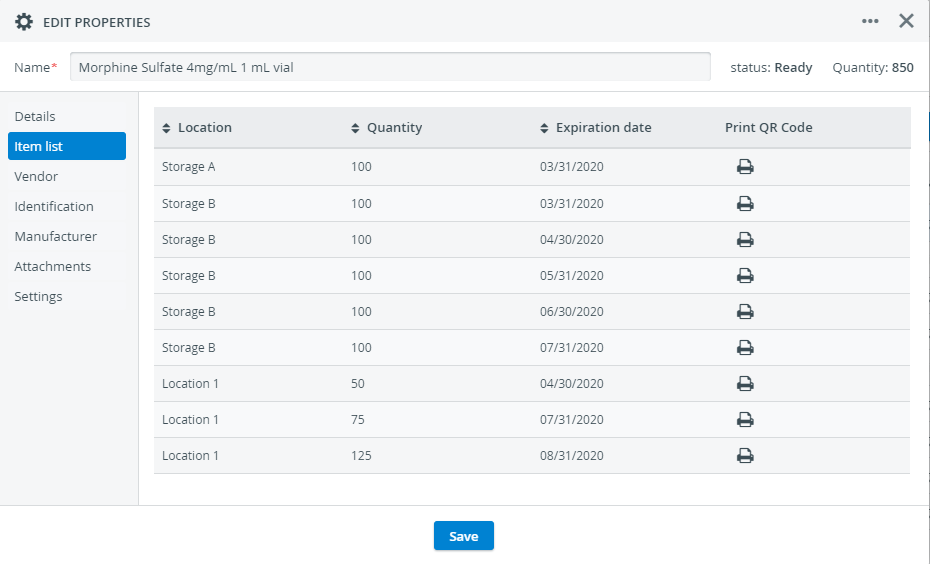
Where Can I Find the QR Code of An Item?
Look for the QR code of an item in the Identification tab—unless it is a Consumables With Expiration ![]() item.
item.
Consumables With Expiration items are given separate QR-codes by the batches they were checked into the Inventory. You can find, display the preview, and print the QR-code of each batch from the Item list tab exclusively available for Consumables With Expiration items:
Advanced Search Options
Search for specific items by filtering down to their category, cabinet, or, where applicable, the expiration date, or warranty.
Consumables With Expiration ![]() items have expiry dates, and Assets
items have expiry dates, and Assets ![]() have their warranty registered upon check-in.
have their warranty registered upon check-in.
Status Filtering Option
Use the black funnel icon in the Items pane to display items according to their current status.
Display Consumables (both types) and Non-Consumable items that are Ready to be used, or check for items that are running low on by selecting the Low Stock filter.
Note
The Low Stock setting only applies to these item categories.
Assets can be assigned different statuses (Low Stock does not apply since assets are registered individually):
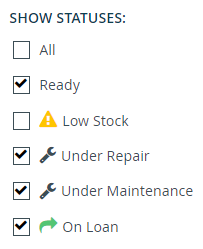
You can apply more than one filter at a time:
Important
If you remove every filter, the category cabinet or subcabinet will not show any results. Click again on the funnel and select a filtering option to display items.
Overview
Content Tools