There are certain steps to follow to set up user-action controlled video recording for an activity.
After selecting an activity you want to work with, do the following:
1. Select Video Start and Stop Triggers
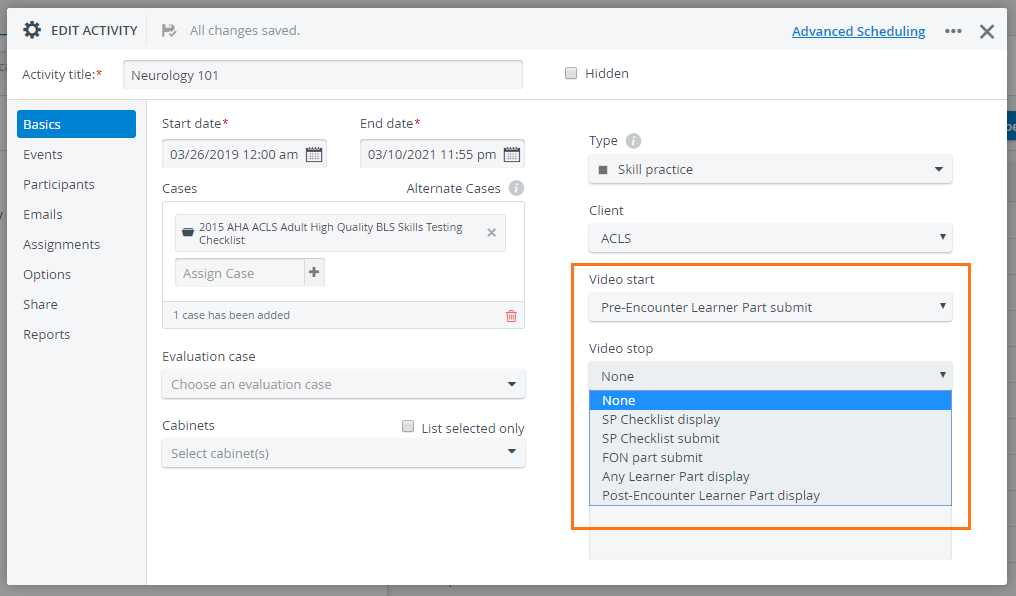
Go to the Basics tab of your activity in the Edit Activity pop-up window.
The video start and stop drop-down menus are located on the right:
Once the conditions are selected, changes are saved automatically.
a. Choose one of the following start conditions from the Video start drop-down menu:
- Pre-Encounter Learner Part display
- Pre-Encounter Learner Part submit
- SP Checklist display
- FON part display
b. Choose one of the following stop conditions from the Video stop drop-down menu:
- SP Checklist display
- SP Checklist submit
- FON part submit
- Any Learner Part display
- Post-Encounter Learner Part display
The video start and stop triggers are all user-actions.
2. Set Up RNSA Login
The above outlined user-actions only have control over video recording if users access the system with RNSA Login.
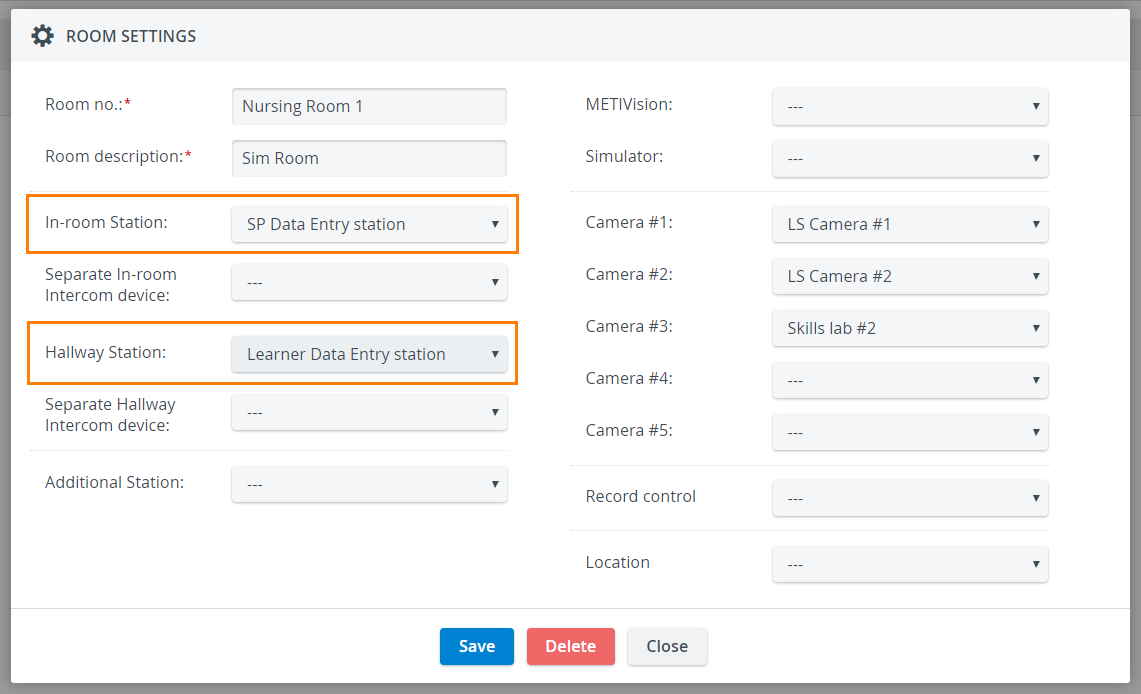
Find the room of your Running-Non Scheduled Activity (RNSA) and open it for editing with the cogwheel icon.
a. Set up the learner data entry workstation: select the name of the computer from the Hallway Station drop-down;
b. Set up the SP data entry workstation: select the name of the computer from the In-room Station drop-down.
3. Make sure your users log in using the right workstation
Learner RNSA Login only works with Hallway configuration. The same goes for SP RNSA Login: it only works with In-room configuration.
Important
User-action triggered video recording will not work if users log into a workstation that does not match their privilege.![]()
![]() If needed, your computer can have multiple workstation functions at the same time. To apply multiple functionalities, select the same computer in the station drop-downs of your choice.
If needed, your computer can have multiple workstation functions at the same time. To apply multiple functionalities, select the same computer in the station drop-downs of your choice.
- To set an activity to start recording automatically,
Important
RNSA Login does not work with In-room configuration for learners. & RNSA Login does not work with Hallway configuration for SPs. ![]() Select all of the functionalities in the Station Manager pop-up to use the computer as any type of workstation later on.
Select all of the functionalities in the Station Manager pop-up to use the computer as any type of workstation later on.
Automatic recording can be set up in relation to certain activity-specific conditions. Such a set-up will apply to all events scheduled within the activity.
IMPORTANT: As the conditions triggering the start and stop of recording depend on checklist display that can be detected by the system, it is only possible from stations, that is, computers, assigned to the room where the scheduled or non-scheduled activity/ event takes place.
As a consequence, the Video start and Video stop parameters only apply if the appropriate assignment is established, that is:
- Hallway station assigned to the room - if the trigger is the display of a checklist to be filled out by learners
- In-room station assigned to the room - if the trigger is the display of a checklist to be completed by SPs
Station assignment in the Room Settings pop-up of the System module:
Overview
Content Tools