In LearningSpace Enterprise, video recording in a Room can be initiated by certain user actions, eg. cameras would start recording upon the SP opening the SP checklist.
There are certain steps to follow to set up user-action-controlled video recording for an Activity.
Make sure that on the Rooms Tab of the System Manager
- In-room and/or Hallway stations are added to the Rooms you want to use, under Room settings
- Activity and Case is selected for a Room, in case of RNSA setup
After selecting an Activity you want to work with, do the following:
1. Select Video Start and Stop Triggers
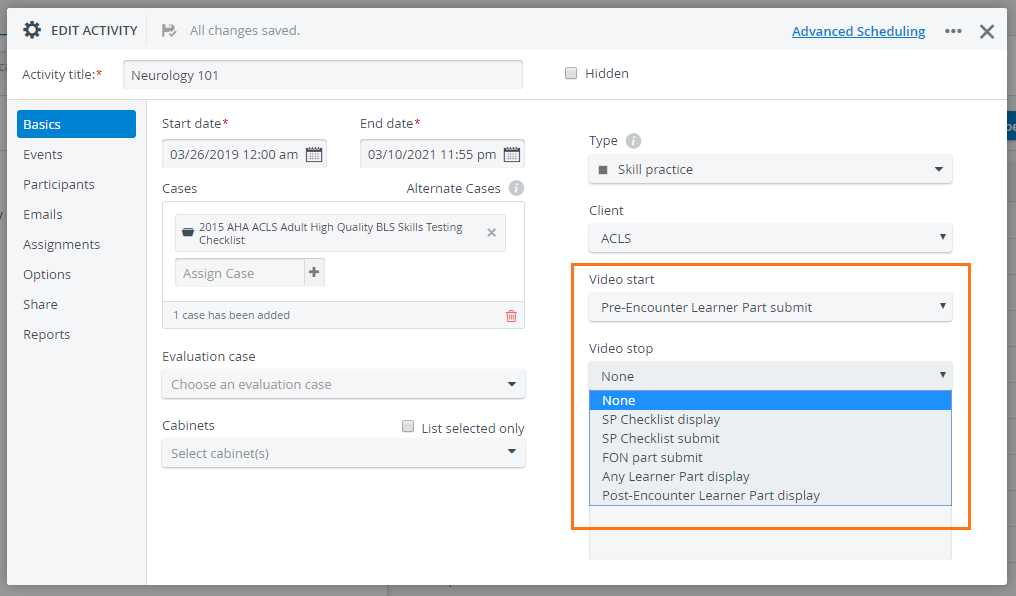
Go to the Basics tab of your Activity in the Edit Activity pop-up window.
The video start and stop drop-down menus are located on the right:
Once the conditions are selected, changes are saved automatically.
a. Choose one of the following start conditions from the Video start drop-down menu:
- Pre-Encounter Learner Part display
- Pre-Encounter Learner Part submit
- SP Checklist display
- FON part display
b. Choose one of the following stop conditions from the Video stop drop-down menu:
- SP Checklist display
- SP Checklist submit
- FON part submit
- Any Learner Part display
- Post-Encounter Learner Part display
The video start and stop triggers are all user-actions.
Example of user-action triggered video recording
If 'Pre-Encounter Learner Part display' is selected as the Video start condition and 'Post-Encounter Learner Part display' is selected as the Video stop condition, all cameras set up in the Activity's room will start recording when a learner opens their Pre-Encounter checklist on the Hallway workstation of the room. Afterwards, the recording will automatically stop when the same learner opens their Post-Encounter checklist on the same station.
2. Set Up RNSA Login
User-actions only have control over video recording if users access the system through an authorized workstation with automatic user-forwarding.
Find the room of your Running-Non Scheduled Activity (RNSA) and open it for editing with the cogwheel icon.
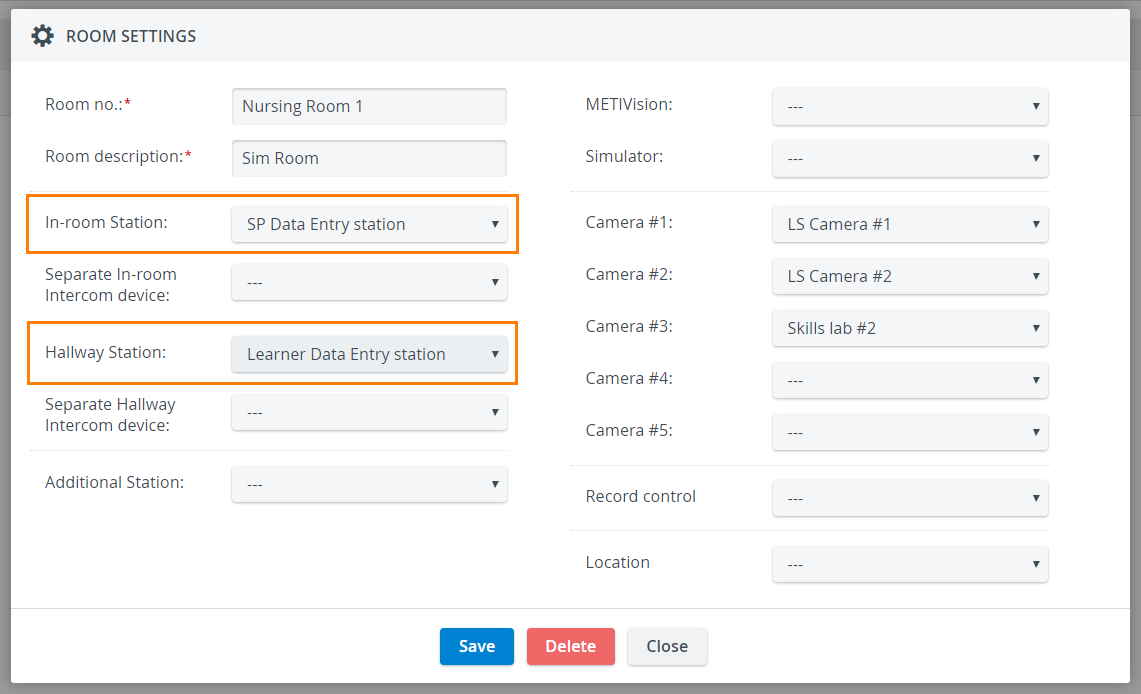
a. Set up the learner data entry workstation: select the name of the computer dedicated to learners from the Hallway Station drop-down;
b. Set up the SP data entry workstation: select the name of the computer dedicated to SPs from the In-room Station drop-down.
Example of station assignment in the Room Settings pop-up:
Make sure your users log in using the right workstations
User-action-triggered video recording will not work if users log into a workstation that does not match their privileges.
Learner automatic user-forwarding only works with Hallway configuration. The same goes for SP automatic user-forwarding: it only works with In-room configuration.
![]() If needed, your computer can have multiple workstation functions at the same time. To apply multiple functionalities, select the same computer in the station drop-downs of your choice.
If needed, your computer can have multiple workstation functions at the same time. To apply multiple functionalities, select the same computer in the station drop-downs of your choice.
Learn more under How to Set up RNSA Login.
IMPORTANT: Video recordings get tied to the RNSA Activity/Case/Learner/SP if started by the user action, but do not get tied if started via the Recording module or by the push button.
See RNSA - How to Reserve a Room Without Scheduling.
For further information, visit our Activity Manager, Activity - How to pages and view our Activity Manager Training Videos.
Overview
Content Tools