Transaction Types
Within your Inventory, you can perform the following three kinds of Transactions:
- Check-In: register new consumables, non-consumables or assets, or return non-consumables or assets to the selected storage location.
- Check-Out: any time someone picks up consumables, available non-consumable, or assets from a storage location, check them out. Tie the transaction to a transaction assignee to keep track of your items on loan.
- Reconciliation: in case some of your Non-Consumables or Assets go missing, or they reach the end of their useful lifespan, you can reconcile the total quantity of these types of items.
Each item category has check-in and check-out processes that are slightly different from each other. You can learn more about each process at the following pages:
Transaction Options
Transactions can be launched from the Transactions tab as well, which will result in a new cart. You can choose from 3 types of transactions on the Transactions tab: Check-Out, Check-In and Reconcile.

You start a new cart any time you launch a transaction.
A new transaction launched from the Transactions tab will discard an existing cart with all its contents if users proceed. Users are warned before creating an entirely new cart.
Check-In
Increase the quantities of consumables or return non-consumables or assets from loan
- by launching a Check-In transaction from the Transactions tab's header or
- by clicking on the cart icon when at any tab and selecting Check-In.
For a step-by-step guide about each item category's check-in process, refer to this section.
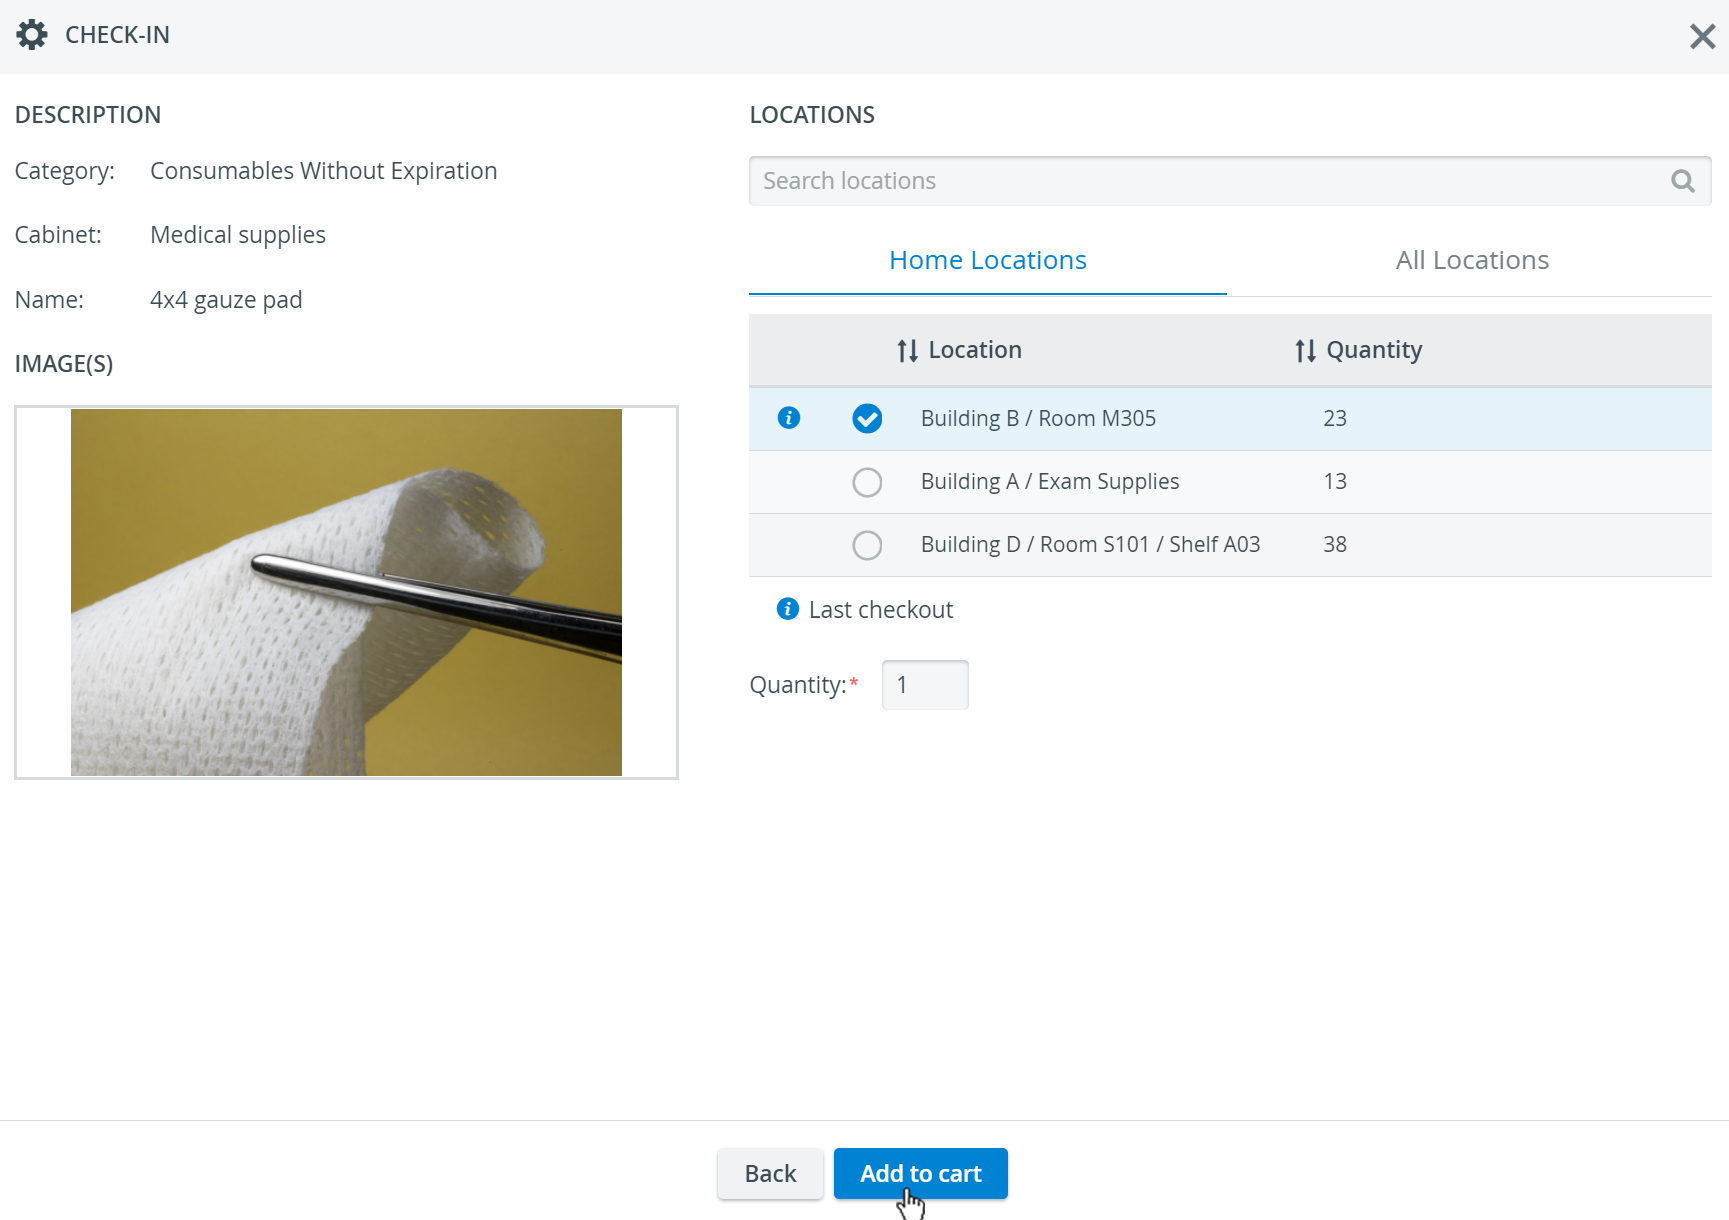
Home Locations Tab
The Home Locations tab contains the location history of the past 180 days of an item. The tab shows where the item was checked out from and where the item is currently in stock to help you select a check-in location more easily.
The Home Locations tab becomes active only after transactions have already been performed with an item. Before that, only the All Locations tab is displayed as active.
The most recent check-out location of the item will always be marked by an '![]() ' icon.
' icon.
To identify an item, scan its QR-code, enter the partial Item ID or start typing the name of the item you are checking in. ![]() How to Detect Items in Your Inventory.
How to Detect Items in Your Inventory.
Check-Out
Decrease the quantities of consumables or lend non-consumables or assets:
- by launching a Check-Out transaction from the Transaction tab's header or
- by opening a new cart and selecting Check-Out or
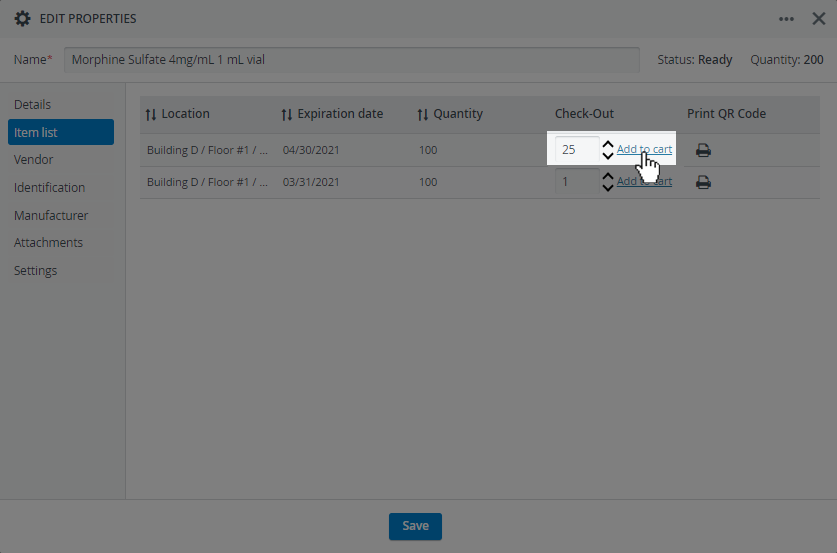
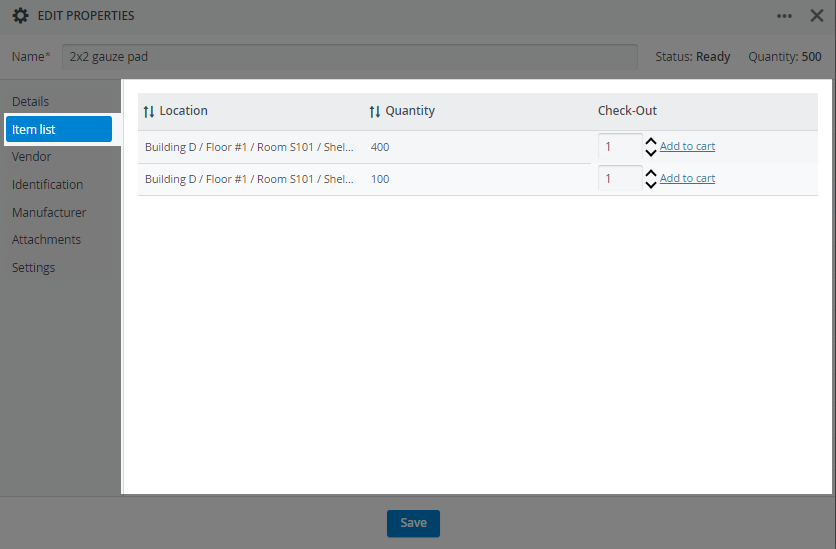
- use the Add to Cart option included at every location in an item's Item List.

For a step-by-step guide about the Check-out process, refer to this section.
Add to Cart Option
You can also add items to check-out directly from the Item List tab with the new Add to cart feature.
Reconciliation
Select Reconciliation in case you would like to scrap items from your inventory.
You can provide two reasons for scrapping:
- dispose of worn-out items or
- register them as lost if they went missing.
With the Reconciliation transaction, you decrease the total quantity of the item.
For a step-by-step guide on reconciling damaged or lost items, refer to this section.
As QR-code identification is supported on the Transaction Summary page of the Cart feature and also at every Setup Sheet, this also allows you to fill in the Assignee drop-down by simply scanning the Transaction Assignee's QR-code.
Select an assignee by scanning their ID card as the finishing step of the transaction workflow:
![]()
When opening a Setup Sheet for check-out, select an assignee by scanning their ID card:
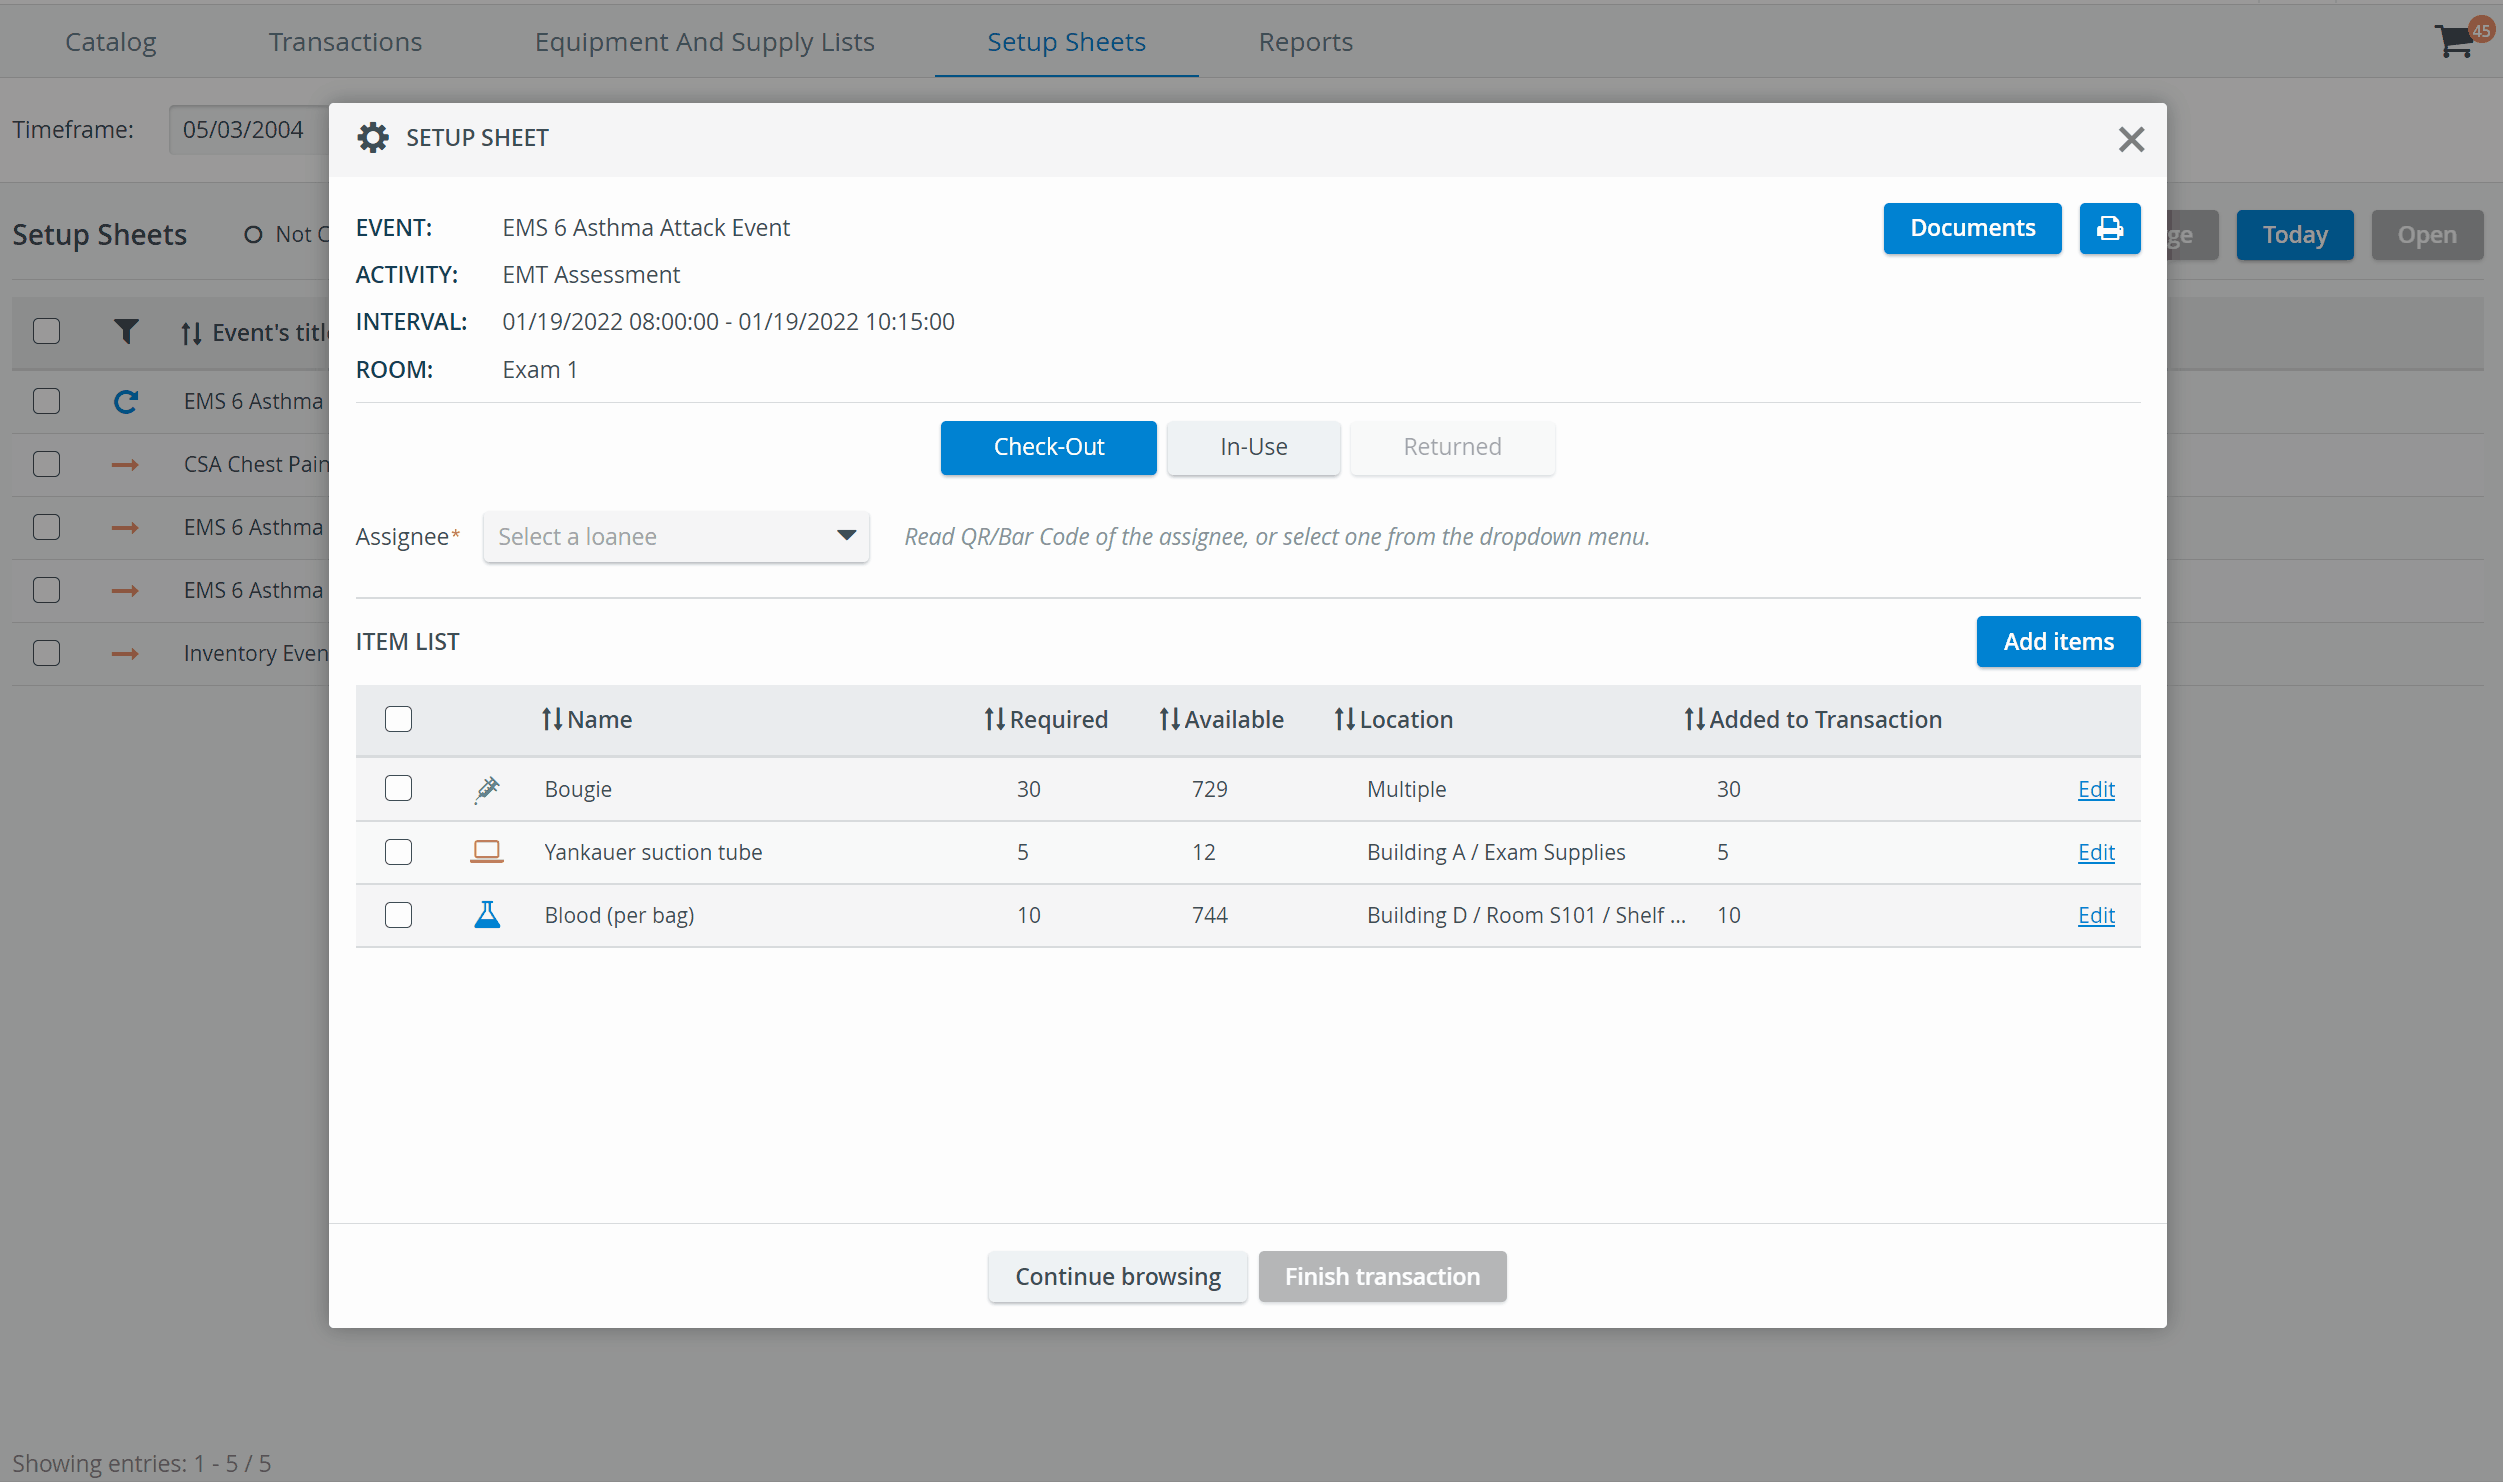
Registered Transaction Assignees can be selected manually by using the Assignee drop-down. If you cannot find an assignee in the list, start typing their name in the quick search bar (a maximum of 50 names can load in the drop-down list).
Instant Transactions
Easy Item Check-In
In the Quantity column of items, the number of items can be increased or transferred from one location to the other without launching a Transaction workflow step-by-step, but check-in logs will still be created by the system to help trace back inventory movements.
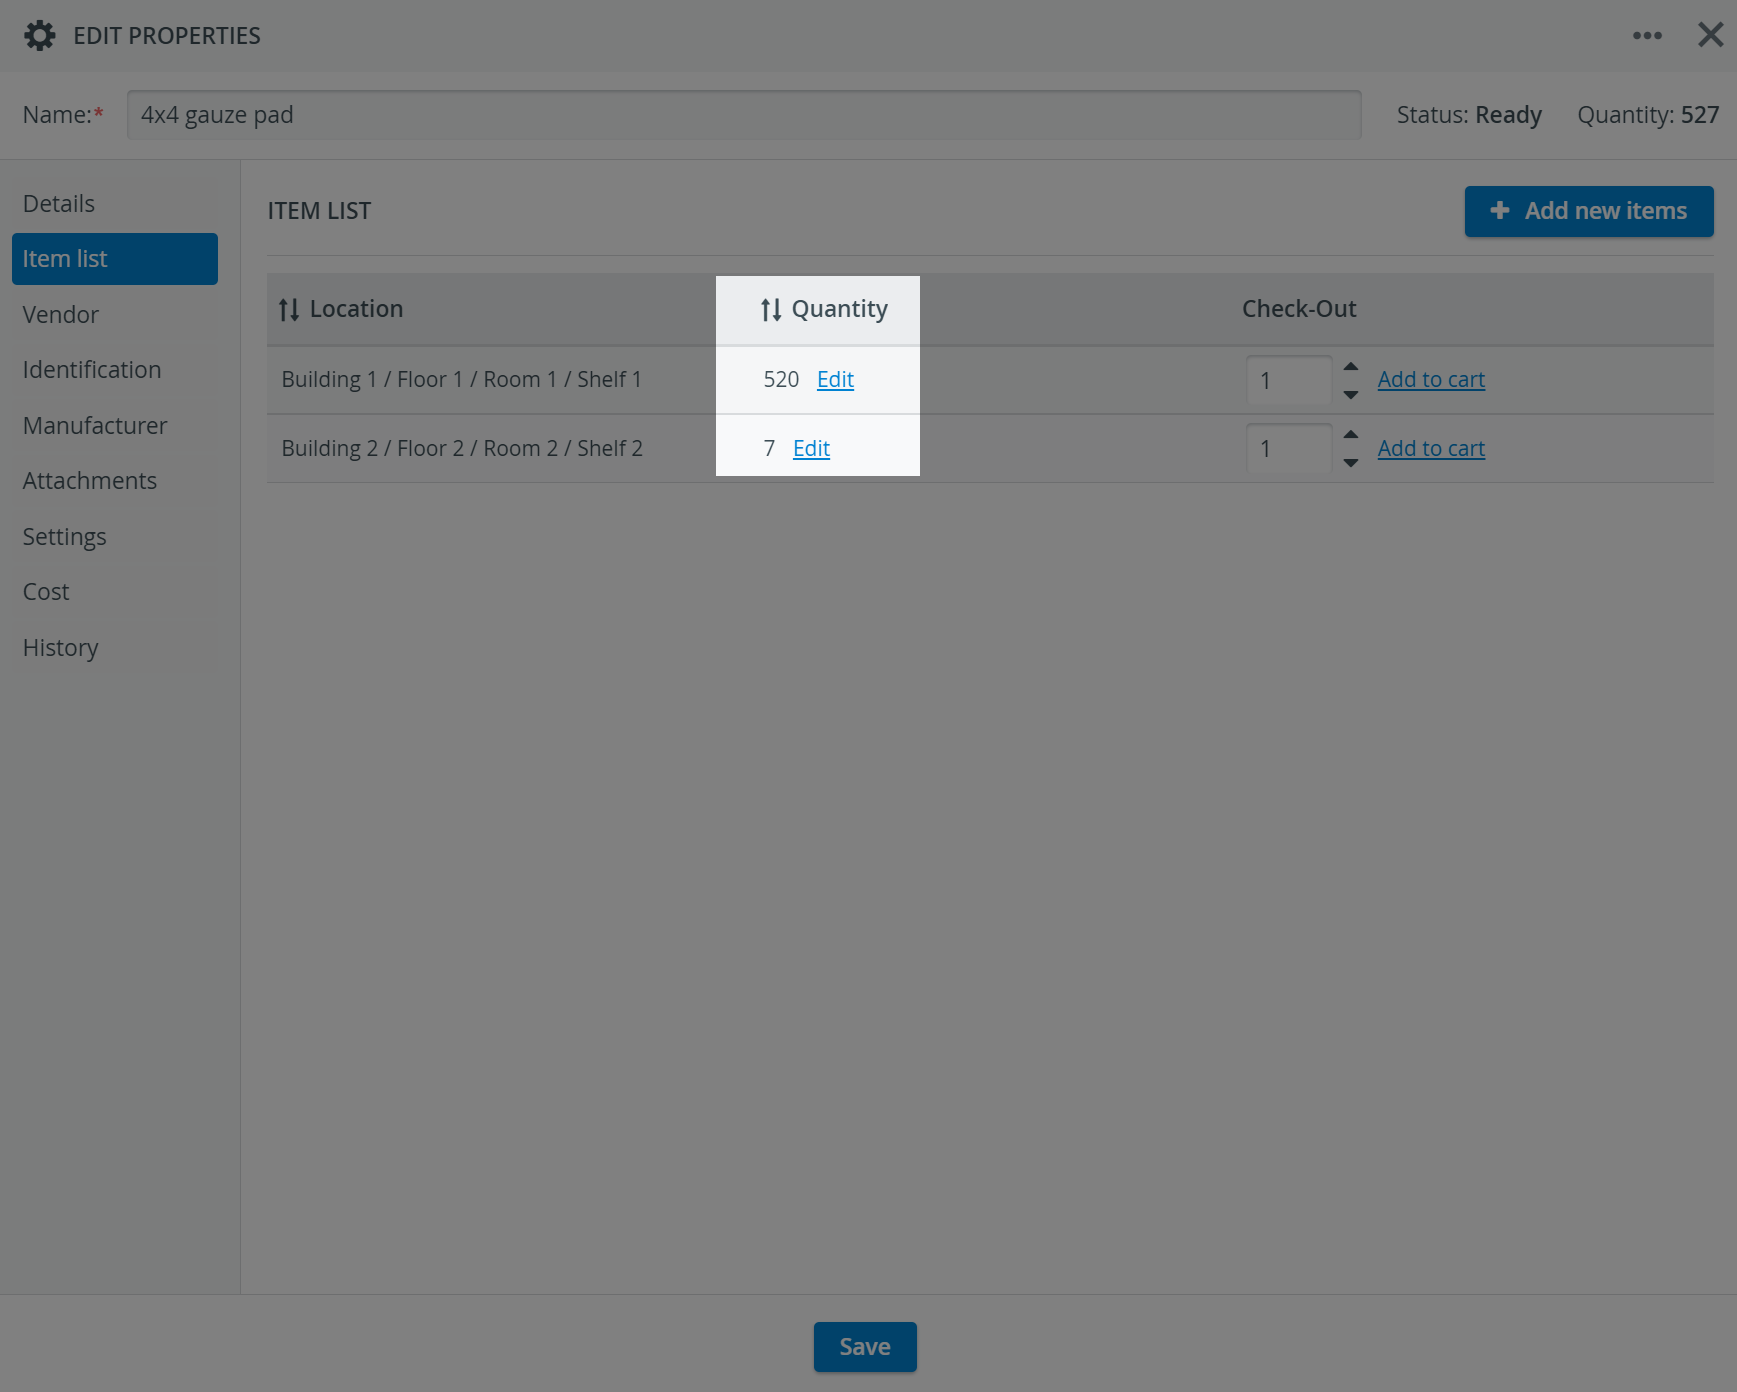
Every item's property editor has an Item list tab where users can check the exact locations of items stored in multiple locations.
Transaction will still be logged by the system to help trace back inventory movements.
Increase Item Quantity Without Check-In
With the help of this feature, the quantity of consumable, non-consumable items can be increased without creating a cart for check-in. Assets can also be checked in with this method.
To enter the quantity of an item for any location, use the +Add New Item button in the upper right corner in the Item List tab:
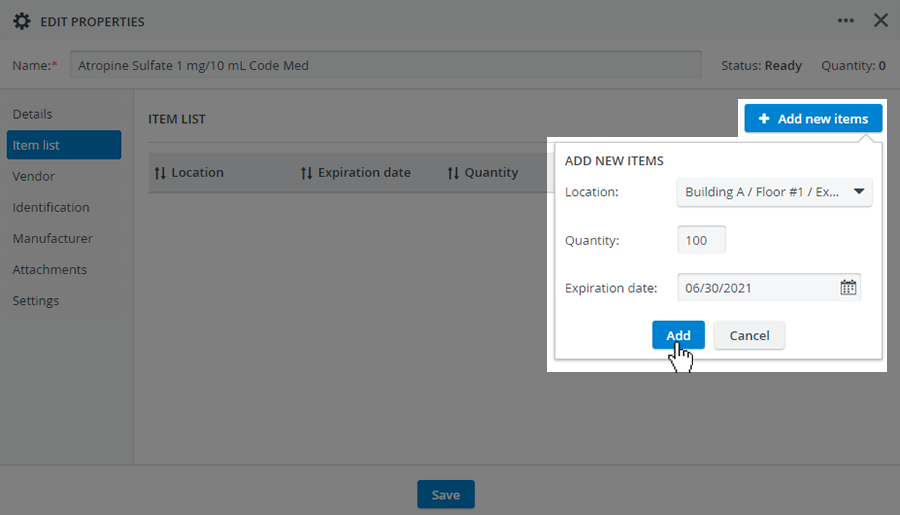
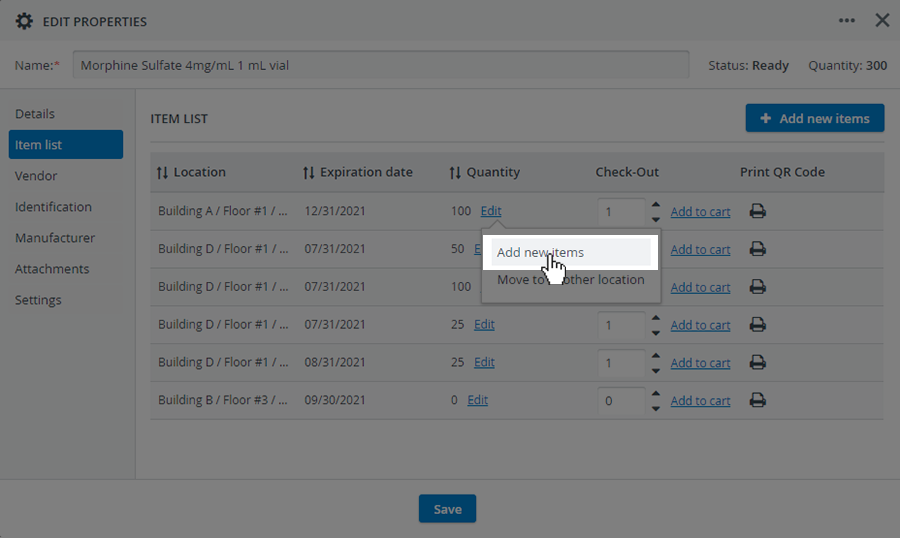
To increment the item quantity for a specific location or batch, access the Add new items option via the Edit button included at each location or batch:
After selecting the option, a pop-up will open where you can put in the quantity you want to add:

The system will create check-in logs in the transaction history each time you add items in the Item List tab so you can trace back when items were stocked:
![]()
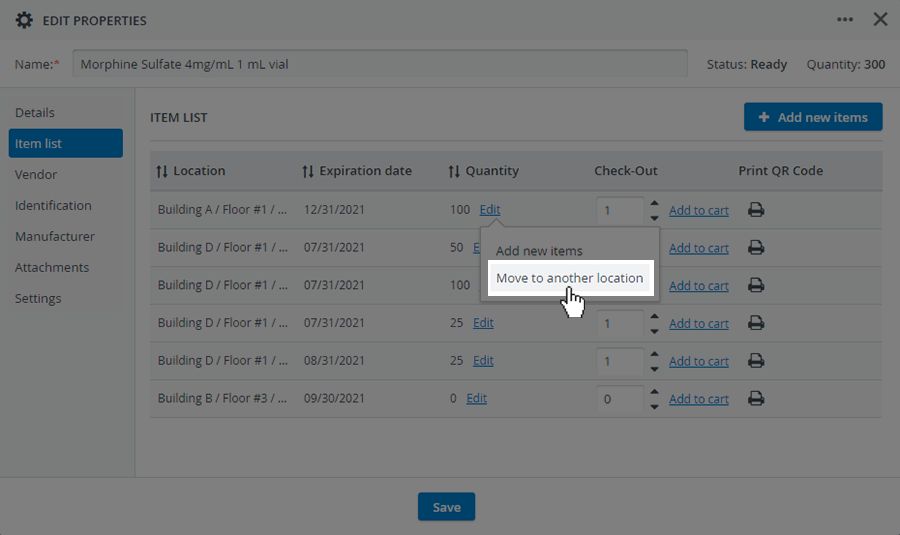
Easy Item Transfer
Transfer multiple items or an asset easily from one location to another with the help of the Move to another location feature, without conducting multiple transactions.
You can access the Move to another location option via the Edit button included at each location or batch.
Similar to easy check-in, the system will automatically create transaction logs for any transfer made in the Item List tab so you can trace back every movement inside your inventory.
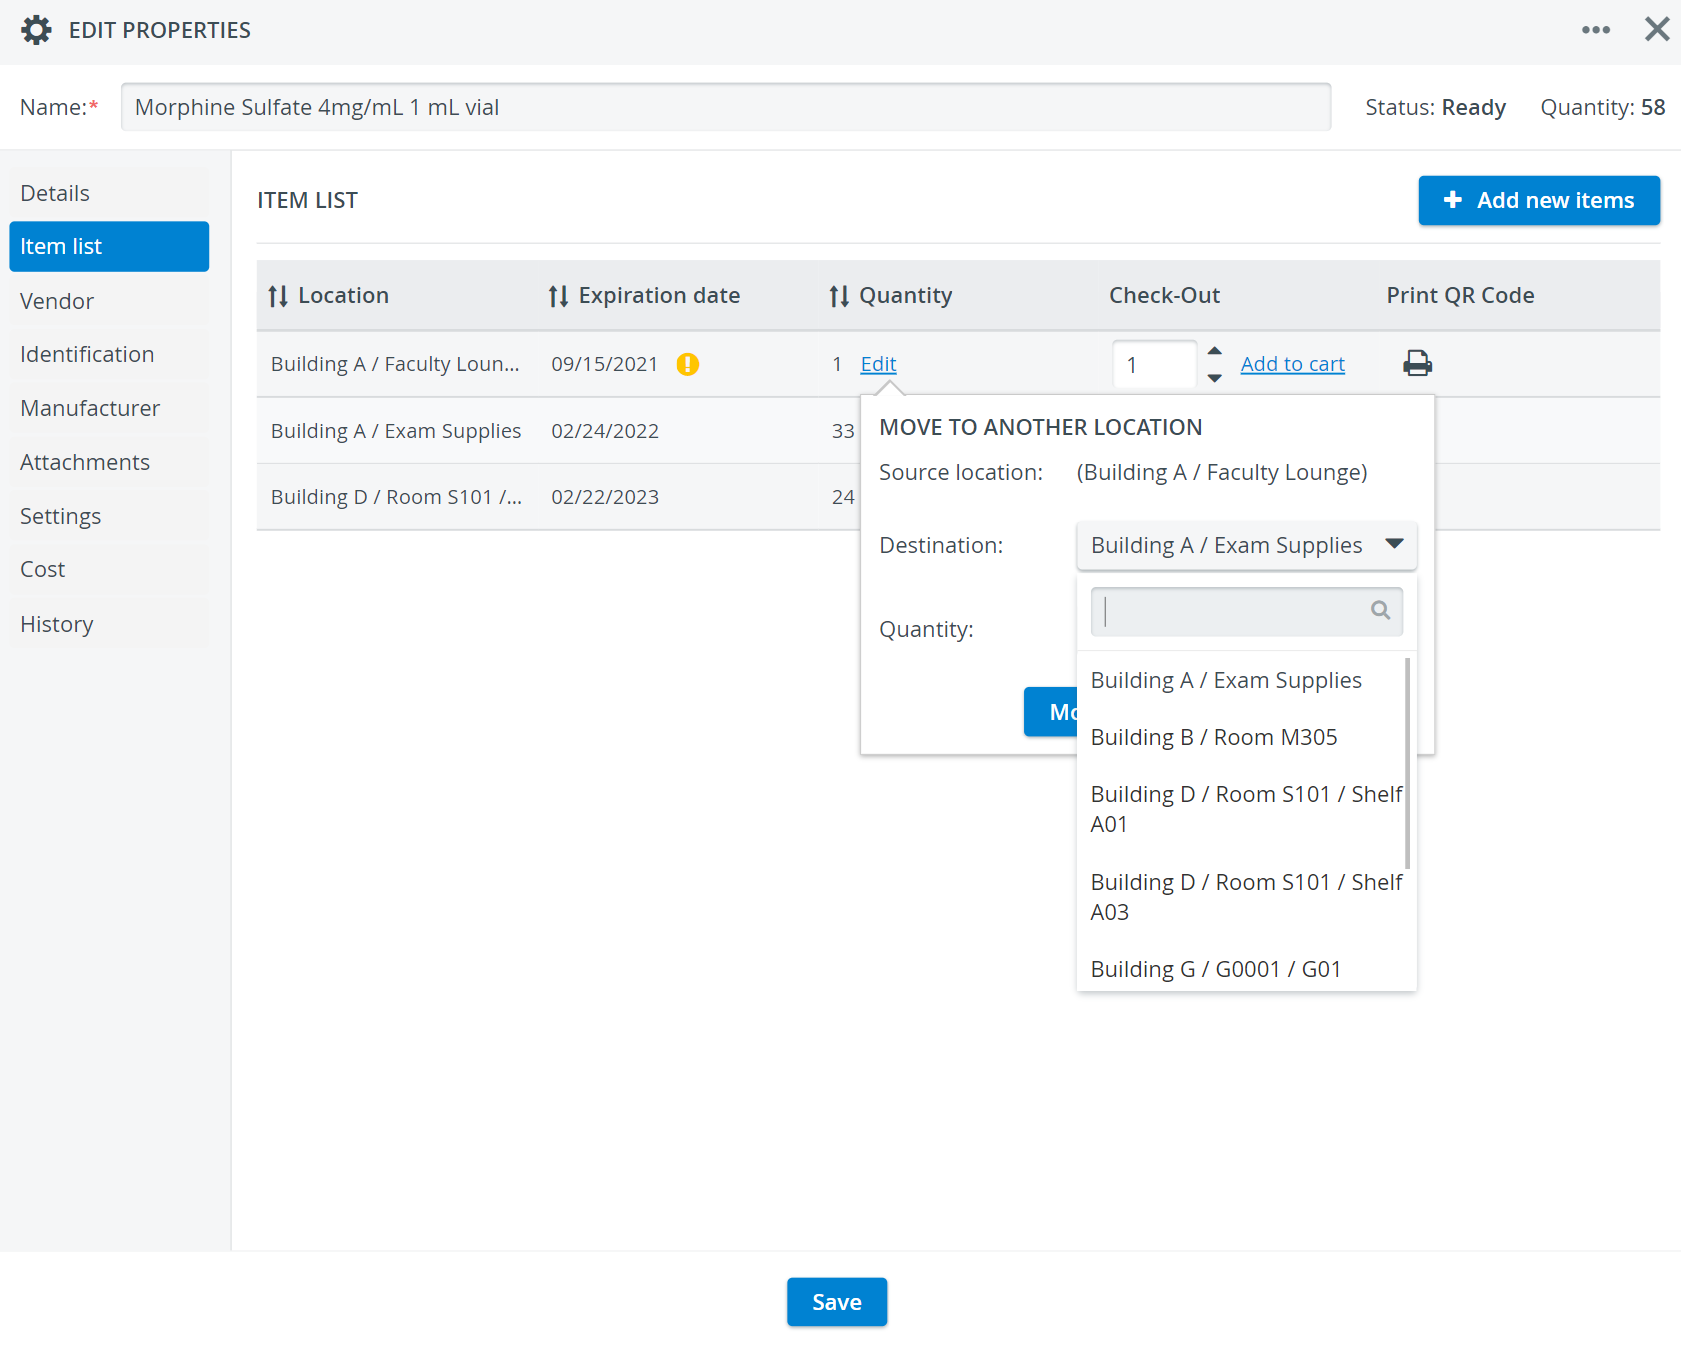
The Easy Item Transfer process creates two transaction logs in Transaction History: one for Check-out and one for Check-in.
![]()
To perform easy check-in or easy transfer, users must have the Transaction Assignee privilege activated in their user profile. If they do not have it, the Edit option will be inactive.
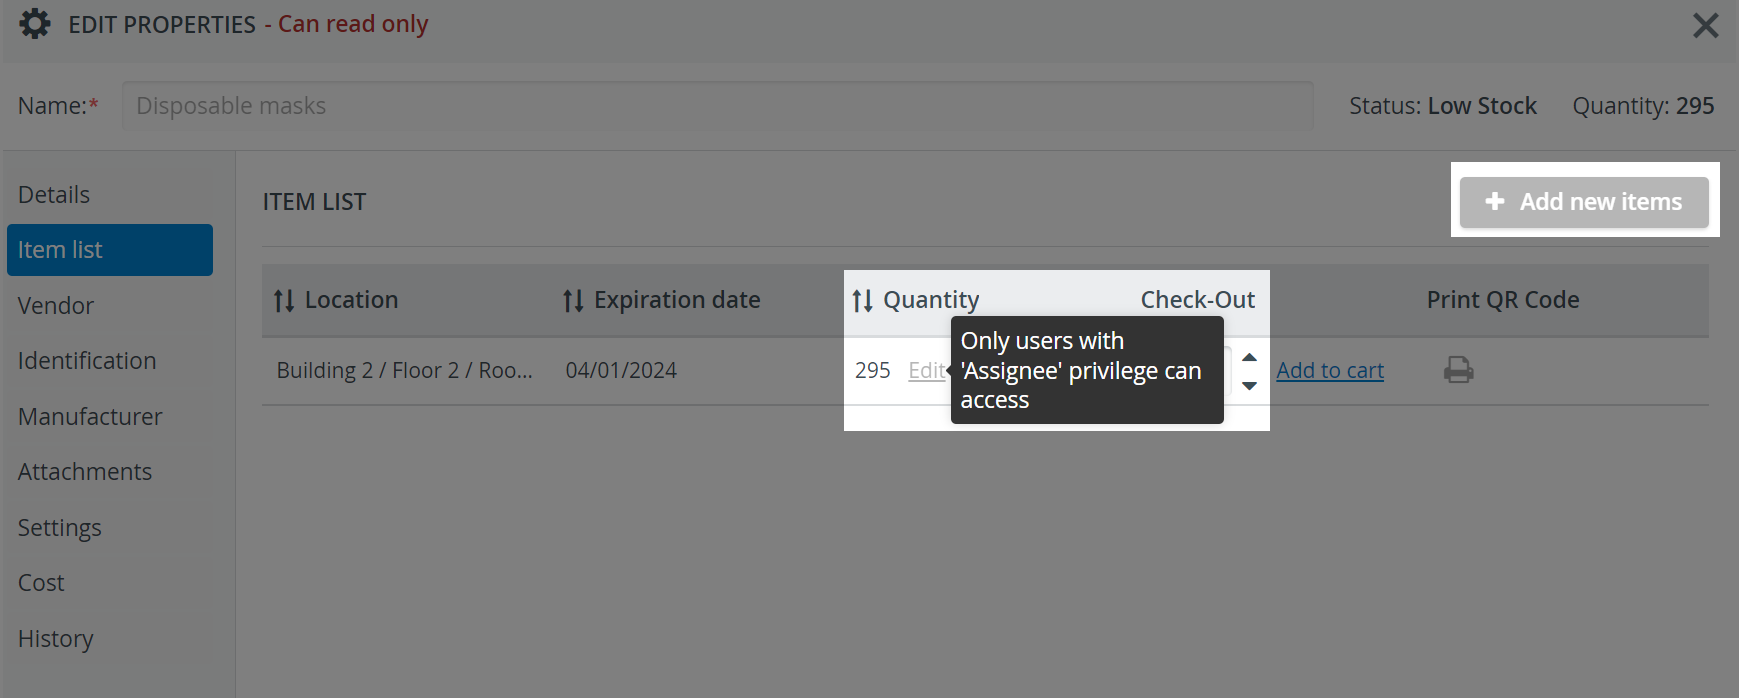
The + Add new items button is only available for users with Transaction Assignee privilege.
Easy Item Check-Out
You can add items to check-out directly from Item List with the help of the Add to Cart option: this will open a new cart for check-out where you can continue with the check-out workflow.
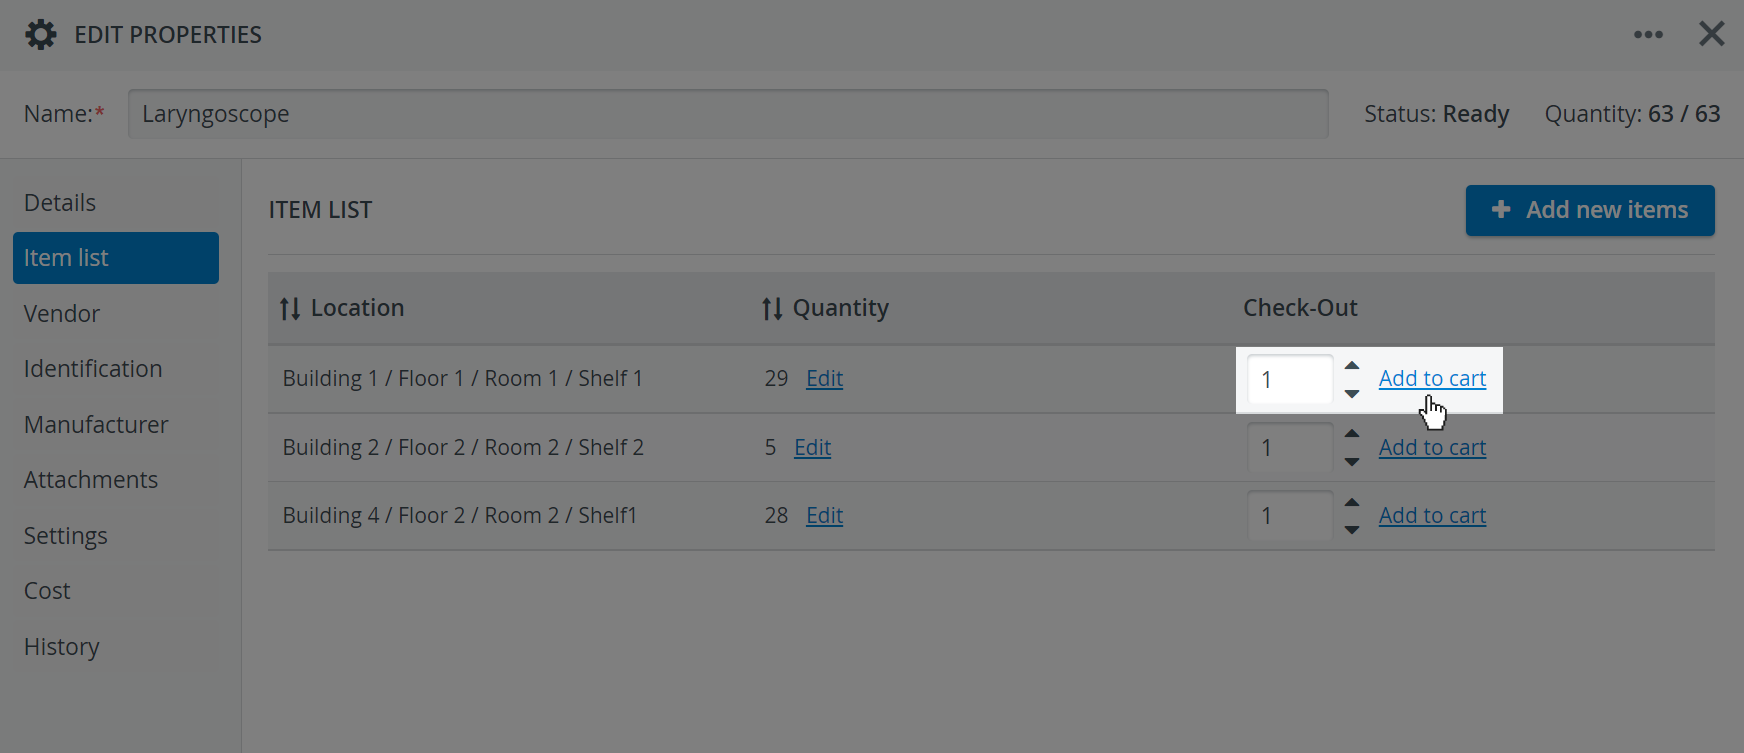
Transaction Assignee privilege is not needed for the Add to Cart option.
Transaction history
In the Transactions tab, you can look up the transaction history of your inventory. Any time you perform a regular transaction within your cart, check-out your Setup Sheets, or perform an instant transaction inside the Item List tab of an item, there is an entry created that contains:
- a timestamp that marks the date of the transaction,
- a transaction assignee who is responsible for the transaction or trusted with the equipment,
- the event the items were checked out for in the case of Setup Sheets,
- the total number of items of the transaction,
- the storage location.
Double-click on a transaction to display its further details like storage location, expiry date, reason of reconciliation, or warranty.
![]()
Check in or out a specific item or multiple items in one go while assigning each transaction to a person responsible for the equipment.
The quantity of each item is automatically updated in the Catalog.
The latest transaction is always displayed on the top of the transaction list, but you can sort the transaction entries by any of the columns using the sorting arrows:
Cart Feature
Access the Cart option while being on any of the tabs inside the Inventory module. The cart saves your selected contents for later while going through other tasks in the module.
Users in charge of transactions first need to detect an item, then subsequently select a location, place the item in their Cart, and are only required to select an assignee in the last step.
With the help of the Cart feature, inventory managers can add multiple items from various locations to a single transaction. Inventory managers can also save their cart contents for later while going through other tasks in the Inventory module.
![]()
Users can create a new cart by clicking the empty Cart icon in the top right corner of the Inventory module:
![]()
After adding items to their cart, users can return to the module and continue browsing while their contents remain in the Cart.
Cart contents persist as long as inventory managers stay inside the Inventory module. If a transaction is not finalized, their cart will be discarded when returning to the Dashboard.
The Cart feature can only handle one launched transaction at a time, so if you launch a new transaction while still having an active cart from earlier, you need to either finish the transaction or discard the contents of your existing cart.
Learn more about the Inventory Manager on our Inventory - How to pages, and watch the Inventory Manager Training Videos.
Overview
Content Tools