The Calendar can be viewed by Month, Week, Day or Room view, and there is also a List view available.
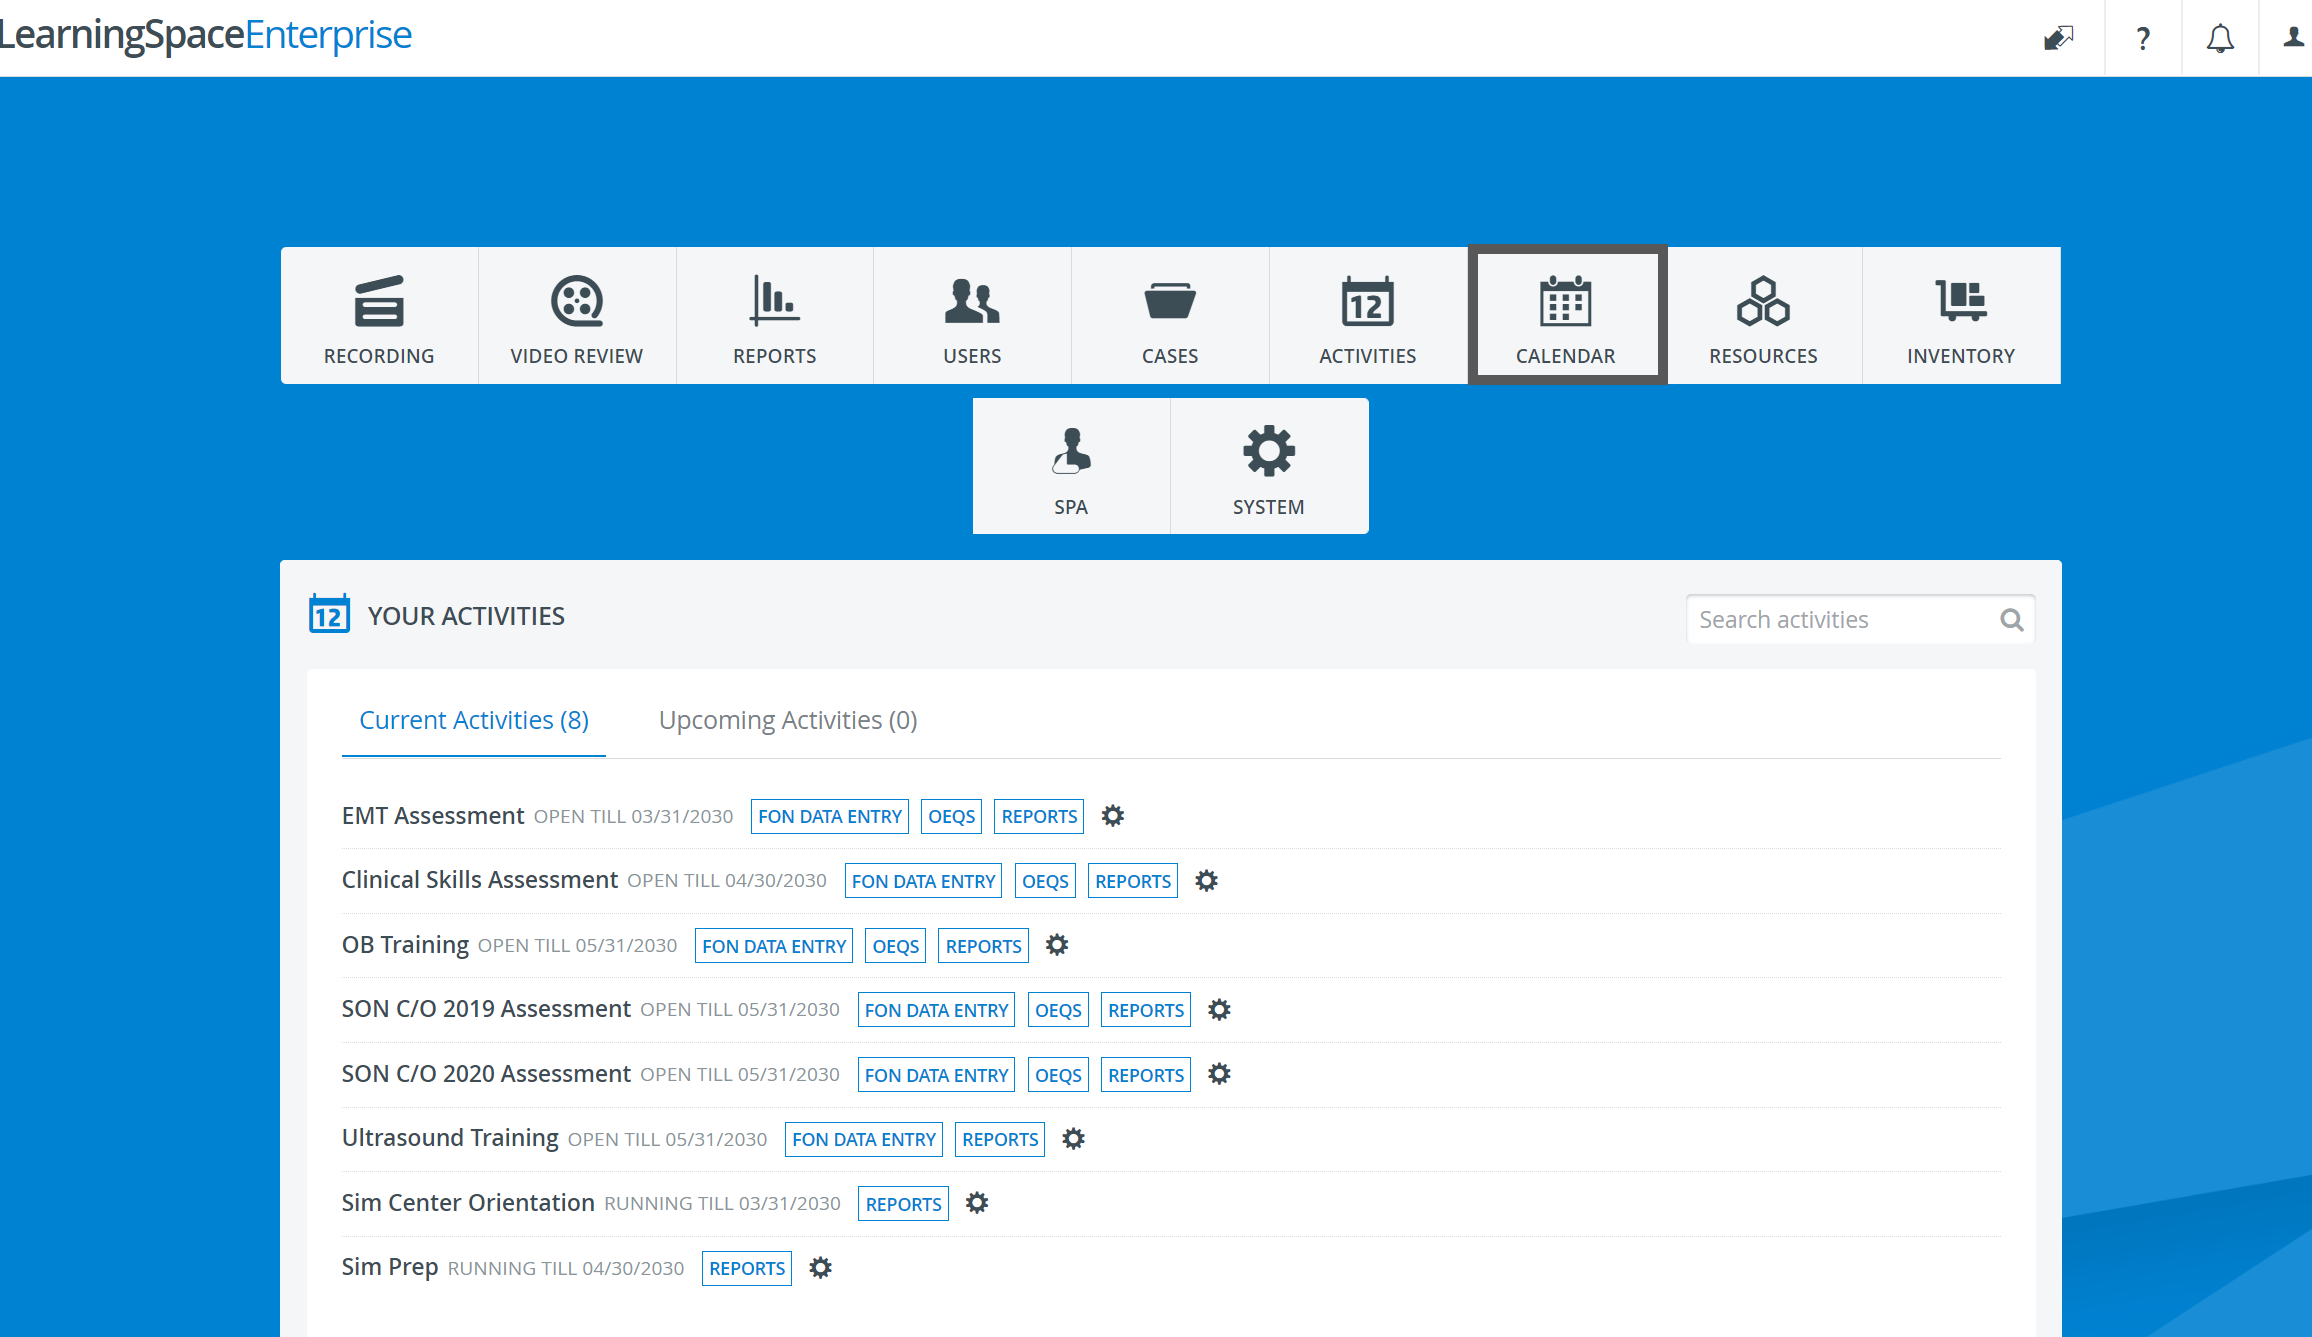
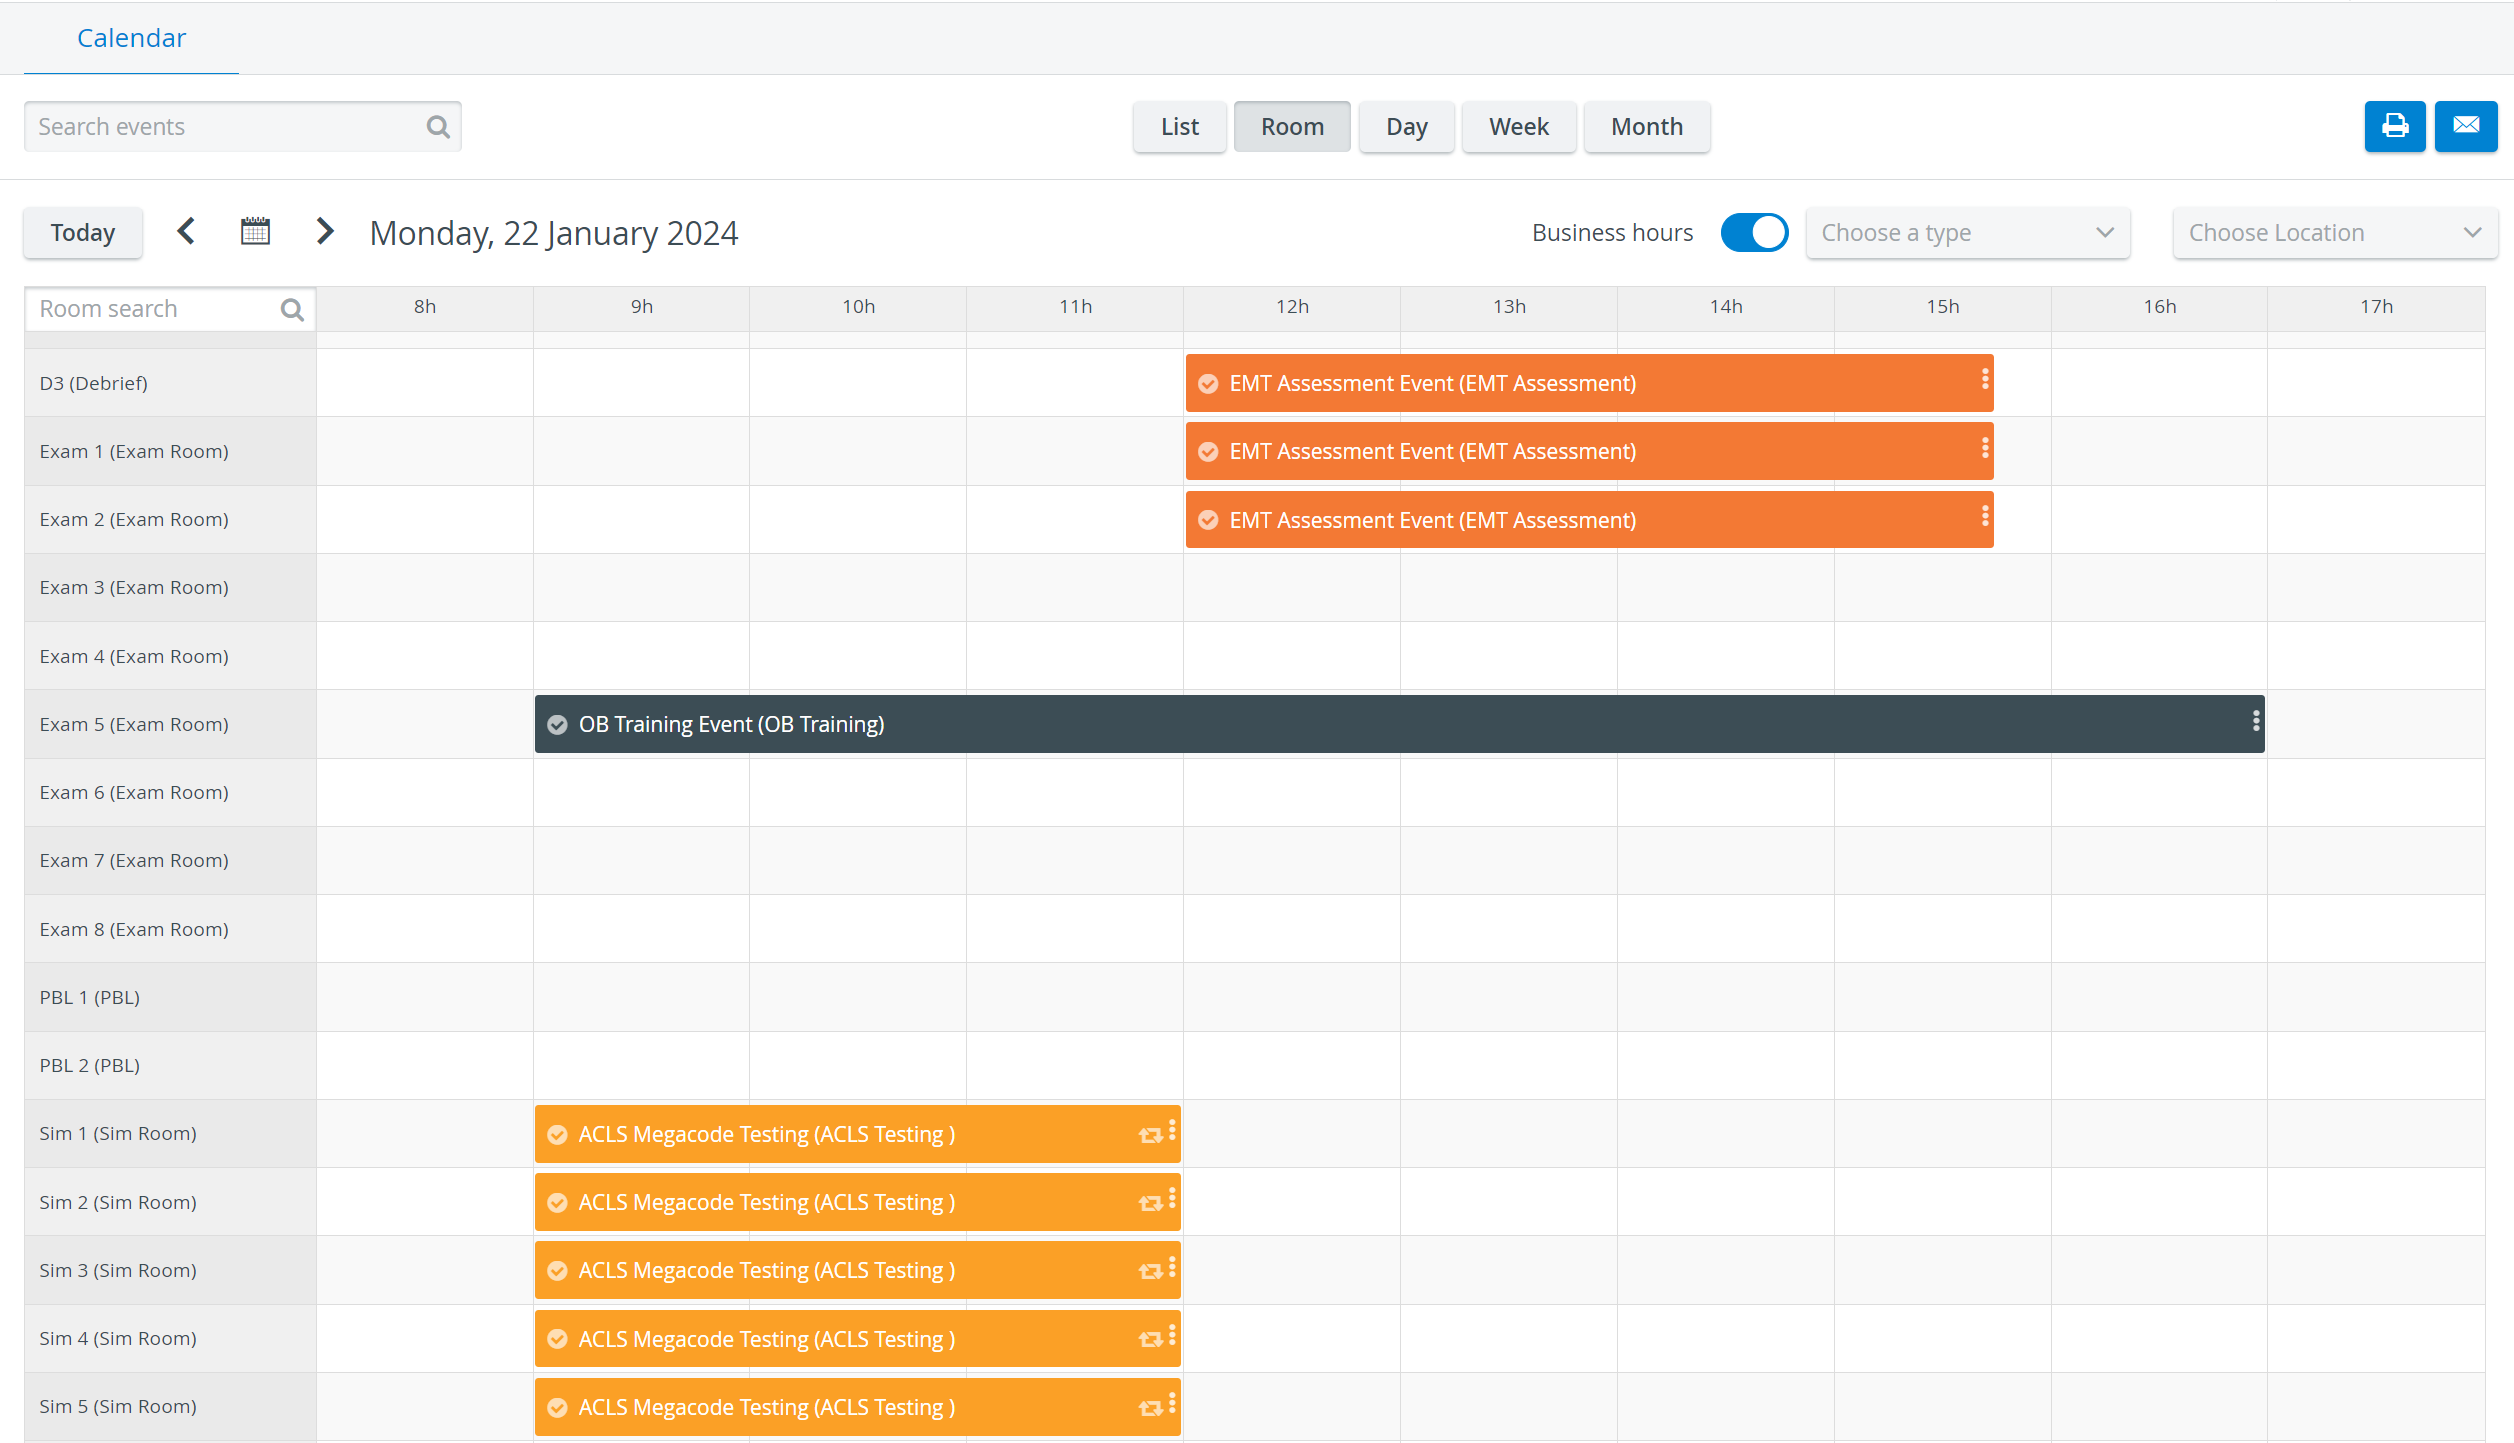
- From the Dashboard, click the Calendar icon. By default, the current Room view appears.
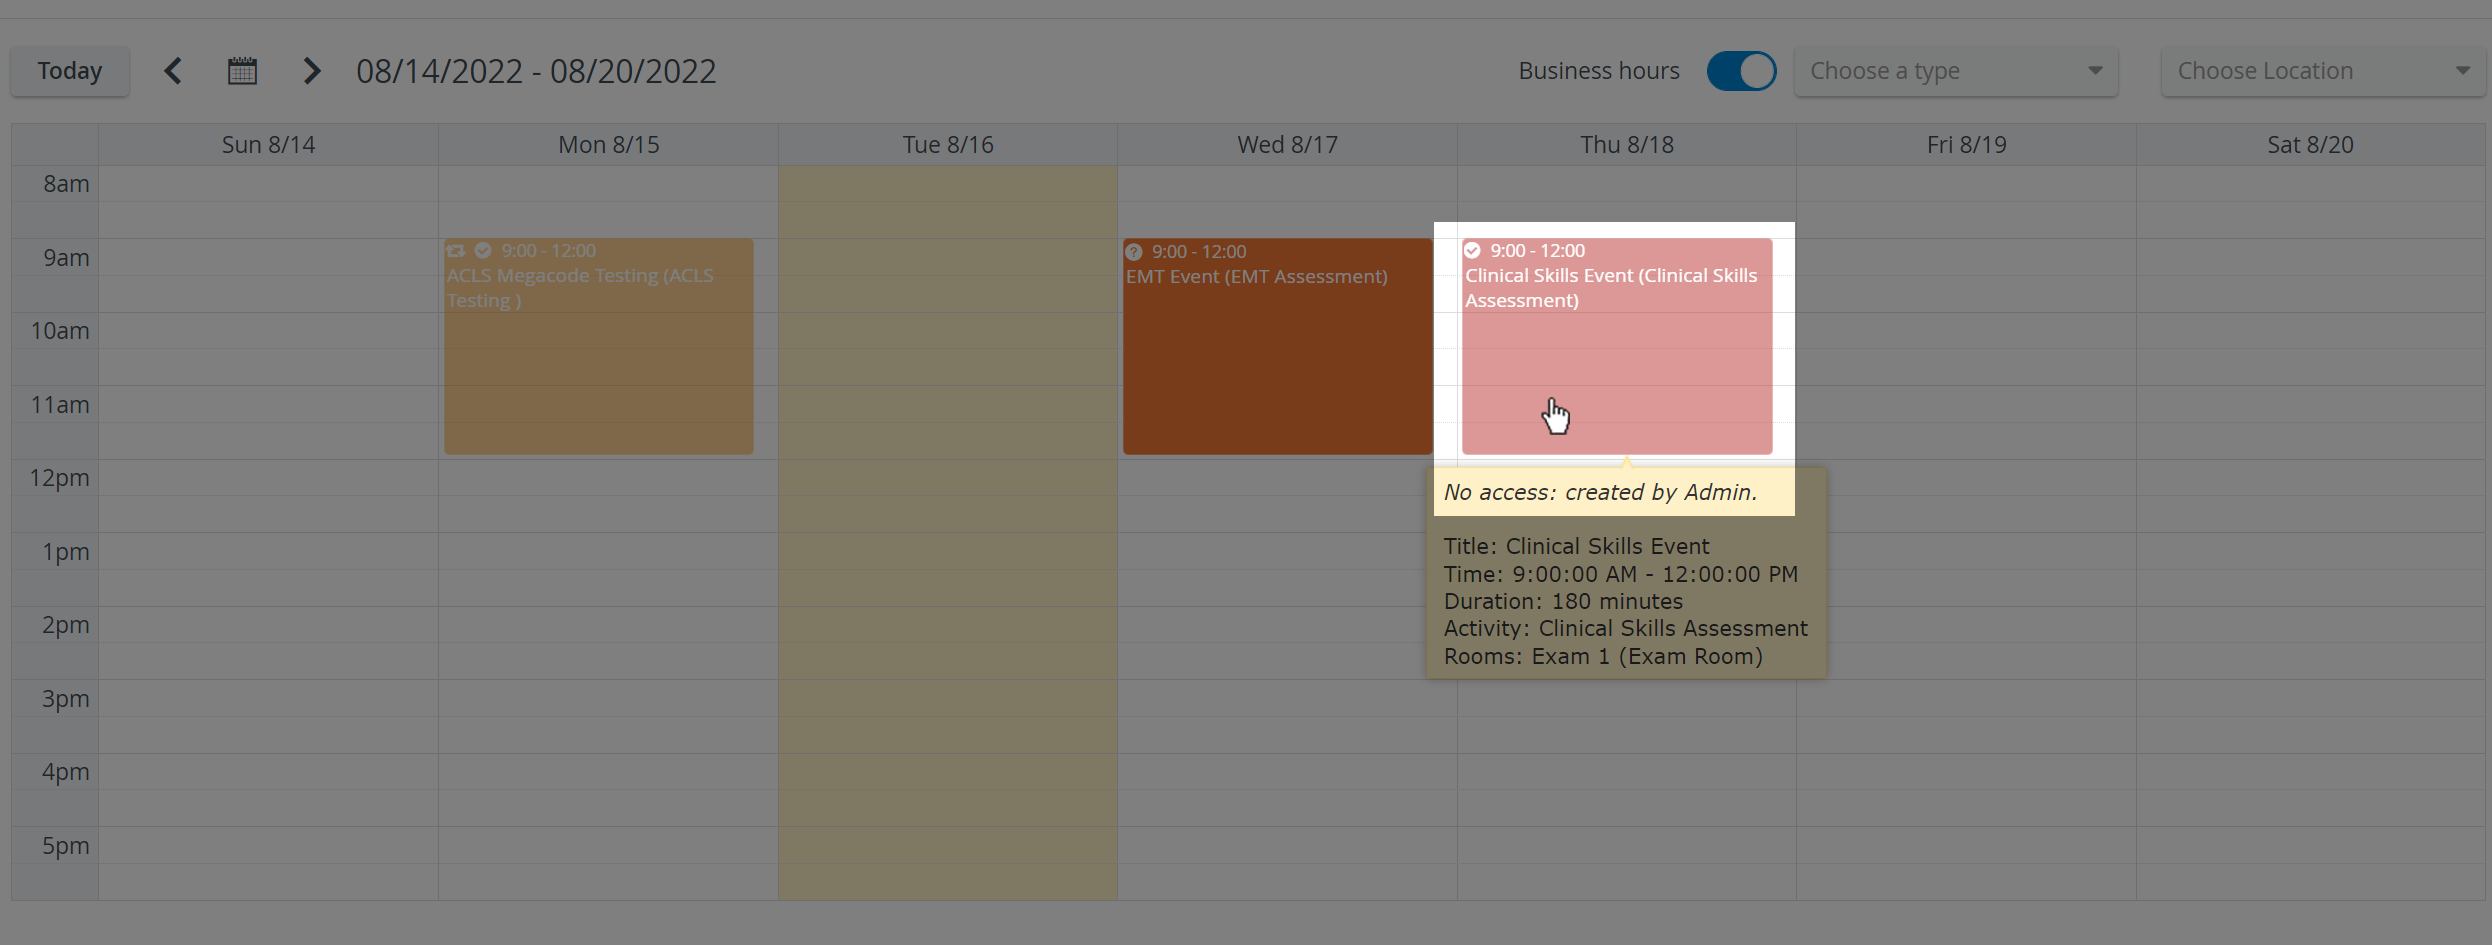
Scheduling displayed as paled indicates that some of the operating users have limited privileges and therefore do not have access to that schedule.
When hovering over any such Event, a warning message appears informing about No access.
When hovering over any such Event, a warning message appears informing about No access.
IMPORTANT: Access to the Calendar module is restricted to users with Admin, SRP or SRP (full control) privilege.
Events can be edited by a user with either privilege. However, in case of users with SRP privilege, any modification made with respect to either time, repetition, activity
or room settings has to be (re-)approved by a user with Admin or SRP (full control) privilege.
Events can be edited by a user with either privilege. However, in case of users with SRP privilege, any modification made with respect to either time, repetition, activity
or room settings has to be (re-)approved by a user with Admin or SRP (full control) privilege.
IMPORTANT: Events that have timeslots scheduled can only be edited in Advanced Scheduling, thus appear paled even for users with the necessary privilege(s).
2. Click the date forward![]() or back
or back ![]() buttons to scroll through the Calendar.
buttons to scroll through the Calendar.
The back and forward arrows jump back or ahead a day, a week or a month according to the actual view.
3. Click the Calendar icon ![]() to select an exact date.
to select an exact date.
In Day view, the selected day, while in Week view, the week including the selected date is displayed.
The Calendar icon is available in Room, Day and Week views.
4. Click the Choose a type drop-down menu next to the Calendar icon to narrow the Events displayed based on the type of Activity in which they have been created.
The color-coded Events appear. Delete the selected Activity type in the drop-down to return to displaying all Events.
5. Display all hours by deactivating the Business hours switch.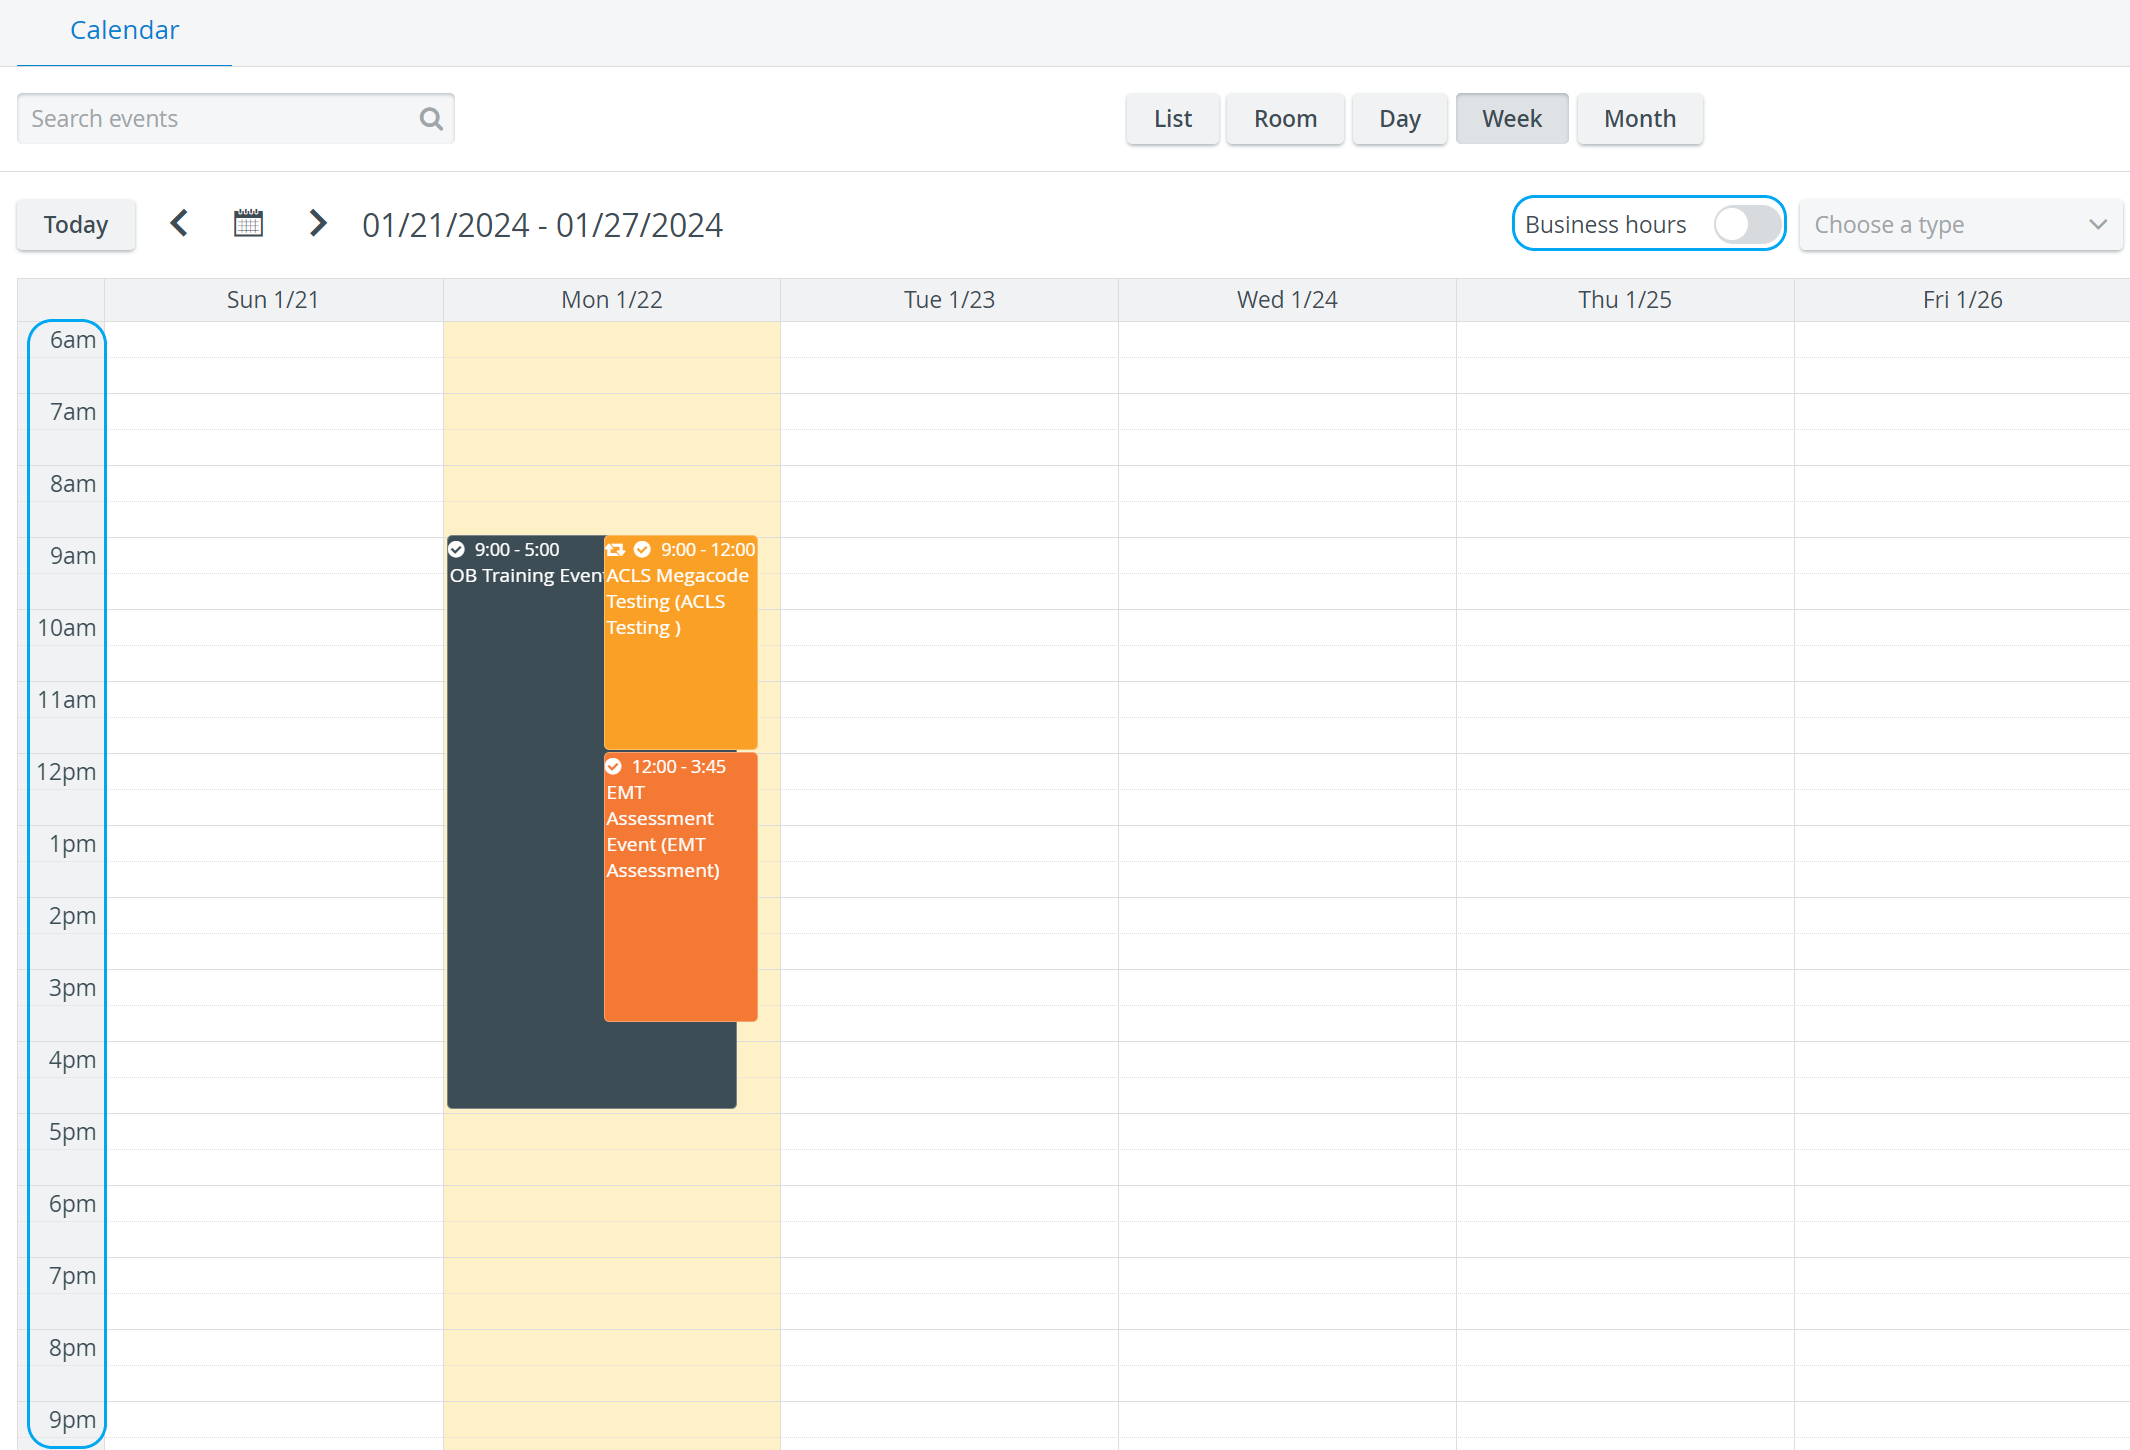
The Business hours switch is available in Room, Day and Week views.
6. Click the Week button to display a weekly Calendar view.
Scheduling displayed as paled indicates that the operating user has limited privileges and thus no access to that specific scheduling.
7. Click the Month button to display a monthly Calendar view.
8. Click the List view to have all the Events listed chronologically by day and the next 6 months in yearly view displayed on the right.
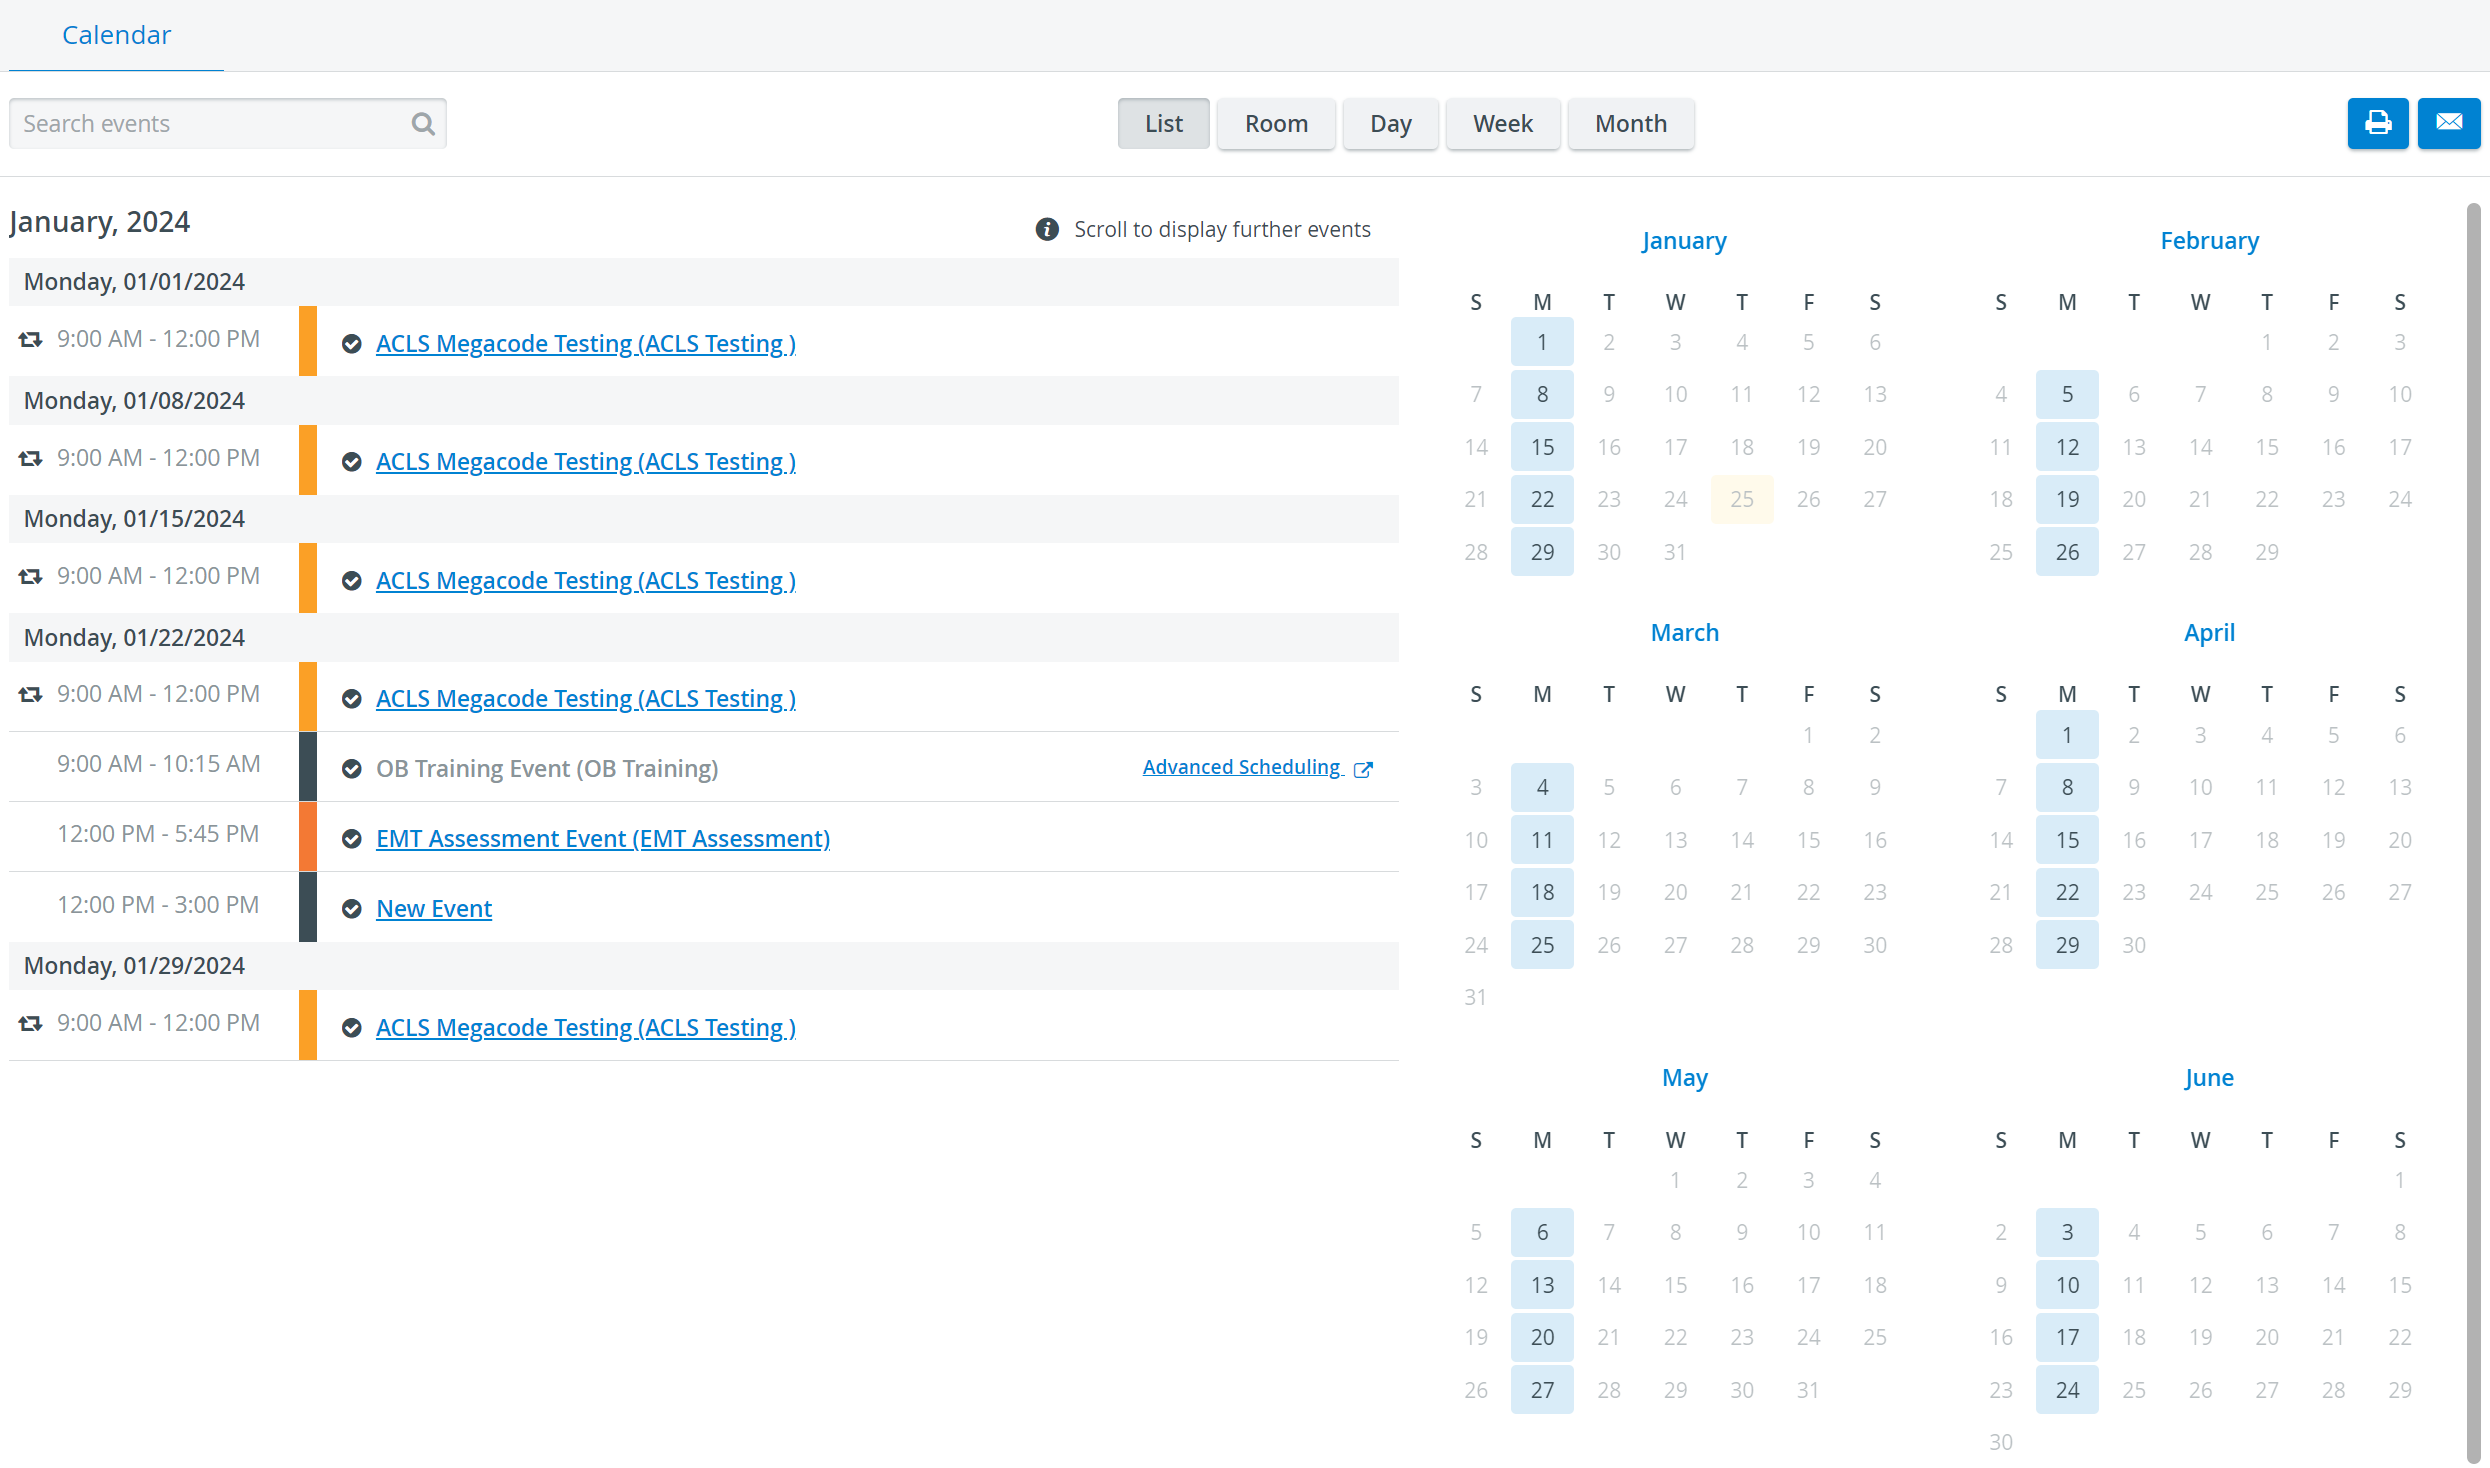
The chronological daily listing of Events starts with the day selected on the yearly view (Calendar on the right). By default, it is today's date.
For further information, visit our Calendar - How to pages and watch our Calendar Module Training Videos.
Overview
Content Tools