The page explains how to search for SPs by demographics or skills, how to send requests to candidates for patient scenario Session dates, and explains the statuses SPs can have in the Recruit SP popup.
Once you have added Cases to your Sessions, you can start recruiting SPs for the patient scenarios.
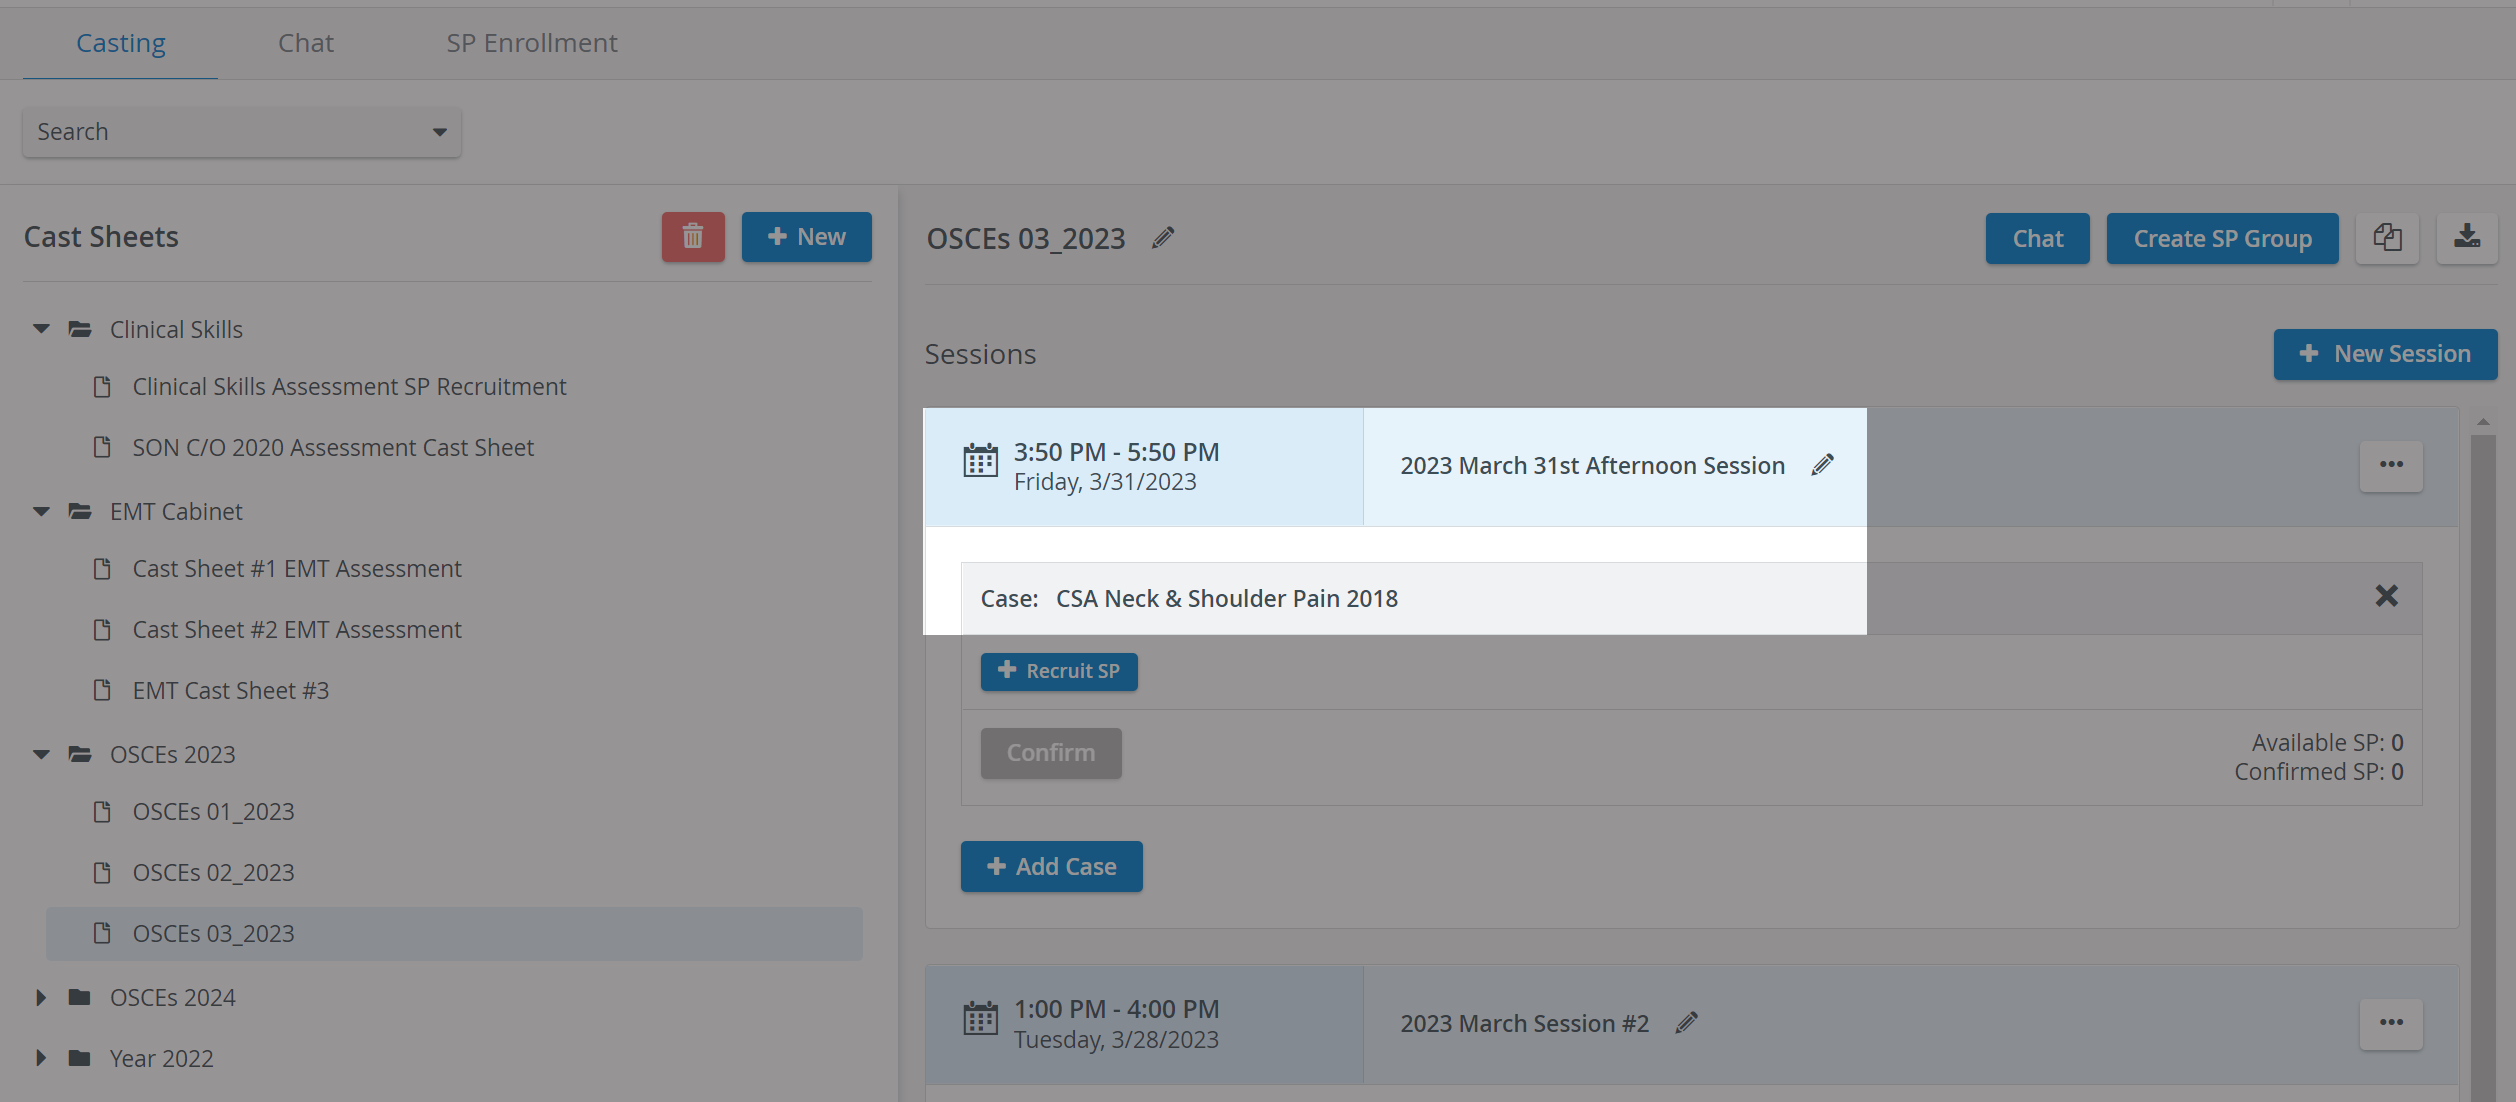
Click on the Recruit SP button inside a Session, under Case.
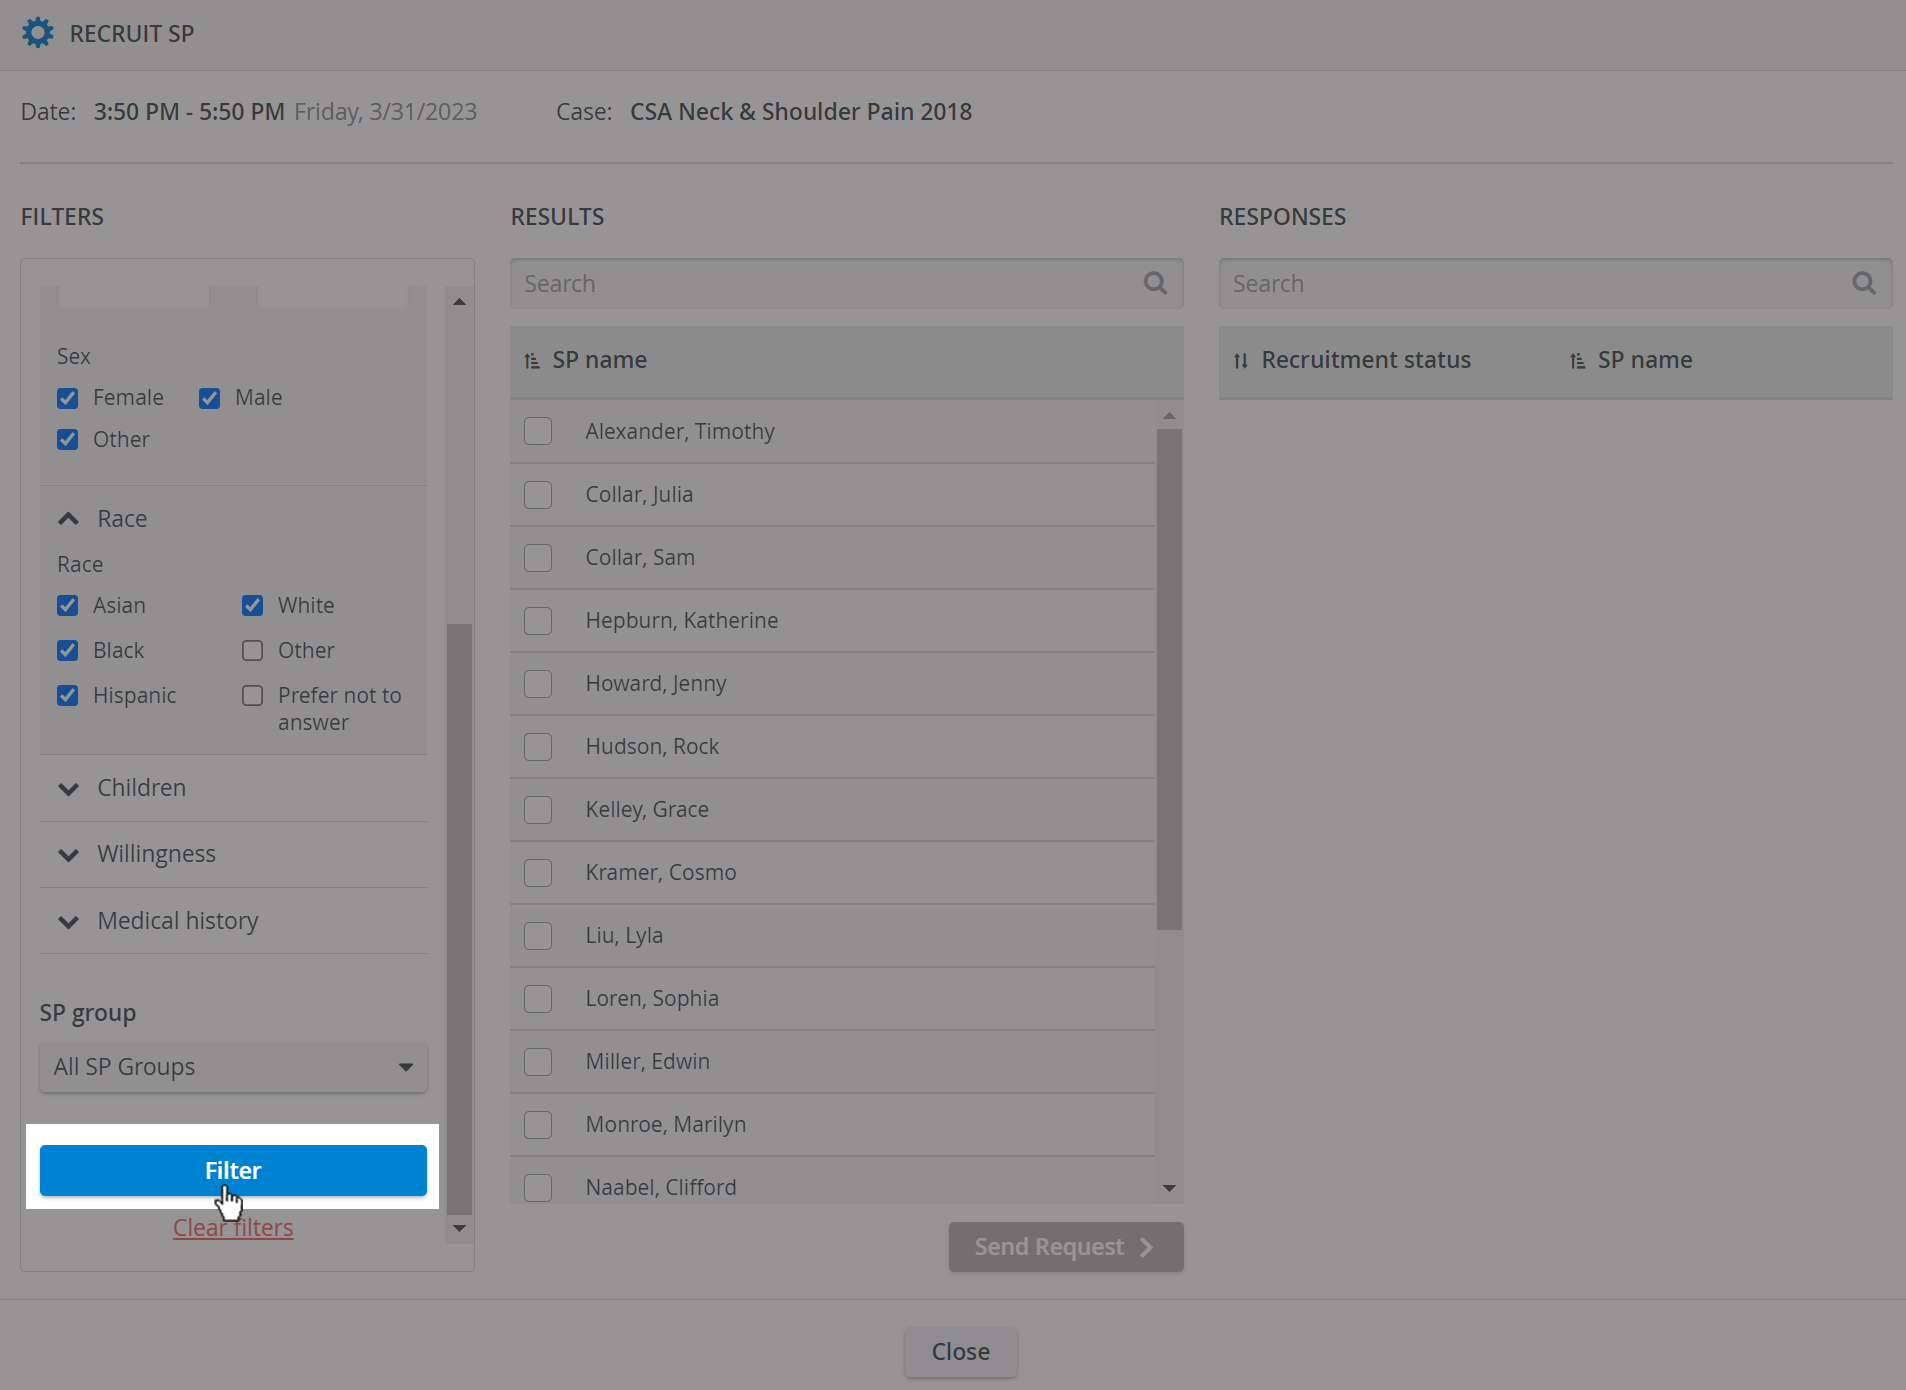
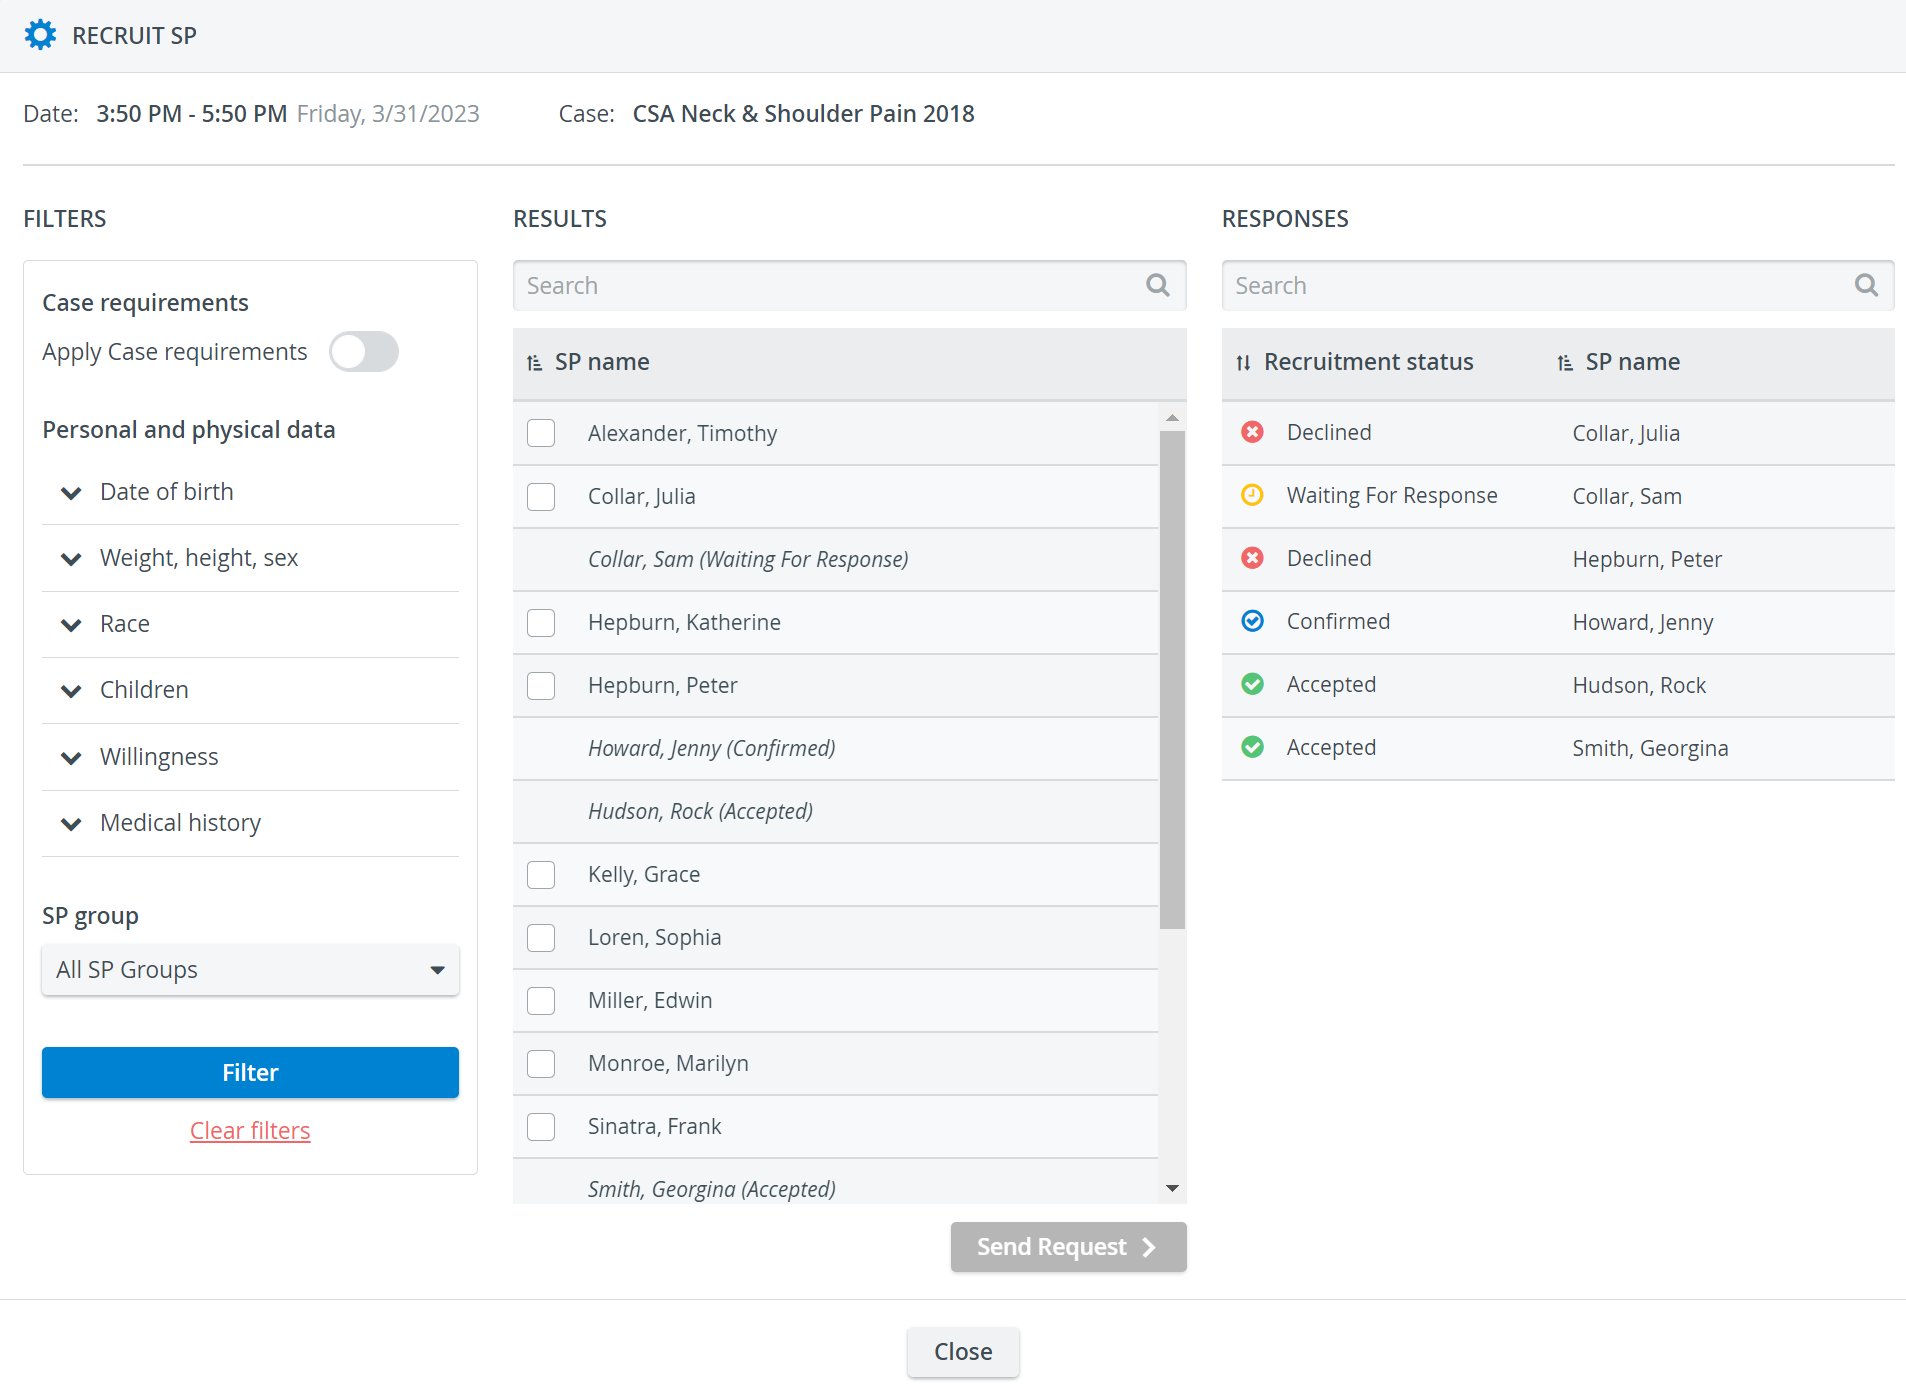
The Recruit SP popup opens.Here, you can set up the search criteria to filter your user database for SPs with specific traits and experience, and notify the candidates about the job opportunity by sending a request.
Set up SP filtering requirements.
Learn more about filtering categories.
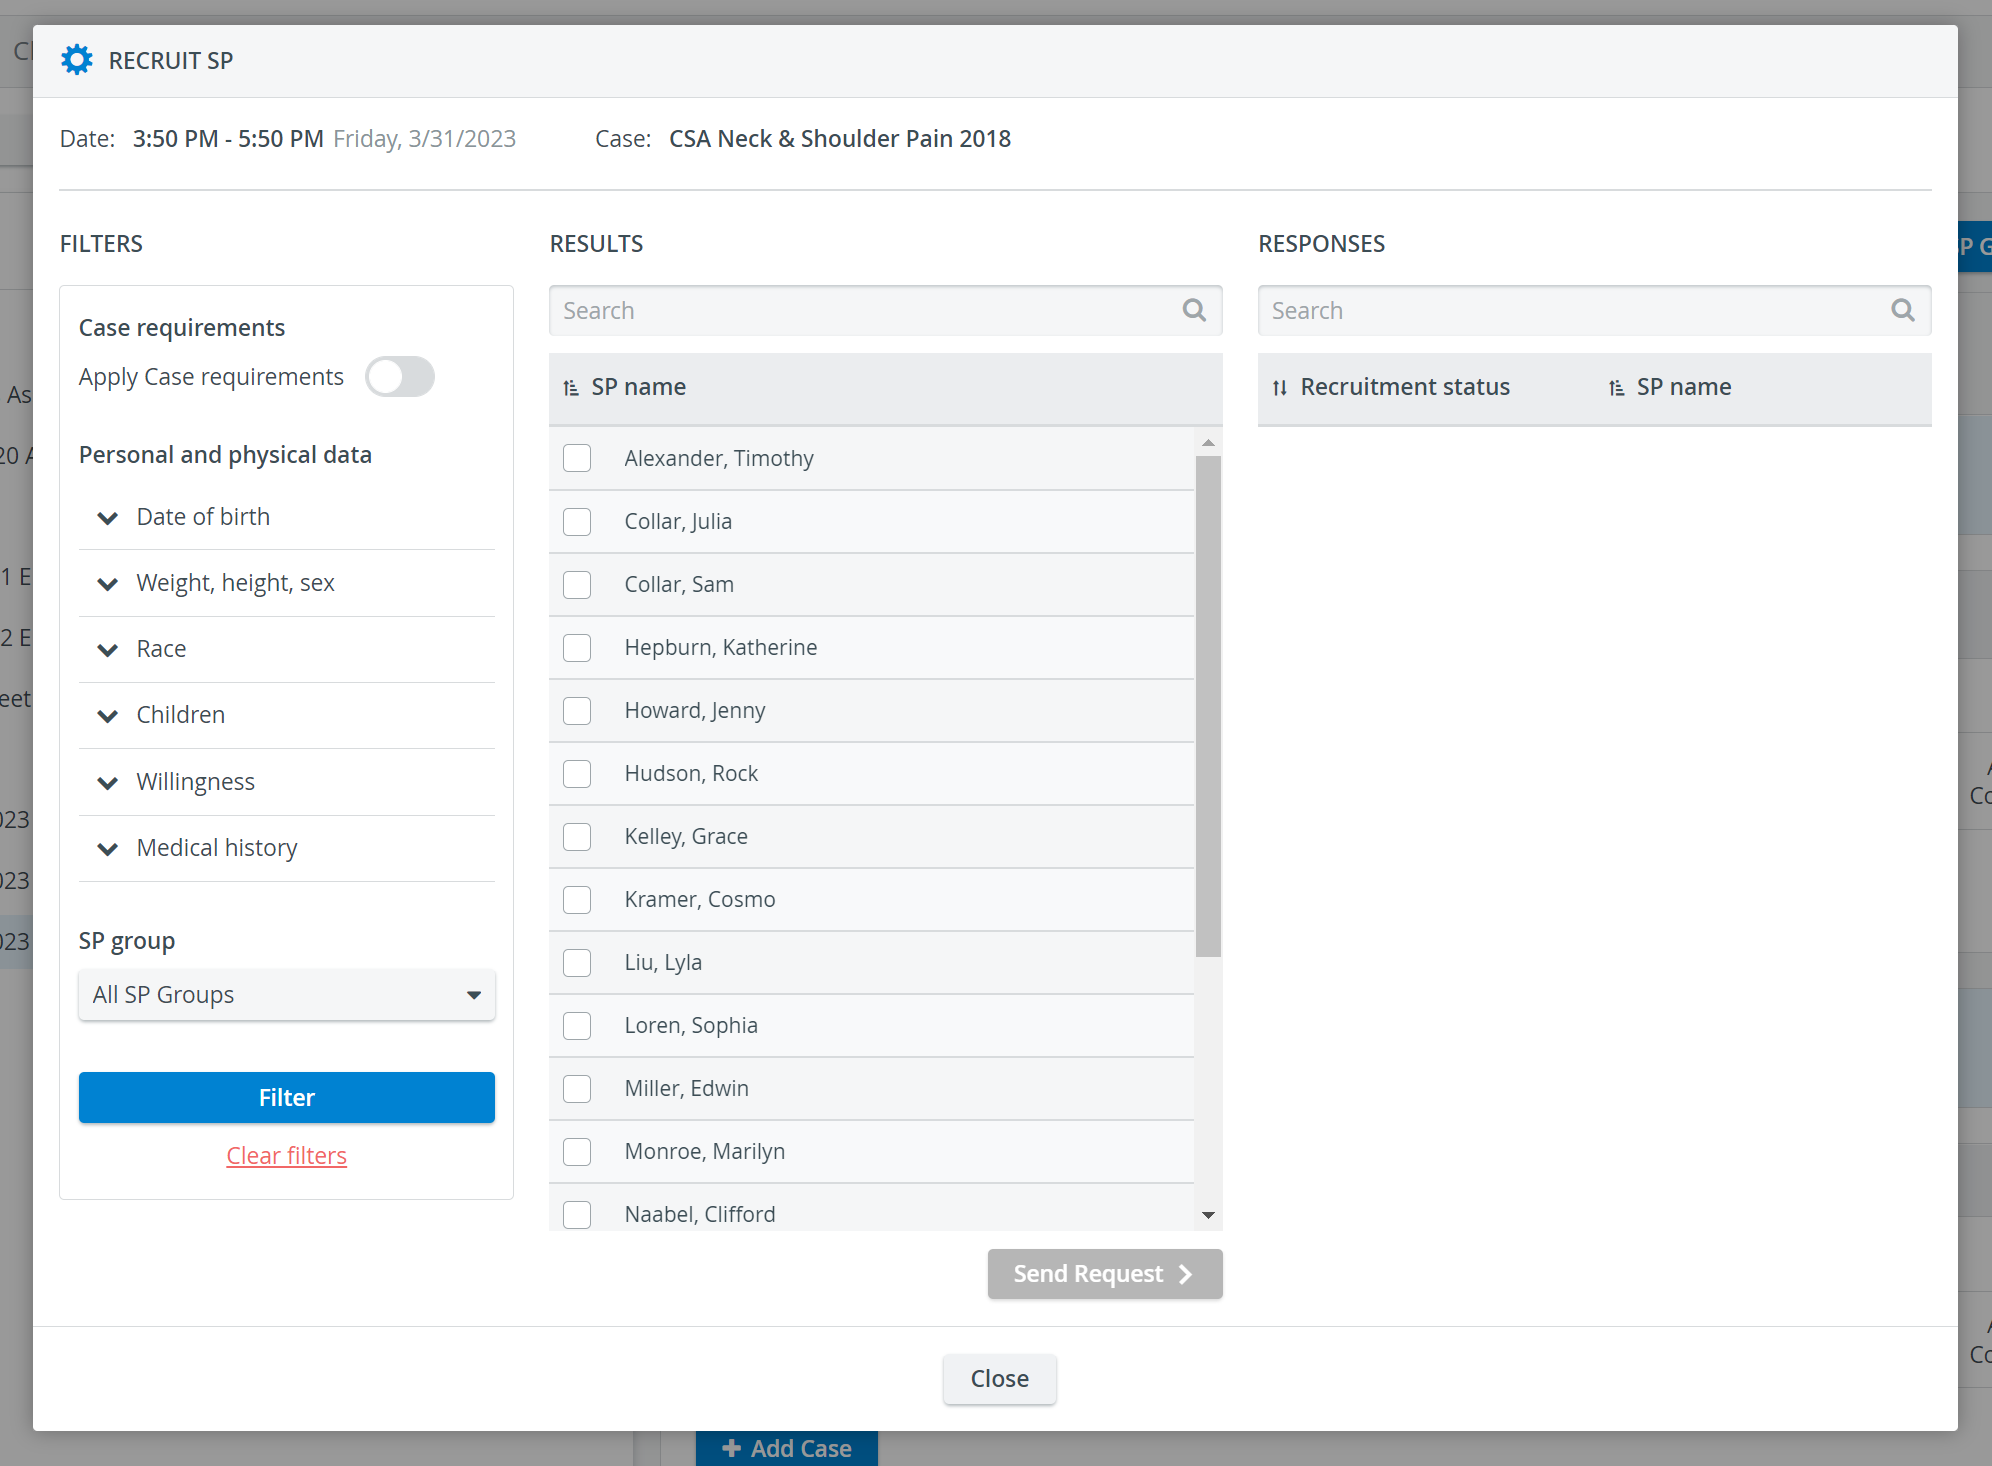
You can import search requirements from the Case that has been added to a Session, or you can manually set up the criteria:
Switch on Apply Case Requirements to fill in automatically the case requirements:
The Apply Case Requirements switch will be automatically disabled after manually editing the search criteria.
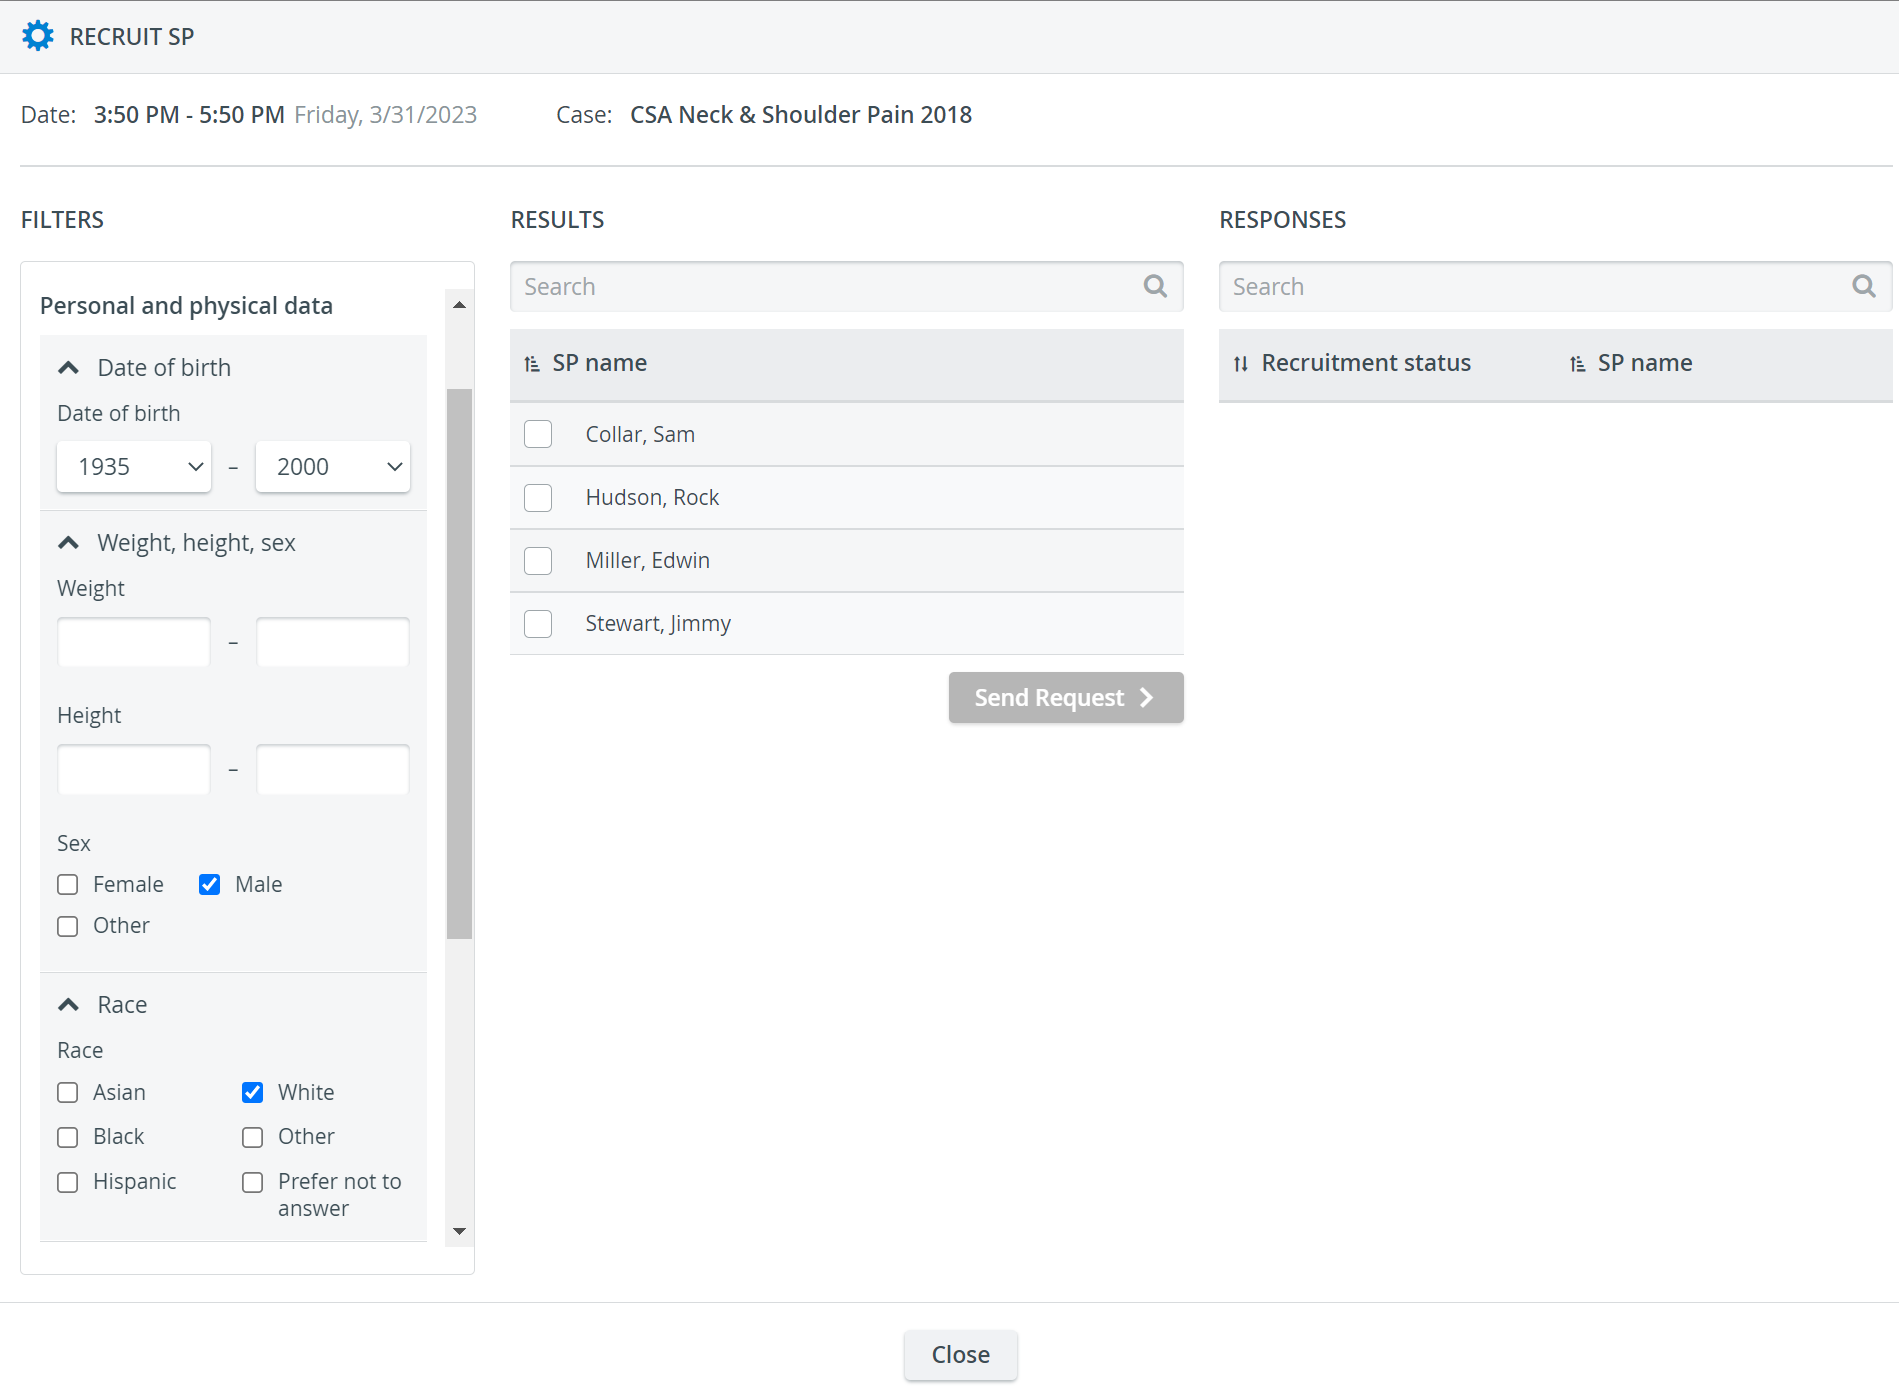
Set up search criteria manually if you do not have a Case added to a Session.
Learn more about adding a Custom Subject.
- Click Filter to search for SPs.
SPs will be filtered down in the Results column in the middle: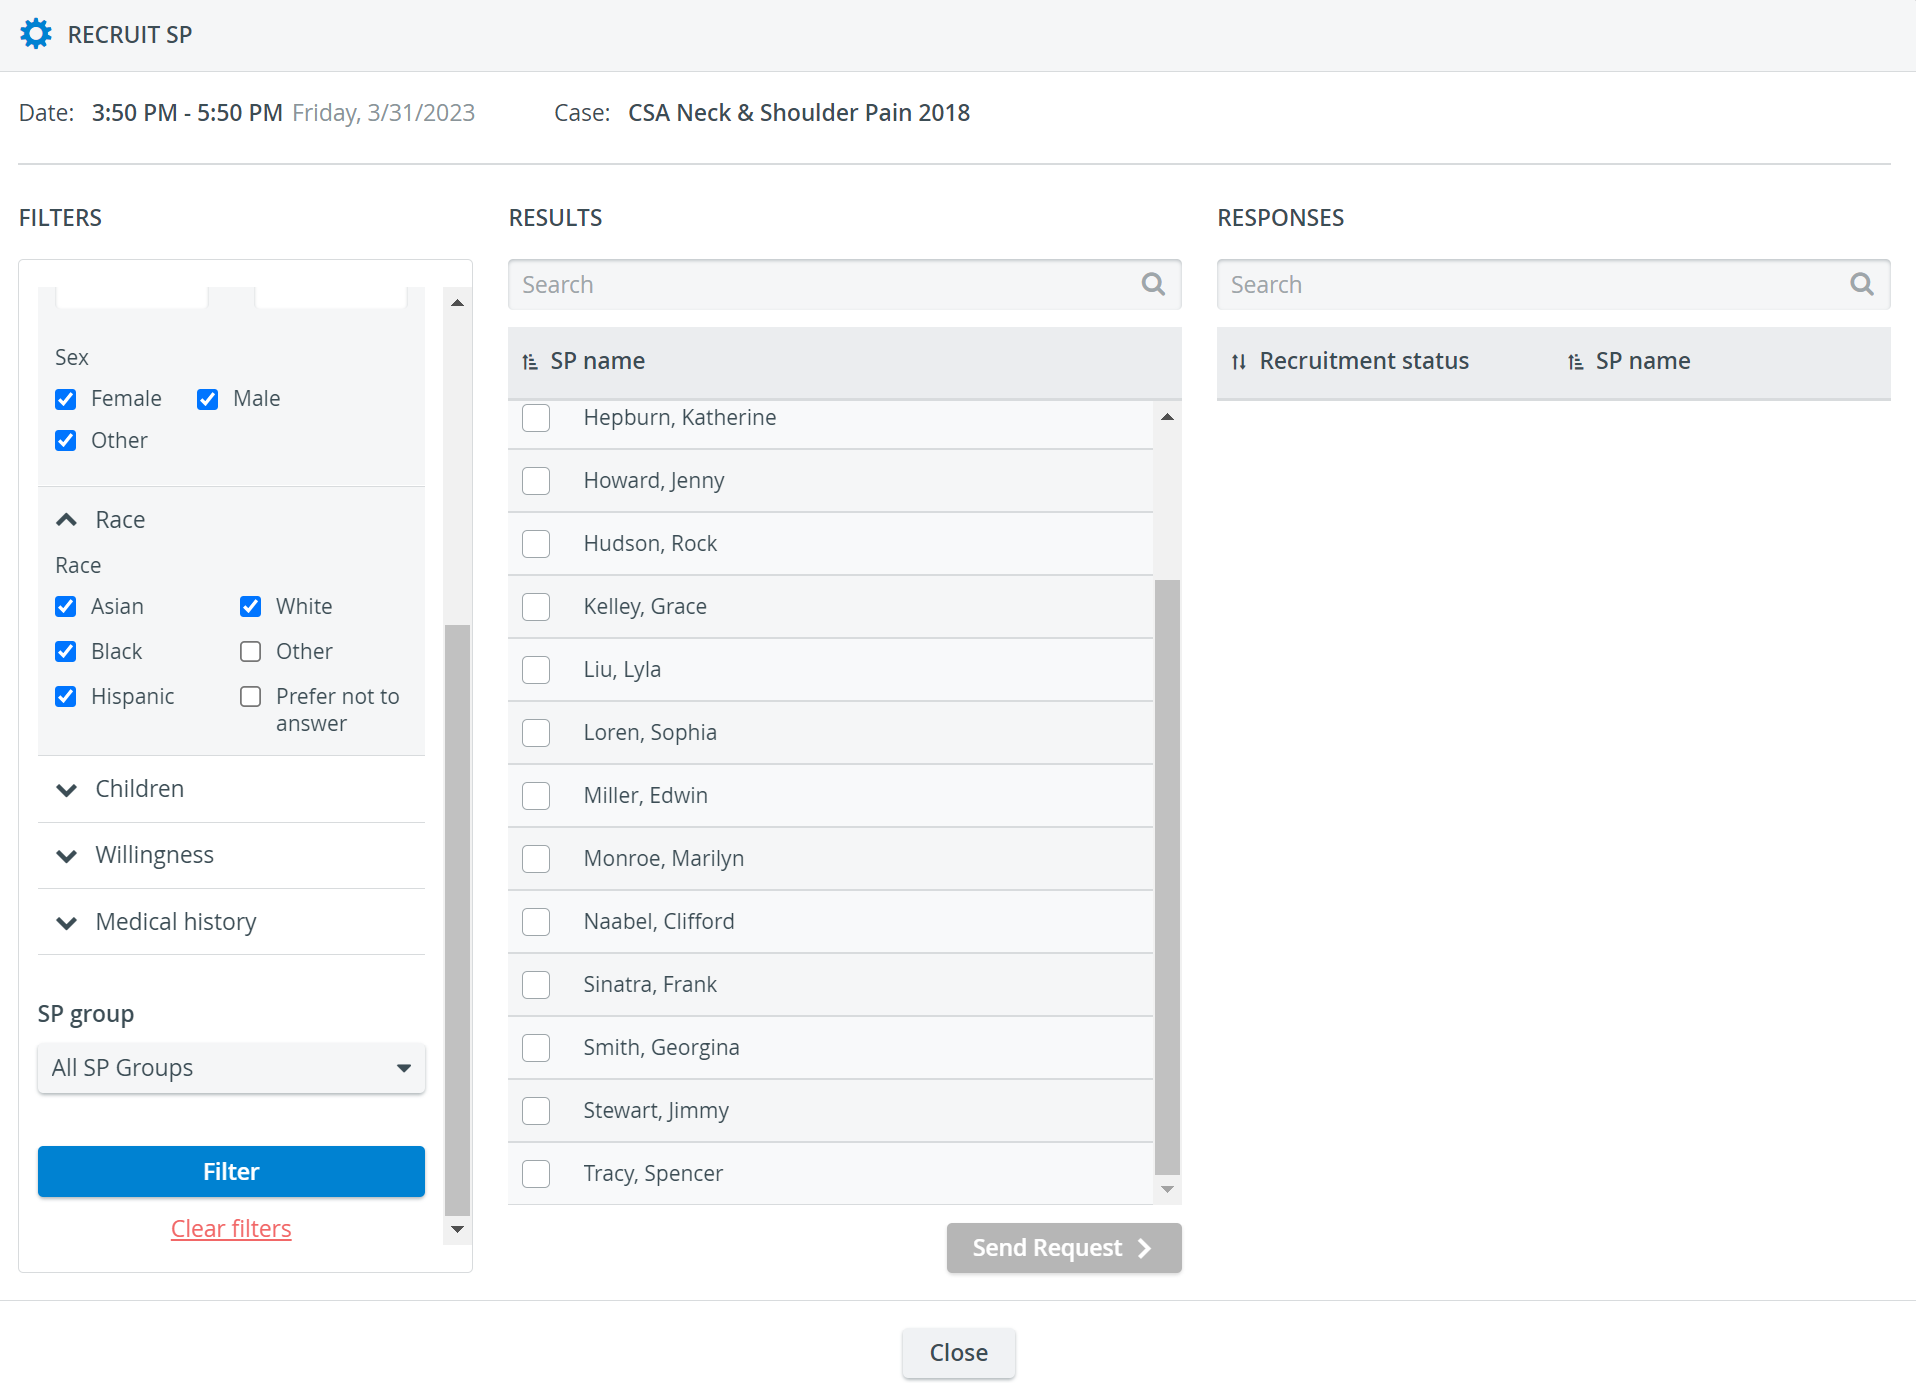
Select SPs from the Results column:
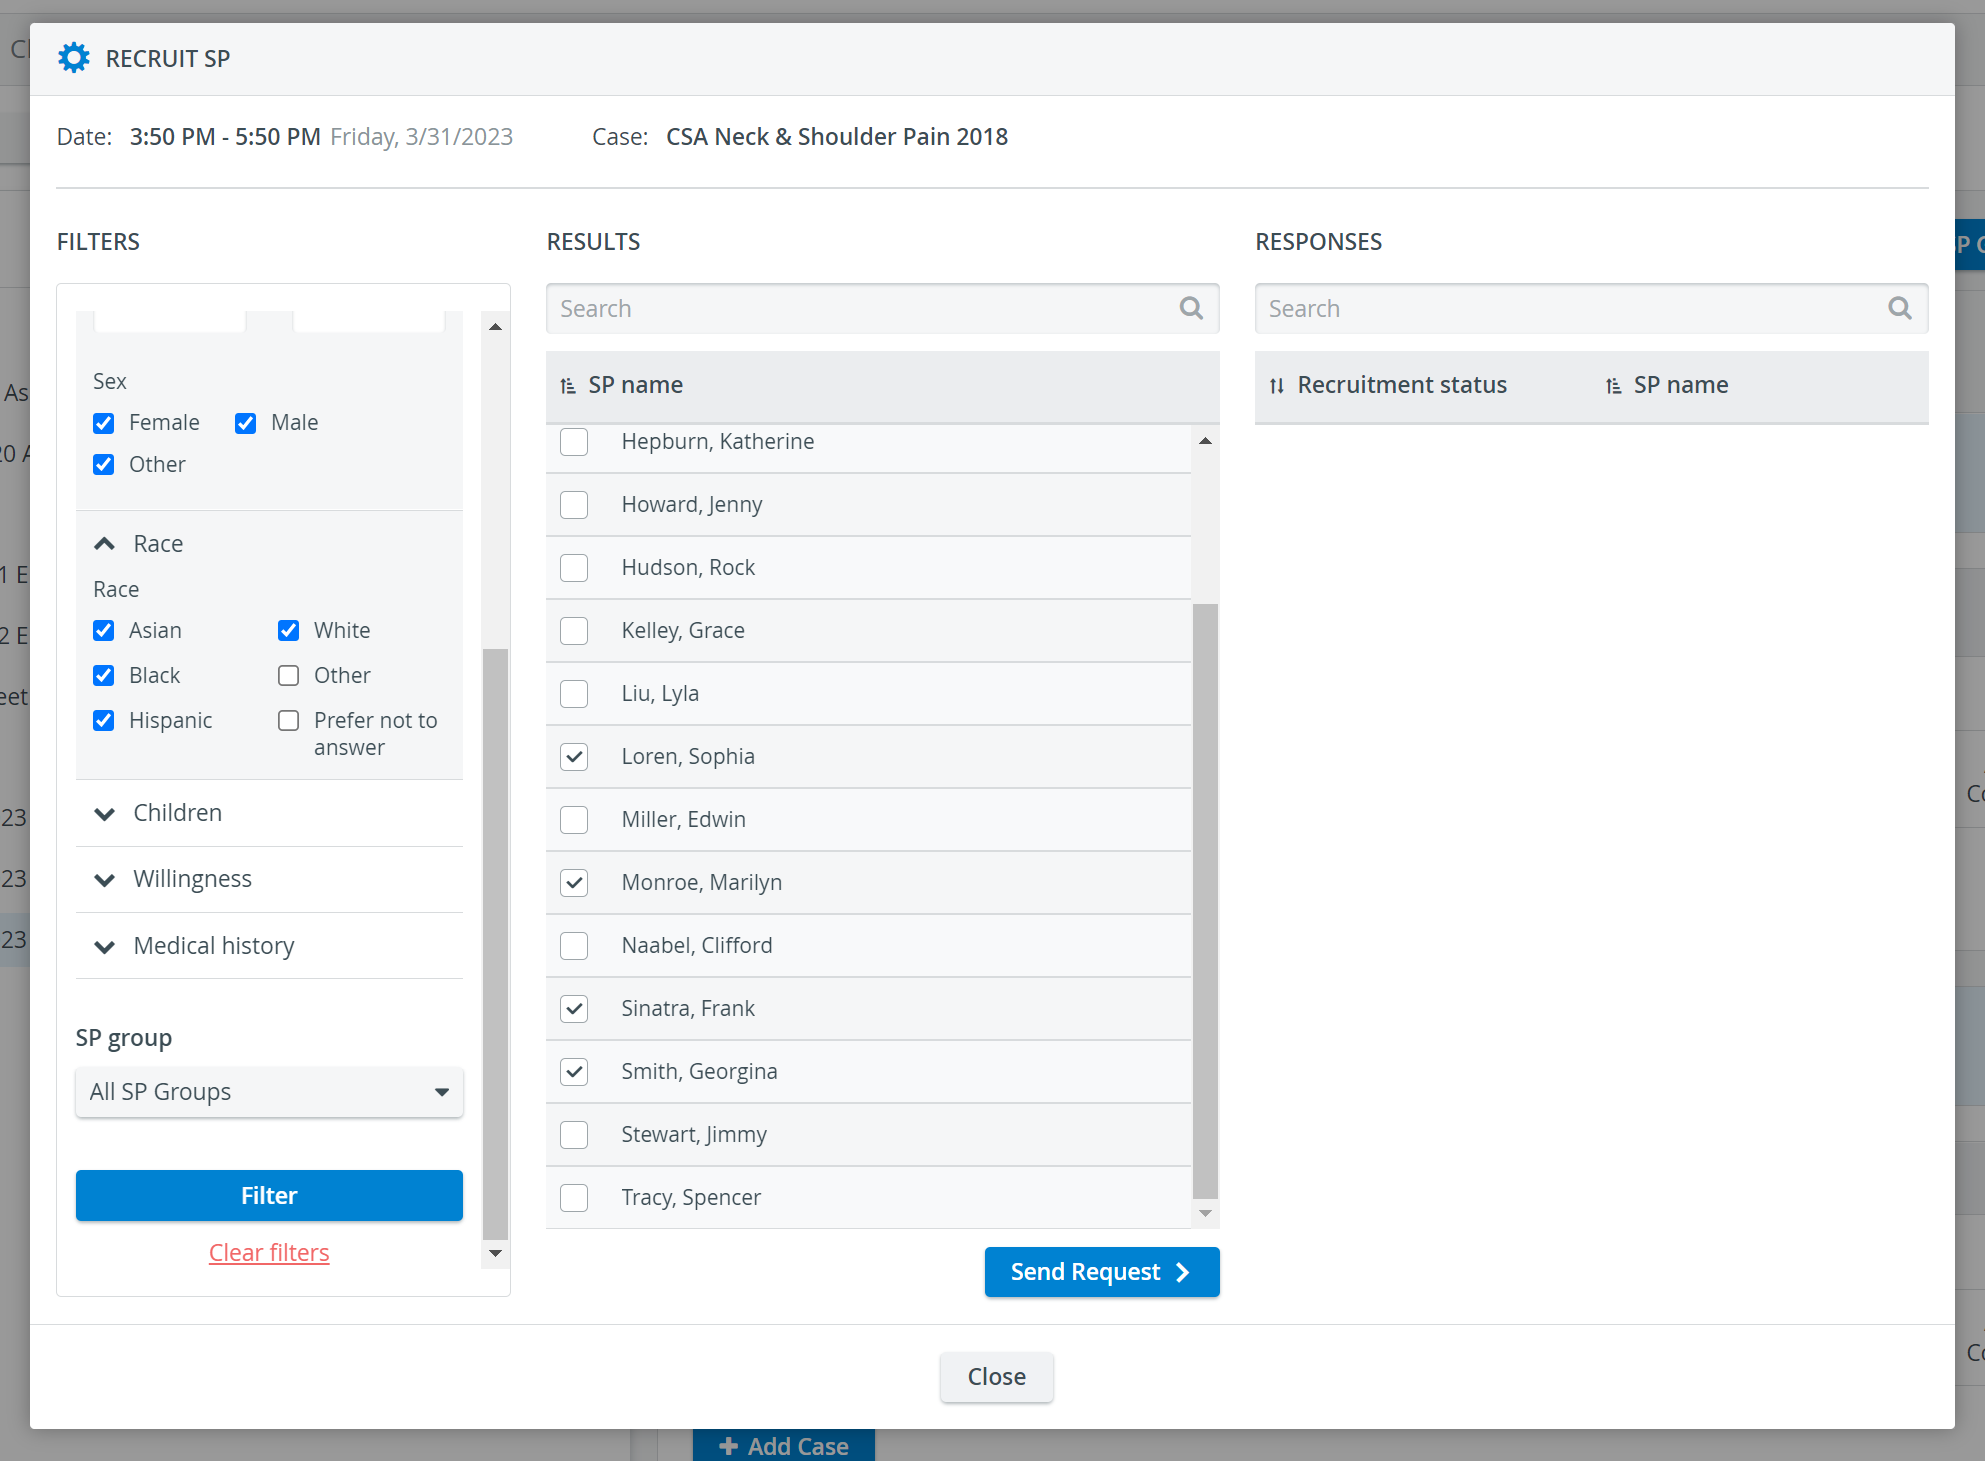
Use the checkbox in the header to select every SP in the filtered list.
Click Send Request to notify the SPs about the appointment date. A confirmation dialogue opens that recites every SP you are about to send the request:
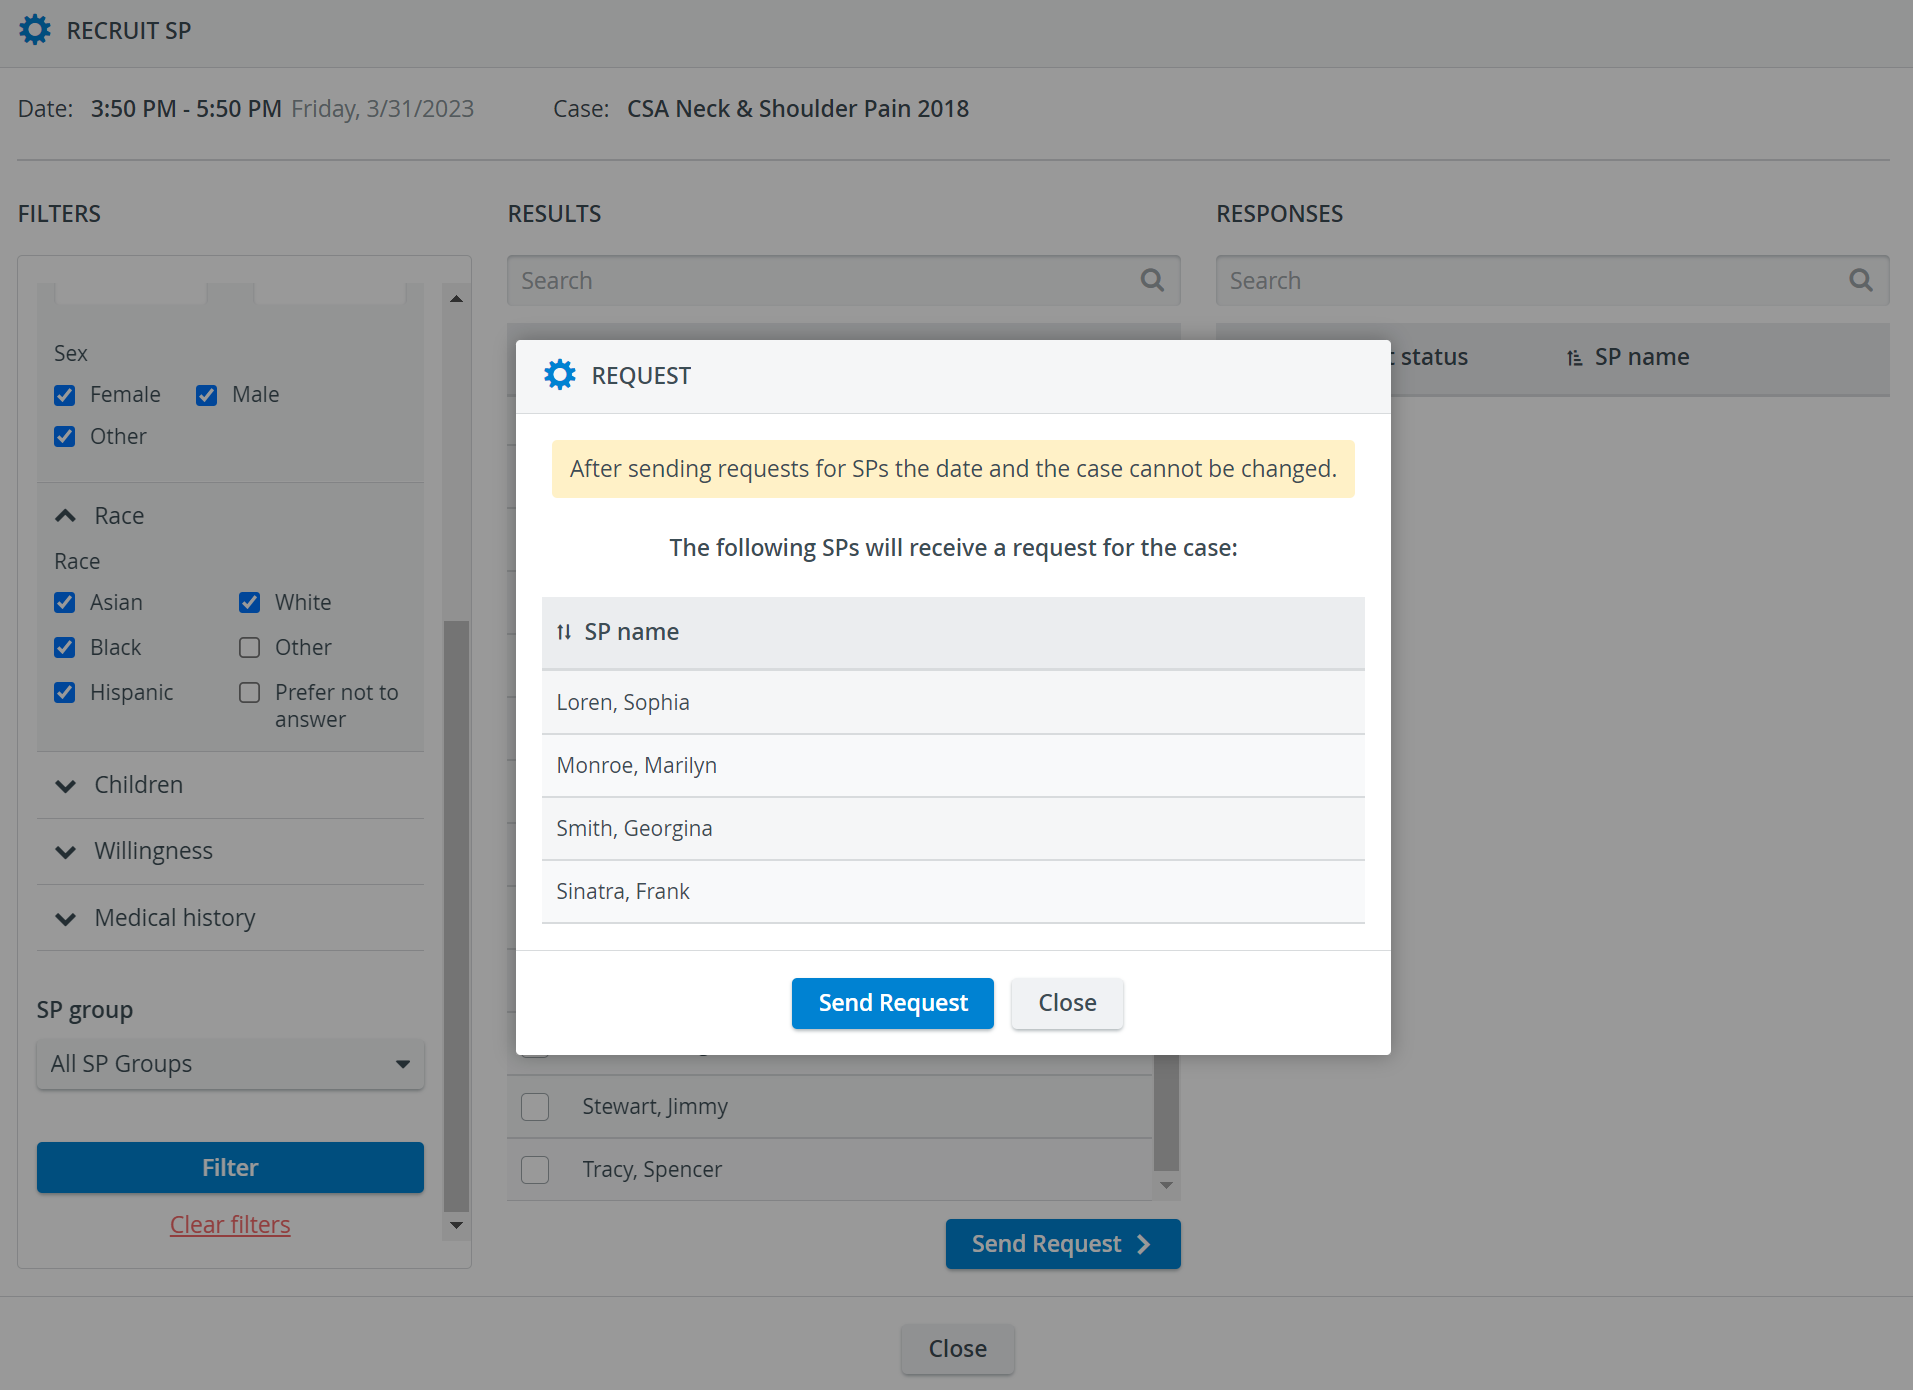
From here on you cannot modify the date and time of the Session nor the Case associated with it. Only the Session's name can be edited henceforth.
The requested SPs will be copied to the Responses tab.
Sort SPs by alphabetical order or recruitment status using the arrows next to each column header.
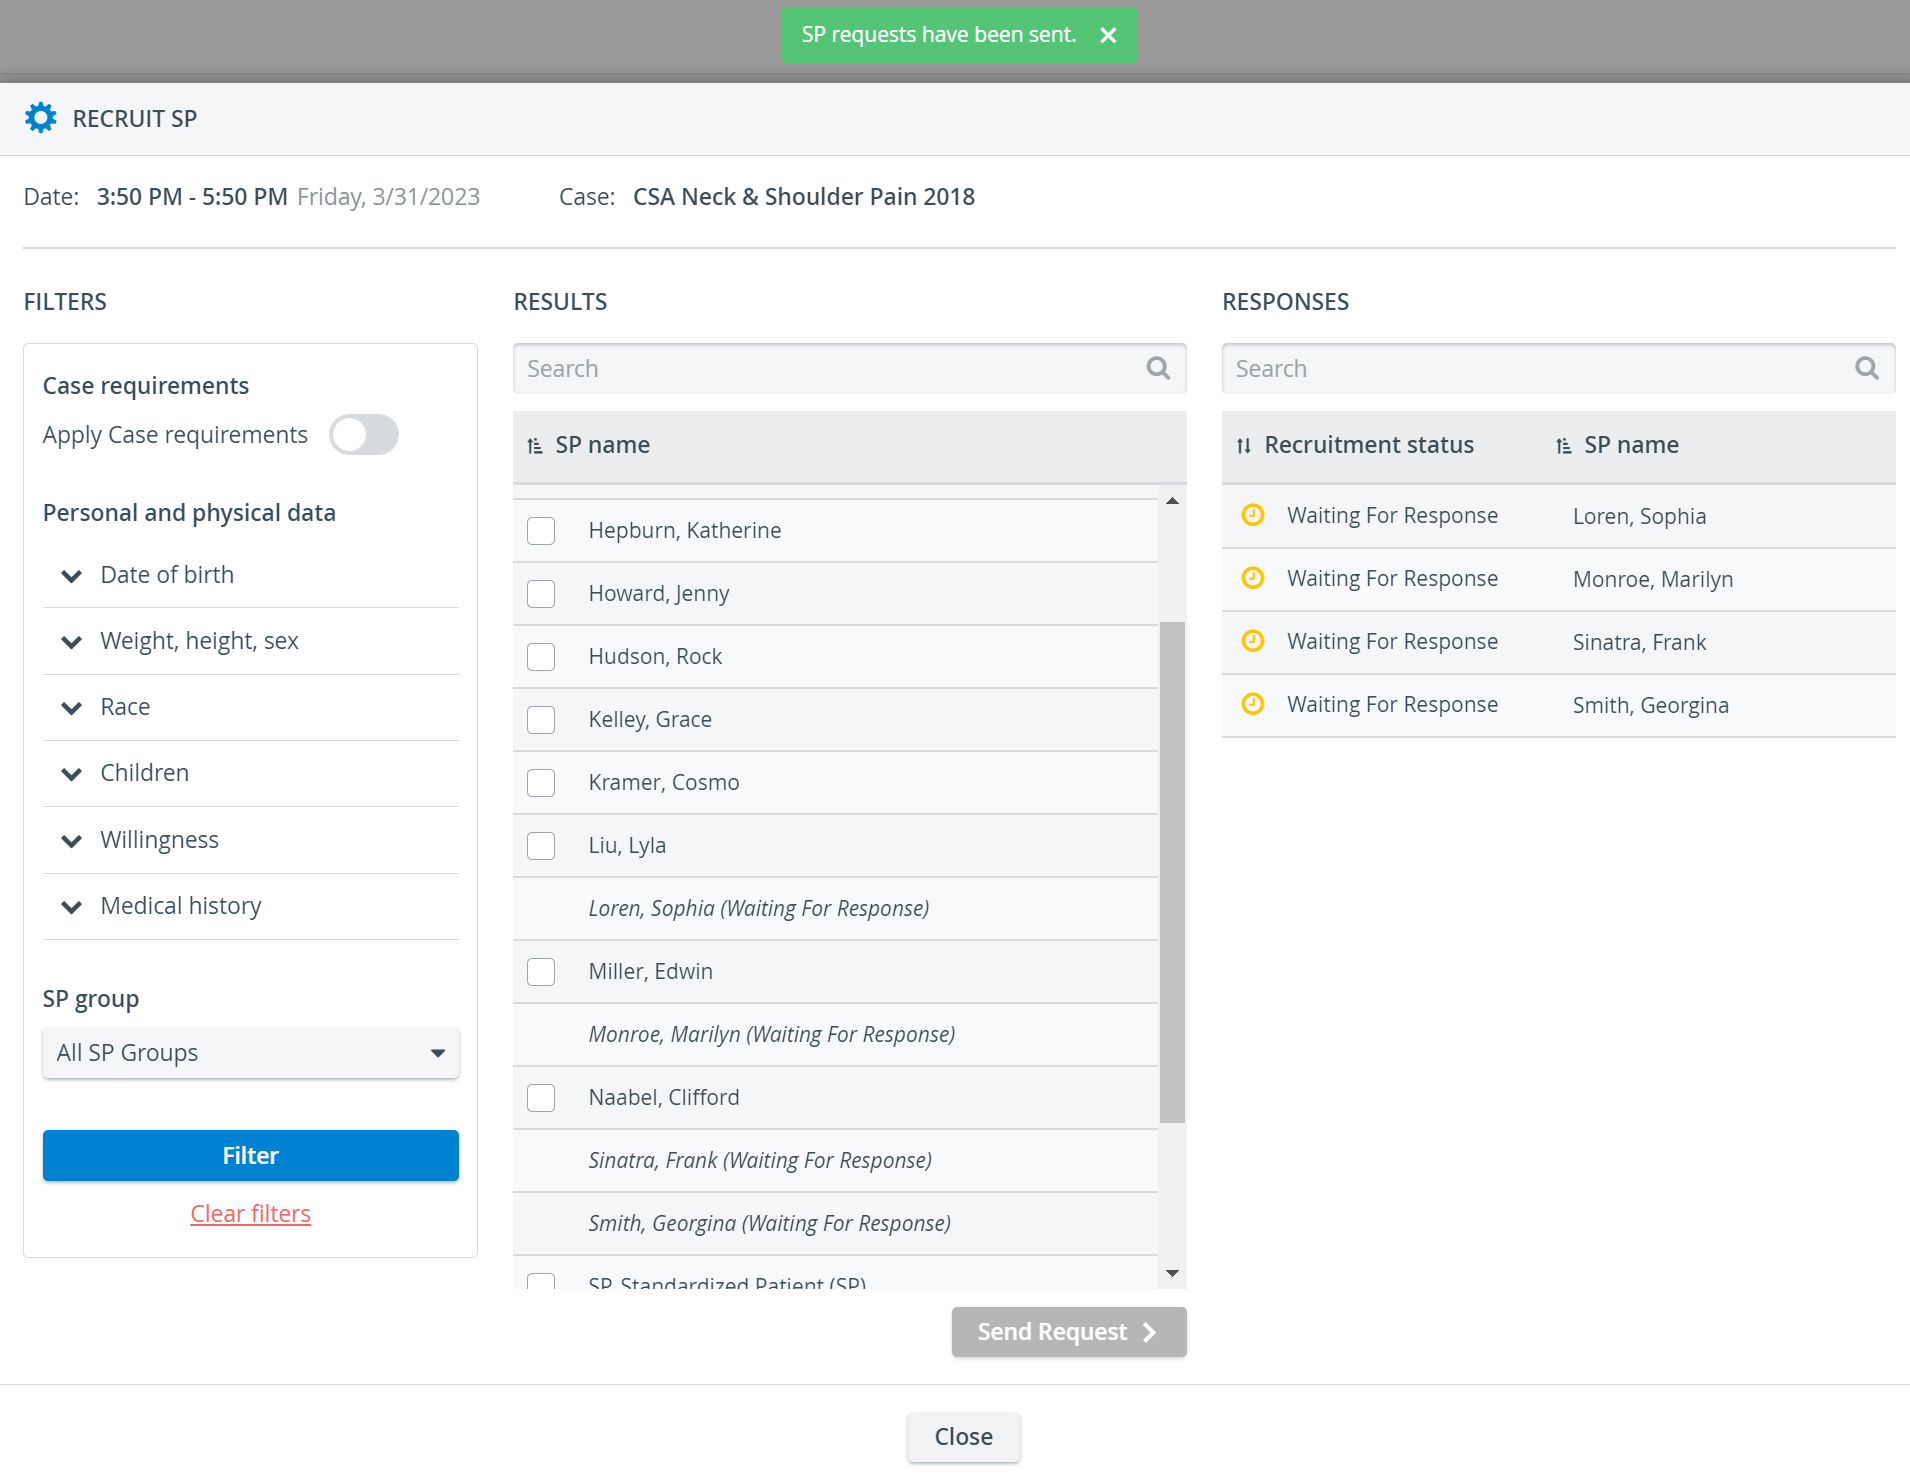
The status of SPs will remain "Waiting for Response" until they approve or decline their availability.
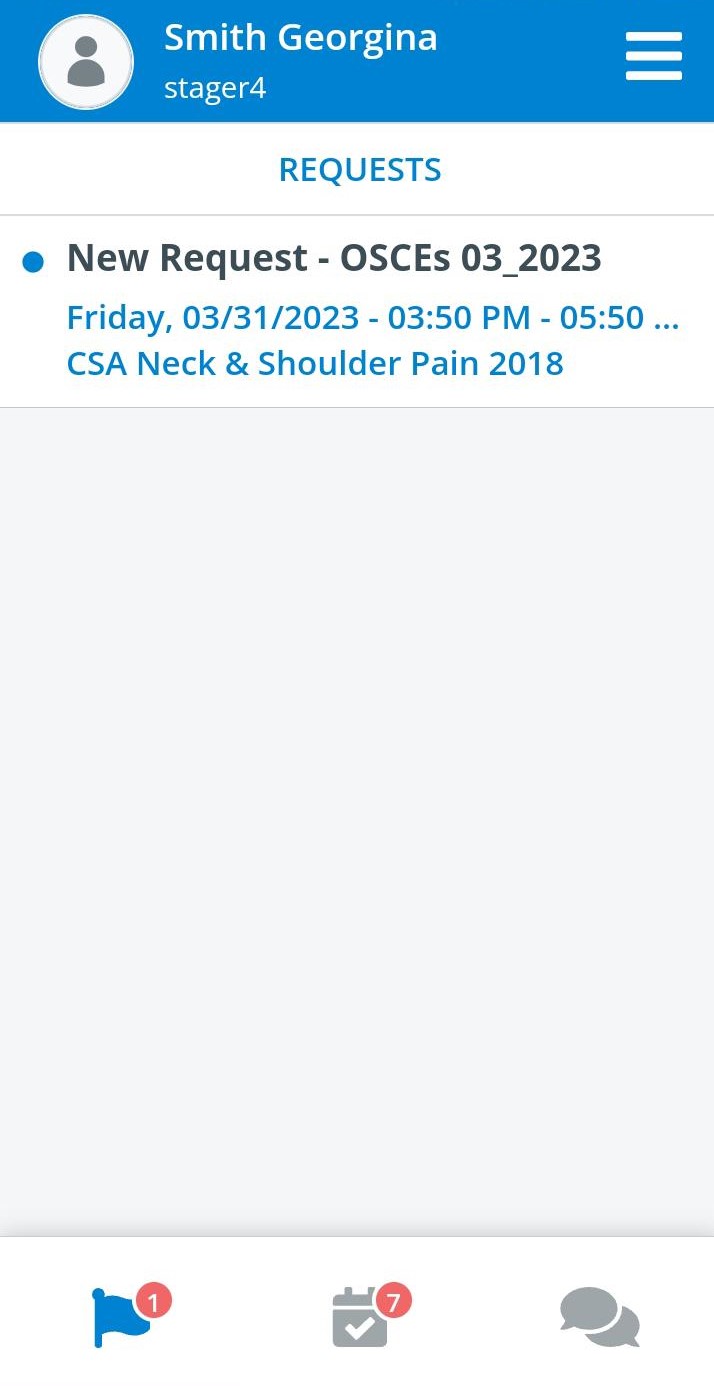
SPs will receive a new notification in the Requests tab inside their SPA mobile application account:
Return to the Case's Recruit SP popup to check up on the recruitment Response statuses:
- SP Response Statuses
Status Meaning Note 
The request has been sent to the SP, but the SP has not shared their availability yet. The SPs may or may have not viewed the notification on their mobile phones yet. 
The SP has accepted the request and is ready to be confirmed for the Case by one of the SP coordinators. The SP's name is displayed in grey at the Case, in Session view. 
An SP coordinator has approved the accepted request. The SP's name turns to blue and gets ticked in Session, at the Case. 
The SP has declined the request. If necessary, the SP coordinator can send a request repeatedly to SPs who have initially declined the request. 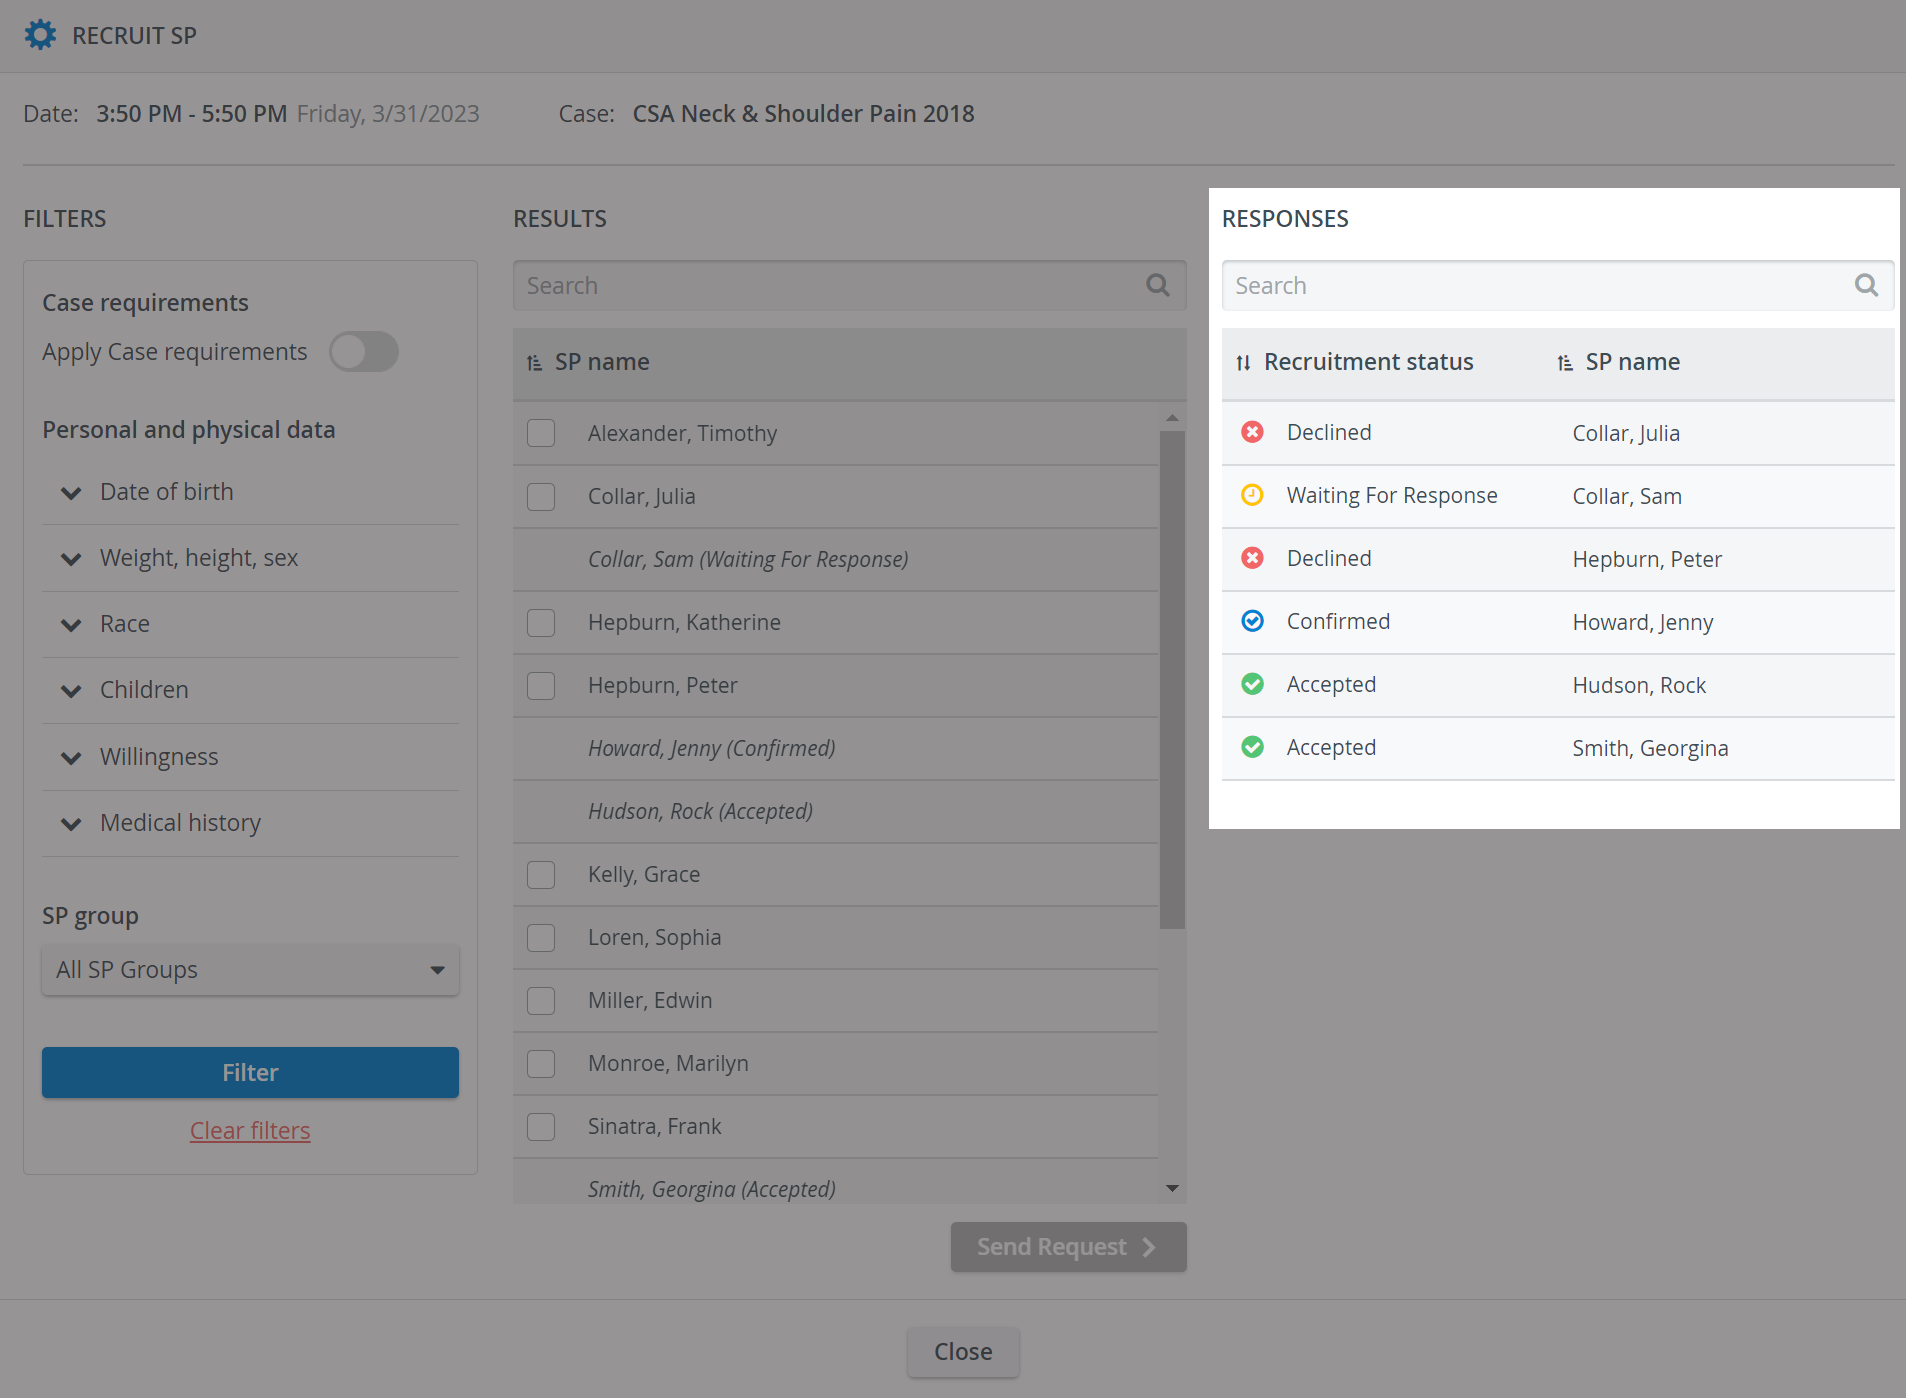
Available SPs are also listed directly at the Case, in grey:

If you already have available SPs, you can continue confirming one or more of them for the patient scenario Sessions. You can count on confirmed SPs to appear and portray the patient scenario at the confirmed date and time.
Important
However, confirmed SPs can still choose to cancel (decline) their spot through the mobile application. Once declined, SPs will also appear as Declined in the SP Responses popup in the Responses column:
In the current version of the SPA Mobile Application, SPs can decline their confirmed appointments right until the starting time of a Session. Since this could lead to difficulties in finding a new SP and/or rescheduling the Session,
SPs need to make sure to consult their SP coordinators before declining an appointment at such short notice.For further information, visit our Standardized Patient Administration and Standardized Patient Administration - How to pages.
Overview
Content Tools