Page History
...
With the help of an event-specific setup sheet, check out exactly what you need for a scenario and print the check-out list to use it as a reference when you go pick up the supplies at the physical storage location. The setup sheet contains the exact date and place of the event in its header to help the person in charge of moving the equipment to keep track of the physical items:
Creating a Setup Sheet
| Tip |
|---|
Learn more on How to Create a Setup Sheet and view our related Training video. |
A setup sheet can be created by finalizing an existing Equipment and Supply List while editing an event in the Calendar module.
...
| Note | ||
|---|---|---|
| ||
By selecting an asset for an event, or adjusting and finalizing the number of items included on your setup sheet, you do not reserve them for the event. Make sure that the asset you are about to check out on your Setup Sheet is returned.
|
The Documents feature available at events and Setup Sheets allows you to upload complementary documents, e.g. guides about preparing the training or exam environment.
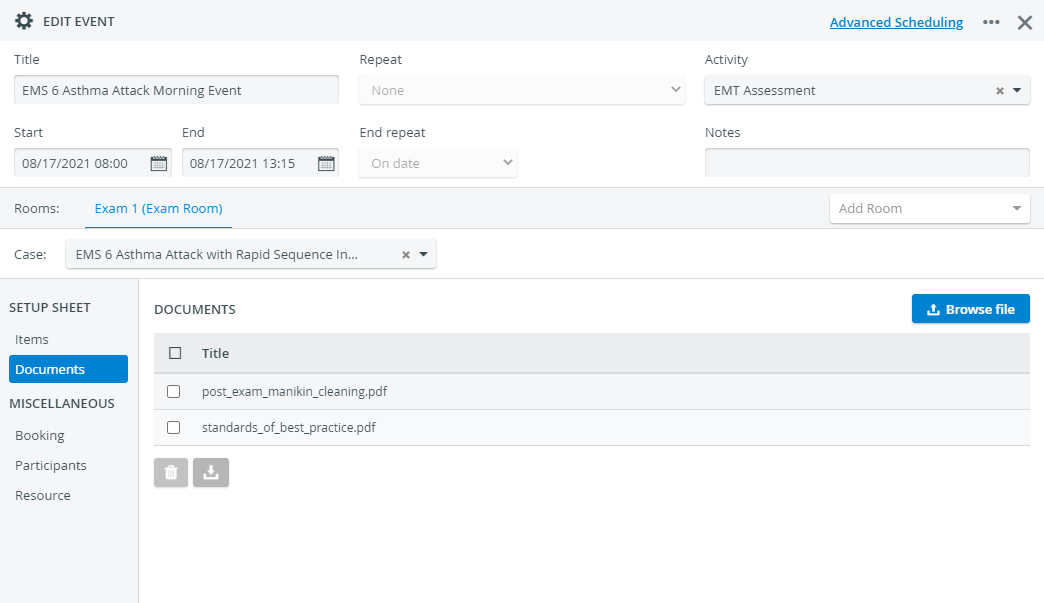
| Info |
|---|
Each document you upload at the event will be passed down to the Setup Sheet located in the Inventory module. |
Then, the Transaction Assignee in charge of the equipment can print the instructions when checking out the items for the event.
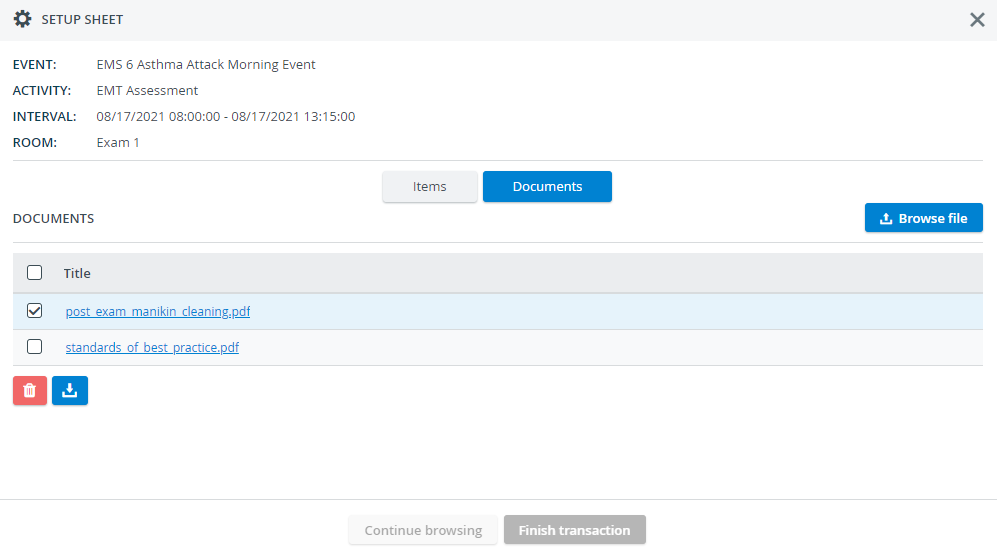
| Tip |
|---|
You can also upload additional files to a Setup Sheet. |
Checking Out the Setup Sheet Items
...
To view more setup sheets at a time, change the timeframe with the date picker: pick the start date in the first field, then the end date in the second.
Note The date in the second field is not inclusive, it displays event setup sheets up to the selected date.
You can also filter by the rooms where the events will take place in, or you can use the quick search bar.
Select the setup sheet you want to check out to activate the Open button.
Once you open a setup sheet, first you have to select a transaction assignee and storage location just as you would do during a basic check-out transaction.
Tip title Scanning Functionality The Inventory module is designed to handle barcode and QR-code reading to facilitate transaction assignee registration and item detection during transactions.
Continue to this section to learn more about the recommended barcode scanning solutions for CAE LearningSpace Inventory.
Verify the quantity of each item.
Note title Important Every setup sheet can be checked out only once.
Make sure to check out the setup sheet from a storage location where every supply and equipment is ready.Check the Available quantity column if you have every item ready for check-out at the selected storage location:
The Available quantity column shows how many of that particular item is available at the selected storage location, not the overall quantity of the item.
When setting up your events and creating Setup Sheets, the system will let you know if you have any overbooked Assets for events.
When adding the same asset by mistake
- to the same event planned in multiple rooms,
- or to more events taking place simultaneously
- or overlapping with each other,
the Setup Sheet inside each event will warn you that there is a booking conflict and will inform you about the asset's current status:
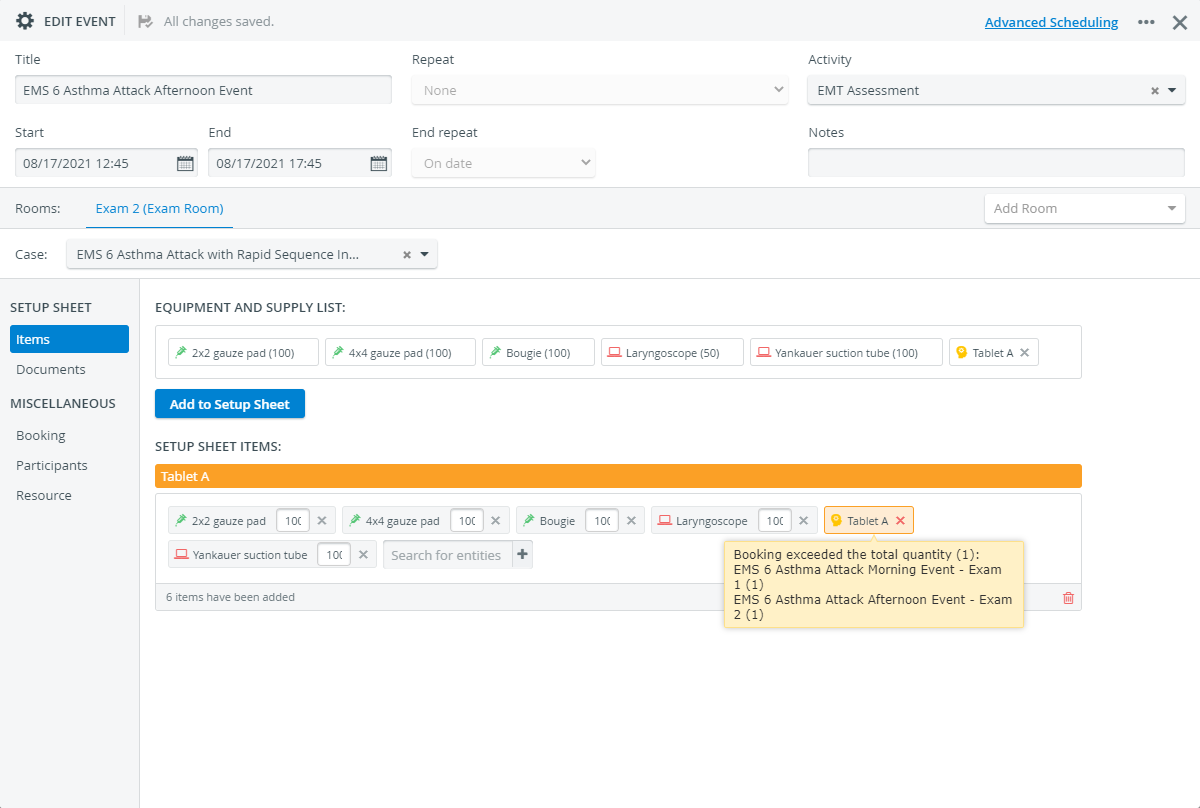
To resolve the issue, remove the asset from one of the events and select a different item.
Info In the case of overlapping events, an asset's potential booking conflict lasts from the start date of the first overlapping event until the end date of the last overlapping event. 
After verifying the quantity, you can start checking out the supplies one item at a time.
In the Check-Out Status column, you can see how many items are selected for check-out per the total amount required of each item.Tip Once an item is prepared for check-out, it will be marked with a black tick.
When the quantities are even in the Check-Out Status column, click on Finish transaction.
Note title Important Make sure to have every item ready for check-out, because once the transaction is performed, you cannot edit the setup sheet.
The system checks out the exact number of items you have set up.
The setup sheet closes automatically.Info The title of the event will be tied to the transaction as well in Transactions.
Open the setup sheet once again after check-out to view and print the now read-only list.
...
Overview
Content Tools