The Details tab accomodates the following options and pieces of information:

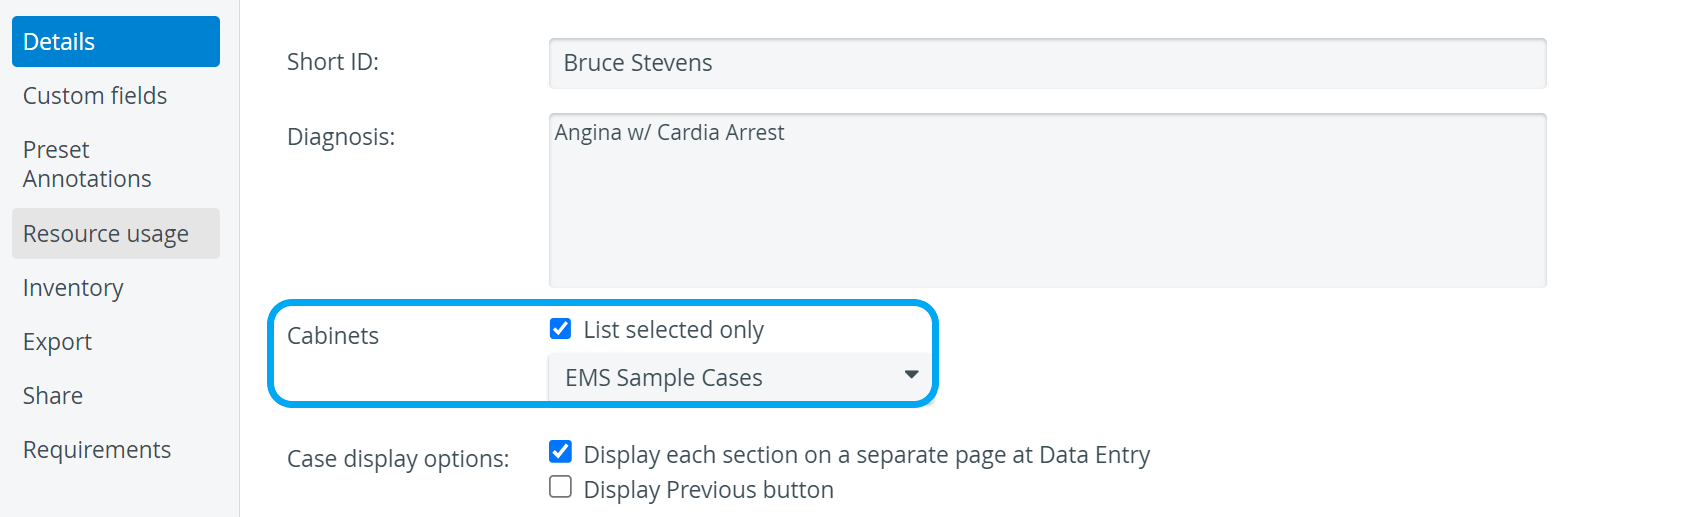
| Short ID | Optional identifier used in functions where limited space is available, e.g. Raw Data files. If you export the raw data file for an Activity, Case names would not be displayed due to limited space, but the Short ID will be indicated in the column header (also, if Section Abbreviations are specified in the different checklists of a Case, they will also be included in the column headers). |
| Diagnosis | Optional field for entering the expected diagnosis. This field is not displayed anywhere but can only be seen by users with Case Manager privilege. |
| Cabinets | Drop-down for categorizing the edited Case in existing cabinets. For checking which cabinets the Case has been added to, tick the List selected only checkbox.
|
| Case display options |
|
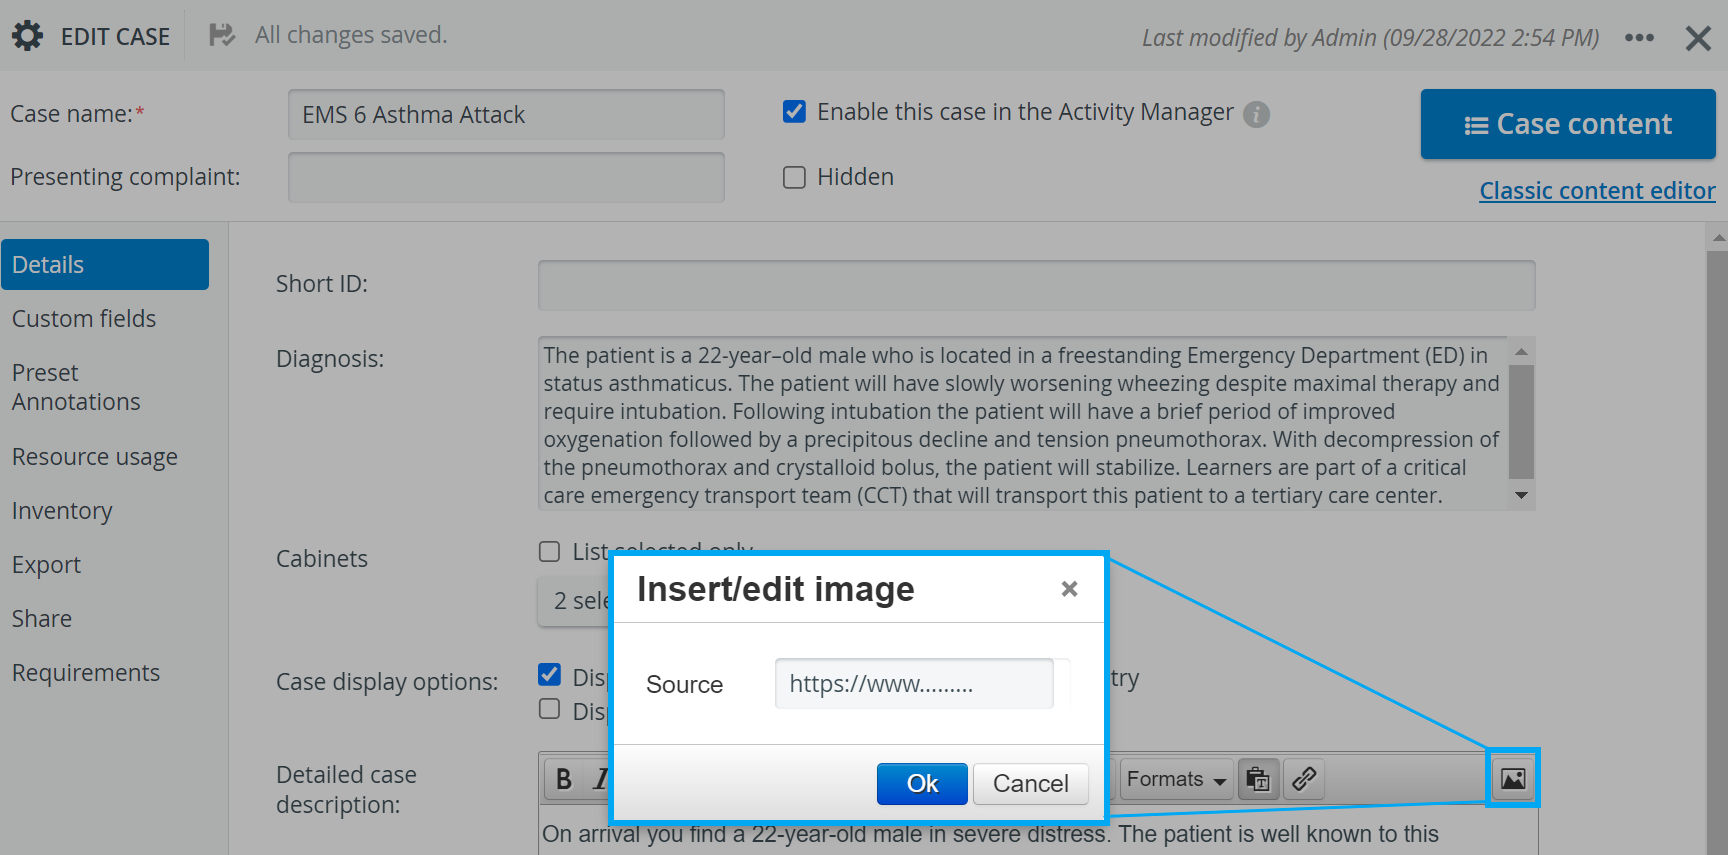
| Detailed Case description | Text editor for accommodating all the medical details and information pertaining to a Case. The text can be formatted and links or media content can also be inserted. The Detailed Case description is displayed
In the Source field of the Insert/Edit image option, use weblinks of the images to be inserted.
|
| Video Self-review instructions | Instruction displayed when viewing recordings on the Video Review page. These instructions are intended to facilitate Learners' evaluation of their own performance in a particular Case, describing what learners were expected to do during the encounter with the SP. |
For further information, visit our Case Manager and Cases - How to pages, or watch our Case Manager Training Videos.
Overview
Content Tools