For an introduction to Advanced Scheduling, please visit the How to Understand Concepts within Advanced Scheduling page.
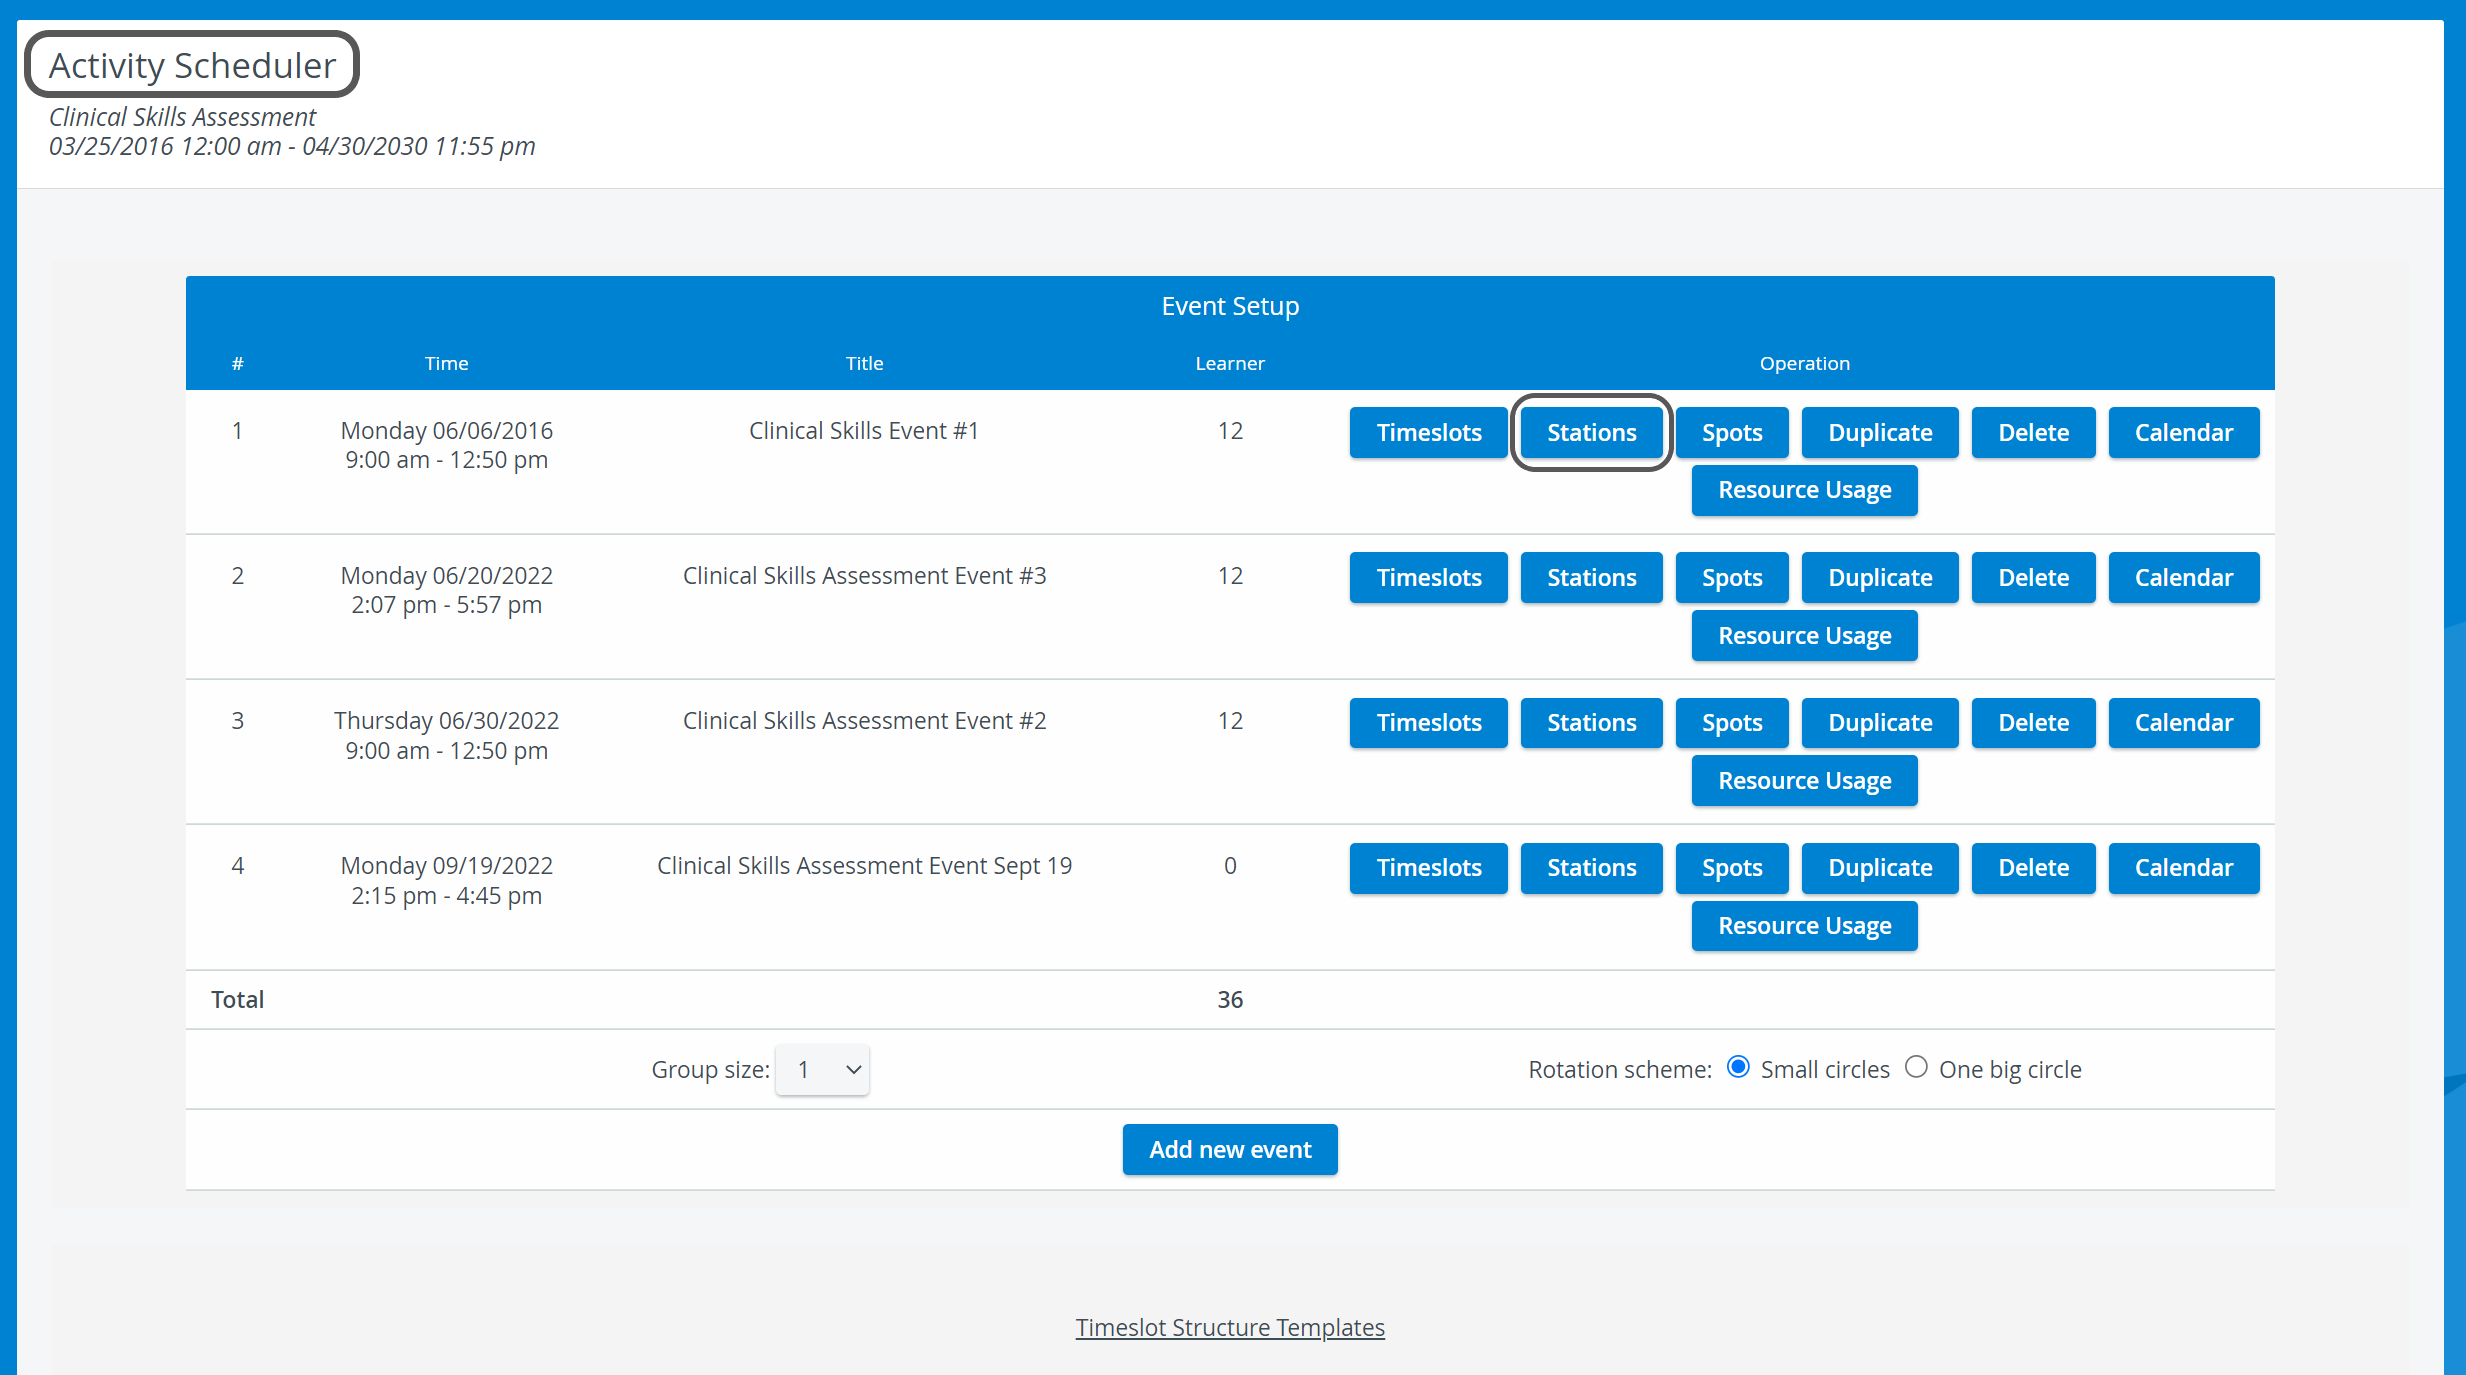
- Access the Activity Scheduler page of the selected Activity.
Find your event and click on Stations.
 .
.Note
Stations can only be set up for existing events.- On the Scheduling (Stations) page:
- First: determine the number of Cases you want your learners to complete during the event, which also means the number of Cases they need to complete within a round.
Learn more about rounds (and their relation to timeslots) here. Then decide in how many stations should each Case be running.
- A Case must be run on at least one station to provide spots for learners.
- The number of spots is closely related to the timeslots of the event.
In a basic setup: where a Case only runs in one station → the number of spots are equal = to the number of the timeslots that were created for the event.
However, if there are multiple Case stations set up → a timeslot can contain more than one spot.  The number of default spots within the event will multiply by the number of defined stations → which means you can assign more learners to the event.
How to Caculate the Number of Spots in an Event
number of total spots = created timeslots* x number of stations
*the number of created timeslots in a round → should be equal to/ the multiple of → the number of required Cases.
- First: determine the number of Cases you want your learners to complete during the event, which also means the number of Cases they need to complete within a round.
Click Continue.
You arrive to a page where you can select the total number of Cases you want in your event, and you can also define the number of stations each Case will run on:

The same Case can run on multiple stations.
- Click Continue once more.
- The system generates the exact number of stations based on the number of Cases you want to conduct during the event multiplied by the number of stations you want each Case to run on:
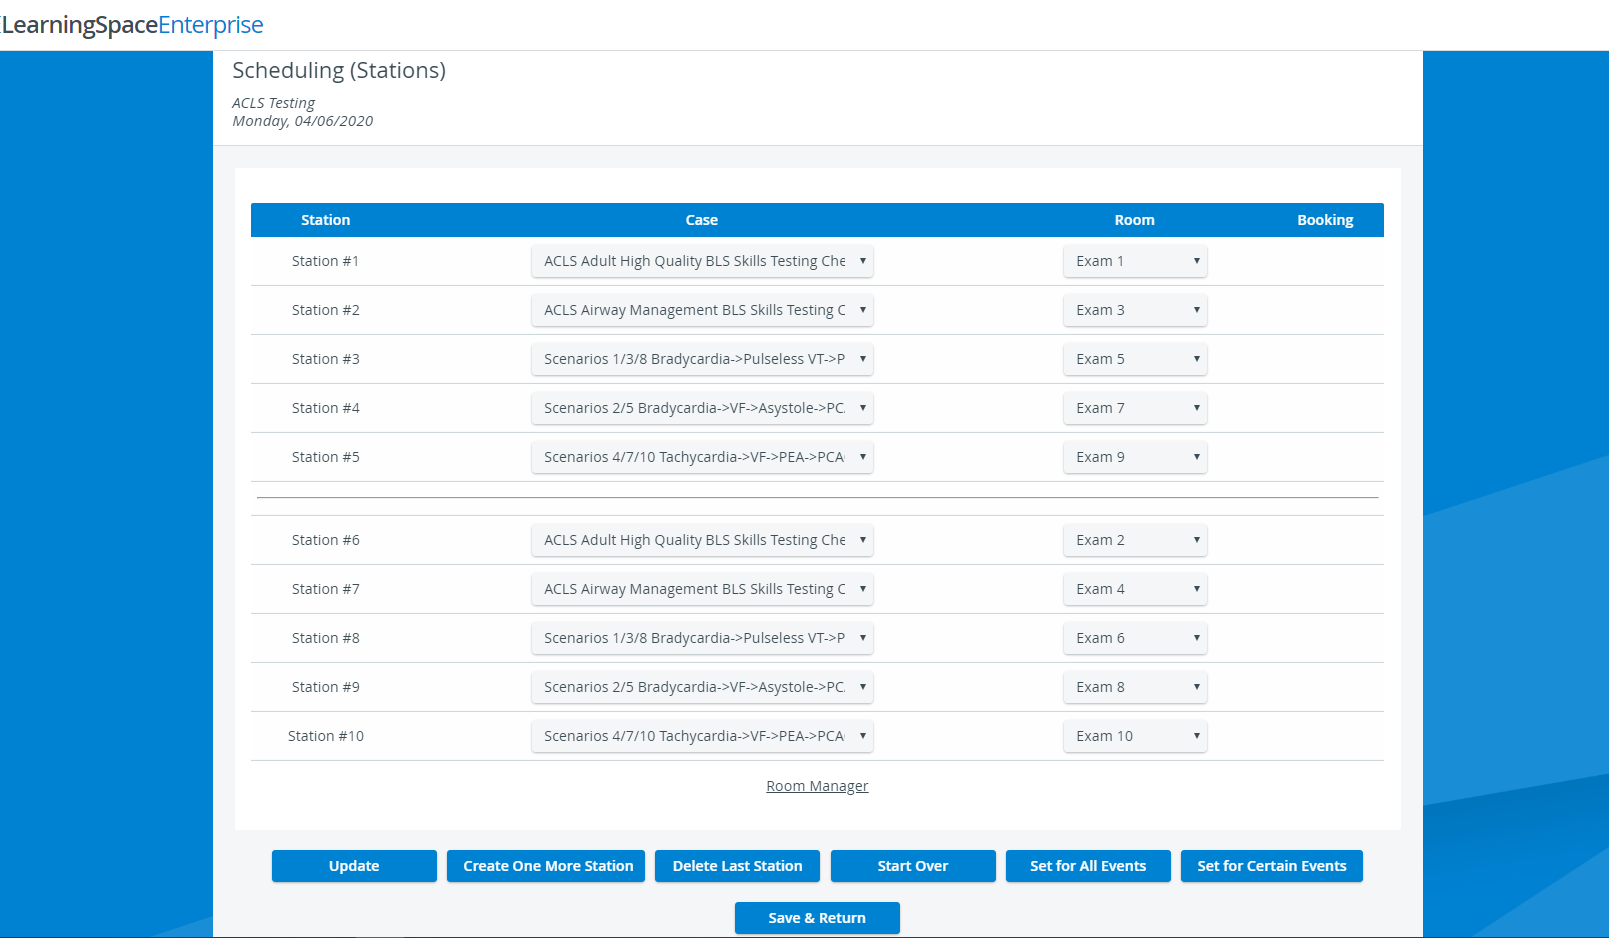
Review Case selection.
Note
In case you want to run each Case on multiple stations, you need to add the same Case to the number of stations you have defined previously.
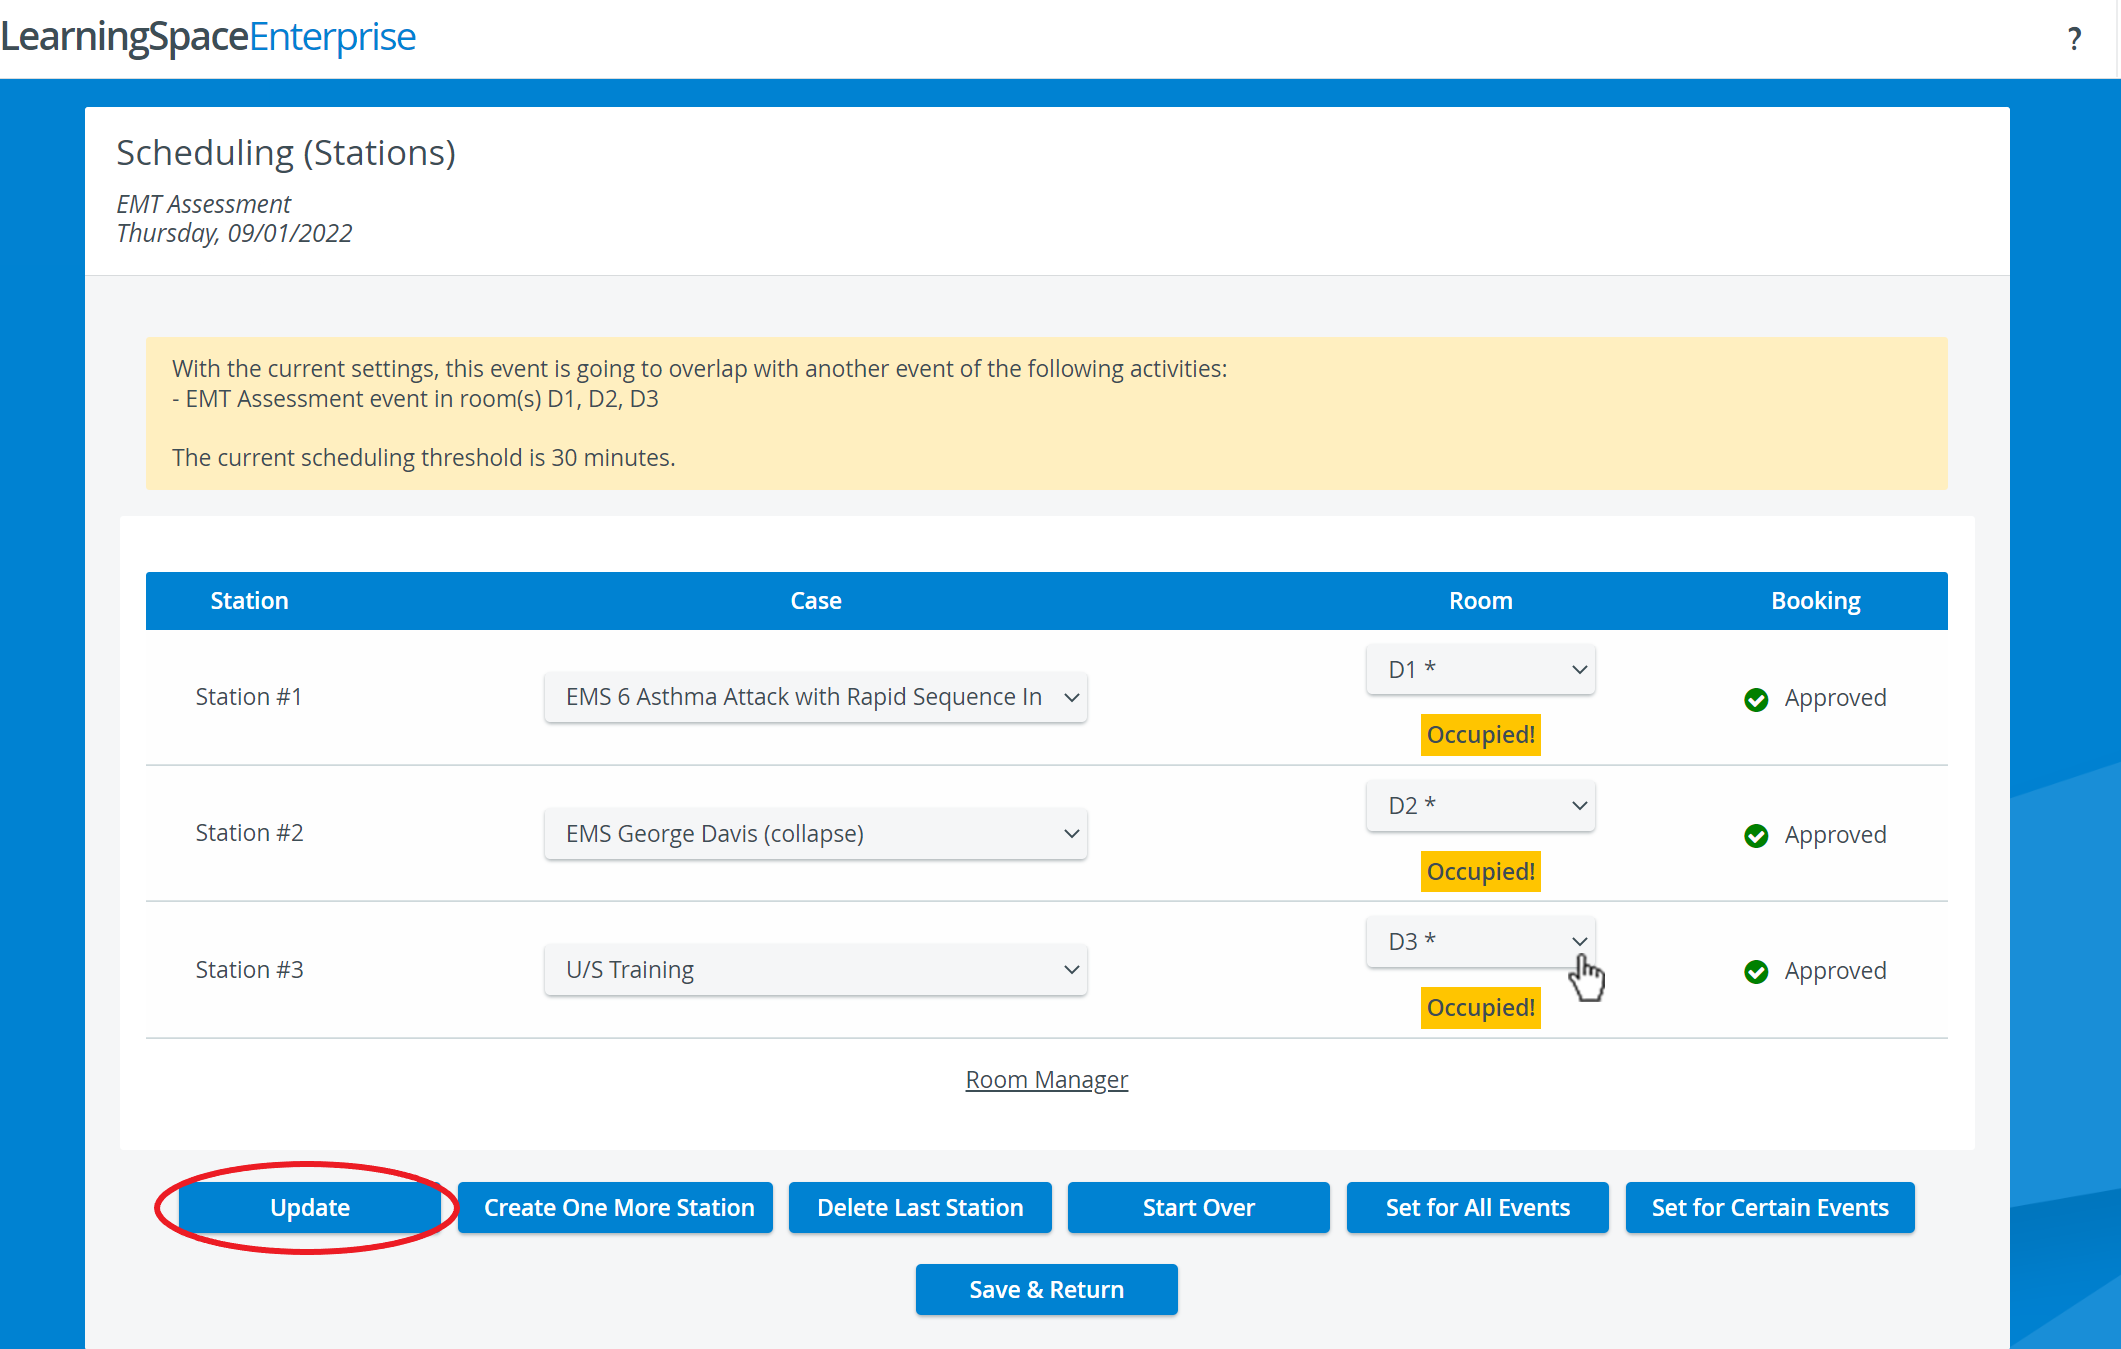
Assign a room to each station.
Important
You cannot assign the same room to more than one event station.
Click Update after selecting rooms to check if any of them have been taken.
- If a room was vacant → the system will save the setting and book the room for the event.
- If the room was occupied → the system will return the message Occupied! under the unavailable room.
- In such case → select another room and hit Update again to check your setting.
Tip
To check available rooms or manage them, click the Room Manager link at the bottom of the page. The link navigates directly to the Rooms tab in the System module.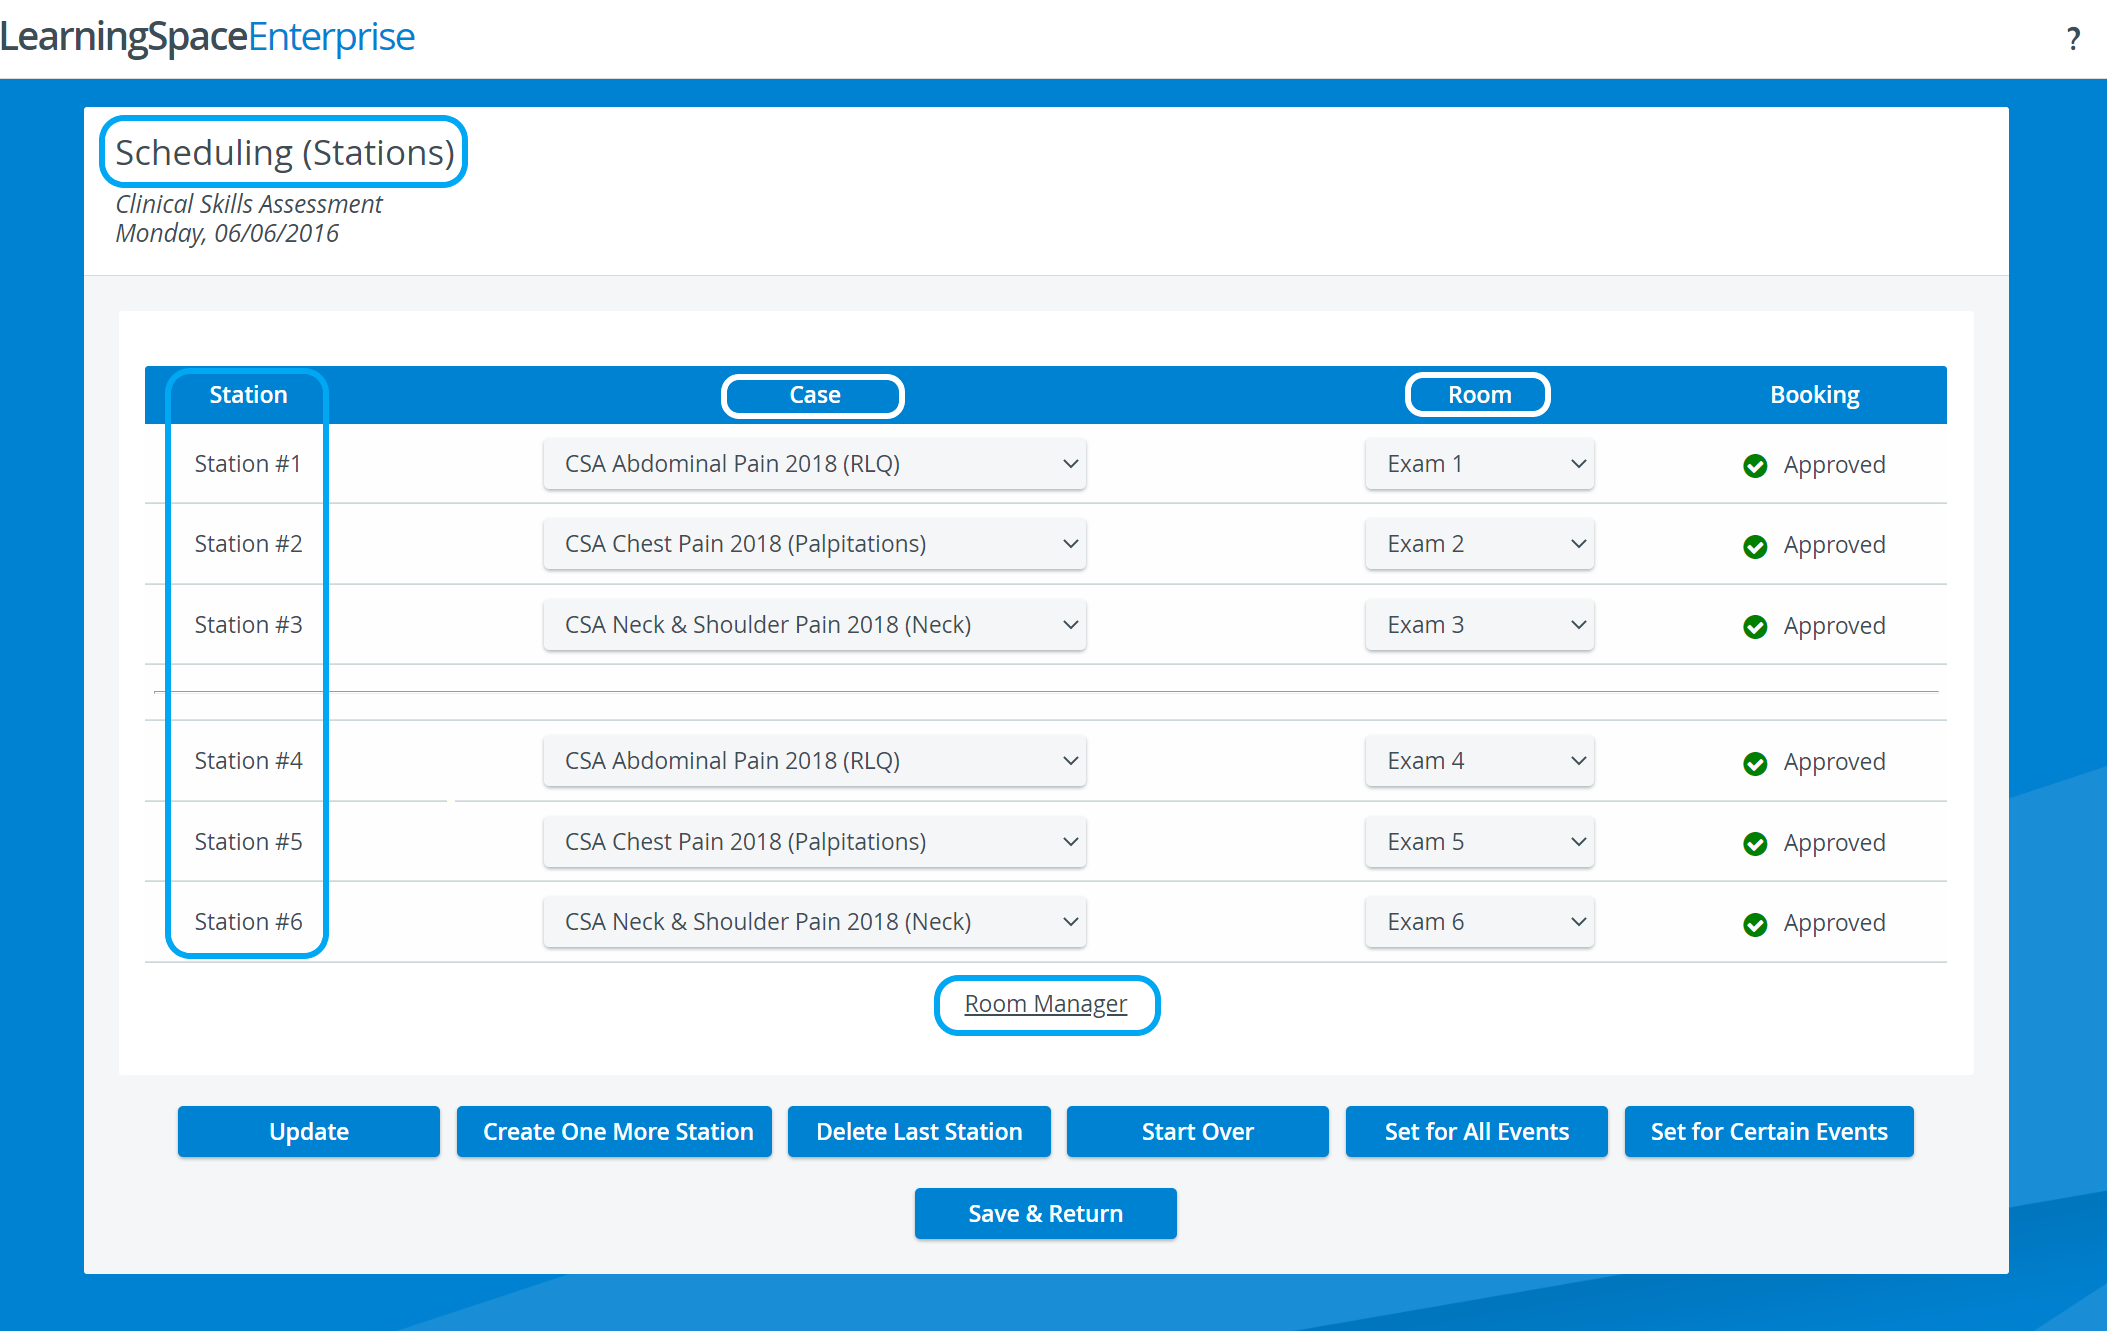
What Does Each Button Do?
Update check if any room has become occupied (indicated in the drop-down with an asterisk next to the room name) Create One More Station create additional stations on top of the system-generated ones Delete Last Station delete the station displayed last Start Over return to the previous Scheduling (Stations) screen to set up new Case and station conditions
Save & Return save the changes and return to the Activity Scheduler page
Set for All Events apply the station setup to all the events of the Activity
Set for Certain Events apply the station setup to other, selected events of the Activity Once you have set up every station, click Save & Return.
You will be redirected to the Activity Scheduling page.
Applying the Station Setup for Other Events
- Access the Activity Scheduler of a selected Activity.
- Click the Stations button of a scheduled event.
The Scheduling (Stations) page opens. To apply the station setup of the event to all the other events of the Activity, select Set for All Events.
A dialog box asks you if you are sure you want to overwrite the settings of the events.
Once confirmed, the station setup will be applied to all the events within the Activity and you will be redirected to the Activity Scheduler page.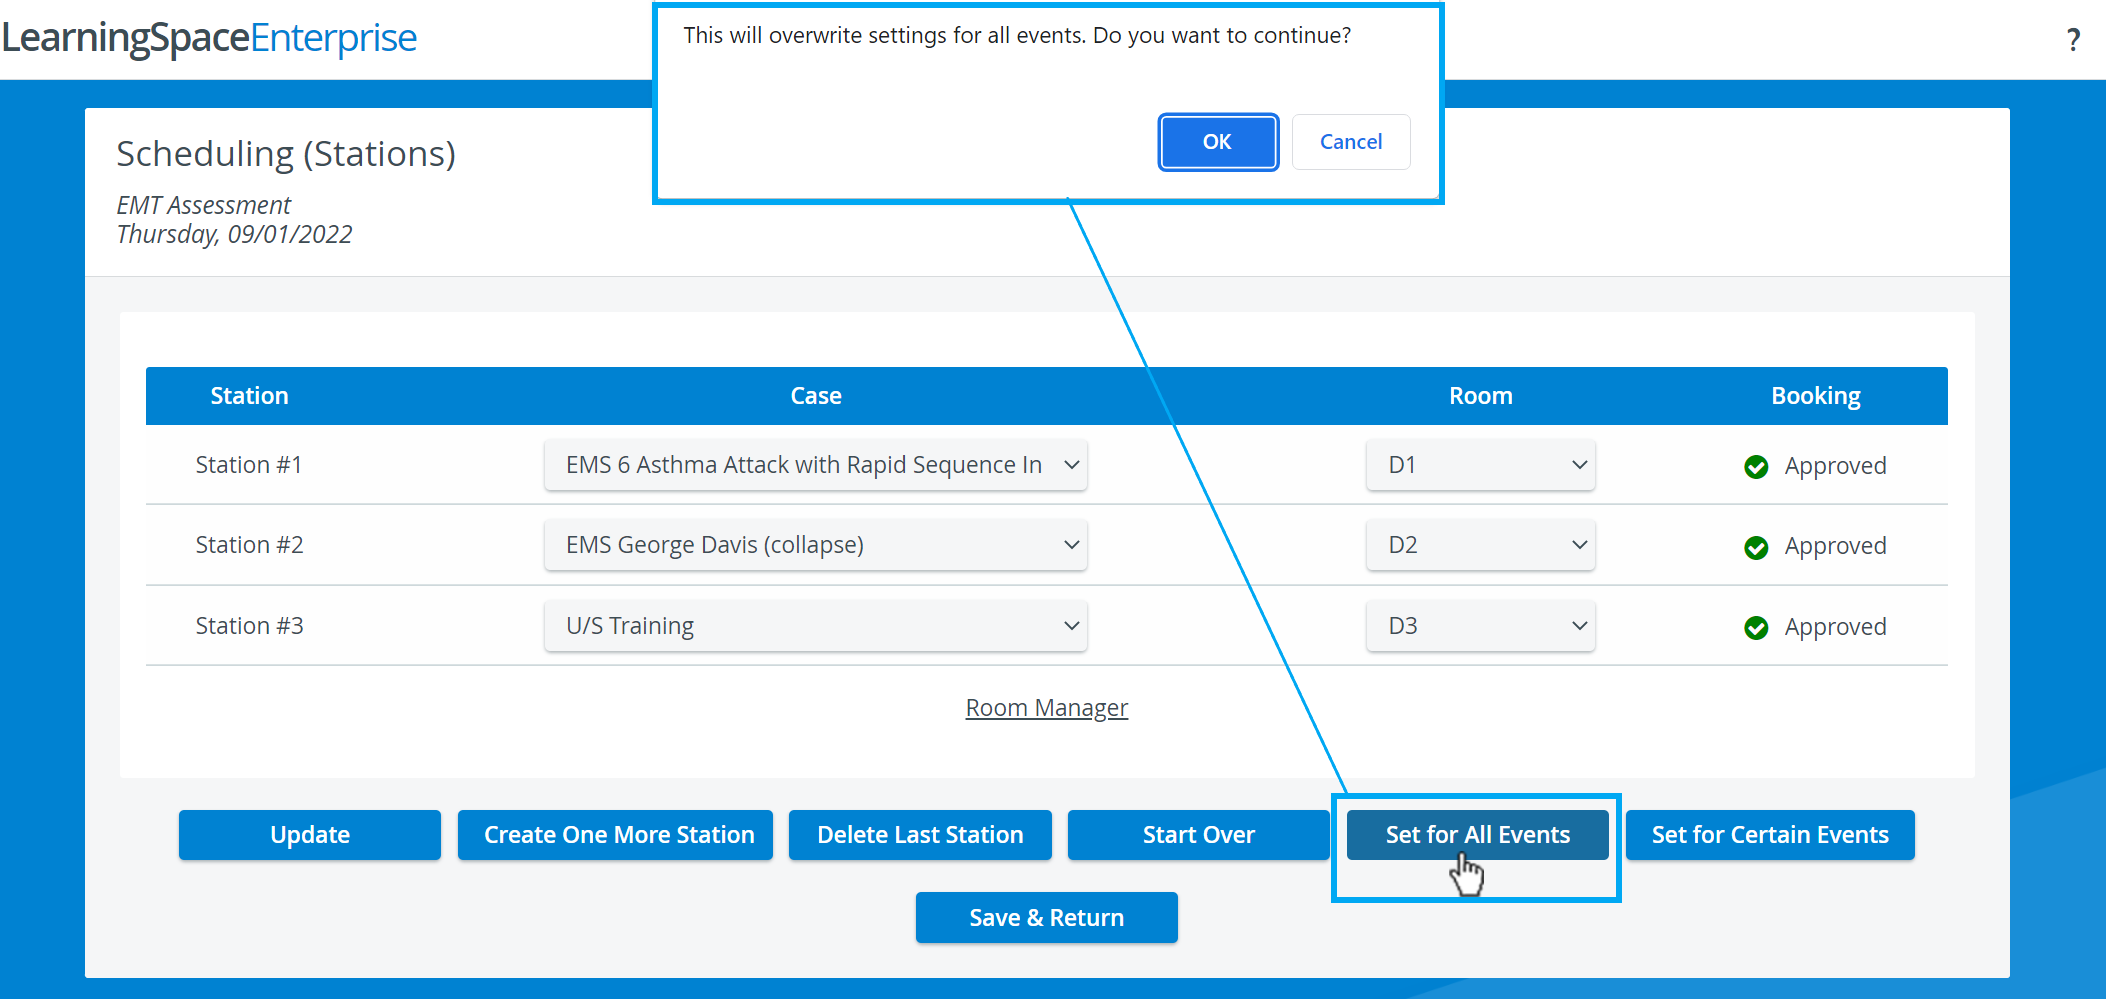
To apply the station setup of the event to certain events, select Set for Certain Events.
The Event Setup panel opens with the list of all the current scheduled events of the Activity.
Select the box next to each event to apply the station setup.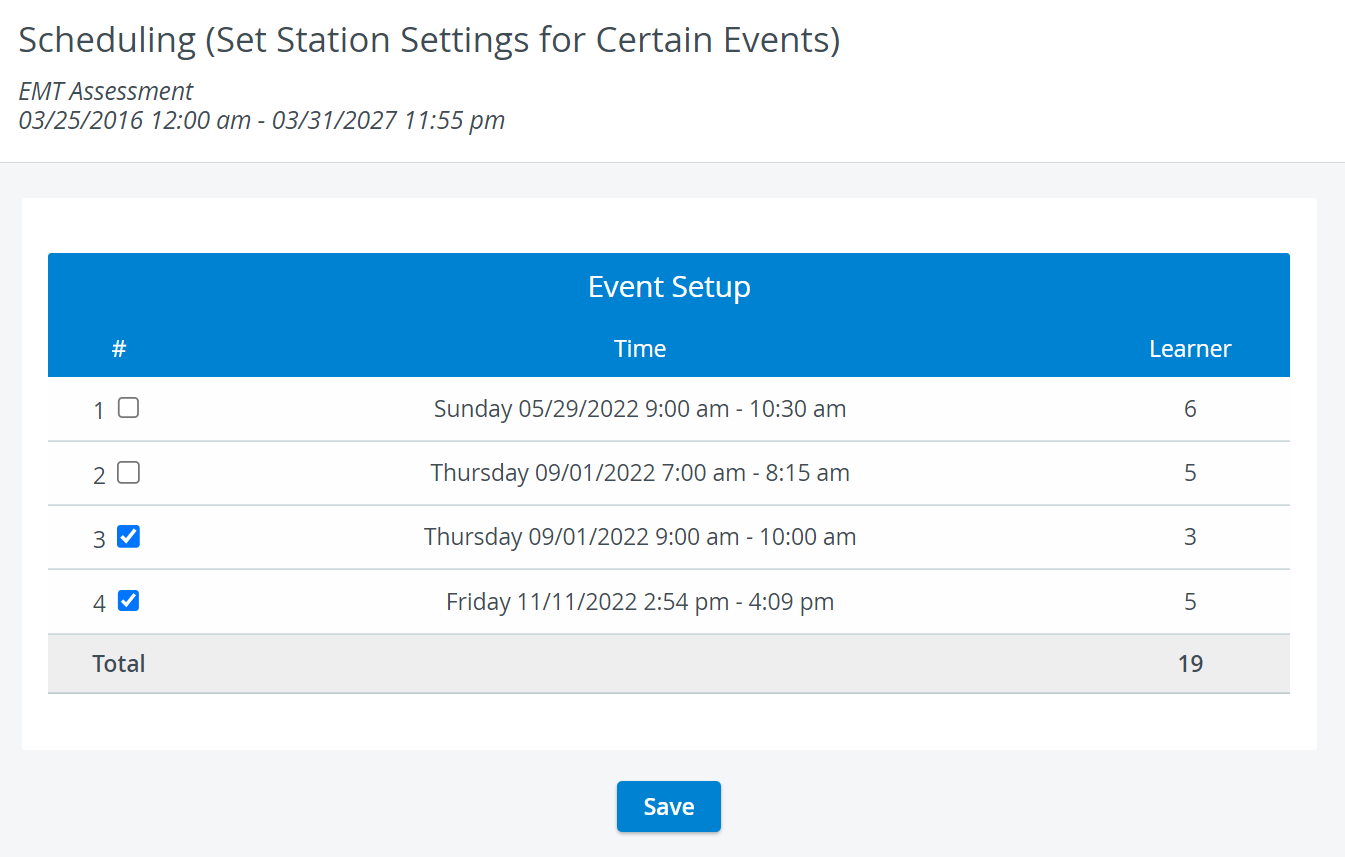
Click Save. The station setup will be applied to the selected event(s).
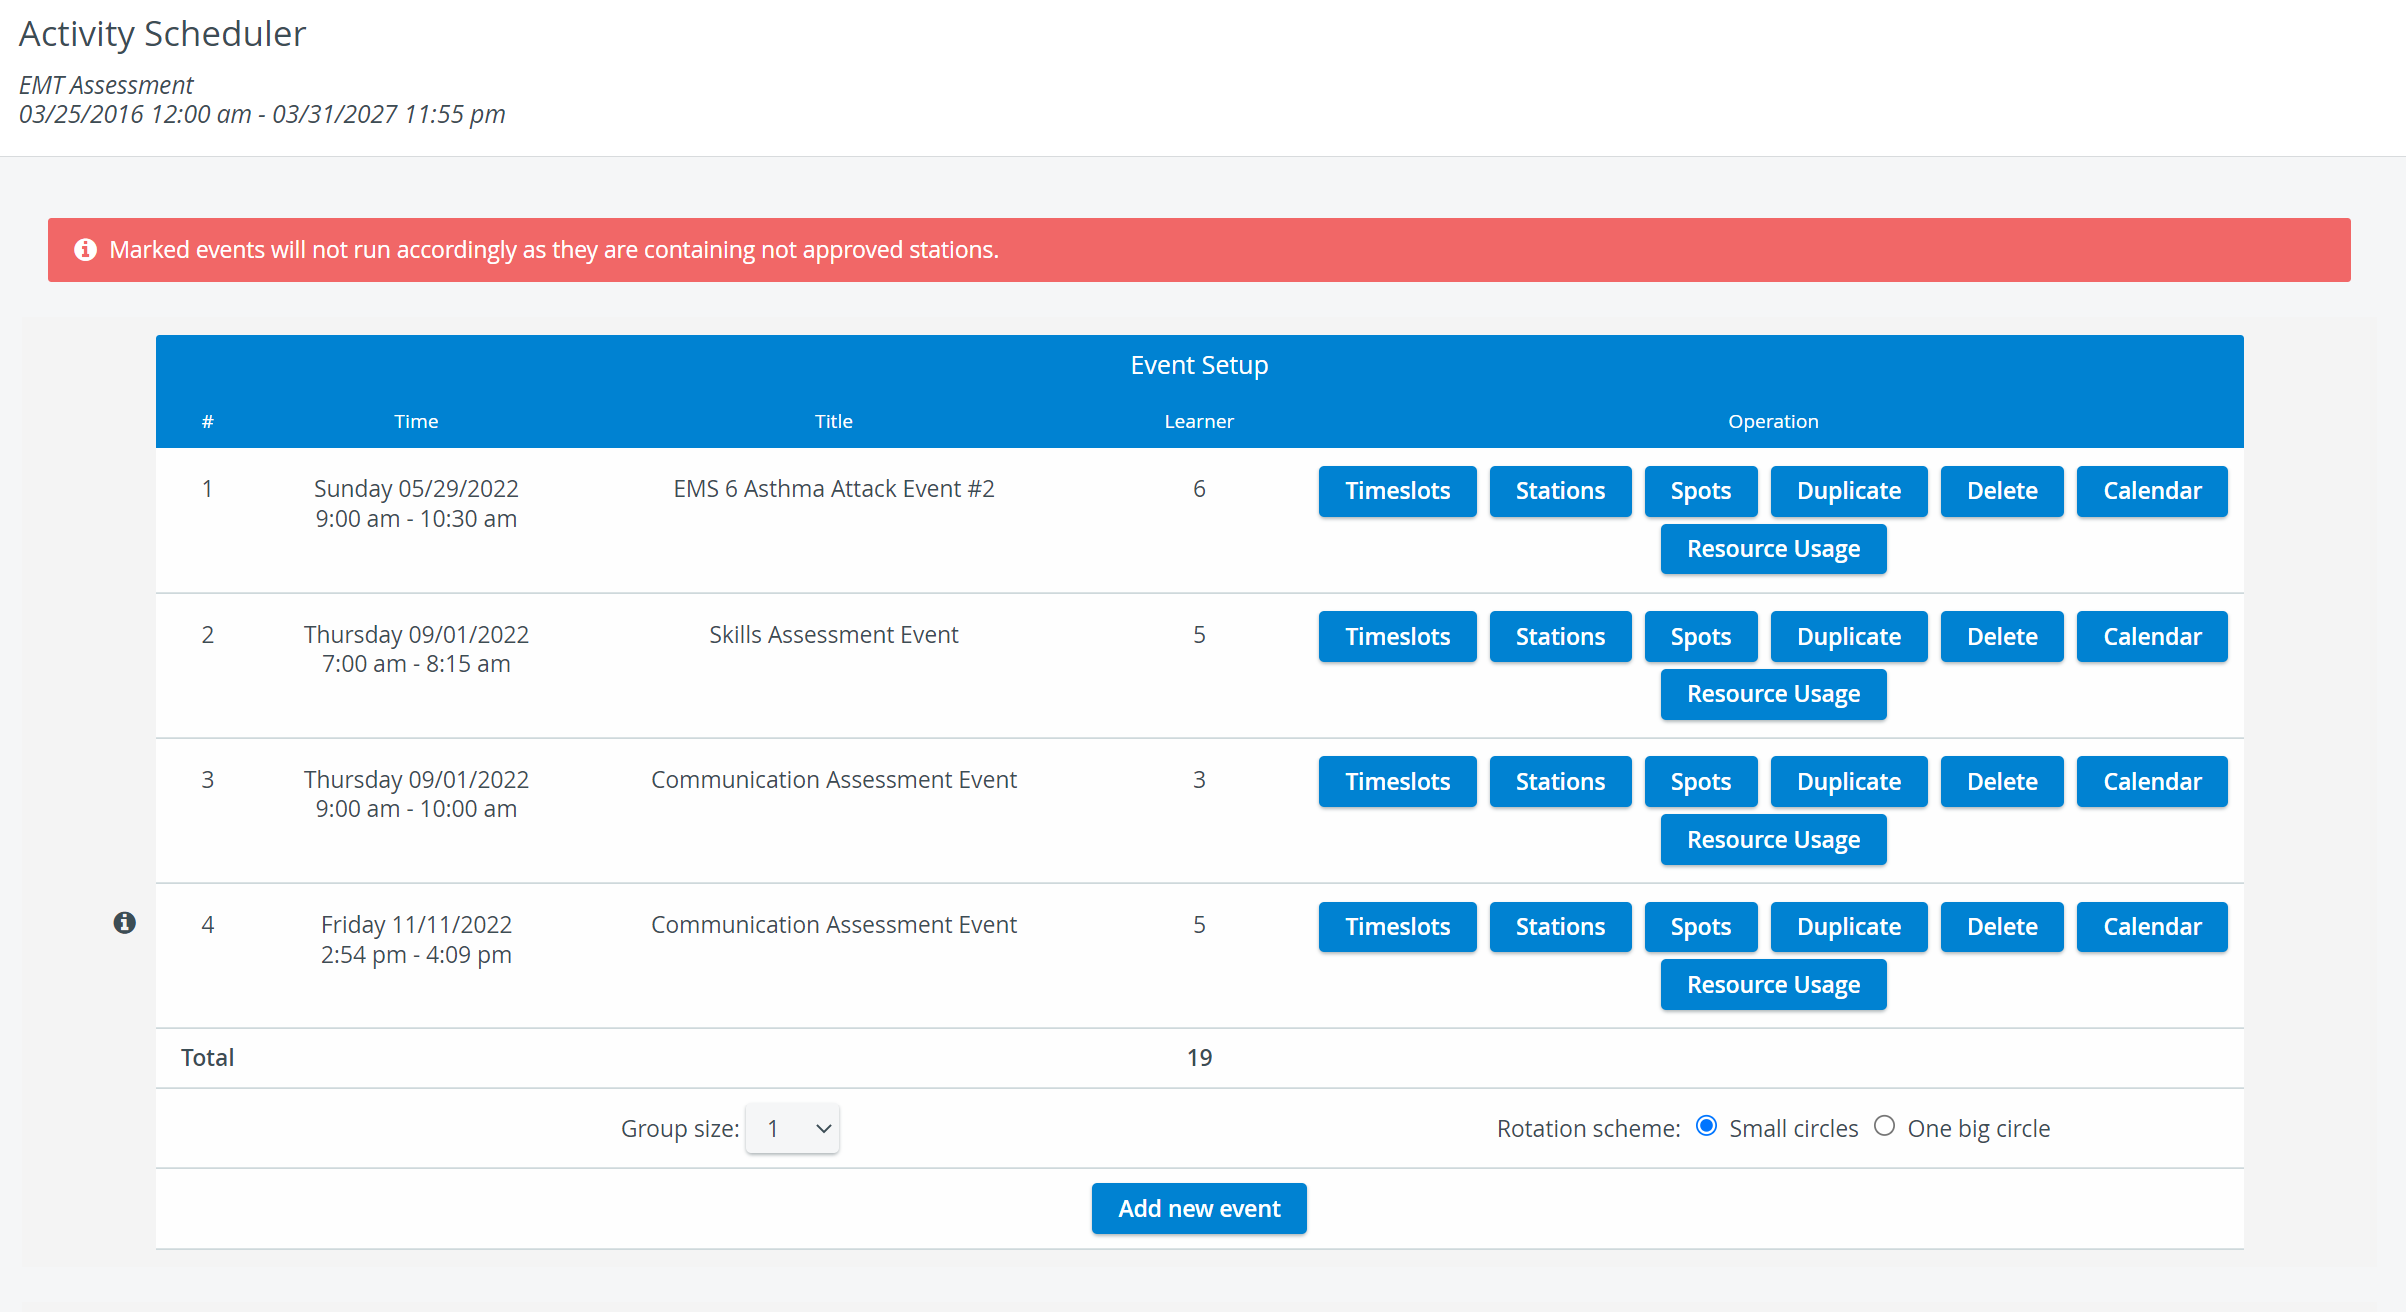
![]() In case of not approved stations, the system will warn you and mark the affected event
In case of not approved stations, the system will warn you and mark the affected event ![]() so that you could correct station setup.
so that you could correct station setup.
For further information, visit our Advanced Scheduling pages, and view our Activity Manager Training Videos.
Overview
Content Tools