This page explains the features available on the Basics tab of an Activity.
For the step-by-step guide on how to set up an Activity, see How to Create an Activity.
After creating a new Activity, you are brought to the Basics tab of the Activity editor. Here, you can add the basic information of the Activity such as its time range, assign Cases, etc.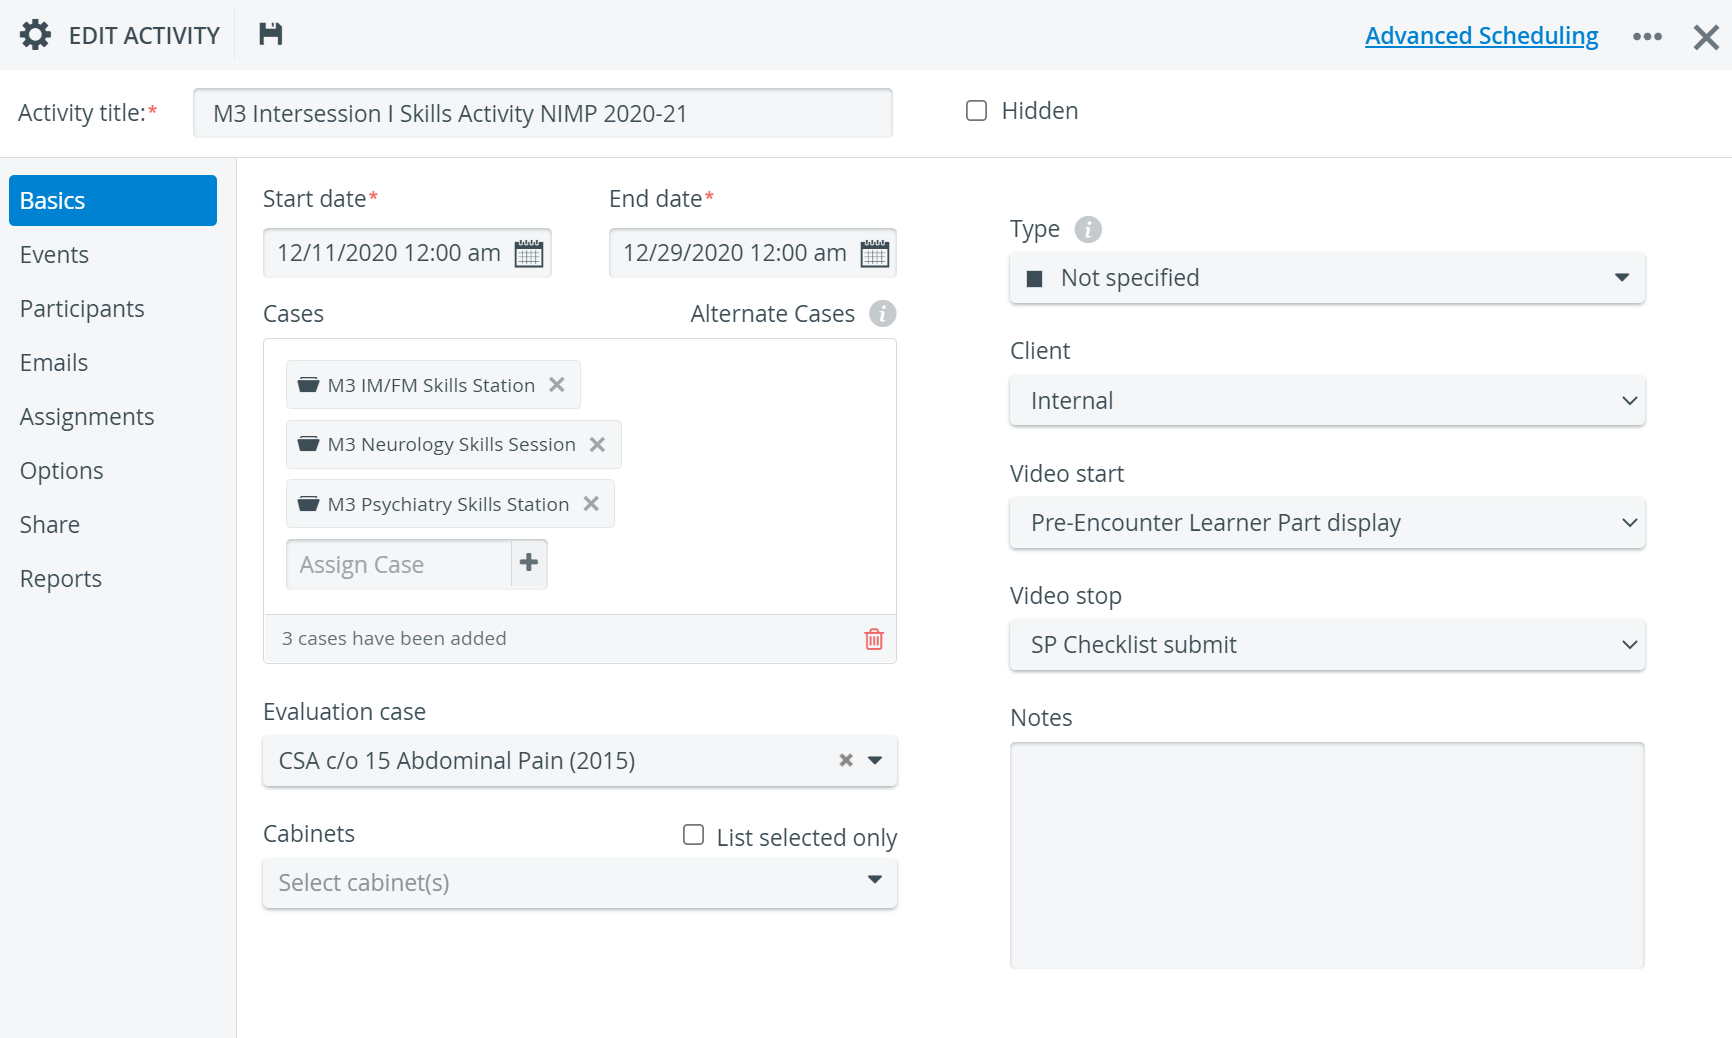
Activity Title | First off, name your new Activity. The field is required to continue. | |
Start and End Dates | Every Activity runs throughout the time range that the Start and End dates determine.
| |
Case Assignment | Here, select the Cases you want your learners to complete within a specific Activity. Alternate Cases Alternate Cases are multiple Cases grouped together. They are similar to elective subjects: only one Case is compulsory for learners from a group of alternate Cases. | |
The Evaluation Case | The Evaluation Case is a checklist for collecting learner feedback about the Activity that the learners completed. As a follow-up to the Activity, the Evaluation Case can be sent out to learners with the Evaluation e-mail option, which is available in the Emails tab. You can put together the Activity evaluation checklist within the Case content editor of any Case, at the Case Evaluation part. |
|
Manage Cabinets | At Cabinets, you can move your Activity from one cabinet to another or add it to multiple cabinets. | |
Activity Type | Select the type of the Activity from the Type drop-down or create a new type. Activity types are automatically color-coded by the system. The color of an Activity will mark every related event blocked off in the Calendar. | |
Client Resource Usage Log | Select a department or an external client to allocate any Activity-related resource usage back to them. | |
Video Start and Stop Triggers | Select video start and stop conditions: select a user-action from each drop-down that will automatically control video recording in the room the Activity is added to. | |
General Note for Every Participant | You can add notes to the Activity in the Notes field. The notes will be visible to the participant of the Activity, during data-entry. |
For more information, visit our Activity - How to pages and view our Activity Manager Training Videos.
Overview
Content Tools