About Cases in LearningSpace
A Case is built around a Standardized patient presenting a scenario and a Learner trying to set up a diagnosis based on their encounter.
Cases provide the medical content for an Activity. At the core of each Case lies the array of scalable and customizable checklists that help you achieve your Activity's specific purpose. The purpose of an Activity can either be learning, practicing, testing knowledge, or particular skills.
A Case contains checklists (which can also be refered to as parts) that correspond to every aspect of the patient-learner encounter from informing participants with a door note to filling out post-encounter checklists from all kinds of perspectives: Learner, SP, faculty, or other (peer or expert) observers.
A Case can also be designed to supervise the quality of the training, or to train new SPs.
When entering the Case Manager, the Cabinets are listed on the left, while all Cases are listed on the right by default.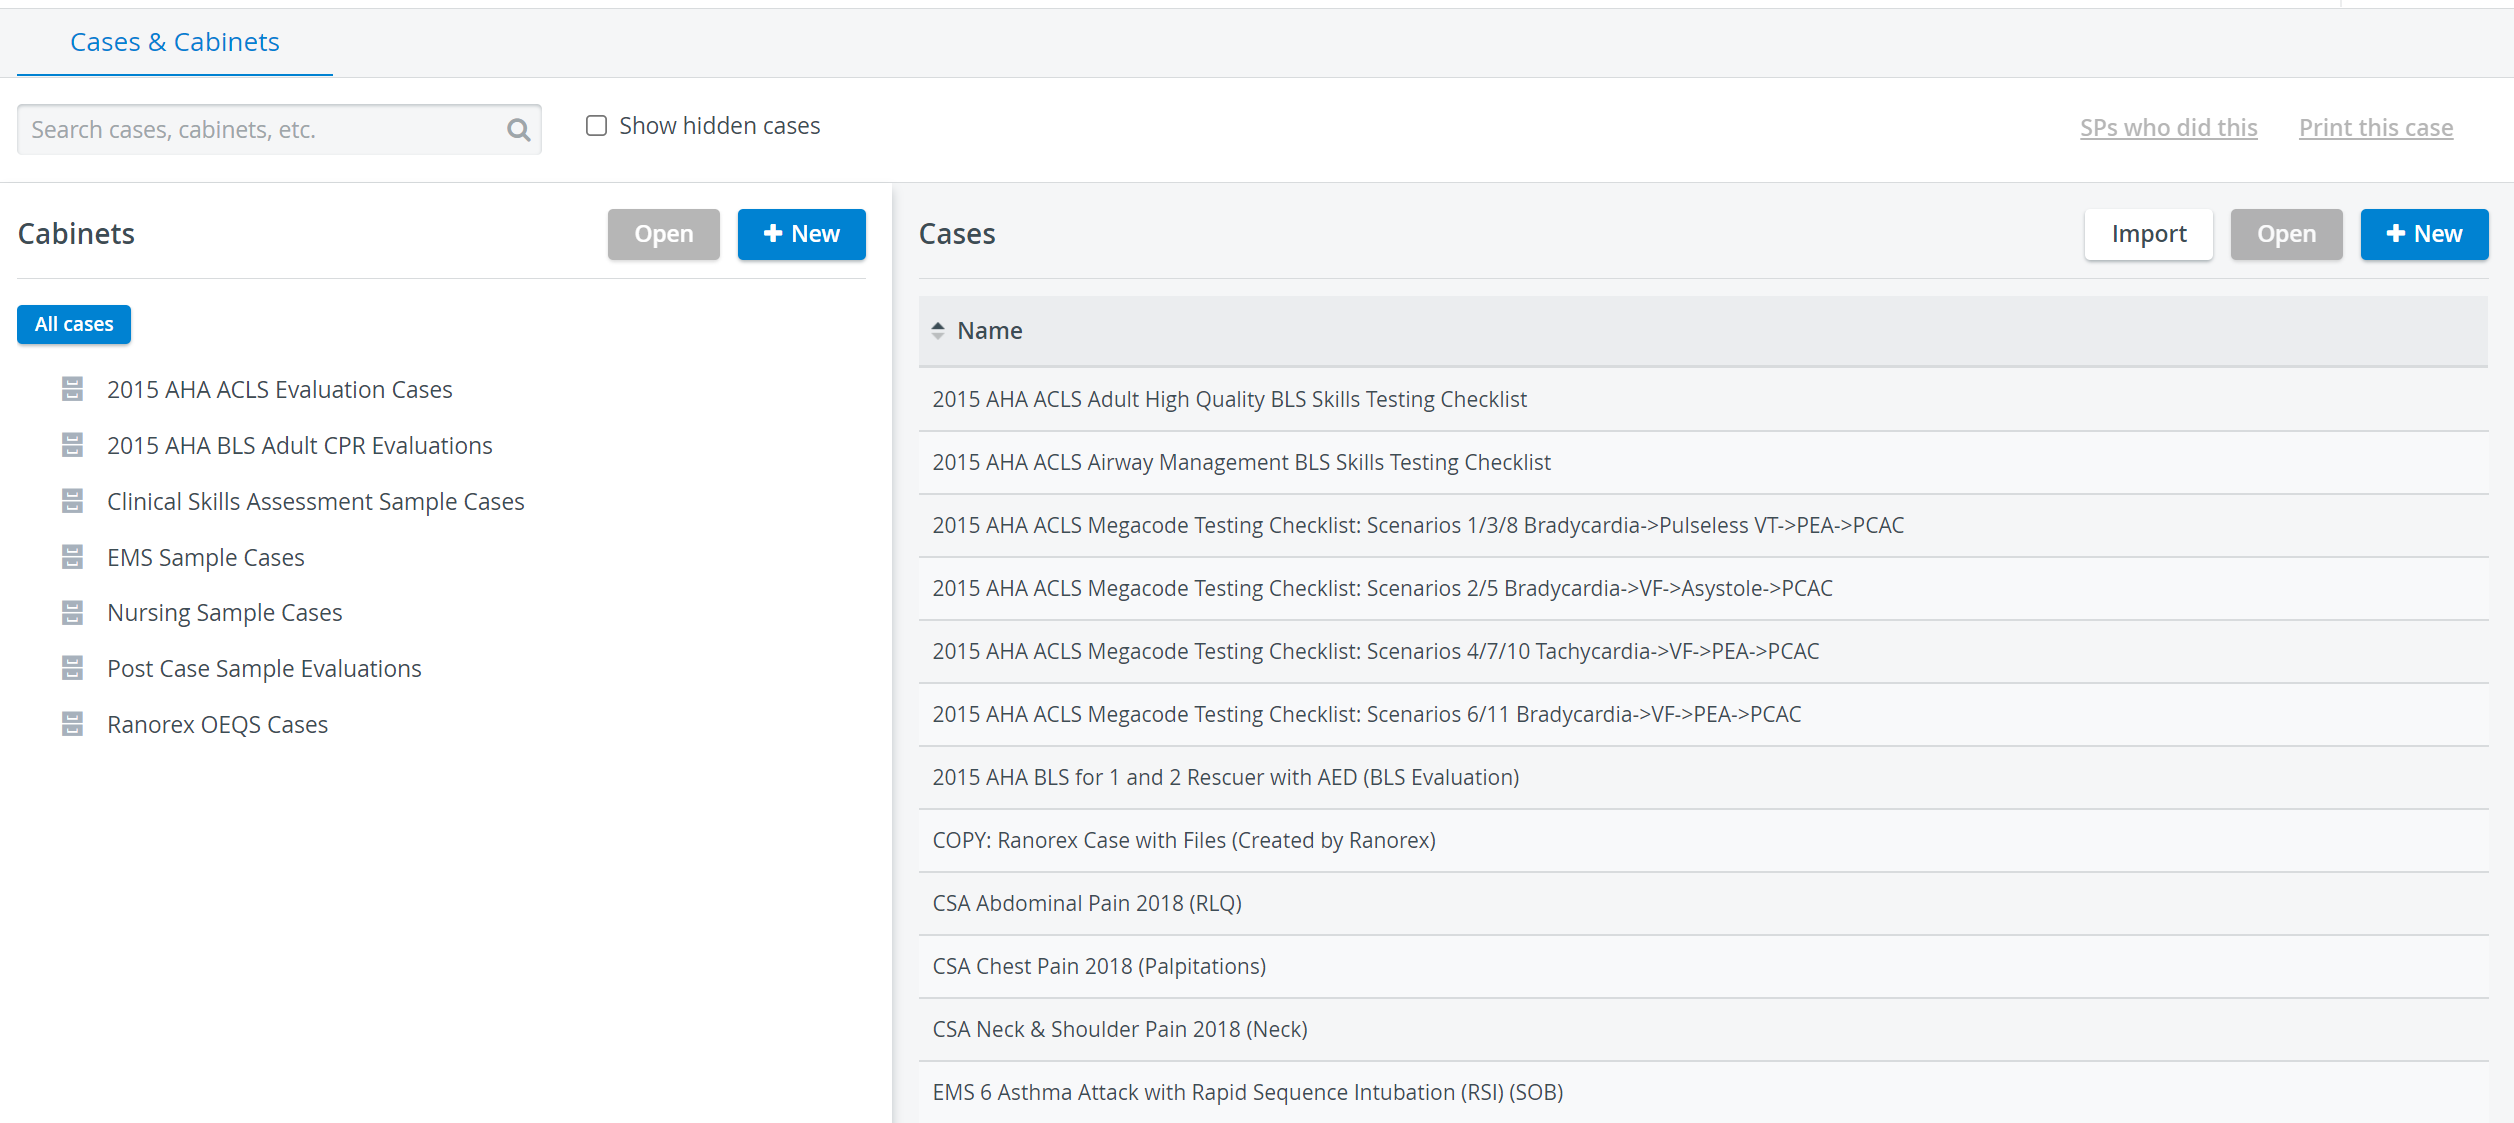
To find a specific Case or cabinet, start typing its tite in the Search bar. Any title including the exact set of characters will be listed below the field and can be opened by clicking on it.
Case Cabinets
Cabinets help organizing Cases and can be structured as parent and child groups.
Existing cabinets are listed on the left side of the opening screen of the Case Manager.
Via the Cabinet Settings window, new cabinets can be created or already existing ones can be edited or deleted, by either clicking the New button in the Cabinets panel or double-clicking the desired cabinet respectively.
For determining access (Read-only or Read and Write) for users with Case Author privilege, selected users have to be added on the Share tab of the Cabinet Settings pop-up.
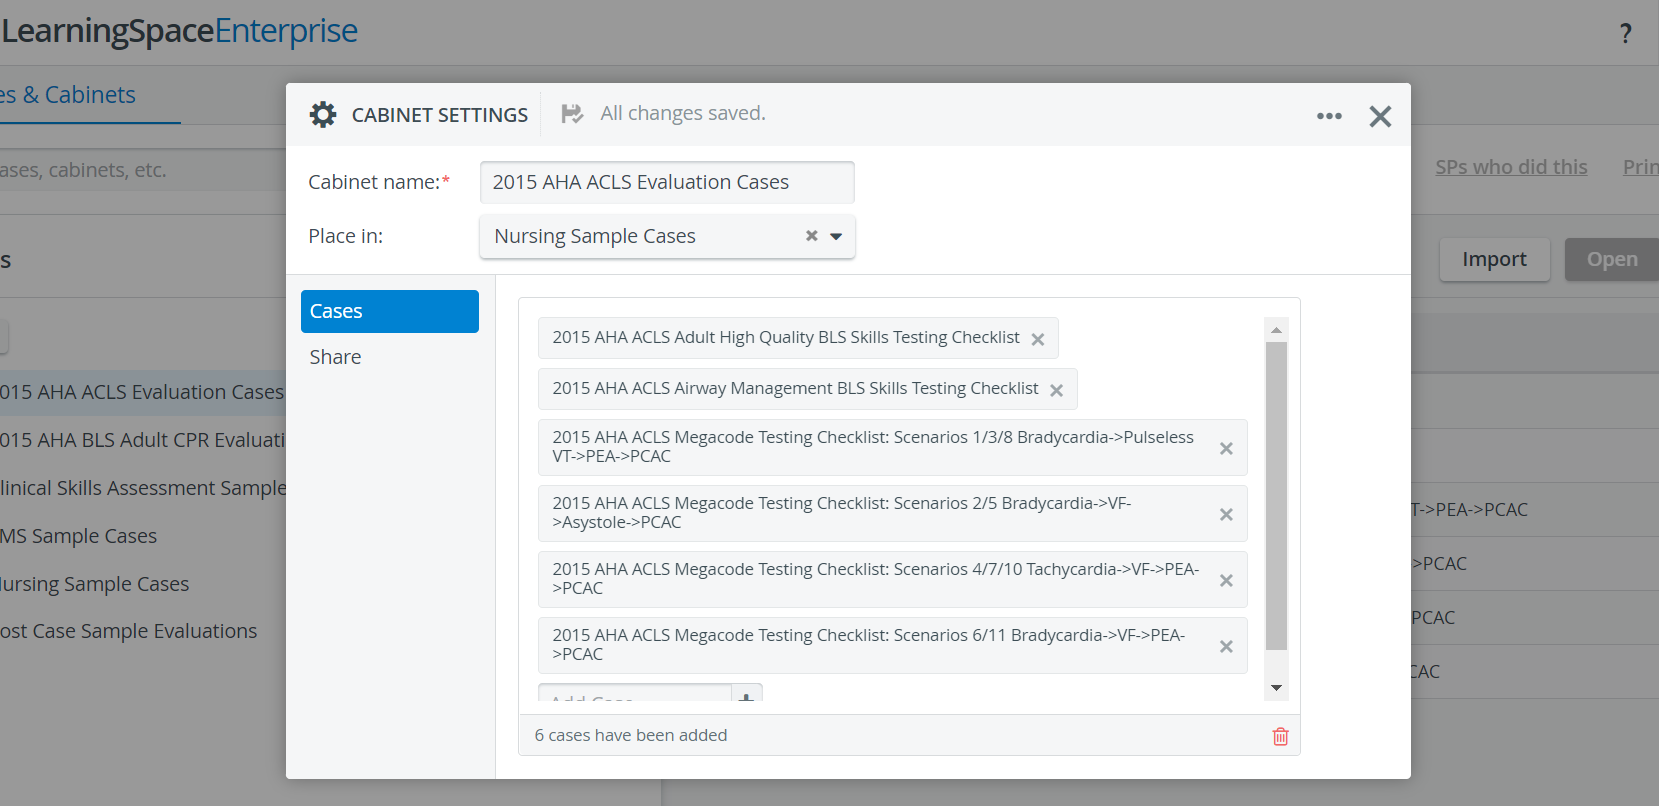
Using the Cabinet function is optional: Cases can be added to the system independently, without placing them into a cabinet.
Cases
To access and edit the details of a specific Case, open the Edit Case pop-up window by double-clicking a Case title, or highlighting a Case title then clicking Open in the top right corner of the panel.
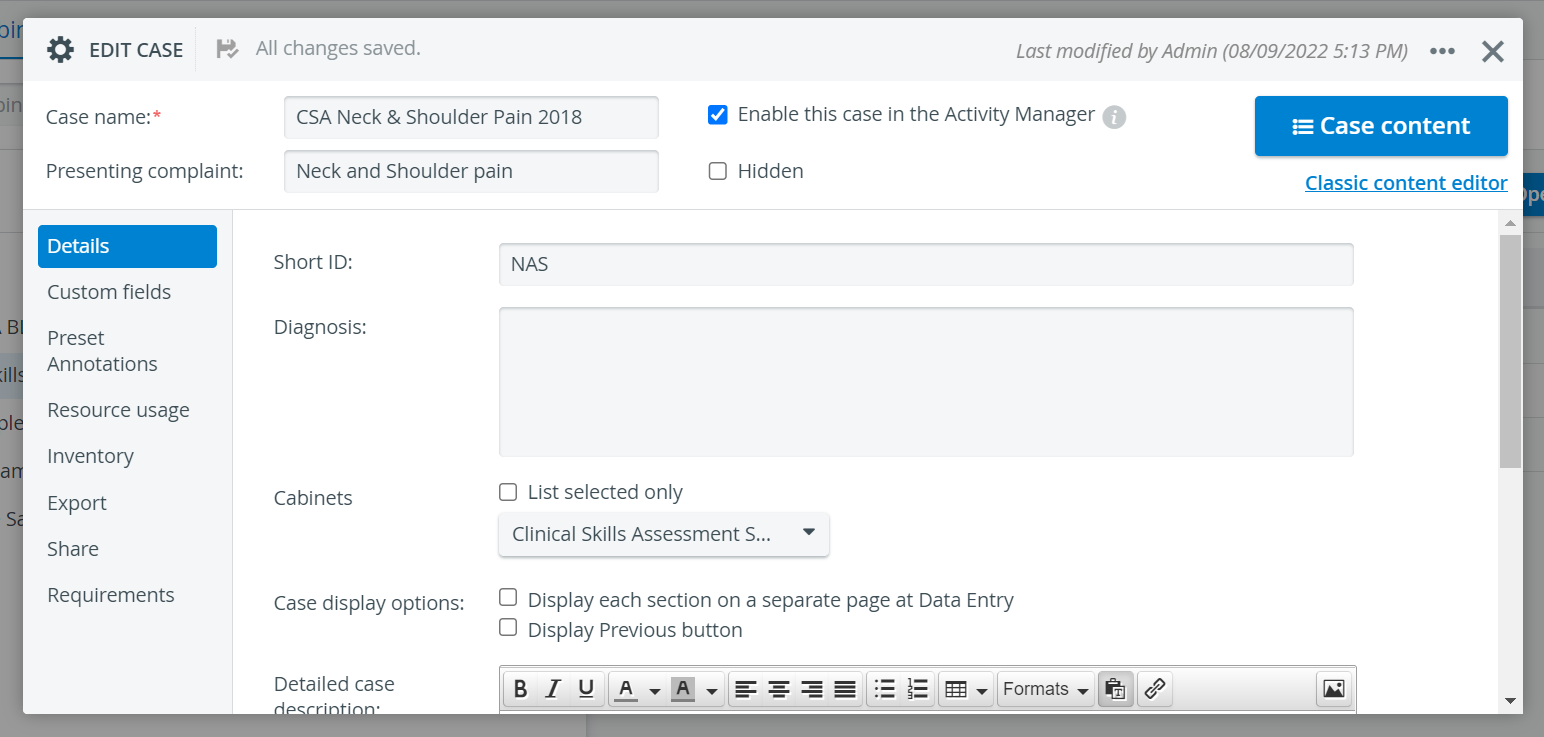
The same Case editor window opens when creating a new Case. Select the New button in the top right corner of the Cases panel to start working on a new Case.
Additional Options
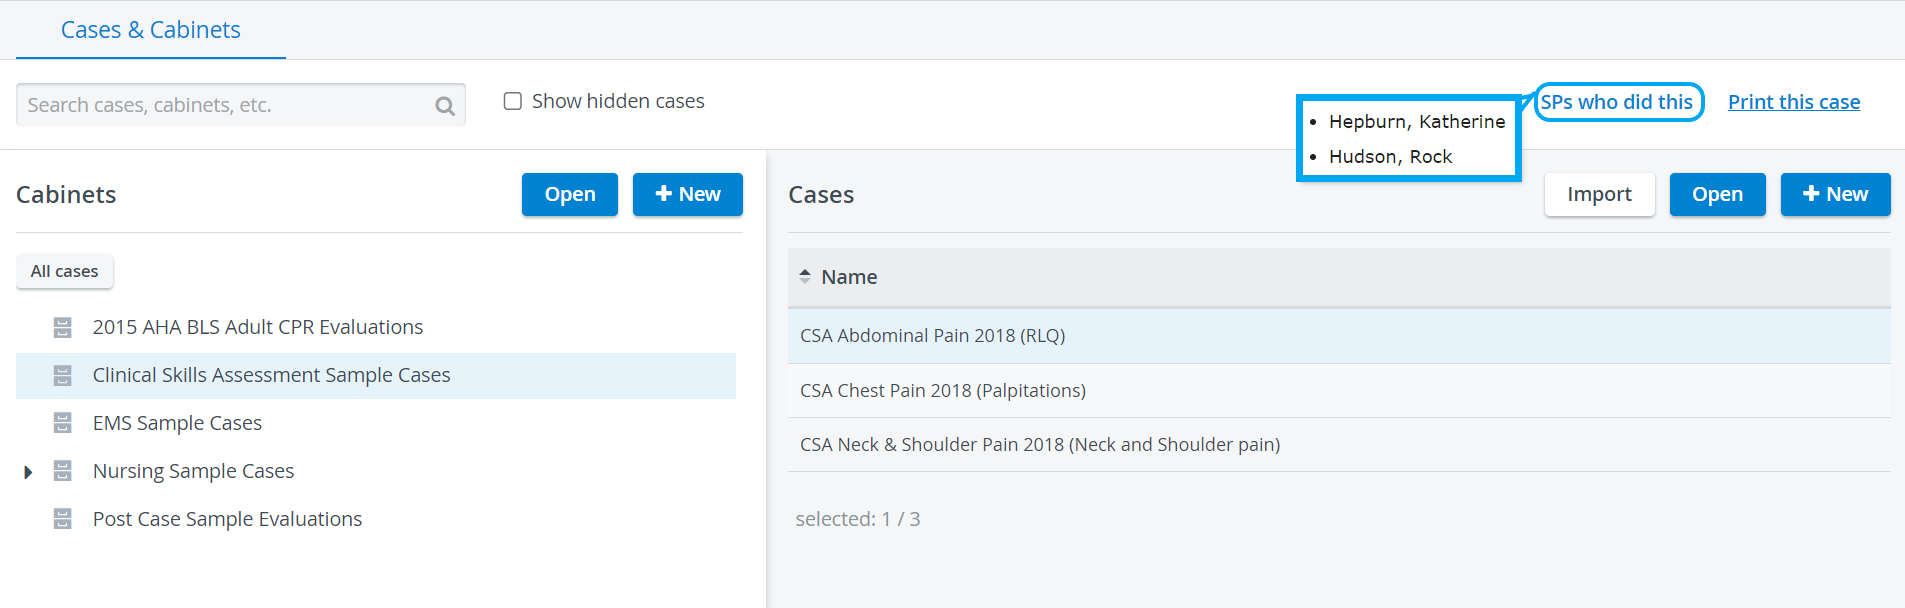
SPs who did this
On the Case Manager screen, when a Case is highlighted, it can be checked which SPs have already been assigned to that specific Case by clicking the SPs who did this link on the right side above the Cases panel.
See How to Check which SPs did a Case.
Print this Case
There is also a possibility to print out the Case as well as all learner-related checklists created for the Case by clicking the Print this Case link in the top right corner of the Case Manager screen.
Before printing, there is a possibility to further narrow the parts to be printed via deselecting the checkbox next to the part(s) not desired to be included.

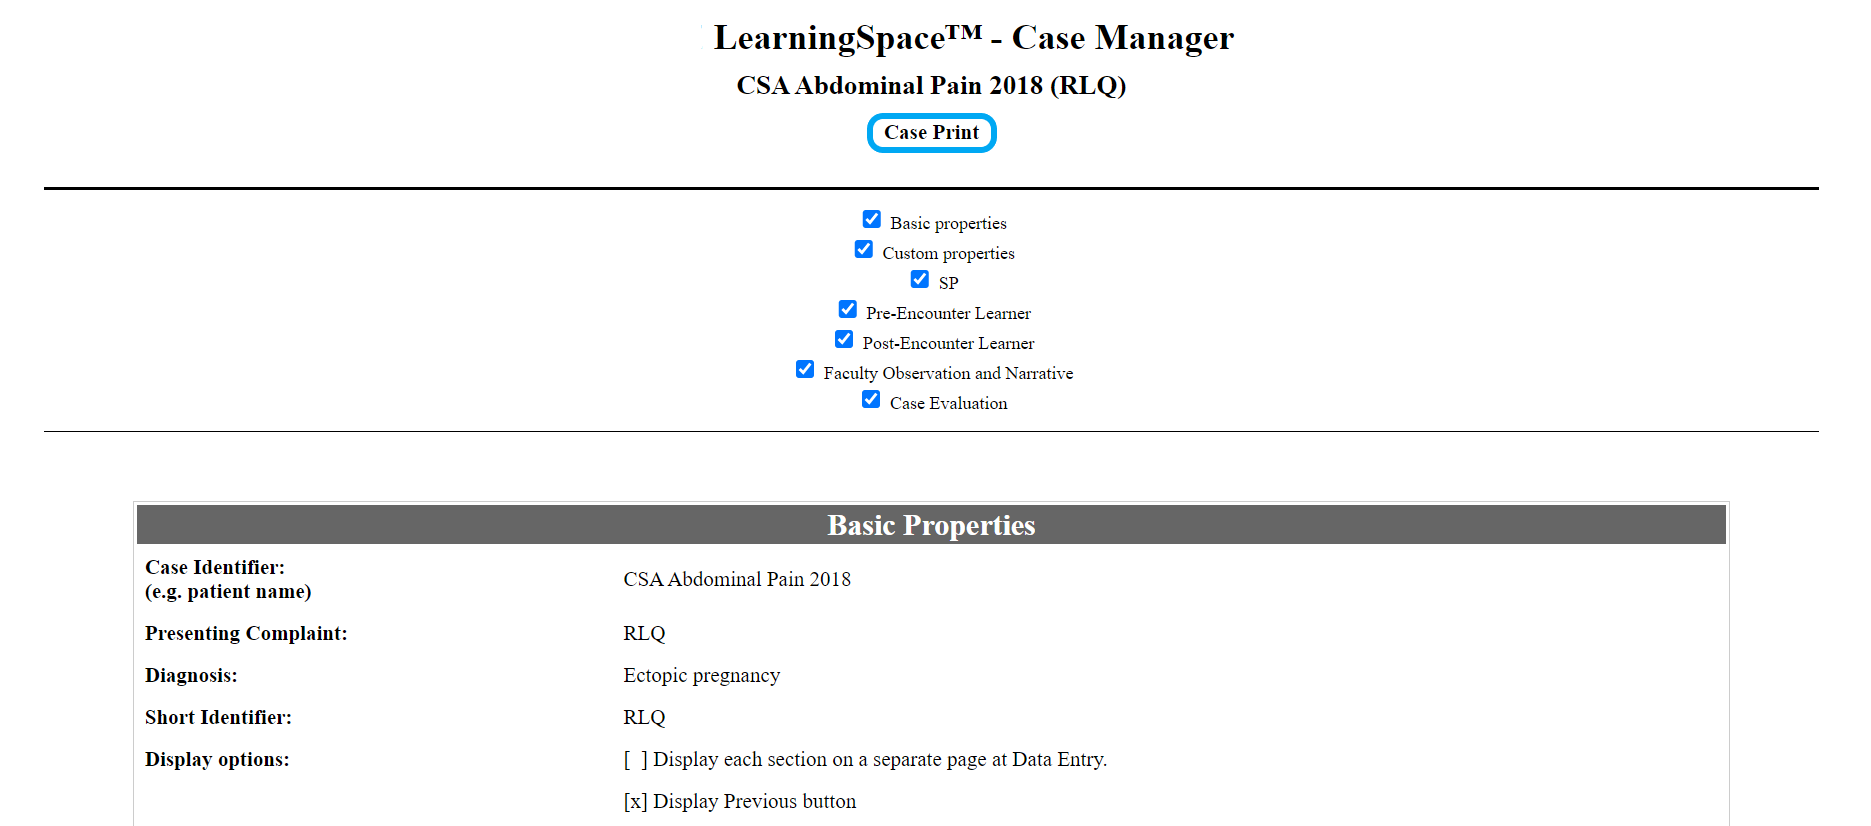
See How to Print a Case.
Import
Cases can be exported via the Export tab of the Edit Case pop-up opened for the intended Case. This way, Case content can be saved to a computer in a LearningSpace-compatible .CAS file format (including all data, every setting and Case Content).
Such files can be moved and shared with/ imported into other LearningSpace systems.


Clicking the Import button prompts a file browser window to pop up. The selected .CAS file saved on the computer in use can be imported into the system by clicking the Open button. 
Once the import is complete, the Edit Case pop-up is displayed with all the data of the saved Case. The file can then be modified if necessary.

For further information, visit our Case Manager and Cases - How to pages, or watch our Case Manager Training Videos.
Overview
Content Tools