Important Note for Enterprise Lite Users
This feature is to be used with in-campus audiovisual (AV) inputs. Hence, it is not available for LearningSpace Enterprise Lite, as the solution is used for web-conferencing-based virtual simulation encounters only. To unlock this feature, please upgrade to the LearningSpace Enterprise solution.
In LearningSpace Single Room View, preset or live Intercom announcements can be sent to three different targets, also called Intercom endpoints: In-Room, Hallway (or both), and Simulator.

IMPORTANT: The Intercom functionality of LearningSpace requires the web browser to have access to the microphone of the client PC, which in turn requires a secure HTTPS connection to the LearningSpace server.
That is, the use of the microphone of the client computer can only be conducted with a valid SSL certificate. (This restriction stems from the Chrome browser security regulations.)
If your layout is different in your Single Room View, you probably have the Legacy version. For the user guide of Legacy pages please go here.
Announcements can be sent to the
In-Room station or a Separate In-Room Intercom device (speaker)
- Hallway station or a Separate Hallway Intercom device (speaker)
- simulator's head ("Voice of Patient")
A Maestro-ready simulator (with built-in speakers) can be connected and used for sending announcements through the manikin.
Once the simulator is connected, the Intercom is also connected for the manikin.
Mute videos while talking
During live announcements (using the Push-to-Talk function) all other camera speakers in the room can be muted by deactivating the ![]() Speaker icon.
Speaker icon.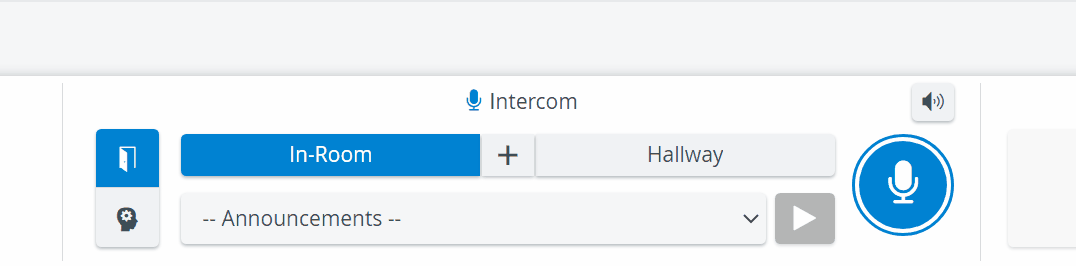
For more information, see
- How to Set Up Conditions for Intercom,
- How to Assign an Independent Intercom Device and
- how to complete hardware assignment in the Room Settings pop-up of the Rooms tab.
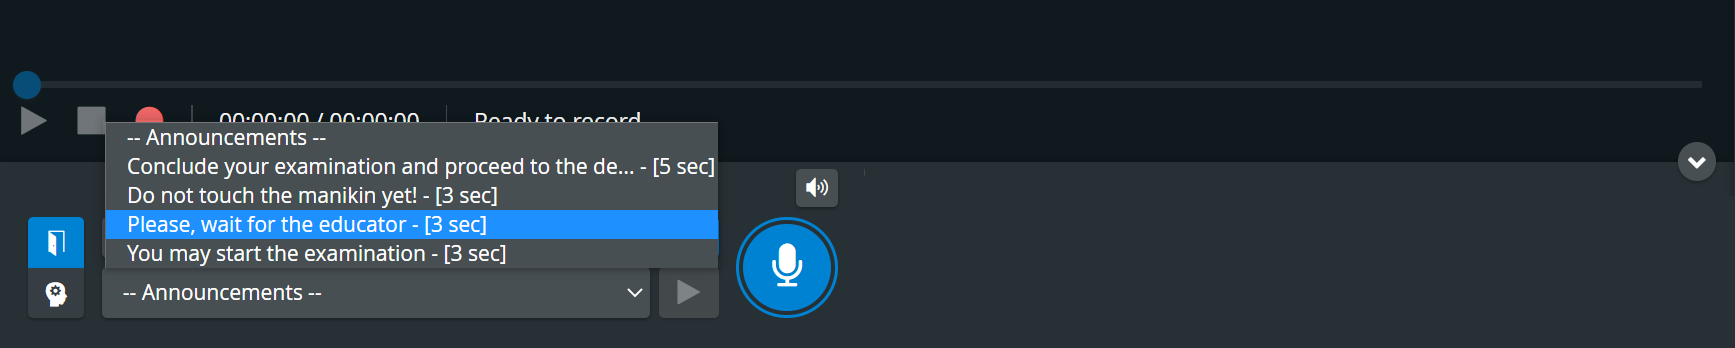
Preset Announcements
Preset announcements can be added on the Intercom tab of the System module.
- Select a pre-recorded announcement via the arrow in the announcement drop-down.
- Highlight the desired target destination.


- Push the Push-to-Talk button in the Intercom area to send out the selected announcement.
The Push-to-Talk button turns green 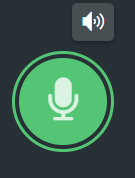 while the preset announcement is being sent out:
Live announcements
Live announcements can also be sounded via the respective device by selecting a target device (In-Room, Hallway or Simulator), and then clicking and holding the Push-to-Talk button.
The Push-to-Talk button turns green while the live announcement is being sent out. The broadcast ends once you let go of the button.
For live announcements, the microphone needs to be enabled in the browser settings.
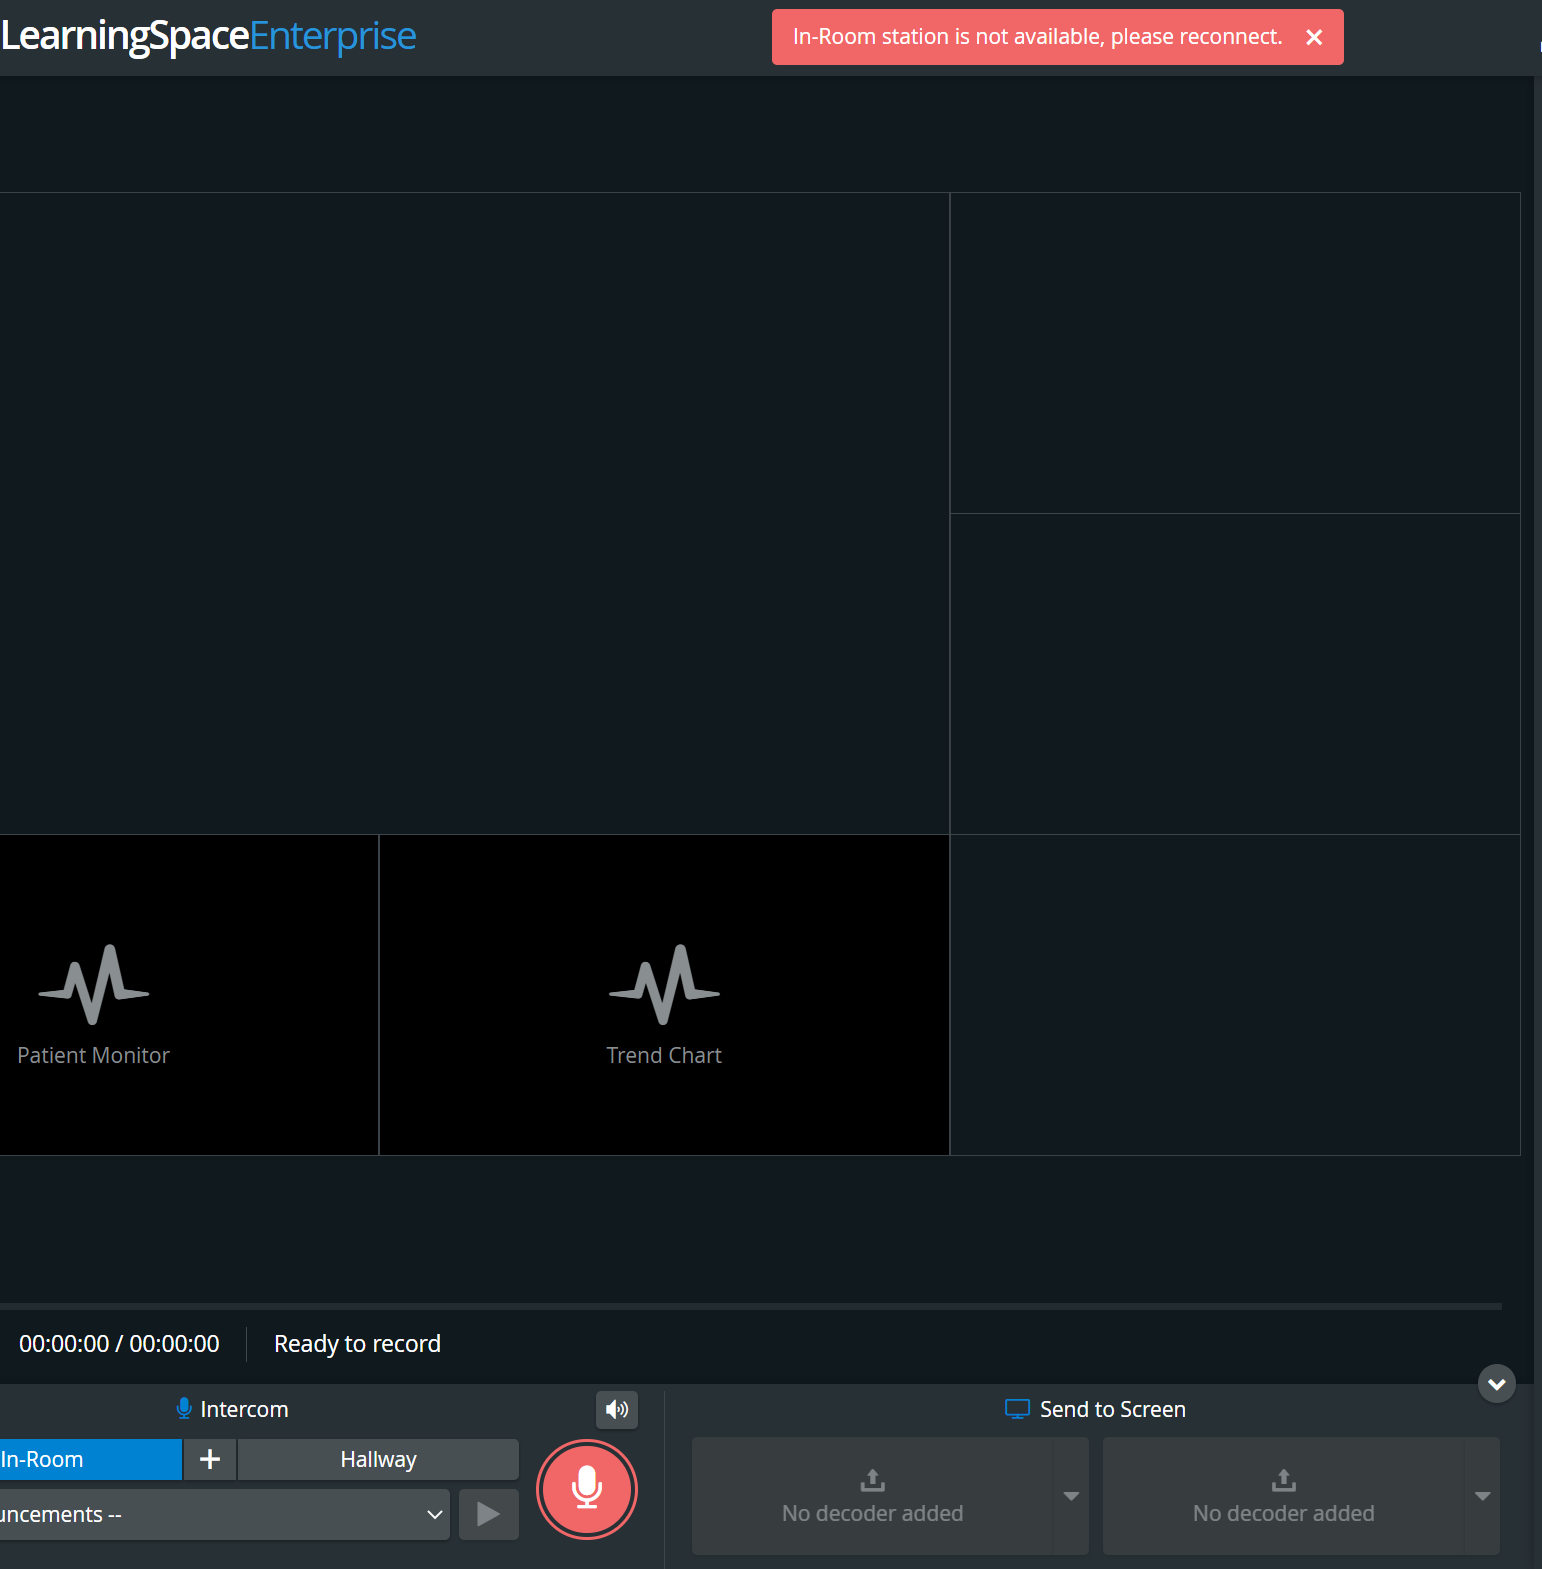
If there is no valid Intercom destination available in the system, the Push-to-talk button is displayed in orange color (when pushing it) and a warning message shows at the top of the page:


If Intercom setup is not completed (e.g a destination station needs to be reconnected), the Push-to-talk button is displayed in red color (when pushing it) and a warning message shows at the top of the page:
The Intercom via Simulator function is only available for Simulators, not for non- (third-party) simulators.
Related pages
For more information, visit our Recording - How to pages and watch the Recording Module Training Video.
Overview
Content Tools